Feta, Chili & Lemon Dip

0

Feta Dip1

How about an app to go with that TGIF cocktail?  (And, I’m not talking about an app for your iPhone).  If you’re inviting friends over this weekend, here is a very simple dip that takes less than 5 minutes and just involves throwing all the ingredients into a food processor.  Voila!  Add crackers or veggies and you’ve got a great appetizer.  I found this recipe on Simply Delicious.  It’s easy, quick and very tasty!  The combination of zesty feta cheese with garlic, hot red chili peppers, lemon and fresh mint leaves is surprisingly delicious.  I used one chili pepper with the seeds and it was pretty spicy, so you can lessen the heat by not including the seeds and increase the heat by adding a second chili pepper. You can also add more olive oil if you want a thinner dip for dipping rather than spreading. Happy Friday!

Feta Dip10

Feta, Chili and Lemon Dip

  • Servings: 6-8
  • Difficulty: easy
  • Print

 •6 oz feta cheese
•1 garlic clove, peeled
•zest and juice from 1 lemon
•1-2 red chilies, roughly chopped
•1/4 cup fresh mint leaves
•pepper to taste
•½ cup extra virgin olive oil

Feta Dip9

  • Put garlic, lemon zest chilies and mint in a food processor and blend until finely minced.

Feta Dip8

  •  Add the feta to the food processor and blend until everything is combined.

Feta Dip7

  •  With the motor running, pour in the olive oil and blend until the dip is smooth and the desired consistency.

Feta Dip6

  •  Transfer the dip to a serving bowl and serve.  Garnish with mint. Drizzle with more olive oil if desired.

Feta Dip3


Wheatless Wednesday – Grilled Avocado Caprese Salad

2


Grilled Avocado Caprese Salad10

Insalata Caprese, the ubiquitous tomato, mozzarella, and basil salad, is one of the most popular dishes in summer when tomatoes are in season and so, so good.  It also happens to be one of my favorites and a great way to use up extra tomatoes.  I sometimes include avocado to increase the nutritional value and make it a bit more filling as a main dish.  I must admit that I am on quite a grilling kick this summer which has taken an interesting turn since I am no longer just throwing steaks and burgers on the grill.  I have had to get more creative with ingredients and have started grilling fruits and vegetables that I would not have considered in the past,  including recent dishes,  Grilled Nectarines and Summer Squash with Balsamic Glaze and Grilled Artichoke Mixed Veggie Platter.

Grilled Vegetables1

Grilled Nectarines and Summer Squash with Balsamic Glaze

Grilled Veggies1

Grilled Artichoke Mixed Veggie Platter.

So when it came to making my first Caprese Salad of the summer, I decided to give it a twist by using the tiny sized mozzarella ‘Pearls’ and cherry tomatoes to top a grilled avocado.  Grilling the avocado gives it a wonderfully warm and creamy, slightly smoky flavor. In addition to being delicious, avocado is a great addition to any diet for health and weight loss.  “According to a study by the Haas Avocado Board, adding avocado to a lunch meal caused a 23-percent increase in satisfaction and a 28-percent decreased desire to eat over the next five hours after eating, compared with the avocado-free lunch. And, over a three-hour period, adding avocado to lunch meant a 26-percent increase in satisfaction and 40-percent decreased desire to eat later on.  Half an avocado has about 112 calories and 6 grams of fiber. Avocados are filled with heart-healthy fats, protein, potassium, and vitamins (such as B6, C, K, and B)” (Glamour.com)  So next time you have the grill going, throw on a couple of avocados.  You’ll like it!

Grilled Avocado Caprese Salad5

Grilled Avocado Caprese Salad

  • Servings: 2
  • Difficulty: easy
  • Print

1 ripe but firm avocado
2 Tbsn olive oil
1 tsp lemon juice
1/2 cup ciliglene, tiny fresh mozzarella balls (or larger mozzarella ball, diced)
1/2 cup cherry tomatoes, sliced in half
1/4 cup fresh basil, sliced crosswise into strips (chiffonade)
1 Tbsn balsamic vinegar
salt and pepper to taste

Grilled Avocado Caprese Salad

  • Using a sharp knife, slice avocado in half lengthwise.  To remove the pit easily, strike the pit with the sharp blade and twist slightly.  The pit should pop right out.

Grilled Avocado Caprese Salad3

  • Brush the cut sides of the avocado with olive oil, lemon juice and season with salt and pepper.  Place cut side down on a hot grill and grill for about 5 minutes, or until you see nice grill marks.  You can place the avocados on the grill perpendicular or horizontal, depending on how you want the grill marks to look.


Grilled Avocado Caprese Salad12

  • Or you can get fancy and grill diagonally

.Grilled Avocado Caprese Salad11

  • Get crisscross grill marks by turning the avocado 90 degrees half way through.

Grilled Avocado Caprese Salad13

  • Remove avocados from heat and let cool slightly.

Grilled Avocado Caprese Salad8

  • Place each avocado half on a plate and fill with tomatoes, mozzarella and basil, divided between the two.
  • Drizzle with olive oil and balsamic vinegar

Grilled Avocado Caprese Salad7

Grilled Avocado Photo Credits:

1) Horizontal- http://www.foodandstyle.com

2) Diagonal- http://www.glamour.com/health-fitness

3) Criss-Cross- http://www.grillinfools.com

Wheatless Wednesday – Scallop Ceviche with Avocado and Tomatillo

2

Scallop Ceviche2

Summer officially begins on Saturday and you know what that means- long lazy days spent at the lake, cool, refreshing drinks by the pool and the return of brilliant pink and red sunsets!  It also means salads or cool foods that don’t heat up your body or your kitchen.  Ceviche is popular in South and Central America where temperatures are warm most of the year.  For the uninitiated, Ceviche is a delicious taste sensation.  Various fish or shellfish is marinated in a citrus-based mixture, usually lemons and limes. In addition to adding flavor, the citric acid causes the proteins in the seafood to become denatured, which is what makes it firm and gives it the taste and feel of being cooked.  Recipes for ceviche vary among countries but adding onions and chili peppers or other herbs and vegetables is fairly common.

My ceviche was inspired by the ingredients I had on hand (tomatillo, serrano peppers, red onion, cilantro and the first tomatoes from my garden), which give it a more Mexican flavor.  I had never used tomatillos before and bought them on a whim the other day. Tomatillo, (in Spanish “green or little tomato”) is not really a tomato but a part of the nightshade family.   If you don’t have access to tomatillos, then you can omit them from the recipe or put some of those ‘not quite ripe tomatoes’ to work for you for a similar flavor.

The ceviche needs at least 3 hours or over night to “cook” but can be assembled in less than 10 minutes.  The flavors combine for a tasty, slightly spicy and refreshing dish that is loaded with vitamins and minerals plus healthy fats.  This is perfect for when you don’t want to turn on your oven.  It makes a great appetizer served in small glasses with chips or crackers or as a main or side dish.


Scallop Ceviche4

Scallop Ceviche with Avocado and Tomatilla

  • Servings: 4
  • Difficulty: easy
  • Print

Scallop Ceviche1

2 lbs bay scallops
4-5 cloves garlic, minced
1 tsp salt
1/2 cup fresh cilantro, finely diced
2-3 Serrano peppers(or other hot pepper), seeded and diced
6 limes, 2 lemons freshly squeezed (should be enough to cover scallops)
1/2 red onion, finely diced
3-4 tomatillas
2-3 ripe tomatoes, diced
2 avocados, peeled, seeded and diced

Scallop Ceviche5

  • Rinse scallops and pat dry.  Place them in a ziplock bag or container with a lid.
  • Add garlic, lime and salt.
  • Dice peppers, onion and cilantro and add to scallops.
  • Remove papery skin from tomatillas and rinse to remove the sticky residue. Dice and add to the scallop mixture.
  • Gently comgine.  The scallops should be covered by lime juice.  Add a bit more if necessary.  Refrigerate at least 2 or 3 hours or overnight while the scallops “cook”.
  • Before serving pour off excess liquid, leaving a bit to keep it moist.  Add tomatoes and avocados and gently combine.

Scallop Ceviche6

  • Serve with crackers or tortilla chips (my fave)..

Scallop Ceviche3


Wheatless Wednesday – Layered Beet Salad with Glazed Pecans & Citrus Vinaigrette

0

Beets14

I have a love affair with all food towered, stacked and layered, the taller the better.  There is something artistic and beautiful about the stark color contrast of the layers, each with it’s distinct flavor and character.  I know, I know,  food is to be eaten and not just looked at.  I also know that my creation will be destroyed the second it’s put on the table.  I’m okay with that.  I actually like the deconstruction process almost as much as the creative.  A certain amount of satisfaction can be derived from wrecking cool things, perhaps harkening back to our childhood days when we spent time building elaborate sand castles and then stomping them into oblivion.

This colorful salad was inspired by my cousin (by marriage), Joey, who is a fantastic and creative cook.  At a recent event, we were swapping kitchen stories, as people who like to cook are wont to do, and he passed along this clever method for layering beets and goat cheese.  Any soft cheese, even cream cheese, will work if you don’t like or have goat cheese.  I like to roast beets, rather than boiling or steaming them, as roasting intensifies the color and the flavor.  After roasting you have gloriously colored beets which can be sliced up and served in salads or simply drizzled with oil and vinegar and eaten alone.  Layering the beets with soft cheese elevates two simple ingredients into a beautiful and delicious work of art.  If you don’t have the time, or the inclination though, just combine all ingredients and toss with vinaigrette.  I love the salty, sweet crunch that the glazed pecans add to the salad.  For this dish I cooked them to almost burning to add a slightly  smokey flavor that complements the goat cheese.  When combined with the light citrus dressing, the flavors are divine!  The  beet slices would make good appetizers on their own, if made with small beets, as would the glazed pecans.


Layered Beet Salad

  • Servings: 4
  • Difficulty: medium
  • Print

 Beets7
2 large or 3 small beets
1/4 cup olive oil
8 oz goat cheese or cream cheese (plain or herbed)
3 cups mixed greens
glazed pecans (recipe below)
citrus vinaigrette (recipe below)
 
Herbs for Goat Cheese(optional)
2 teaspoons chopped fresh flat-leaf parsley leaves
2 teaspoons chopped fresh chives
1 teaspoon chopped fresh thyme leaves
1/2 teaspoon freshly ground black pepper


  • Rinse beets and pat dry. Do not remove tops or stems (you don’t want to lose any juice). To roast, you can either wrap them in aluminum foil or place in a covered glass dish.  Drizzle with olive oil and cook at 425 degrees for about an hour (or until you can easily pierce with a fork).  Larger beets may take longer.  Remove from the oven and let cool.

Beets6Beets1

  • When the beets are completely cool, peel the skin with a paper towel and remove the top and tail with a knife.

Beets2

  • Goat cheese should be at room temperature for best results.   If you would like you can add parsley, chives, thyme and black pepper to the goat cheese and mix to combine.
  • To assemble the beet towers, slice beets crosswise into 1/4 inch rounds, keeping them in order.
  • Place the bottom round on a platter and spread with spoonful of goat cheese.  Cover with a beet round and repeat until the beet has been reassembled.

Beets3

  • Wrap the beets tightly with plastic wrap and refrigerate at least an hour or overnight.

Beets5


  • Remove beet towers from the refrigerator and carefully unwrap.  Slice each tower vertically to get lovely striped slices. Wipe knife between each slice and use a spatula to transfer them to plates.

Beets16

Beets15


  • Toss greens in vinaigrette and divide greens evenly onto four plates.
  • Arrange a couple of slices of beet on each plate.
  • Top with pecans if desired.

Beets14

Glazed Pecans

  • Servings: 4
  • Difficulty: easy
  • Print

Beets8

1/4 white sugar)
1 Tbsn butter or coconut oil
1/8 teaspoon salt
2 Tbsn water
1 1/2 cup pecan halves (or walnut)
  • Combine sugar, butter, water and salt in a large skillet and stir over medium heat until butter is melted.
  • Add pecans and cook, stirring constantly,making sure pecans are evenly coated,  for 5-7 minutes.
  • Spread pecans in single layer on parchment paper and cool completely.

VARIATIONS:  To make pecans for snacking add 1/4 to 1/2 teaspoon of cayenne pepper for a spicy kick.  For a sweeter, dessert topping add 1/4 teaspoon vanilla or dash of cinnamon.  You can even substitute the white sugar for brown sugar for more of a carmely ‘turtle’ type result (great over ice cream!).

Citrus Vinaigrette

  • Servings: 1 cup
  • Difficulty: easy
  • Print

Beets13
1/4 cup lemon juice
1/4 cup orange juice
1/2 tsp minced fresh thyme leaves
2 Tbsn balsamic vinegar
1/2 teaspoon lemon or orange zest
1/2 cup avocado oil
Salt and freshly ground black pepper
  • Whisk all ingredients together.  Drizzle over salad and toss.

Mango Margaritas & “Homemade” Tortilla Chips with Grilled Pineapple Salsa!

3

Margaritas2

TGIF! Cinco de Mayo is just around the corner and you know what that means – Margaritas! In the interest of having a good time research, my trusty pals and I decided to go in search of the new perfect margarita. Sure the lime margarita is delicious and traditional but why limit yourself? One click of the keyboard and a multitude of exotic possibilities lay before me-strawberry, blackberry, cucumber, pomegranate, cranberry, mango-avocado, papaya, hibiscus, watermelon and mint! Who knew there were so many? Obviously, a lot of research has already been done on this subject. Since we had fresh mango and pineapple in the refrigerator, we decided to start there.  After much testing and tasting we came up with a fabulous Mango Margarita, which is cool and refreshing with just the right amount of sweet-the perfect grownup dessert, like a mini vacation for your tastebuds. Take me away Calgon…

Crunchy, salty tortilla chips, warm from the oven, topped with spicy, smoky, sweet pineapple salsa are a perfect pairing for the ice-cold mango margaritas.  Sure it’s easy to just pick up a bag from the store (I do it all the time), but making them yourself out of good quality (non GMO) tortillas is so much tastier!  It’s easy too and only takes 15 minutes or so, depending on quantity.  Each 6 inch tortilla makes 6 chips, so do the math to figure out how many you need. (I would say 2 tortillas per person).  This is also a great use for stale or dried out tortillas, so don’t throw those out!  The grilled pineapple salsa is the creation of my son, Eric. Grilling the pineapple is pure genius!  It adds a nice smoky quality and softens the pineapple so that it picks up the other flavors nicely.  His version included habanero peppers and was delicious but pretty spicy (our lips were numb), so I have toned it down with mildly spicy jalapeno peppers.  If you like things super spicy (like my Dad) increase the amount of peppers or add spicier varieties.  This is also a good appetizer for my Fish Tacos, Chile Rellenos or Black Bean and Mango Salad with Avocado Ranch if you want to continue the Mexican theme.

Tips:   You can buy mango pre-cut but it’s very easy to do it yourself if you know the right technique.  How to cut a Mango.  If you like your margies really thick and frozen, you can buy frozen fruit or cut the fruit into chunks, lay them on parchment or waxed paper and freeze them for a half hour or so.  Using frozen fruit reduces the amount of ice you need, resulting in a thicker, fruitier beverage.

Mango Margaritas

  • Servings: 3-4
  • Difficulty: easy
  • Print

Margaritas5

2 cups ripe Mango, large dice
6 Tbsn fresh lime juice
1 Tbsn agave necter
4 ounces Tequila (100% agave blanco)
1-2 cups Ice

Margaritas3

  • Rub the cut side of a lime around the rim of the glass and dip the wet rim in salt. (Optional)
  • Add all the ingredients into the blender and blend until smooth. Add additional ice if a thicker drink is desired.

Margaritas1

  • Pour into prepared glasses.  Cheers!

Homemade Tortilla Chips

  • Servings: 72 tortilla chips
  • Difficulty: easy
  • Print

Margaritas4

12  6″ corn tortillas
1/3 cup vegetable oil(avocado, grapeseed or sunflower)
kosher or sea salt
  • Pre-heat oven to 375 degrees.
  • Brush tortillas with oil on both sides.  Place in a stack.

Margaritas7

  • Cut tortilla stack into 6 triangle shaped wedges.
  • Arrange the tortillas on a baking sheet in a single layer and bake  for about 6 minutes.

Margaritas6

  • Using tongs turn them over, sprinkle with a little salt, and bake for another 6 minutes..
  • Remove from the oven and let cool.

Spicy Grilled Pineapple Salsa

  • Servings: 1 1/2 cups
  • Difficulty: easy
  • Print

Margaritas8

1/4 whole pineapple, sliced into rounds
2 jalapenos, seeded and finely diced(or other hot pepper)
1 small shallot, finely diced
1/2 cup cherry tomatoes, diced
1 tsp fresh lime juice
salt and pepper to taste

mARGARITAS9 mARGARITAS10

  • Grill pineapple slices on a hot grill for several minutes on both sides and remove from heat.

margaritas12

  • Dice pineapple into small chunks

Margaritas11

  • Using gloves, finely mince jalapeno
  • Combine all ingredients.  Serve with chips. Ole!

Margaritas4

Meatless Monday – Asparagus & Goat Cheese Tart

5

Asparagus and Goat Cheese Tart5

Looking for a simple and quick appetizer?  It’s asparagus season and I wanted an appetizer that would show case this perennial spring favorite.  This tart  recipe which I adapted from HuffPoste Taste has only four ingredients plus olive oil and a few fresh herbs and spices.  It takes less than 10 minutes to assemble and about 12 minutes to cook.  Slice into squares and you have an elegant and sophisticated hors d’oeuvre to serve your guests.  This is a very forgiving appetizer which doesn’t have to be served piping hot.  It’s just as good at room temperature which makes it perfect for a dinner party.  Just make the tart ahead and it will sit and wait until you’re ready to serve.  You can also halve the recipe to make just one tart, which is enough for 2 to 4 people as an appetizer.

This is not a typical recipe for me since I try to avoid white flour, however, I was intrigued by it’s simplicity and wanted to give it a try.  I am a newbie to phyllo dough, which can be tricky to work with since it’s so thin and dries out quickly.  Just make sure everything is ready before you unwrap the phyllo dough.  Don’t worry if it rips as you handle it because the rips will be hidden within the layers.  This is a fairly thin crust (2 sheets of phyllo dough folded in half per tart), just enough to provide a beautiful backdrop for the asparagus and give a satisfying salty, crispy, crunch.  If you like a more substantial crust, just add more layers of phyllo.  Thin asparagus spears work better than thick which may not end up fully roasted when the phyllo is done.  If you don’t like goat cheese, substitute ricotta or gruyere.  Fresh herbs are a nice accompaniement but dried herbs will work just fine.  If you make it, let me know how it goes!

Asparagus and Goat Cheese Tart

  • Servings: 2 thin 8x12 tarts
  • Difficulty: easy
  • Print

4 sheets phyllo pastry, thawed
1/4 cup olive oil
6 oz goat cheese (ricotta or gruyere)
1 bunch slender asparagus
2 Tbsn grated parmesan (optional)
Salt and freshly ground black pepper
fresh thyme, rosemary and/or basil (optional)


  • Preheat the oven to 400°F.
  • Trim the asparagus spears to fit the width of the folded phyllo, leaving room for a one inch border on each side.  Toss asparagus with a drizzle of olive oil.

Asparagus and Goat Cheese Tart1 Asparagus and Goat Cheese Tart2

  • Lay 2 sheets of phyllo dough on a baking sheet so half is hanging over the edge. Brush the half sheets of pastry in the pan with olive oil, and fold  the other halves, one at a time and brush each with oil.  Repeat with other 2 sheets of phyllo.  You should end up with 2 rectangles.  You may need two baking sheets if you don’t have a jumbo one like I do.
  • Crumble the goat cheese on top, leaving a border of pastry. Add the asparagus in rows.

Asparagus and Goat Cheese Tart3 Asparagus and Goat Cheese Tart4

  • Season with salt, pepper, parmesan and fresh herbs, if using. Bake for 12 minutes, until the pastry is golden-crisp and the asparagus just tender.
  •  Top with freshly chopped or sliced basil, if desired.

Asparagus and Goat Cheese Tart6


Meatless Monday – White Bean & Kale Dip

0

White Bean and Kale Dip4

Kale is the current ‘It’ food. We have Kale Chips, Kale Smoothies, Sauteed Kale and Kale salads. I guarantee if you show up at a party bearing anything with Kale, you will be heralded as a hip Foodanista.  I don’t want to knock kale, because it really is a nutritional powerhouse definitely worthy of being the star of the latest food fad. It’s not called ‘The Queen of Greens’ for nothing!   “One cup of chopped kale contains 33 calories and 9% of the daily value of calcium, 206% of vitamin A, 134% of vitamin C, and a whopping 684% of vitamin K. It is also a good source of minerals copper, potassium, iron, manganese, and phosphorus. (www.webmd.com)

Combine kale with white beans which are high in minerals, fiber and protein and you’ve got a snack worthy of superman. White Bean and Kale Dip combines some of my favorite flavors, white beans (cannellini), kale, cayenne, cumin, lemon, tahini and pine nuts and has none of the fattening creams or cheeses (which I love but am trying to cut back on).  The creaminess in this dip comes from the white beans, pine nuts and a bit of olive oil, all healthy and nutritious.  More importantly, it is delicious! If you are looking for a yummy but healthy appetizer, then this is for you.  I served it with pita crackers but its also great with carrots and other raw veggies.  You can also spread it on toasted bread and add a sprig of arugula and tomato. Yum!

white Bean and Kale Dip5

There are a surprising number of recipes out there for White Bean and Kale Dip (or perhaps not so surprising given kale’s goddess status).  Variations include walnuts or cashews instead of pine nuts and spinach instead of kale.  I would recommend Lacinato (Dinosaur) Kale, which is sweeter and less tough(chewy) than the curly type, for this recipe since we are using it raw. If you include nuts, I would recommend running them through the food processor or blender to make a fine powder before adding the other ingredients. You could probably also use an almond or cashew butter if you have it  instead.  Otherwise, this dip only takes a few minutes to put together but it needs at least an hour to chill in the refrigerator to firm up. I actually thought it tasted better the next day.  So time to jump on the Kale Bandwagon if you haven’t done so already!

White Bean and Kale Dip

  • Servings: 8
  • Difficulty: easy
  • Print

kale-1

1 can white cannellini beans,- drained and rinsed
1 cup kale, roughly chopped
1/4 cup flat leaf parsley
1/4 cup pine nuts (optional)
2 Tbsp tahini
2 cloves garlic
1/3 cup olive oil
2 Tbsn balsamic vinegar
2 tsp lemon juice (1/2 lemon)
Zest from ½ lemon
1 tsp cumin (optional)
 1/2 tsp black pepper
½ tsp cayenne (or more to taste)
Salt to taste
1/4 cup water, if needed

White Bean and Kale Dip

Directions:

  •  If you’re using nuts, process them into a fine powder in the food processor before adding the other ingredients.
  • Add the rest of the ingredients and blend until smooth. Add water if needed to blend ingredients.
  • Pour into a serving dish and chill in fridge for 1 hour or more.  It will thicken quite a bit and the flavors will meld.
  • Serve with crackers or raw veggies.

White Bean and Kale Dip4


Limoncello

12

Limoncello1
“I believe when life gives you lemons, you should make lemonade…and try to find someone whose life has given them vodka, and have a party.” (Ron White, Author)

…Or you can combine the two and make Limoncello! I am lucky to have a beautiful, and bountiful, Meyer Lemon tree right outside my kitchen door. Most citrus trees bear two crops a year, a smaller one in the summer and the heaviest crop in winter.  Meyer lemon trees, however, are known for bearing fruit all year long, although their largest crop is now. With such an abundance of fruit, I am always looking for ways to use lots of lemons at once. I don’t mind sharing but I hate when they are wasted. Limoncello is an easy way to use extra lemons, although is not instantly gratifying since there is a considerable wait time until you have a final product. Limoncello is a crowd pleaser and makes a great gift, so our problem is that it goes too quickly. For that reason, as soon as I bottle one batch, I often start another.  Even if you don’t have a tree in your backyard, its easy to find Meyer lemons this time of year at your supermarket or even at Costco. You can also use regular lemons with good results, so use what you have.   It’s not too late!

The Limoncello I have made in the past is more “California style”, rather than Italian. I found the recipe on the internet from someone in Berkeley who has a prolific meyer lemon tree in her backyard and came up with a recipe in an attempt to use up her lemons. Sounded familiar so I gave it a whirl. I can’t credit her for the recipe since I could never find her post again. I liked the fact that she uses whole lemons and not just the peel. The results were good and I’ve had no complaints, however, after our trip to Italy last summer, I decided to attempt the Italian version, which uses only the peel. Purists believe that this makes the best quality limoncello, so I decided to put it to the test.  Here are a couple of photos from the ‘California style’ batch.

  1. making limoncelloLimoncello

In selecting the lemons, try to get organic since the peel is where most of the insecticides reside and often they are waxed to give them a longer shelf life. If you can’t find organic lemons, just scrub them with warm soapy water and dry them with a towel.   I have divided the process into two steps. Since the limoncello needs to sit for 6 to 8 weeks before bottling, you don’t have to have everything on hand just to get started. The large Bell containers are easy to find at hardware  or department stores like Target.   The Container Store and Pier One Imports both carry a nice selection of flip cap bottles that are perfect for bottling. Lastly, think about ‘your’ label which is the finishing touch and gives it personality and helps to make it the perfect gift. http://www.onlinelabels.com has pretty much every size and shape label you could ever want and they have a downloadable template which makes it very easy.

Limoncello

  • Servings: 8-12 oz bottles
  • Difficulty: medium
  • Print

STEP 1

 What you Need:

18 Meyer Lemons
1 handle or 2 fifths of Everclear or vodka
2 gallon glass jar with a lid(found at most hardware stores)
Potato peeler or microplaner (to zest)
• Wash and dry lemons. If not using organic scrub them with a vegetable brush in warm soapy water. Drying helps remove any remaining residue.

Limoncello3 Limoncello4

  •  Using a potato peeler, zester or a microplaner, carefully remove the peel trying not to get any of the bitter white pith. I used a potato peeler to cut long strips and then scraped any white from the back with a sharp knife.
  • Place all of the peels in the glass jar and pour the alcohol/vodka over the top to fill. Cover with a tight lid. (Note: The photo below shows a double batch.)
  • Squeeze the juice from the lemons.  Add sugar and water to make lemonade or freeze in ice cube trays, then put in baggies when frozen and save for another use.

Limoncello5
• Let sit covered with a kitchen towel or two for 6 to 8 weeks. I like to give it a little shake every few days for the first couple of weeks, just to make sure it’s evenly mixed. After that you can store it somewhere dark and out of the way.

STEP 2

What you Need:

Funnel
Fine mesh strainer
2 or 3 paper coffee filters
large bowl
ladle
2 1/2 cups sugar
2 1/2 cups water (filtered preferred)
8 12 oz bottles
labels (optional)
  • Wash and air dry bottles.  Can be done in a hot dishwasher. (Drying with a towel can reintroduce germs.)
  • Heat water and sugar in a pot until the sugar dissolves and the simple syrup is clear. /Remove from heat and let cool to room temperature.

Limoncello8 Limoncello9

  • Line your mesh strainer with coffee filters and place it over the large bowl (or have someone hold it for you).  Carefully pour lemon/vodka mixture over the strainer, taking care not to let the liquid go over the top of the filters.

Limoncello7

  • Discard lemon peels.
  • Clean Bell jar and pour filtered vodka mixture back into the jar (I would filter at least twice).

Limoncello10

  • Pour simple syrup into the jar and mix to combine.
  • Place a funnel into one of the bottles (with a coffee filter if you want to filter again) and carefully ladle limoncello into the bottle leaving 1 inch clearance at the top.

Limoncello12

  • Seal the cap and repeat with remaining bottles.

Limoncello13Limoncello15

  • The Limoncello will continue to mellow and improve over the next several weeks.
  • Label the bottles if desired. I’m testing a new label.  What do you think?
  • Store in a cool place.  Serve icy cold from the freezer.

So what was the final verdict?  The Italian style version requires more preparation time, in the peeling of so  many lemons,  but the final product is smoother and tastes more like the Limoncello we had in Italy, although less sweet since we also reduced the amount of sugar.   I think its worth the extra effort.  Cheers!

Wheatless Wednesday – Spicy Roasted Chickpeas

4

Roasted Garbanzos6

Warning – Highly Addictive! If you like Corn Nuts you’ve got to try these.   I got this recipe idea from my friend, Laura, who makes these snacks for her two teenaged boys, who gobble them up and ask for more without actually knowing what they are eating.  When they would first ask,  Laura’s answer was really vague (sudden attack of coughing) or evasive  (urgent phone call). She finally decided to call them Bean Pops. Clever Mama!  Regardless of the mommy maneuvering, she is getting her boys away from bad fat and preservative laden junk foods to protein and nutrient rich, yet still yummy chickpea snacks, or what I think of as healthy ‘corn nuts’ (if there can be such a thing).  Garbanzo beans are a source of several vitamins including vitamin C, B6 and folate. Many dietary minerals are also available from garbanzo beans, including manganese, phosphorus, copper, iron, magnesium, selenium, zinc and calcium. (www.livestrong.com )

Dieters take note!  ‘Furthermore, there is a recent study in which participants consumed fewer processed foods and less food overall when the diet was supplemented with garbanzo beans.  Research suggests that the fiber benefits of garbanzo beans may go beyond the fiber benefits of other foods’.  For more information on this study click here: http://www.whfoods.com/genpage.php?tname=foodspice&dbid=58

When I was a teenager, my Mom went through a garbanzo (also called chickpeas or ceci beans) phase where they showed repeatedly up in our salads and main dishes – even as flour in bread. (My Mom was way ahead of her time – by 25 years or so). I checked with my sister, Margaret, who also remembers the time when we had garbanzos coming out of our ears.  She admitted though that they are now her favorite bean and she puts them in everything she can, so I guess the apple doesn’t fall far from the tree.   I didn’t appreciate my Mom’s creativity at the time, especially since I wasn’t a garbanzo fan as a kid.  I am a huge fan now though (same apple tree, I guess).  I called my Mom to see what she had to say on the subject and she was about to start some garbanzo sprouts which nutritionally speaking is like garbanzos on steroids (increased vitamin content among a host of other benefits).  So there you go.  At 86, Mom  is still way ahead of everyone else!

Shameless PlugTIP: Spicy Roasted Chickpeas are particularly delicious when paired with a glass of red wine. I’m enjoying  the 2009 Paradisos Red Wine from my brother, Paul’s winery, Paradisos del Sol in Zillah, Washington.  It retails for $28 per bottle but if you mention my blog you will get the $14 family rate.  They deliver to Seattle too!  Check them out at http://www.paradisosdelsol.com/  Cheers!

Spicy Roasted Chickpeas

  • Servings: 3 cups
  • Difficulty: easy
  • Print

2 Tbsn olive oil
1 Tbsn ground cumin
1 tsp garlic powder
½ tsp chili powder
1 tsp salt (or to taste)
¼ tsp cayenne pepper (or more if you like spicy)
2 cans chickpeas/garbanzo beans (or 2 -3 cups cooked dry beans)

  • Preheat oven to 400  degrees
  • Rinse and dry garbanzo beans.  You can either air dry them on paper towels or pat dry with additional papertowels.

Roasted Garbanzos 1

  • Whisk the oil, cumin, garlic powder, chili powder, salt,  and red pepper together in a medium sized bowl.;

Roasted Garbanzos 2


  • Add the chickpeas and toss to coat.


Roasted Garbanzos 3

  •  Spread into a single layer on a baking sheet. Shake the pan back and forth a bit to disperse them evenly.

Roasted Garbanzos 4


  • Roast, stirring occasionally, until nicely browned and slightly crispy, about 40 to 45 minutes or until desired crispness.  They will continue to crisp a bit while cooling on the pan.


Roasted Garbanzos5

  •  Serve warm or cold.

Roasted Garbanzos6

Wheatless Wednesday – Kusshi Oysters with Jalapeno Mignonette

0

Oysters2
I’m not sure if oysters really make you fall in love, or even lust, but the possibility is certainly a fun concept.  The last two times he’s been to the Farmer’s Market my husband has come home with fresh oysters. Hmmm…  ‘Oysters have always been linked with love. When Aphrodite, the Greek goddess of  love, sprang forth from the sea on an oyster shell and promptly gave birth to  Eros, the word “aphrodisiac” was born. The dashing lover Casanova also used to  start a meal eating 12 dozen oysters.” (www.globalgourmet.com)  Regardless of their effect on our love lives, oysters are at the very least  nutrient rich and low in fat and calories (57 for 6 medium for those counting).  High in protein and low in fat, oysters are an excellent source of vitamins A, B1(thiamin), B2 (riboflavin), B3 (niacin), C and D. Four or five medium size oysters supply your daily allowance of iron, copper, iodine, magnesium, calcium, manganese and phosphorus. Oysters also provide large amounts of zinc;  a mineral which boosts prostate health, so maybe there is a germ of truth to the folklore.  (Nutritional Data from www.hogislandoysters.com)

We bought two kinds of oysters from the Santa Rosa Seafood Company at the Marin Country Mart Farmer’s Market on Saturday.  Kusshi ( meaning precious in Japanese) is a West Coast oyster, grown in Deep Bay, British Columbia.  They are small, sweet and very clean tasting so we decided to serve them raw with a tasty jalapeno mignonette called “Hog Wash” by the Hog Island Oyster Company.  My husband has become quite an expert shucker, armed with an oyster knife and oven mitts to protect his hands from the sharp shells.  I would not suggest trying to shuck your own oysters without the proper tools.  Click here for a video on how to shuck oysters: http://hogislandoysters.com/kitchen/shucking-oysters

Oysters3

The other oysters, local Drake’s Bay, are very large and meaty, more than bite size, so we just popped them on the grill whole. Once you hear them ‘pop’, you can pry the top shell off and top them with barbecue sauce.   We used the rest of the yummy Chipotle Butter (also a  Hog Island recipe) left over from the  last time we made them. Since I have already posted that recipe I won’t repeat it.   To see that original post with complete recipe and directions click here:  https://goodmotherdiet.com/2013/12/21/grilled-oysters-with-garlic-chipotle-butter/

Oysters4

Jalapeno Mignonette

  • Servings: 3/4 cup
  • Difficulty: easy
  • Print

Jalapeno Mignonette (aka Hog Wash)

1/4 cup seasoned rice vinegar
1/4 cup natural rice vinegar
1 large shallot, peeled and roughly chopped
1 large Jalapeno pepper, seeded and roughly chopped
1/2 bunch of cilantro
juice of 1 lime
  • Put all ingredients in a food processor or blender and process until smooth. For a chunkier mignonette, just dice the shallots, jalapeno and cilantro finely and combine ingredients.  This is mildly spicy, so for more spice, include some or all of the jalapeno seeds.

Oysters6Oysters2

Meatless Monday – Farmer’s Market Pasta & Balsamic Marinated Beets

0

Farmers Market 17

Do you know where your food has been?  Do you care?  I finally got around to checking out the Farmer’s Market at Marin Country Mart in Larkspur (California) and I can’t believe it took me so long.  I have really been missing out! This is an open air market where you can buy gorgeous fresh vegetables, fruit, nuts, wild caught seafood, artisan cheeses, flowers and baked goods, all locally grown and crafted.

Farmers Market

While I perused the various stands, my husband stood in line at the Santa Rosa Seafood stand.

Farmers Market 5Farmers Market 11

It was a beautiful sunny day.   The only problem is that I had a terrible case of buyer indecision.  I wanted everything, even to grind my own flour!   Do I buy gluten free goodies from Flour Craft Bakery or Granola from Café Fanny?  Why didn’t I bring my knives which could really stand to be sharpened?  Why didn’t I learn to knit? (I almost bought the yarn anyway…)

Farmers Market 13 Farmers Market 12

This market is also a great family destination with live music, kid crafts and several hot food stands, including one that specializes in grilled cheese. Yum!  It’s open Saturdays from 9am to 2pm. Click here for a listing of vendors and schedule of events. (http://marincountrymart.com/farmers-market)

Farmers Market 27

Why buy local?
Buying locally-produced food is good for your body, for the earth, and for our local economy.  Because your food doesn’t travel long distances to get to you, it is more nutritious.  Fewer fossil fuels are used in distribution and shipping when you buy local.  Supporting GROWN LOCAL helps keep farming families in business and our dollars in our own communities. (www.buylocalmarin.org )

Farmers Market 26 Farmers Market 9

To find a farmer’s market in your area, check out the USDA National Farmers Market Directory, an interactive site with information on farmer’s markets all over the US.   (http://search.ams.usda.gov/farmersmarkets/)  Here is another great (and more complete) source for finding farmer’s markets, , family farms, and other sources of sustainably grown food in your area http://www.localharvest.org/.

Farmers Market 6 Farmers Market 7

So what did we end up with?  My husband came home with two kinds of oysters (which I will get to on Wednesday so oyster lovers stay tuned).  After much agonizing, I bought a gorgeous bunch of multi-colored beets, purple asparagus (which I couldn’t resist because of the color) and a bag of mixed greens (chard, kale, mustard and a few I don’t recognize).  I also bought Devil’s Gulch cheese from Cowgirl Creamery and Fig and Black Sesame Jam from Blue Chair Farms which made an excellent and simple appetizer.  Just add crackers.

Farmers Market 25I didn’t have any particular dish in mind when I selected these vegetables.  I was buying purely with my senses and allowed myself to be seduced by their glorious colors.  Once home I decided to make a winter version of pasta primavera and serve roasted, marinated beets on the side.  The resulting dish was very colorful and delicious!  Plus I could feel good knowing I was supporting some local hardworking folks.

Farmers Market 4

Fusilli with Braised Greens and Asparagus

  • Servings: 4
  • Difficulty: easy
  • Print

Fusilli with Braised Greens and Asparagus

3/4 pound whole-wheat fusilli
4-6 cups mixed greens (chard, kale, etc), chopped and rinsed
1 bunch asparagus, sliced into 1 or 2 inch pieces
1/3 cup pine nuts
2 tablespoons olive oil (or a combination of butter and olive oil)
4 sliced garlic cloves
1/4 teaspoon red chile flakes
1/2 teaspoon kosher salt
1/2 cup vegetable broth
Freshly shredded parmesan cheese (optional)
Farmers Market 21Farmers Market 22
  • Cook pasta as package directs. Drain and set aside.
  • If your pine nuts are not toasted, heat them in a dry pan over medium heat for a few minutes.  Set aside.
  • Add oil to pan, add garlic and chile flakes.  Cook stirring until fragrant, about a minute.
  • Add asparagus and salt. Cook for a minute or two.
  • Add greens and broth.  Cover and cook until greens are tender, about 5 minutes, stirring several times.
  • Stir in pasta and pine nuts.
  • Top with parmesan cheese (optional)

Farmers Market 24

Balsamic Marinated Beets

  • Servings: 2-4
  • Difficulty: easy
  • Print

Balsamic Marinated Beets

small bunch of beets
1-2 Tbsn olive oil
1 orange (optional)
Marinade/Dressing(see directions below)
Farmers Market 19 Farmers Market 20
  • Cut tops off of beets taking care not to cut into beet.  Leave skin and tails intact.  Wash, dry and place beets in a baking dish (or a large piece of aluminum foil).  Drizzle with olive oil.  Cover with foil and cook for about an hour at 425 degrees.  Larger beets might take longer.  They should be easy to slice with a knife. 
  • Remove from heat and let cool.  Skins will come off easily.  Use a papertowel to keep your hands from getting red.
  • Peel orange and slice crosswise into thick slices.  Section into triangles.
  • Slice beets.  You can marinate them for 30 minutes or overnight, or you can arrange them on a plate, top with orange sections and drizzle with balsamic dressing.

Marinade:  Combine 1/4 cup balsamic vinegar, 1/4 cup red wine vinegar, 1/4 cup olive oil, 1 minced shallot, salt and pepper.

Orange-Kissed Seed Crackers with Red Pepper & Rosemary Spread

8

Seed crackers10

I was saved from a Cambazola guilt trip a few days ago when my dog ate almost an entire wedge on the way home from the store. I can’t really blame her as it fell out of the bag as I turned the corner and landed at her feet. I’m sure she couldn’t believe her luck -like manna from heaven! Of course, I had to find something else to serve our guests, but it meant I didn’t get any either.

seeds1

When it comes to appetizers I am a cheese and crackers girl. I will walk straight by the fancy hors d ‘Oeuvres and head right to the cheese platter, especially if it includes Cambazola or some other soft, aromatic (read stinky) cheese or spread. I may hang out at the veggie platter for a while too but I have been known to make crackers with cheese or dip most, if not all of my dinner. Unfortunately, cheese, while delicious, is pretty fat laden and high calorie (especially if you can’t step away from the table) and crackers don’t usually add much nutrition. Knowing my weakness, I am always looking for a healthier alternative and I think I’ve found one!

While perusing the ‘Vegetarian Everyday’ cookbook by Frankiel and Vindahl, I stumbled upon the Orange-Kissed Seed Crackers. The photo was beautiful and the name, oh so cute. They are gluten free and nut free multi-seed crackers that are really good for you. You can use amaranth, quinoa or almond flour, all of which are highly nutritious and make a good cracker base. Three pages later I spotted the Red Pepper & Rosemary Spread, gorgeous orange-red in color, made from roasted red peppers and sunflower seeds with a bit of spice from cayenne pepper and fresh rosemary. This spread uses no oil and gets it’s creaminess from blending the peppers in a food processor with sunflower seeds. The combination of these two is pretty addictive, although the crackers would be pretty good with Cambazola too. 🙂

seed crackers2

The cracker recipe calls for many seeds that I have never used and I wasn’t sure how easy they would be to find. I didn’t find hemp seeds so substituted poppy seeds but I’m sure other seeds can be substituted as long as the total quantity is the same. Here is the rundown on what each seed has to offer from a nutritional standpoint.  Flax seeds are rich in omega-3 fatty acids, fiber, zinc, iron, calcium, and Vitamin E. Pumpkin seeds, also known as pepitas, are chock full of magnesium, manganese, phosphorus, tryptophan, and iron. They’re also a good source of copper, zinc, and Vitamin K. Sesame seeds are loaded with copper and manganese, and also have plenty of calcium, magnesium, tryptophan, and iron. Sunflower seeds are a tremendous source of Vitamin E and are also rich in Vitamin B1.  Hemp seeds are rich in protein, calcium, fiber, and omega-3 fatty acids. (www.qualityhealth.com).  Throw in quinoa flour and you’ve got a grain free, gluten free, protein and vitamin packed and very savory cracker you can gobble up guilt free.  You may not even have to make dinner…

Seed crackers11

Orange-Kissed Seed Crackers

1/2 cup sunflower seeds
1/2 cup sesame seeds
1/2 cup flax seeds, ground
1/2 cup hemp seeds
scant 1 cup amaranth, quinoa or almond flour
1 1/2 tsp sea salt
1/4 cup olive oil
2 Tbsn freshly squeezed orange juice (optional)
1 Tbsn honey or maple syrup(optional)

  • Preheat oven to 300 degrees
  • Combine all the seeds in a medium bowl.  Scoop out about a quarter of them and reserve for the topping.

Seed crackers3

  • Add flour, salt and olive oil with 1 1/4 cups water and stir to combine.  It should be loose.  Add more water if it seems thick.  It will evaporate during cooking.
  • Line 2 12 x 24 in. baking sheets with parchment paper.  Pour half the batter over the paper onto each pan and use a spatula to spread the batter as thinly as you can.

Seed crackers4Seeds7

  • Bake for 25 minutes.
  • Whisk together the honey and orange juice (if desired) in a small bowl.
  • Remove the baking sheet from the oven and brush the cracker with the glaze and sprinkle with the reserved seeds
  • Cut into 2 inch pieces and bake for 30 minutes more or until they are crunchy.
  • Cool on a wire rack.

NOTE:  I followed the recipe pretty closely but next time I would add a bit more maple syrup or honey to make the seeds stick better.   I will also try another type of flour with a less earthy taste and sprinkle some  coarse or flaked sea salt on top as well.

Seed crackers8

Red Pepper & Rosemary Spread

3 large red  bell peppers, halved and seeded
2/3 cup sunflower seeds
pinch of cayenne pepper
sea salt
juice of 1/2 lemon
2 sprigs of rosemary
 Seed crackers5 Seed crackers6
  • Roast the peppers on a baking sheet and roast for about 40 minutes, or until slightly charred.  Remove from the oven and leave to cool.
  • Meanwhile, toast the sunflower seeds, cayenne and salt in a dry frying pan over medium heat for a few minutes.
  • When the peppers have cooled, peel away the skin and roughly chop.
  • Place all ingredients in a food processor or blender and puree until smooth.  Adjust seasoning if necessary.
  • Will keep in an airtight container for 2 weeks.

NOTE:  You can also roast the peppers on broil or on the grill.  They peel more easily if you put them in a paper bag while they cool.

Buffalo Wings Two Ways

0

Buffalo Wings 14

SUPERBOWL XLVIII. Looking for the perfect SUPERBOWL SUNDAY appetizer for game day? Look no further. I am posting my Buffalo Chicken Wing recipe by request, which is pretty basic but oh so good! They never make it past the first half.  While I was at it I decided to throw in a vegetarian Buffalo “Wing” recipe for our vegetarian friends or our friends who are counting their calories, although these are pretty yummy, but that could have something to do with the buffalo sauce and blue cheese dressing. You may find yourself guarding the platter to save some for yourself. The “Wings” are really cauliflower dipped in batter then baked on high heat. They are a fun alternative to regular buffalo wings but without the extra fat and calories (or bones). After all it is cauliflower which is loaded with nutrients and naturally low in fat. ‘ Cauliflower heads also contain numerous health benefiting phtyo-nutrients that help prevent prostate, ovarian and cervical cancers’. (Nutrition-and-You.com). Okay, I have to admit that my house is divided for this superbowl game. Now that the Niners are out, I have to root for my home state, and the Seahawks, but my husband is nursing a grudge and going for the Broncos. It’s always fun to be on opposing sides! Even if you’re not a SEAHAWKS or a BRONCOS fan (or a football fan at all) you can check out the adorable Puppy Bowl on the Animal Planet channel, or at the very least, there are always the commercials…

SHOPPING TIPS:  I don’t eat chicken very often but when I do I try to find organic, farm raised chicken. It is a bit more expensive but you are getting less of the bad stuff, like preservatives and additives and more of the healthy nutrients found in animals fed real food. Plus I don’t like to promote the factory farms. I would rather support the Mom and Pop farms whenever possible.  Wouldn’t it be nice if chickens running around outside pecking at bugs on the ground was the norm and not the other way around?  I  found organic free range chicken wings at Whole Foods, although, they weren’t at the counter. I had to ask for them.  Blue Cheese dressing is traditionally served with buffalo wings and I have provided a recipe for homemade, however, there are some good commercial brands available, like Bob’s and Litehouse.  A shortcut is to buy a commercial dressing (the refrigerated dressings are usually best) and add some fresh, crumbled blue cheese.  My favorite wing sauce is Frank’s Buffalo Wing Sauce but you can also make your own by combining hot pepper sauce and melted butter. (Several recipes say not to use Tabasco, not sure why, just passing it along)  The cauliflower recipe can easily be made vegan.  Just replace the melted  butter with vegan margarine.

Buffalo Chicken Wings

  • Servings: 6-8
  • Difficulty: easy
  • Print

2-3 lbs of chicken wings
Cooking spray for pan
1/2 tsp cayenne pepper
1/2 tsp chili powder
1/2 tsp garlic powder
1/2 tsp onion powder
1 cup Buffalo sauce or 2/3 cup hot pepper sauce mixed with 1/3 cup melted butter
  • Wash and dry chicken wings. (Whole wings have to be cut apart at the joint, tips removed. “Party wings”, if you can find them, are already cut for you).
  • Lightly spray bottom of pan to prevent sticking.
  • Mix dry spices together in a small bowl.
  • Place chicken pieces in bottom of pan a single layer.  Sprinkle with half of dry spices.

Buffalo Wings 1

  • Broil for 8 or 10 minutes or until golden brown.  Turn them over and sprinkle with remaining spices.  Cook another 8 or 10 minutes.

Buffalo Wings 2Buffalo Wings 3

  • Brush wings with buffalo sauce and cook another 5 minutes.  Turn and repeat on the other side. (If too many drippings have accumulated in the bottom of the pan, you can remove some of it with a turkey baster before you turn them, so you don’t lose your sauce into the drippings)
  • Serve with blue cheese dressing and celery sticks

Buffalo Wings 10

Buffalo Cauliflower Wings

  • Servings: 6-8
  • Difficulty: easy
  • Print

1 cup water
1 cup flour (any kind will work)
1 tsp. garlic powder
1/4 tsp cayenne pepper
1/4 tsp chili powder
1/4 tsp salt
1 head of cauliflower, cored and cut into florets
1 cup buffalo sauce or 2/3 cup hot sauce mixed with 1/3 cup melted butter)
Buffalo Wings 5 Buffalo Wings 6
  • Preheat the oven to 450°F.
  • Spray a baking dish with non-stick oil.
  •  Combine the water, flour, and  spices in a large bowl and stir  to make a paste. I used coconut flour which is very absorbent so had to add more water.
  • Add the cauliflower pieces and stir to coat.  Place in a shallow  baking dish in a single layer. Bake for 18 minutes.

Buffalo Wings 9Buffalo Wings 12

  • Brush the buffalo sauce on the baked cauliflower and continue baking  for a few more minutes. Turn and repeat.

Blue Cheese Dressing

  • Servings: about 2 cups
  • Difficulty: easy
  • Print

3/4 cup sour cream
1 1/3 cups  mayonnaise
4  ounces blue cheese, crumbled
1/2 teaspoon dry mustard
 1  teaspoon Worcestershire sauce
 1/3 teaspoon garlic powder
1/2 teaspoon  salt
1/2 teaspoon  ground black pepper
  • Whisk all ingredients together in a medium sized bowl. For a smoother dressing, mix in a blender or food processor. Cover and refrigerate.  Best if made the night before.

Buffalo Wings 13

Margherita and Pesto Chicken Pizzas on White Whole Wheat Crust

0

Pizzas

WHAT?  PIZZA CRUST MADE WITH WHITE WHOLE WHEAT?  ISN’T THAT A MISNOMER? I AM ON THE HUNT FOR THE PERFECT HEALTHY PIZZA…

What is white whole wheat? I have only recently heard about white whole wheat flour, which is reported to retain the nutrients as a whole grain flour but be lighter in look and flavor.  Standard whole wheat flour is made using red wheat which is darker in color and makes a heavy whole grain flour or requires lots of processing to make into white flour By contrast, white whole wheat flour is made with albino wheat which is an entirely different variety. This type of wheat grain has a lighter hue and requires much less processing to produce a flour that is more similar to bleached  white flour.

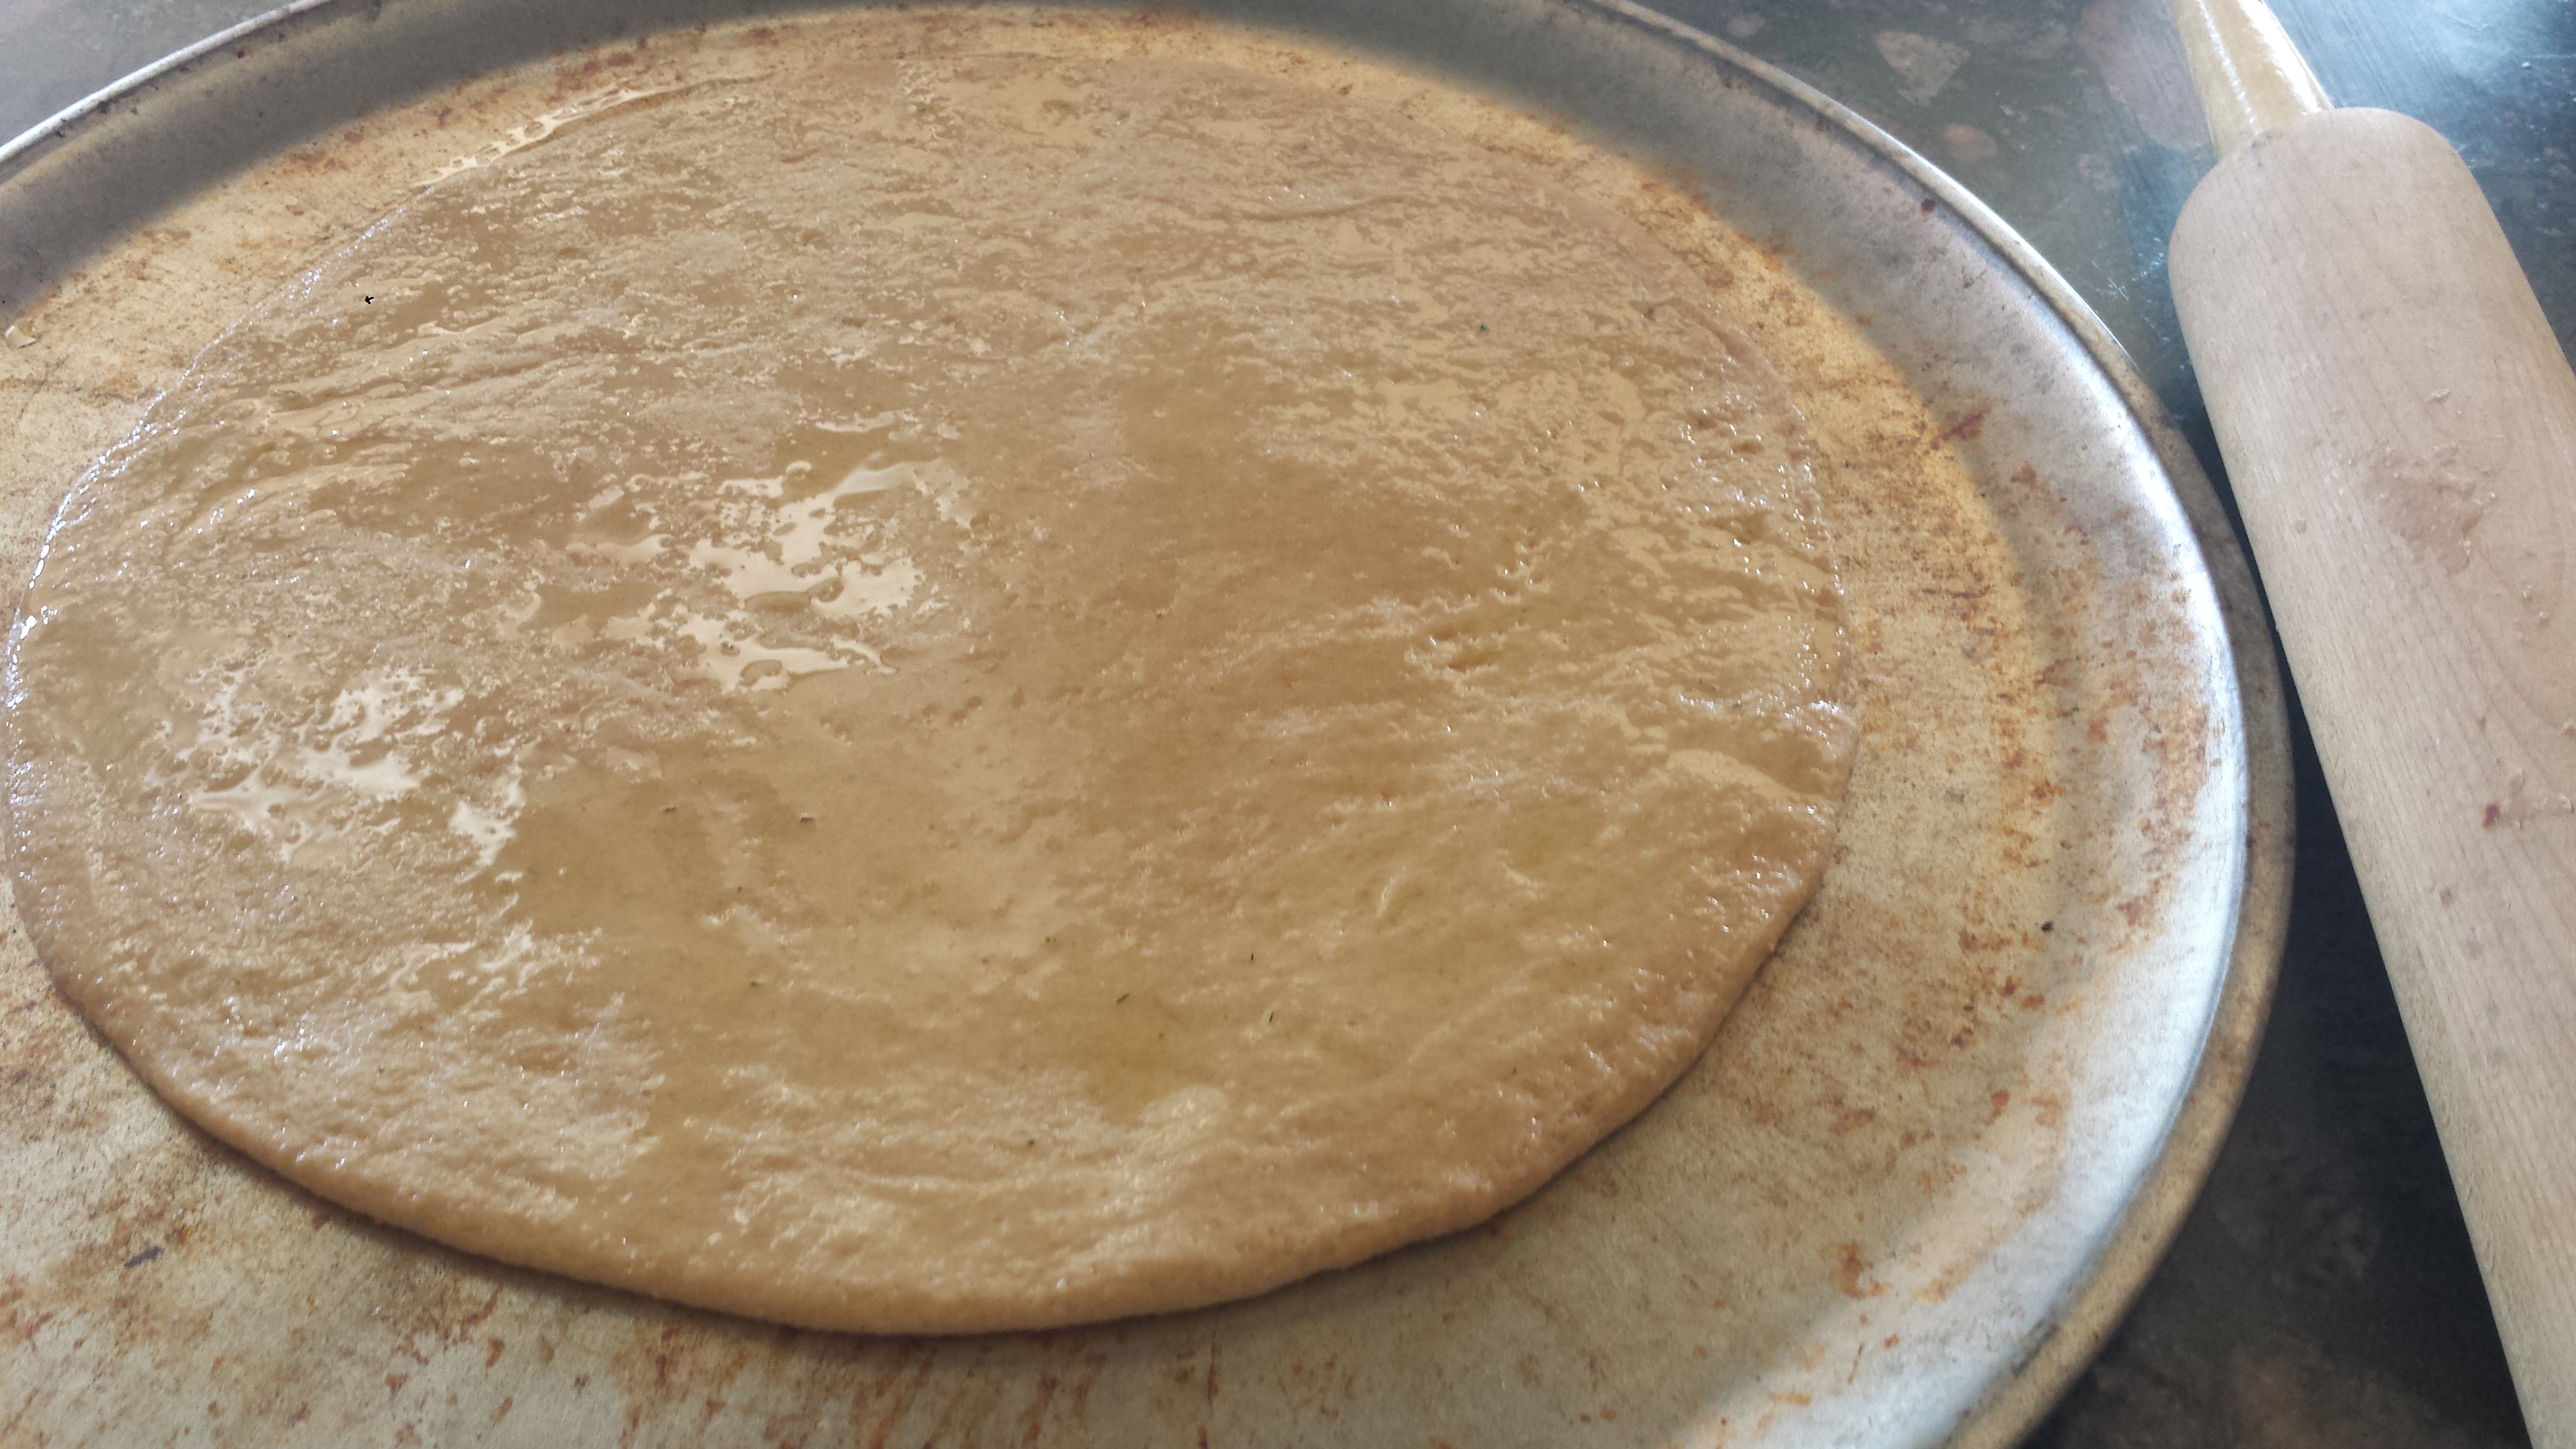
I was not able to find white whole wheat flour locally, so ordered it online from www.kingarthurflour.com.  Since ordering though, I have noticed that Trader Joe’s carries the King Arthur brand.  As a pizza lover who is trying to avoid ‘empty’ carbs (those made with white flour), I decided to make a couple of pizzas and see how it goes. I used the King Arthur recipe, which is dairy free and 100% whole grain. Most whole grain recipes call for less than a third whole grain and are mostly white flour. I thought the pizza turned out pretty well but after reading comments about homemade pizza have decided to invest in a pizza stone (for next time) which gives a crispier crust.  It is not quite as light and crusty as white flour pizza crust but it is less dense and doesn’t have the slightly bitter taste that whole wheat sometimes gives baked goods.  I will definitely make it again and roll it even thinner next time –  but I have a few more whole grain recipes so will keep testing…

Pesto Chicken PizzaMargherita pizza

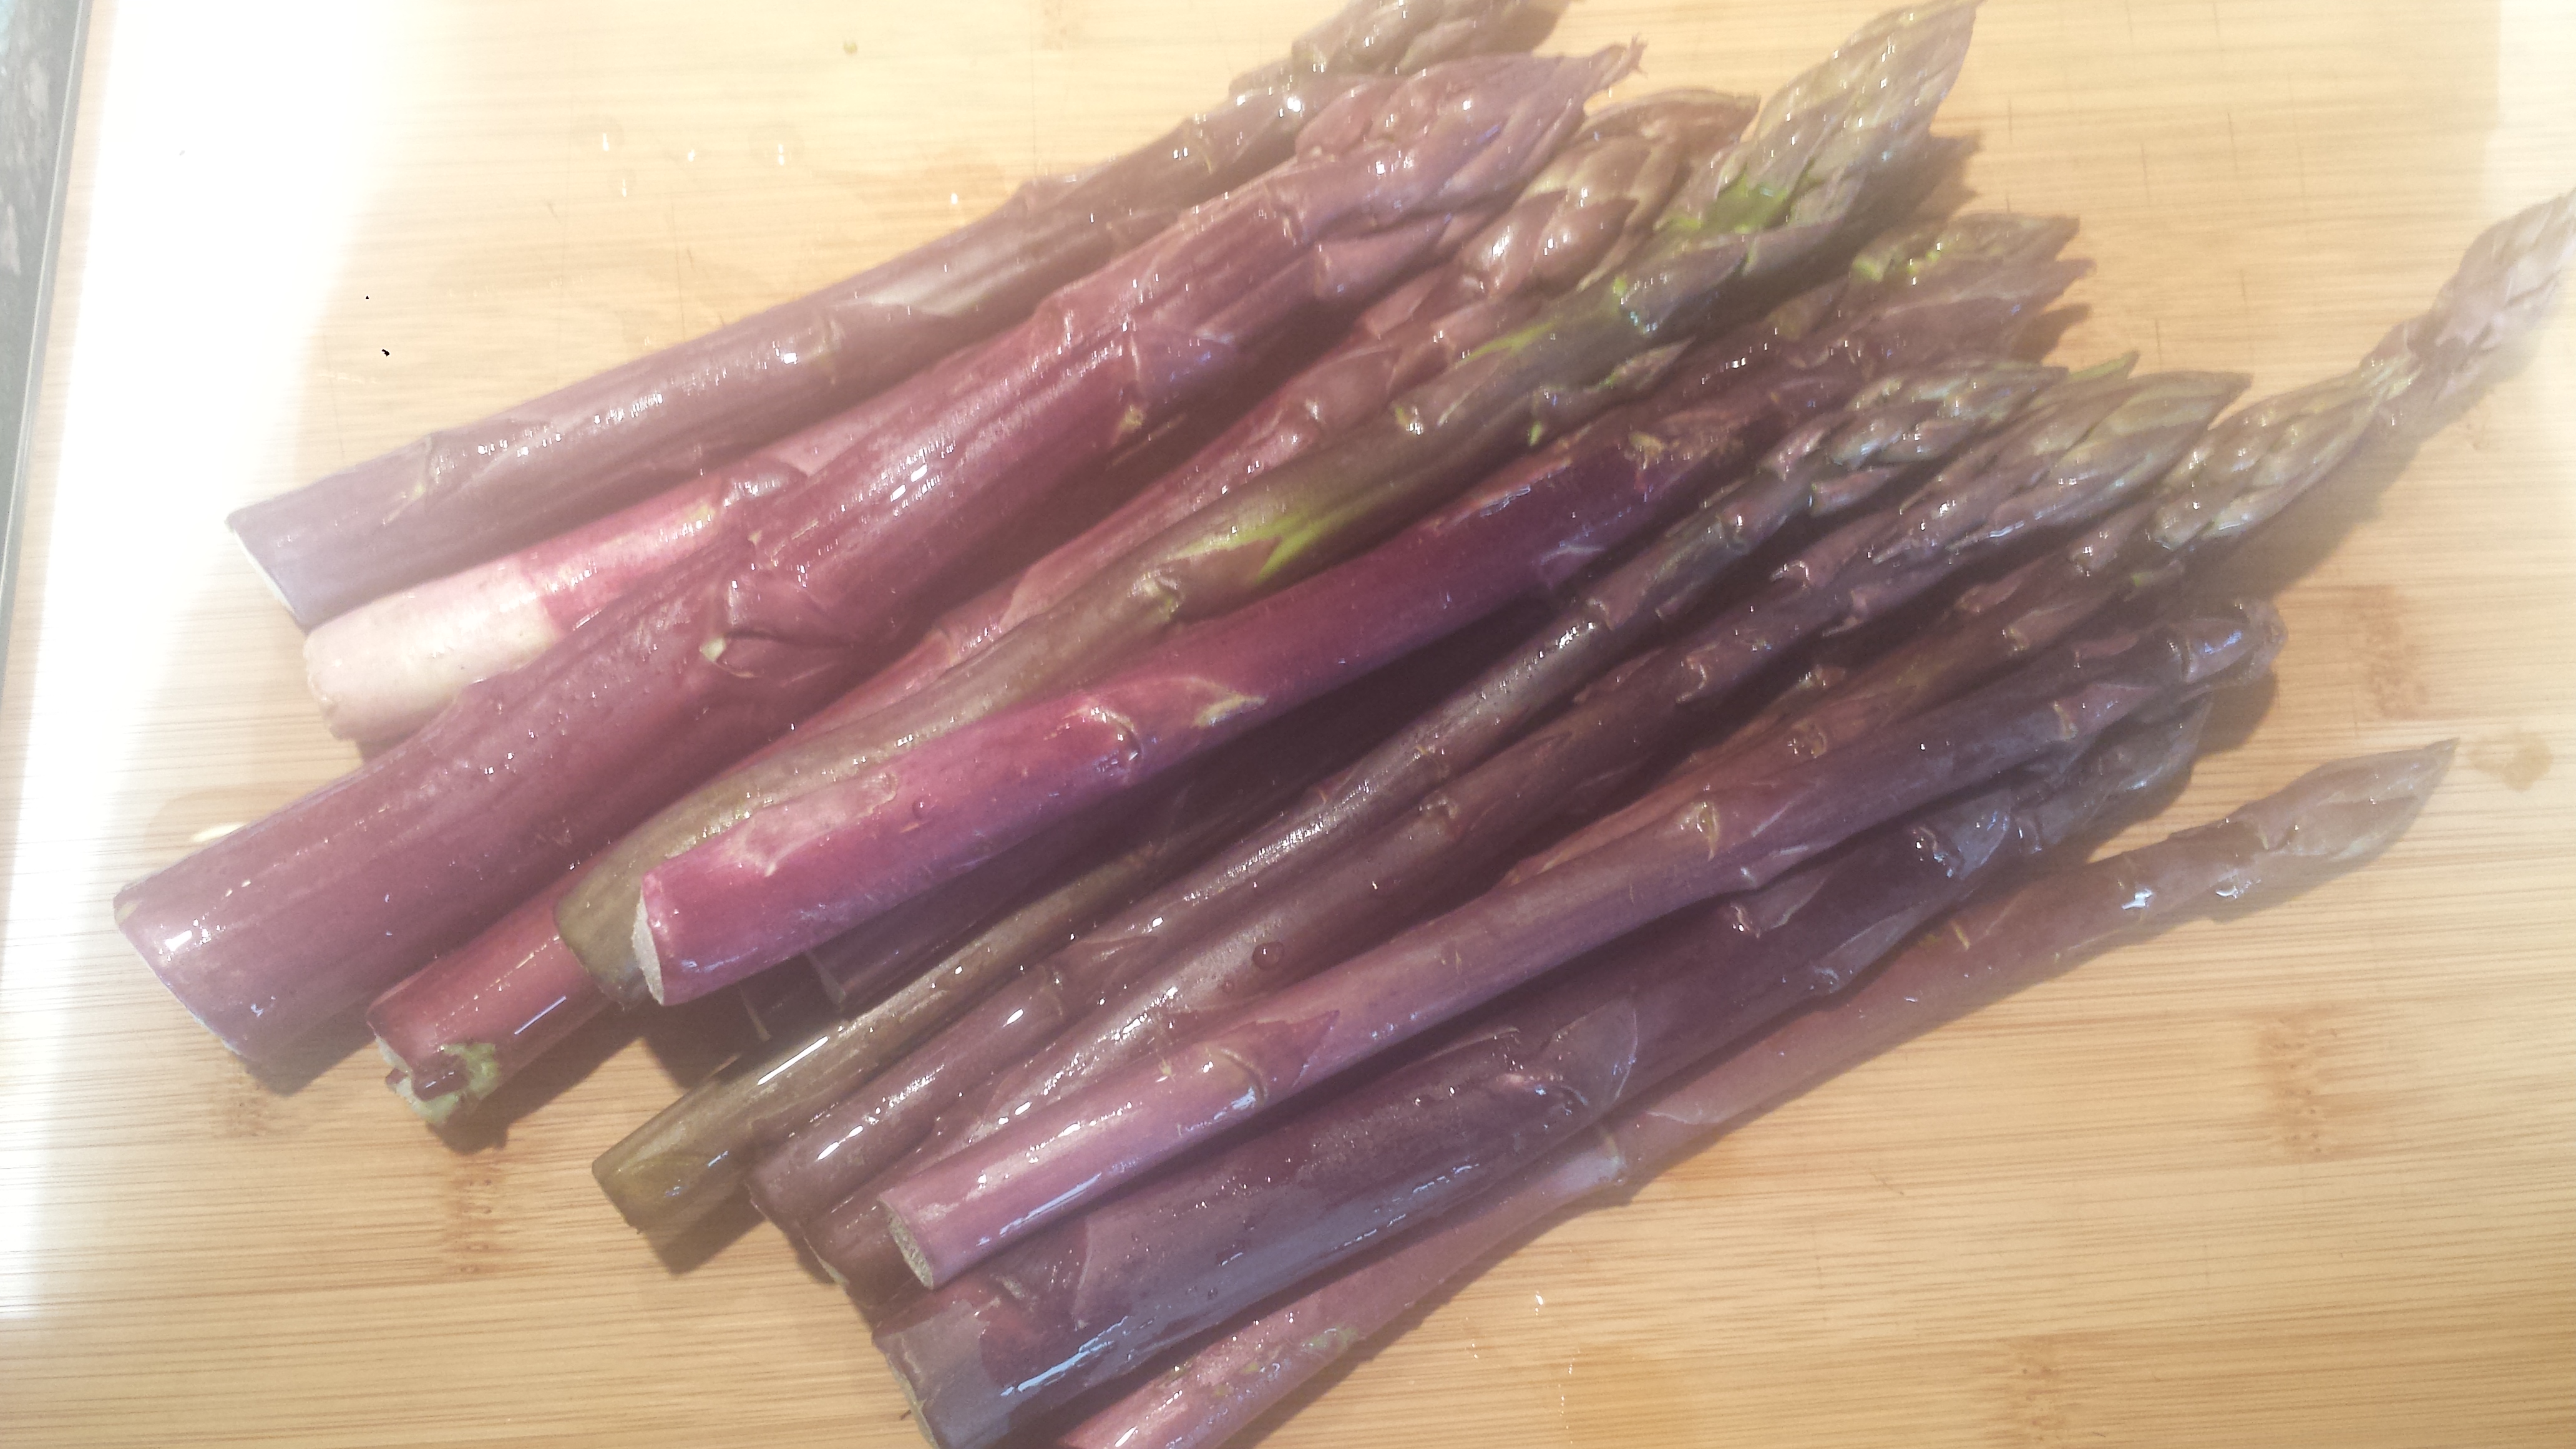
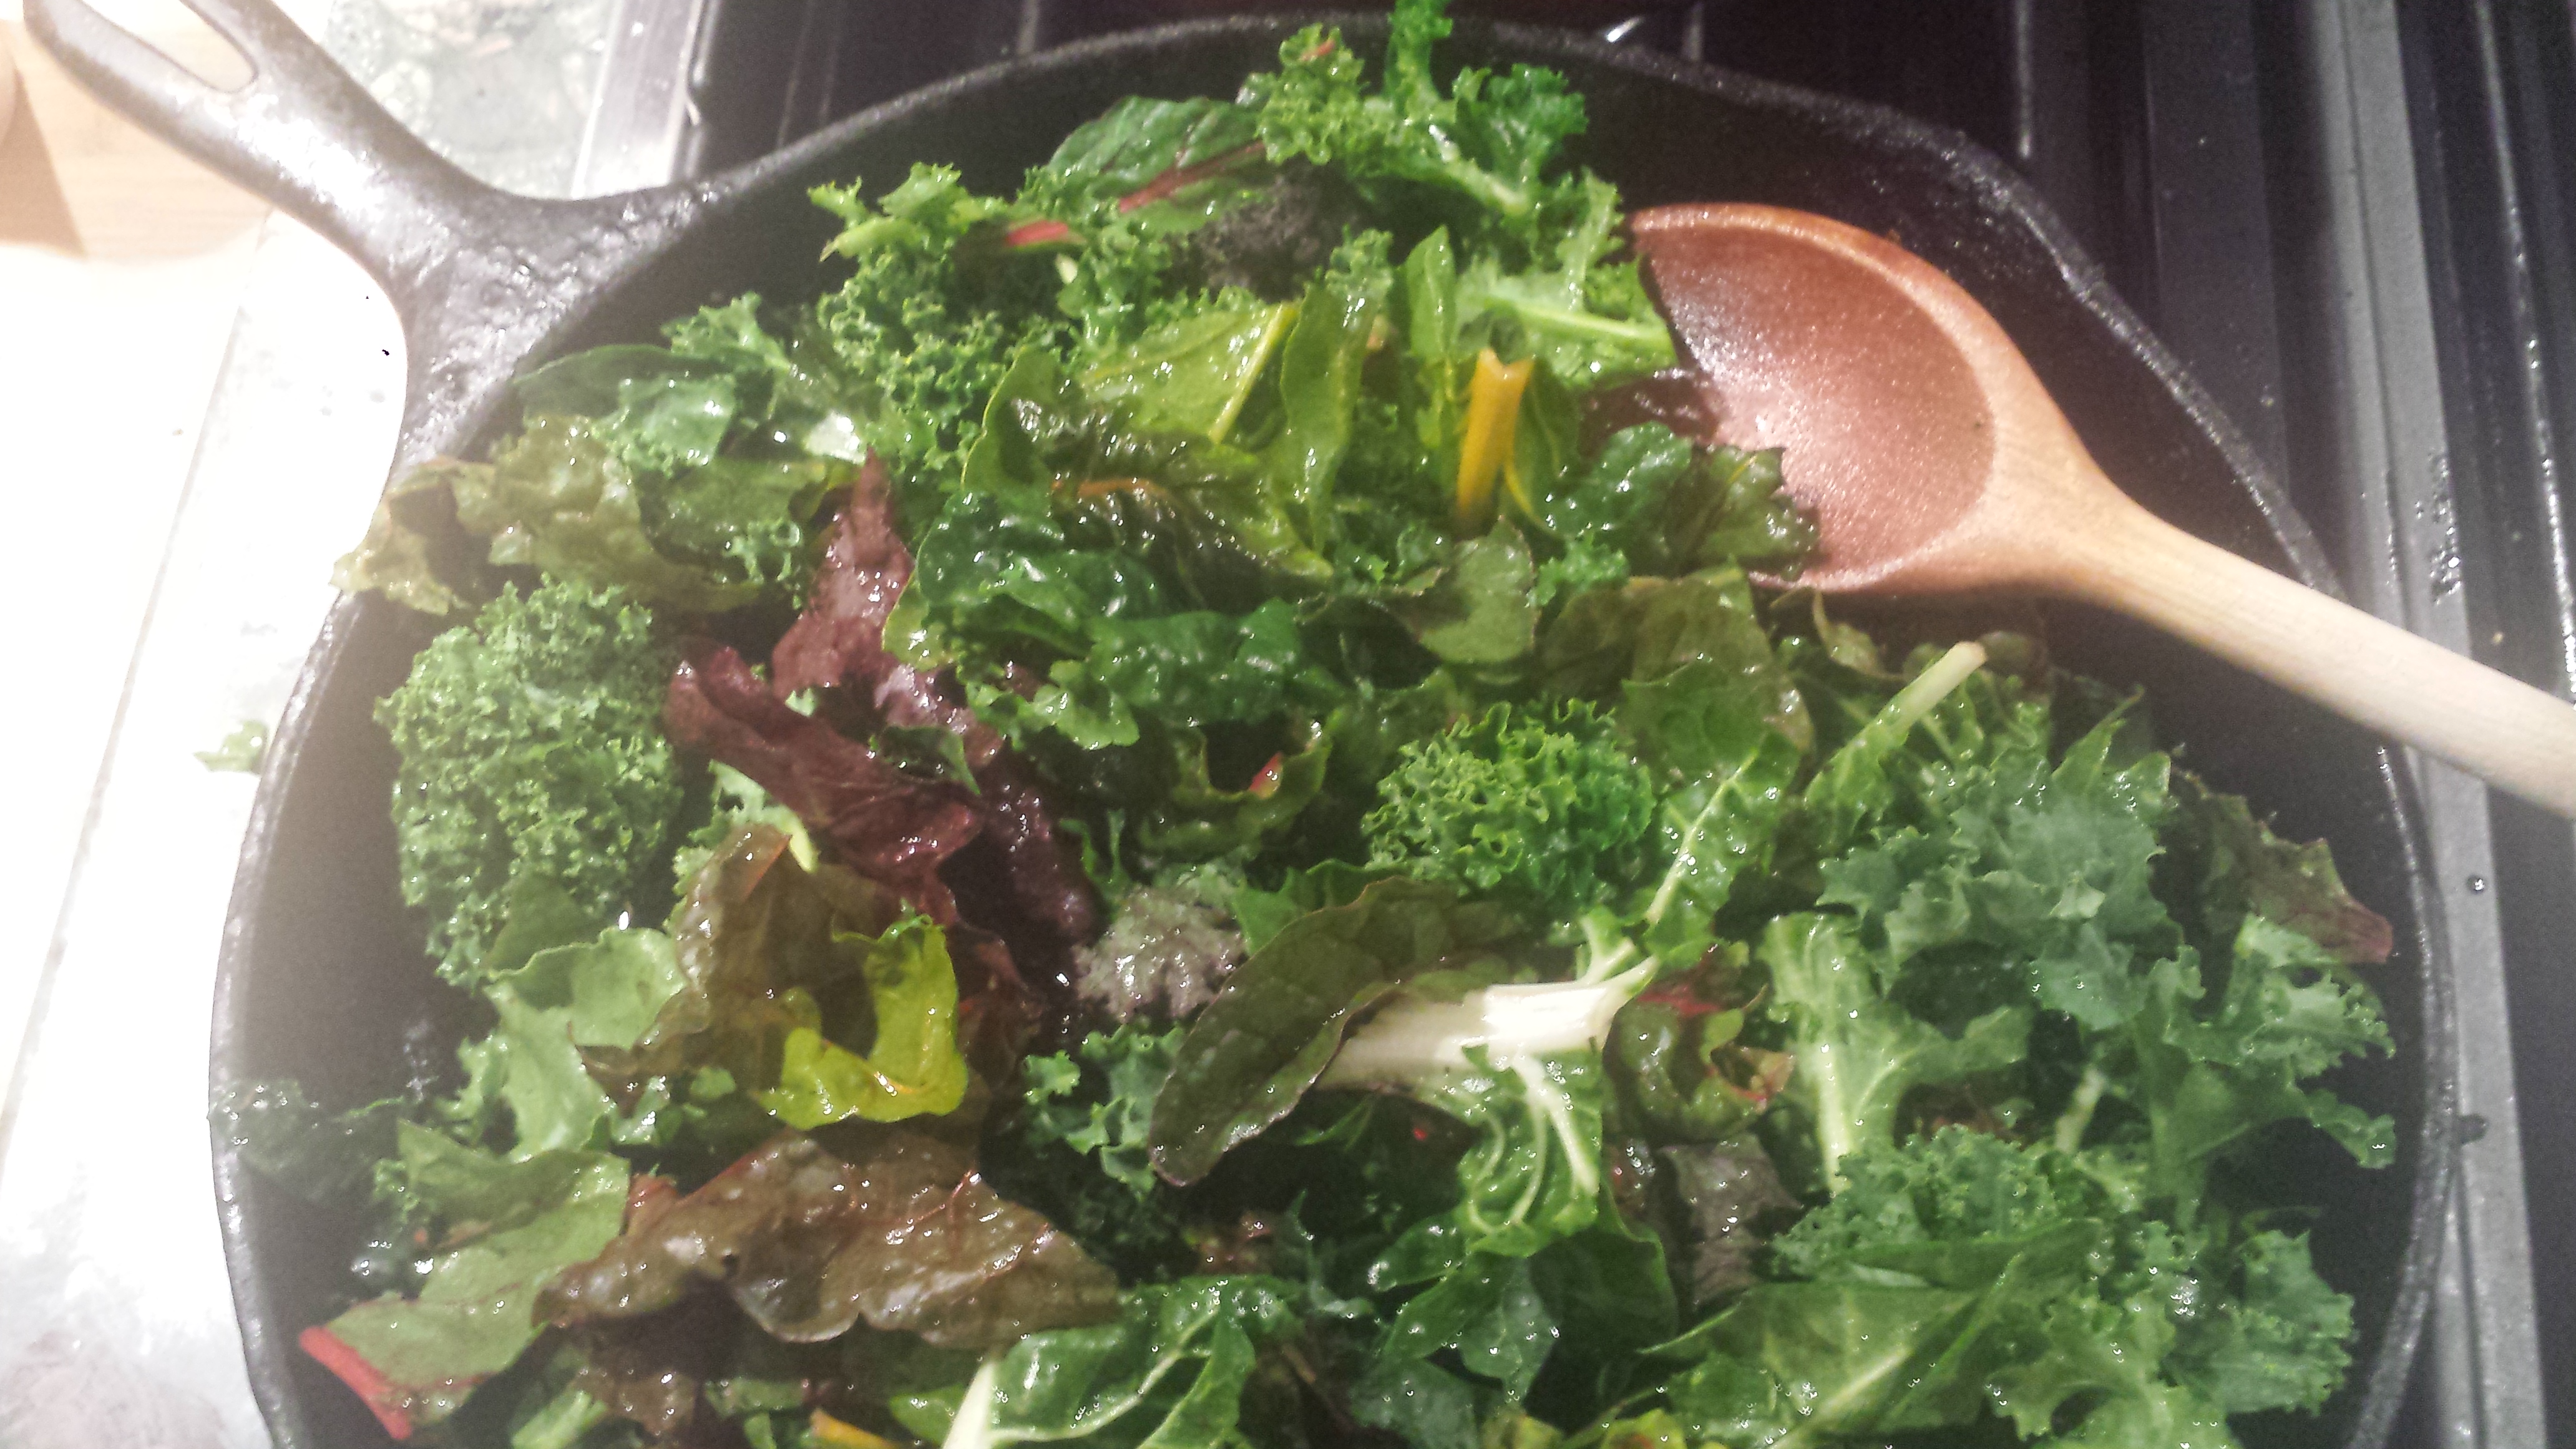
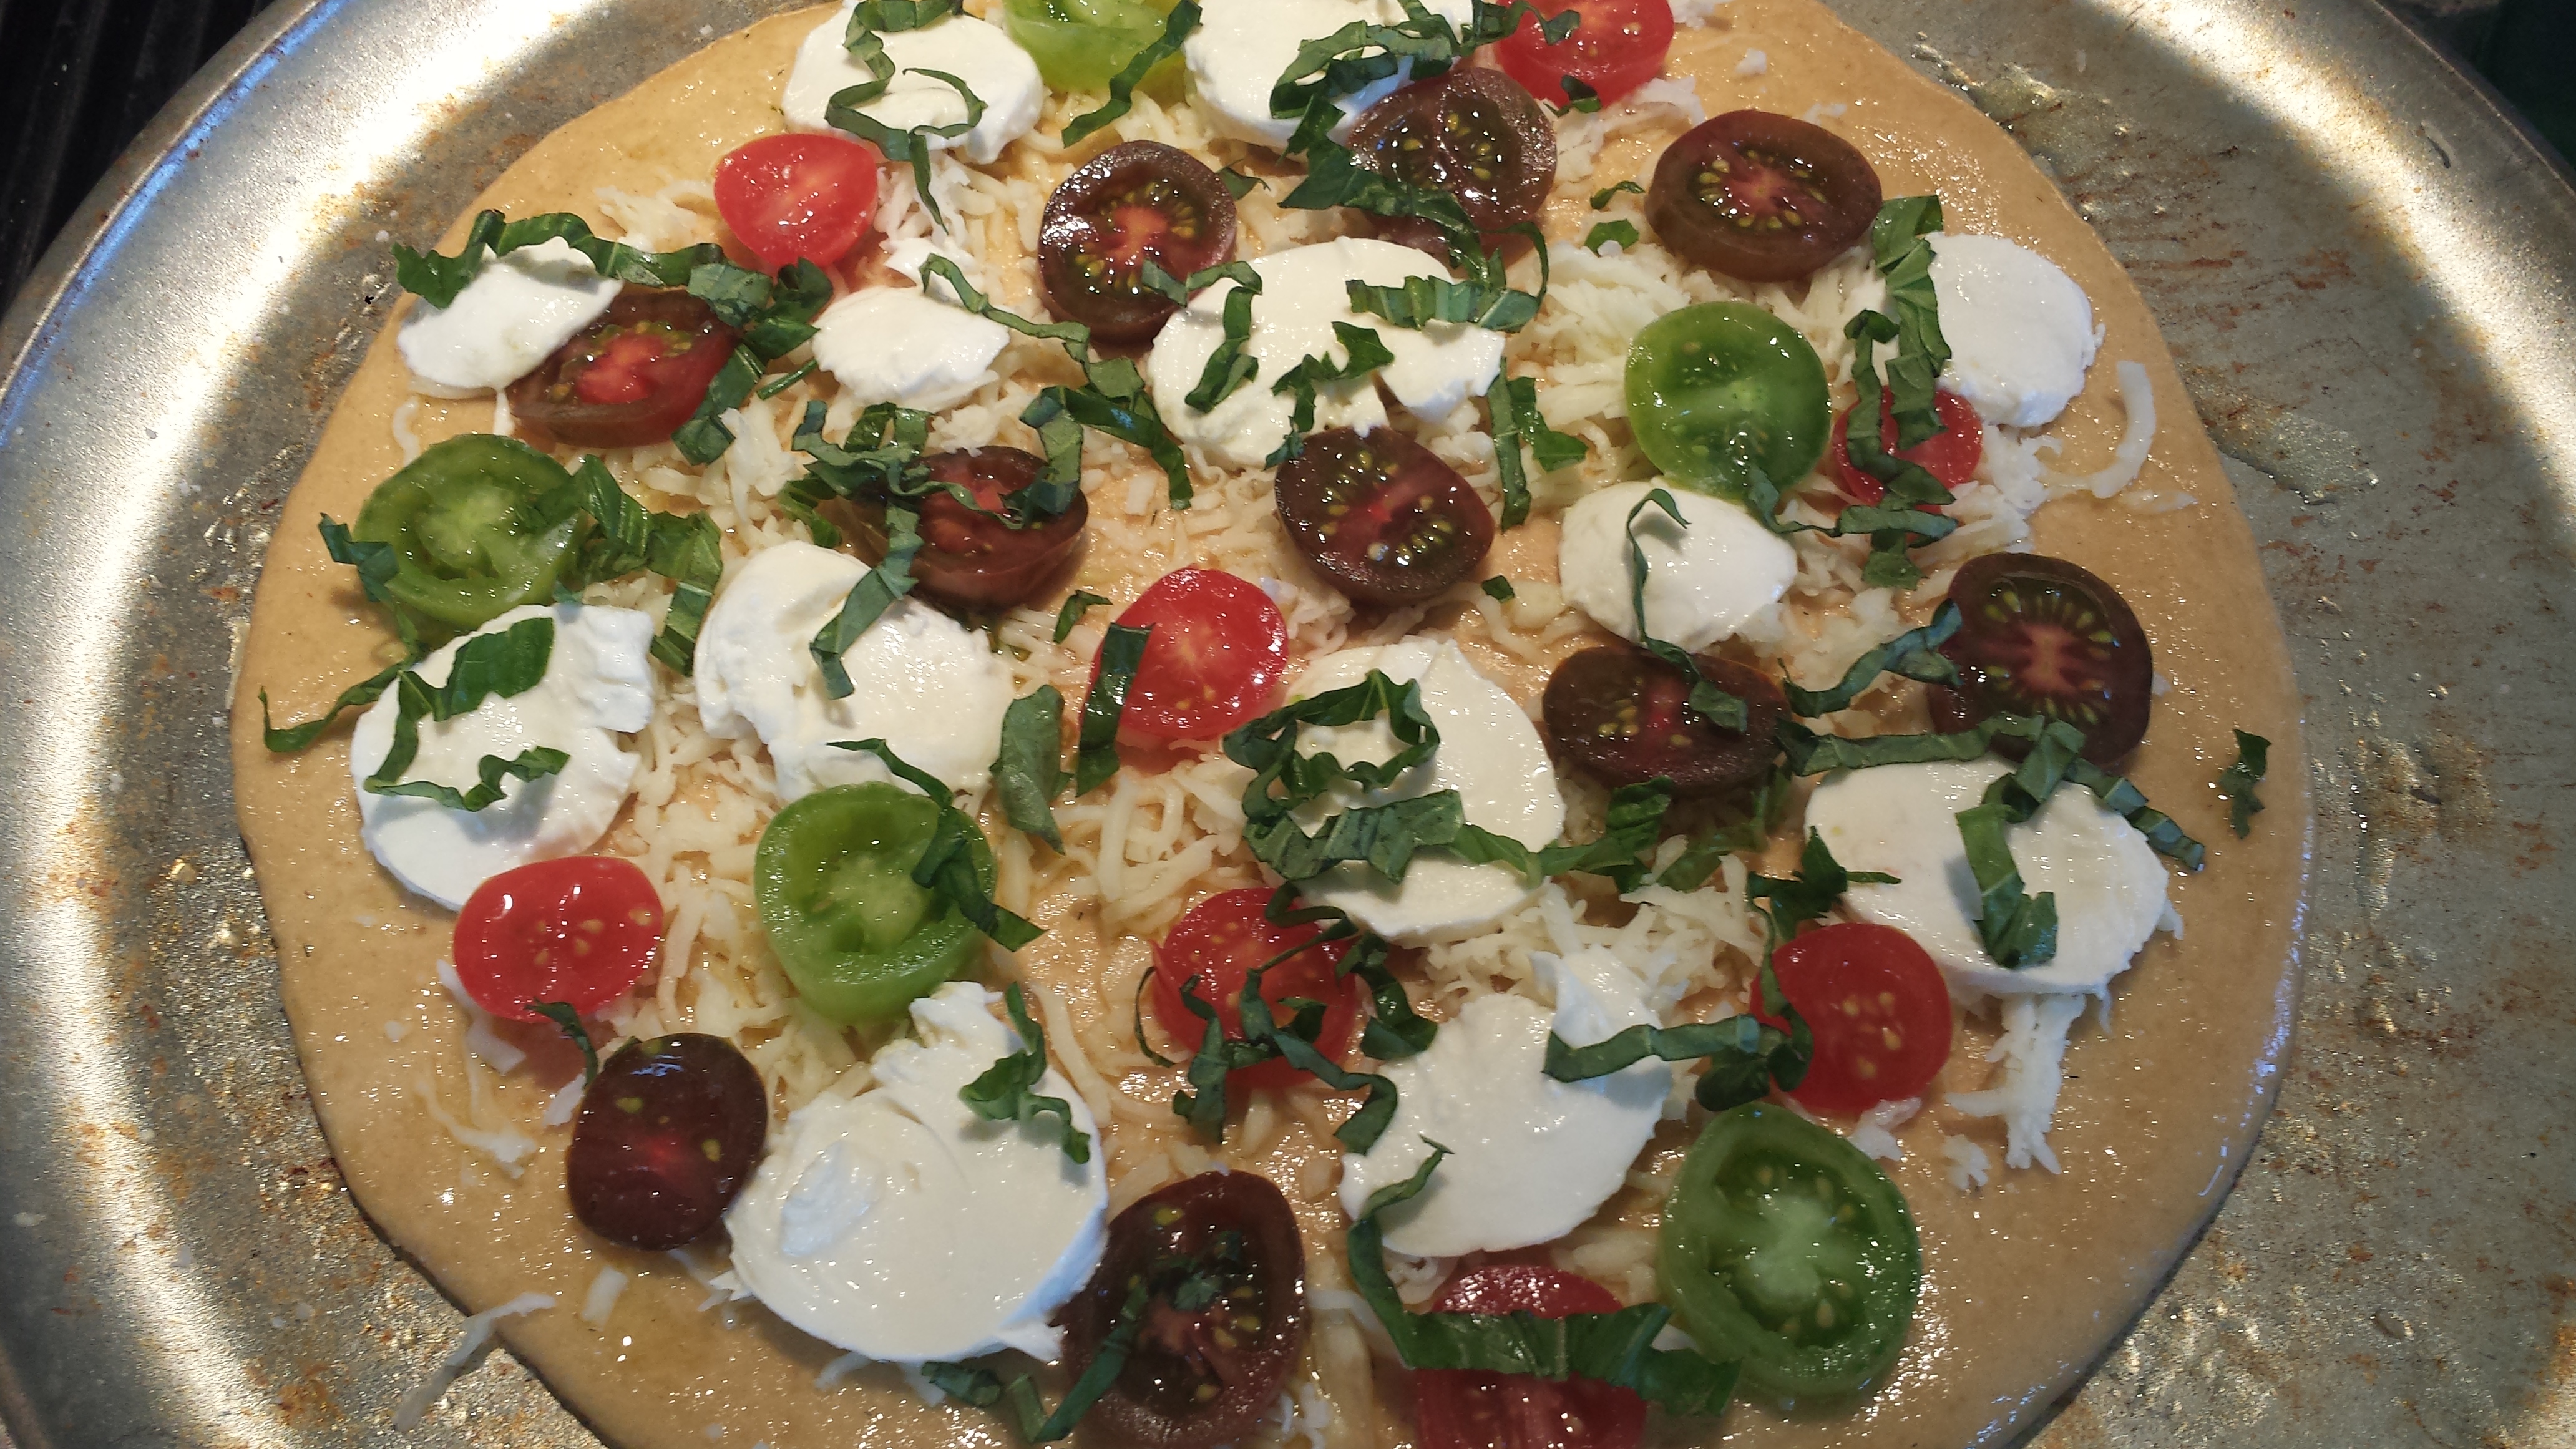
This recipe makes one large or two small pizzas.  I cut my dough in half and topped one with olive oil, garlic fresh mozzarella, sliced tomatoes and fresh basil.  I topped the finished pizza with more basil and fresh greens.  The second pizza I topped with pesto, sliced cooked chicken, shredded mozzarella, red peppers and scallions. I followed the recipe and found it nice to make the dough the night before and just roll it out and les it rise before game time. Makes a great halftime appetizer.  Just glad my team won!

White Whole Wheat Pizza

Ingredients

  • 3 cups      King Arthur White Whole Wheat Flour or King Arthur 100% Organic White Whole Wheat Flour
  • 2      teaspoons instant yeast
  • 1 1/4      teaspoons salt
  • 2      tablespoons honey
  • 2      tablespoons lukewarm orange juice
  • 2      tablespoons olive oil
  • 3/4 cup lukewarm water

Tips from King Arthur bakers

  • What’s  with the orange juice in this recipe? No, it doesn’t make your pizza taste like oranges; but it does mitigate the somewhat tannic flavor whole wheat can sometimes have. Substitute water if desired.
  • Can you use traditional red wheat flour in this recipe? Absolutely; your crust will be darker, and more assertively flavored due to red wheat’s stronger  taste.
  • Researchers managed to increase antioxidants to their highest level by baking pizza crust at 500°F. However, since some readers have ovens that won’t heat that hot; and since baking at 500°F can be a little tricky (the time difference between perfect and burned becomes very short), we’ve chosen a slightly more moderate baking temperature: 450°F

1) Combine all of the ingredients, and allow to rest for 30 minutes; this gives the whole wheat flour a chance to absorb the liquid.

2) Mix and knead — by hand, mixer, or bread machine — to make a smooth, soft dough.

3) Transfer the dough to a bowl, cover it, and let it rest at room temperature for 30 minutes. Refrigerate overnight, or for about 18 hours; a bit longer is fine. Handy schedule: Make pizza dough at 8 p.m., and refrigerate until 4 p.m. the next day. Shape, let rise for 2 hours, and bake at 6 p.m.

4) Remove the dough from the refrigerator. Pat it into a lightly greased half-sheet pan (18″ x 13″) that’s been drizzled with olive oil. This will make a thick-crust, Sicilian-style pizza, one that’s thick enough to undergo the long bake at a high temperature necessary to optimize its antioxidants.

Pizza dough

5) Brush the dough with sauce, if desired; and top with your favorite cooked toppings: cooked vegetables, and/or cooked or smoked meats. Don’t add the cheese yet. Cover the pizza, and let it rise for about 2 hours, or until it’s very puffy. Towards the end of the rising time, preheat the oven to 450°F.

Margarite Pizza uncooked Chicken Pesto Pizza uncooked

6) Bake the pizza on the bottom shelf of the oven for 8 minutes, then remove it from the oven and top with cheese, if desired.

7) Replace the pizza on a shelf in the upper third of the oven. Bake for an additional 6 to 8 minutes, until the cheese is melted and the crust browned.

8) Remove the pizza from the oven, let rest for about 5 minutes (for the cheese to settle), and serve right away. If not serving right away, transfer the pizza to racks to cool, so the bottoms stay crisp.

Yield: about 16 slices.

Pizzas


Grilled Oysters with Garlic Chipotle Butter

4

Grilled Oysters

Today my husband came back from the Farmers Market at Country Mart with a bag of really large fresh oysters in the shell and I knew immediately what I wanted to do with them.  A couple of years ago, our friends, Chris and Carrie, gifted us with a bag of fresh oysters they had brought back from their weekend at Point Reyes.  Not having prepared oysters before, I went on to the Hog Island Oyster Company website and found many great recipes for both raw and cooked oysters.  We opted to try their “Hog Wash” mignonette and their barbecued oysters with Garlic Chipotle Butter. We really liked the Hog Wash for dipping raw oysters, but we Loved the Garlic Chipotle Butter. We were practically licking the shells clean!

Following is the Hog Island recipe. I took a shortcut and used one whole tube of garlic paste which was much easier than peeling and chopping ¾ cup of fresh garlic.  I had a 7 oz can of chipotle chiles in adobo sauce so I used the whole thing, rather than wasting some of it.  Otherwise, I followed the recipe pretty closely. I have now done both the ‘burrito’ method and the bowl and spoon and think both work just as well..

In preparing the oysters, you can pre-shuck them using an oyster knife or put them on the grill whole until the shell pops (it is an audible pop) and you can more easily remove the top shell.  Make sure you have an oyster knife.  A regular knife will not work and is unsafe.  Click on this link for a video of proper oyster shucking technique from Hog Island.  http://hogislandoysters.com/kitchen/shucking-oysters  Enjoy!

Grilled Oysters with Garlic Chipotle Butter

The Ingredients

50 Hog Island sweet water Oysters

1/2 lb (two sticks) unsalted butter softened to room temp

1/2 cup brown sugar

1/2 cup bourbon

3/4 cup finely chopped garlic

Half of (10 oz) can of chipotle chilies in adobo sauce,chopped.

Raw Oysters

The Butter (can be made up to one week in advance, keep refrigerated)

In a medium bowl, dissolve the brown sugar with the bourbon. In a food processor or blender, combine the softened butter with the bourbon/brown sugar mixture and add the garlic and chipotles. Mix on medium/high speed until well blended (OK if some chunks remain). Lay down a sheet of parchment paper (12″ or so), scoop the butter compound onto the sheet working to form a long row. Roll the butter in the parchment, like a burrito, folding the ends as you go. Refrigerate for about two hours or until firm. The finished roll should be the dimension of a cube of butter, only longer (about a foot). When you are ready to grill, slice 1/8″ pats of butter from the butter log and place on top of your shucked, raw oysters. Allowing the butter to melt as the oysters cook. *You can also skip the log-roll and leave the butter in a airtight covered bowl (refrigerate after making). Scoop a tablespoon of the mixture onto each oyster as they grill.

Tip:  I opted for the burrito method for the butter and found it a bit gloppy at first.  It was easier to work with once it was in the refrigerator for a bit.  I rolled it in the parchment paper and went back a couple of time to form it into a more rectangular shape as it hardened.
Chipotle butter burrito Chipotle butter

The Grill

Preheat the grill to medium hot. You can pre-shuck the oysters or just place them whole on the grill.  Once you hear them pop, they will be easier to open.  Wearing an oven mitt, pick up the hot oyster and insert the tip of an oyster knife in the opening at the skinny tip of the oyster and pry the top shell off.  Place a pat of butter onto each shucked oyster and place back on the grill.  After about 2-4 minutes of bubbling and sizzling remove the oysters from the heat.  The oysters will be ready when the edges of their meat begins to curl and the butter sauce is bubbling hot.  Remove from heat and let cool slightly before eating.

Grilled Oysters wholeGrilled Oysters openingGrilled Oysters 2Grilled Oysters