Ginger Miso Tofu Noodle Bowl (v, gf)

0
20160122_135925

The Japanese have known the health benefits of miso and scallions and have used miso soup to cure the common cold since ancient times, kind of like a vegetarian version of homemade chicken soup. We have all had miso soup in Japanese restaurants, that savory broth with tiny cubes of tofu and thinly sliced scallions  floating on top. Usually, in restaurants we consider it as a small starter before the main courses arrive but in Japan miso soup is a staple and eaten for breakfast and throughout the day loaded with eggs, fish and other garnishes.  So I figure that they must be onto a good thing and decided to create a miso soup that is simple to make but worthy of being a main course for lunch or dinner, and I came up with this Ginger Miso Tofu Noodle Bowl. For more on using miso soup to cure the common cold check out this article: 

Miso Soup: An Ancient Remedy for the Common Cold

20160121_191548

It is delicious and satisfying and can be made spicy or mild depending on tastes.  I simmered bok choy, carrots, snow peas and cubes of tofu in miso broth and then served them over rice noodles.  I offered a selection of garnishes which, in my opinion, really makes the dish.   Not surprisingly, everyone’s noodle bowl looked different. This is a good time to try the hot new Korean hot sauce, Go-Ku Jang.
20160121_185549

What is miso anyway?  Miso is a Japanese word that means “fermented beans”, which are almost always soybeans, although other grains can be added to achieve certain flavors, resulting in many different varieties of miso available.  I used a white miso, which is lighter in color and milder in flavor, however any kind of miso will work just as well.  Miso is a good source of fiber and protein and a great way to increase your nutrient intake while you think you are just adding flavor.  In fact, adding  two tablespoons of miso to a soup or stir-fry, is the equivalent of approximately one-quarter cup of a legume(like lentils).  Miso is also  a very good source of copper, manganese and a good source of vitamin K, zinc, phosphorus, and omega-3 fatty acids.  It also has naturally occurring pro-biotics, those beneficial bacteria that are so good for our bellies.

20160121_192746

TIPS:  Making miso broth is easy but you can also find miso broths already prepared or in dried form that are pretty tasty too.  When purchasing both tofu and miso, make sure they are labelled organic since a wide majority (90% in the U.S.) of soy based products are made from genetically modified soybeans, those dasterdly GMO’s which are to be avoided at all costs. Miso is generally simmered on medium or medium low to prevent the loss of nutrients, so don’t let your soup boil! One last tip, noodles tend to get soft and mushy if left sitting in broth, so add them to the broth just before serving.

20160122_135956

GINGER MISO TOFU NOODLE BOWL

8 oz medium width rice noodles (or soba)
3-4 Tbsn shiro miso (white fermented-soybean paste)
6 cups vegetable broth (or water)
1 tsp fresh ginger, minced (or ginger paste) or more to taste
1 lb extra firm organic tofu
2 carrots, roughly chopped or sliced
1 cup snowpeas
2 bok choy, sliced in half lengthwise

TOPPINGS (all optional)
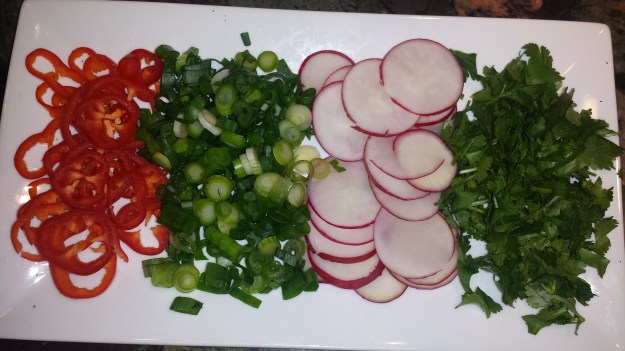
3-4 scallions, sliced into rings
3-4 radishes, thinly sliced
1-2 red chili peppers(or sweet mini red peppers), thinly sliced into rings
2 Tbsn cilantro, roughly chopped

  • Place miso in a small bowl with hot water and stir until dissolved.
20160121_192149
  • Prepare noodles as directed, rinse with cold water and divide among four bowls
20160121_185454
  • Prepare all soup ingredients. Cut tofu into cubes and let drain on paper towels. Slice bok choy in half or in quarters lengthwise. Cut carrots into bite sized pieces and string snowpeas.
20160121_185549
  • Prepare all toppings. Include Sriracha or Go-Chu Jang.
20160121_191548
  • Pour miso and remaining vegetable broth into a stockpot or wide saucepan. On medium heat, simmer carrots for about a minute, then add bok choy, snowpeas and tofu and simmer about five minutes.  Don’t let it boil or some of the nutrients in the miso will be lost.
20160121_192504
  • Spoon vegetables between the four bowls and pour in the broth.
20160122_135956
  • Top with radishes, scallions, chili peppers and cilantro, as desired.  Sriracha is also a great spicy addition.
20160122_135925

Ginger Miso Tofu Noodle Bowl

  • Servings: 4
  • Difficulty: easy
  • Print

 20160122_135925

8 oz medium width rice noodles (or soba)
3-4 Tbsn shiro miso (white fermented-soybean paste)
6 cups vegetable broth (or water)
1 tsp fresh ginger, minced (or ginger paste) or more to taste
1 lb extra firm organic tofu
2 carrots, roughly chopped
1 cup snowpeas
2 bok choy, sliced in half lengthwise

TOPPINGS (all optional)
3-4 scallions, sliced into rings
3-4 radishes, thinly sliced
1-2 red chili peppers(or sweet mini red peppers), thinly sliced into rings
2 Tbsn cilantro, roughly chopped

  • Place miso in a small bowl with hot water and stir until dissolved.
  • Cut tofu into cubes and let drain on paper towels.
  • Prepare noodles as directed, rinse with cold water and divide among four bowls
  • Prepare all soup ingredients and toppings.
  • Pour miso and remaining vegetable broth into a stockpot or wide saucepan.
  • On medium heat, simmer carrots for about a minute, then add bok choy, snowpeas and tofu and simmer about five minutes
  • Spoon vegetables between the four bowls and pour in the broth.
  • Top with radishes, scallions, chili peppers and cilantro, as desired.  Sriracha is also a great spicy addition.

Portobello Mushroom Wellington

0

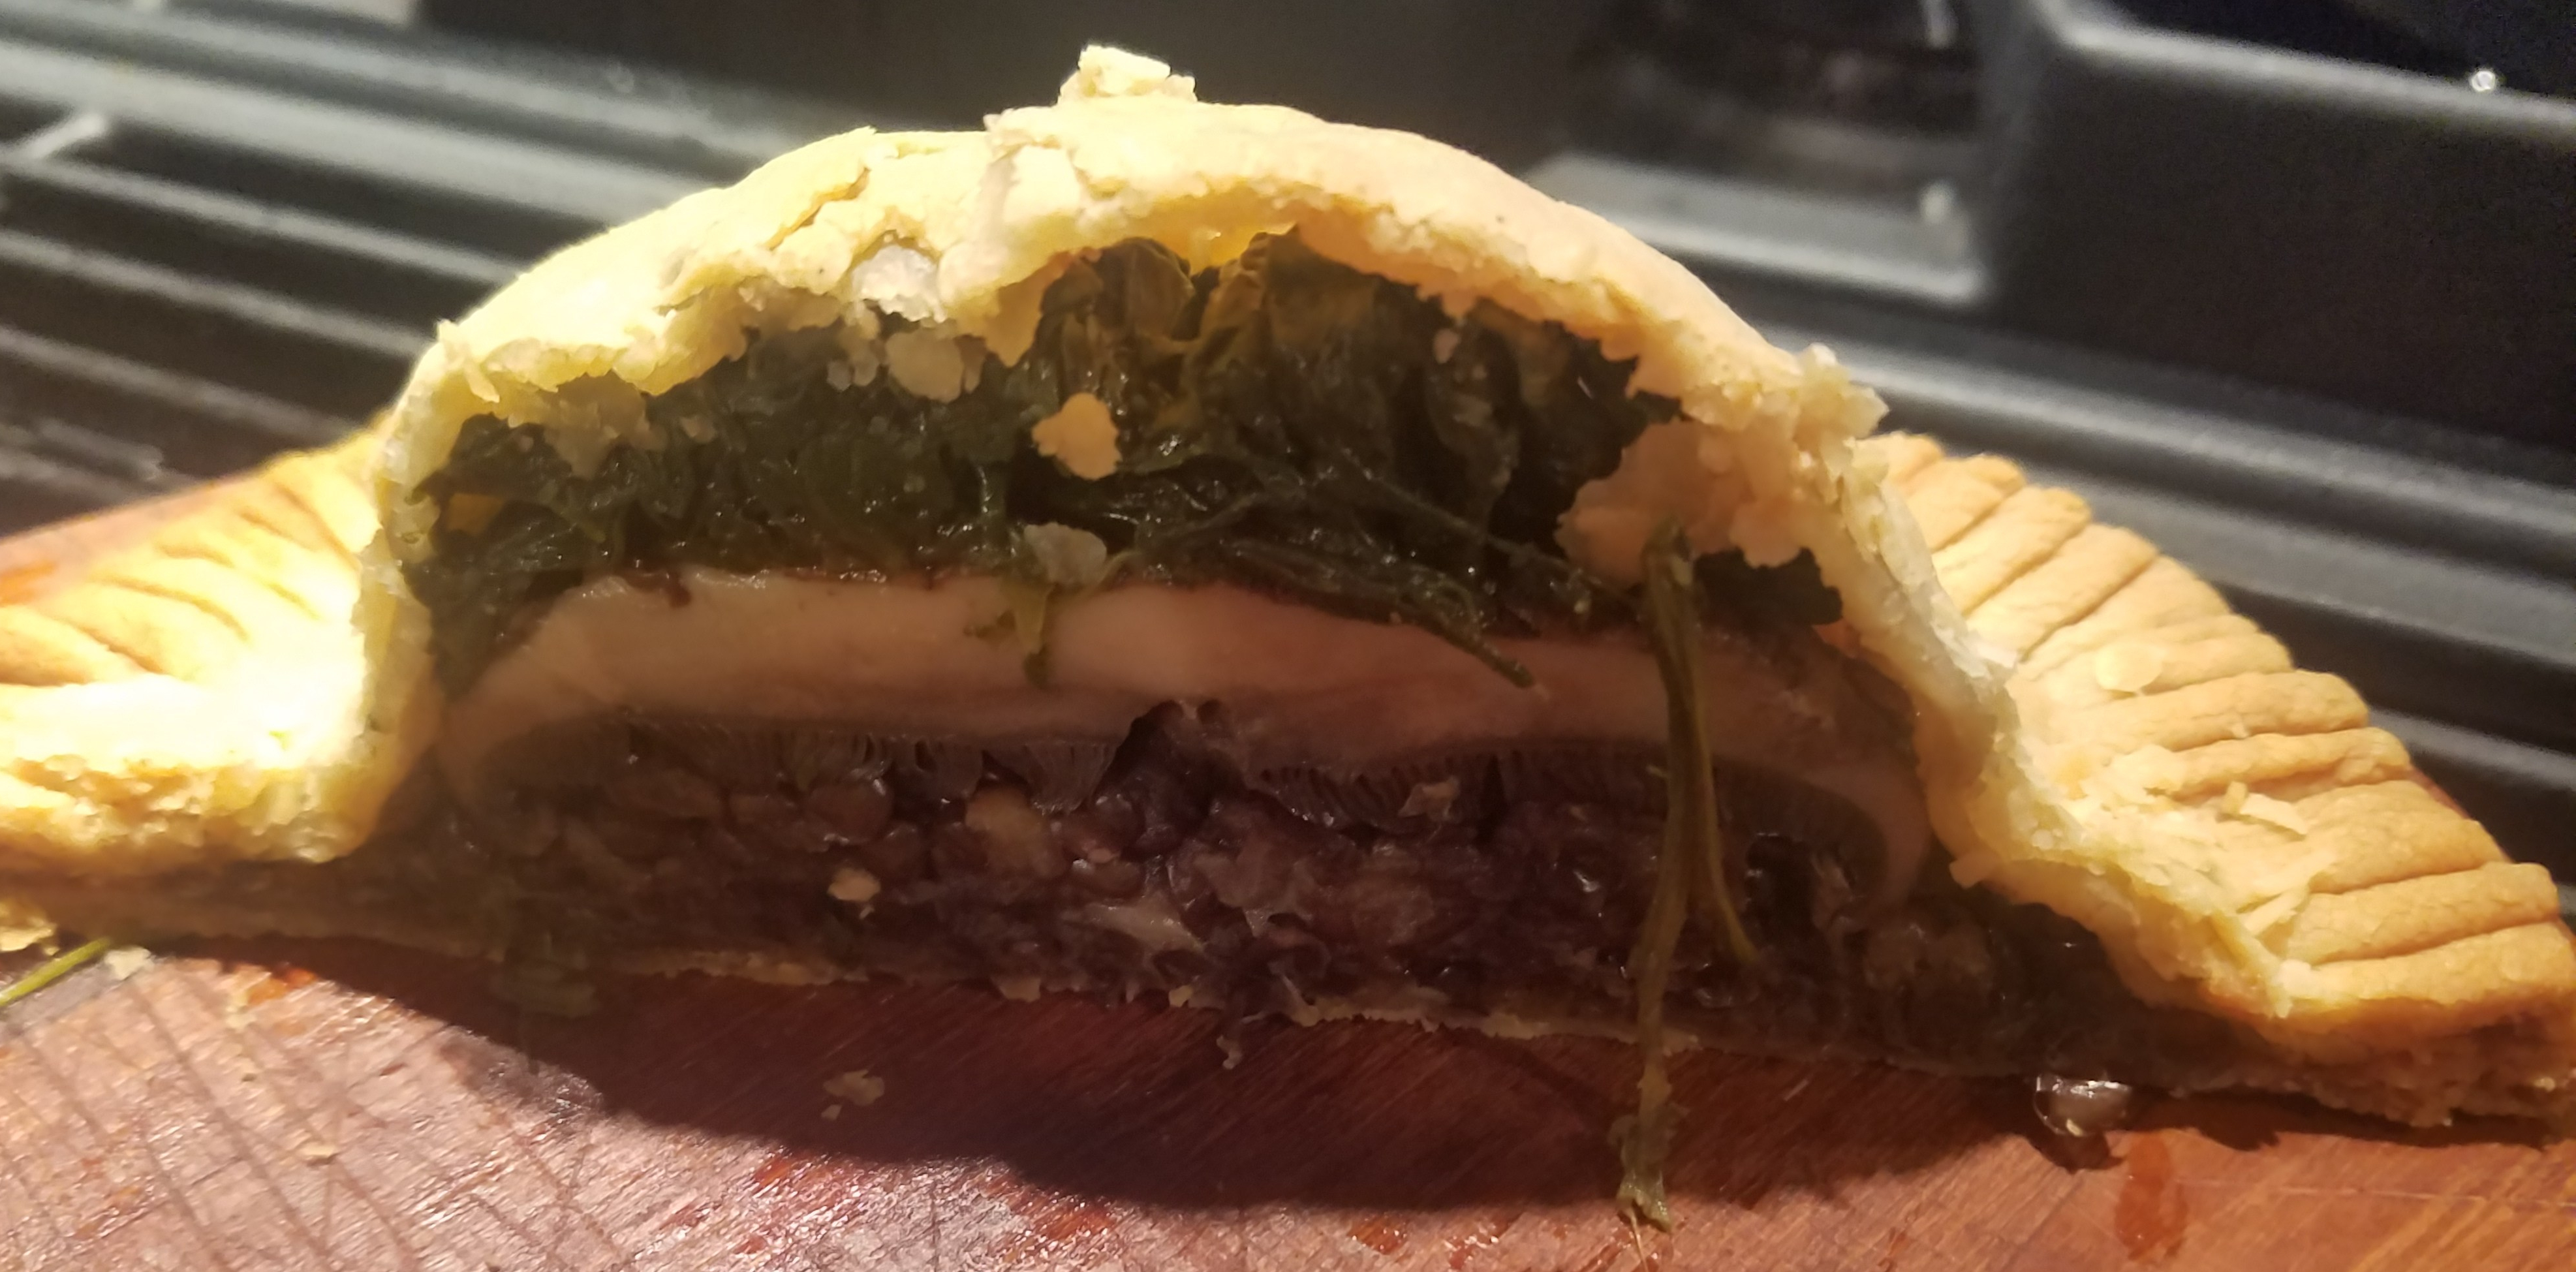
This vegan Portobello Wellington is pretty enough to serve as a main course for Thanksgiving or Christmas. It features layers of rich beluga lentils, whole portobello mushrooms and sauteed garlic spinach. I created this dish a couple of years ago while looking for a non-turkey main course for Thanksgiving. The dish was a huge success, pretty AND delicious. This year I will be making Mushroom Wellington again but with a gluten free crust.  Just add mashed potatoes and cranberry sauce and you’re good to go!  🙂

20181115_191810.jpg

A traditional Beef Wellington is a fillet steak coated with pâté and duxelles, which is then wrapped in pastry and baked.  In this reimagined vegan  version, whole portobellos stand in for the ‘steak’  and the lentils with shallots and garlic would be the ‘pate’ with duxelles, which is just a fancy name for mushrooms sautéed with onions, shallots and garlic.  The flavor combination of the three layers worked so well together in creating a flavorful but still juicy filling.  I cooked the lentils in vegetable broth for more flavor. Of course, adding sauteed shallots and garlic to the black lentils gave them an even richer taste.  They were a great first layer.  Then I placed whole sauteed portobello mushrooms as the middle later and topped with spinach sauteed in garlic.

20181115_170356

Except for the pretty crust, which is what makes this a holiday worthy dish, all of the ingredients add flavor and nutritional value.  Spinach and mushrooms are high in food value, including fiber, vitamins and minerals, plus protein.  They also have zero or low amounts of fat, cholesterol, carbs and sugars.  If I were going to make my own crust, I would try a recipe using white whole wheat flour like this one from King Arthur Flour or this gluten free onehttps://www.kingarthurbaking.com/recipes/gluten-free-classic-double-pie-crust-recipe.  Last time I made this on a whim, so I cheated with pre-made crusts.  It happens…

20181115_154520.jpg

I chose black lentils, also called Beluga lentils due to their resemblance of black caviar, because I find them the richest in flavor and their texture remains firm when cooked.  However, brown or green lentils would work well here too.  They are also quite healthy.  100 grams of cooked lentils contains 116 calories, 9.02 g of protein, .3 g of fat and 9.02 g of fiber.  They are also rich in minerals and vitamins.  Click for MORE info.

20181115_151736.jpg

TIPS:  This recipe is easy to prep a day or so ahead of time and assemble just before cooking.  Just prepare the lentil mixture and saute and drain the mushrooms and the spinach, then place in the refrigerator in airtight containers until ready to assemble.  You can preform them into log shapes before refrigerating for easier assembly.  For those who really like to plan ahead, you could probably assemble the whole thing a day or two ahead and refrigerate until you are ready to bake. One word of warning, don’t keep it warm in the oven as the spinach gets overcooked.

PORTOBELLO WELLINGTON

20181115_183603.jpg

Note:  This recipe can be made with 3 or 4 large portobello mushrooms.  The 3 mushroom wellington will fit in an 18″ baking sheet, while a 4 mushroom one needs a 21″ pan.  The recipe is for both.  For the larger wellington, use the larger quantities.

  • 1-1 1/4 cup black lentils (or brown)
  • 4-5 cups vegetable broth (optional)
  • 3-4 large portabello mushrooms
  • 3-4 large shallots peeled and minced
  • 4-6 cloves garlic, minced (divided)
  • 3 Tbs olive oil (divided)
  • 8-12 oz fresh spinach (3- 4 cups)
  • 2 – 3 blocks or rolls of pastry dough (or puff pastry, if preferred)
  • 1/4 cup vegan butter or soy milk (as pastry wash)
  • salt and pepper to taste
20181115_155547.jpg
  • Cook lentils in vegetable broth for more flavor (optional) following instructions on package.  Remove from heat and let cool. Trim mushroom stalks if needed and wipe caps clean with a damp paper towel. Do not immerse in water.
20181115_155740.jpg
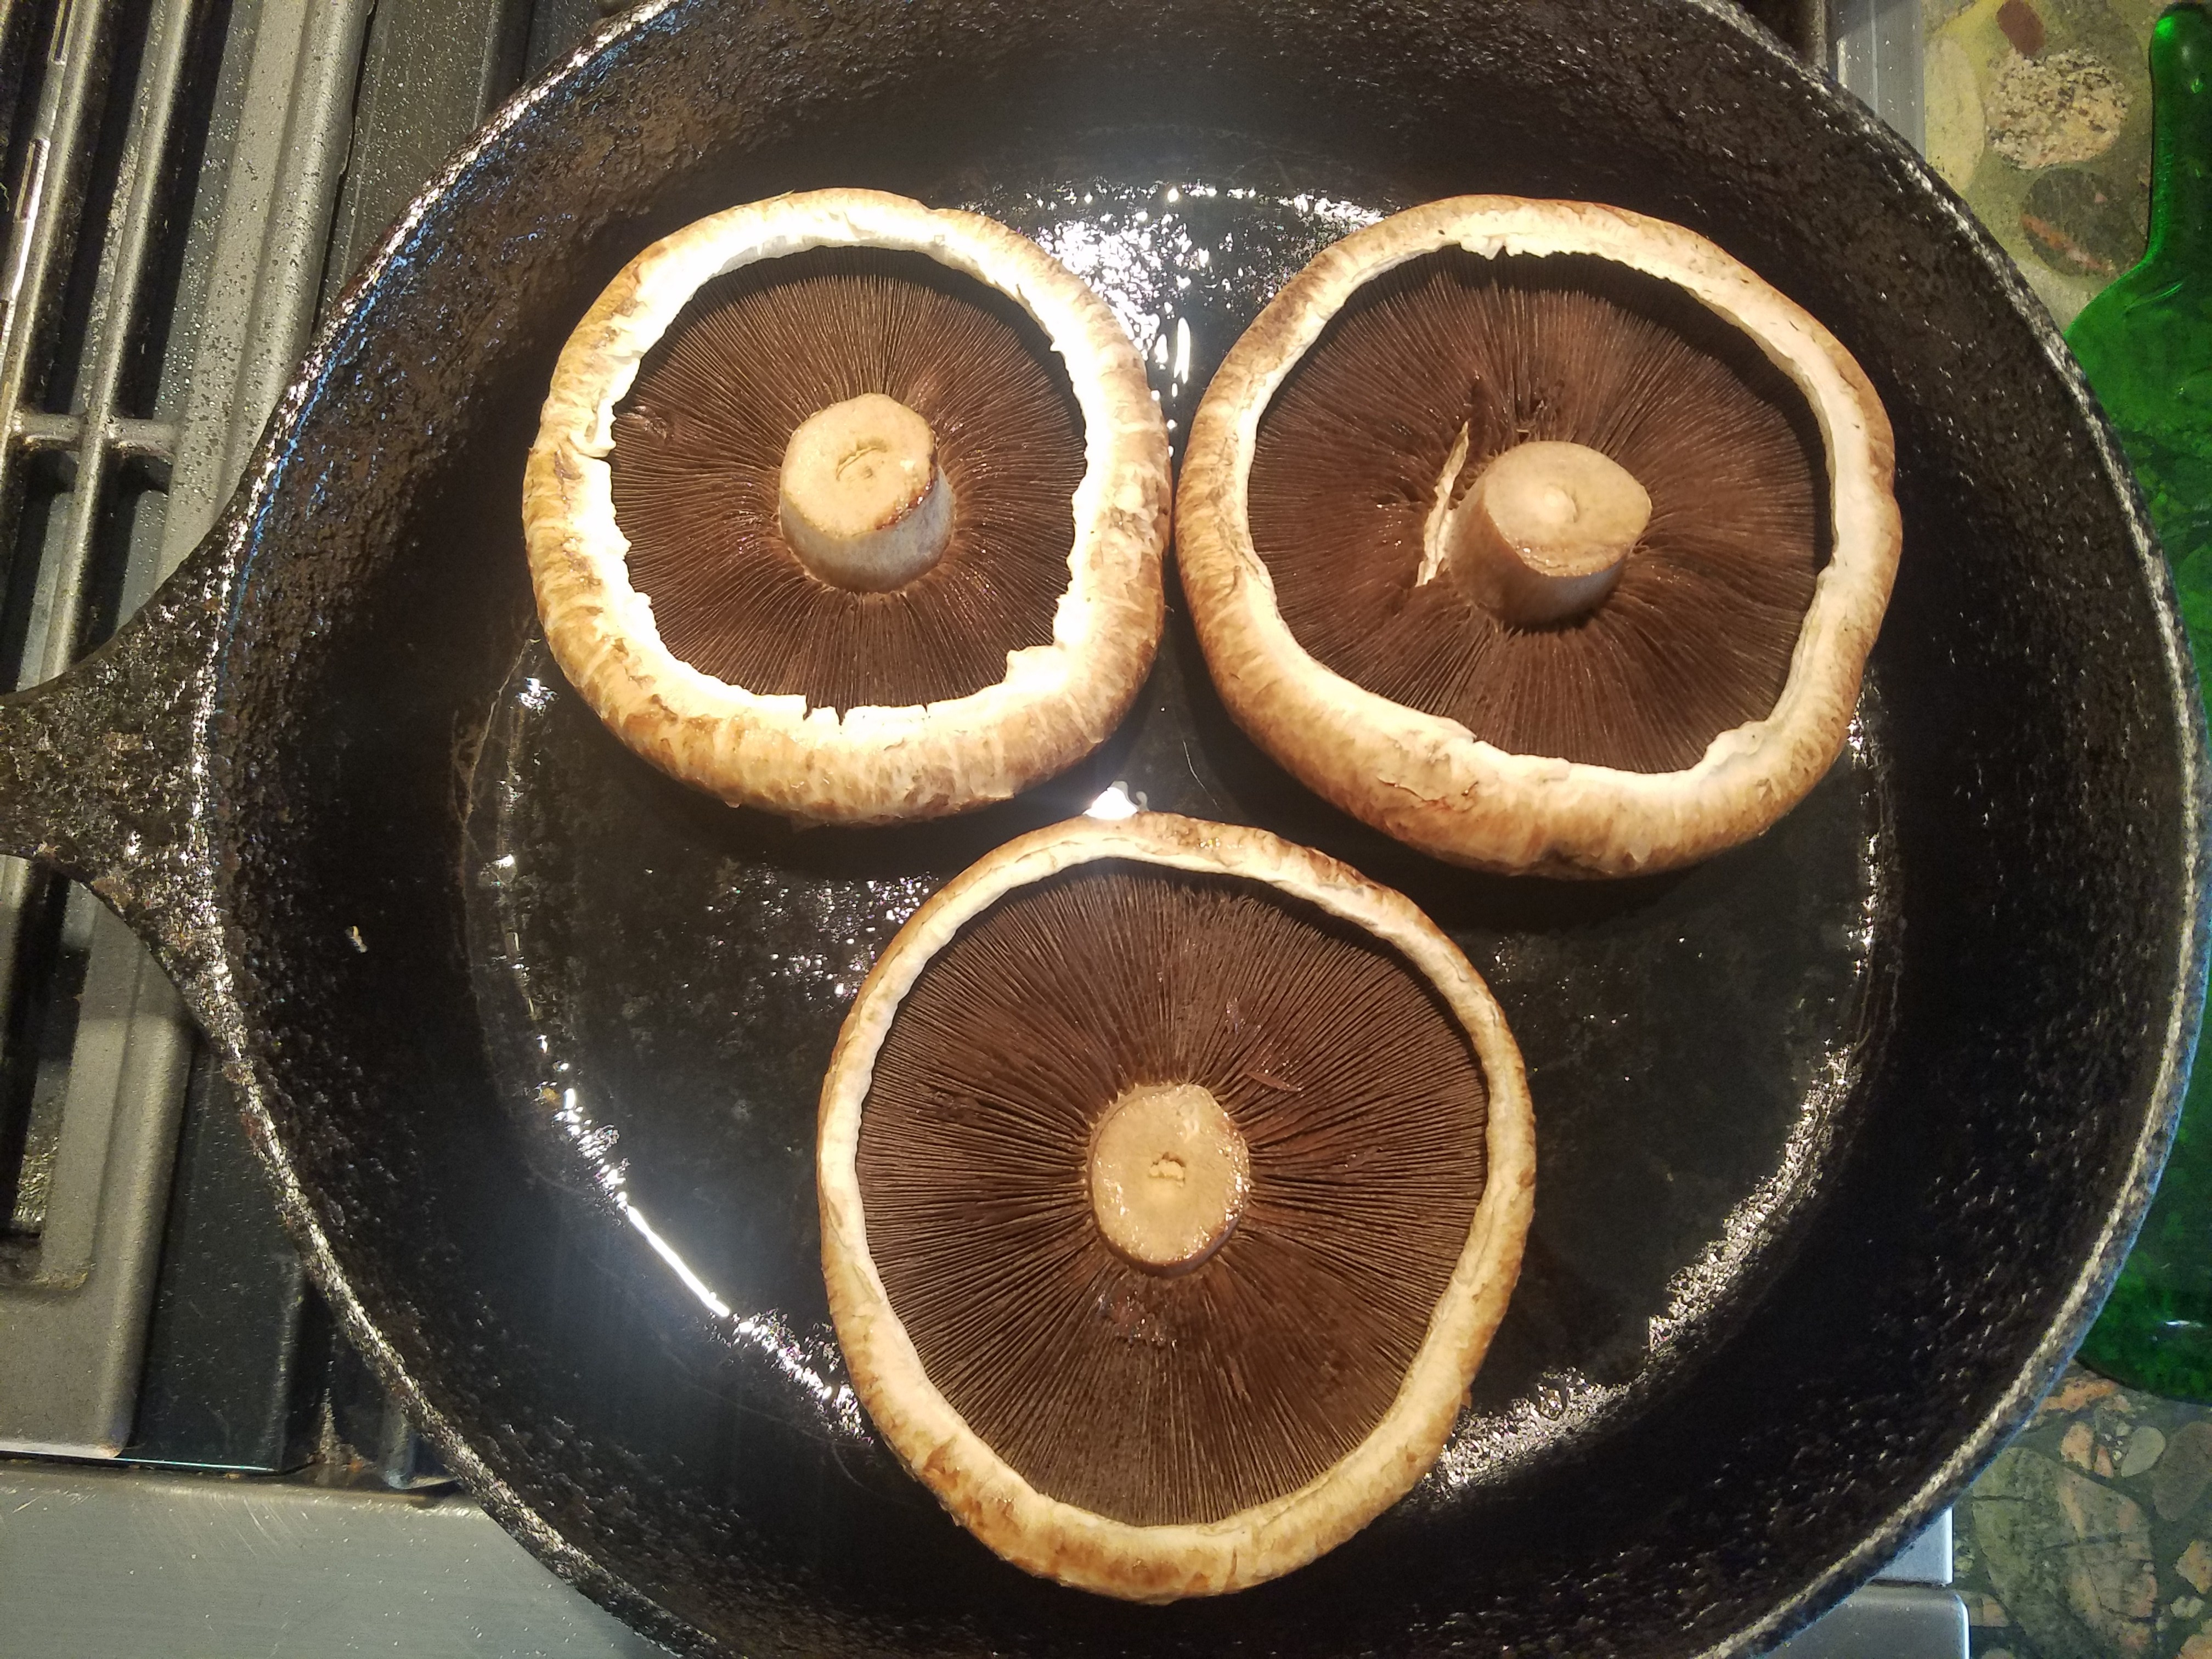
  • Heat 1 Tablespoon olive oil in a skillet and place the mushrooms, top side down. Cook on medium heat for about 5 minutes.  Turn them over and cook for another 5 minutes or until you hear the water release and sizzle in the pan. Remove from the heat, and drain on paper towel cap side up as they will release liquid as they cool.
20181115_161751.jpg
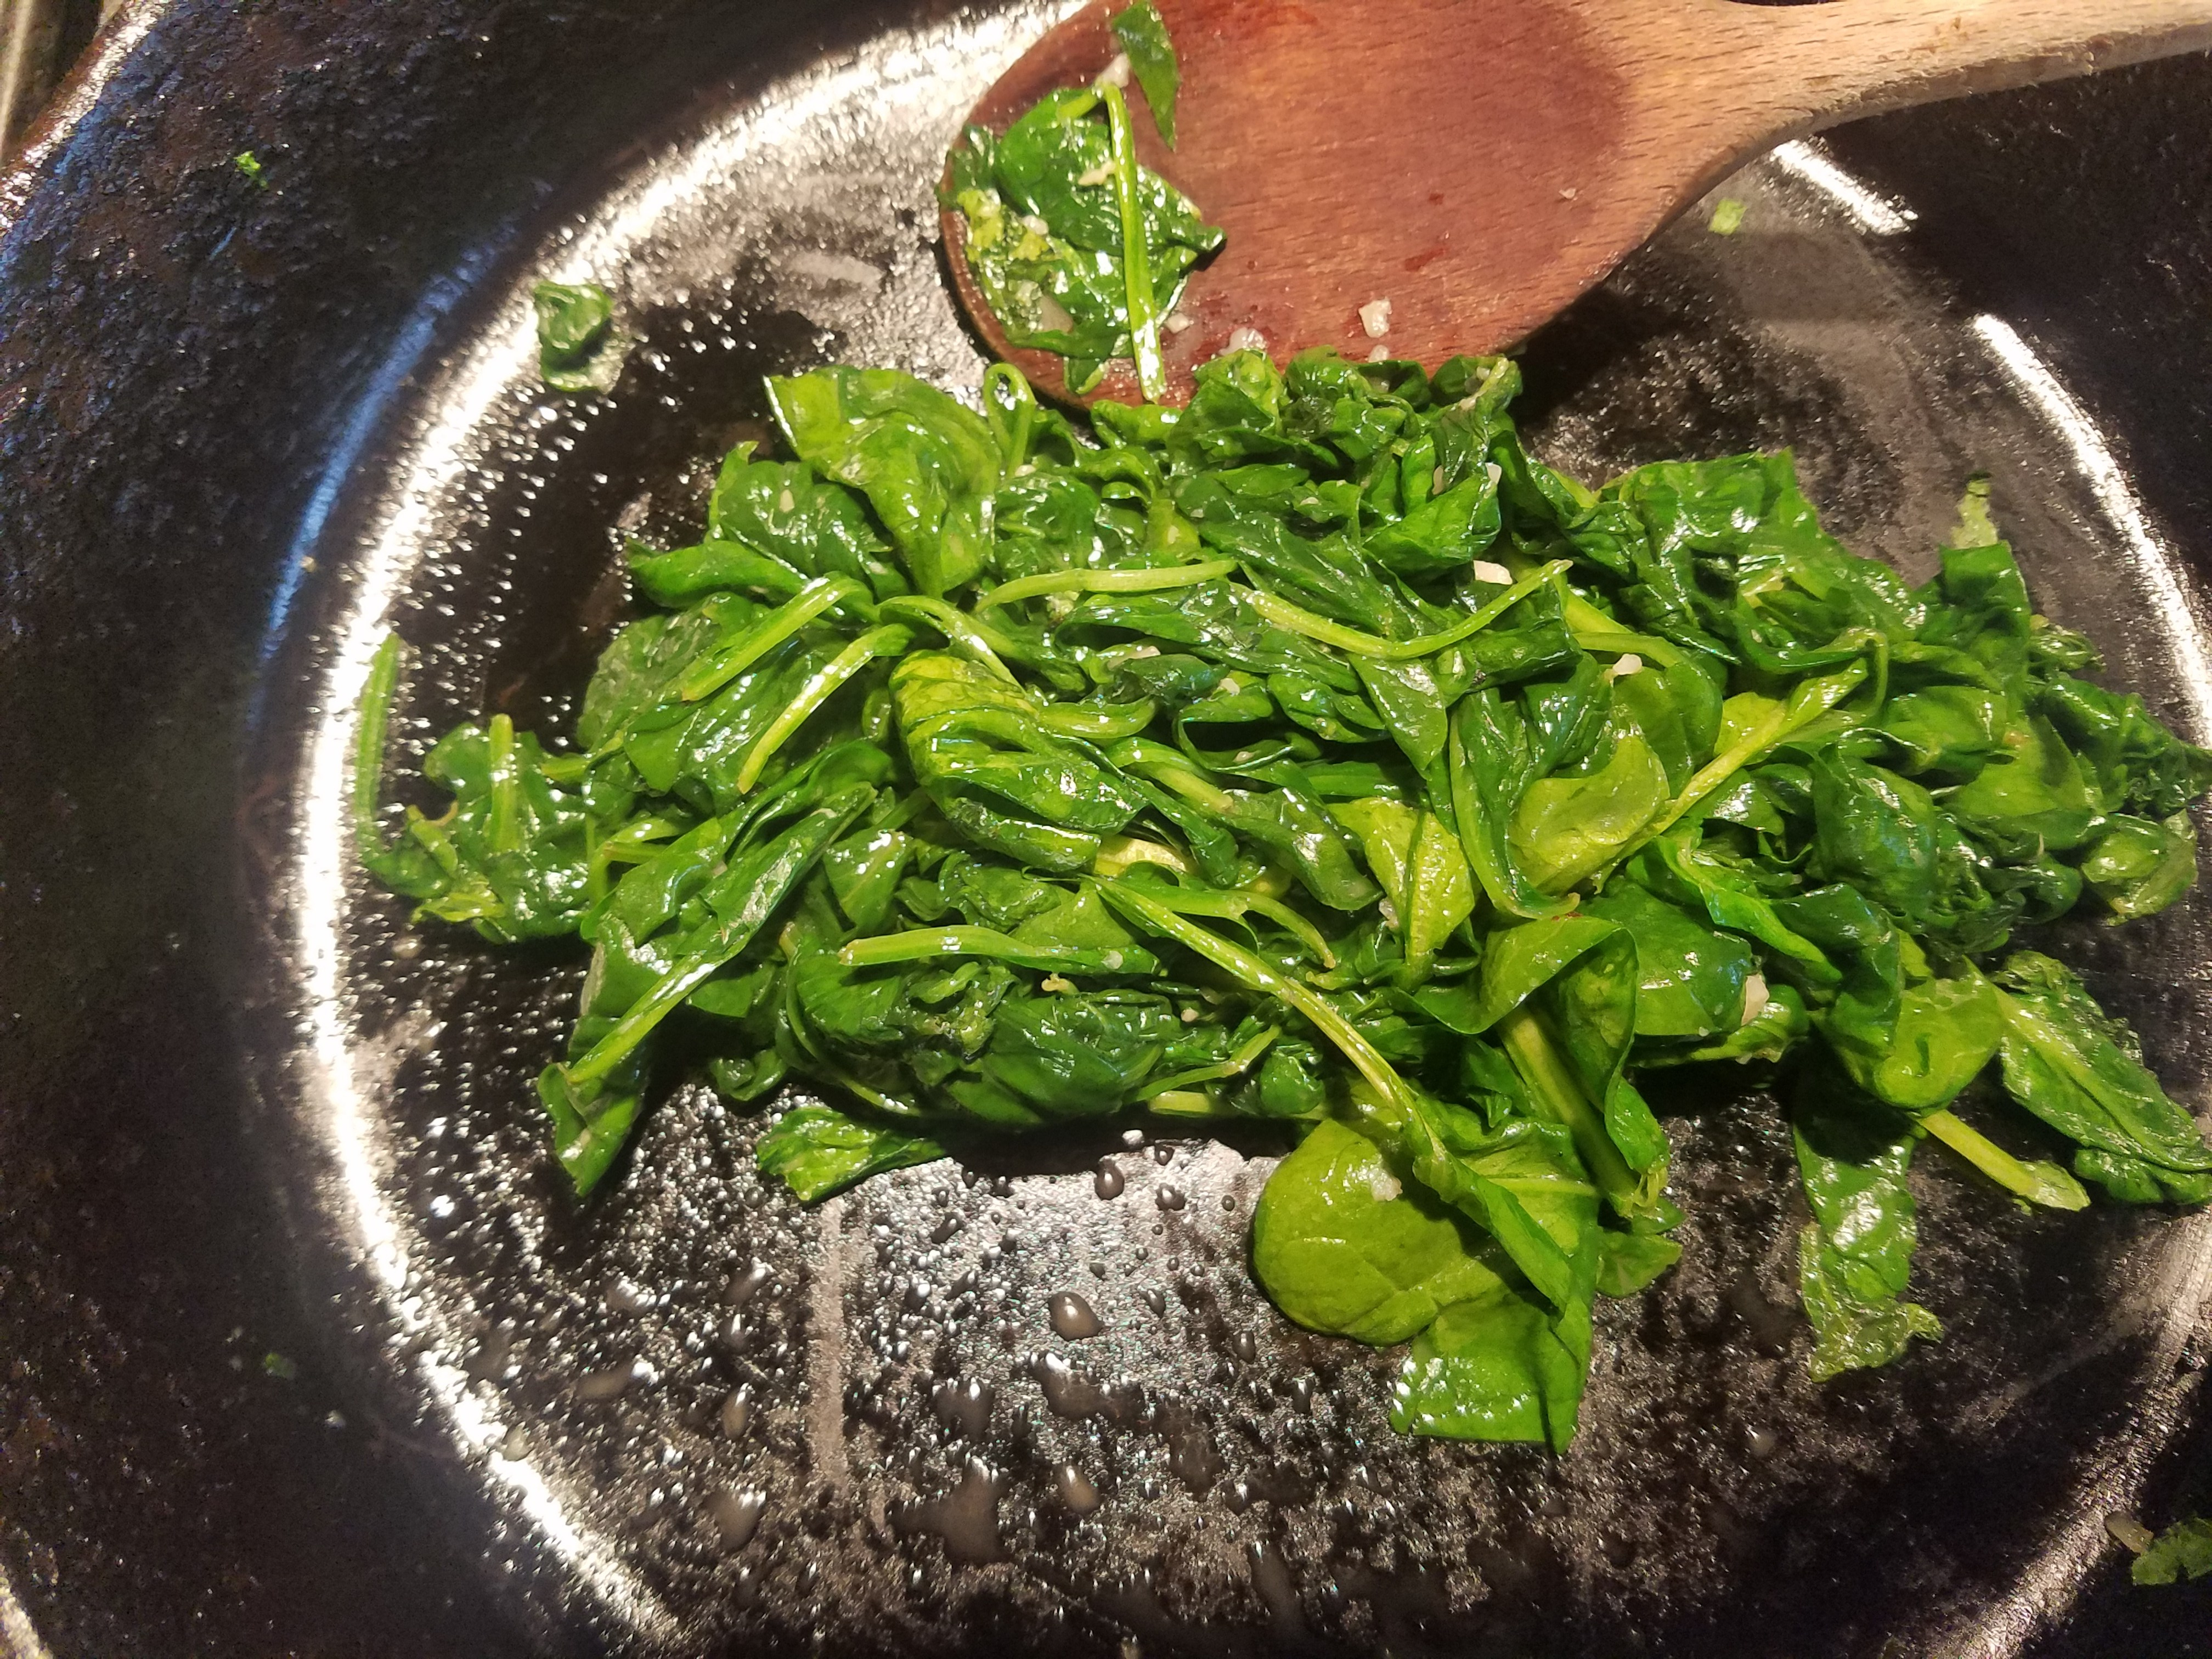
  • In the mushroom skillet, heat 1 Tablespoon olive oil and half of garlic, lightly saute spinach.  Just cook until wilted and liquid releases.  If you decided to use frozen spinach, squeeze out as much water as possible. Remove from heat and let cool
20181115_161625.jpg
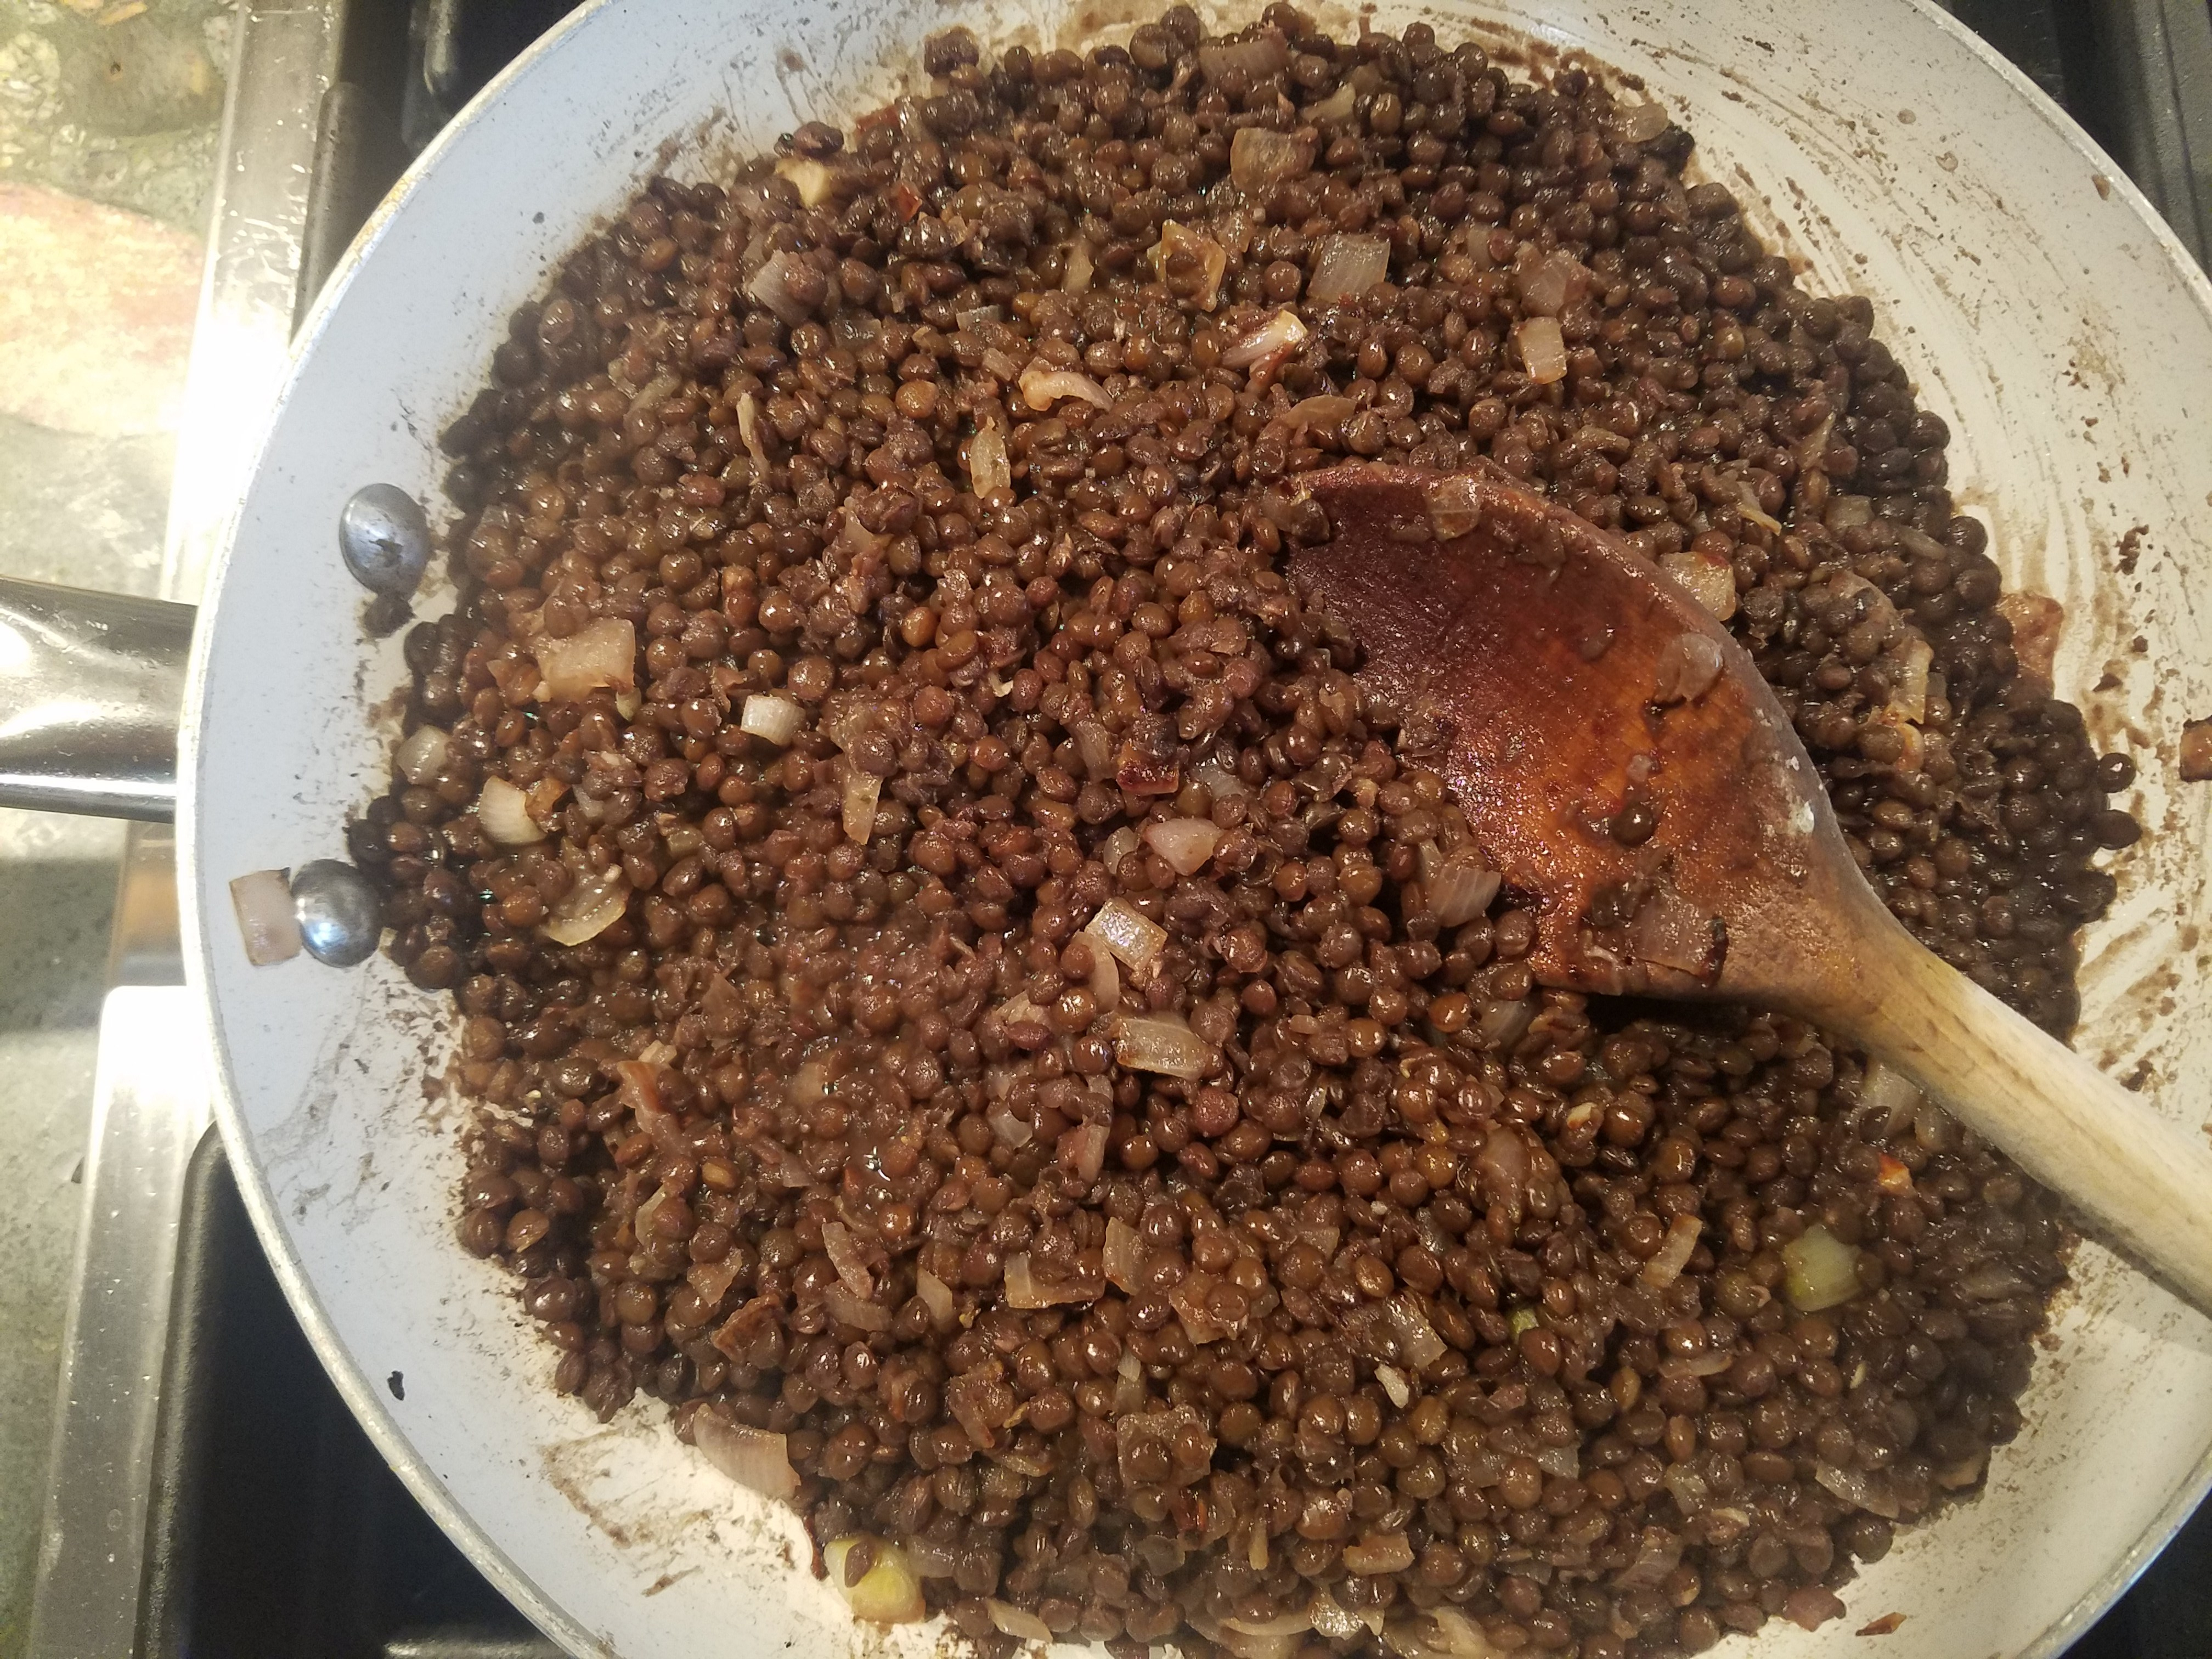
  • Saute shallots in 1 Tablespoon olive oil until lightly browned.  Add remaining garlic and cooked lentils.  Stir to combine. Taste and add salt and pepper if needed.  Remove from heat and let cool.
20181115_163015.jpg
  • Once cool enough, you should be able to form it into a log.  If you can’t, it’s probably too wet, so return it to the stove or put it in the refrigerator to firm up.
20181115_162817.jpg
  • Roll out pastry dough into any shape you prefer to make both a top and bottom crust.  I used 4 pre-made pie crusts and rolled 1 1/2 together to make the long traditional Wellington shape, however, you can make it a circle, square or rectangle.
20181115_170057
  • Place bottom crust on a parchment lined baking sheet.  Form lentil log in center of bottom crust and pat into shape
20181115_170248
  • Arrange mushrooms on top of lentils, cap side up
20181115_170356.jpg
  • Top evenly with the sauteed spinach.  Pat into as smooth a shape as possible for best results
20181115_170729
  • Place top crust over your lentil, mushroom, spinach creation and smooth it with your fingers.
20181115_170841
  • Cut around the Wellington using a sharp knife or pizza cutter, leaving a generous 1 inch margin.
20181115_171314.jpg
  • Using a fork, firmly press the two edges closed going all the way around.
20181115_171436.jpg
  • Cut shapes with a cookie cutter to decorate the top if you like.  Leaves would be pretty too. Save any leftover dough for future use.
20181115_171715.jpg
  • Brush the pastry with melted vegan butter or soy milk and poke air holes with a fork.
20181115_182131.jpg
  • Bake at 400 degrees for about 30 to 40 minutes, or until the crust is golden brown.  If the edges start getting too brown, cover them with strips of aluminum foil. Serve immediately or at room temperature.

Portobello Wellington

  • Servings: 6-8
  • Difficulty: easy
  • Print

20171227_183929
Note:  This recipe can be made with 3 or 4 large portobello mushrooms.  The 3 mushroom wellington will fit in an 18″ baking sheet, while a 4 mushroom one needs a 21″ pan.  The recipe is for both.  For the larger wellington, use the larger quantities.

  • 1-1 1/4 cup black lentils (or brown)
  • 4-5 cups vegetable broth (optional)
  • 3-4 large portabello mushrooms
  • 3-4 large shallots peeled and minced
  • 4-6 cloves garlic, minced (divided)
  • 3 Tbs olive oil (divided)
  • 8-12 oz fresh spinach (3- 4 cups)
  • 2 – 3 blocks or rolls of pastry dough
  • 1/4 cup vegan butter or soy milk (as pastry wash)
  • salt and pepper to taste
  1. Cook lentils in vegetable broth for more flavor (optional) following instructions on package.  Remove from heat and let cool.
  2. Trim mushroom stalks if needed and wipe caps clean with a damp paper towel. Do not immerse in water.
  3. Heat 1 Tablespoon olive oil in a skillet and place the mushrooms, top side down. Cook on medium heat for about 5 minutes.  Turn them over and cook for another 5 minutes or until you hear the water release and sizzle in the pan. Remove from the heat, and drain on paper towel cap side up as they will release liquid as they cool.
  4. In the mushroom skillet, heat 1 Tablespoon olive oil and half of garlic, lightly saute spinach.  Just cook until wilted and liquid releases.  If you decided to use frozen spinach, squeeze out as much water as possible. Remove from heat and let cool
  5. Saute shallots in 1 Tablespoon olive oil until lightly browned.  Add remaining garlic and cooked lentils.  Stir to combine. Taste and add salt and pepper if needed.  Remove from heat and let cool.  Once cool enough, you should be able to form it into a log. If you can’t, it’s probably too wet, so return it to the stove or put it in the refrigerator to firm up.
  6. Roll out pastry dough into any shape you prefer to make both a top and bottom crust.  I used 4 pre-made pie crusts and rolled 1 1/2 together to make the long traditional Wellington shape, however, you can make it a circle, square or rectangle.
  7. Place bottom crust on a parchment lined baking sheet
  8. Form lentil log in center of bottom crust and pat into shape
  9. Arrange mushrooms on top of lentils, cap side up
  10. Top evenly with the sauteed spinach.  Pat into as smooth a shape as possible for best results
  11. Place top crust over your lentil, mushroom, spinach creation and smooth it with your fingers.
  12. Cut around the Wellington using a sharp knife or pizza cutter, leaving a generous 1 inch margin.
  13. Using a fork, firmly press the two edges closed going all the way around.
  14. Cut shapes with a cookie cutter to decorate the top if you like.  Save and leftover dough for future use.
  15. Brush the pastry with melted vegan butter or soy milk and poke air holes with a fork.
  16. Bake at 400 degrees for about 30 to 40 minutes, or until the crust is golden brown.  If the edges start getting too brown, cover them with strips of aluminum foil.

Best Pasta with No Cook Tomato Sauce

0
20150616_200847

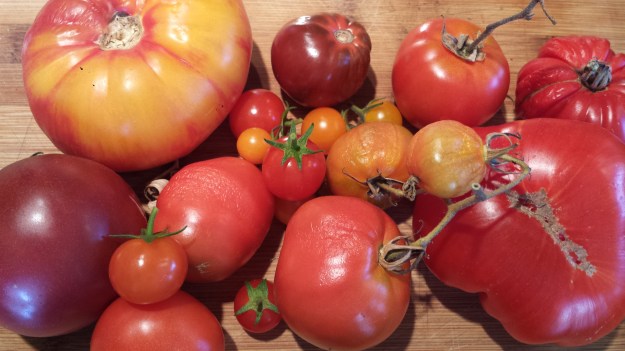
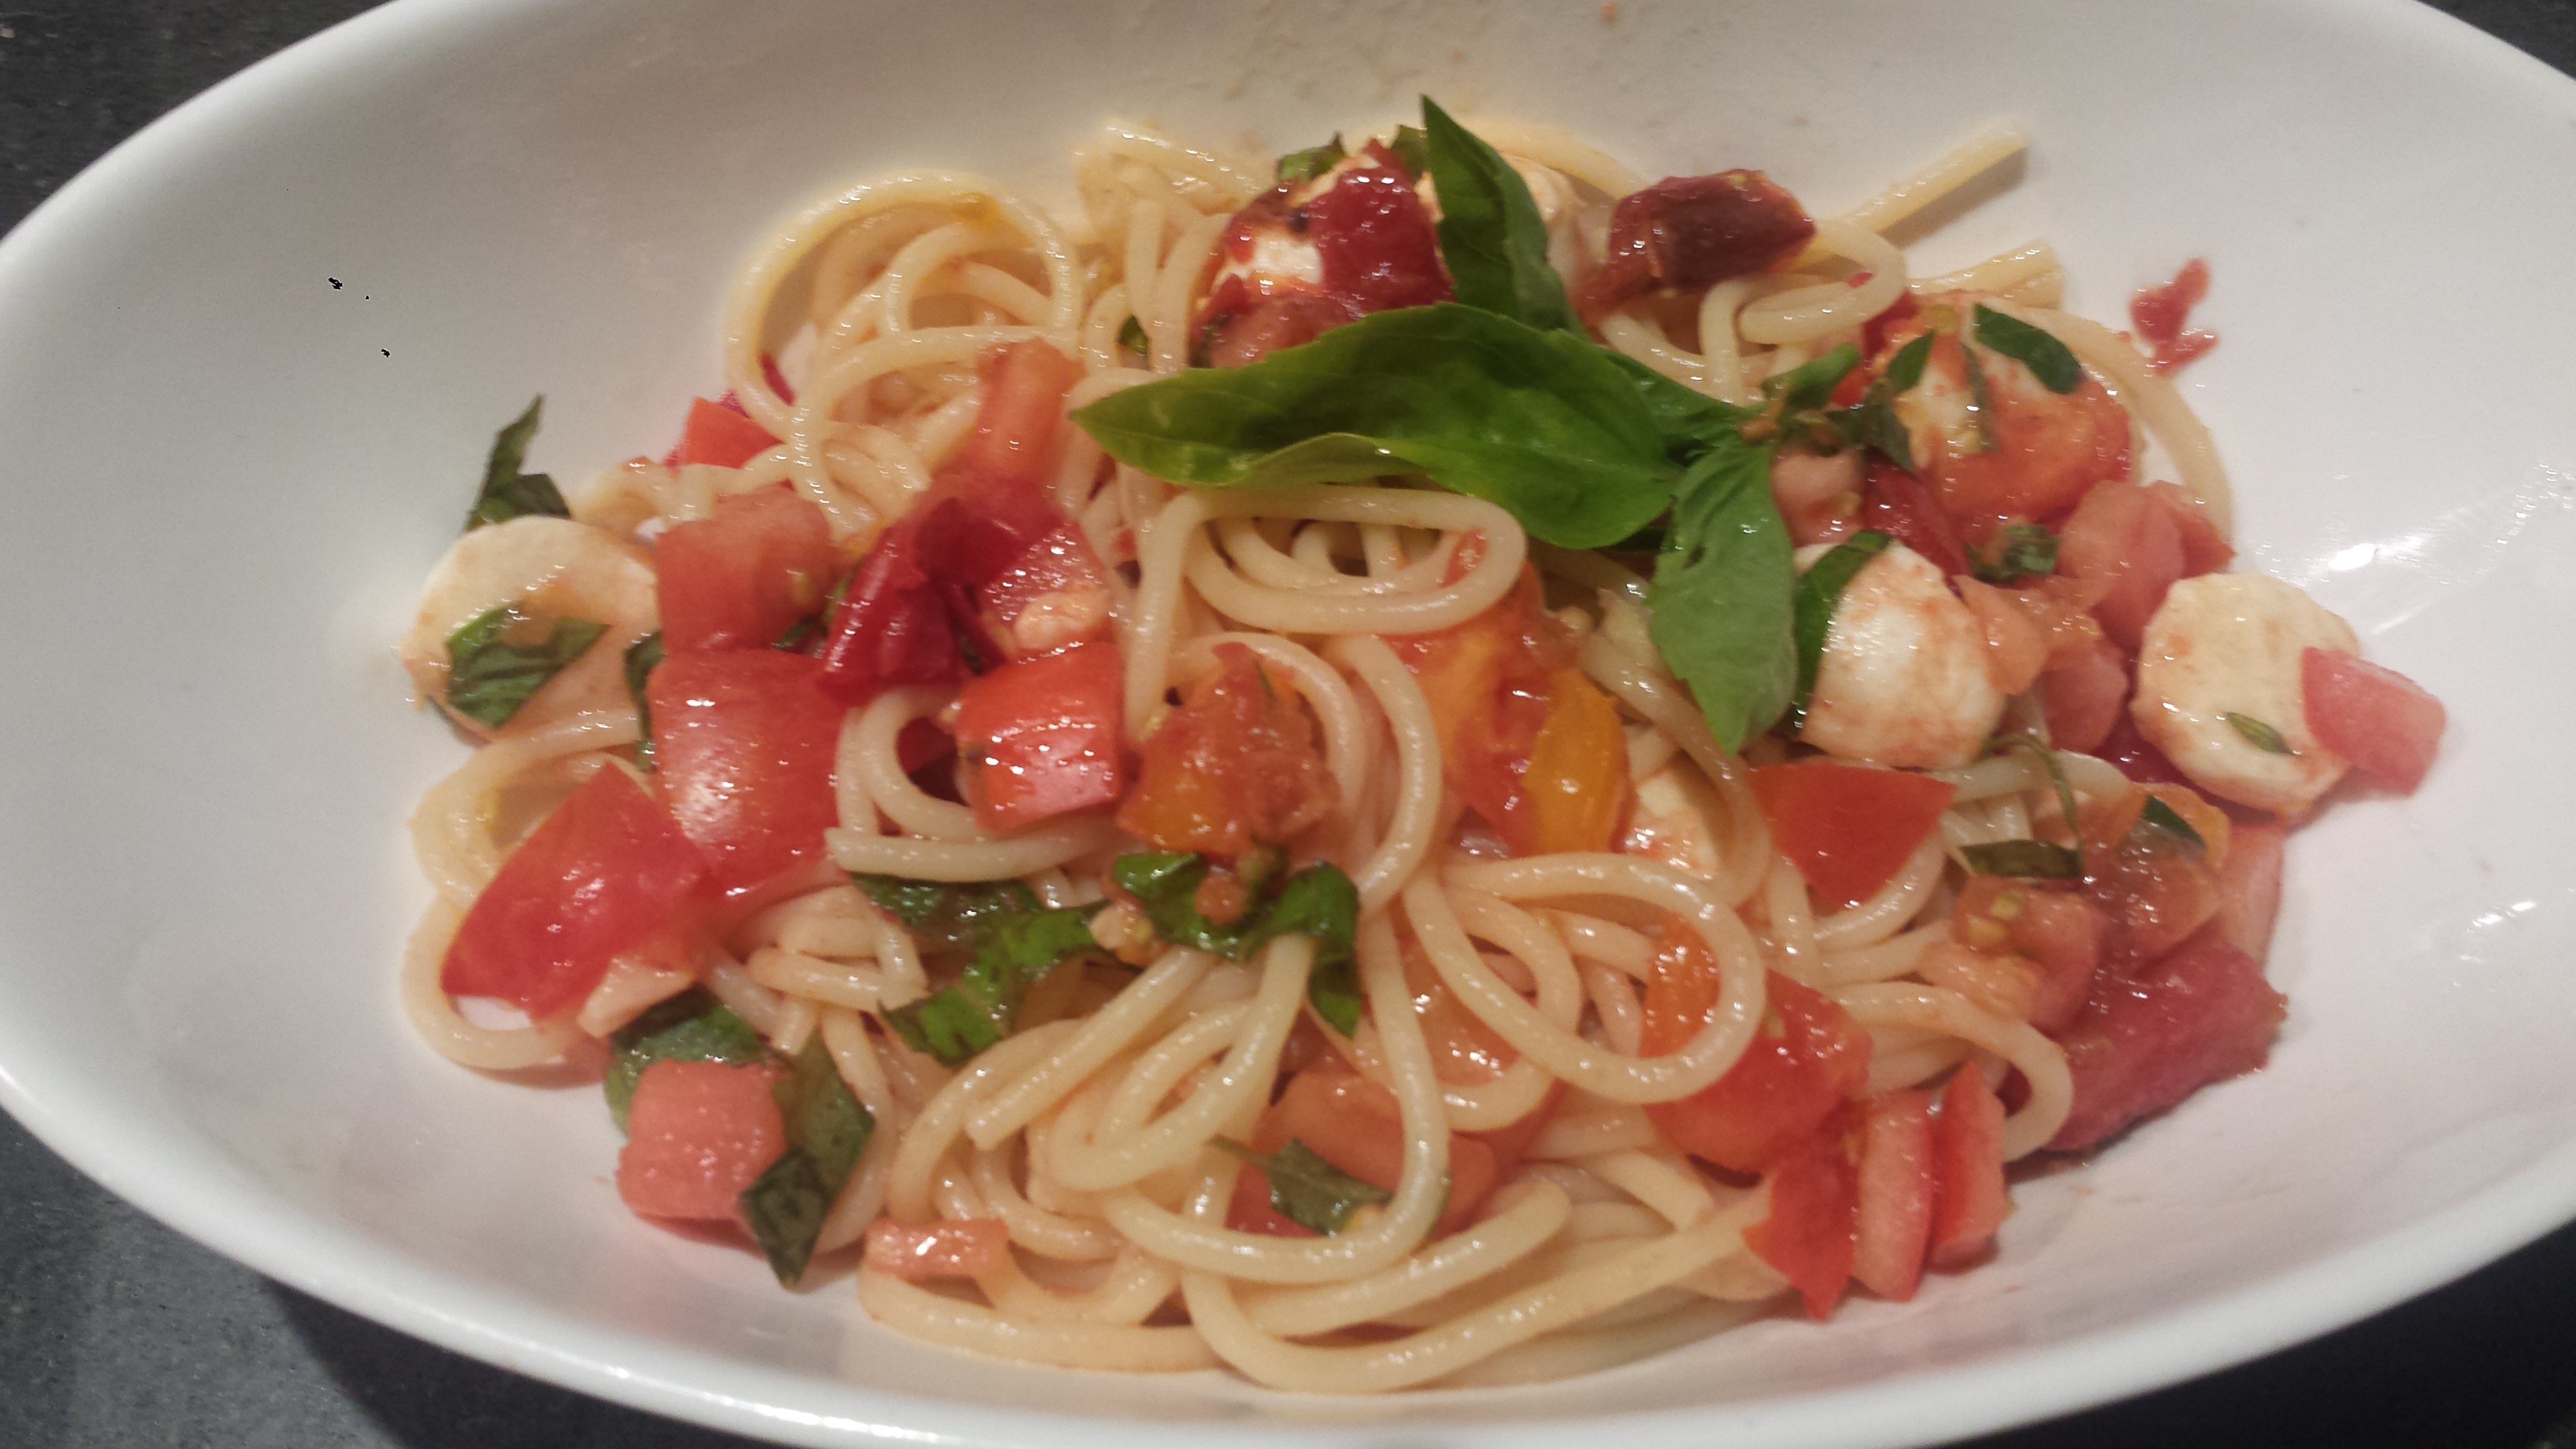
What could be easier than tossing warm pasta with fresh tomatoes, basil and olive oil?  This is a delicious NO COOK sauce that I have been making for ten years or so.  It is really delicious!   I no longer have the original recipe for this ‘sauce’ and usually only think about making it later in the summer when I have too many tomatoes on my windowsill on the verge of getting overripe. This recipe  is a great use for tomatoes that are a bit past their prime and starting to get a mealy texture. Of course, the better quality tomatoes, the more delicious the sauce but you can slip in an overripe tomato or two and it will work out just fine.  You can also add a few cherry tomatoes if you wish. I just use what I have on hand, but the more colorful the variety of tomatoes, the better.  Just dice the tomatoes, add a clove of minced garlic, sliced or chopped basil and oregano, drizzle with olive oil and let sit on the counter at room temperature for one to three hours.  All the flavors combine and transform raw tomatoes into a deliciously fresh sauce.  Sometimes I add fresh mozzarella for a Caprese type pasta or sprinkle with grated or shaved parmesan but it is just as good on its own. Great vegan cheese choices are Miyoko’s Vegan Mozz and Vio Life Just Like Parmesan.

Tomato Pasta12

There is some debate whether tomatoes are more nutritious raw or cooked.  Usually cooking vegetables reduces their nutritional value as vitamins are lost during the cooking process, however, it looks like tomatoes may be different.  Cooking tomatoes reduces the amount of vitamin C but may increase the amount of lycopene (a phytochemical with antioxidant properties) that can be absorbed by our bodies.  So I think its a toss up.  You can lightly sauté this sauce if you prefer but I love the simplicity of leaving it raw as nature intended. It can be served immediately, warmed by the hot pasta or at room temperature.

TIP:  Garlic lovers beware!  For those of us who pile on the garlic, be forewarned.  Since this sauce is not cooked, the garlic does not mellow and sweeten the same way it does when cooked, so don’t use the same amount you would in a cooked sauce and make sure you finely mince. For gluten free substitute a GF pasta. There are so many good options out there now! Easy peasy…

Tomato Pasta1

Spaghetti with Fresh Tomatoes and Basil

  • Servings: 6
  • Difficulty: easy
  • Print

Tomato Pasta1

4 – 6 ripe tomatoes of varying size and variety

1/2 cup olive oil

1/2 cup fresh basil, sliced or chopped

1 Tbsn fresh oregano, chopped (or thyme)

1-2 cloves garlic, minced

1/2 tsp salt (or to taste)

1/4 tsp pepper (or to taste)

1 cup fresh mozzarella (optional)

Tomato Pasta11

  •  Dice tomatoes and place in a medium sized bowl

Tomato Pasta9

  •  Add garlic, herbs, olive oil, salt and pepper to tomatoes.

Tomato Pasta8

  •  Stir gently to combine and let sit at room temperature for one to three hours (30 minutes if you can’t wait).

Tomato Pasta6

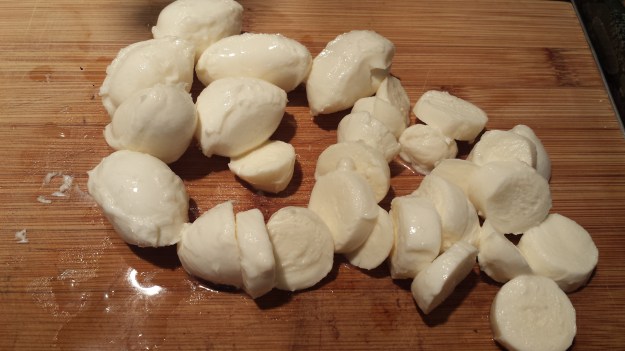
  •  Slice or dice fresh mozzarella, if using.

Tomato Pasta4

  •  Add mozzarella to the sauce about 15 minutes or so before serving. (You don’t want it sitting out too long). Adjust seasoning, if necessary.

Tomato Pasta3

  •  Cook spaghetti according to instructions, drain and place in a serving bowl.

Tomato Pasta2

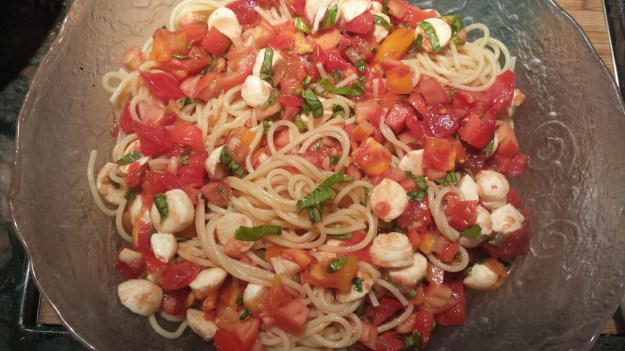
  •  Pour tomato sauce over the top and gently combine.  Serve warm or at room temperature.

Rustic Tomato Tart

1
20150702_184531
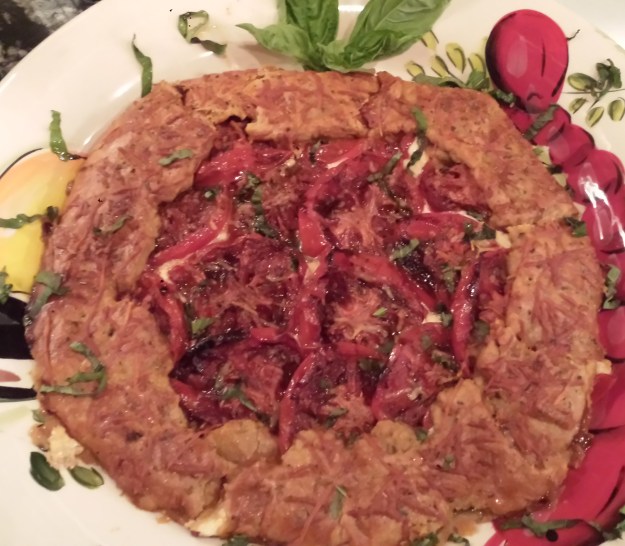
I can’t say enough about these roasted tomatoes – drizzled with balsamic and honey and slow roasted until they reach caramelized perfection.  Their cooking juice alone is worth the price of admission, delicious as a dipping  sauce for a crusty baguette.  But that’s not all!   I layered the lovely roasted tomatoes over a bed of fresh mozzarella and then folded it all in a buttery crust to form a rustic tart. You would never know that the crust is actually good for you because it’s so yummmy, but it’s made with 100% White Whole Wheat Flour.  No that wasn’t a typo.  I used a whole grain flour made from white whole wheat, which is a different kind of wheat whose germ has a lighter color and milder in flavor than the more traditional ‘red’ wheat.  It has the same nutritional value as whole wheat but is not as heavy, making it a better choice for baking. I believe in making food healthy but not at the expense of taste.  Win, Win!
20150702_142916
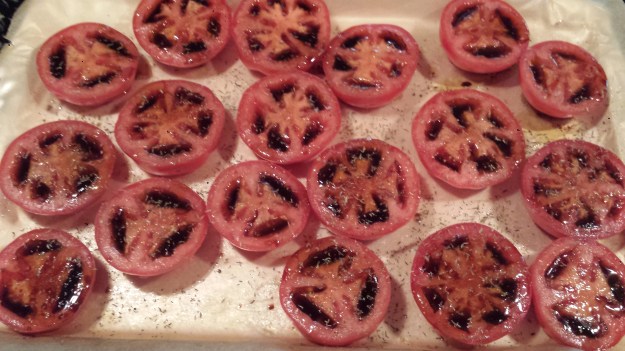
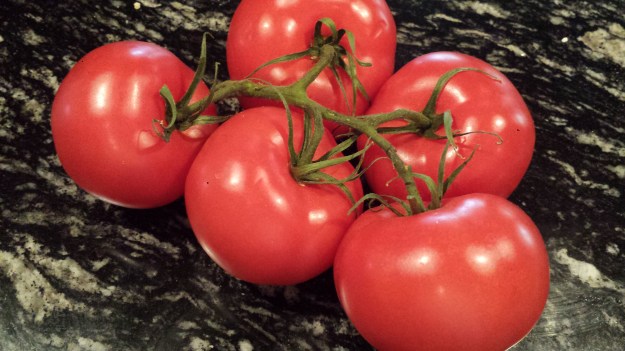
These roasted tomatoes are really sweet and flavorful, great layered in sandwiches or mixed in with other vegetables. I know I will be making these over and over again!  I know I already said this, but it bears repeating.  The sauce is ‘to die for’ so carefully pour every last drop into a small bowl and use it as a dipping sauce.
20150702_125826
Tomatoes are America’s favorite vegetable (even though it’s technically a fruit) and they are so wonderful when they are in season like right now, fresh from the vine.  You can just taste the goodness! If you are worried that cooking tomatoes, destroys the nutrients, don’t. Tomatoes are one of the veggies that actually benefits from being cooked. Most people know that tomatoes are loaded with vitamins and nutrients, like lycopene, an antioxidant that helps protect our immune systems.  The best way to get lycopene, which is in the skin and gives tomatoes their red color, is through cooked or processed tomatoes.  Cooking them with a little healthy oil helps carry the lycopene into the bloodstream. ( Best Health Magazine)  So roast away!  You won’t regret it…

TIPS:  This recipe is easy to make vegan.  Just substitute a vegan mozzarella (I really like Miyoko’s Vegan Mozz) and vegan parmesan (I like Vio Life Just Like Parmesan) or omit the cheeses which are not necessary anyway, as the star of this dish is really the roasted tomatoes. To veganize the crust, substitute a vegan butter (I love Miyoko’s) or oil and brush the crust with non-dairy milk (My favorite is Oatley) before cooking.  Then I would suggest sprinkling the tomatoes and especially the crust with a coarse salt and more herbs before baking.
20150702_184521
I spotted this recipe in the Farm Fresh – Summer, 2015 magazine, although I added a layer of fresh mozzarella beneath the tomatoes and used white whole wheat flour for the crust for a more nutritious tart.
RUSTIC ROASTED TOMATO TART
7-8 ripe tomatoes
1/3 cup olive oil
1 Tbsn balsamic vinegar
2 tsp honey
3 tsp fresh thyme (or 1 1/2 tsp dried)-divided
1/2 tsp salt
6 oz fresh mozzarella or vegan mozz, sliced
1/4 cup parmesan or vegan parm, shredded(optional)
CRUST (or your favorite pre-made crust)
1 cup white whole wheat flour (or all purpose flour)plus more for dusting the surface
2 tsp sugar
1/4 tsp salt
1 stick (1/2 cup) cold unsalted vegan butter
2 Tbsn + 1 tsp ice water
1 egg or 2 Tbsn non-dairy milk(for glazing the crust)
20150702_171600
If you are making dough for a crust, combine the flour, sugar and salt in a food processor and pulse briefly to combine.  Cut butter into slices and add to the flour mixture.  Pulse about 20 times or until the butter particles are small.  With the motor running, add the ice water and process until the dough is beginning to come together.  It will be loose but will come together if you pinch it.  Turn the loose dough out onto a mixing bowl and knead it briefly  Shape it into a flat disc and wrap in plastic.  Refrigerate for at least 45 minutes and up to 2 days.  (Or to save time later, you can roll it into a 12 inch round, then wrap it in plastic and store in the refrigerator)
20150702_132240
Pre-heat the oven to 425.  Line a heavy duty rimmed baking sheet with parchment paper.  Brush with with olive oil.  Combine the olive oil, balsamic vinegar and honey in a small bowl.
20150702_131718
Cut tomatoes in half horizontally and carefully remove seeds.
20150702_131613
Place tomatoes cut side up on the baking sheet and lightly sprinkle with salt.
20150702_132555
Pour the balsamic mixture into each tomato half, distributing as evenly as possible. Sprinkle with 2 tsp thyme.
20150702_142916
Roast the tomatoes until they are brown on the edges and collapsed, about an hour.  Let them cool.  Save any pan juices to serve with crusty sourdough bread!
20150702_171804
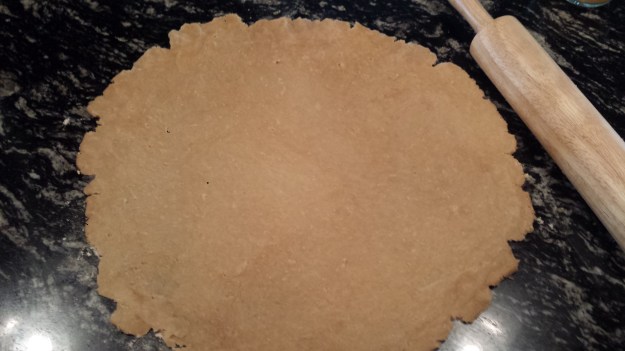
While the tomatoes are cooling, remove the dough from the refrigerator and let come to room temperature.  Heat oven to 400.  Line a heavy duty rimmed baking sheet with parchment paper.  Place the dough on a lightly floured surface and roll into a 12 inch round, then transfer to parchment paper. Don’t worry if the edges aren’t perfect.  I think it makes a more interesting tart.
20150702_172021
Arrange mozzarella slices in the center of the round, leaving a 2 inch border of dough.
20150702_172540
 
Arrange the roasted tomato halves over the mozzarella, starting in the center and slightly overlapping, still leaving a 2 inch border.

Fold the edge of the dough up and over the tomatoes, pleating as you go.
20150702_173504
Brush the dough (including under the folds) with beaten egg.  Sprinkle the tart with parmesan and remaining thyme. Bake until the crust is golden brown, about 40 minutes.

20150702_181601
 
Let cool slightly and transfer to a cutting board or serving platter.  Serve warm or at room temperature.


Rustic Tomato Tart

  • Servings: 6
  • Difficulty: easy
  • Print

 
20150702_184652
7-8 ripe tomatoes
1/3 cup olive oil
1 Tbsn balsamic vinegar
2 tsp honey
3 tsp fresh thyme (or 1 1/2 tsp dried)-divided
1/2 tsp salt
6 oz fresh mozzarella, sliced (optional)
1/4 cup parmesan, shredded(optional)
CRUST (or your favorite pre-made crust)
1 cup white whole wheat flour (or all purpose flour)plus more for dusting the surface
2 tsp sugar
1/4 tsp salt
1 stick (1/2 cup) cold unsalted butter
2 Tbsn + 1 tsp ice water
1 egg (for glazing the crust)
If you are making dough for a crust, combine the flour, sugar and salt in a food processor and pulse briefly to combine.  Cut butter into slices and add to the flour mixture.  Pulse about 20 times or until the butter particles are small.  With the motor running, add the ice water and process until the dough is beginning to come together.  It will be loose but will come together if you pinch it.  Turn the loose dough out onto a mixing bowl and knead it briefly  Shape it into a flat disc and wrap in plastic.  Refrigerate for at least 45 minutes and up to 2 days.
Pre-heat the oven to 425.  Line a heavy duty rimmed baking sheet with parchment paper.  Brush with with olive oil.  Combine the olive oil, balsamic vinegar and honey in a small bowl.
Cut tomatoes in half horizontally and carefully remove seeds.
Place tomatoes cut side up on the baking sheet and lightly sprinkle with salt.
Pour the balsamic mixture into each tomato half, distributing as evenly as possible. Sprinkle with 2 tsp thyme.  Roast the tomatoes until they are brown on the edges and collapsed, about an hour.  Let them cool.  Save any pan juices to serve with crusty sourdough bread!
While the tomatoes are cooling, remove the dough from the refrigerator and let come to room temperature.  Heat oven to 400.  Line a heavy duty rimmed baking sheet with parchment paper.  Place the dough on a lightly floured surface and roll into a 12 inch round, then transfer to parchment paper. Don’t worry if the edges aren’t perfect.  I think it makes a more interesting tart.
Arrange mozzarella slices in the center of the round, leaving a 2 inch border of dough.
Arrange the roasted tomato halves over the mozzarella, starting in the center and slightly overlapping, still leaving a 2 inch border.
Fold the edge of the dough up and over the tomatoes, pleating as you go.
Brush the dough (including under the folds) with beaten egg.  Sprinkle the tart with parmesan and remaining thyme. Bake until the crust is golden brown, about 40 minutes.
Let cool slightly and transfer to a cutting board or serving platter.  Serve warm or at room temperature.


Endive Salad Bites

0
20150324_192857

Appetizers are the little things you keep eating until you lose your appetite. ~ Joe Moore
I don’t know who Joe Moore is but I’m with him on this.  The way I look at it, you might as well make the appetizer as yummy and nutritious as dinner.  This one is sure to satisfy, or at least start your night off on a delicious, healthy and low cal note.  I’m loving the three bite salad!

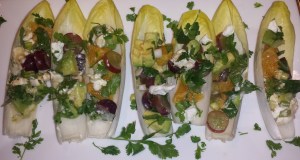
I am a sucker for foods that have a nice presentation and are easy to eat appetizer style, my kind of eating! The shape of endive spears is perfect for stuffing. Just toss all the salad ingredients with the dressing and pile them up in the endive spear, or boats as I have always thought of them.  Their slight bitterness is offset by the sweetness of the orange and grapes and the creaminess of the avocado and soft cheese.  The vinaigrette is simple but helps to blend the flavors nicely and done in just a few minutes.

20150324_185940

Alternatively, you could julienne the endive and toss the whole thing together as a large salad.  Either way, delicious!

20150324_193209

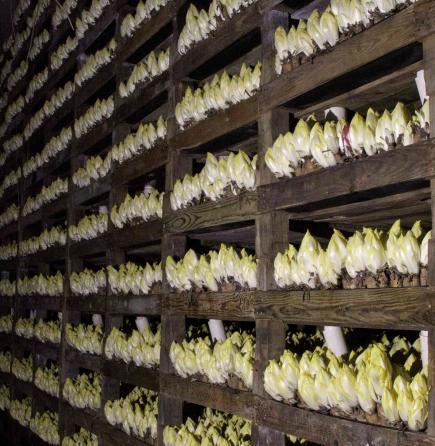
The first time I made this salad was when I was getting weekly CSA boxes and my endive came with an informational blurb which I found quite interesting.  Endive is a member of the chicory family (which makes me think of coffee for some reason).  Belgian endive is grown from chicory roots in a dark environment, which is why their tender leaves are such a light color. I was enthralled, so I googled, and here is what endive looks like growing. At first glance I thought I was looking at a photo of a factory chicken farm! You can click on the photo link for the full story on endive.

endive
Photo Credit: http://endive.com/how-endive-is-grown

For their pale complexions, endive are surprisingly nutritious, providing many valuable vitamins and minerals, including vitamin C, calcium, iron and zinc, among many others.  The biggest surprise is that it is a good source of beta-carotene which we usually attribute to the orange vegetable family.  But that’s not all.  It has more than 50% of the potassium of a banana. Not too bad for our pale friend, the endive.  It also makes a darn good edible appetizer boat.

20150324_185853

ENDIVE SALAD BITES

1 head Belgian endive
1 orange or grapefruit
1 avocado
1/2 cup red grapes
4 scallions, chopped
1/3 cup crumbled goat, gorgonzola or feta cheese (or vegan Vio Life Feta or Miyoko’s Classic Chive soft cheese)
1/3 cup cilantro or parsley, chopped (or more for garnish)

Marinade

2 Tbsn olive oil
1 Tbsn balsamic vinegar
1 Tbsn red wine or apple cider vinegar
salt and pepper to taste

20150324_190230
  • Cut the ends off orange and remove the peel by cutting in a downward motion going all the way around.  Cut into wheels and then sections.  Place in a large bowl.
20150324_190721
  • Slice grapes and admire their gorgeous jewel toned colors.
20150324_190824
  • place in the bowl with the oranges.
20150324_191511
  • Halve avocado and cut into pieces a similar size to the orange segments.
20150324_191938
  • Add avocado, cilantro, scallions and crumbled goat cheese to the bowl.
20150324_192024
  • Prepare marinade and drizzle over salad sparingly.  You can always drizzle more later and since they are to be eaten by hand, you don’t want them too drippy.
20150324_192857
  • Cut the core end off the endive. Clean by gently wiping both sides with a lightly damp paper towel. Pull off as many leaves as you want to use. The remainder can be stored in the refrigerator under a lightly damp paper towel. Place 1-2 tablespoons of salad into each endive spear.   Arrange on a platter and garnish with extra cilantro.

Endive Salad Bites

  • Servings: 12 pieces
  • Difficulty: easy
  • Print

20150324_192857

1 head Belgian endive
1 orange or grapefruit
1 avocado
1/2 cup red grapes
4 scallions, chopped
1/3 cup crumbled goat, gorgonzola or blue cheese (or vegan Vio Life Feta or Miyoko’s Classic Chive soft cheese)
1/3 cup cilantro or parsley, chopped (or more for garnish)

Marinade

2 Tbsn olive oil
1 Tbsn balsamic vinegar
1 Tbsn red wine or apple cider vinegar
salt and pepper to taste

  • Cut the ends off orange and remove the peel by cutting in a downward motion going all the way around.  Cut into wheels and then sections.  Place in a large bowl.
  • Slice grapes and place in the bowl with the oranges.
  • Halve avocado and cut into pieces a similar size to the orange segments.
  • Add avocado, cilantro and scallions to the bowl.
  • Crumble goat cheese and add to the salad.
  • Cut the core end off the endive. Clean by gently wiping both sides with a lightly damp paper towel. Pull off as many leaves as you want to use. The remainder can be stored in the refrigerator under a lightly damp paper towel.
  • Prepare marinade and drizzle over salad sparingly.  You can always drizzle more later and since they are to be eaten by hand, you don’t want them too messy.
  • Place 1-2 tablespoons of salad into each endive spear.   Arrange on a platter and garish with extra cilantro.

Black & Wild Rice Salad with Roasted Butternut Squash & Pomegranate

2
Black and Wild Rice with Roasted Butternut Squash and Pomegranate

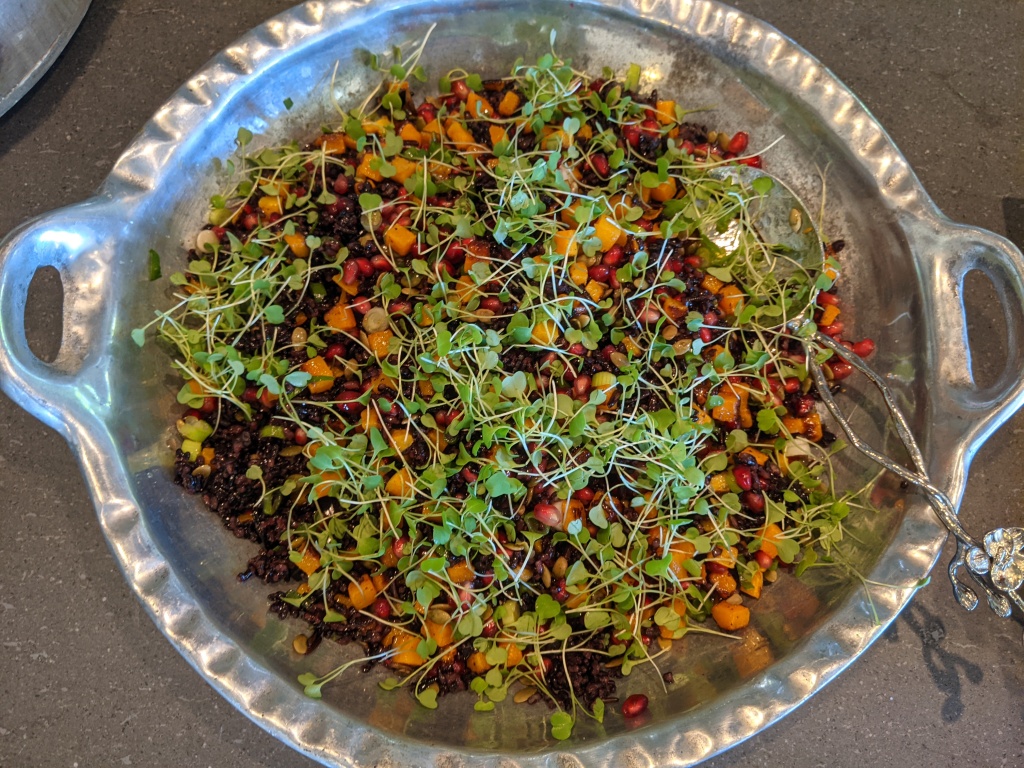
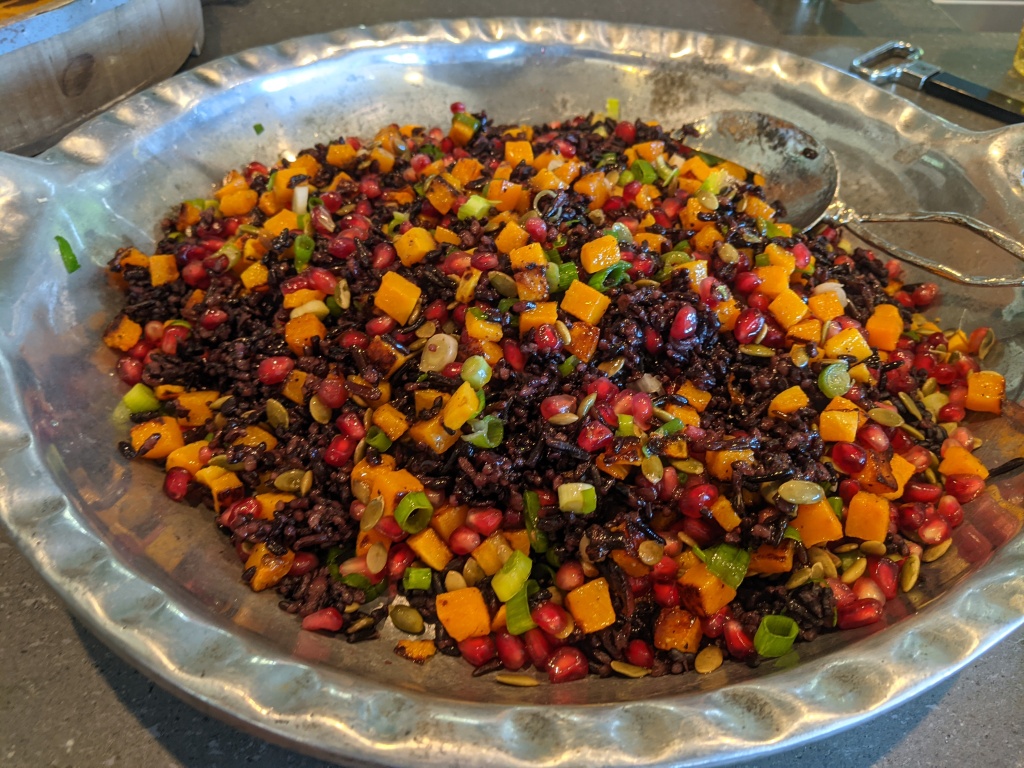
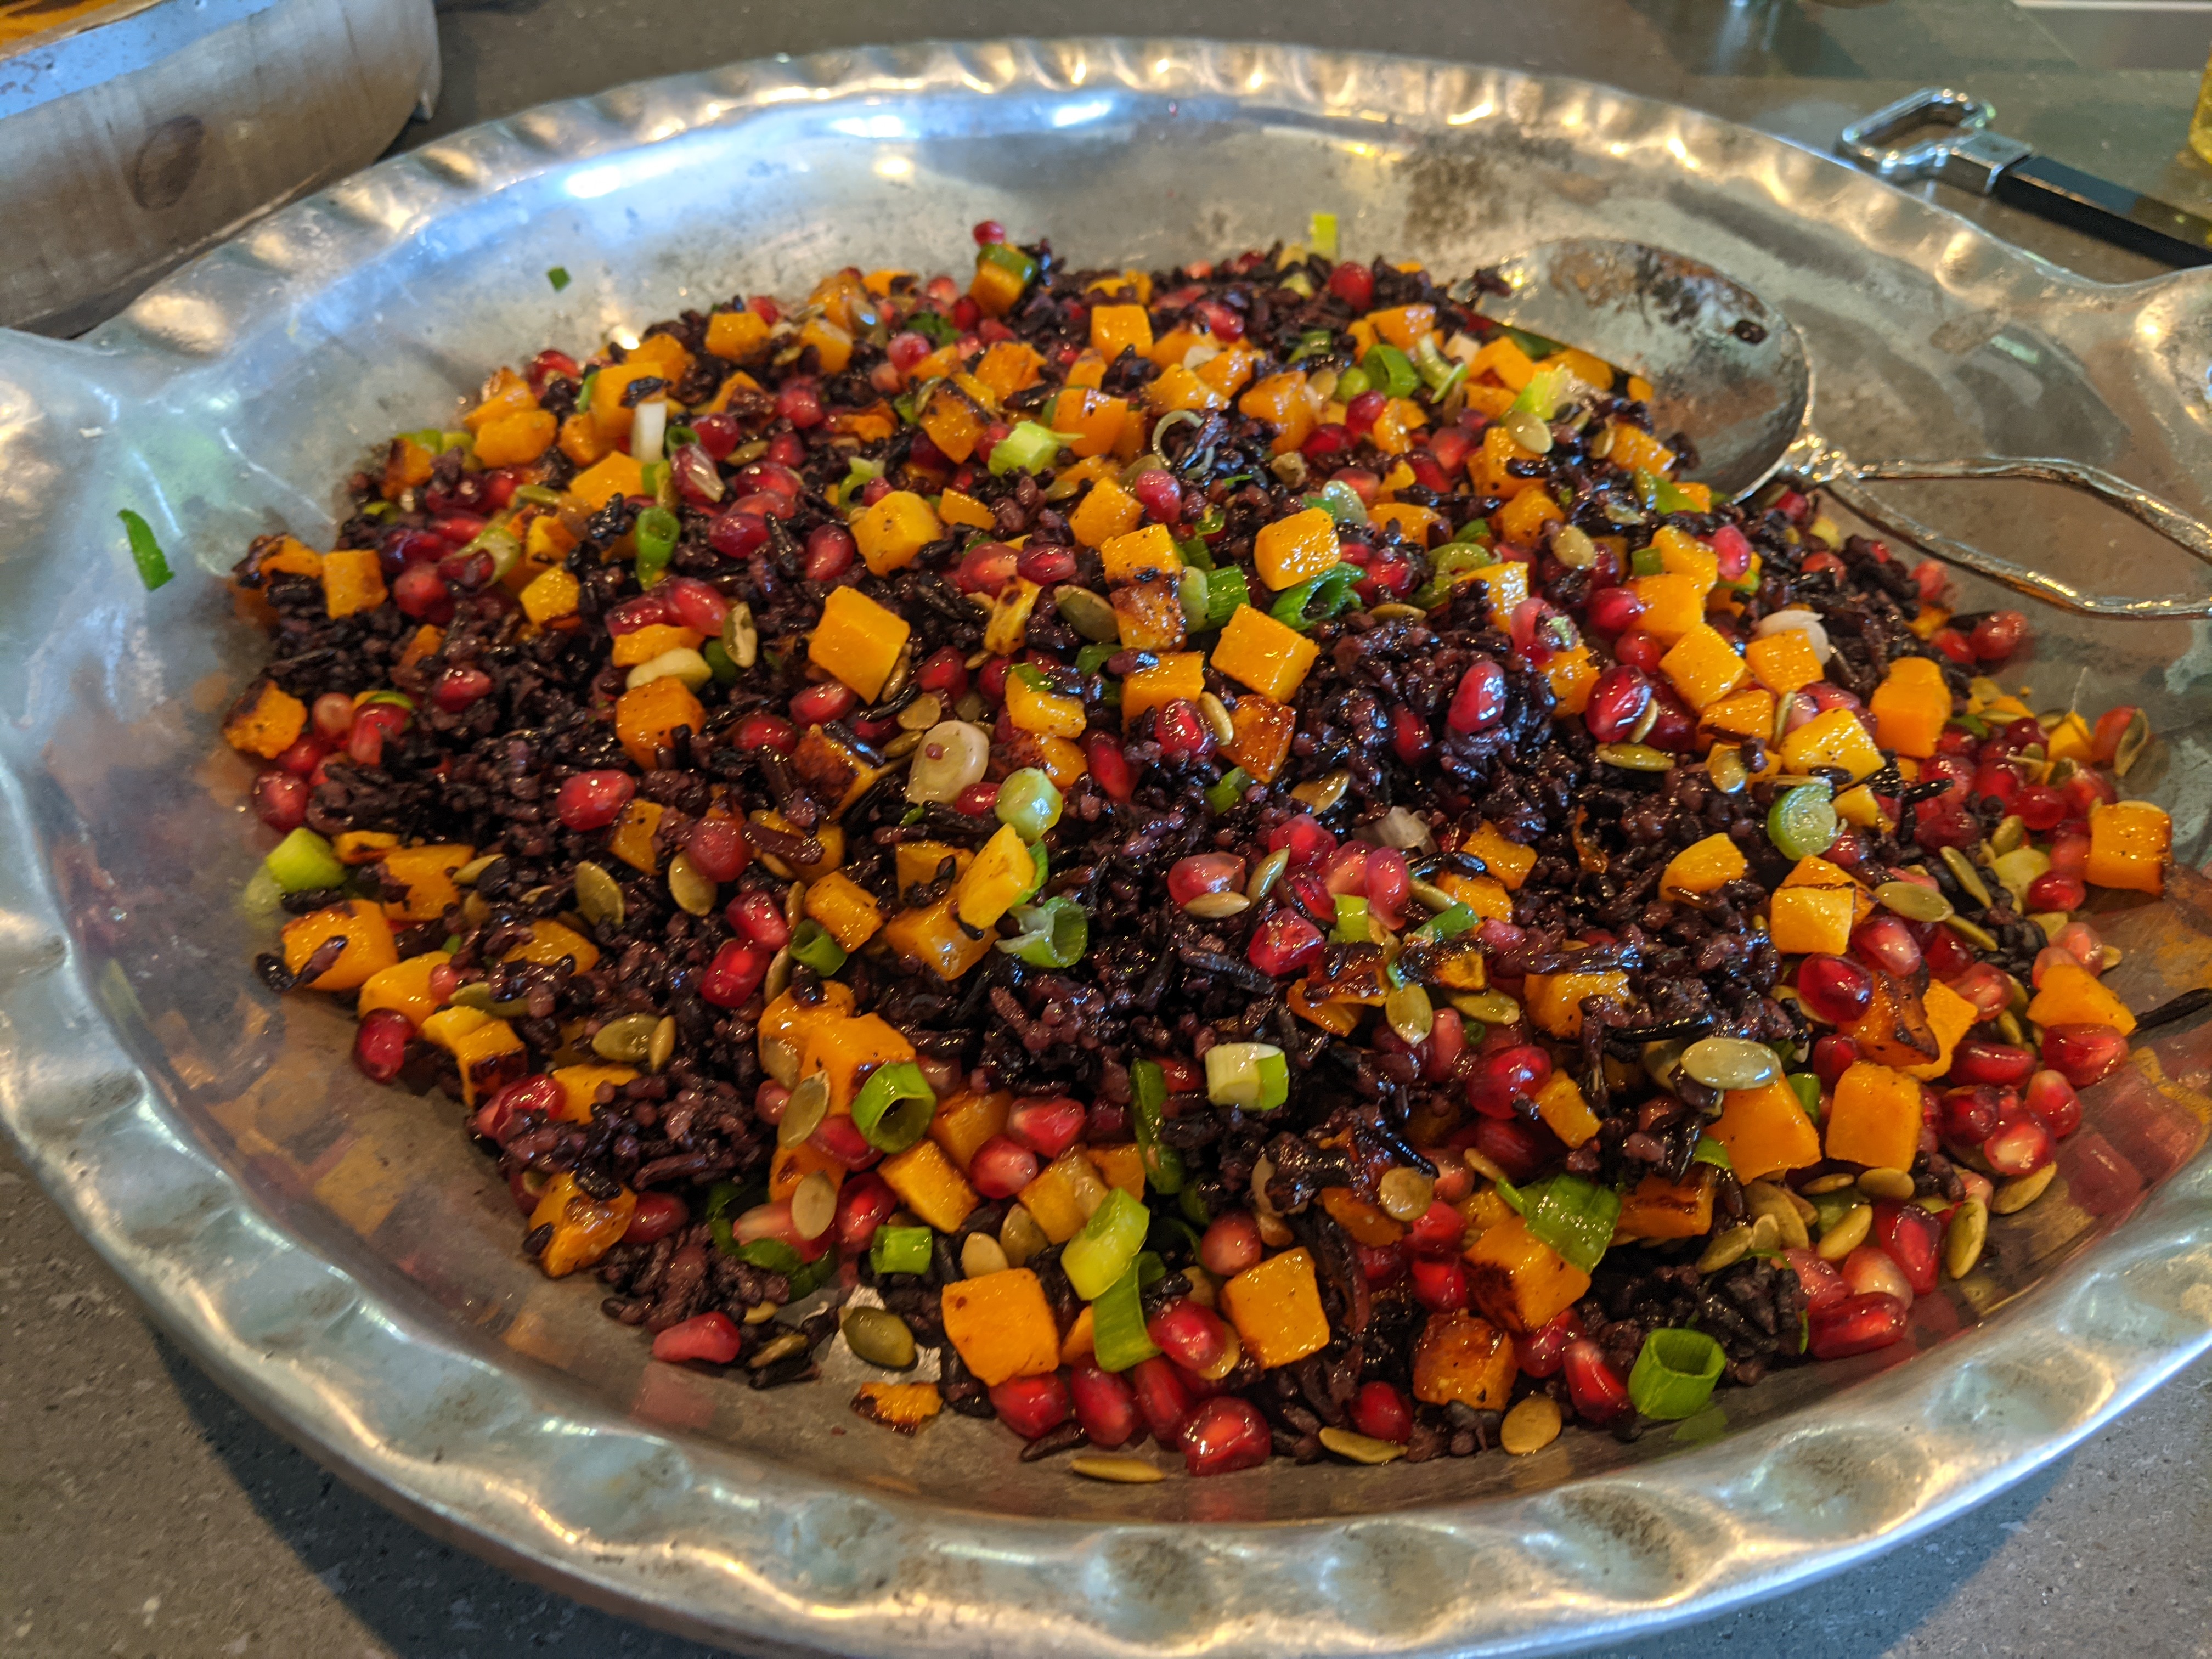
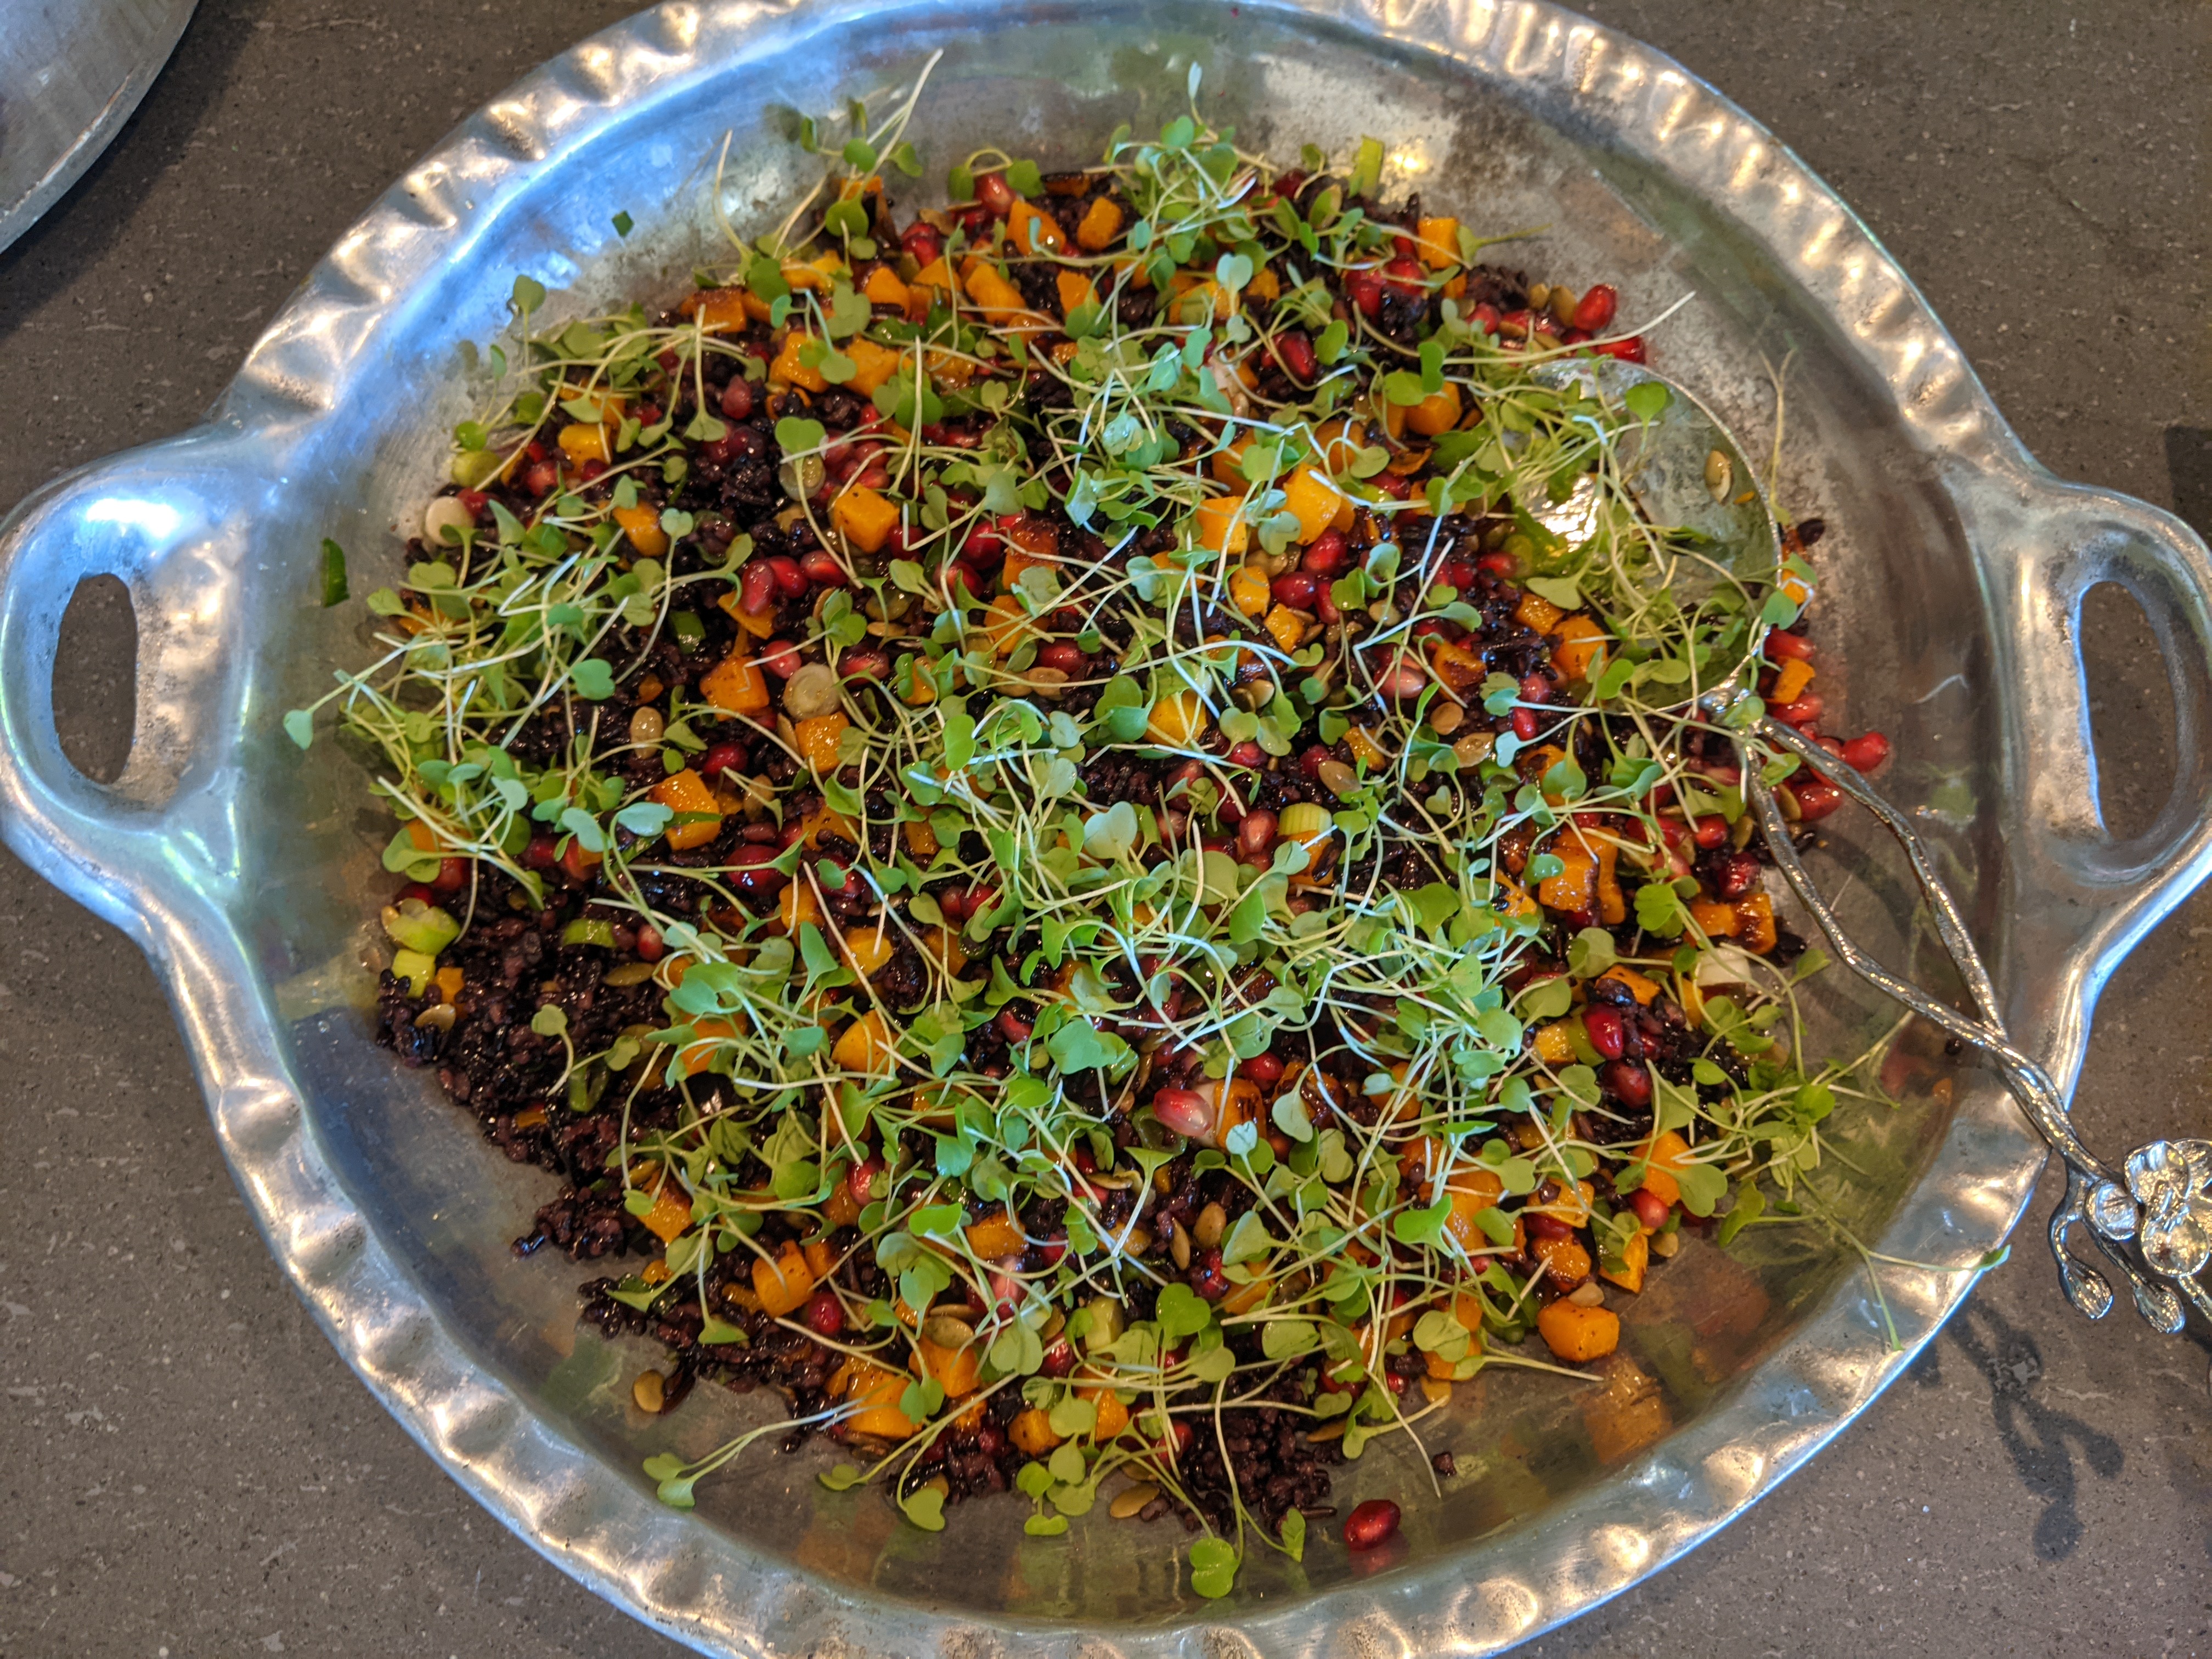
People often ask for food recommendations.  Here it is people –    one of my top five favorite dishes so far!  This is a Wow! dish. I have updated a few photos from this 2014 blog when Goodmotherdiet was only 2 months old and I was a newbie at food photography.  I can remember feeling it was a major accomplishment just to get a photo onto the blog regardless of quality. But I digress… Black and wild rice, roasted butternut squash, scallions, pumpkin seeds, pomegranate and microgreens, all topped with a yummy honey vinaigrette!  I have made this dish out of season with dried cranberries or cherries with good results but nothing compares to the zing and pop that you only get from pomegranate seeds.

I love this grain salad because it can serve as a main course or a hearty side dish. It’s fabulous as a party or buffet dish since it’s served at room temperature. It can be made ahead and you just toss it when ready to serve.

To see the original blog post click on the link: https://goodmotherdiet.com/2014/01/27/meatless-monday-black-wild-rice-with-roasted-squash/amp/ But check out the new photos and recipe below first to see all of the goodness that goes into this dish. -Joyce

BLACK AND WILD RICE SALAD WITH ROASTED BUTTERNUT SQUASH AND POMEGRANATE

  • 1 1/2  cup black rice
  • 1/2 cup wild rice
  • kosher salt
  • 1/2 medium or 1 small butternut squash
  • 1/2 cup olive oil (divided)
  • 1/4 cup red wine vinegar
  • 2 tsp honey
  • 2 scallions, thinly sliced
  • 1 cup pomegranate seeds
  • 1 cup microgreens (or parsley or cilantro)
  • 1/2 cup pistachios (or pepitas – shelled pumpkin seeds)
  1. Cook black rice and wild rice in a large pot of boiling water with about 4 cups vegetable broth or salted water about 35 minutes or until tender.  Remove from pot into a large bowl.
  2. Preheat oven to 450. Half, seed and peel the squash and cut into cubes.  I found a small squash so used the whole thing.  Place squash cubes in a baking dish and toss with 1/4 cup olive oil.  Season with salt and pepper.
  3. Roast squash 20 to 25 minutes, stirring a couple of times.  Remove from heat and let cool.
  4. Whisk vinegar, honey and 1/4 cup oil in a large bowl.  Add rice, squash, pomegranate, microgreens and pistachios; toss to combine.
  5. To make ahead, combine all ingredients except for dressing and microgreens and refrigerate. For serving, bring to room temperature, add dressing and microgreens and toss.

Meatless Monday -Vegan Mini Meatloaf

1

IMG_20200228_082920

Vegan meatloaf might not spring to mind as a delicious main course but I’m here to tell you it is….It’s reminiscent of my mother’s traditional meatloaf using Quaker Rolled Oats, onions, ketchup and Beyond Meat ground ‘beef’, cooked to a nice perfection and then topped with barbecue sauce for the last bit of cooking.  It’s pretty delicious.

IMG_20200227_143341

I was asked to come up with a vegan main course for a St. Patrick’s Day event where the main course was going to be corned beef.  This was a nice (and perhaps selfish)  challenge for me since even though I have gotten used to eating around the main course or making side dishes into dinner, its always nice to have a dinner option available.  Vegetarians and vegans are often in a pickle at parties where a vegetarian/vegan option isn’t being served.  We don’t want to be perceived as difficult or judgey, but then again we won’t eat the meat option and we are hungry too.  So when someone goes to the trouble to make sure there is something meat free , I am beyond grateful.

IMG_20200225_181007

I used to love my Mom’s meatloaf which was based on a Quaker Rolled Oats recipe from the 1960’s.  It was a huge hit in my house and now that there are so many good meat substitutes available, I decided to give meatloaf another whirl but using Beyond Meat ground beef substitute instead of actual ground beef. If you are interested in the health aspects or nutritional information, check out  Beyond Meat. I chose to make mini meatloaves because they are easier to serve than slicing, and they are darned cute.  You can use a mini meatloaf pan or hand form the meatloaves onto a glass baking dish or cooking sheet with a rim.

IMG_20200225_200111

You can also make a traditional large meatloaf using a loaf pan or free formed onto a baking dish.  This recipe is makes eight mini meatloaves. You can cut the recipe in half for four servings if you prefer.  Or you can make one large meatloaf.  Form meatloaf mixture with your hands into 10×6-inch loaf on glass baking dish or cooking sheet with a rim. Bake 50 to 55 minutes or until meatloaf is firm and has a nice crust. Add barbecue sauce for the last 10 or 15 minutes. Let stand 5 minutes to ensure easy slicing.

I used real eggs as a binder, compliments of my backyard rescue chickens whom I consider ambassadors for all factory animals. Here’s my sister, Margaret, with Margaret the chicken. Aren’t they cute?  Check out their facebook page Mrs V’s Rescue Chickens.   If you aren’t lucky enough to have access to pasture raised chicken eggs or you don’t use eggs at all, there are really good options beyond making a flax egg (1 Tablespoon flax seeds to 3 Tablespoons water equals 1 egg).  I have had success using Just Egg but there is also Follow Your Heart and Red Hill Egg Replacer neither of which I have tried.

Tips:

Mini meatloaves can be made ahead of time, which is a nice time saver if you are hosting an event.  Uncooked loaves can be covered in plastic wrap and kept in the refrigerator for a few days until you are ready to cook.  Just bring to room temperature before cooking to ensure even cooking.  Cooked meatloaves can be frozen for about three months and microwave well once defrosted.

IMG_20200227_143231

VEGAN MEATLOAF

  • 1 Tbsn olive oil
  • 1 large onion, chopped
  • 2 pkgs of @beyondmeat Beyond Burgers  (2 lbs)
  • 1/3 cup vegetable broth
  • 2 eggs or vegan egg substitute (*see note)
  • 1 Tbsp Worcestershire Sauce or gf soy sauce
  • 1/2 cup Ketchup
  • 1 1/2 cup rolled oats
  • 1 tsp Garlic Powder
  • 1 tsp of Onion Powder
  • 3/4 tsp Salt
  • 1/4 tsp Black Pepper
  • 1/2 – 3/4 cup barbecue sauce

IMG_20200225_181409

  • Saute the chopped onions in olive oil until tender, remove from heat and let cool.

IMG_20200225_182302

  • Combine all ingredients except for barbecue sauce in a large bowl.

IMG_20200225_182453

  • Mix well using a large wooden spoon (or I prefer to use my hands)

IMG_20200225_182959

  • Divide the mixture into eight parts and form them into small loaves and place on an oiled baking sheet, or spoon into oiled mini loaf pans, forming a rounded top on each one.

IMG_20200225_193242

  • Bake at 400 degrees for 20 minutes, spread with barbecue sauce or ketchup and cook another 15 minutes,

IMG_20200227_143231

Vegan Mini Meatloaves

  • Servings: 8
  • Difficulty: easy
  • Print

IMG_20200227_143231

  • 1 Tbsn olive oil
  • 1 large onion, chopped
  • 2 pkgs of @beyondmeat Beyond Burgers  (2 lbs)
  • 1/3 cup vegetable broth
  • 2 eggs or egg substitute (*see note)
  • 1 Tbsp Worcestershire Sauce or soy sauce
  • 1/2 cup Ketchup
  • 1 1/2 cup rolled oats
  • 1 tsp Garlic Powder
  • 1 tsp of Onion Powder
  • 3/4 tsp Salt
  • 1/4 tsp Black Pepper
  • 1/2 – 3/4 cup barbecue sauce or ketchup


  1. Saute the chopped onions in olive oil until tender, remove from heat and let cool.
  2. Combine all ingredients except for barbecue sauce in a large bowl.
  3. Mix well using a large wooden spoon (or I prefer to use my hands)
  4. Divide the mixture into eight parts and form them into small loaves and place on an oiled baking sheet, or spoon into oiled mini loaf pans, forming a rounded top on each one.
  5. Bake at 400 degrees for 20 minutes, spread with barbecue sauce or ketchup and cook another 15 minutes,


Meatless Monday-Roasted Cauliflower Steaks with Balsamic Drizzle

2


IMG_20200209_191125

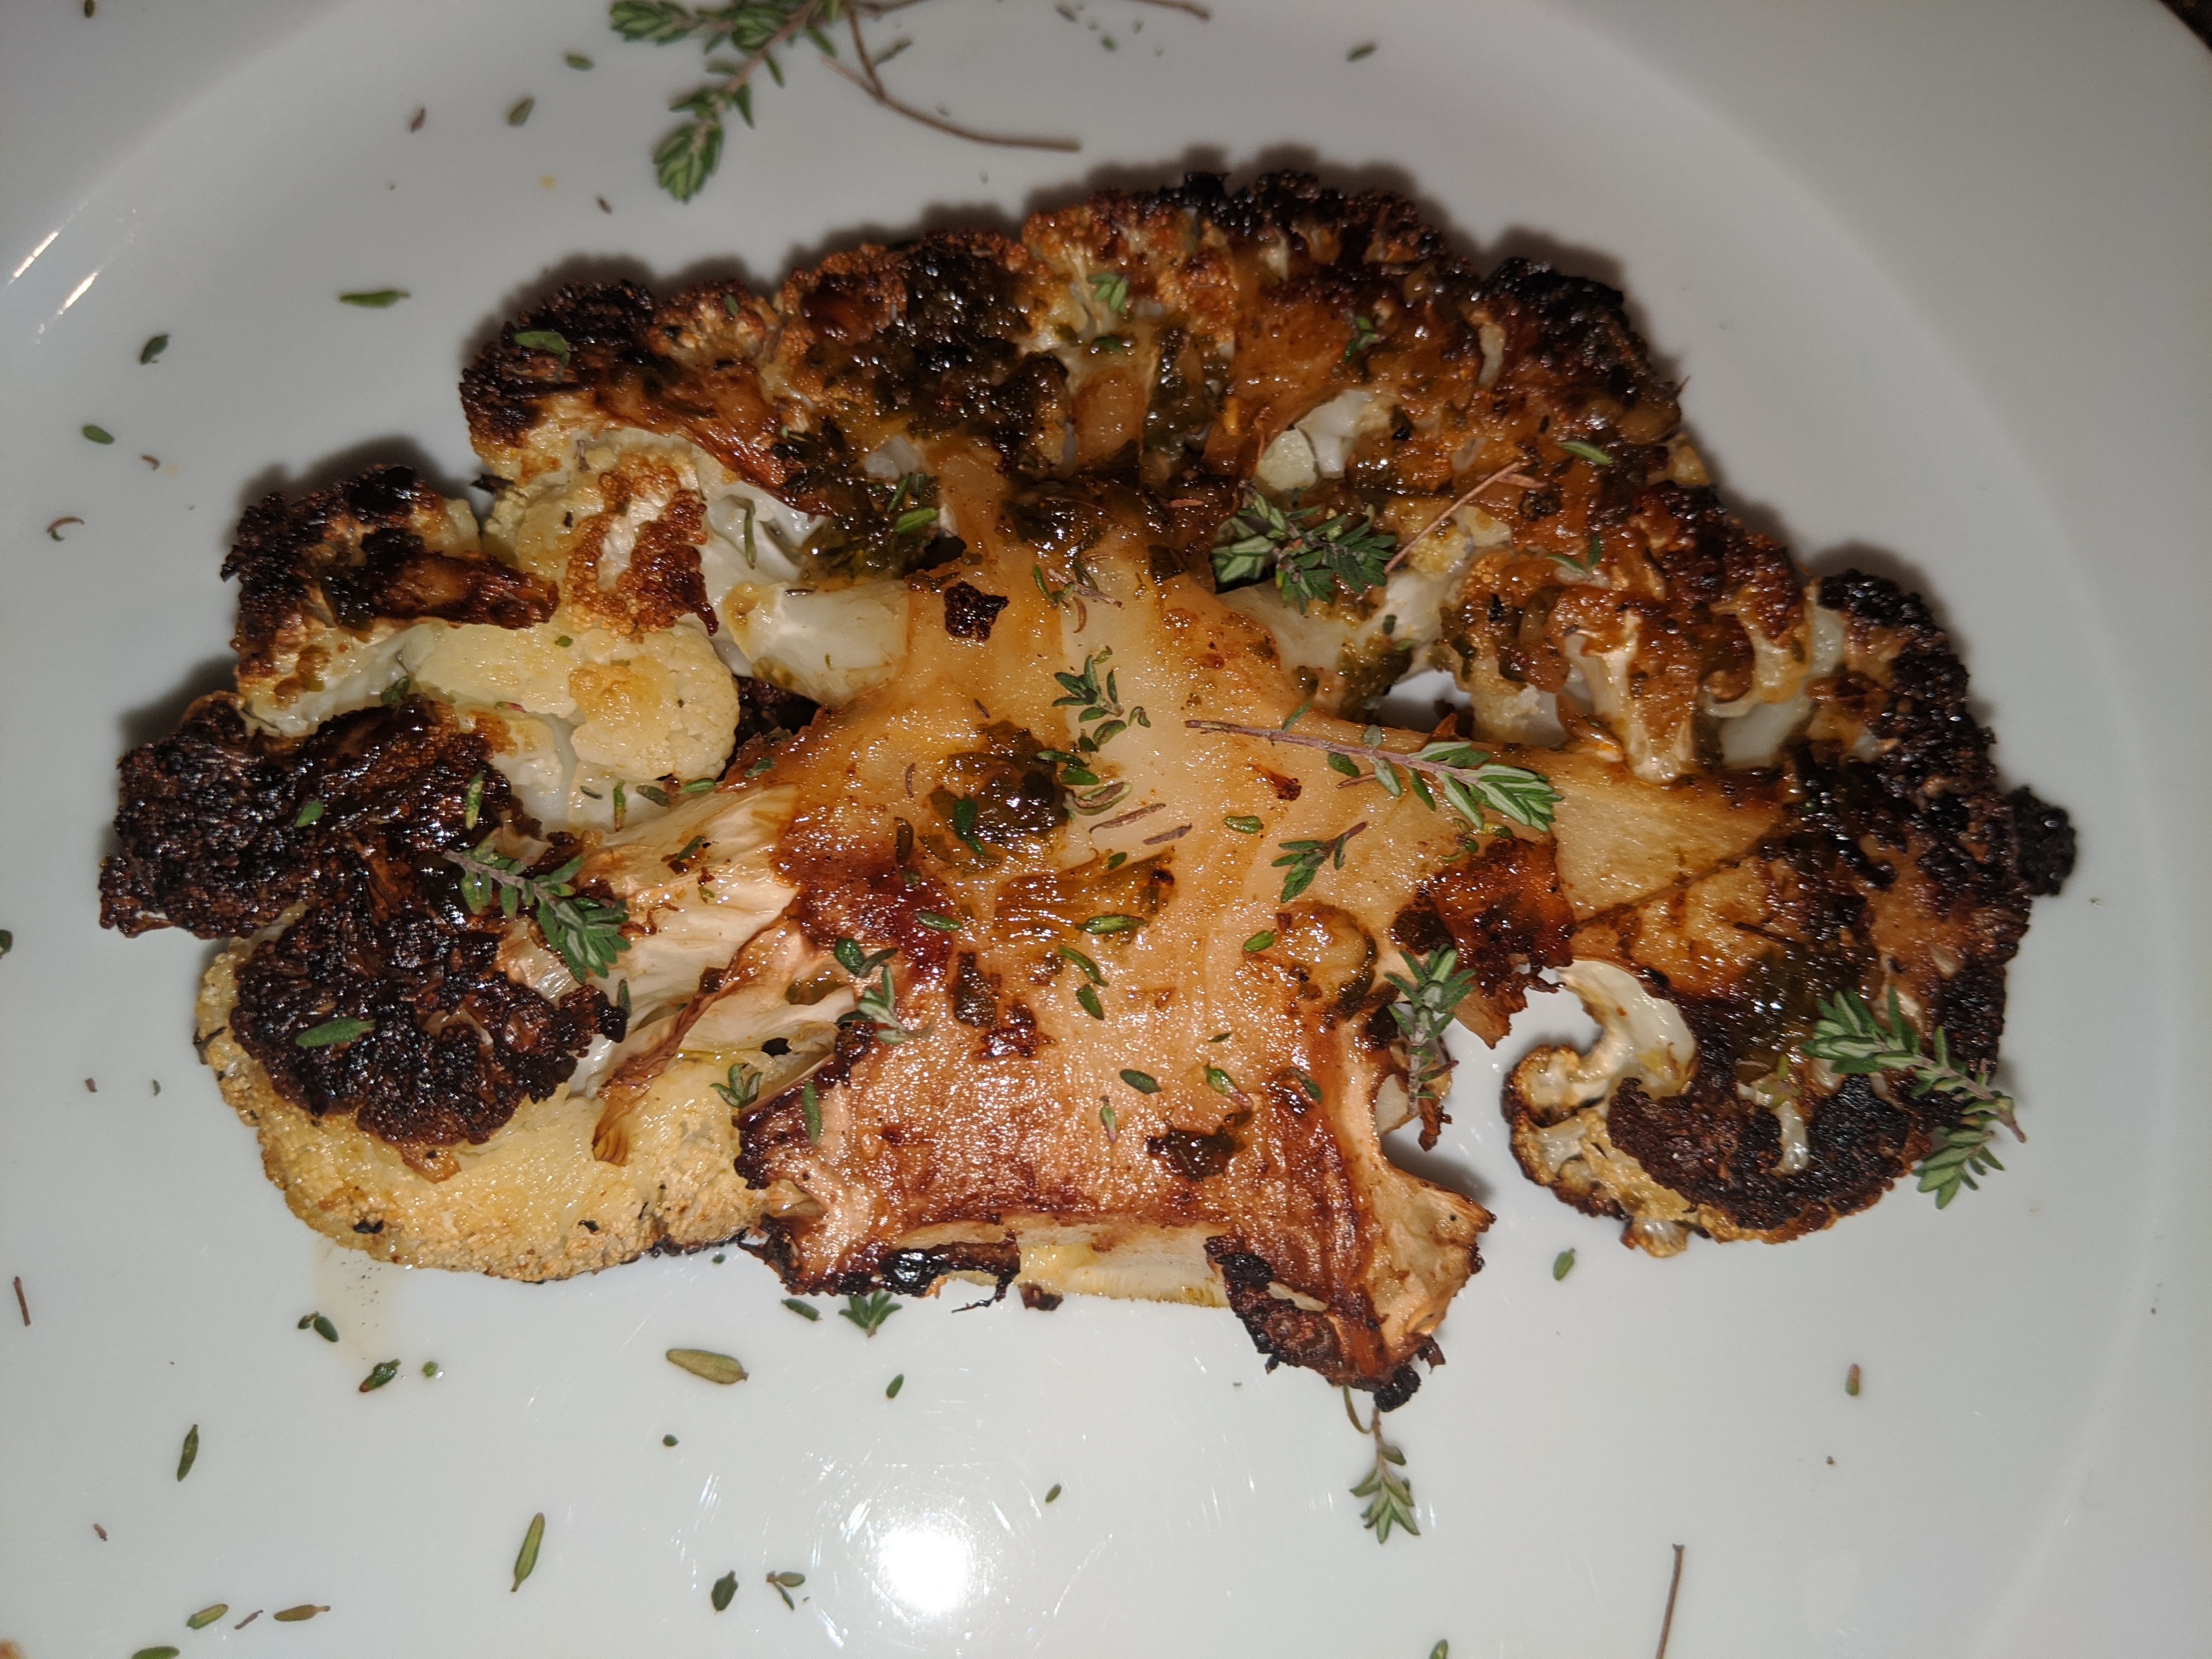
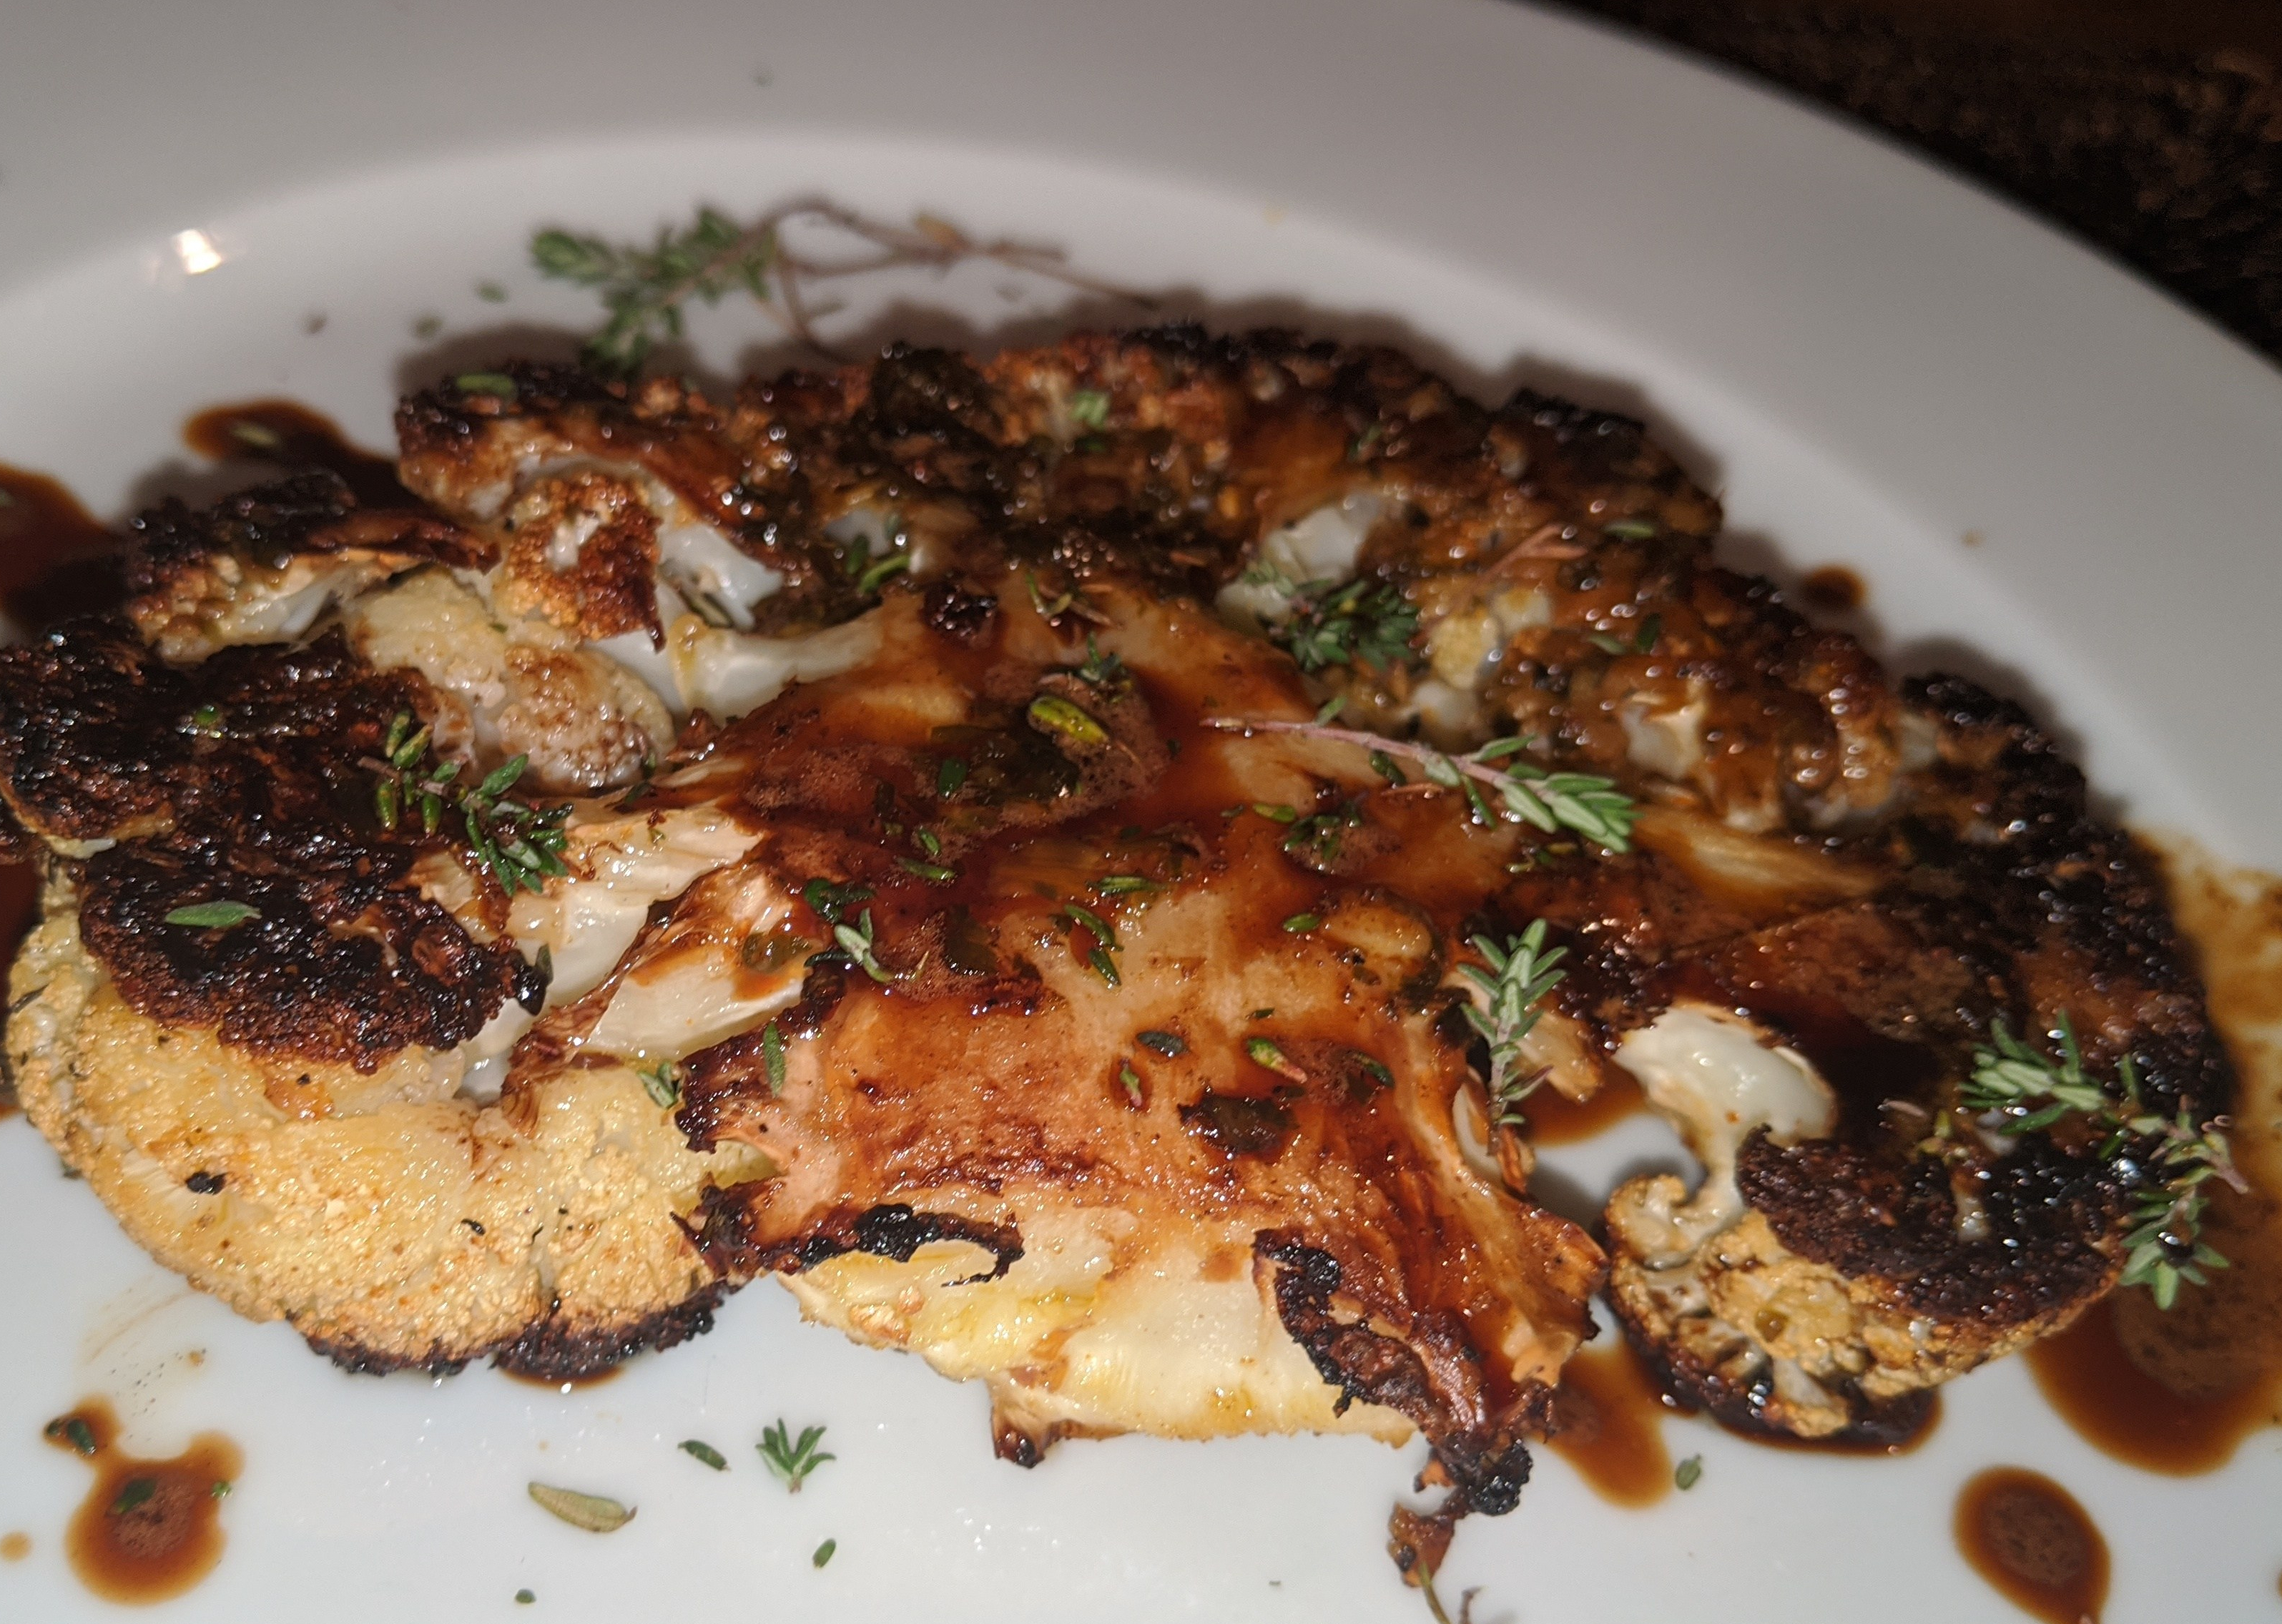
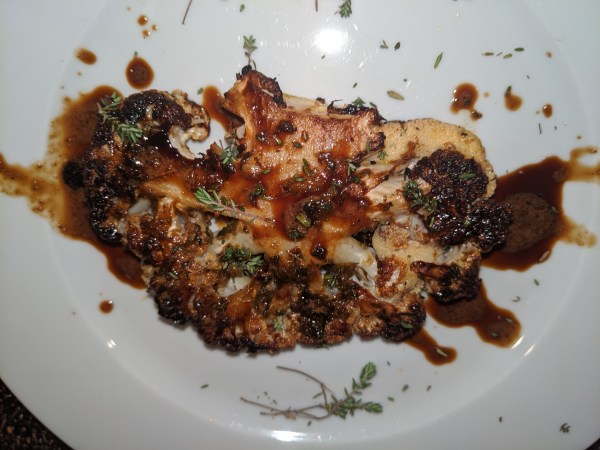
Move over portobello mushrooms, Cauliflower Steak is the hot new vegan main course, and rightly so.  Cauliflower is the chameleon of vegetables and can become whatever you want it to be.  In this case, it takes center stage as a beautiful plant based steak with a caramelized crust and drizzled with a balsamic reduction.  Infused with herbs and smoked paprika, it is delicious and surprisingly hearty and done in 30 minutes.  I recommend serving over rice or couscous to soak up the delicious juices.

IMG_20200209_174745

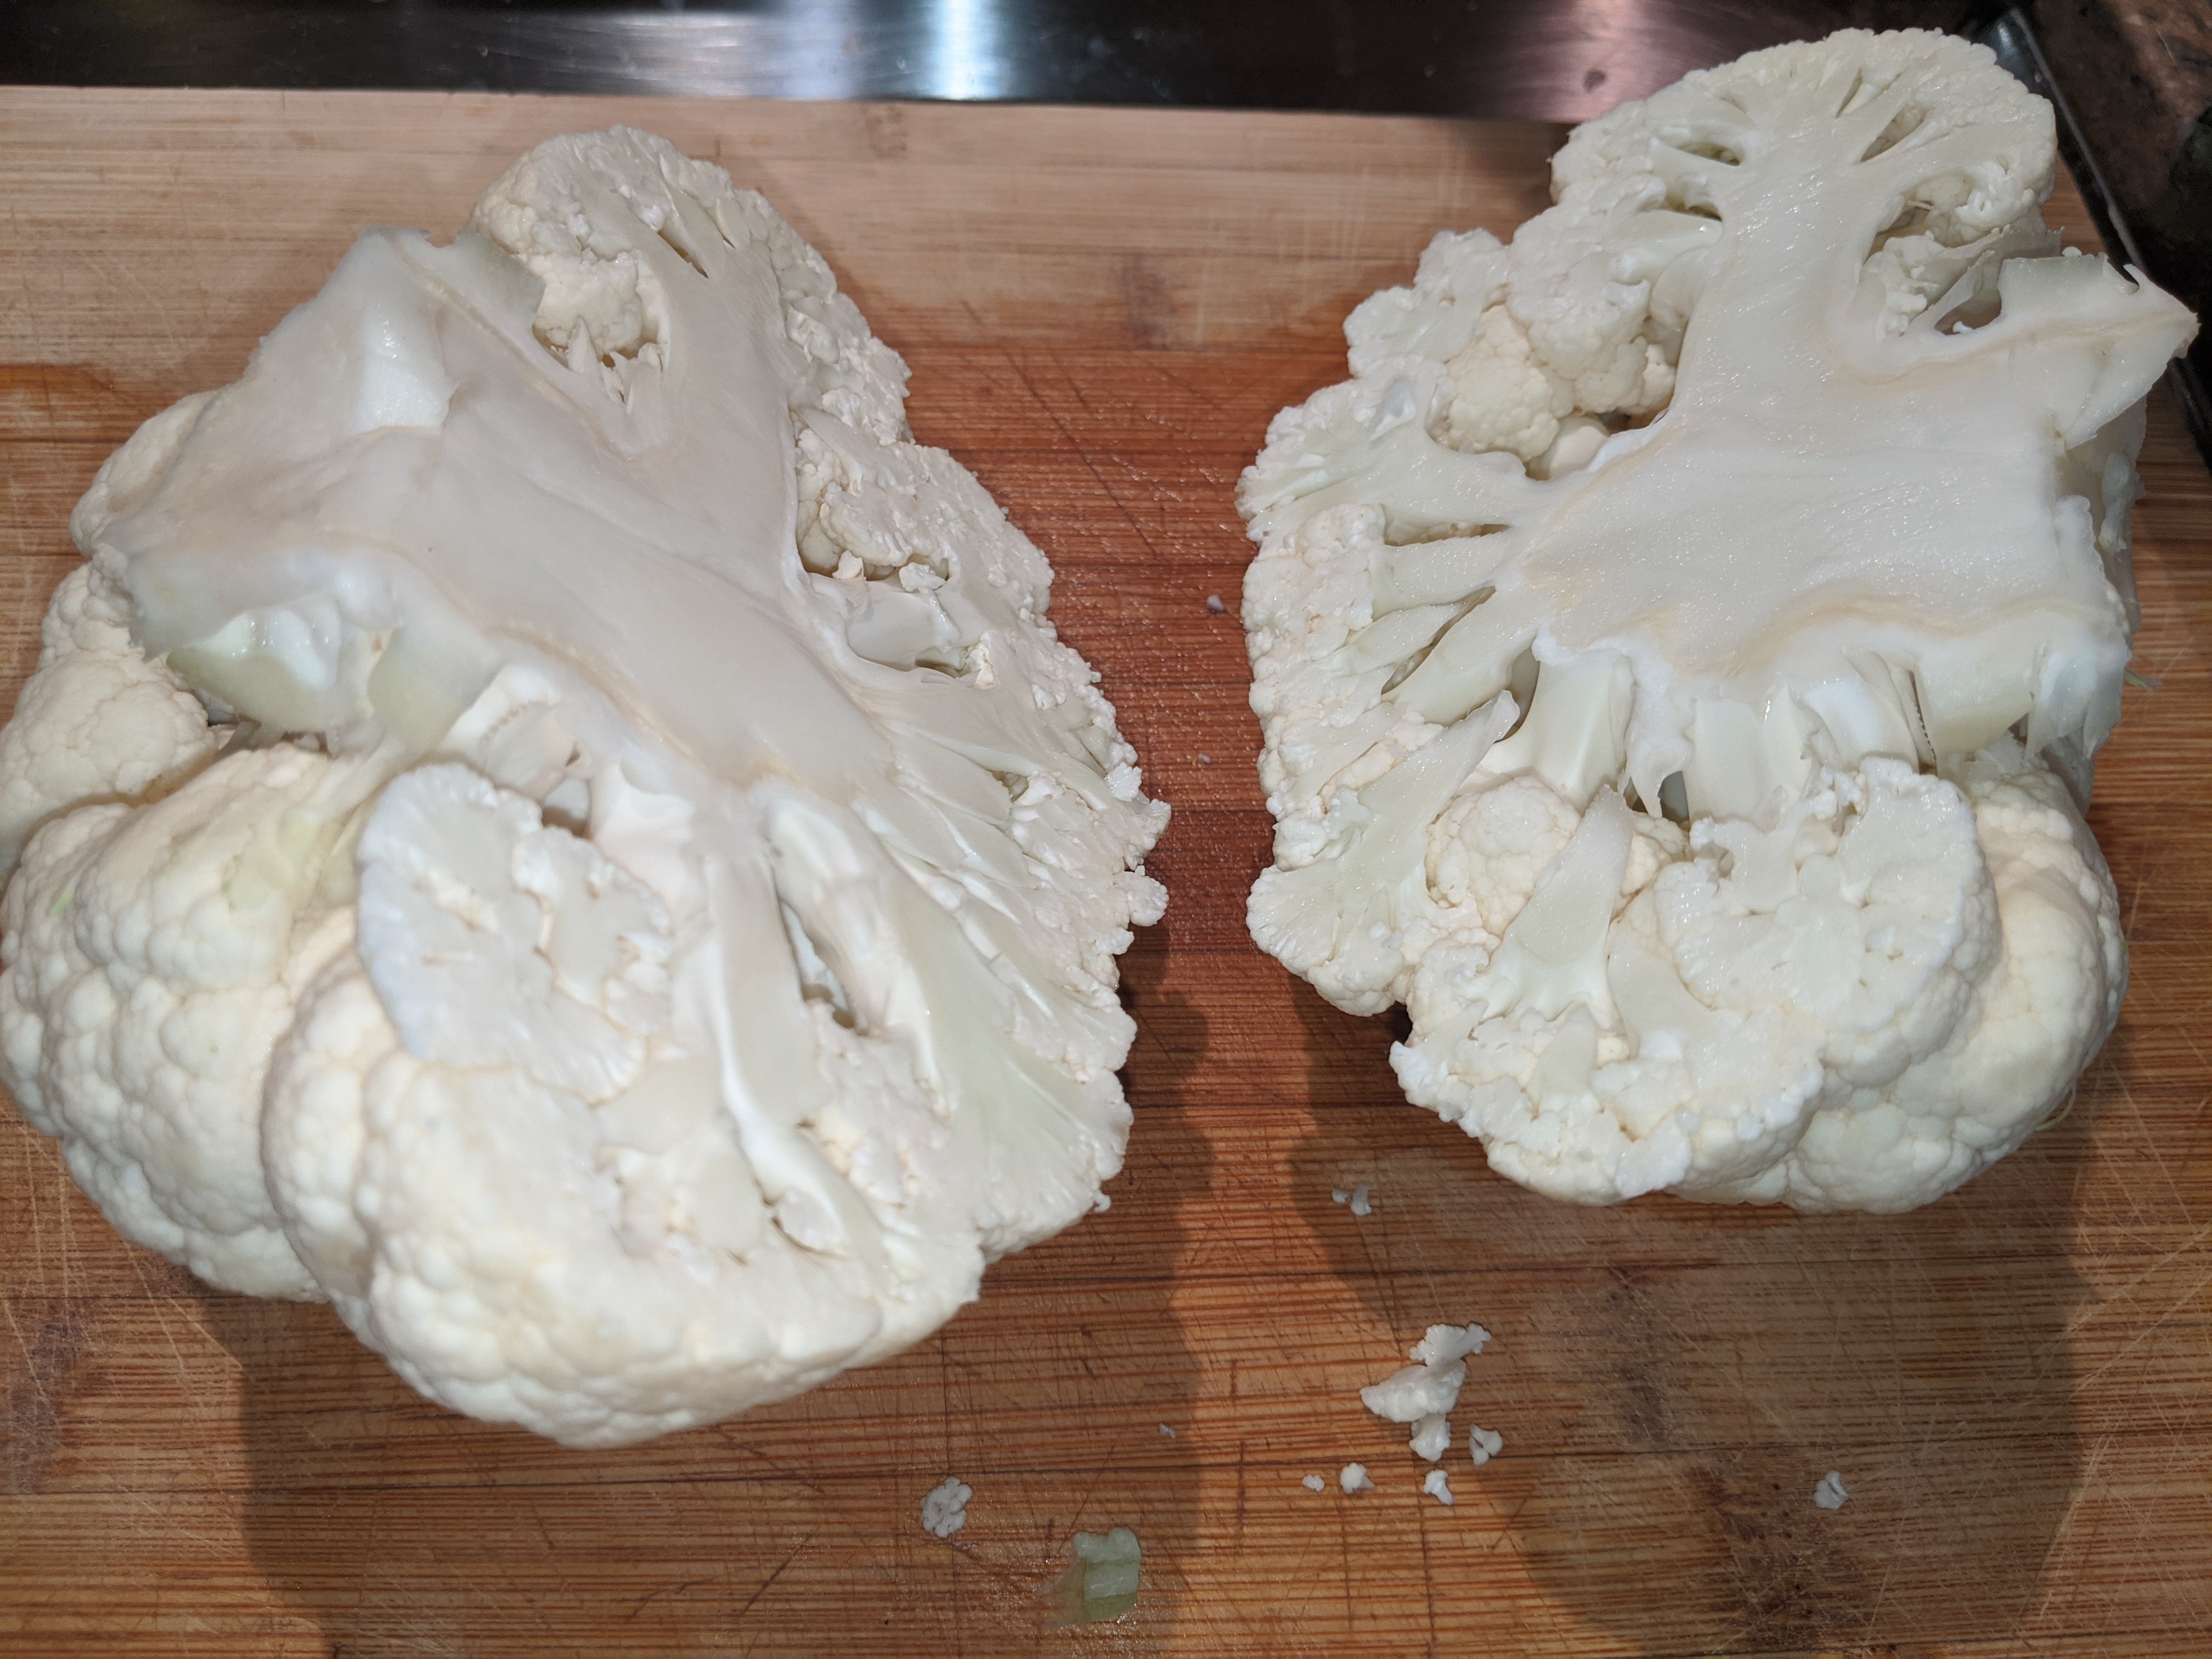
When buying cauliflower, choose a head that is firm and heavy.  A lighter head will probably fall apart when you try to cut thick slices.  As it is, I plan on two steaks per head.  Sometimes I get lucky and get two more smaller ones but sometimes its mostly florets, which are still delicious but don’t have the same presentation.  If you are lucky enough to have your outside pieces stay together, cut off the curved edges so both sides can properly caramelize. This recipe serves two to three people but the sauce recipe can easily be doubled using two heads of cauliflower.
IMG_20200209_191239

TIP:  The trick to getting the proper caramelization or sear on the cauliflower is by managing the heating element of your oven.  Preheat your oven to a warm 300 and then increase the heat to get the element going again when you put the cauliflower in to roast.  Your baking sheet should be in the bottom third of the oven and close to the element. The key is to keep the element hot as ovens are designed to bake everything and keep the oven at a constant temperature, which means the heat source turns off as the desired heat is achieved, but we definitely want the heat to stay on.  Think of it as broiling in reverse…

IMG_20200209_175134

For my nutrition and health conscious friends who want to delve deeper into the goodness of cauliflower, here is an article that lists 8 Amazing Health Benefits of Cauliflower including heart and brain health. One serving of cauliflower contains 77 percent of the recommended daily value of vitamin C, vitamins and anti oxidants. Surprisingly, it is also an anti inflammatory and a good detoxifyer so don’t be surprised if you see cauliflower start showing up in even more foods…  Check my  recipes below that feature cauliflower.

CLICK THROUGH FOR MORE CAULIFLOWER RECIPES:

‘Chicken’ Fried Cauliflower Steaks with Creamy Mash

Cheesy Cauliflower Breadsticks

Spice Crusted Whole Roasted Cauliflower

Parmesan Roasted Cauliflower

Cauliflower Mac and Cheese

Pizza with Cauliflower Crust

Cauliflower Leek Soup

Spaghetti with Cauliflower, Capers and Lemon

IMG_20200209_191252

ROASTED CAULIFLOWER STEAKS WITH BALSAMIC REDUCTION

  • One head of cauliflower (makes 2 steaks)
  • 1/3 cup olive oil
  • 3 cloves garlic, minced
  • 1/2 tsp salt
  • 1/2 tsp fresh pepper
  • 2 tsp dried Italian herb mix
  • 1 Tbsn fresh thyme
  • 1 tsp smoked paprika
  • 1/2 cup balsamic vinegar
  • 1 tsp honey or agave nectar (optional)

IMG_20200209_175030

  • Preheat your oven to 300°F  . Remove leaves from stem end of cauliflower, leaving the core intact.

IMG_20200209_175239

  • Place cauliflower core side down on cutting board and slice in half with a large knife. Carefully slice a one inch thick steak from the center of each half. You will be left with two smaller steaks or possibly some florets.  Slice the rounded edges off for better caramelizing.

IMG_20200209_181742

  • Combine olive oil, garlic, salt, pepper, herbs, and 2 tsp of the thyme into a bowl.

IMG_20200209_182428

  • Spray or brush a baking sheet with olive oil and arrange the cauliflower steaks along with smaller piecesBrush the cauliflower slices generously on both sides with this mixture.

IMG_20200209_190103

  • Turn the oven up to 425°F and place the baking sheet in the lower third of the oven near the element.  Roast in the oven for 10 to 15 minutes, until the bottoms are golden brown. Carefully turn over the steaks and spread any remaining olive oil mixture on the top. (optional)


  • While the cauliflower is roasting, pour balsamic vinegar in a small saucepan.  Stir in honey, if using, and bring to a boil.  Lower heat and simmer for about 10 to 15 minutes until thickened.  Remove from heat and let cool.

IMG_20200209_190717

  • Continue roasting another 8 to 10 minutes to caramelize the other side.  Smaller florets may need to be removed to a platter earlier.  If the heating element on your oven turns off, increase the temperature to 450°F. When the cauliflower steaks are done, remove from oven and transfer onto a serving platter or individual serving plates.

IMG_20200209_191239

  • Sprinkle with additional fresh thyme leaves and drizzle with balsamic reduction.
 

Roasted Cauliflower Steaks with Balsamic

  • Servings: 2-3
  • Difficulty: easy
  • Print
IMG_20200209_191245

  • One head of cauliflower (makes 2 steaks)
  • 1/3 cup olive oil
  • 3 cloves garlic, minced
  • 1/2 tsp salt
  • 1/2 tsp fresh pepper
  • 2 tsp dried Italian herb mix
  • 1 Tbsn fresh thyme (divided)
  • 1 tsp smoked paprika
  • 1/2 cup balsamic vinegar
  • 1 tsp honey or agave nectar
  1. Preheat your oven to 300°F  . Remove leaves from stem end of cauliflower, leaving the core intact. Place cauliflower core side down on cutting board and slice in half with a large knife.
  2. Carefully slice a one inch thick steak from the center of each half. You will be left with two smaller steaks or possibly some florets.  Slice the rounded edge off for better caramelizing.
  3. Spray or brush a baking sheet with olive oil and arrange the cauliflower steaks along with smaller pieces.
  4. Combine olive oil, garlic, salt, pepper, herbs, and 2 tsp of the thyme into a bowl.
  5. Brush the cauliflower slices generously on both sides with this mixture.
  6. Turn the oven to 425°F and place the baking sheet in the lower third of the oven near the element.  Roast in the oven for 10 to 15 minutes, until the bottoms are golden brown. Carefully turn over the steaks and spread any remaining olive oil mixture on the top. (optional)
  7. While the cauliflower is roasting, pour balsamic vinegar in a small saucepan.  Stir in honey, if using, and bring to a boil.  Lower heat and simmer for about 10 minutes until thickened.  Remove from heat and let cool.
  8. Continue roasting another 8 to 10 minutes to caramelize the other side.  If the heating element on your oven turns off, increase the temperature to 450°F
  9. When the cauliflower steaks are done, remove from oven and transfer onto individual serving plates. Sprinkle with additional fresh thyme leaves and drizzle with balsamic reduction.
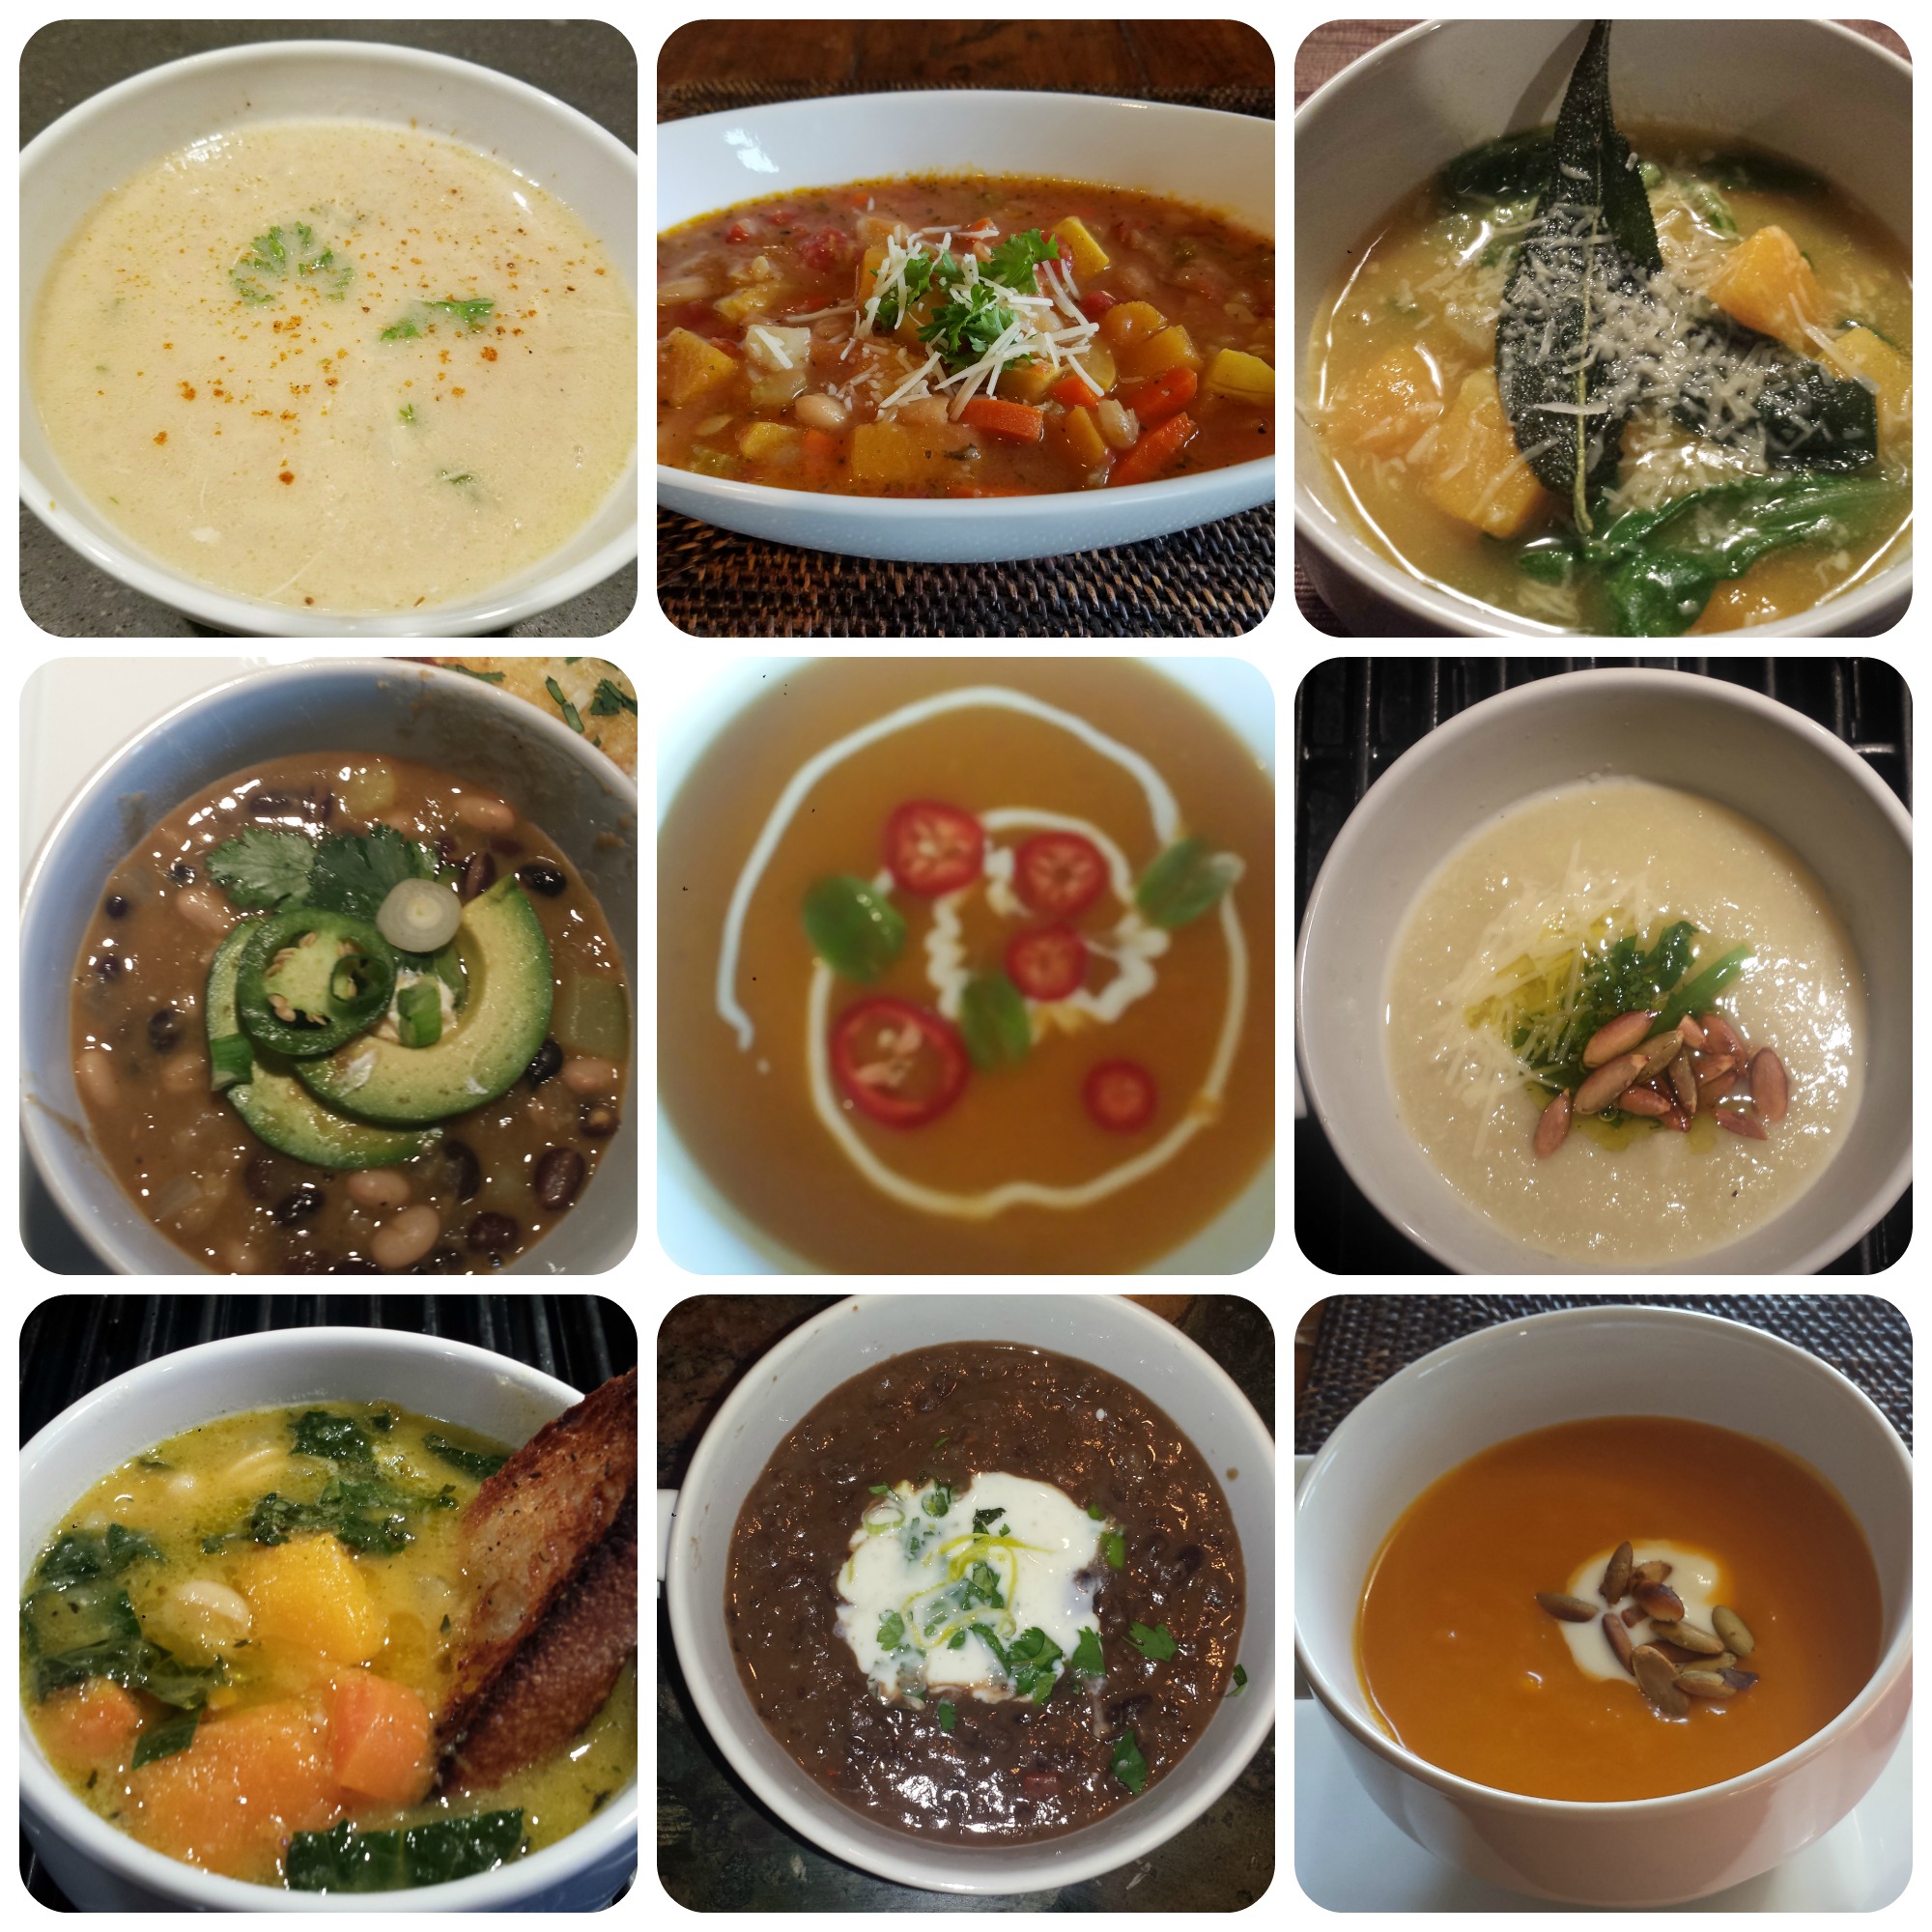
12 Vegetarian and Vegan Soups

3


picmonkey-collage-1

Thanksgiving is over but Soup Season has just begun. Brrr… Soup is the ultimate comfort food for cold, rainy or snowy days.  It’s hot, steamy goodness warms you up from the inside out. Click through for a collection of 16 of my favorite soups. Mmm, so good!  All soups are vegetarian or vegan (or easily adapted for vegans) and gluten and wheat free.  Since they are meat free, they are naturally low in calories but nutrient dense, so fill up your belly guilt free!  Each link will send you to the recipe and original blog post. Sharing is caring. -J

20161129_193648

Creamy Mushroom Soup (Vegan)

20170209_185822

Thai Red Curry Soup

20161215_183530

Hot and Sour Soup

20160320_185849

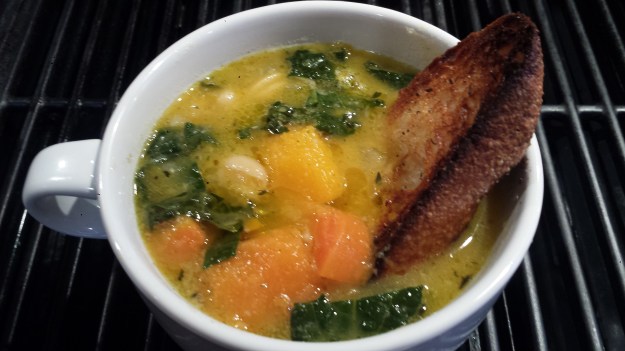
Tuscan Bean Soup with Squash and Kale

Cauliflower Leek Soup2

Creamy Cauliflower Leek Soup

Black Bean Soup1

Spicy Black Bean Soup

CArrot Sweet Potato Soup1

Carrot, Sweet Potato Soup with Turmeric

20160122_135925

Ginger Miso Tofu Noodle Bowl

Mushroom Barley Soup 1

Mushroom and Barley Soup with Cannelini Beans

20161015_123034

Fall Harvest Minestrone

Autumn Harvest Soup11

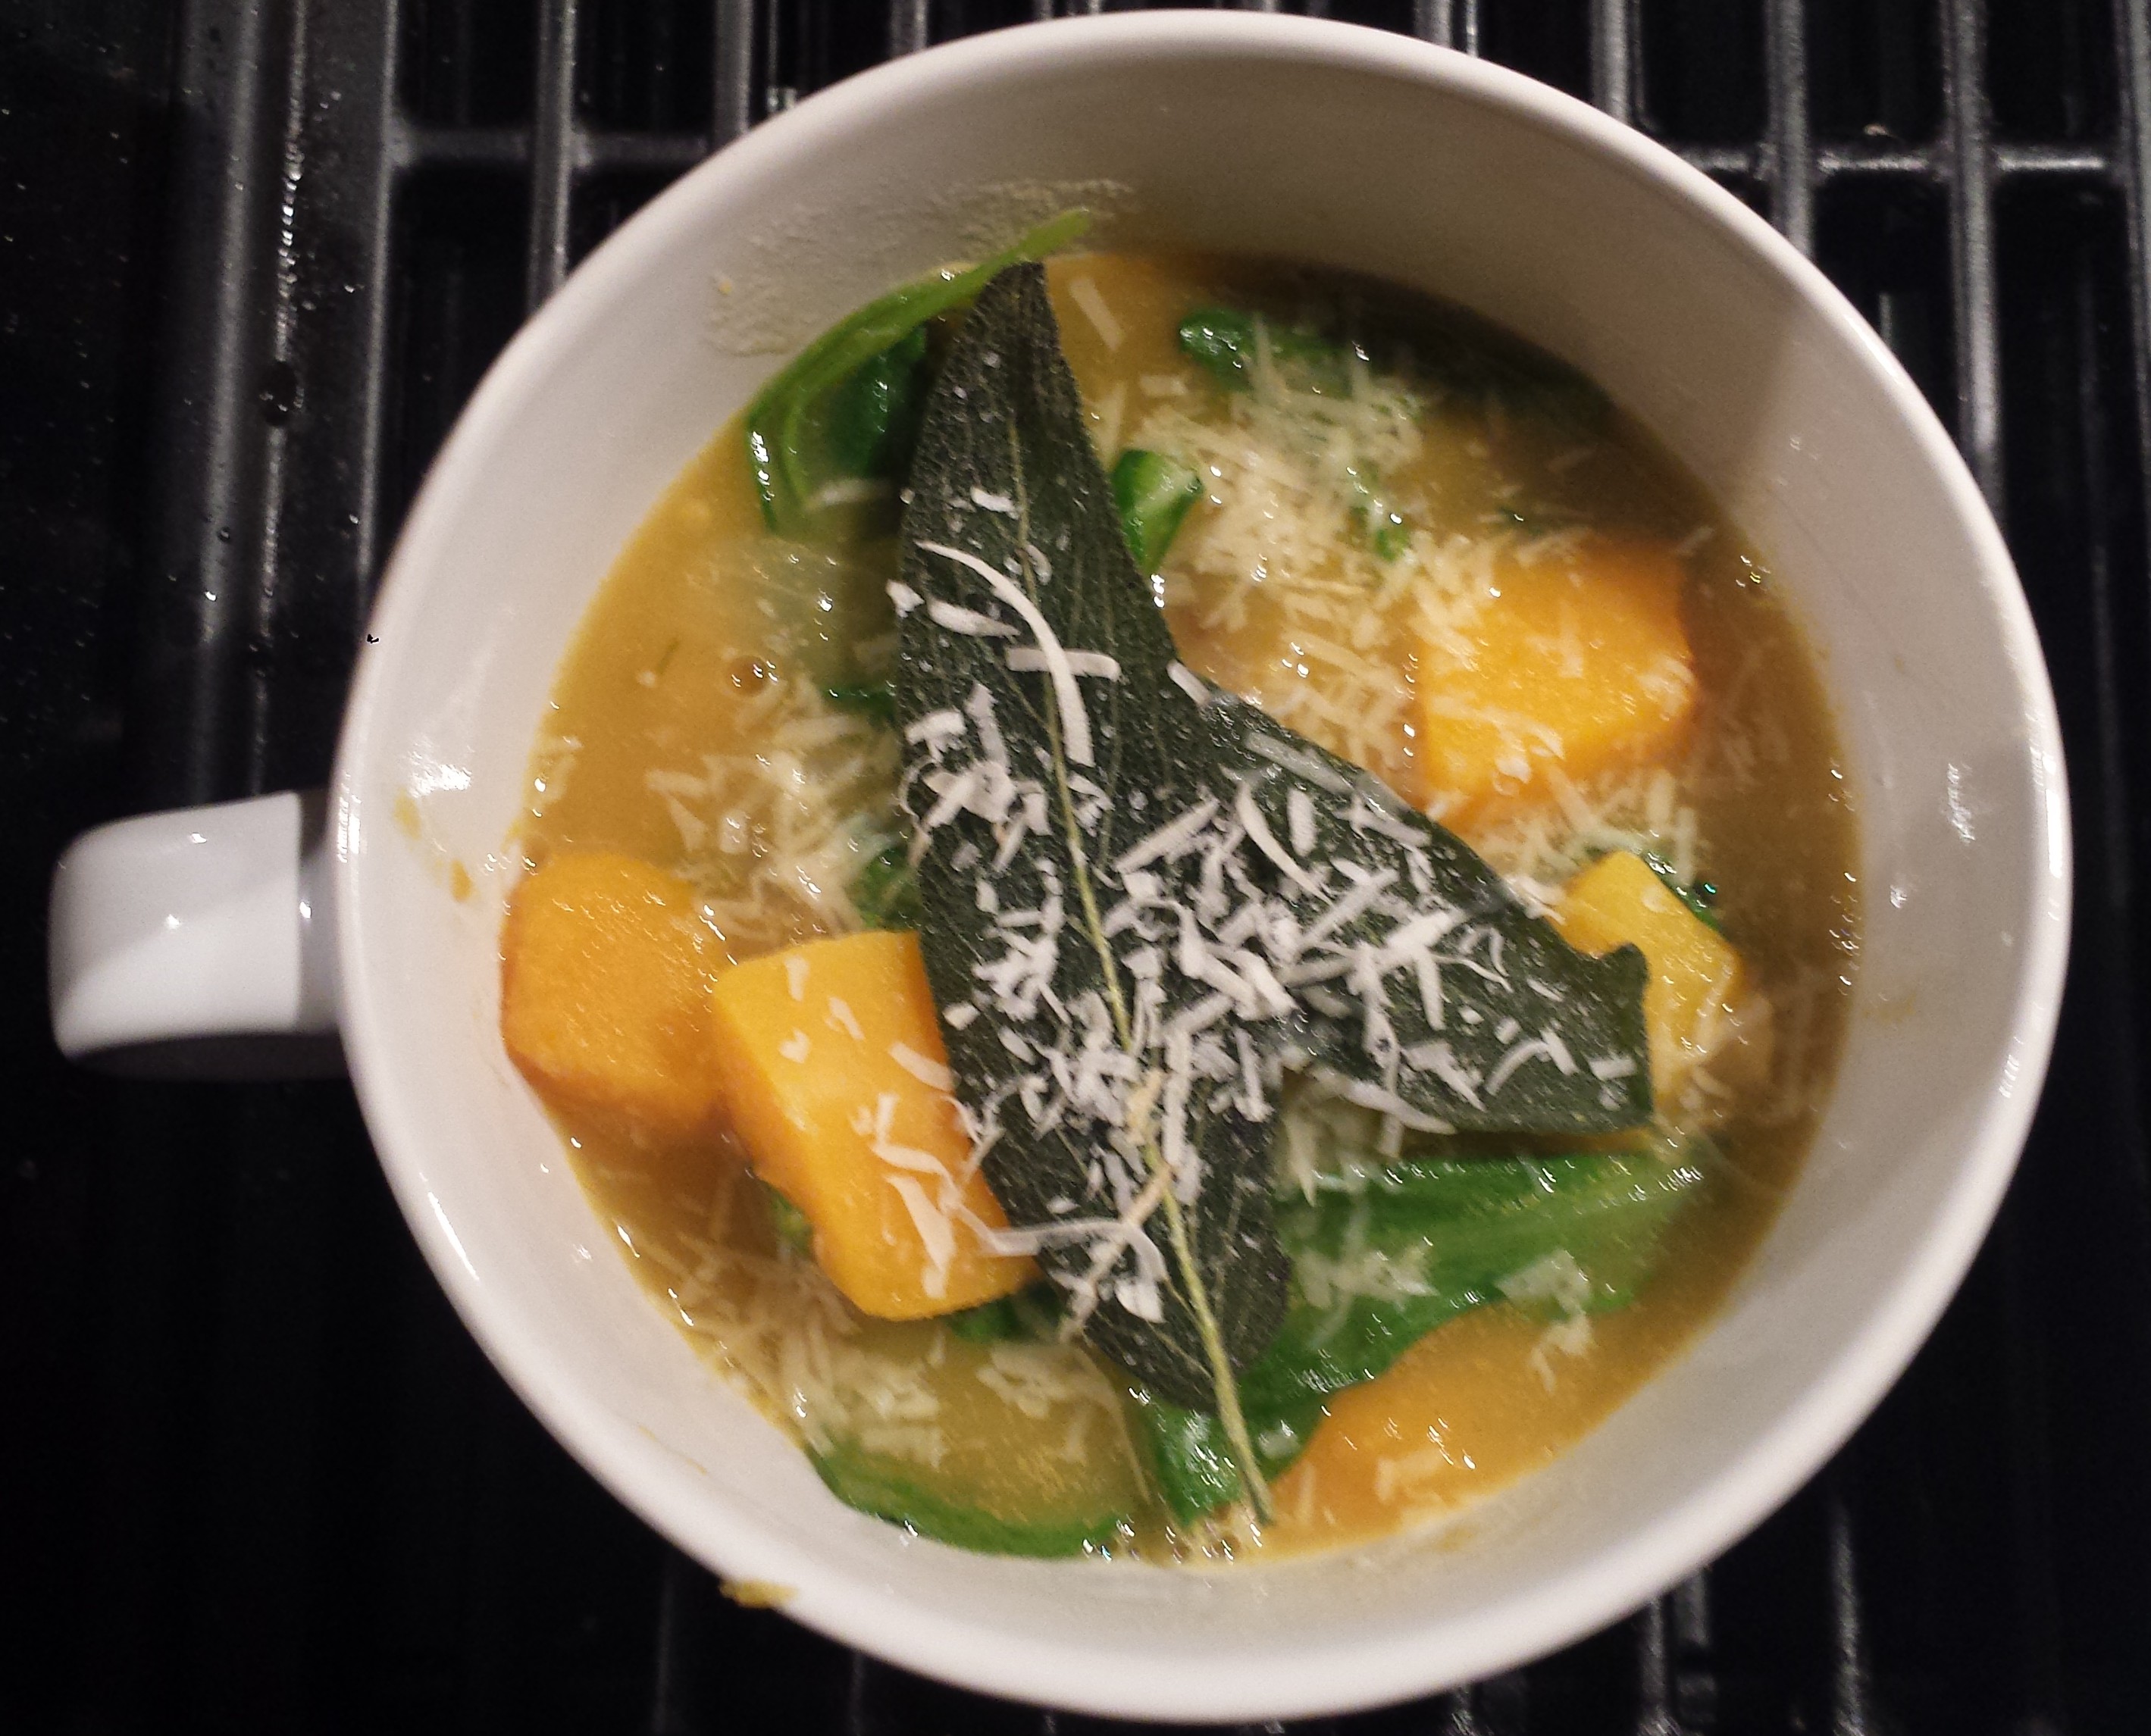
Butternut Squash and Potato Soup with Crispy Fried Sage

Black and White Chili

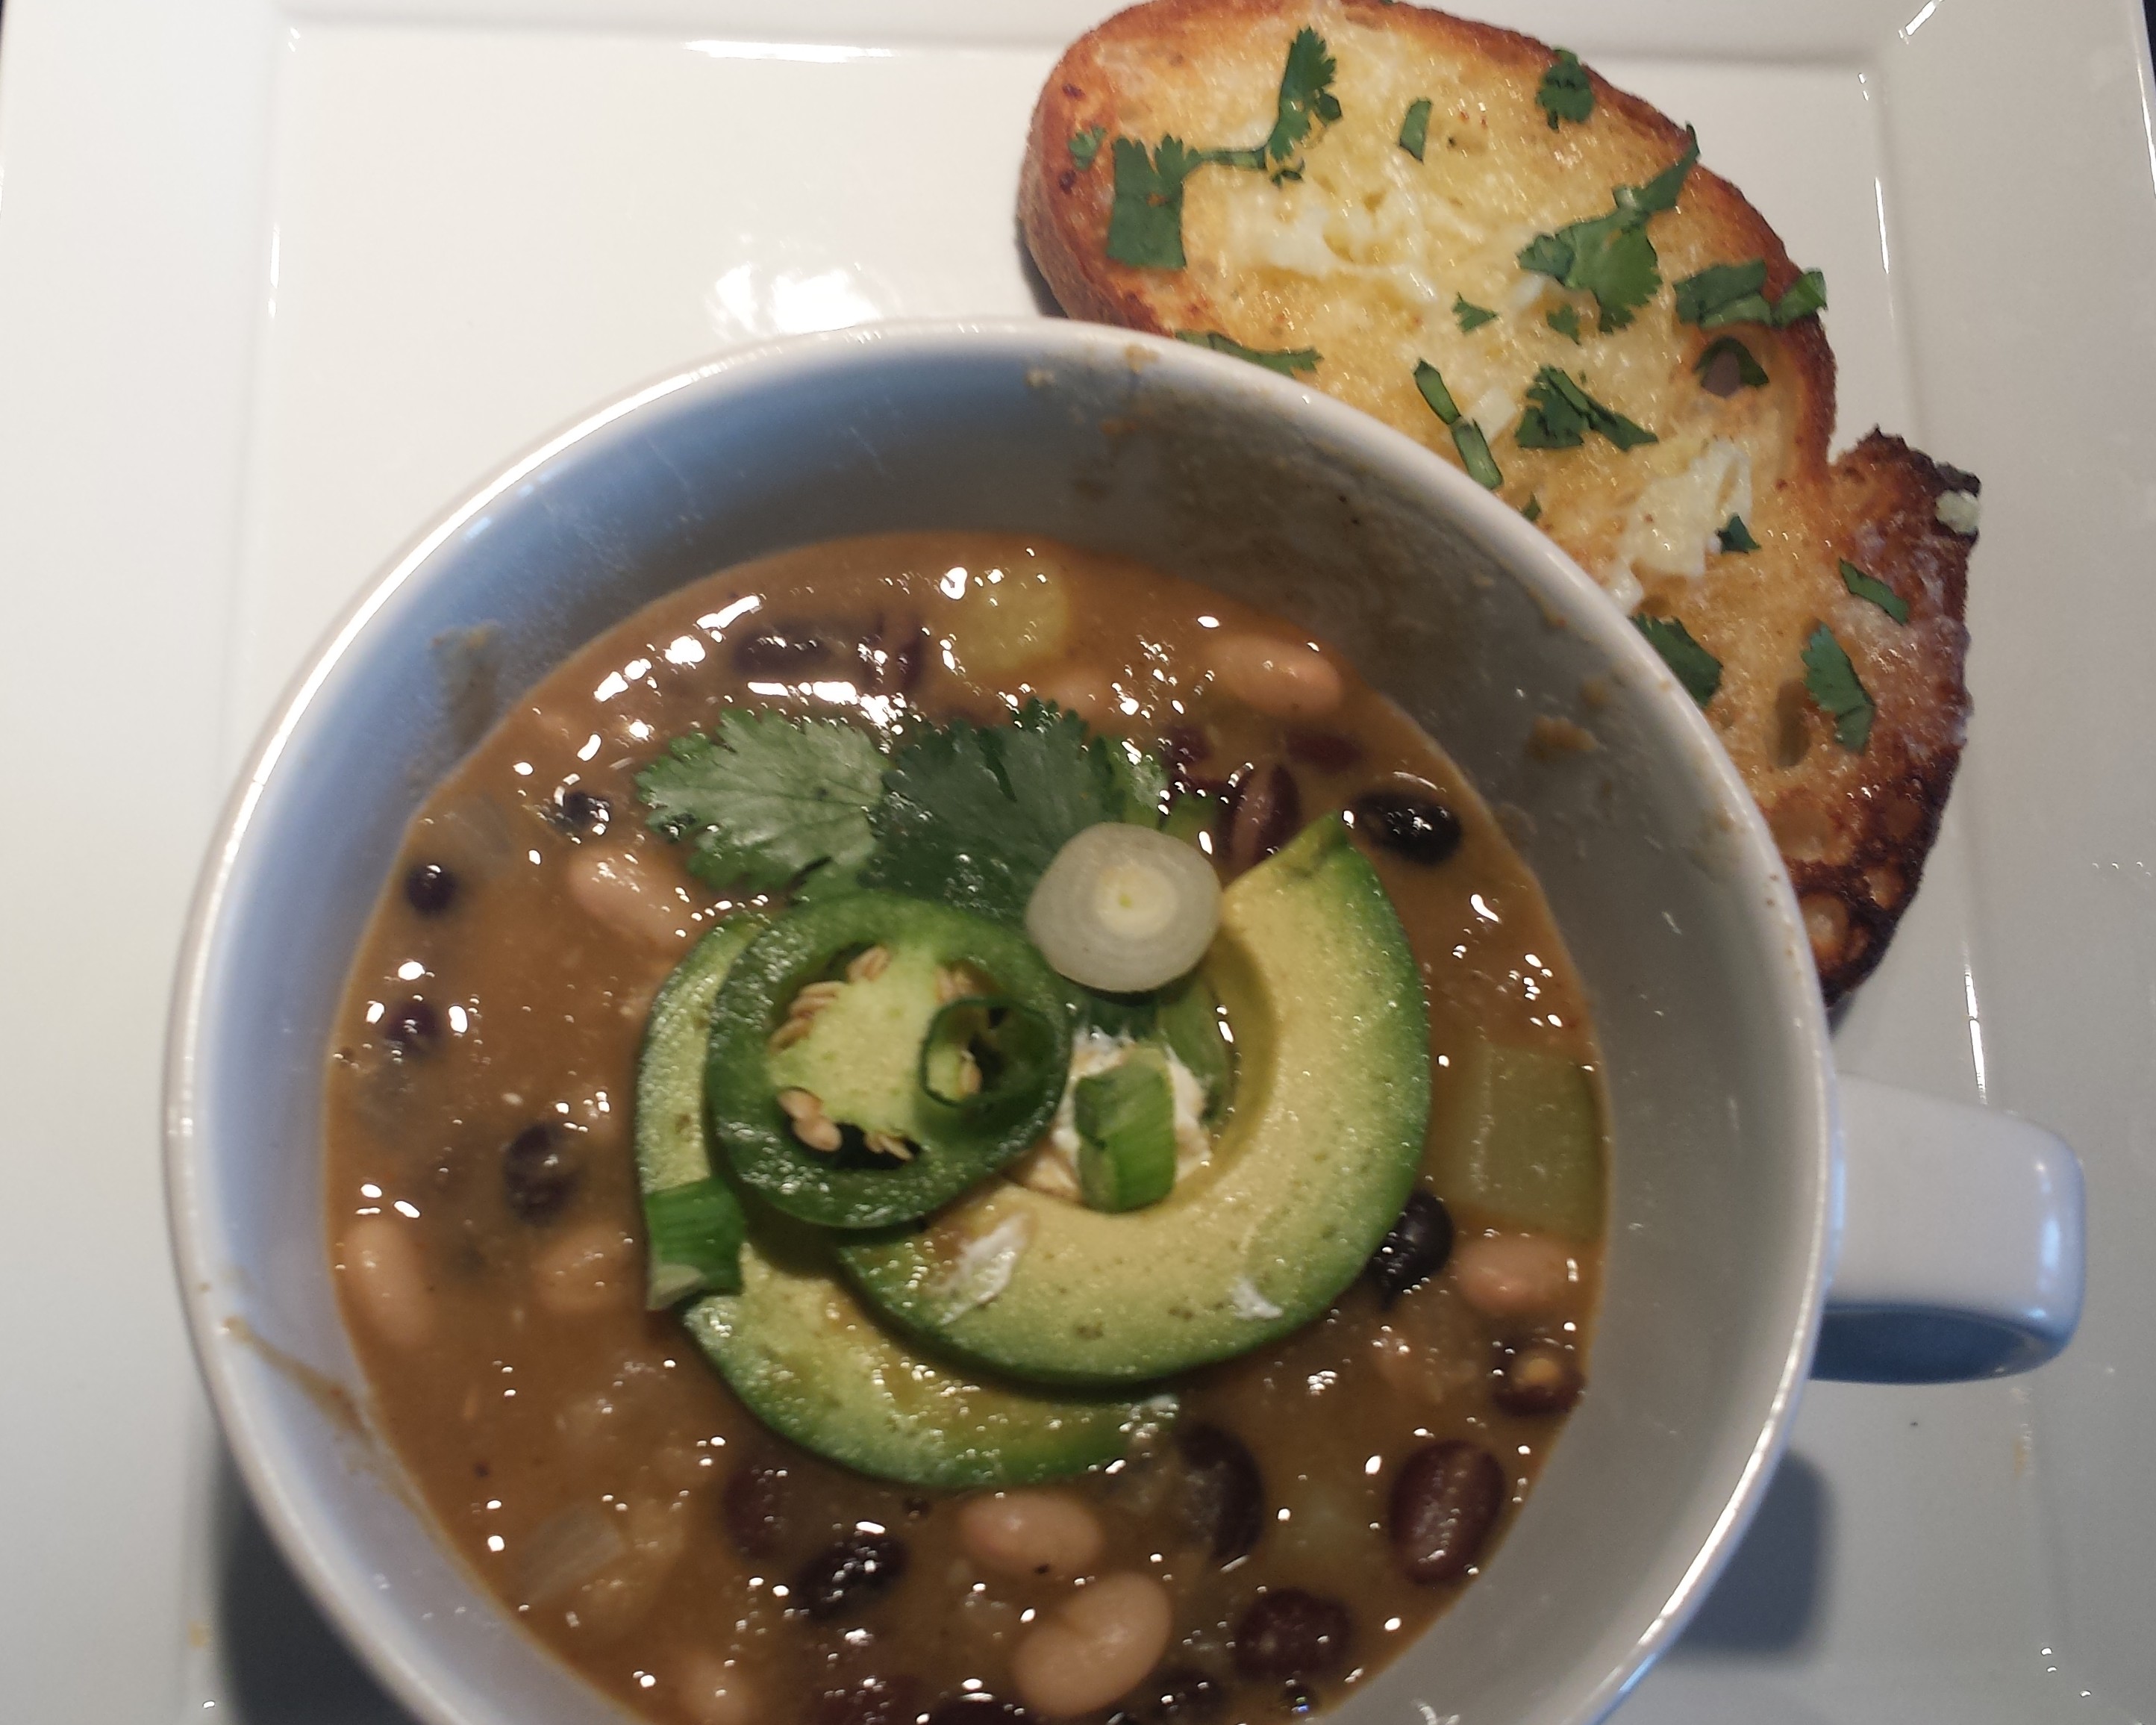
Black and White Chili with Garlic Toast

White Bean and Swiss Chard Soup

White Bean and Swiss Chard Soup

Carrot Coconut Soup with Marinated Tofu Triangles

Butternut Squash Soup and Polenta Tower2

Butternut Squash Soup with Polenta Towers

Dhal Lentil Sou[p

Dhal Lentil Soup with Quinoa Cauliflower Cakes

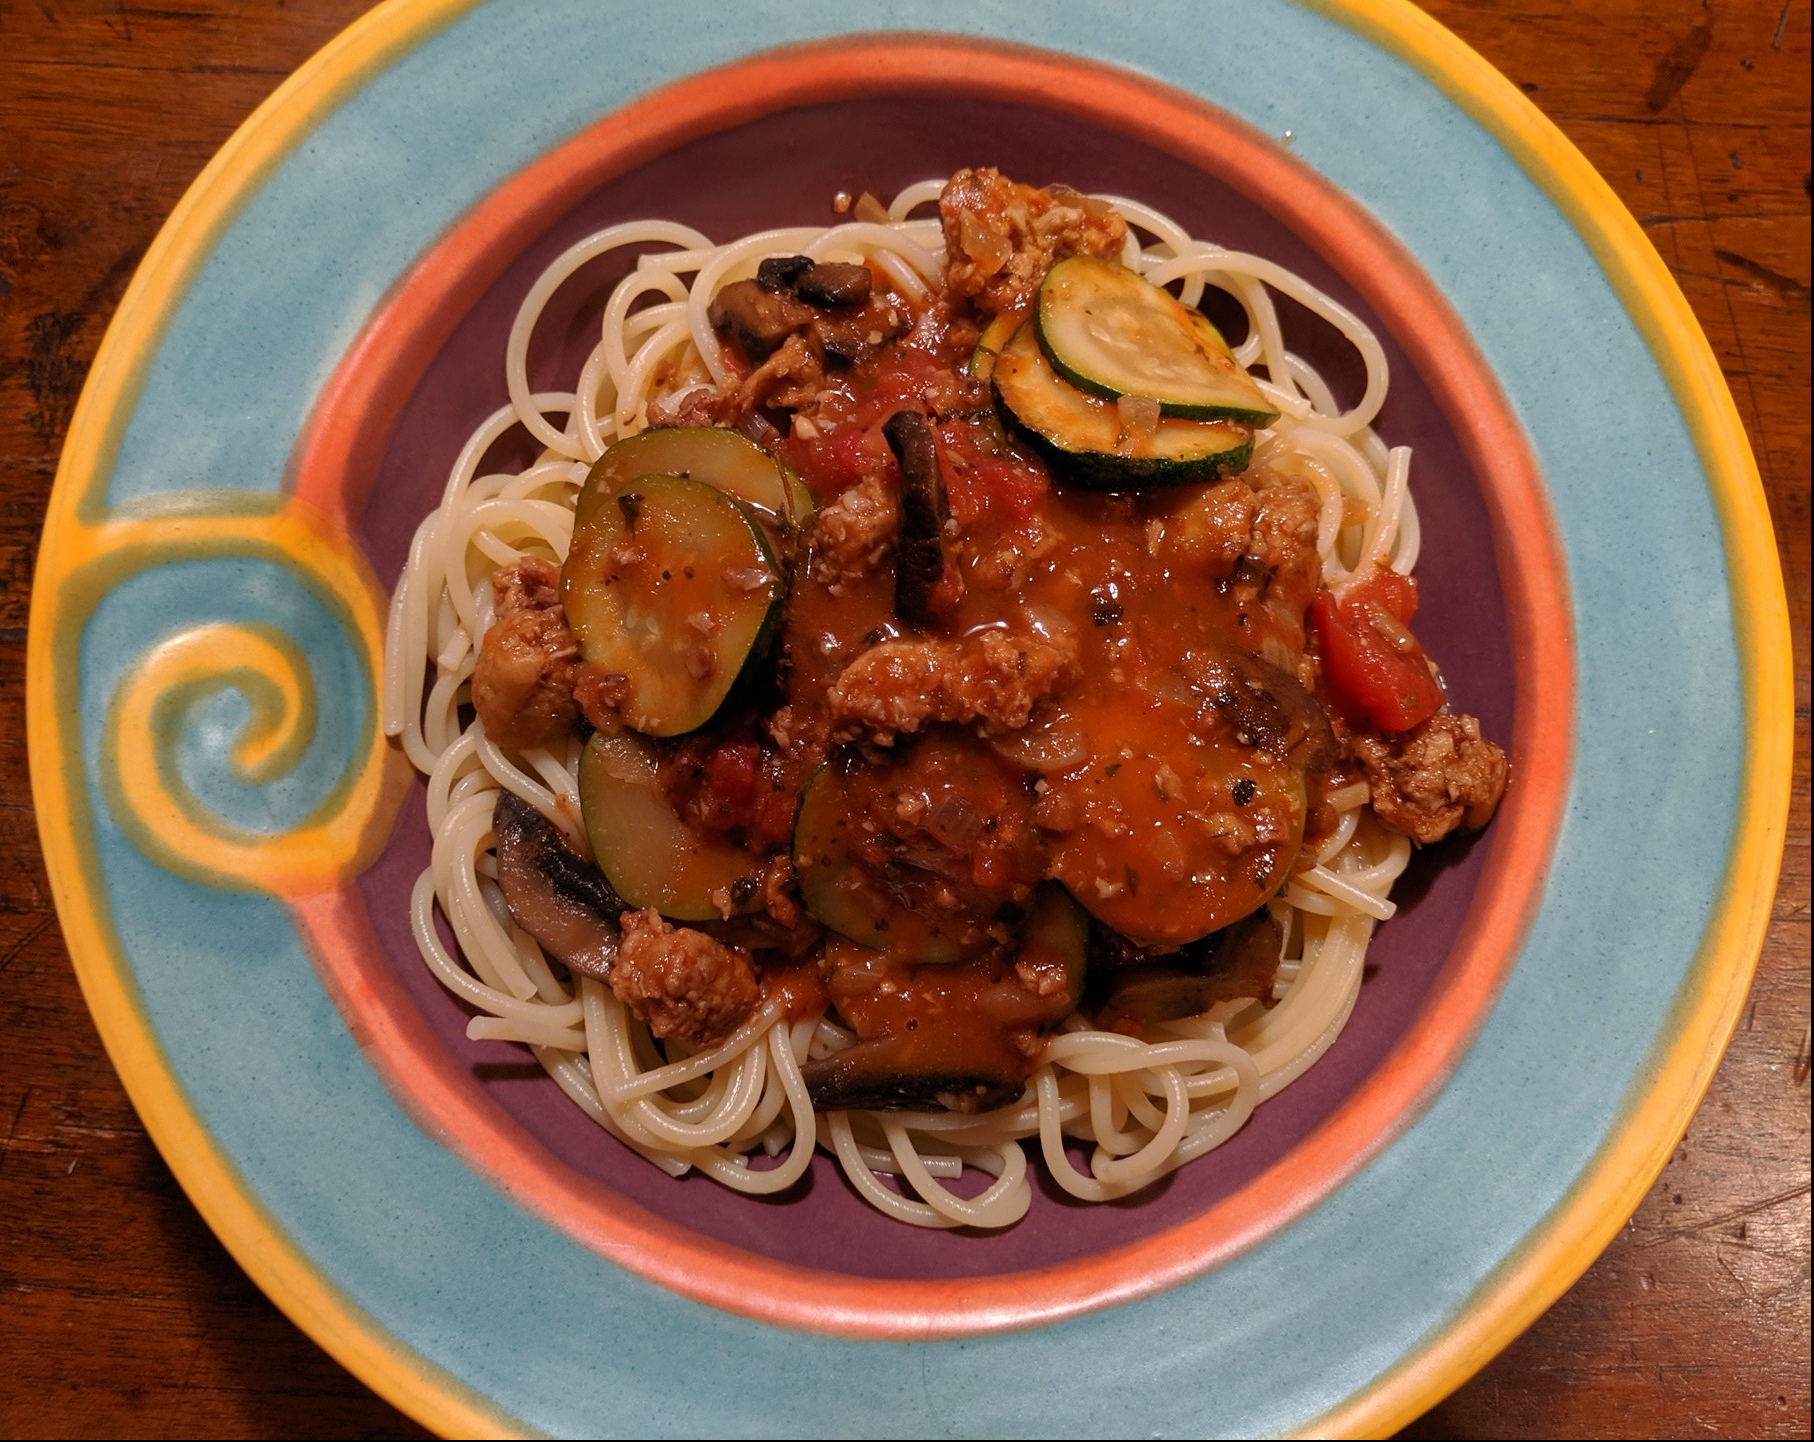
Spaghetti with ‘Sausage’, Zucchini and Mushrooms (Vegan)

1

IMG_20191022_205333

This recipe is a re-boot of my family’s favorite pasta.  It’s incredibly flavorful and loaded with sausage, zucchini, mushrooms and tomatoes.  The difference is that I substituted Beyond Meat Hot Italian Sausage for traditional meat sausage.  I haven’t made this recipe for about five years, since I stopped eating meat, so I was happy when Beyond Meat introduced their wonderful vegan sausages.  Top with freshly grated Vio-Life Vegan Parm for a salty, nutty flavor.  The recipe tastes just the same as it used to, but now its guilt-free.  I guess you really can go back home…

img_20191022_204917.jpg

This is one of the first recipes I started making early in my marriage back in the 80’s.  I had no idea how to cook, so I ordered a subscription to a monthly book series, “Great Meals in Minutes” which is really how I learned to cook.  The format of the books is quite brilliant and shows step by step instructions, but most importantly teaches HOW TO HAVE EVERYTHING DONE AT THE SAME TIME!  which is always the biggest challenge in cooking.  With that in mind, I try to design my recipes incorporating all the steps including a photo of what the dish is supposed to look like.  Call me needy, but I like to know what I’m shooting for.

IMG_20191022_204637

This recipe is based on one that originally came from the Pasta Menus book of this series. It quickly became a favorite of ours and then of our kids too, once they were old enough that we didn’t have to separate their food into piles that didn’t touch each other any longer.  Once you’re there, you’re golden.  However, for those parents with young kids, this recipe also worked when we were at that phase of life.  I would fix the kids plates with plain pasta with butter with sauteed zucchini (or defrosted peas) and plain sauteed sausage.  Then I would proceed to make the proper dish for the grown ups. Easy, and I didn’t have to become a short order cook in the process.

img_20191022_193647.jpg

SHORT CUTS & SUBSTITUTIONS: Over the years, I have taken short cuts when necessary.  I think this dish is best when the sausage and veggies are cooked separately and added to the sauce toward the end, as their flavors and textures are retained, however, I have also had good results doing it all in one pot.  Saute the onions and garlic, then add the sausage and cook about five minutes.  Add mushrooms and wine and let evaporate.  Then add tomatoes, herbs, and zucchini.  Simmer while pasta is cooking.  Another short cut is to use diced tomatoes with Italian herbs already included.  If you prefer a smoother sauce, substitute crushed tomatoes.  If it is still tomato season, you can use fresh tomatoes.  Just parboil them for a few minutes in boiling water.  Remove with a slotted spoon and peel when cool enough to handle.  Dice and use as directed in the recipe.  Or go the lazy way and just dice whole.  The skins will mostly disappear into the sauce if you cook them a little longer.

img_20191022_180535.jpg

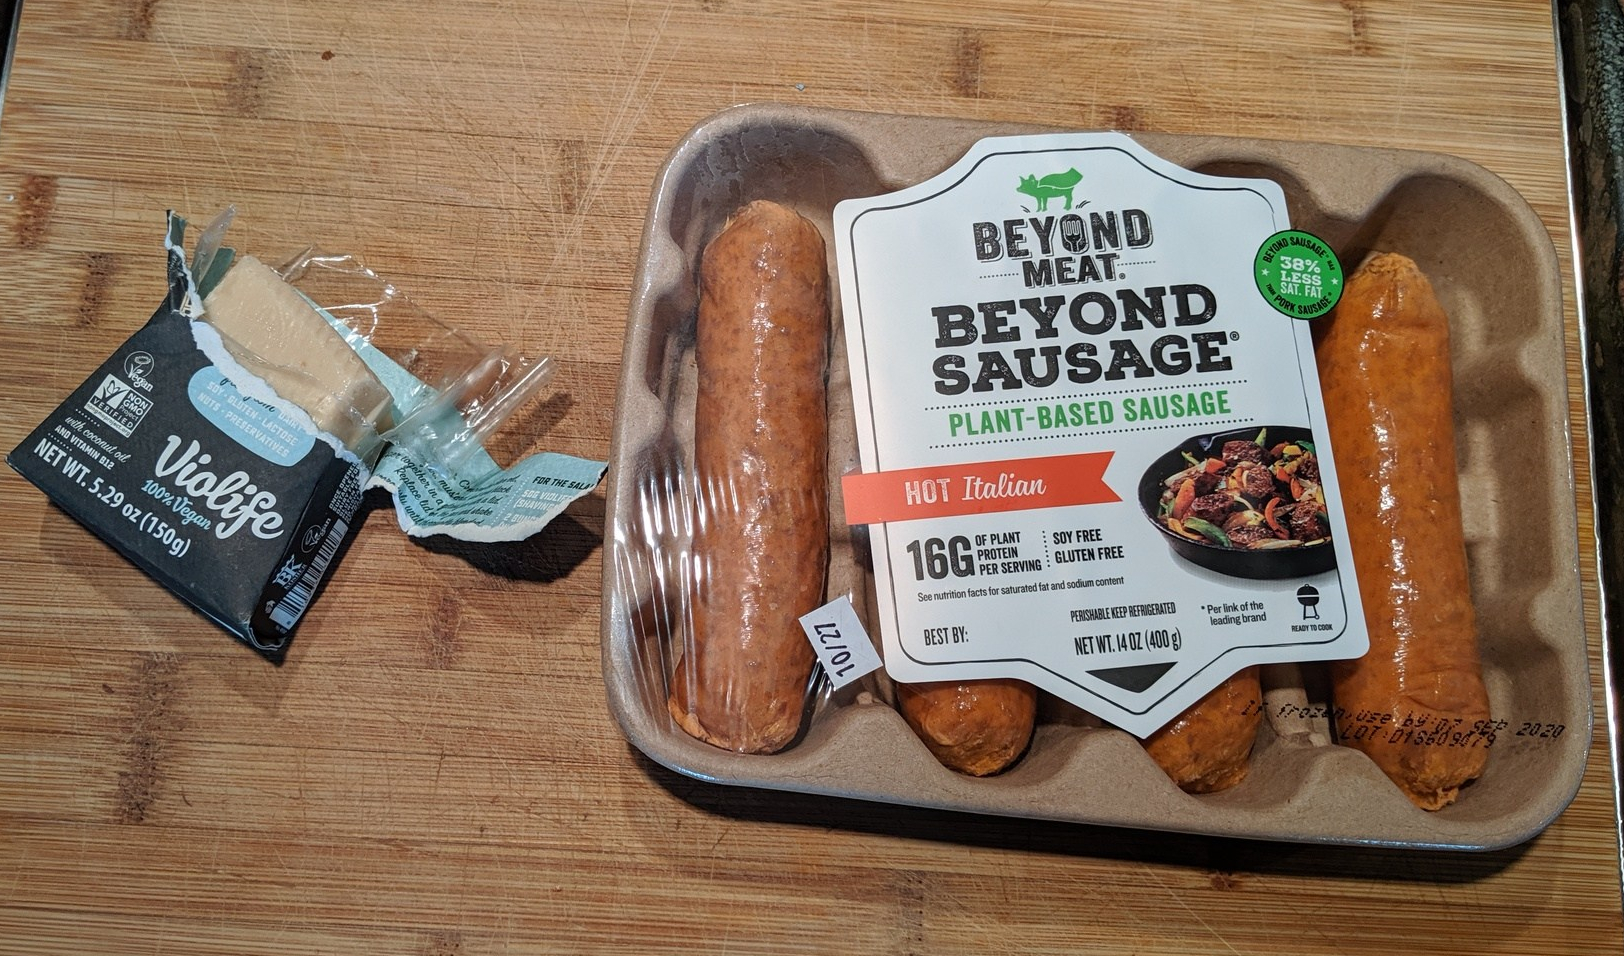
VEGAN PRODUCTS:I like to share new vegan products as I find ones I like. (FYI, there are many I don’t like and no one pays me to recommend products) BEYOND MEAT offers a Sweet and a Hot Italian Sausage.  I like them both but think the hot has a little better flavor without being too spicy..  The sausage has a pleasing texture too.  You can cook them as you would any meat sausage but not for as long since they aren’t really raw and you don’t want them to dry out.  I also really like the VIO LIFE JUST LIKE PARMESAN.  It comes in a small wedge so you can freshly grate it as needed.  It tastes just like regular parmesan.  Click the underlined product names above for nutritional information on their products.

img_20191022_204505.jpg

PASTA TIPS: Don’t forget to save a cup of pasta water before draining!  It literally is the magic that restaurants use to make a sauce glisten.  Its not the same as adding hot water.  Pasta water contains essential starch that smooths out your sauce and gives it a velvety quality.  You should never rinse pasta after cooking (unless you are making a cold pasta salad) and pasta should remain wet, not dry, because the starch is what helps the sauce stick to the pasta.  Adding oil to your cooked pasta to prevent sticking actually prevents your sauce from sticking to the pasta which may seem counter-intuitive. Instead, add back a little pasta water.  Trust me, pasta water will change your life…

IMG_20191022_205309

  SPAGHETTI WITH ‘SAUSAGE’, ZUCCHINI AND MUSHROOMS (VEGAN)

  • 1/2 medium onion
  • 2-3 cloves garlic
  • 1/2 cup olive oil(divided)
  • 28 oz can diced tomatoes
  • 1 Tbsn fresh chopped basil or 1/2 tsp dried
  • 2 tsp fresh thyme or 1/4 tsp dried
  • Salt (for pasta water)
  • 1 lb spaghetti or spaghettini
  • 2-3 small zucchini (1 lb)
  • 5-6 mushrooms (criminy or white)
  • 1 lb sweet or spicy Beyond Meat Italian Sausages
  • 3 Tbsn red wine
  • salt and pepper to taste
  • freshly grated vegan parmesan cheese (optional)

img_20191022_192555.jpg

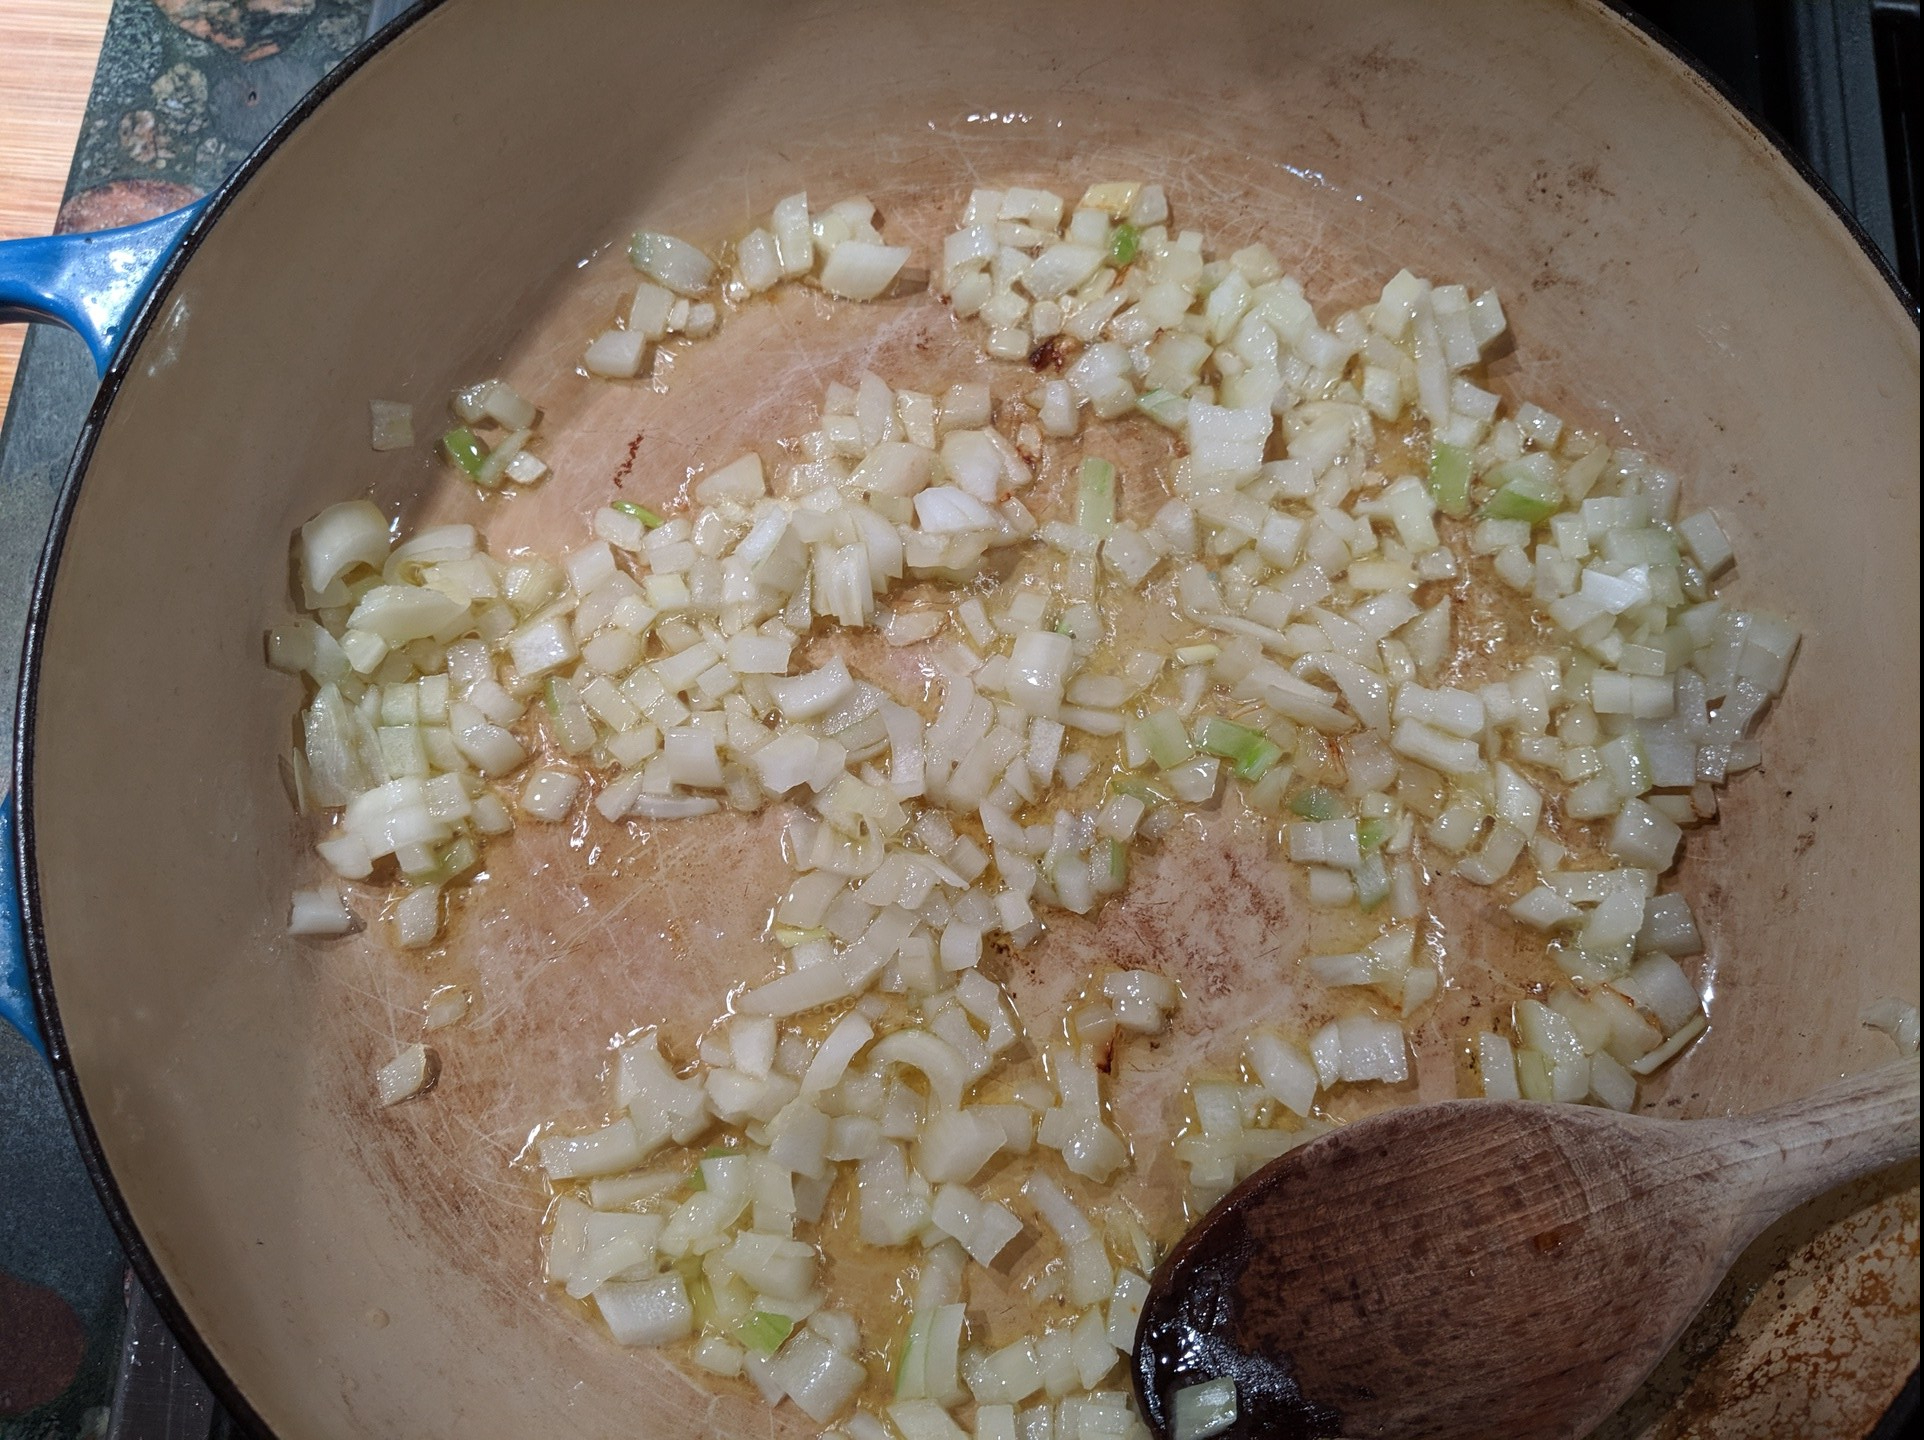
  • Chop onion and garlic finely. Heat half of the olive oil in a heavy saucepan over medium heat. Reduce heat and saute onion and garlic for about 5 minutes, or until onions are translucent.
  • Set pasta water with salt and a drizzle of olive oil to bring to a boil.

img_20191022_193413.jpg

  • Add tomatoes, basil and thyme to onion mixture and stir to combine. I like to rinse the tomato can out with about a quarter cup of water and add to the pan. Simmer 10 minutes on low.

IMG_20191022_193647

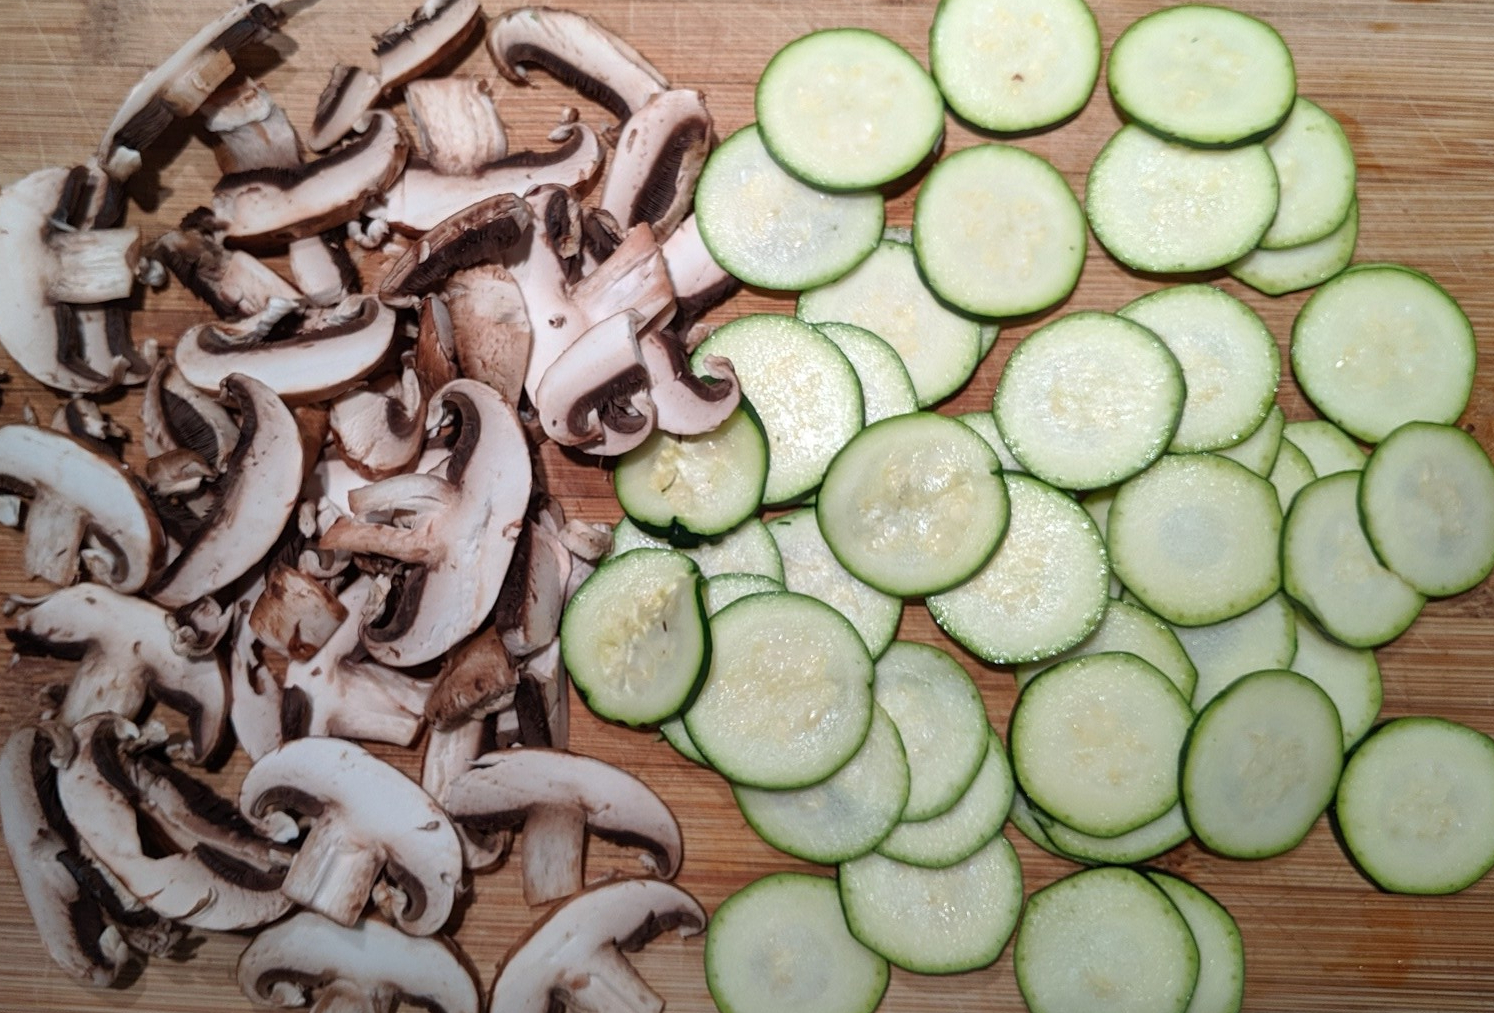
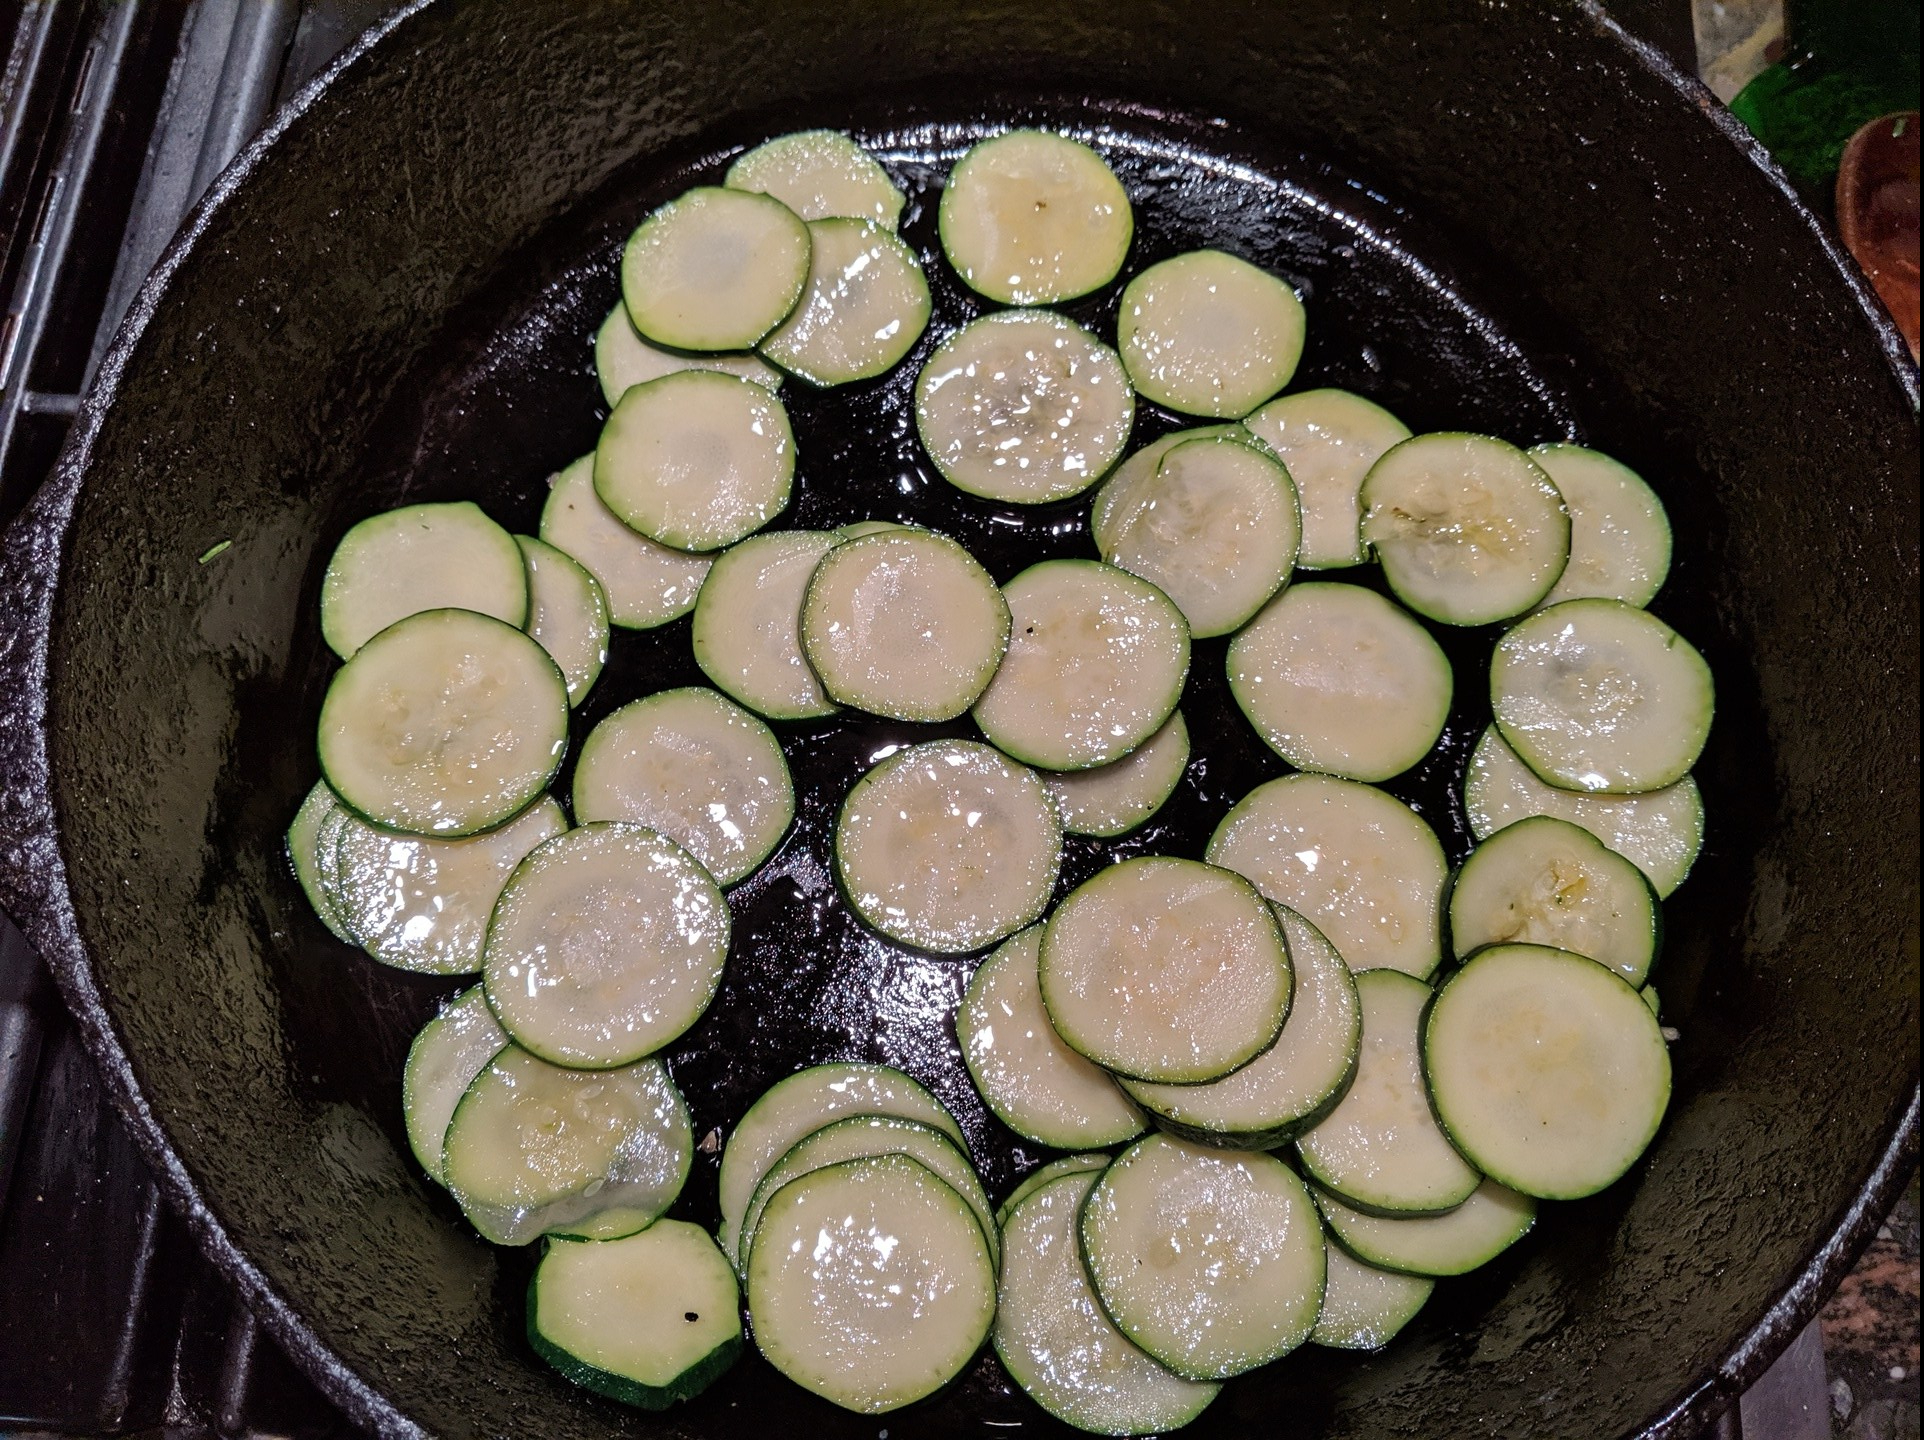
  • While sauce is cooking, slice zucchini into 1/8 inch rounds. Wipe mushrooms with damp paper towel, remove tough ends and thinly slice

img_20191022_194838.jpg

  • Heat remaining olive oil in skillet over medium heat and saute zucchini several minutes until lightly browned  Remove zucchini to a plate and set aside

IMG_20191022_195656

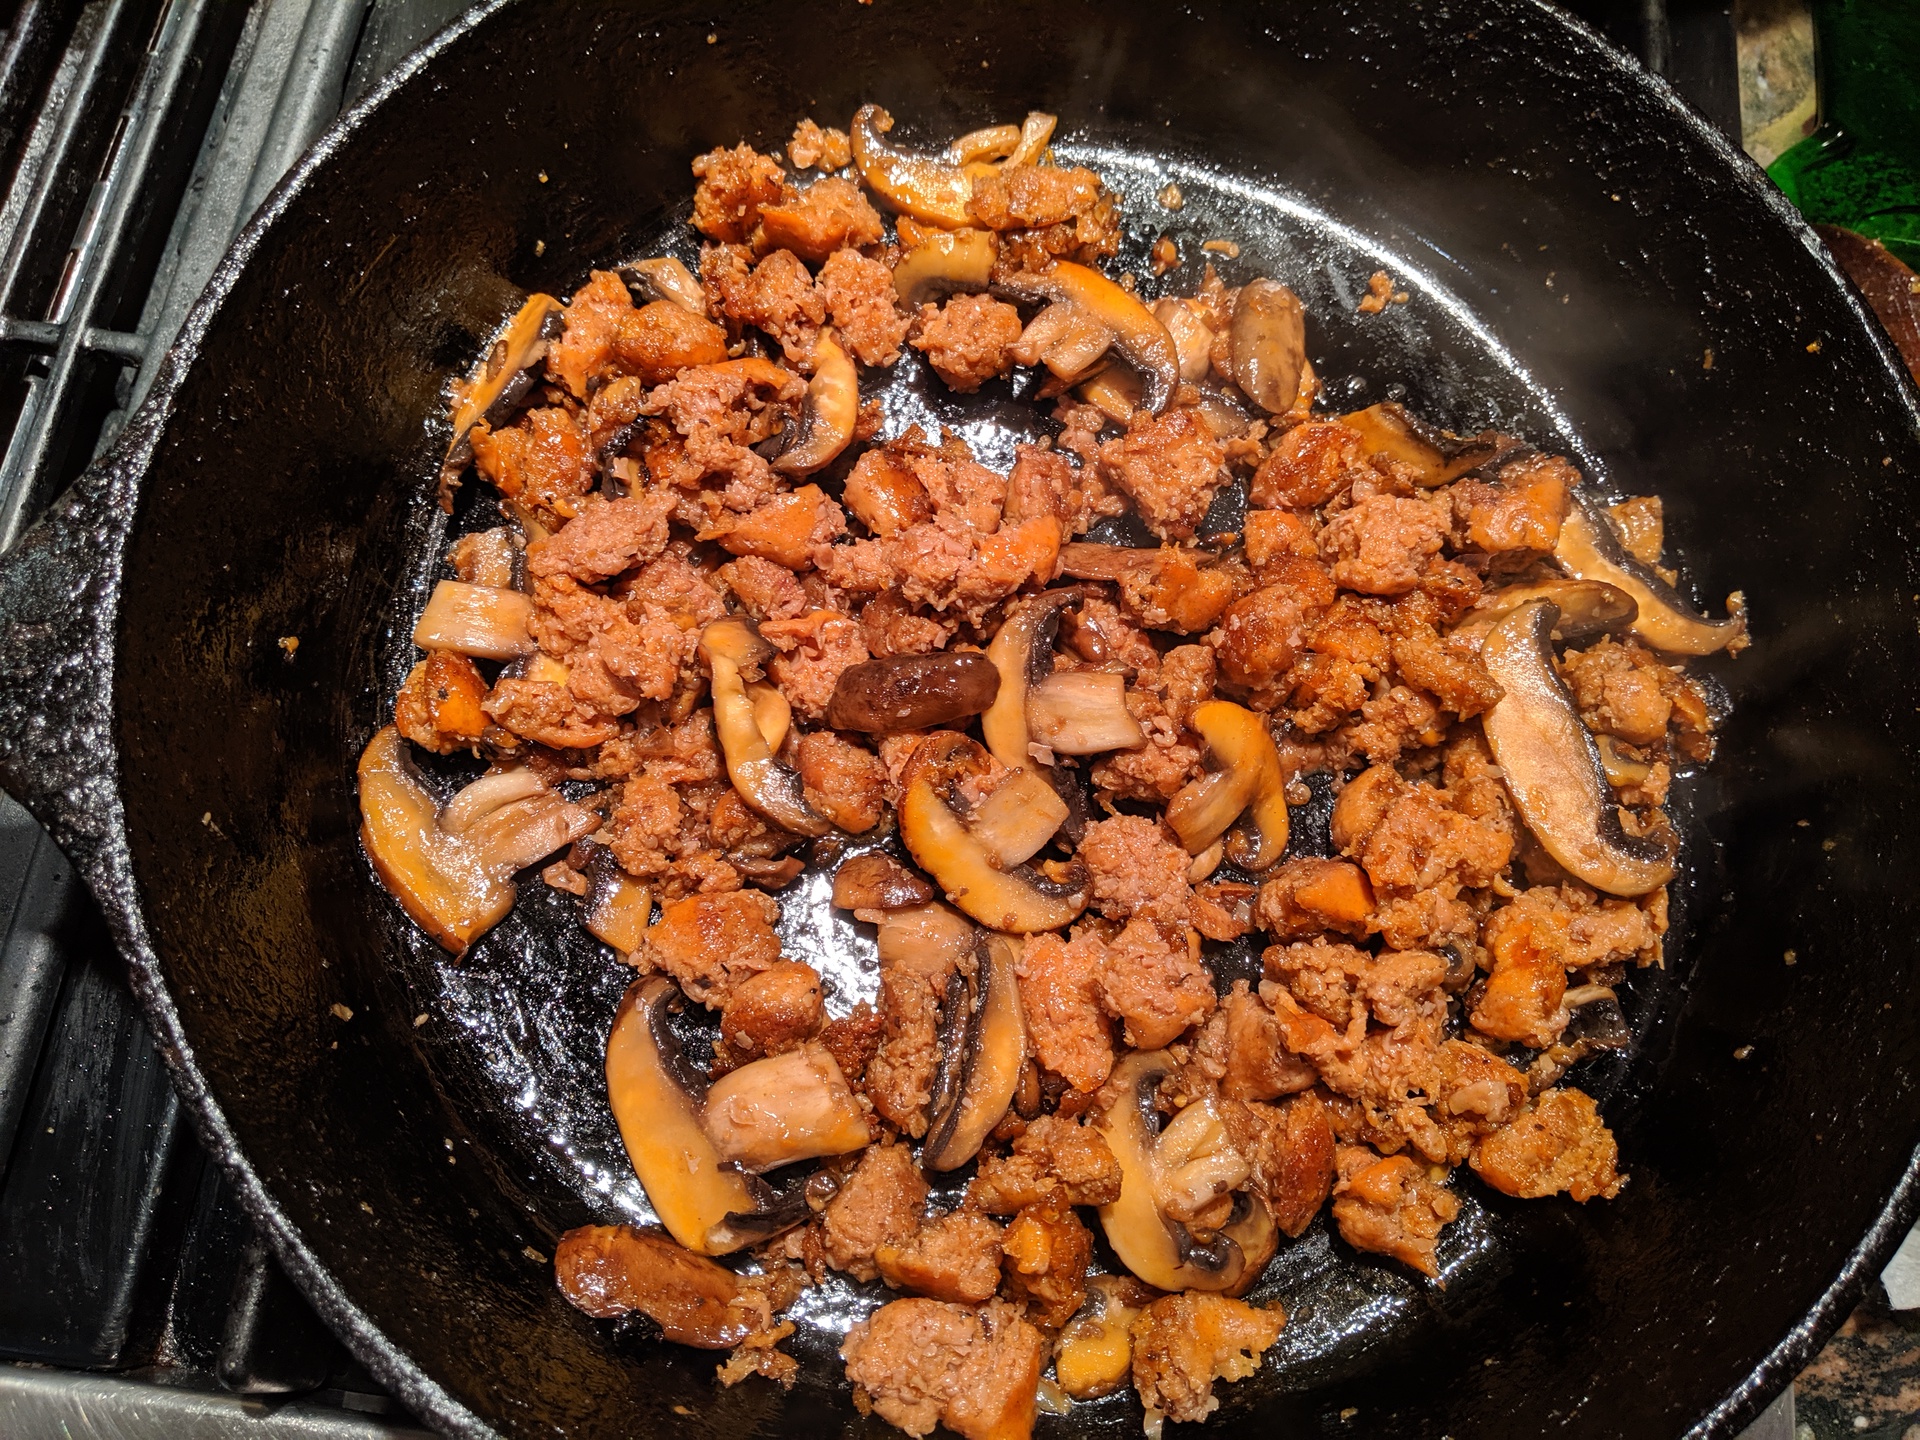
  • Beyond Meat sausage has no casings to remove.  Just break off small pieces with your fingers. Saute sausage in the same pan, breaking it into a crumble with a wooden spoon.  Add mushrooms and mix gently.  Add wine and let it evaporate.

IMG_20191022_195924

  • Add zucchini and sausage mixture into the tomato sauce and stir to combine. Let simmer over low heat while pasta is cooking. Taste and add salt and pepper to taste.

IMG_20191022_204505

  • Cook spaghetti according to directions.  Before draining, remove one cup of pasta water and set aside.  Drain but do not rinse pasta.

IMG_20191022_204637

  • Add about a 1/2 cup pasta water to sauce and stir to combine.  Its the magic ingredient that binds everything together!  If it seems too dry or too skimpy, add the rest and simmer until ready to serve.

IMG_20191022_205333

  • Spoon sauce on top of pasta or mix all together, depending on your preference. Serve with grated parmesan if desired.

Spaghetti with Vegan Sausage, Zucchini and Mushrooms

  • Servings: 4
  • Difficulty: easy
  • Print

IMG_20191022_205309

  • 1/2 medium onion
  • 2-3 cloves garlic
  • 1/2 cup olive oil(divided)
  • 28 oz can diced tomatoes
  • 1 Tbsn fresh chopped basil or 1/2 tsp dried
  • 2 tsp fresh thyme or 1/4 tsp dried
  • Salt (for pasta water)
  • 1 lb spaghetti or spaghettini
  • 2-3 small zucchini (1 lb)
  • 5-6 mushrooms (criminy or white)
  • 1 lb sweet or spicy Beyond Meat Italian Sausages
  • 3 Tbsn red wine
  • salt and pepper to taste
  • freshly grated vegan parmesan cheese (optional)
    1. Chop onion and garlic finely
    2. Heat half of the olive oil in a heavy saucepan over medium heat. Reduce heat and saute onion and garlic for about 5 minutes, or until onions are translucent.
    3. Set pasta water with salt and a drizzle of olive oil to bring to a boil.
    4. Add tomatoes, basil and thyme to onion mixture and stir to combine. I like to rinse the tomato can out with about a quarter cup of water and add to the pan. Simmer 10 to minutes on low.
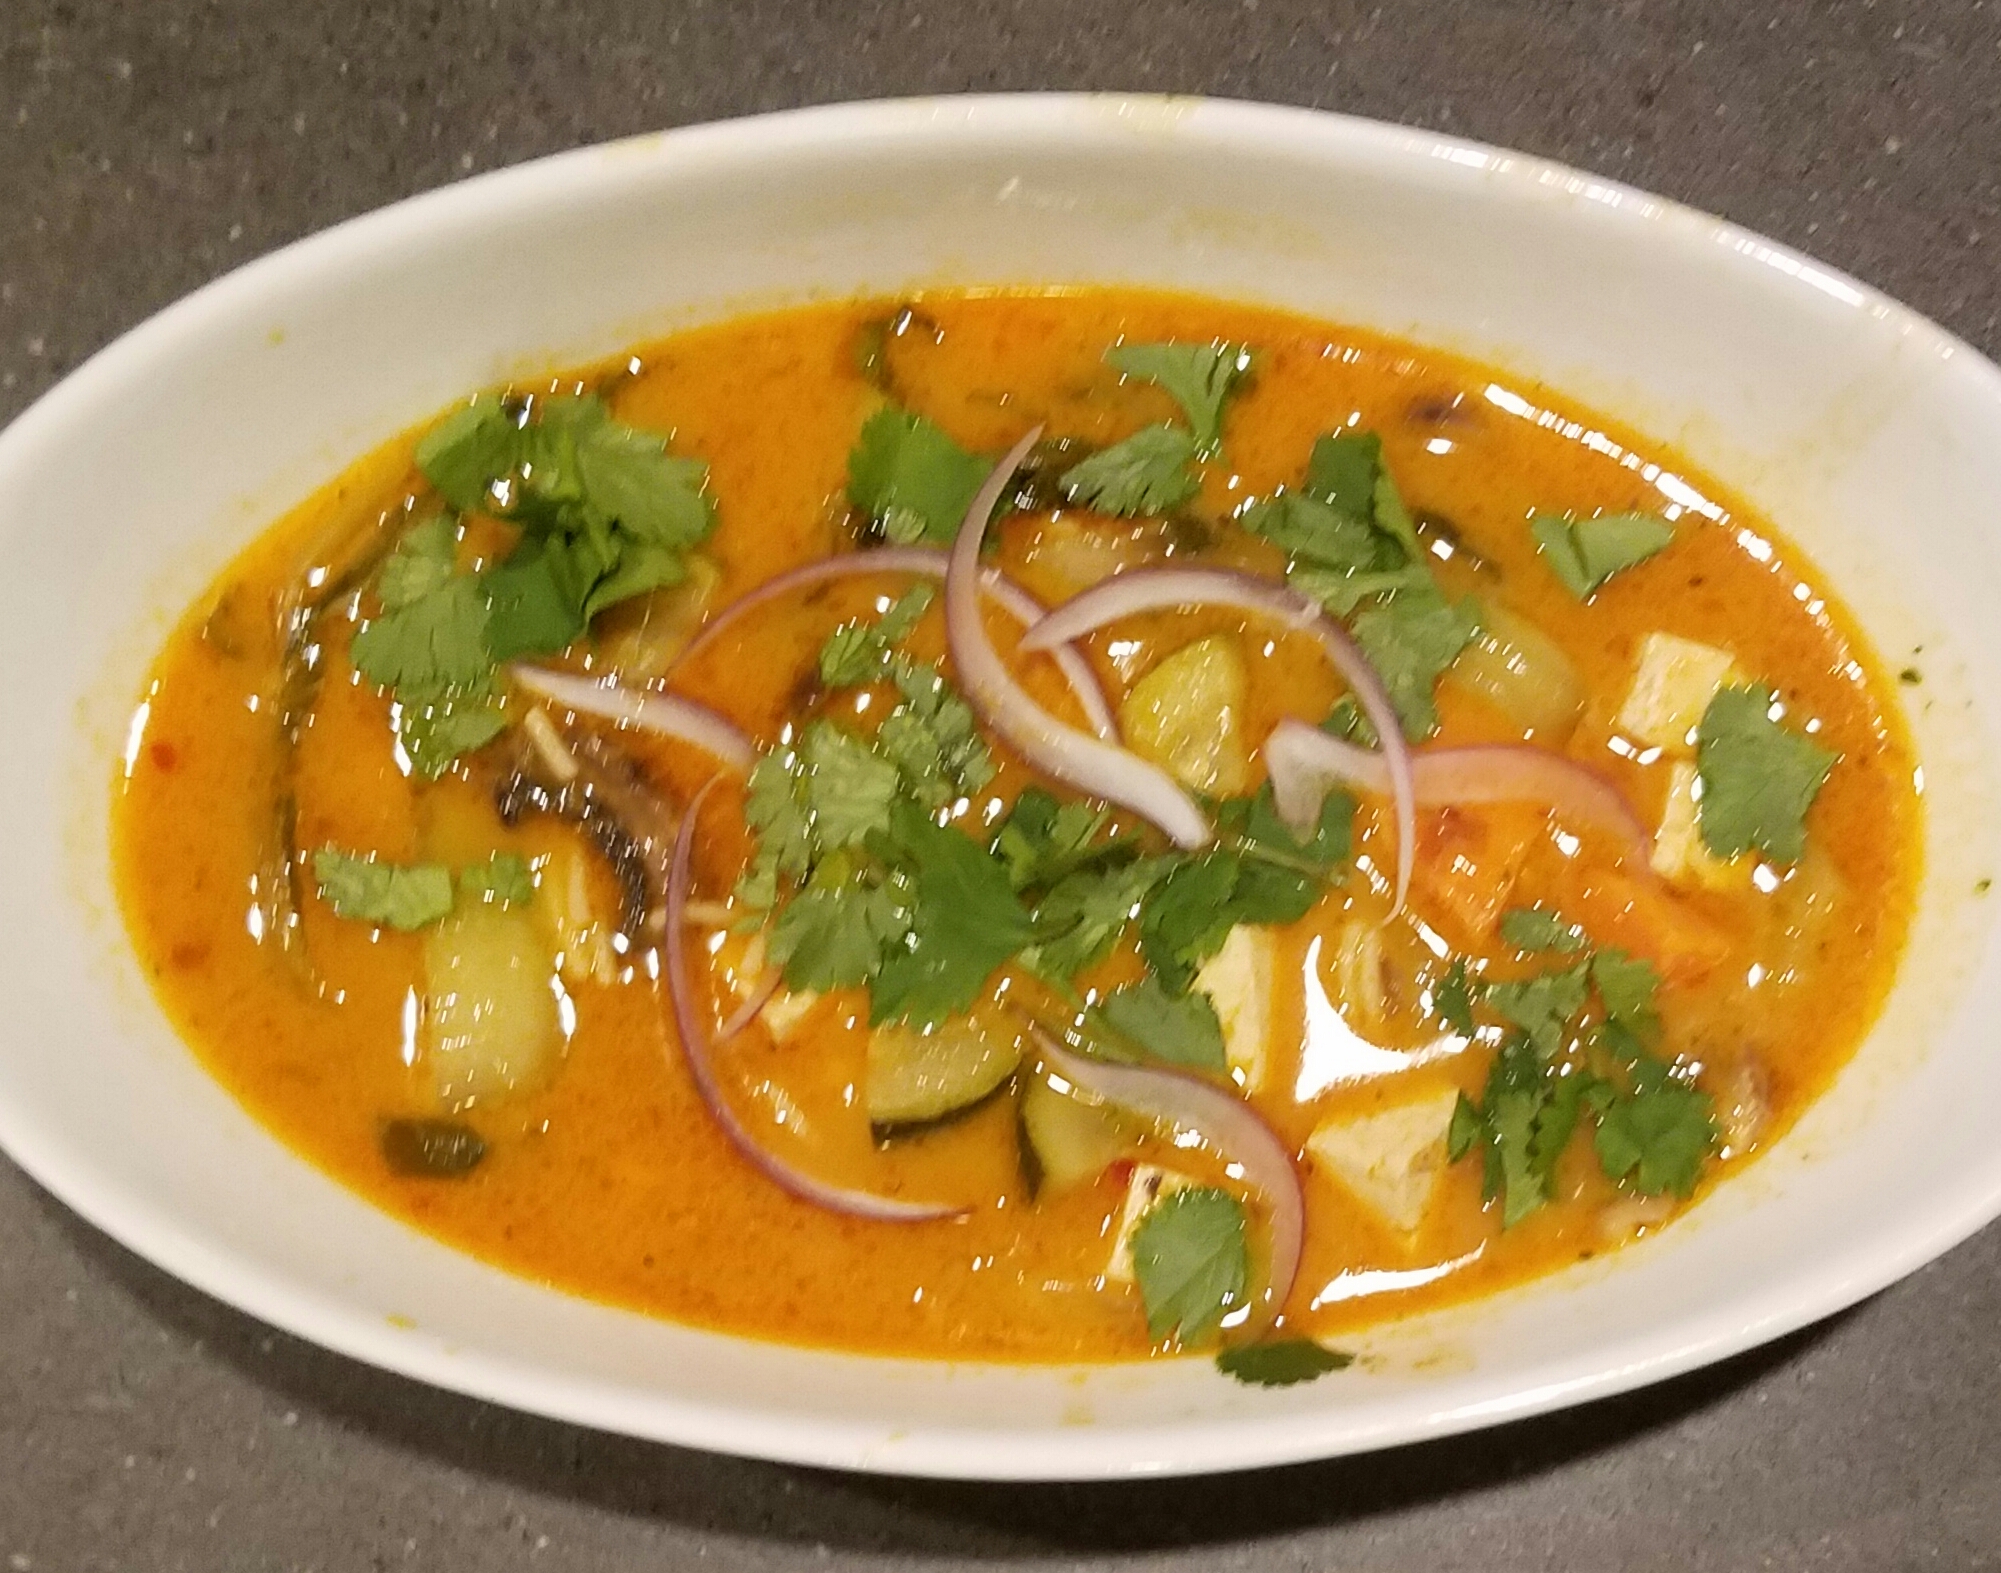
    5. While sauce is cooking, slice zucchini into 1/8 inch rounds
    6. Wipe mushrooms with damp paper towel, remove tough ends and thinly slice
    7. Beyond Meat sausage has no casings to remove. Just break into small pieces with your fingers.
    8. Heat remaining olive oil in skillet over medium heat and saute zucchini several minutes until lightly browned  Remove zucchini to a plate and set aside
    9. Saute sausage in the same pan, breaking it into a crumble with a wooden spoon.  Add mushrooms and mix gently.  Add wine and let it evaporate.
    10. Add zucchini and sausage mixture into the tomato sauce and stir to combine. Let simmer over low heat while pasta is cooking. Taste and add salt and pepper to taste.
    11. Cook spaghetti according to directions.  Before draining, remove one cup of pasta water and set aside.  Drain but do not rinse pasta.
    12. Add 1/4 to 1/2 cup pasta water to sauce and stir to combine.  Its the magic ingredient!  If it seems too dry or too skimpy, add the rest.
    13. Spoon sauce on top of pasta or mix all together, depending on your preference. Serve with grated parmesan if desired.

Meatless Monday – Beet Veggie Burgers with Pickled Onions

1

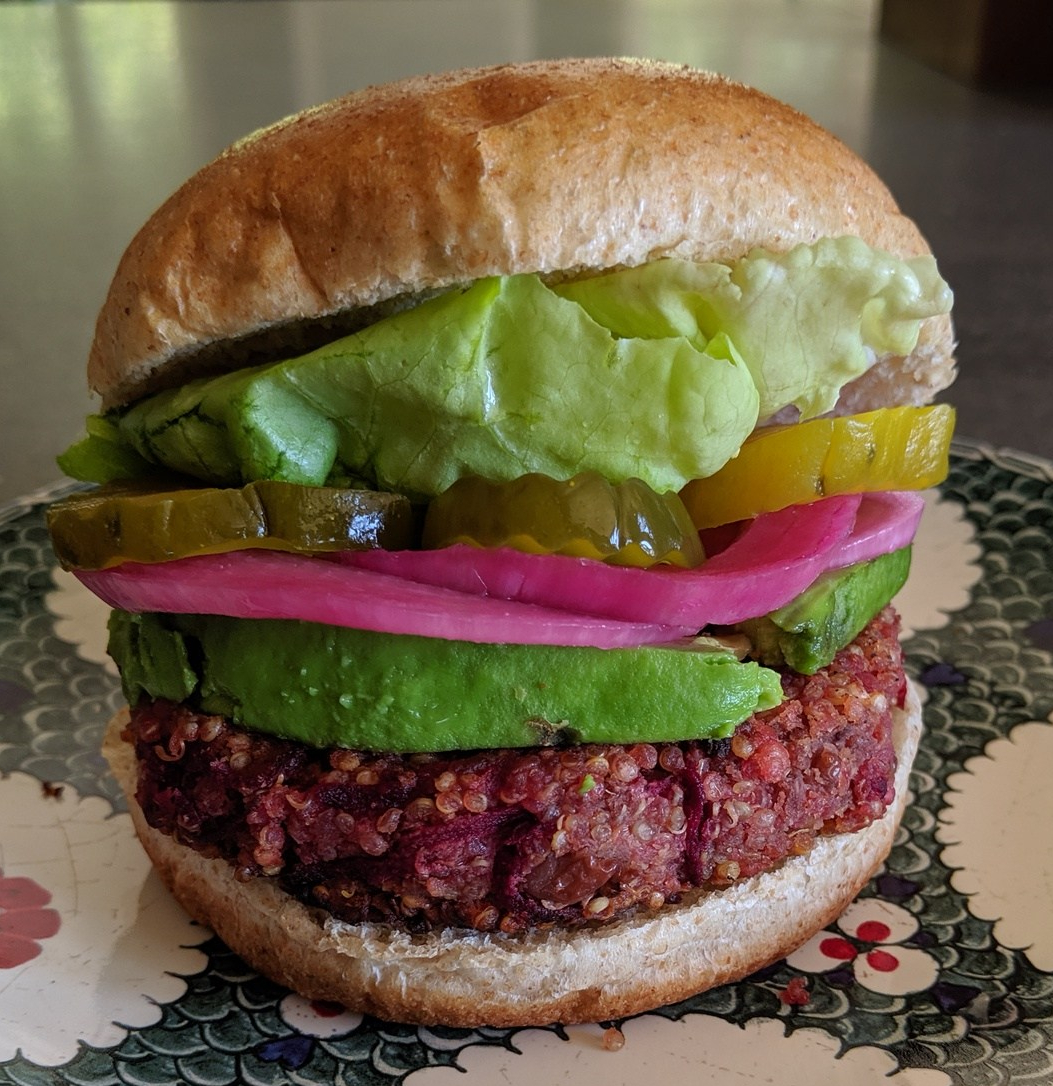
What is more American than a juicy burger, except for maybe baseball, hot dogs and apple pie, and I would argue about that… Well these burgers may not be traditional in that they are plant based, primarily quinoa and pinto beans and they get their lovely color from raw shredded beets, but they can definitely go head to head with a beef burger.  I thought these were really good, especially with the pickled red onions, butter lettuce, a little avocado, mustard and mayo, boom!  I could eat these once a week!

img_20190913_114143.jpg
I found this recipe in the Hannaford fresh Magazine, May – June 2019 this summer and I’ve been wanting to make them ever since.  I have always liked veggie burgers, not because I miss meat, but because there is something so iconic about eating a burger.  It’s the ultimate comfort food. (Sorry mac and cheese)  I was immediately intrigued by the addition of raw shredded beet in this recipe. You may have tried the increasingly popular Beyond Meat Burger which is entirely plant based and gets its red coloring from beet juice which is what piqued my interest in this recipe.  Beyond Beef is a very good beef replacement but I’m not sure where regular people go about getting pea protein isolate so… that’s where this recipe comes in. These burgers are packed with protein provided by both the pinto beans and quinoa with smoked paprika and other spices to make a really delicious burger which is easy to make.   Plus homemade is best!
img_20190912_153908-1.jpg
IMG_20190912_154234
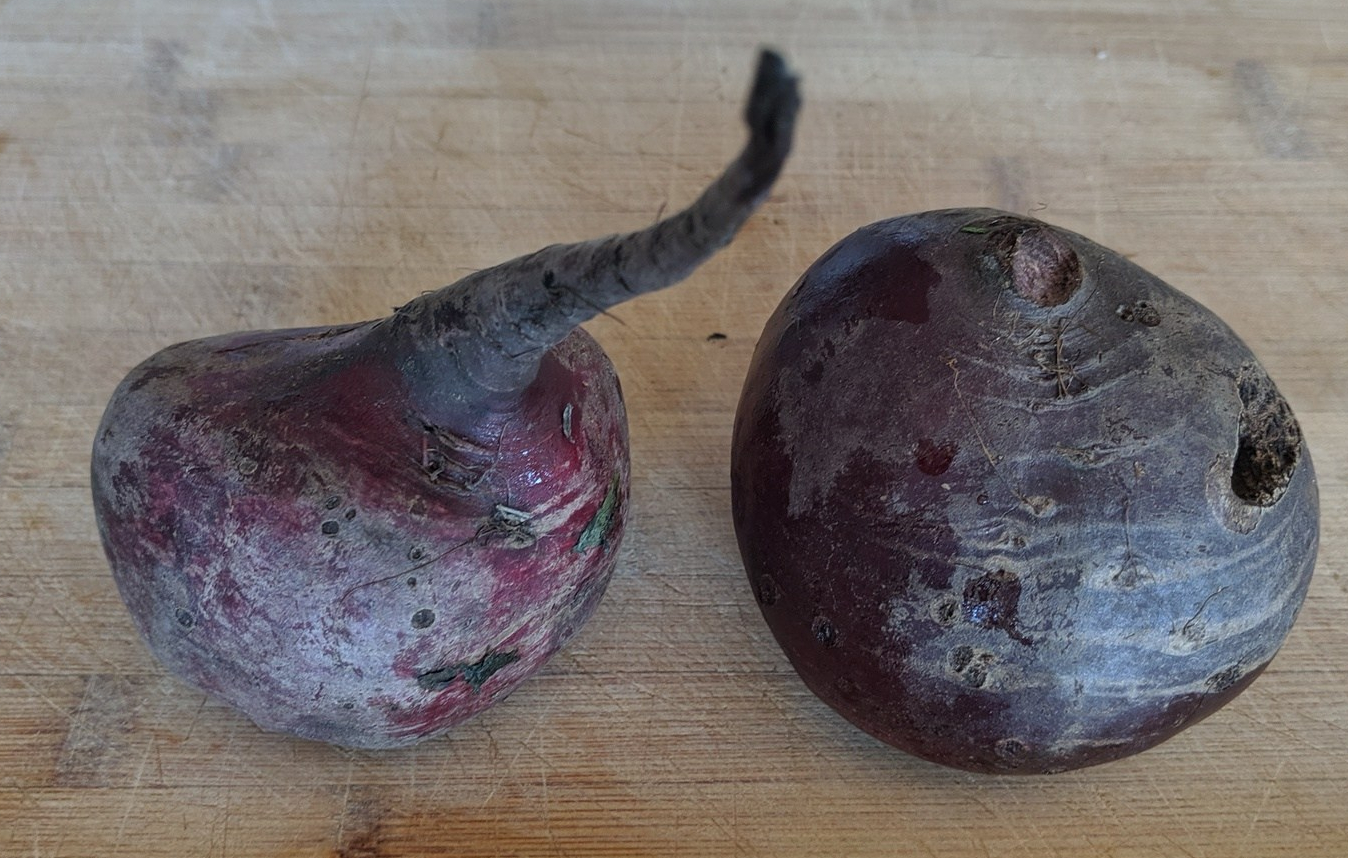
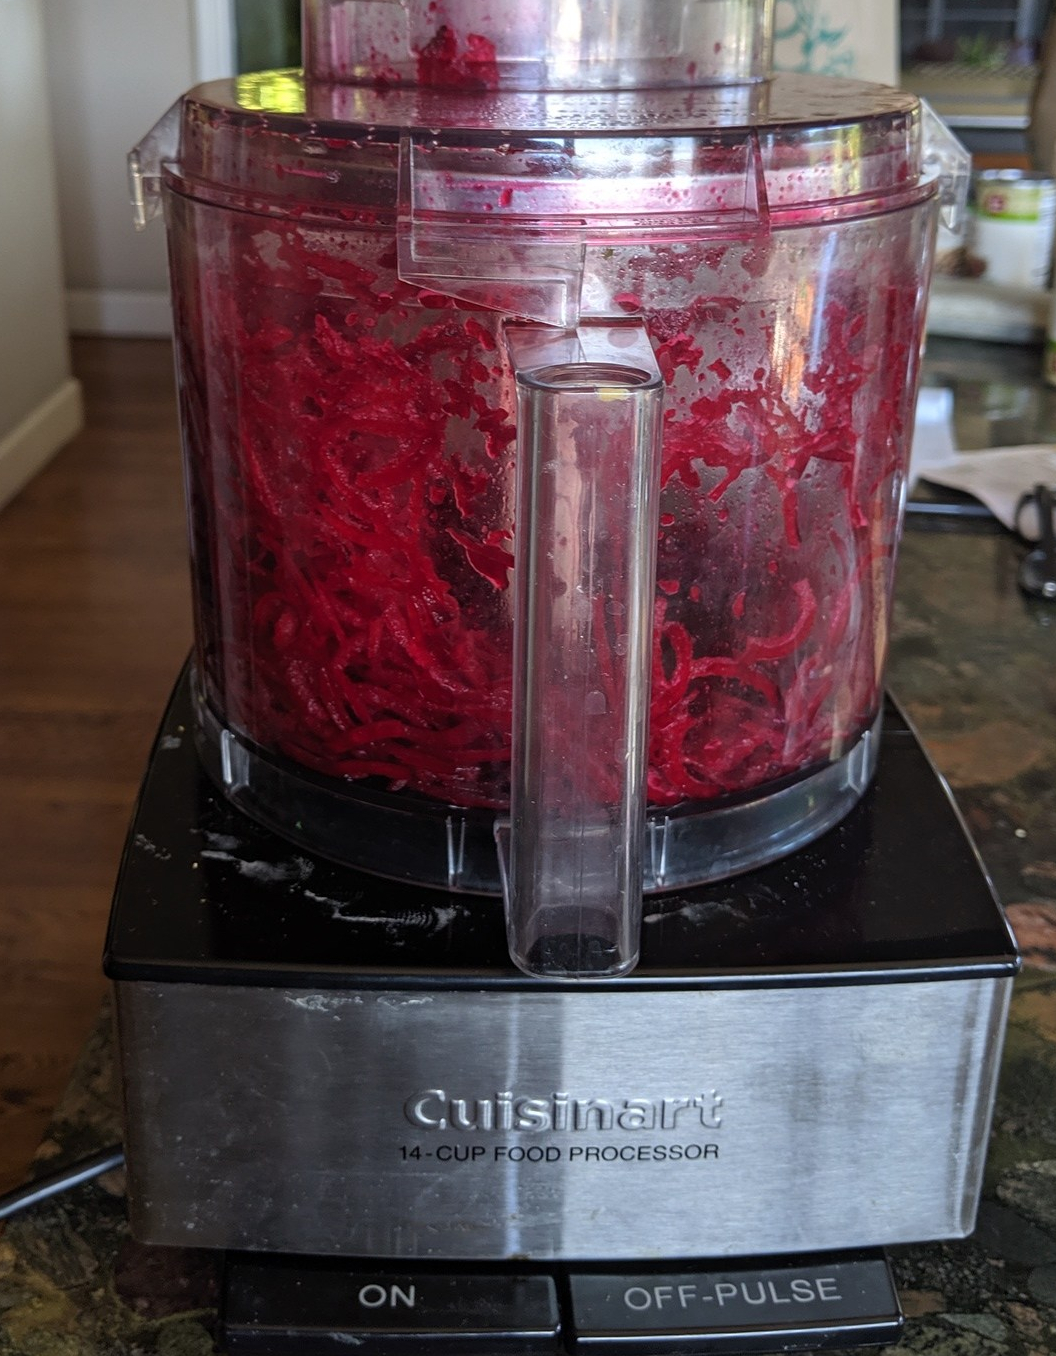
…And the magic ingredient is beets!  In spite of their homely external appearance, once peeled they are beautiful and vibrant jewel tones, proving the old adage that beauty is on the inside. In addition to providing the gorgeous red color in these burgers, beets are a great source of fiber, antioxidants, vitamins and minerals including vitamin C and iron.  One word of caution though, beet juice stains anything porous so use a ceramic cutting board or a plate when peeling.  I used my cuisinart for shredding which worked pretty well although it looked a bit like a bloodbath.
img_20190912_154437-1.jpg
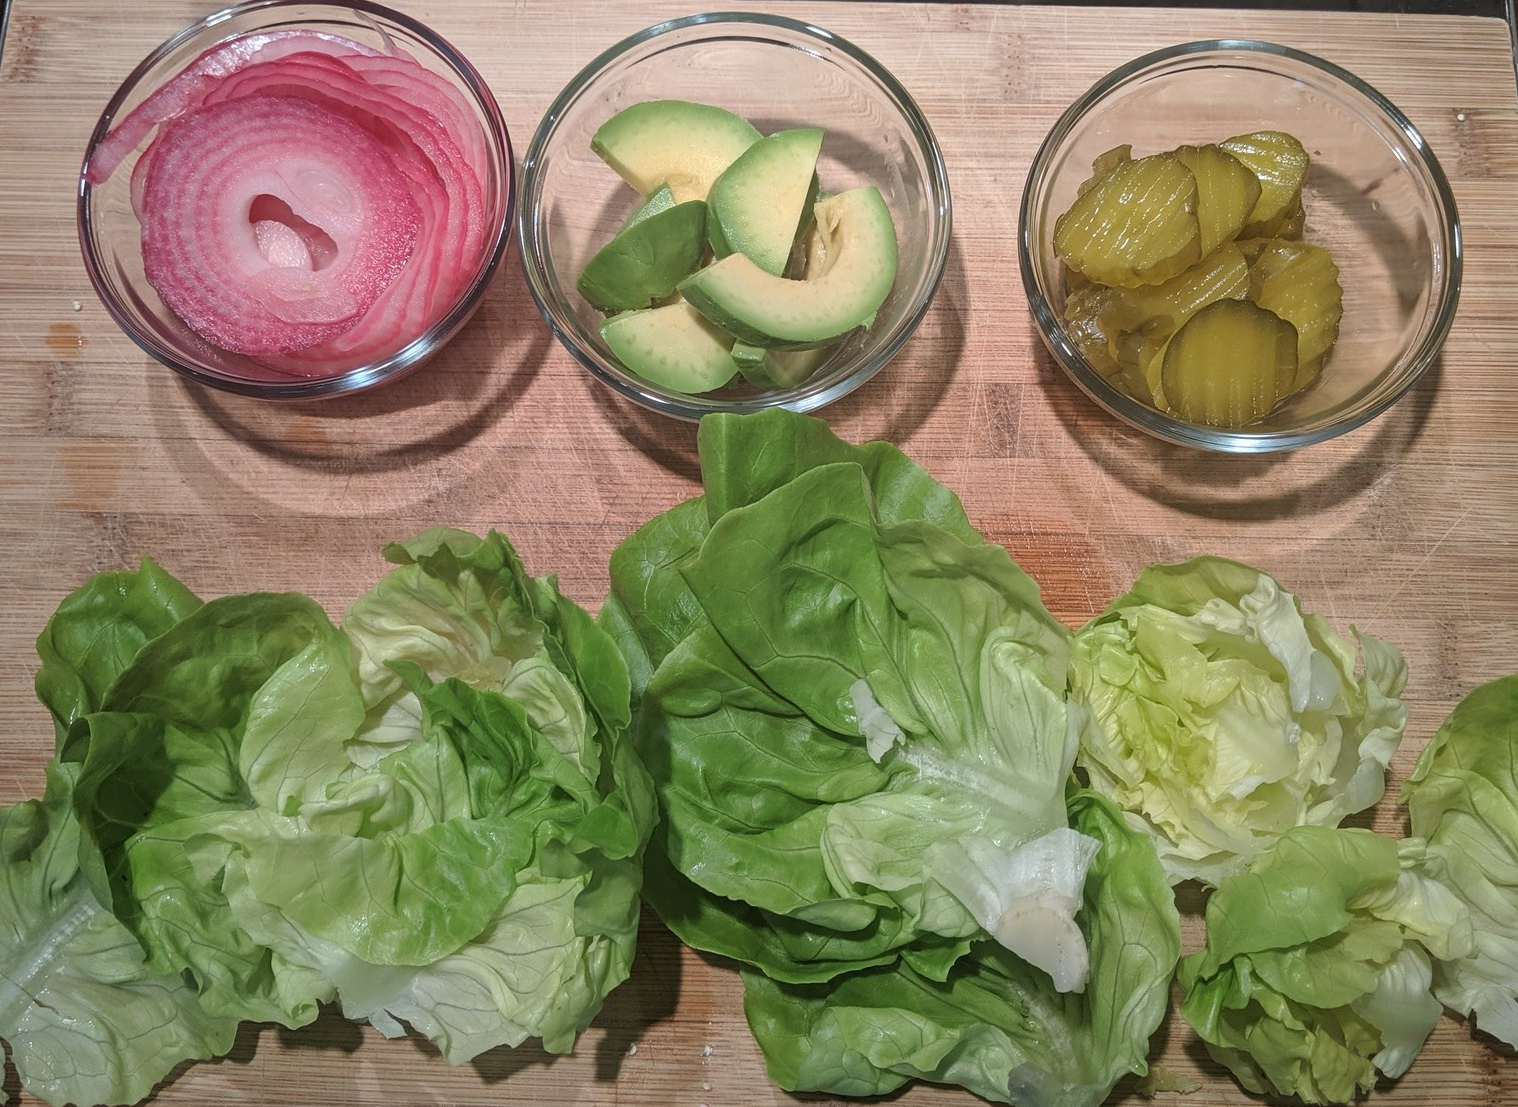
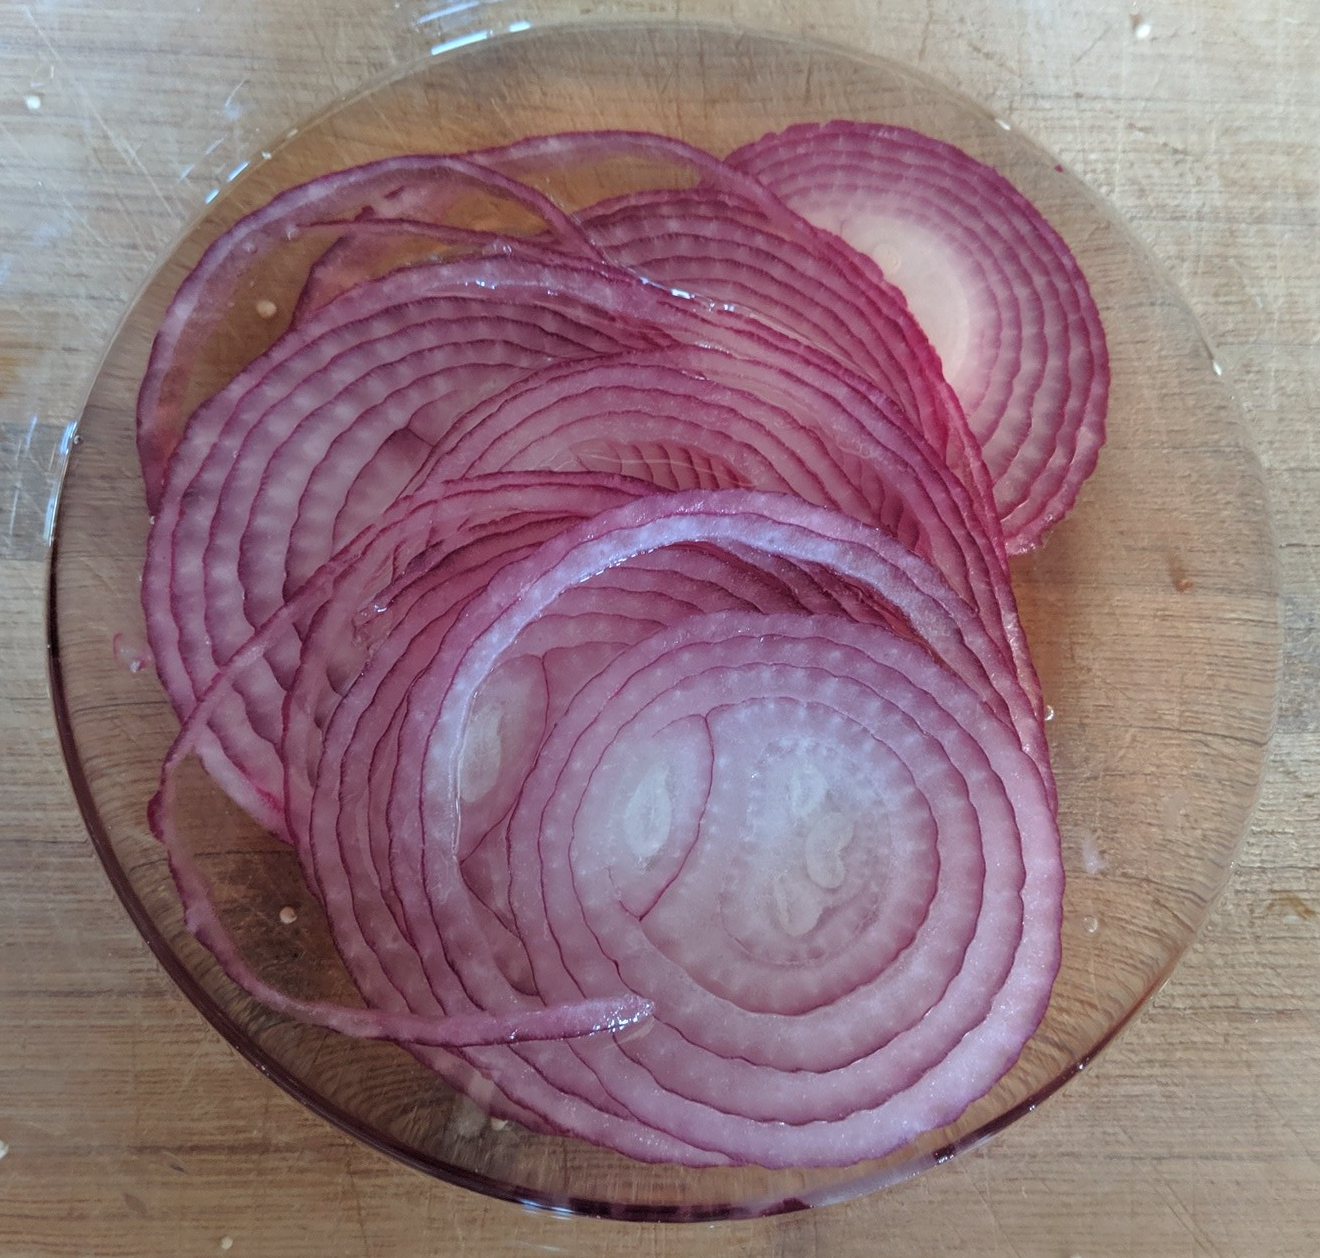
I like to set up a burger bar so people can make their own.  This time, I set out pickled onion, avocado, dill pickles, butter lettuce and the usual condiments.  The pickled onion is a fun touch but completely optional.  Pickling red onions in half rice wine vinegar and half water softens their texture and sharpness.  It becomes a whole new vegetable!
img_20190912_192708.jpg
TIPS:  This recipe takes under 30 minutes if you are efficient, including quinoa cooking time.  Using leftover quinoa, or making it ahead, is even faster.  It does recommend refrigerating patties for a half hour before cooking to firm them up but this step can be skipped if you are pressed for time. This recipe can be made gluten free by using gluten free panko.  It can be made vegan by using an egg replacer or flaxseed combined with water. Use 1 tablespoon ground flaxseed meal to 3 tablespoons of water for one egg.  The original recipe called for 1 cup chopped walnuts but I am allergic, so I skipped it altogether.  I don’t feel the recipe needed it but feel free to add walnuts for more heft and protein.
IMG_20190913_114212
BEET VEGGIE BURGERS
1 (15-oz.) can pinto beans, drained and rinsed
1 1/2 cups cooked quinoa (1/2 cup uncooked)
1/2 cup panko breadcrumbs
1/2 cup shredded red beet (1 small beet)
1 large egg or vegan egg substitute (see Tips)
1 tsp. garlic powder
1 tsp. salt
1 tsp. smoked paprika
4 tsp. olive oil
6 hamburger buns
1/2 -1 cup finely chopped walnuts (optional-see Tips above)
PICKLED RED ONION (Optional)
1 small red onion
3/4 cup rice vinegar
3/4 cup water
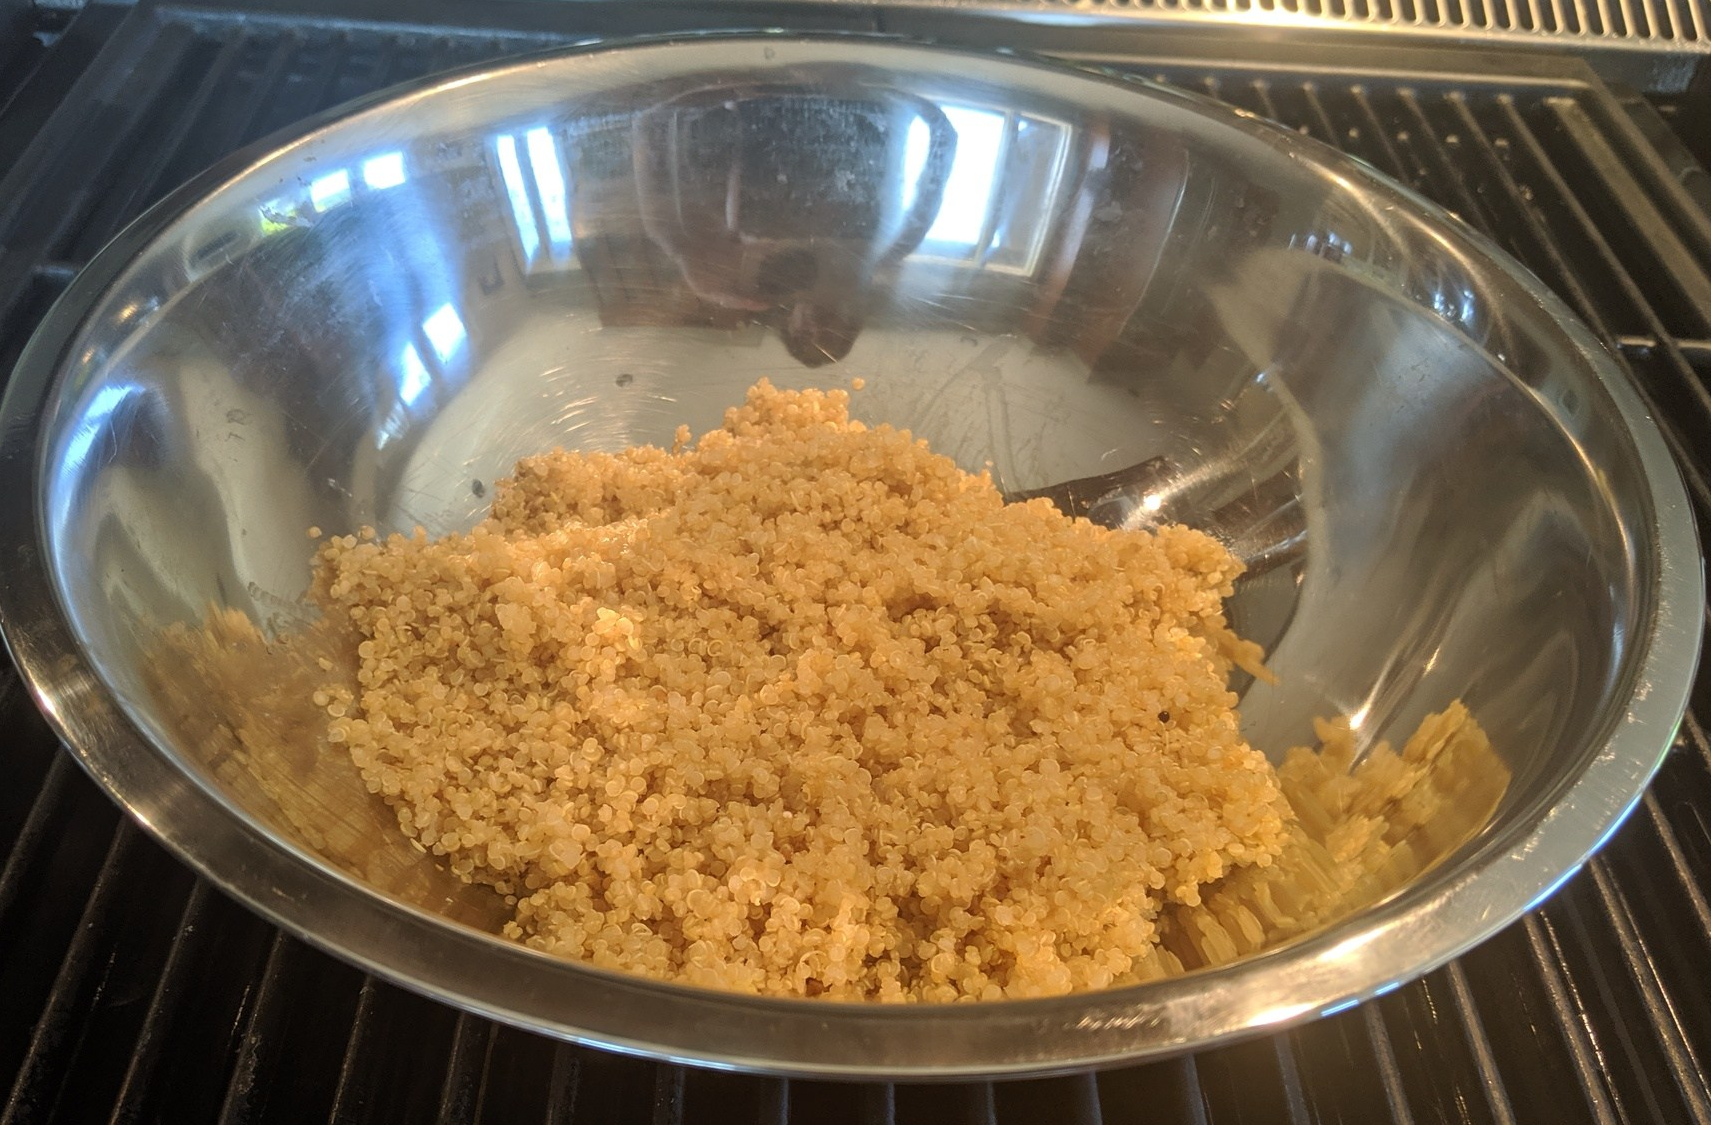
  • Cook 1/2 cup of quinoa according to directions.  Pour into a large bowl to cool.

img_20190912_155905.jpg

  • While quinoa is cooking, thinly slice red onion and place in a bowl with rice vinegar and water. Cover and refrigerate until burgers are ready for serving.

img_20190912_153813.jpg

  • Mash pinto beans with a wooden spoon until mostly broken down but not completely smooth and add to quinoa.

IMG_20190912_160453

  • Peel raw beet with a sharp knife on a plate to save your cutting board from staining.  Shred or grate in a food processor, mandolin or box grater. Add to quinoa mixture.

IMG_20190912_160826

  • Add breadcrumbs, egg, garlic powder, salt, and paprika and mix until well combined.

IMG_20190912_162026

  • Form mixture into six thick patties and place on a parchment-lined baking sheet. Cover with plastic wrap and refrigerate 30 minutes. (You may be able to skip this step if you are in a hurry)

IMG_20190912_192835

  • Heat 2 teaspoons oil in a large nonstick skillet over medium heat until shimmering. Add three patties and cook until browned, about 5 minutes per side. Transfer to a plate and cover loosely with foil to keep warm. Repeat with remaining 2 teaspoons oil and patties.

IMG_20190912_194658

  • Place cooked patties in buns and serve with pickled red onions and your other favorite toppings.

Beet Veggie Burger

  • Servings: 6
  • Difficulty: easy
  • Print

IMG_20190913_114212

1 (15-oz.) can pinto beans(drained and rinsed)
1 1/2 cups cooked quinoa (1/2 cup uncooked)
1/2 cup panko breadcrumbs
1/2 cup shredded red beet (1 small)
1 large egg or vegan egg substitute (see Tips)
1 tsp. garlic powder
1 tsp. salt
1 tsp. smoked paprika
4 tsp. olive oil
6 hamburger buns
1/2 -1 cup finely chopped walnuts(optional-see Tips)
PICKLED RED ONION (Optional)
1 small red onion
3/4 cup rice vinegar
3/4 cup water
  • Cook 1/2 cup of quinoa according to directions.  Pour into a large bowl to cool.
  • While quinoa is cooking, thinly slice red onion and place in a bowl with rice vinegar and water. Cover and refrigerate until burgers are ready for serving.
  • Mash pinto beans with a wooden spoon until mostly broken down but not completely smooth and add to quinoa.
  • Peel raw beet with a sharp knife on a plate to save your cutting board from staining.  Shred or grate in a food processor, mandolin or box grater. Add to quinoa mixture.
  • Add breadcrumbs, egg, garlic powder, salt, and paprika and mix until well combined.
  • Form mixture into six thick patties and place on a parchment-lined baking sheet. Cover with plastic wrap and refrigerate 30 minutes. (You may be able to skip this step if you are in a hurry)
  • Heat 2 teaspoons oil in a large nonstick skillet over medium heat until shimmering. Add three patties and cook until browned, about 5 minutes per side. Transfer to a plate and cover loosely with foil to keep warm. Repeat with remaining 2 teaspoons oil and patties.
  • Place cooked patties in buns and serve with pickled red onions and your other favorite toppings.

Meatless Monday – Rustic Tomato Tart

1

20150702_184531

I can’t say enough about these roasted tomatoes – drizzled with balsamic and honey and slow roasted until they reach caramelized perfection.  Their cooking juice alone is worth the price of admission, delicious as a dipping  sauce for a crusty baguette.  But that’s not all!   I layered the lovely roasted tomatoes over a bed of fresh mozzarella and then folded it all in a buttery crust to form a rustic tart. You would never know that the crust is actually good for you because it’s so yummmy, but it’s made with 100% White Whole Wheat Flour.  No that wasn’t a typo.  I used a whole grain flour made from white whole wheat, which is a different kind of wheat whose germ has a lighter color and milder in flavor than the more traditional ‘red’ wheat.  It has the same nutritional value as whole wheat but is not as heavy, making it a better choice for baking. I believe in making food healthy but not at the expense of taste.  Win, Win!

20150702_142916

These roasted tomatoes are really sweet and flavorful, great layered in sandwiches or mixed in with other vegetables. I know I will be making these over and over again!  I know I already said this, but it bears repeating.  The sauce is ‘to die for’ so carefully pour every last drop into a small bowl and use it as a dipping sauce.

20150702_125826

Tomatoes are America’s favorite vegetable (even though it’s technically a fruit) and they are so wonderful when they are in season like right now, fresh from the vine.  You can just taste the goodness! If you are worried that cooking tomatoes, destroys the nutrients, don’t. Tomatoes are one of the veggies that actually benefits from being cooked. Most people know that tomatoes are loaded with vitamins and nutrients, like lycopene, an antioxidant that helps protect our immune systems.  The best way to get lycopene, which is in the skin and gives tomatoes their red color, is through cooked or processed tomatoes.  Cooking them with a little healthy oil helps carry the lycopene into the bloodstream. ( Best Health Magazine)  So roast away!  You won’t regret it…

TIPS:  This recipe would be easy to make vegan.  Just omit the cheeses which are not necessary anyway, as the star of this dish is really the roasted tomatoes. To veganize the crust, substitute a vegan butter or oil and brush the crust with non-dairy milk before cooking.  Then I would suggest sprinkling the tomatoes and especially the crust with a coarse salt and more herbs before baking.

20150702_184521

I spotted this recipe in the Farm Fresh – Summer, 2015 magazine, although I added a layer of fresh mozzarella beneath the tomatoes and used white whole wheat flour for the crust for a more nutritious tart.

RUSTIC ROASTED TOMATO TART

7-8 ripe tomatoes
1/3 cup olive oil
1 Tbsn balsamic vinegar
2 tsp honey
3 tsp fresh thyme (or 1 1/2 tsp dried)-divided
1/2 tsp salt
6 oz fresh mozzarella, sliced (optional)
1/4 cup parmesan, shredded(optional)

CRUST (or your favorite pre-made crust)

1 cup white whole wheat flour (or all purpose flour)plus more for dusting the surface
2 tsp sugar
1/4 tsp salt
1 stick (1/2 cup) cold unsalted butter
2 Tbsn + 1 tsp ice water
1 egg (for glazing the crust)

20150702_171600

  • If you are making dough for a crust, combine the flour, sugar and salt in a food processor and pulse briefly to combine.  Cut butter into slices and add to the flour mixture.  Pulse about 20 times or until the butter particles are small.  With the motor running, add the ice water and process until the dough is beginning to come together.  It will be loose but will come together if you pinch it.  Turn the loose dough out onto a mixing bowl and knead it briefly  Shape it into a flat disc and wrap in plastic.  Refrigerate for at least 45 minutes and up to 2 days.  (Or to save time later, you can roll it into a 12 inch round, then wrap it in plastic and store in the refrigerator)

20150702_132240

  • Pre-heat the oven to 425.  Line a heavy duty rimmed baking sheet with parchment paper.  Brush with with olive oil.  Combine the olive oil, balsamic vinegar and honey in a small bowl.

20150702_131718

  • Cut tomatoes in half horizontally and carefully remove seeds.

20150702_131613

  • Place tomatoes cut side up on the baking sheet and lightly sprinkle with salt.

20150702_132555

  • Pour the balsamic mixture into each tomato half, distributing as evenly as possible. Sprinkle with 2 tsp thyme.

20150702_142916

  • Roast the tomatoes until they are brown on the edges and collapsed, about an hour.  Let them cool.  Save any pan juices to serve with crusty sourdough bread!

20150702_171804

  • While the tomatoes are cooling, remove the dough from the refrigerator and let come to room temperature.  Heat oven to 400.  Line a heavy duty rimmed baking sheet with parchment paper.  Place the dough on a lightly floured surface and roll into a 12 inch round, then transfer to parchment paper. Don’t worry if the edges aren’t perfect.  I think it makes a more interesting tart.

20150702_172021

  • Arrange mozzarella slices in the center of the round, leaving a 2 inch border of dough.

20150702_172540


  • Arrange the roasted tomato halves over the mozzarella, starting in the center and slightly overlapping, still leaving a 2 inch border.

20150702_173148

  • Fold the edge of the dough up and over the tomatoes, pleating as you go.

20150702_173504

  • Brush the dough (including under the folds) with beaten egg.  Sprinkle the tart with parmesan and remaining thyme. Bake until the crust is golden brown, about 40 minutes.

20150702_181601

20150702_181607


  • Let cool slightly and transfer to a cutting board or serving platter.  Serve warm or at room temperature.


20150702_184652

7-8 ripe tomatoes
1/3 cup olive oil
1 Tbsn balsamic vinegar
2 tsp honey
3 tsp fresh thyme (or 1 1/2 tsp dried)-divided
1/2 tsp salt
6 oz fresh mozzarella, sliced (optional)
1/4 cup parmesan, shredded(optional)

CRUST (or your favorite pre-made crust)

1 cup white whole wheat flour (or all purpose flour)plus more for dusting the surface
2 tsp sugar
1/4 tsp salt
1 stick (1/2 cup) cold unsalted butter
2 Tbsn + 1 tsp ice water
1 egg (for glazing the crust)

  • If you are making dough for a crust, combine the flour, sugar and salt in a food processor and pulse briefly to combine.  Cut butter into slices and add to the flour mixture.  Pulse about 20 times or until the butter particles are small.  With the motor running, add the ice water and process until the dough is beginning to come together.  It will be loose but will come together if you pinch it.  Turn the loose dough out onto a mixing bowl and knead it briefly  Shape it into a flat disc and wrap in plastic.  Refrigerate for at least 45 minutes and up to 2 days.
  • Pre-heat the oven to 425.  Line a heavy duty rimmed baking sheet with parchment paper.  Brush with with olive oil.  Combine the olive oil, balsamic vinegar and honey in a small bowl.
  • Cut tomatoes in half horizontally and carefully remove seeds.
  • Place tomatoes cut side up on the baking sheet and lightly sprinkle with salt.
  • Pour the balsamic mixture into each tomato half, distributing as evenly as possible. Sprinkle with 2 tsp thyme.  Roast the tomatoes until they are brown on the edges and collapsed, about an hour.  Let them cool.  Save any pan juices to serve with crusty sourdough bread!
  • While the tomatoes are cooling, remove the dough from the refrigerator and let come to room temperature.  Heat oven to 400.  Line a heavy duty rimmed baking sheet with parchment paper.  Place the dough on a lightly floured surface and roll into a 12 inch round, then transfer to parchment paper. Don’t worry if the edges aren’t perfect.  I think it makes a more interesting tart.
  • Arrange mozzarella slices in the center of the round, leaving a 2 inch border of dough.
  • Arrange the roasted tomato halves over the mozzarella, starting in the center and slightly overlapping, still leaving a 2 inch border.
  • Fold the edge of the dough up and over the tomatoes, pleating as you go.
  • Brush the dough (including under the folds) with beaten egg.  Sprinkle the tart with parmesan and remaining thyme. Bake until the crust is golden brown, about 40 minutes.
  • Let cool slightly and transfer to a cutting board or serving platter.  Serve warm or at room temperature.


Meatless Monday – Tofu ‘Steaks’ with Chimichurri Sauce

1

20150427_194425

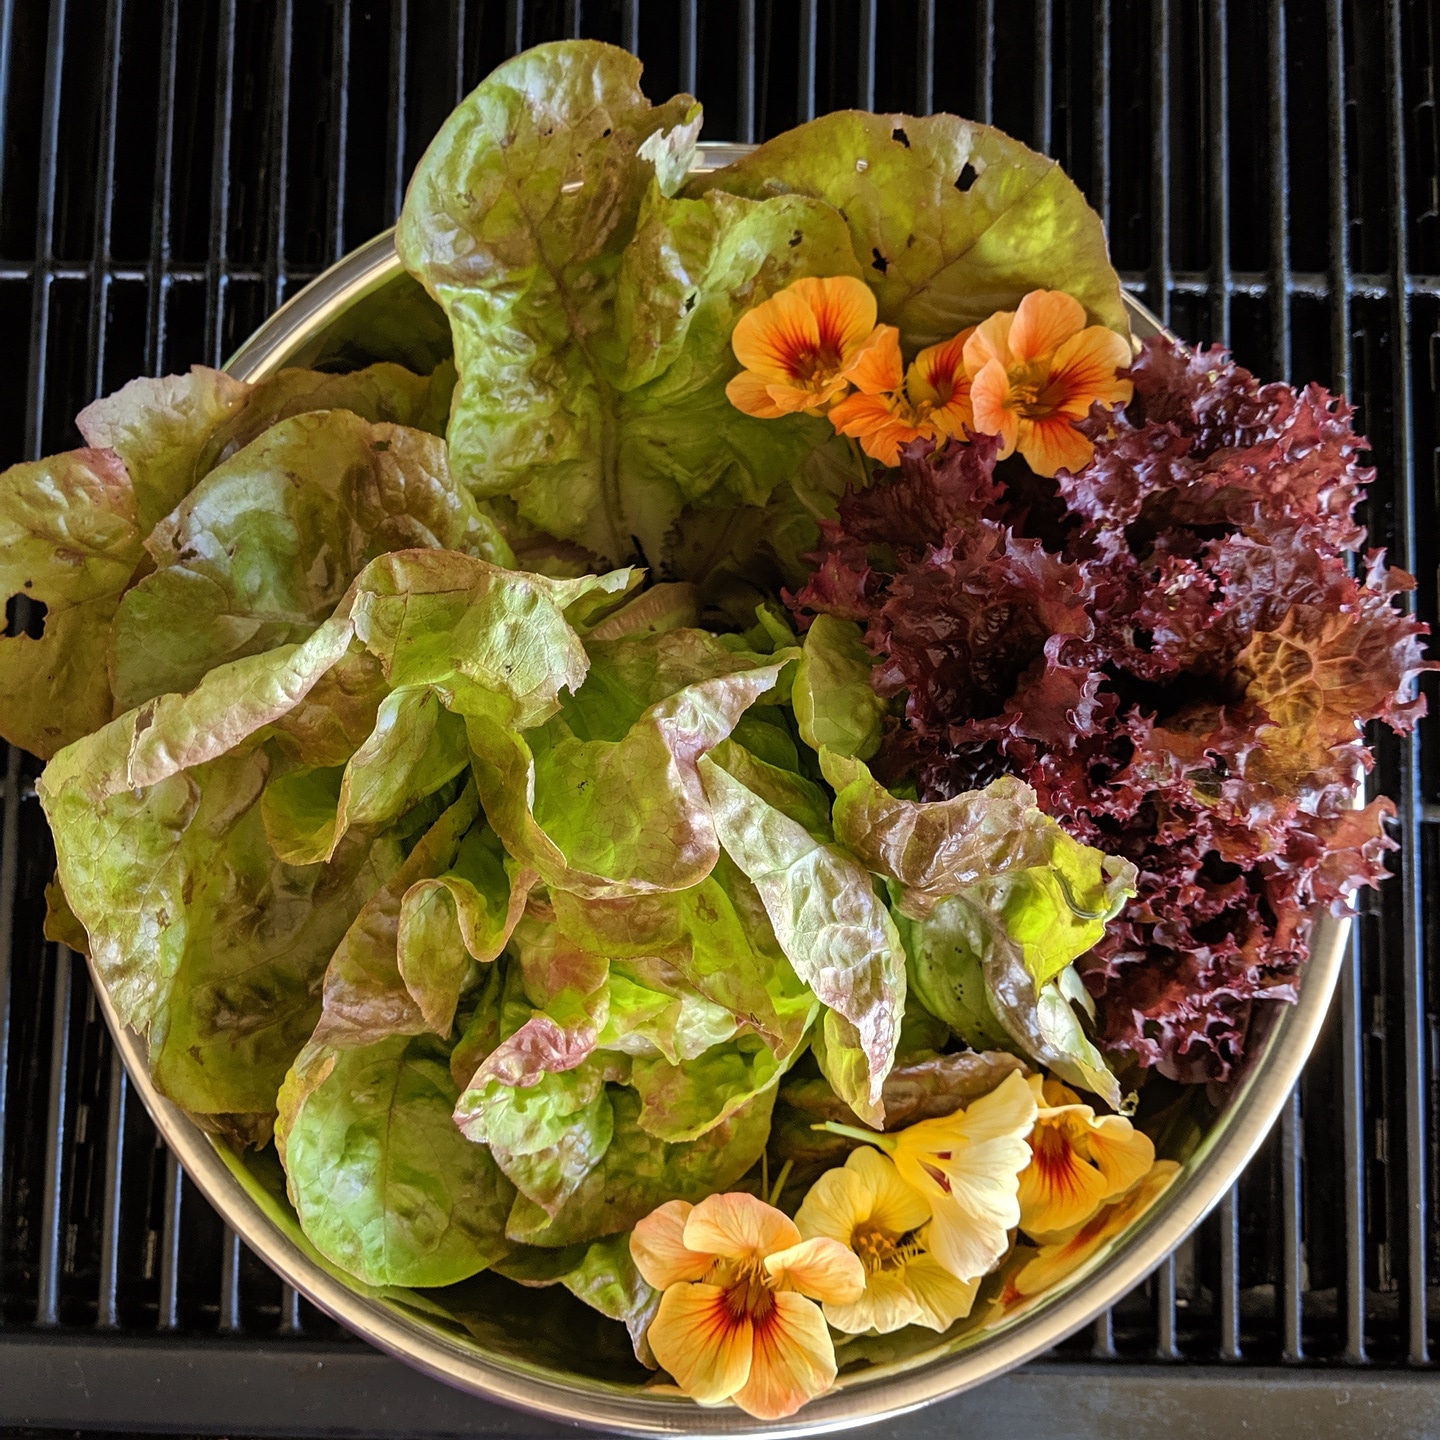
When I made this the first time, I declared it a place where meat lovers and vegans can co-exist in happiness.  I just made it again and I still agree. Here is a  ‘steak’ a meat lover will find tasty and satisfying while a vegetarian will be in raptures…  It takes less than 30 minutes and will not disapoint.    Last time, I served the tofu steaks with brown rice and broccoli with a healthy dose of chimichurri over everything which was hearty and satisfying.  This time, I served with a simple salad of lettuces and edible flowers that I had just picked from my garden.  It’s a hot day so it was perfect.

IMG_20190605_182023_011IMG_20190605_193844

Each tofu steak is a hefty seven ounces although my husband has a hearty appetite and usually eats his and goes back for seconds, so I need to use two blocks of tofu if I’m serving a large eater.  I also like to make sure there are leftovers for lunch.  Its really good cold too. The tofu is first brushed with a spicy and savory marinade and then pan seared and topped with a fresh and zesty chimichurri sauce, a South and Latin American condiment that is loaded with chili peppers, fresh herbs and garlic.  Chimichurri is good on almost anything and it can be made spicy or mild depending on your taste, which is why its so popular.  Originating in Argentina, it is commonly used to top grilled steak, which is one reason it’s so good on this dish.

20150423_191518

Even though the tofu should be allowed to drain for about 10 minutes, this recipe still takes less than 30 minutes.  Just slice the tofu and let it drain.  While it’s draining, prepare the chimichurri sauce and the marinade.  Using a food processor for the shimichurri sauce saves time and results in a smoother sauce.  Brush the tofu with the marinade and let sit while you prepare the rice or other veggies you’re serving.  The tofu only takes about 6 minutes to cook.  Easy, fast, delicious!

20150427_194726

Tofu steaks can be cut in two sizes, depending on preferences.  One block serves two people, unless you have someone with a large appetite, in which you can double the recipe.  I loved the thickness (about one inch) of the steaks and my husband loved the size (7 oz each).  Tofu is normally cut into thinner slices or cubes so this is a nice difference. The outside was so flavorful and the inside had a wonderful creamy consistency that you don’t get with thinner pieces.  For 7 oz steaks, stand the tofu on end and slice vertically to get two one inch thick pieces. For 3.5 oz steaks, cut each half in half. Pictured below.

20150427_175328

20150427_194405

TOFU ‘STEAKS’ WITH CHIMICHURRI SAUCE

15 – 16 oz extra firm tofu
1/4 cup avocado oil (or other high heat oil)
1 bunch broccolini(optional)
1 cup brown rice (optional)

Tofu Marinade:
2 Tbsn olive oil
1 tsp garlic powder
1 tsp onion powder
1 tsp cumin
1/2 tsp cayenne pepper
1/2 tsp salt
1/2 tsp pepper

Chimichurri Sauce:
1/3 cup extra-virgin olive oil
1/4 cup freshly squeezed lemon juice (or red wine vinegar)
2 large garlic cloves, minced
1/4 cup fresh oregano, finely chopped
1/2 cup flat-leaf parsley, finely chopped
1/2 tsp salt
1 fresh red chili pepper, seeded and minced (or 1 tsp dried hot pepper flakes-or both)

20150427_175328

  •  Drain tofu and stand it on it’s end and cut in half vertically on the narrow side so you end up with two wide one inch slices.  Place tofu on double thick paper towels and top with another paper towel and place something heavy (like a cast iron pan) on top to help press out the water.  Let sit at least 10 minutes. Tofu can be cut into 7 oz or 3/5 oz ‘steaks’.  See TIPS.

20150423_175613

  • Mix all Chimichurri ingredients together in a small bowl and set aside. For a finer sauce, pulse in food processor.

20150427_193741

  • Combine tofu marinade ingredients and brush them onto tofu covering top, bottom and all sides.  Marinade should be fairly thick and pasty. Set aside.

20150423_190504

  • If you are serving with rice, get it started.  If you are preparing a vegetable, like baby broccolini, heat 2-3 tablespoons olive oil in a heavy skillet and saute broccolini with some chopped garlic, 8 to 10 minutes.  Sprinkle with salt and pepper.  Remove from pan and tent with foil or cover and use a new pan for the tofu.

20150427_194131

  • Add more oil to the pan if necessary, or use a grill pan or grill, and heat on medium high until almost smoking.  Add tofu and cook 3-4 minutes until golden brown. Turn and cook the other side another 3-4 minutes.

20150423_191511

  • Serve with a big spoonful of chimichurri sauce.

Tofu Steaks with Chimichurri Sauce

  • Servings: 2
  • Difficulty: easy
  • Print

TOFU STEAKS WITH CHIMICHURRI SAUCE

  • Servings: 2-4
  • Difficulty: easy
  • Print

 20150427_194425

15 – 16 oz extra firm tofu
1/4 cup avocado oil (or other high heat oil)
1 bunch broccolini(optional)
1 cup brown rice (optional)

Tofu Marinade:
2 Tbsn olive oil
1 tsp garlic powder
1 tsp onion powder
1 tsp cumin
1/2 tsp cayenne pepper
1/2 tsp salt
1/2 tsp pepper

Chimichurri Sauce:
1/3 cup extra-virgin olive oil
1/4 cup freshly squeezed lemon juice (or red wine vinegar)
2 large garlic cloves, minced
1/4 cup fresh oregano, finely chopped
1/2 cup flat-leaf parsley, finely chopped
1/2 tsp salt
1 fresh red chili pepper, seeded and minced (or 1 tsp dried hot pepper flakes-or both)

  •  Drain tofu and stand it on it’s end and cut in half vertically on the narrow side so you end up with two wide one inch slices.  Place tofu on double thick paper towels and top with another paper towel and place something heavy (like a cast iron pan) on top to help press out the water.  Let sit at least 10 minutes.  Tofu can be cut into 7 oz or 3/5 oz ‘steaks’.  See TIPS.
  • Mix all Chimichurri ingredients together in a small bowl and set aside.  If you prefer a smoother sauce, pulse in the food processor.
  • Combine tofu marinade ingredients and brush them onto tofu covering top, bottom and all sides.  Set aside.
  • If you are serving with rice, get it started.  If you are preparing a vegetable, like baby broccolini, heat 2-3 tablespoons olive oil in a heavy skillet and saute broccolini with some chopped garlic, 8 to 10 minutes.  Sprinkle with salt and pepper.  Remove from pan and tent with foil or cover and use a new pan for the tofu.
  • Add more oil to the pan if necessary, or use a grill pan or grill, and heat on medium high until almost smoking.  Add tofu and cook 3-4 minutes until golden brown.
  • Turn and cook the other side another 3-4 minutes.
  • Serve with a big spoonful of chimichurri sauce.


Meatless Monday – Mediterranean Orzo

2

20190531_162239.jpg

Toss together cooked orzo, sun dried tomatoes, kalamata olives, crumbled feta and fresh herbs with a lemon dressing for a quick, fuss free meal.  I just love a dish that doesn’t need to be babied or involve a lot of prep, no oven and can be ready in 20 minutes, plus cooling time.  This delicious pasta dish is served at room temperature, so you can make it and let it sit until you are ready which makes it perfect for a summer buffet or when you have guests for dinner.  Or better yet, make this the day before and bring to room temperature to serve while you sit back and enjoy a glass of wine…

20190531_162414-e1559406557232.jpg

I love this combination of flavors and colors. The orzo (which is pasta not rice) absorbs the lemon vinaigrette along with the sun dried tomatoes in oil.  The herbs and onions add a freshness while the olives and feta add a wonderful saltiness as the final touch. I have made this for a large party and tossed with roasted shrimp with great success but I prefer it just like this.  I think I like it better the next day, so feel free to make it ahead. To avoid waiting for the orzo to cool, cook it ahead of time and just toss all ingredients together for a 10 minute meal.

20190531_151705.jpg

In purchasing feta, I advise getting a block in water rather than already crumbled.  The quality is better and you can control the size of crumbles.  Often the pre-crumbled feta is very small and would get lost in this dish.

20190531_162239

MEDITERRANEAN STYLE ORZO

  • 3/4 lbs orzo pasta (or gluten free orzo)
  • 1/2 cup lemon juice
  • 1/3 cup olive oil
  • 1/2-3/4 cup sun dried tomatoes in oil
  • 1-2 tsp salt (to taste)
  • 1 tsp pepper
  • 1/2 cup kalamata olives, pitted and sliced in half lengthwise
  • 1/2 cup scallions, minced white and green parts
  • 1/2 cup fresh flat-leaf parsley, chopped
  • 1/2 cup red onion, thinly sliced or small dice
  • 8-12 oz feta cheese, large crumble or dice ( Try Vio Life Vegan Feta)

20190531_150935.jpg

  • Cook the orzo according to package instructions, stirring occasionally, until it’s cooked al dente. Drain and pour into a large bowl. Do not rinse.

20190531_150853.jpg

  • Whisk together the lemon juice,  olive oil, salt and pepper and pour over the hot pasta. Mix well.

20190531_151306

  • Stir in the sun dried tomatoes with oil and the olives. Set aside to cool and allow the juice and flavors to absorb.  If it seems too dry, add a bit more olive oil.

20190531_152345.jpg

  • While the pasta is cooling, thinly slice the scallions, thinly slice the red onion and cut the slices in half (or finely dice) and chop the parsley.

20190531_160538.jpg

  • When pasta is cool, add the scallions, parsley, onion and mix well.

20190531_162230

  • Add the feta and stir gently. Taste and add seasoning as needed. Set aside at room temperature to allow the flavors to blend (the longer the better).

20190531_162403.jpg

TIPS:  This recipe can be made a day ahead and refrigerated overnight. Just bring it back to room temperature and check seasonings before serving.

Mediterranean Orzo

  • Servings: 4-6
  • Difficulty: easy
  • Print

20190531_162239

  • 3/4 lbs orzo pasta (or gluten free orzo)
  • 1/2 cup lemon juice
  • 1/3 cup olive oil
  • 1/2-3/4 cup sun dried tomatoes in oil
  • 1-2 tsp salt (to taste)
  • 1 tsp pepper
  • 1/2 cup kalamata olives, pitted and sliced in half lengthwise
  • 1/2 cup scallions, minced white and green parts
  • 1/2 cup fresh flat-leaf parsley, chopped
  • 1/2 cup red onion, thinly sliced or small dice
  • 8-12 oz feta cheese, large crumble or dice
  1. Cook the orzo according to package instructions, stirring occasionally, until it’s cooked al dente. Drain and pour into a large bowl. Do not rinse.
  2. Whisk together the lemon juice,  olive oil, salt and pepper and pour over the hot pasta. Mix well.
  3. Stir in the sun dried tomatoes with oil and the olives. Set aside to cool and allow the juice and flavors to absorb.  If it seems too dry, add a bit more olive oil.
  4. While the pasta is cooling, thinly slice the scallions, thinly slice the red onion and cut the slices in half (or finely dice) and chop the parsley.
  5. When pasta is cool, add the scallions, parsley, onion and mix well.
  6. Add the feta and stir gently. Taste and add seasoning as needed. Set aside at room temperature to allow the flavors to blend (the longer the better).

TIPS:  This recipe can be made a day ahead and refrigerated overnight. Just bring it back to room temperature and check seasonings before serving.