Limoncello

12

Limoncello1
“I believe when life gives you lemons, you should make lemonade…and try to find someone whose life has given them vodka, and have a party.” (Ron White, Author)

…Or you can combine the two and make Limoncello! I am lucky to have a beautiful, and bountiful, Meyer Lemon tree right outside my kitchen door. Most citrus trees bear two crops a year, a smaller one in the summer and the heaviest crop in winter.  Meyer lemon trees, however, are known for bearing fruit all year long, although their largest crop is now. With such an abundance of fruit, I am always looking for ways to use lots of lemons at once. I don’t mind sharing but I hate when they are wasted. Limoncello is an easy way to use extra lemons, although is not instantly gratifying since there is a considerable wait time until you have a final product. Limoncello is a crowd pleaser and makes a great gift, so our problem is that it goes too quickly. For that reason, as soon as I bottle one batch, I often start another.  Even if you don’t have a tree in your backyard, its easy to find Meyer lemons this time of year at your supermarket or even at Costco. You can also use regular lemons with good results, so use what you have.   It’s not too late!

The Limoncello I have made in the past is more “California style”, rather than Italian. I found the recipe on the internet from someone in Berkeley who has a prolific meyer lemon tree in her backyard and came up with a recipe in an attempt to use up her lemons. Sounded familiar so I gave it a whirl. I can’t credit her for the recipe since I could never find her post again. I liked the fact that she uses whole lemons and not just the peel. The results were good and I’ve had no complaints, however, after our trip to Italy last summer, I decided to attempt the Italian version, which uses only the peel. Purists believe that this makes the best quality limoncello, so I decided to put it to the test.  Here are a couple of photos from the ‘California style’ batch.

  1. making limoncelloLimoncello

In selecting the lemons, try to get organic since the peel is where most of the insecticides reside and often they are waxed to give them a longer shelf life. If you can’t find organic lemons, just scrub them with warm soapy water and dry them with a towel.   I have divided the process into two steps. Since the limoncello needs to sit for 6 to 8 weeks before bottling, you don’t have to have everything on hand just to get started. The large Bell containers are easy to find at hardware  or department stores like Target.   The Container Store and Pier One Imports both carry a nice selection of flip cap bottles that are perfect for bottling. Lastly, think about ‘your’ label which is the finishing touch and gives it personality and helps to make it the perfect gift. http://www.onlinelabels.com has pretty much every size and shape label you could ever want and they have a downloadable template which makes it very easy.

Limoncello

  • Servings: 8-12 oz bottles
  • Difficulty: medium
  • Print

STEP 1

 What you Need:

18 Meyer Lemons
1 handle or 2 fifths of Everclear or vodka
2 gallon glass jar with a lid(found at most hardware stores)
Potato peeler or microplaner (to zest)
• Wash and dry lemons. If not using organic scrub them with a vegetable brush in warm soapy water. Drying helps remove any remaining residue.

Limoncello3 Limoncello4

  •  Using a potato peeler, zester or a microplaner, carefully remove the peel trying not to get any of the bitter white pith. I used a potato peeler to cut long strips and then scraped any white from the back with a sharp knife.
  • Place all of the peels in the glass jar and pour the alcohol/vodka over the top to fill. Cover with a tight lid. (Note: The photo below shows a double batch.)
  • Squeeze the juice from the lemons.  Add sugar and water to make lemonade or freeze in ice cube trays, then put in baggies when frozen and save for another use.

Limoncello5
• Let sit covered with a kitchen towel or two for 6 to 8 weeks. I like to give it a little shake every few days for the first couple of weeks, just to make sure it’s evenly mixed. After that you can store it somewhere dark and out of the way.

STEP 2

What you Need:

Funnel
Fine mesh strainer
2 or 3 paper coffee filters
large bowl
ladle
2 1/2 cups sugar
2 1/2 cups water (filtered preferred)
8 12 oz bottles
labels (optional)
  • Wash and air dry bottles.  Can be done in a hot dishwasher. (Drying with a towel can reintroduce germs.)
  • Heat water and sugar in a pot until the sugar dissolves and the simple syrup is clear. /Remove from heat and let cool to room temperature.

Limoncello8 Limoncello9

  • Line your mesh strainer with coffee filters and place it over the large bowl (or have someone hold it for you).  Carefully pour lemon/vodka mixture over the strainer, taking care not to let the liquid go over the top of the filters.

Limoncello7

  • Discard lemon peels.
  • Clean Bell jar and pour filtered vodka mixture back into the jar (I would filter at least twice).

Limoncello10

  • Pour simple syrup into the jar and mix to combine.
  • Place a funnel into one of the bottles (with a coffee filter if you want to filter again) and carefully ladle limoncello into the bottle leaving 1 inch clearance at the top.

Limoncello12

  • Seal the cap and repeat with remaining bottles.

Limoncello13Limoncello15

  • The Limoncello will continue to mellow and improve over the next several weeks.
  • Label the bottles if desired. I’m testing a new label.  What do you think?
  • Store in a cool place.  Serve icy cold from the freezer.

So what was the final verdict?  The Italian style version requires more preparation time, in the peeling of so  many lemons,  but the final product is smoother and tastes more like the Limoncello we had in Italy, although less sweet since we also reduced the amount of sugar.   I think its worth the extra effort.  Cheers!

Wheatless Wednesday – Spicy Roasted Chickpeas

4

Roasted Garbanzos6

Warning – Highly Addictive! If you like Corn Nuts you’ve got to try these.   I got this recipe idea from my friend, Laura, who makes these snacks for her two teenaged boys, who gobble them up and ask for more without actually knowing what they are eating.  When they would first ask,  Laura’s answer was really vague (sudden attack of coughing) or evasive  (urgent phone call). She finally decided to call them Bean Pops. Clever Mama!  Regardless of the mommy maneuvering, she is getting her boys away from bad fat and preservative laden junk foods to protein and nutrient rich, yet still yummy chickpea snacks, or what I think of as healthy ‘corn nuts’ (if there can be such a thing).  Garbanzo beans are a source of several vitamins including vitamin C, B6 and folate. Many dietary minerals are also available from garbanzo beans, including manganese, phosphorus, copper, iron, magnesium, selenium, zinc and calcium. (www.livestrong.com )

Dieters take note!  ‘Furthermore, there is a recent study in which participants consumed fewer processed foods and less food overall when the diet was supplemented with garbanzo beans.  Research suggests that the fiber benefits of garbanzo beans may go beyond the fiber benefits of other foods’.  For more information on this study click here: http://www.whfoods.com/genpage.php?tname=foodspice&dbid=58

When I was a teenager, my Mom went through a garbanzo (also called chickpeas or ceci beans) phase where they showed repeatedly up in our salads and main dishes – even as flour in bread. (My Mom was way ahead of her time – by 25 years or so). I checked with my sister, Margaret, who also remembers the time when we had garbanzos coming out of our ears.  She admitted though that they are now her favorite bean and she puts them in everything she can, so I guess the apple doesn’t fall far from the tree.   I didn’t appreciate my Mom’s creativity at the time, especially since I wasn’t a garbanzo fan as a kid.  I am a huge fan now though (same apple tree, I guess).  I called my Mom to see what she had to say on the subject and she was about to start some garbanzo sprouts which nutritionally speaking is like garbanzos on steroids (increased vitamin content among a host of other benefits).  So there you go.  At 86, Mom  is still way ahead of everyone else!

Shameless PlugTIP: Spicy Roasted Chickpeas are particularly delicious when paired with a glass of red wine. I’m enjoying  the 2009 Paradisos Red Wine from my brother, Paul’s winery, Paradisos del Sol in Zillah, Washington.  It retails for $28 per bottle but if you mention my blog you will get the $14 family rate.  They deliver to Seattle too!  Check them out at http://www.paradisosdelsol.com/  Cheers!

Spicy Roasted Chickpeas

  • Servings: 3 cups
  • Difficulty: easy
  • Print

2 Tbsn olive oil
1 Tbsn ground cumin
1 tsp garlic powder
½ tsp chili powder
1 tsp salt (or to taste)
¼ tsp cayenne pepper (or more if you like spicy)
2 cans chickpeas/garbanzo beans (or 2 -3 cups cooked dry beans)

  • Preheat oven to 400  degrees
  • Rinse and dry garbanzo beans.  You can either air dry them on paper towels or pat dry with additional papertowels.

Roasted Garbanzos 1

  • Whisk the oil, cumin, garlic powder, chili powder, salt,  and red pepper together in a medium sized bowl.;

Roasted Garbanzos 2


  • Add the chickpeas and toss to coat.


Roasted Garbanzos 3

  •  Spread into a single layer on a baking sheet. Shake the pan back and forth a bit to disperse them evenly.

Roasted Garbanzos 4


  • Roast, stirring occasionally, until nicely browned and slightly crispy, about 40 to 45 minutes or until desired crispness.  They will continue to crisp a bit while cooling on the pan.


Roasted Garbanzos5

  •  Serve warm or cold.

Roasted Garbanzos6

Meatless Monday – Avocado Toast with Coconut ‘Bacon’

4

Avocado Toast 1

BACON – NEED I SAY MORE? I stopped eating meat last June and I must say I don’t really miss it. BACON, however, which really should be it’s own food group, is a different story… There is something about bacon’s crispy, fatty, salty deliciousness that is just so irresistible! I know people who are vegetarians, except for bacon.  I mean, there is a Bacon of the Month Club!   So when I stumbled upon a recipe for Sweet Smokey Coconut Bacon on Pintarest (via www.tohealthblog.wordpress.com ), I realized a stroke of brilliance was before me, bacon without the guilt.

I have been hooked on Avocado Toast for breakfast these past couple of weeks. I’ve been trying to recreate my favorite appetizer, Avocado Bruschetta, from Picco Restaurant in Larkspur, which has chorizo crumbled on top. I have been substituting dry toasted pine nuts and flakes of Maldon Sea Salt which I was pretty happy with -Until I heard about COCONUT BACON! I let my fingers do the walking (thank you google) only to find that there are many, many recipes for coconut bacon on the internet. How did I not know this? Two of my favorite flavors together sounds like a match made in heaven. The recipes call for varying combinations of coconut flakes, maple syrup, smoked paprika, cloves, Braggs Amino Acids, Liquid Smoke or Soy Sauce. For those, unenlightened folks like me, Braggs Amino Acids is a gluten free soy sauce substitute that has beneficial amino acids.  I tried one batch with liquid smoke and one without and I liked it better without, but that is a personal taste. I know a lot of men people love that smoky flavor .  So does it really taste like bacon?  Not really, but it makes a tasty substitute that is  mostly monosaturated fat and Omega-6 fatty acids, which are extremely beneficial for  the body.  For nutritional info on coconut click here:  (http://www.ehow.com/about_5304349_health-benefits-coconut-flakes.html)

Avocados have gotten a bad rap as a high fat, high calorie food when they  are actually quite healthy and are nutrient dense. (Calories that Count).   ‘Nutrient density is a measure of the amount of nutrients a food contains in comparison to the number of calories. One-fifth of a medium avocado (1 oz.) has 50 calories and contributes nearly 20 vitamins and minerals, making it a nutrient-dense food choice.  They are naturally sodium and cholesterol free and contain mono and poly unsaturated fats (good fats).’  For more information on the benefits of amazing avocados click here. (http://www.californiaavocado.com/avocado-nutrients/)

Avocado Toast 2Avocado Toast 3

Avocado Toast with Coconut 'Bacon'

  • Servings: 2
  • Difficulty: easy
  • Print


2 slices good bread (sourdough, ciabatta or whole grain )
1 Tbsn olive oil, coconut oil or butter (optional)
1 half ripe avocado
Salt (I like coarse or flaked sea salt)
2 Tbsn pine nuts (optional)
2 Tbsn coconut ‘bacon’ (recipe below)

  • Brush tops of bread with oil and broil for a few minutes until golden.  Or you can toast in a toaster and then brush with a bit of oil.
  • Dry roast pine nuts in a medium fry pan until golden.  Remove from heat.
  • Pit, peel and half avocado.  Slice.  Place half of slices on each piece of toast. Or you can ‘smash’ it on the toast with a fork.
  • Top with coconut bacon and pine nuts.  Sprinkle with salt.  Enjoy!

Coconut Bacon 5

Coconut ‘Bacon’

1 cup  coconut flakes
1 Tbsn liquid aminos (or soy sauce)
2 tsp liquid smoke (optional)
1 tsp maple syrup
1/2 tsp smoked paprika
4-6 cloves ground (or 1/4 tsp pre-ground cloves)
2 tsp  water
Coconut Bacon 1 Coconut Bacon 2
  • Mix the aminos, syrup, paprika, cloves, liquid smoke and water together in a bowl until well combined.  Gently stir in the coconut flakes, trying to coat them each thoroughly and soak up the liquid.  Let sit for 5 minutes, then stir again gently.

Coconut Bacon 3 Coconut Bacon 4

  • Preheat over to 300°F, then bake for 20 to 25 minutes.  Store them in a plastic bag or container.  Does not need to be refrigerated.

Coconut Bacon 5

Avocado Toast 1

[/recipe]

Wheatless Wednesday – Kusshi Oysters with Jalapeno Mignonette

0

Oysters2
I’m not sure if oysters really make you fall in love, or even lust, but the possibility is certainly a fun concept.  The last two times he’s been to the Farmer’s Market my husband has come home with fresh oysters. Hmmm…  ‘Oysters have always been linked with love. When Aphrodite, the Greek goddess of  love, sprang forth from the sea on an oyster shell and promptly gave birth to  Eros, the word “aphrodisiac” was born. The dashing lover Casanova also used to  start a meal eating 12 dozen oysters.” (www.globalgourmet.com)  Regardless of their effect on our love lives, oysters are at the very least  nutrient rich and low in fat and calories (57 for 6 medium for those counting).  High in protein and low in fat, oysters are an excellent source of vitamins A, B1(thiamin), B2 (riboflavin), B3 (niacin), C and D. Four or five medium size oysters supply your daily allowance of iron, copper, iodine, magnesium, calcium, manganese and phosphorus. Oysters also provide large amounts of zinc;  a mineral which boosts prostate health, so maybe there is a germ of truth to the folklore.  (Nutritional Data from www.hogislandoysters.com)

We bought two kinds of oysters from the Santa Rosa Seafood Company at the Marin Country Mart Farmer’s Market on Saturday.  Kusshi ( meaning precious in Japanese) is a West Coast oyster, grown in Deep Bay, British Columbia.  They are small, sweet and very clean tasting so we decided to serve them raw with a tasty jalapeno mignonette called “Hog Wash” by the Hog Island Oyster Company.  My husband has become quite an expert shucker, armed with an oyster knife and oven mitts to protect his hands from the sharp shells.  I would not suggest trying to shuck your own oysters without the proper tools.  Click here for a video on how to shuck oysters: http://hogislandoysters.com/kitchen/shucking-oysters

Oysters3

The other oysters, local Drake’s Bay, are very large and meaty, more than bite size, so we just popped them on the grill whole. Once you hear them ‘pop’, you can pry the top shell off and top them with barbecue sauce.   We used the rest of the yummy Chipotle Butter (also a  Hog Island recipe) left over from the  last time we made them. Since I have already posted that recipe I won’t repeat it.   To see that original post with complete recipe and directions click here:  https://goodmotherdiet.com/2013/12/21/grilled-oysters-with-garlic-chipotle-butter/

Oysters4

Jalapeno Mignonette

  • Servings: 3/4 cup
  • Difficulty: easy
  • Print

Jalapeno Mignonette (aka Hog Wash)

1/4 cup seasoned rice vinegar
1/4 cup natural rice vinegar
1 large shallot, peeled and roughly chopped
1 large Jalapeno pepper, seeded and roughly chopped
1/2 bunch of cilantro
juice of 1 lime
  • Put all ingredients in a food processor or blender and process until smooth. For a chunkier mignonette, just dice the shallots, jalapeno and cilantro finely and combine ingredients.  This is mildly spicy, so for more spice, include some or all of the jalapeno seeds.

Oysters6Oysters2

Meatless Monday – Farmer’s Market Pasta & Balsamic Marinated Beets

0

Farmers Market 17

Do you know where your food has been?  Do you care?  I finally got around to checking out the Farmer’s Market at Marin Country Mart in Larkspur (California) and I can’t believe it took me so long.  I have really been missing out! This is an open air market where you can buy gorgeous fresh vegetables, fruit, nuts, wild caught seafood, artisan cheeses, flowers and baked goods, all locally grown and crafted.

Farmers Market

While I perused the various stands, my husband stood in line at the Santa Rosa Seafood stand.

Farmers Market 5Farmers Market 11

It was a beautiful sunny day.   The only problem is that I had a terrible case of buyer indecision.  I wanted everything, even to grind my own flour!   Do I buy gluten free goodies from Flour Craft Bakery or Granola from Café Fanny?  Why didn’t I bring my knives which could really stand to be sharpened?  Why didn’t I learn to knit? (I almost bought the yarn anyway…)

Farmers Market 13 Farmers Market 12

This market is also a great family destination with live music, kid crafts and several hot food stands, including one that specializes in grilled cheese. Yum!  It’s open Saturdays from 9am to 2pm. Click here for a listing of vendors and schedule of events. (http://marincountrymart.com/farmers-market)

Farmers Market 27

Why buy local?
Buying locally-produced food is good for your body, for the earth, and for our local economy.  Because your food doesn’t travel long distances to get to you, it is more nutritious.  Fewer fossil fuels are used in distribution and shipping when you buy local.  Supporting GROWN LOCAL helps keep farming families in business and our dollars in our own communities. (www.buylocalmarin.org )

Farmers Market 26 Farmers Market 9

To find a farmer’s market in your area, check out the USDA National Farmers Market Directory, an interactive site with information on farmer’s markets all over the US.   (http://search.ams.usda.gov/farmersmarkets/)  Here is another great (and more complete) source for finding farmer’s markets, , family farms, and other sources of sustainably grown food in your area http://www.localharvest.org/.

Farmers Market 6 Farmers Market 7

So what did we end up with?  My husband came home with two kinds of oysters (which I will get to on Wednesday so oyster lovers stay tuned).  After much agonizing, I bought a gorgeous bunch of multi-colored beets, purple asparagus (which I couldn’t resist because of the color) and a bag of mixed greens (chard, kale, mustard and a few I don’t recognize).  I also bought Devil’s Gulch cheese from Cowgirl Creamery and Fig and Black Sesame Jam from Blue Chair Farms which made an excellent and simple appetizer.  Just add crackers.

Farmers Market 25I didn’t have any particular dish in mind when I selected these vegetables.  I was buying purely with my senses and allowed myself to be seduced by their glorious colors.  Once home I decided to make a winter version of pasta primavera and serve roasted, marinated beets on the side.  The resulting dish was very colorful and delicious!  Plus I could feel good knowing I was supporting some local hardworking folks.

Farmers Market 4

Fusilli with Braised Greens and Asparagus

  • Servings: 4
  • Difficulty: easy
  • Print

Fusilli with Braised Greens and Asparagus

3/4 pound whole-wheat fusilli
4-6 cups mixed greens (chard, kale, etc), chopped and rinsed
1 bunch asparagus, sliced into 1 or 2 inch pieces
1/3 cup pine nuts
2 tablespoons olive oil (or a combination of butter and olive oil)
4 sliced garlic cloves
1/4 teaspoon red chile flakes
1/2 teaspoon kosher salt
1/2 cup vegetable broth
Freshly shredded parmesan cheese (optional)
Farmers Market 21Farmers Market 22
  • Cook pasta as package directs. Drain and set aside.
  • If your pine nuts are not toasted, heat them in a dry pan over medium heat for a few minutes.  Set aside.
  • Add oil to pan, add garlic and chile flakes.  Cook stirring until fragrant, about a minute.
  • Add asparagus and salt. Cook for a minute or two.
  • Add greens and broth.  Cover and cook until greens are tender, about 5 minutes, stirring several times.
  • Stir in pasta and pine nuts.
  • Top with parmesan cheese (optional)

Farmers Market 24

Balsamic Marinated Beets

  • Servings: 2-4
  • Difficulty: easy
  • Print

Balsamic Marinated Beets

small bunch of beets
1-2 Tbsn olive oil
1 orange (optional)
Marinade/Dressing(see directions below)
Farmers Market 19 Farmers Market 20
  • Cut tops off of beets taking care not to cut into beet.  Leave skin and tails intact.  Wash, dry and place beets in a baking dish (or a large piece of aluminum foil).  Drizzle with olive oil.  Cover with foil and cook for about an hour at 425 degrees.  Larger beets might take longer.  They should be easy to slice with a knife. 
  • Remove from heat and let cool.  Skins will come off easily.  Use a papertowel to keep your hands from getting red.
  • Peel orange and slice crosswise into thick slices.  Section into triangles.
  • Slice beets.  You can marinate them for 30 minutes or overnight, or you can arrange them on a plate, top with orange sections and drizzle with balsamic dressing.

Marinade:  Combine 1/4 cup balsamic vinegar, 1/4 cup red wine vinegar, 1/4 cup olive oil, 1 minced shallot, salt and pepper.

Wheatless Wednesday – Mushroom & Barley Soup with Cannelini Beans

1

Mushroom Barley Soup 1

Is Barley the smarter but less popular sister? Back in Medieval times barley was widely consumed and was one of the first grains cultivated by humans. Barley beer was thought to be one of the first alcoholic drinks developed by Neolithic humans. (Yes, that long ago)  Barley later on was used as currency which makes me think it was pretty important back then. (Wikipedia)  Barley is a nutritional powerhouse.  According to the FDA, barley’s soluble fiber reduces the risk of coronary heart disease and can lower cholesterol. Barley also contains insoluble fiber, which reduces the risk of Type 2 diabetes and colon cancer. Barley is virtually fat-free, cholesterol-free and gluten free.  Who knew our ancestors were so smart?

Did you know that barley is the number 4 produced grain in the US (behind wheat, rice and corn)? It is grown in more than half of US states, so why is barley not thought of as a regular rice, potato, wheat option at our dinner table?    Where is it going?  According to the Barley Growers Association  over half of barley goes to feed animals sold for food, 44% is made into malt for beer and whisky, 3% is for seed and just 2% is food for humans.  I guess we are more likely to be drinking our barley than eating it.

I admit that I’m guilty.  I have never made anything with barley.  My son and creative chef, Eric, who knows I have a new-found quest to seek out wheat free options, suggested I make a version of his barley soup (and  I just happened to have a package of Black Barley in my pantry that I didn’t know what to do with). Now that California is finally getting our winter (read seven days in a row of much needed rain) the thought of a big pot of soup bubbling away in my kitchen sounds pretty appealing.  It warms up your house and your heart from the inside out.

Black barley is a whole grain that has been prized for generations in Ethiopia. It has a chewy texture and dark purplish black appearance. It can also take 3 or 4 hours to cook so be forwarned.  Pearl barley, which is the variety typically found in supermarkets, is processed to remove some of the outer bran layer, but unlike with processed rice which has lost most of it’s food value, barley retains significant amounts of fiber and nutrients because the fiber in barley is located throughout the entire kernel and not just in the outer layer. Pearl barley cooks in about 30 to 40 minutes. I have also heard that there is a fast cooking barley but I don’t know where you can get it.  Regardless of which kind you use, follow the cooking instructions on the package and then incorporate it into the recipe.  You can substitute any bean or legume for the cannellini beans which adds a little protein boost. I think Eric often uses lentils which sounds like a good combination.  Feel free to use beer instead of sherry for twice the barley power. Stay warm and dry…
BarleyLarge2

Mushroom and Barley Soup with Cannelini Beans

  • Servings: 4-6
  • Difficulty: easy
  • Print

1 cup barley, black, pearled or quick cooking
1 cup cannellini beans, cooked
1 Tbsn olive oil
1 small or 1/2 large onion, diced
1 garlic clove, minced
1 large carrot, chopped
1 small zucchini, chopped
10 ounces sliced mushrooms, any kind
1/2 tsp dried thyme
1 tsp dried oregano
1 quart vegetable broth
2 tbsp dry sherry
  • Rinse barley to remove any lingering dust or debris and cook according to directions, as different types of barley require varying cooking times.
  • Heat oil in a soup pot or Dutch oven. Cook onion, garlic and carrots on medium heat until softened
  • Add dried herbs, vegetable broth, beans, barley, sherry, zucchini and mushrooms and simmer for about 20 minutes.
  • Salt and pepper to taste.

.

Meatless Monday – Lasagne Pinwheels with Confetti Topping

6

Lasagne pinwheels 3
When the cat’s away, the mice will play… As soon as my husband left town for a golf trip, I seized the opportunity to invite some girlfriends over and serve pasta that is oozing with creamy ricotta, mozzarella and parmesan.  (Add wine plus gossip times eight ladies equals fun night). A creamy dish like that would normally make my husband run from the room screaming, so if I want to indulge it has to be when he’s not around. When we first met, his aversion to creamy white foods like mayo, sour cream and yogurt was so strong that it would make him physically ill (or at least he thought it was physical). I discovered this ‘fun fact’ by accident one morning while he was powering through a big stack of pancakes. On pancake number four, I casually mentioned that I put one tablespoon of plain yogurt in the pancake batter. His fork went flying across the room and within minutes he was curled into a ball of misery on the couch. Needless to say, I married him anyway.

The lasagna pinwheels did not disappoint. What could be bad – perfect pretty pinwheels resting in a simple marinara sauce topped with zucchini, tomato and caper confetti. They are simple to make and can be prepared ahead of time (even frozen) and thrown in the oven at the last minute.  Mini lasagna is perfect to serve to a group as they are small, two or three bite morsels and they make a nice, clean presentation and no messy cutting or layers sliding about.

This meal was all about yumminess but there are many substitutions that can be made to make this a healthier option.  I used a whole grain lasagna noodle rather than the regular but there are also wheat and gluten free versions, even one made with artichoke ‘flour’.   Ricotta, made with sheep’s milk is usually the gold standard in pastas and desserts but it can be replaced with a lower fat cottage cheese , clotted cream, fresh goat cheese or queso fresco. Vegans can use silken tofu mixed with a little olive oil, nutmeg and seasoned salt.  Feel free to use any combination of cheeses, just keep the total amount the same.  You can also add a layer of wilted spinach or kale for an extra nutrient and flavor boost.  It’s easy to make your own pasta sauce, but as a time saver you can use any prepared pasta sauce and it will come out just fine.

Lasagne pinwheels 1

We finished our meal with mini Bittersweet Chocolate Mousse cups, each miniature glass dish holding only about one scant tablespoon, perfect when you really just want a taste and don’t want to commit to an entire dessert.  I found the glass dishes at Ikea.  They were very inexpensive and I have since discovered many uses for them.  For the Bittersweet Chocolate Mousse recipe click on this link:  https://goodmotherdiet.com/2014/02/12/wheatless-wednesday-bittersweet-chocolate-mousse/

Lasagne Pinwheels

  • Servings: 4
  • Difficulty: easy
  • Print

1/2 (16 oz) package curly lasagna noodles (9 but make a few extra since some come apart during cooking)
1 14 oz container of ricotta cheese
1 1/2 cups mozzarella cheese, shredded
3 Tbsn Parmesan cheese, grated
1/2 tsp coarsely ground black pepper
4 Tbsn chopped or shredded fresh basil
2 tsp olive oil
1 small onion, small dice
1 zucchini, small dice
1 Tbsn capers, drained
 
  • Prepare marinara sauce (recipe below) or use your favorite.
  • Prepare lasagna noodles as label directs.  Drain and rinse with cold water.  Return noodles to saucepot with cold water to cover.
  • Combine all cheese, pepper and 3 tablespoons basil in a large bowl.

Lasagne pinwheels 12Lasagne pinwheels 11

  • Drain lasagna noodles on a clean kitchen towel.  Spread rounded 1/3 cup filling on each noodle and roll up jelly-roll fashion.  Slice each rolled noodle in half, crosswide.

Lasagne pinwheels 10Lasagne pinwheels 9

  • Spread tomato sauce evenly in the bottom of baking dish.  Arrange lasagna rolls, cut-side down, in sauce.  Cover loosely with foil and bake 35 to 40 minutes in 375 degree oven.
  • Heal oil over medium heat in medium skillet.  Saute onion until tender.  Stir in zucchini and cook a few more minutes.
  • Stir in diced tomato, capers and remaining basil and heat through

Lasagne pinwheels 6

  • To serve, place sauce and lasagna rolls on plates and spoon confetti topping over the top.

Lasagne pinwheels 5Lasagne pinwheels 15

(original recipe for Three Cheese Lasagne Rolls from the Step By Step Cookbook by Good Housekeeping)

Marinara Sauce

1 28 oz can crushed tomatoes
2 Tbsn fresh basil, finely chopped
2 cloves garlic, minced
1 Tbsn olive oil
½ tsp salt
1 tsp balsamic vinegar <
  • Heat olive oil in a saucepan and saute garlic for a few minutes.  Add basil and crushed tomatoes and stir to combine.
  • Bring to a boil and add salt.  Simmer about 45 minutes.
  • Before serving add balsamic vinegar and stir to combine


A Whirlwind Weekend in Seattle

4

seattle-skyline

Eat, Drink, Sleep, Repeat. I  just spent 48 hours in the ‘Emerald City’, and I don’t mean Oz.  Seattle is known as the Emerald City because of the abundance of evergreens in the city and surrounding area.  Beautiful Seattle stays green year round, probably due in part to a little bit of rain…  I am originally from the Pacific Northwest where most of my family still lives and I have the pleasure of going back to visit often, this time for my Dad’s 83rd birthday.  If I were going to Seattle as a tourist or on vacation, I would be busy soaking up all Seattle has to offer, however, I was there to see family and friends so tended to frequent neighborhood restaurants and local haunts, which are also pretty great.  For the unenlightened I thought it fun to list my top five things to do in Seattle, then I will get to the point of my blog which is a very brief tour of Seattle’s neighborhood restaurants, at least as many as I could get to in 48 hours. Alas, I was not home to prepare menus this weekend but Meatless Monday and Wheatless Wednesday will be back next week.

Seattle Pike-Place-Market

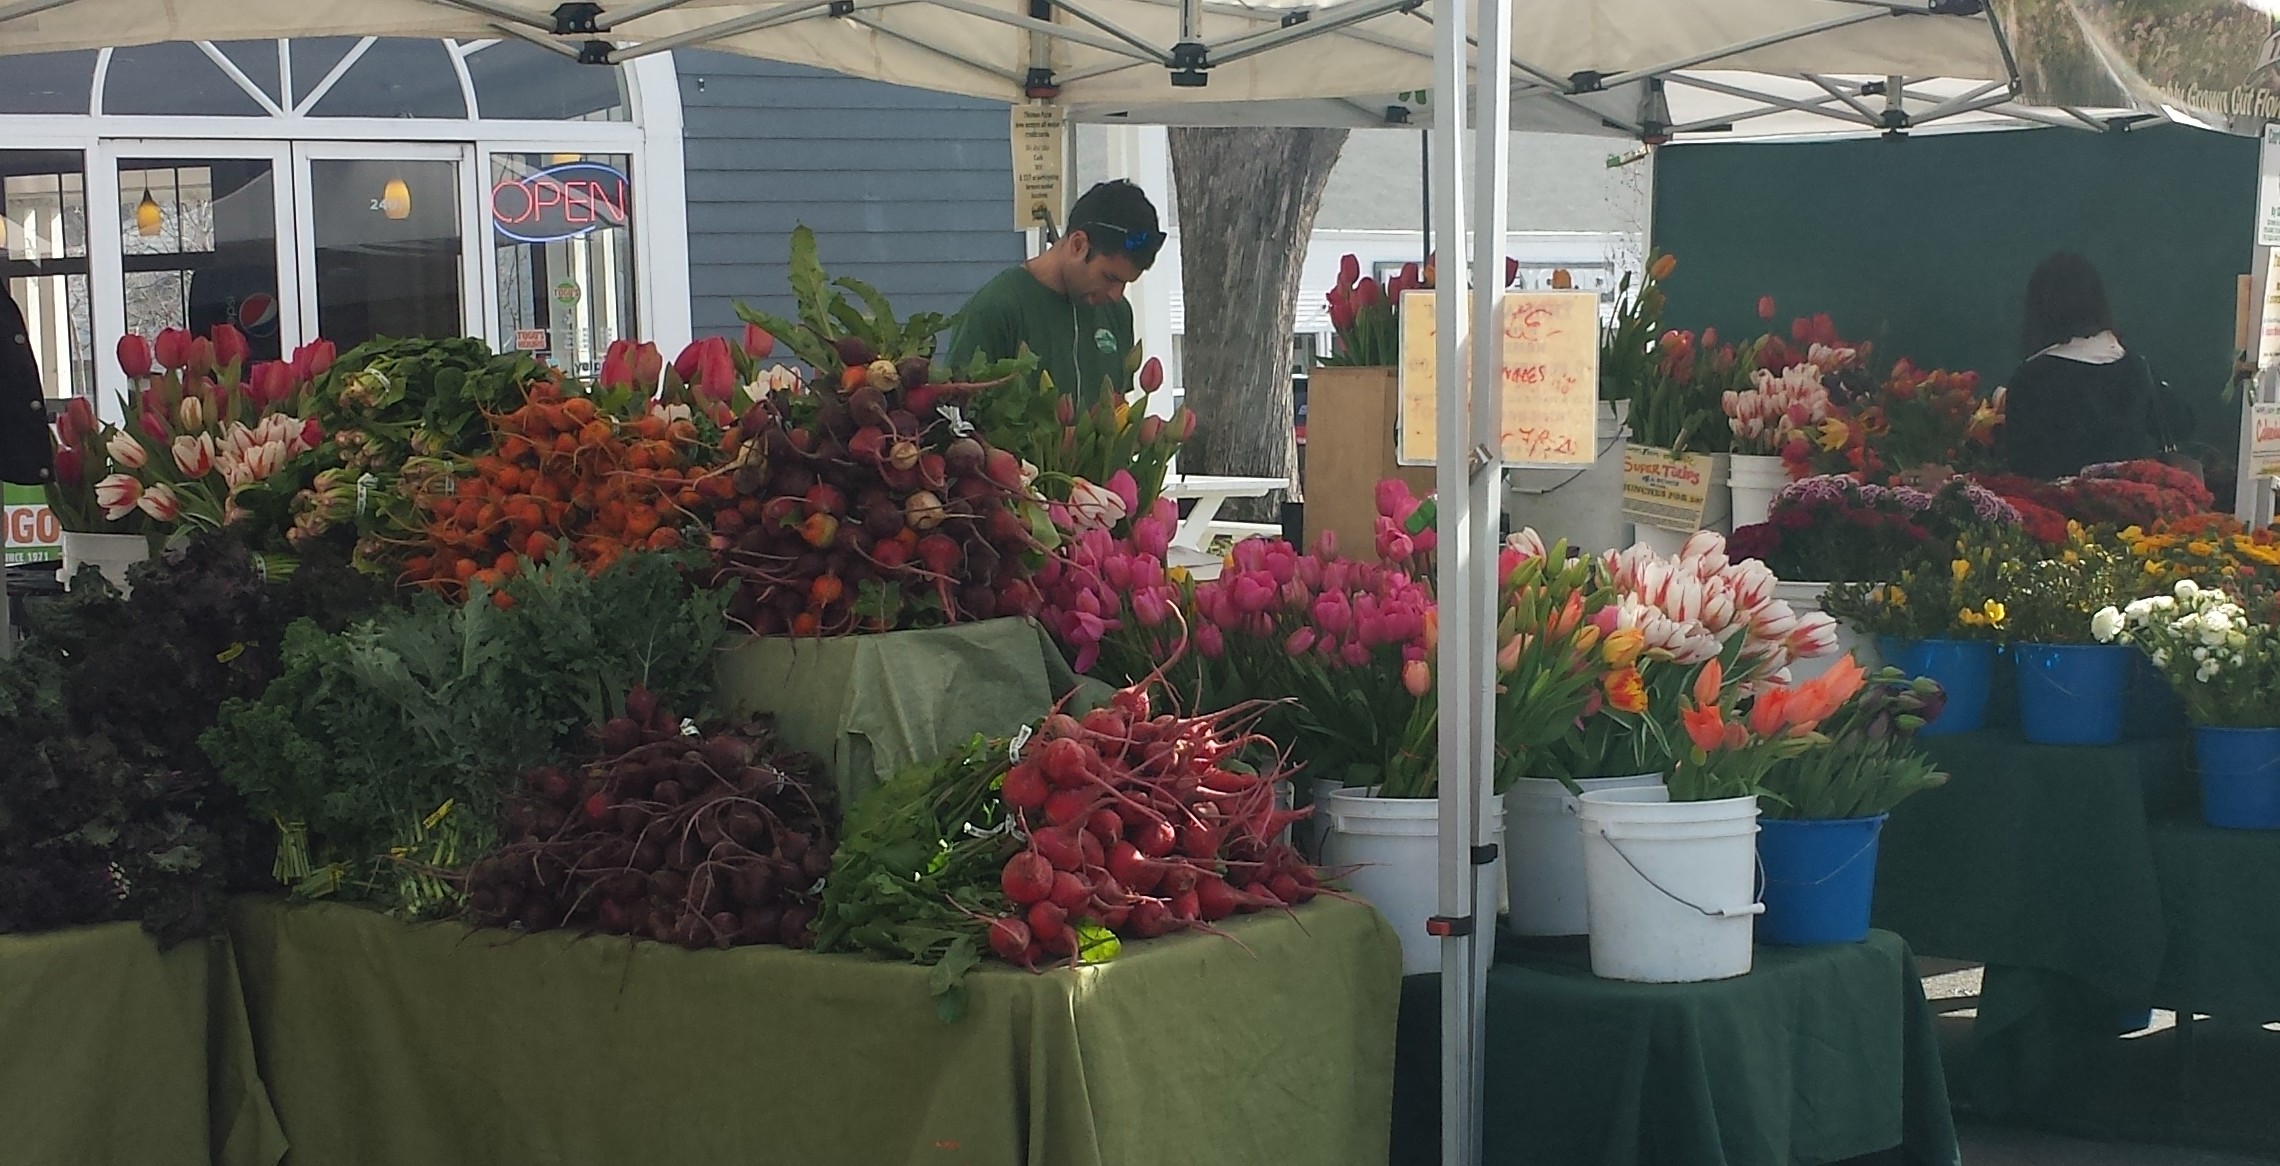
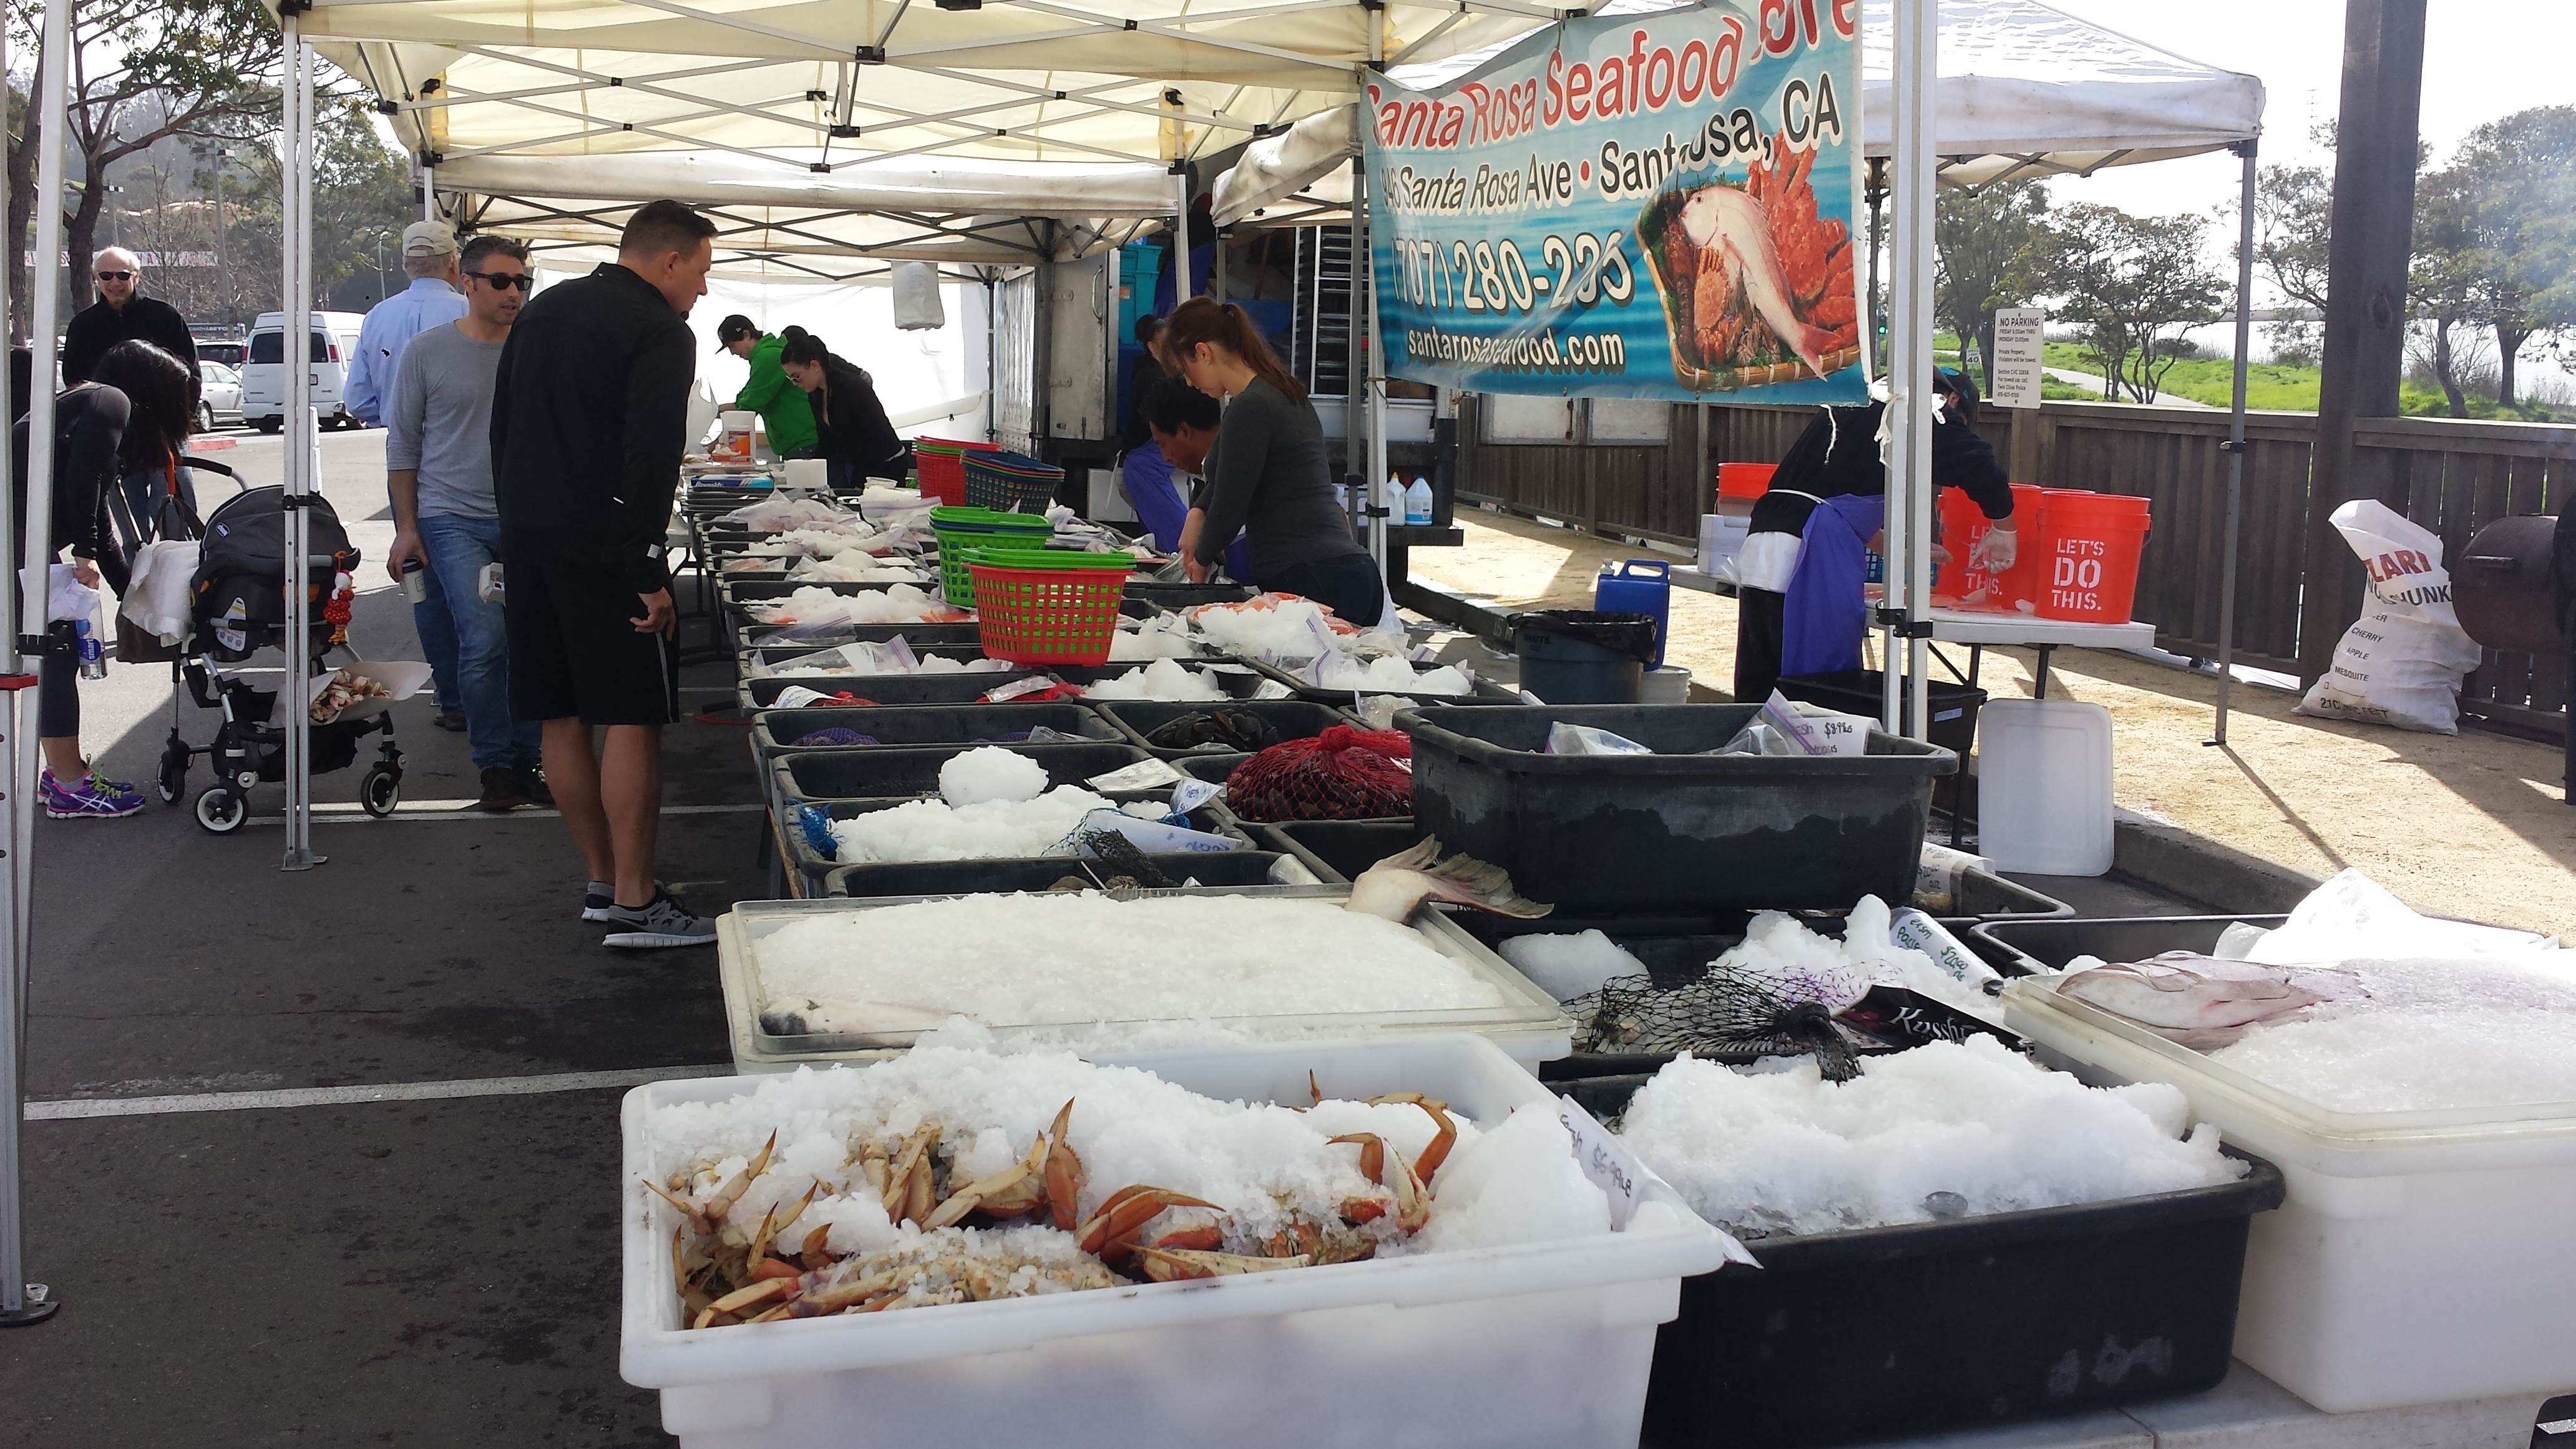
1) Pike Place Market, opened since 1907, is one of the oldest markets on the west coast and one of my favorite places to go in Seattle.  You will see fish mongers tossing fish to each other, fresh produce, beautiful flowers, interesting places to eat and great shopping.

Seattle ferriswheel10

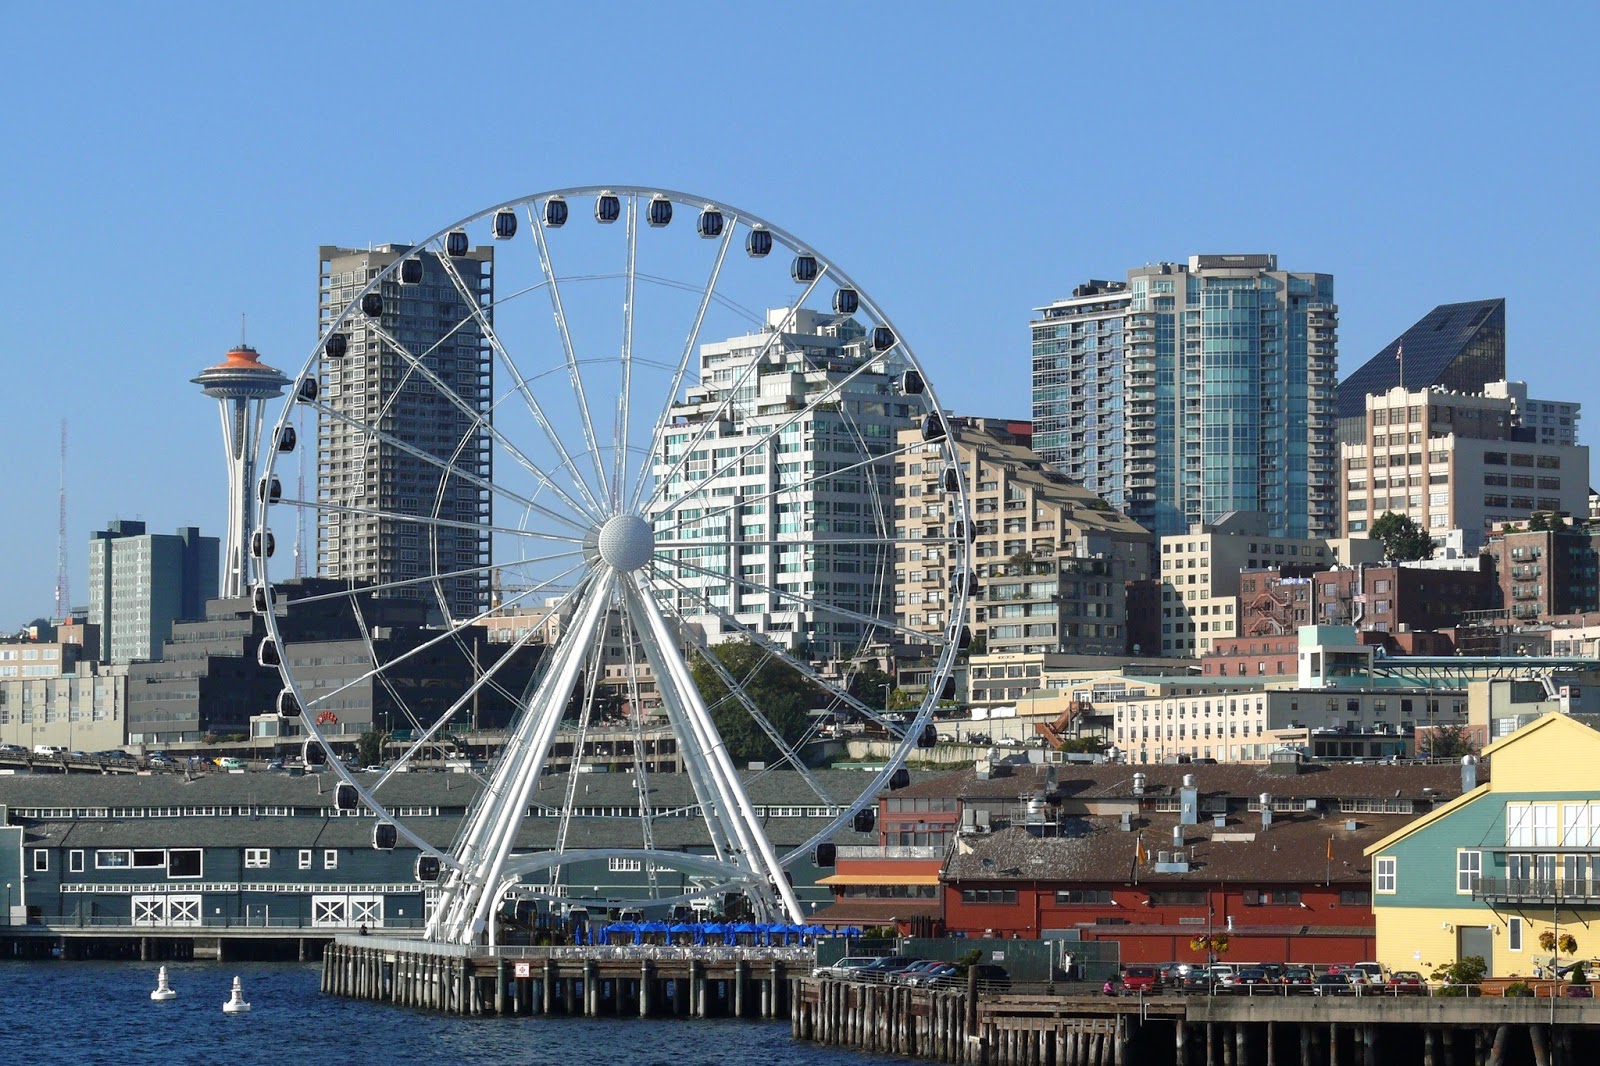
2)Seattle Water Front is another interesting and diverse area. More great shopping and dining while you enjoy a free show of the musicians and street performers that take over the piers.  Walk down to Pier 57 and check out the Seattle Great Wheel, the city’s newest attraction just built in 2012, which is the largest observation wheel on the west coast. I have not gone on the Great Wheel yet but it looks like fun and an awesome view!

Seattle_Center_Monorail

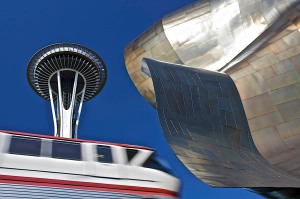
3)Take the monorail from downtown Seattle to Seattle Center, an amusement park and entertainment center, originally built for the 1962 World’s Fair,  which also includes the famous Space Needle where you can take the elevator up 605 feet and enjoy a 360 degree view of Seattle.  There is a rotating restaurant on top which completes the circle every 46 minutes for a unique dining experience.   Thanks to technology you can now experience the amazing view from the Space Needle from the comfort of your armchair. Just click on the link and start scrolling for a pretty cool view of Seattle and the observation decks.  http://www.spaceneedle.com/home/

Seattle_Ferry

4) If you’re in Seattle for the first time, you should take a ferry – anywhere. It’s a common mode of transportation for locals but also a great way to see Seattle and the surrounding area.  Go visit Bainbridge, Whidbey or one of the many islands that form the San Juan Islands.  You can even take a high speed ferry to Victoria BC which is charming.  You can take your car right on the ferry and go exploring once you get to the other side.

wild ginger sign2

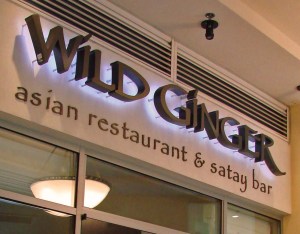
5)Seattle cuisine is exceptional so check out some of the trendy and fun restaurants.  My hip local friends are raving about Flying Fish in South Lake Union, Luc, Ba Bar and Tavern Law in Capital Hill and Caffe Presse near Seattle University.  The only trendy restaurant I went to this trip was Wild Ginger.   Located in downtown Seattle, it has a great ambiance and delicious Asian inspired food.  I would definitely recommend.

seattle-tacoma

So now lets leave the ‘virtual trip’ and talk about my ‘actual’ trip.  After a 5:30am wake up call and flight to Sea Tac Saturday morning, my sister, Margaret and her husband, Scott launched my two day eat-a-thon with lunch at Green Leaf Vietnamese Restaurant in Chinatown.

20140222_121100

Chinatown is also known as the International District which is a multi-ethnic neighborhood with predominantly Asian Americans where you can find noodles, sushi, dim sum, stir fry and pho, all delicious and authentic.

Seattle3Seattle4

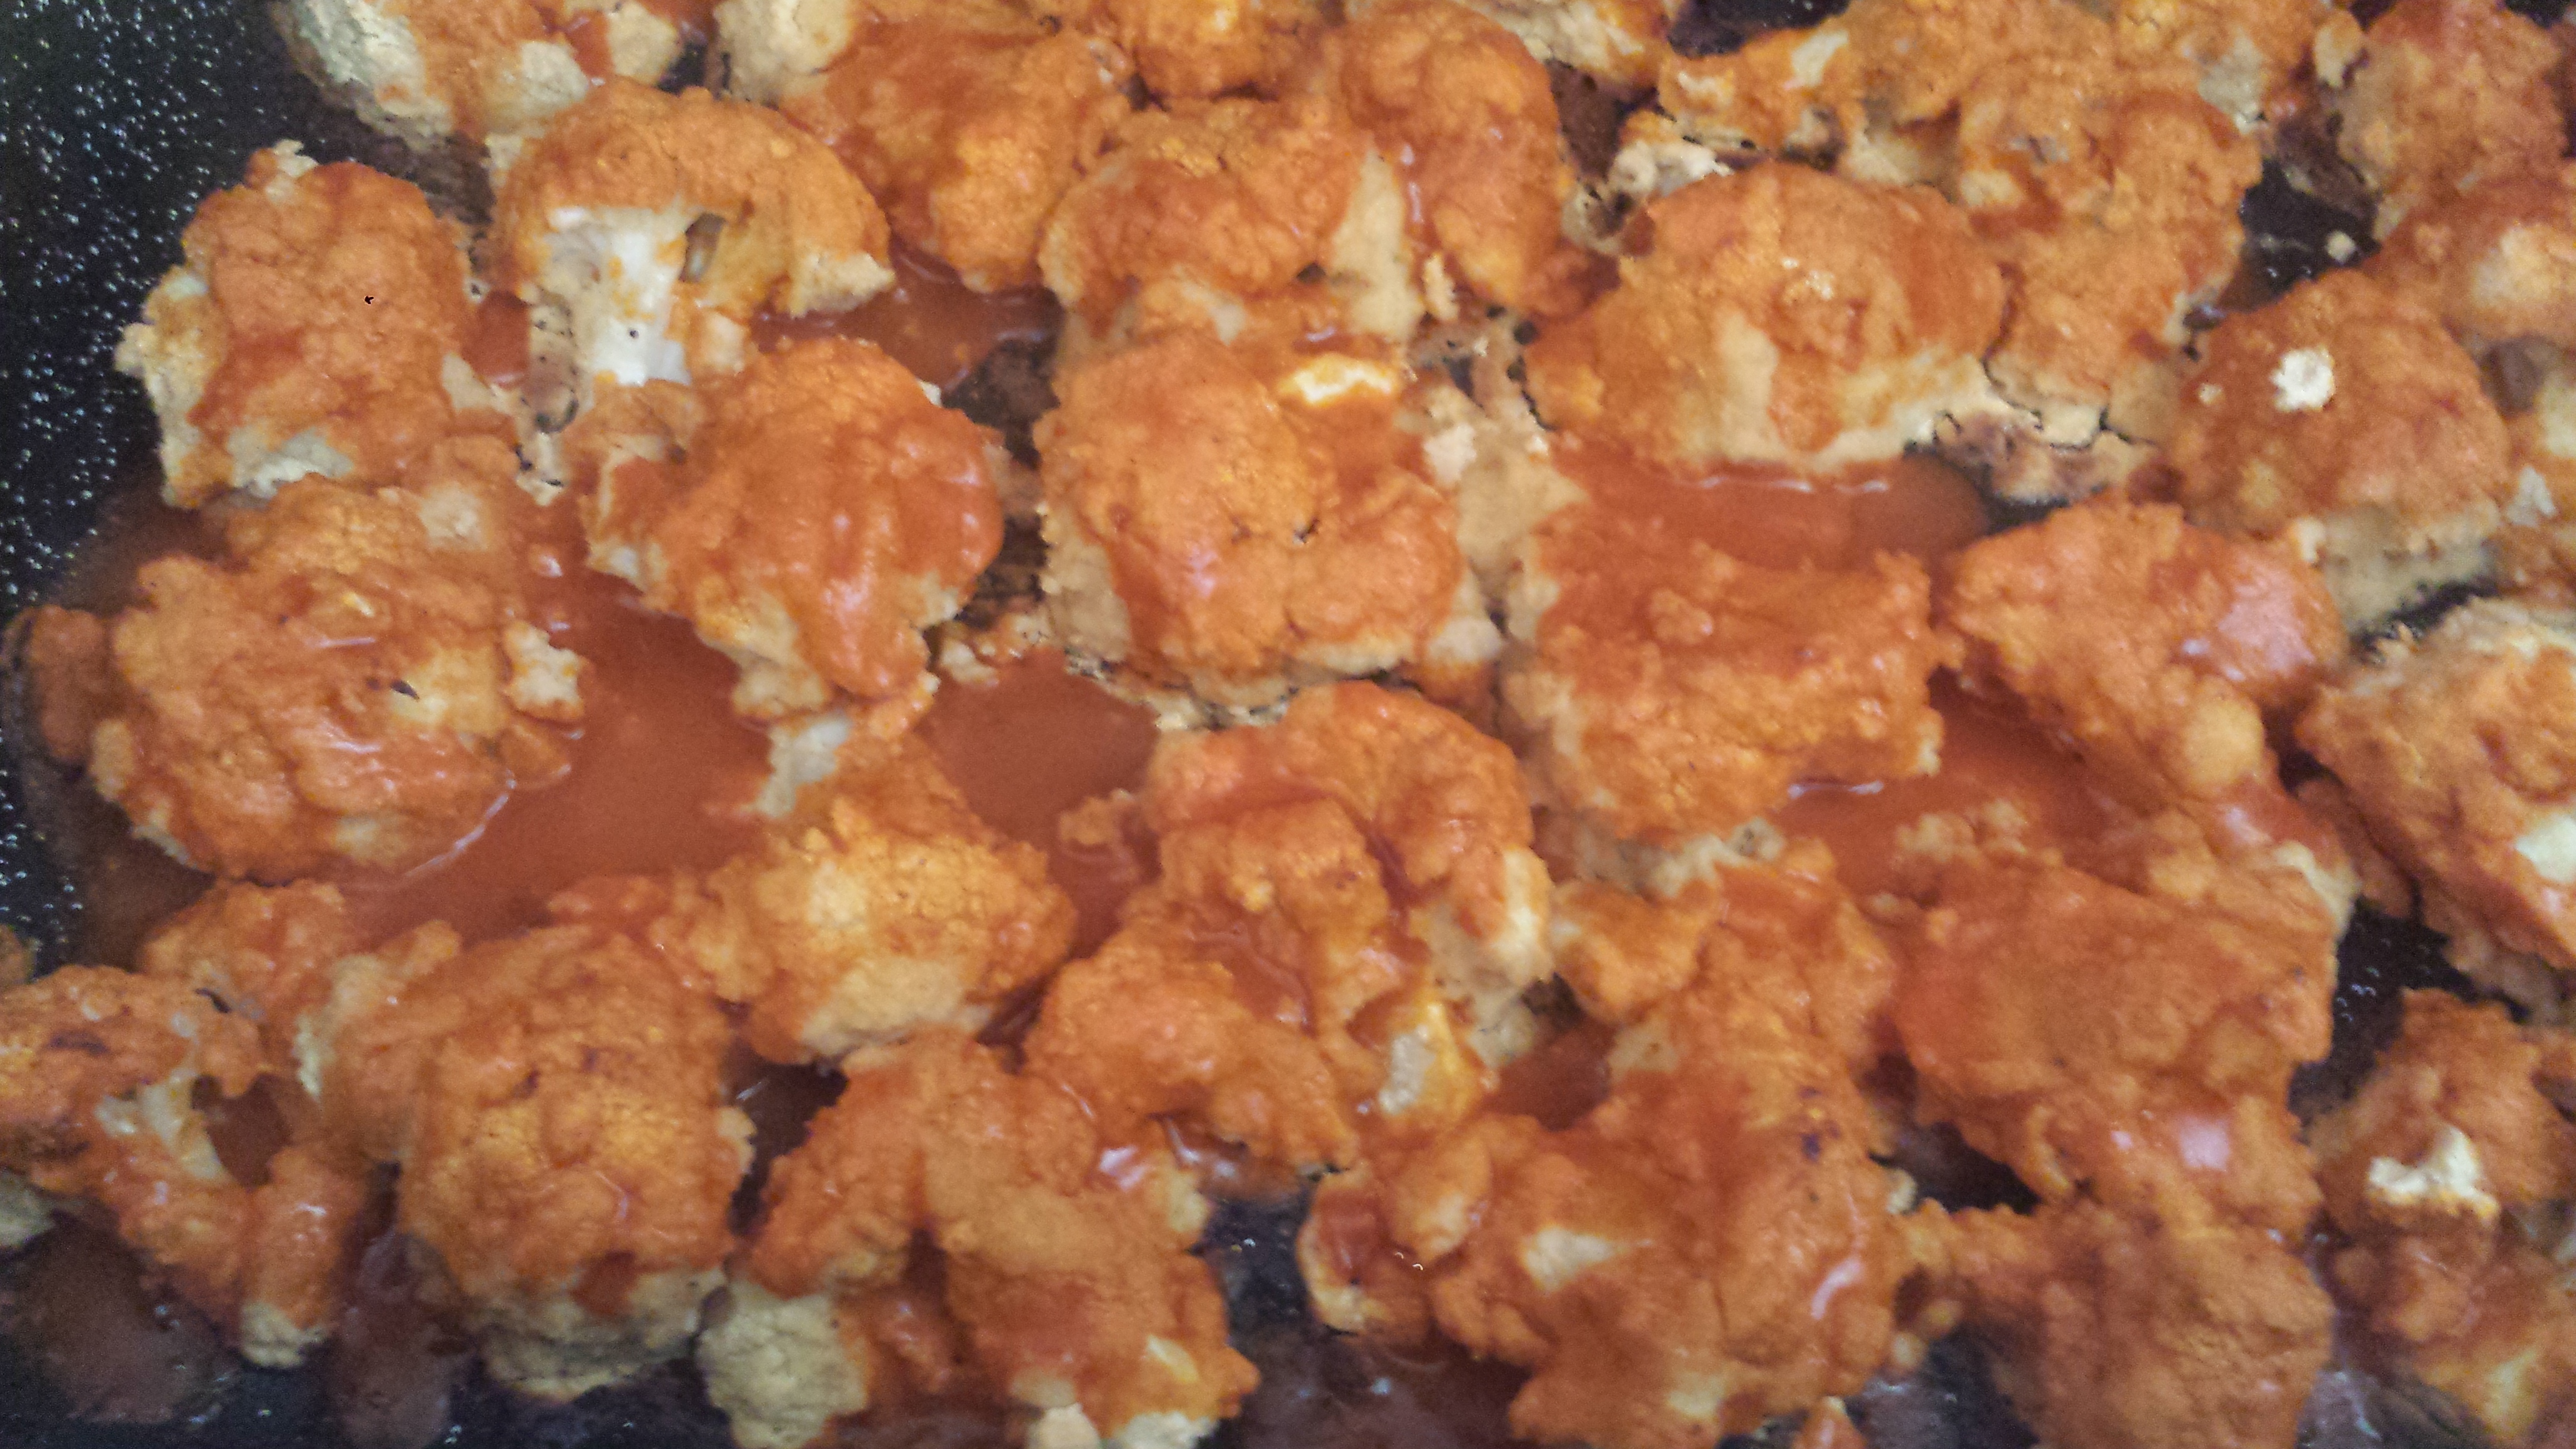
At Green Leaf we ordered Tofu Spring Rolls (which I had to take a second picture of since my sister insisted on getting her Sea Hawks jersey in the photo.  It was a tofu packed meal as I followed up with Bun Chay, a noodle bowl with Chinese mushrooms, vegetables, grilled tofu, fried tofu and something suspiciously called ‘imitation ham’, which is apparently common on Vietnamese vegetarian menus.

20140222_123145

Our waitress seemed somewhat vague about what it was made out of ( maybe wheat and vegetables) so I ordered it on the side.  I’m not a fan of tempeh like foods so I was a bit hesitant to try it but we all agreed that it was better than we expected. (see photo above).

europa2

We celebrated my Dad’s birthday at Europa Bistro Italiano in the heart of Tacoma’s Proctor District, near where my parents live.  Europa is a small neighborhood restaurant that makes its own pasta (gluten free upon request) and uses fresh local seafood.  The wonderful aroma that greets you at the entry lets you know it’s going to be a good meal.

20140222_20125320140222_201055

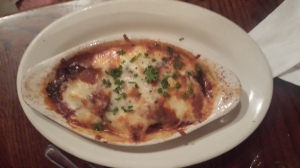
My Dad and I shared Vongole, fresh Manila clams (the little teeny ones that are so good) sautéed in  garlic, olive oil, white wine broth. I have a large family so we got to try half the menu.  Other popular dishes that night were Eggplant Parmagiana and Spinach Manicotti with homemade noodles.

20140223_103124

Breakfast Sunday was at Calamity Janes, in Georgetown, Seattle’s oldest district known back then for its bars, brothels and saloons. It actually incorporated in 1905 as a response to Prohibition.  Georgetown is still dotted with taverns that are still rustic, filled with old wood and original brick. but they are now trendy and serve good food.

20140223_105008

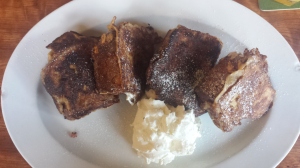
For breakfast I splurged on Orange Almond French Toast (with Drambuie French toast batter).  Their omlettes and other dishes looked pretty good too.  Calamity Janes prides itself on supporting neighborhood businesses and serves Georgetown beers, coffee and baked goods.

Seattle 220140222_134951

My grandfather had a car top shop in the neighborhood back in the day and frequented Jules Mae’s Saloon which is still there today.  A block away is Doris Street (which is my Mom’s name) which is just an interesting coincidence.  Jules Mae’s also serves great breakfast but doesn’t open until around 11am.

20140222_13555720140222_135150 20140222_135232

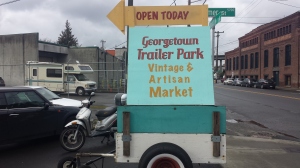
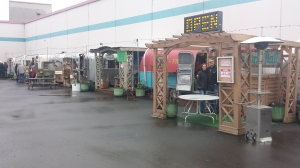
We stopped in at the Star Brass Works Lounge for a Screwdriver and then checked out Georgetown Trailer Park which is a very cute second hand/antique shopping center housed entirely with retro trailers.  Then we drove back down to Tacoma to hand deliver mini birthday cakes to our Dad on his actual birthday. Happy Birthday Dad!

Seattle1

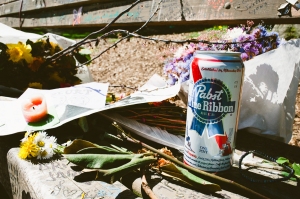
Our last leg of the trip was a quick stop at the house on Lake Washington Boulevard where Curt Cobain, Nirvana lead singer, lived (and died) on the way to meet our friends. Next to the house, in Viretta Park, fans have turned two benches into a shrine where people often leave flowers and messages honoring the singer.  Fans of ‘Where’d You Go Bernadette’ will remember that this is the neighborhood where Bernadette lived and Curt Cobain’s house had a cameo.

MGB0740

We UBERed to Wild Ginger, an Asian fusian restaurant and satay bar  in downtown Seattle. This is a great place to meet friends.  The food is excellent and creatively prepared.  We ordered Siam Lettuce cups, grilled seabass with roasted peanuts, Thai basil, lime, chili and tamarind wrapped in butter lettuce leaves. Yum!    Another dish I would recommend is the Thai Passion Tofu, fried tofu, eggplant, kefir lime and basil,. The purple and green are glorious and the sauce is delicious.

20140223_19095420140223_195138

Their most popular dish is one we tried as well, Green Curry Chicken.  I love everything with green curry but this was pretty good.  The restaurant is so kind as to share the recipe on their website, so I have printed it below.  ‘Til next time Seattle…Enjoy!

Credit for the fabulous photos goes to:

Seattle Skyline – http://www.localtrips.com/images/seattle-trips.jpg

Pike Place Market – http://pt.inlinguavancouver.com/blog/files/2012/02/Pike-Place-Market-Seattle-Washington.jpg

Seattle Great Wheel – http://3.bp.blogspot.com/-r8P5t8ZO3Bo/UTybZUvXdJI/AAAAAAAAfNE/4FNVhUOzwGA/s1600/Seattle+USA+16.jpg

Monorail – http://i.images.cdn.fotopedia.com/bjlhsj2drko3q-MofiM6w9p0U-hd/Seattle/Places_of_Interest/Transportation/Seattle_Center_Monorail/Seattle_Center_Monorail.jpg

Ferry – http://upload.wikimedia.org/wikipedia/commons/1/10/Seattle_Ferry.jpg

20140223_195216

Wild Ginger Chicken Curry


For the marinade:

1 tsp    Wild Ginger curry powder

½ tsp  white pepper
1 tsp  sesame oil
1  egg white
1 Tbl   rice wine
2 tsp   corn starch
1½ lb  chicken breast
For the curry:
2  green onions, bulb and greens, thinly sliced
1  shallot, thinly sliced
2 cloves garlic, minced
1  medium yellow onion, finely chopped
2 Tbl rice wine
1½  cup chicken stock
¾ cup coconut cream
1½ Tbl  Wild Ginger curry powder
1 tsp sugar
 fish sauce to taste
Method: Marinate chicken for 30 minutes.  Cut into bite size pieces.
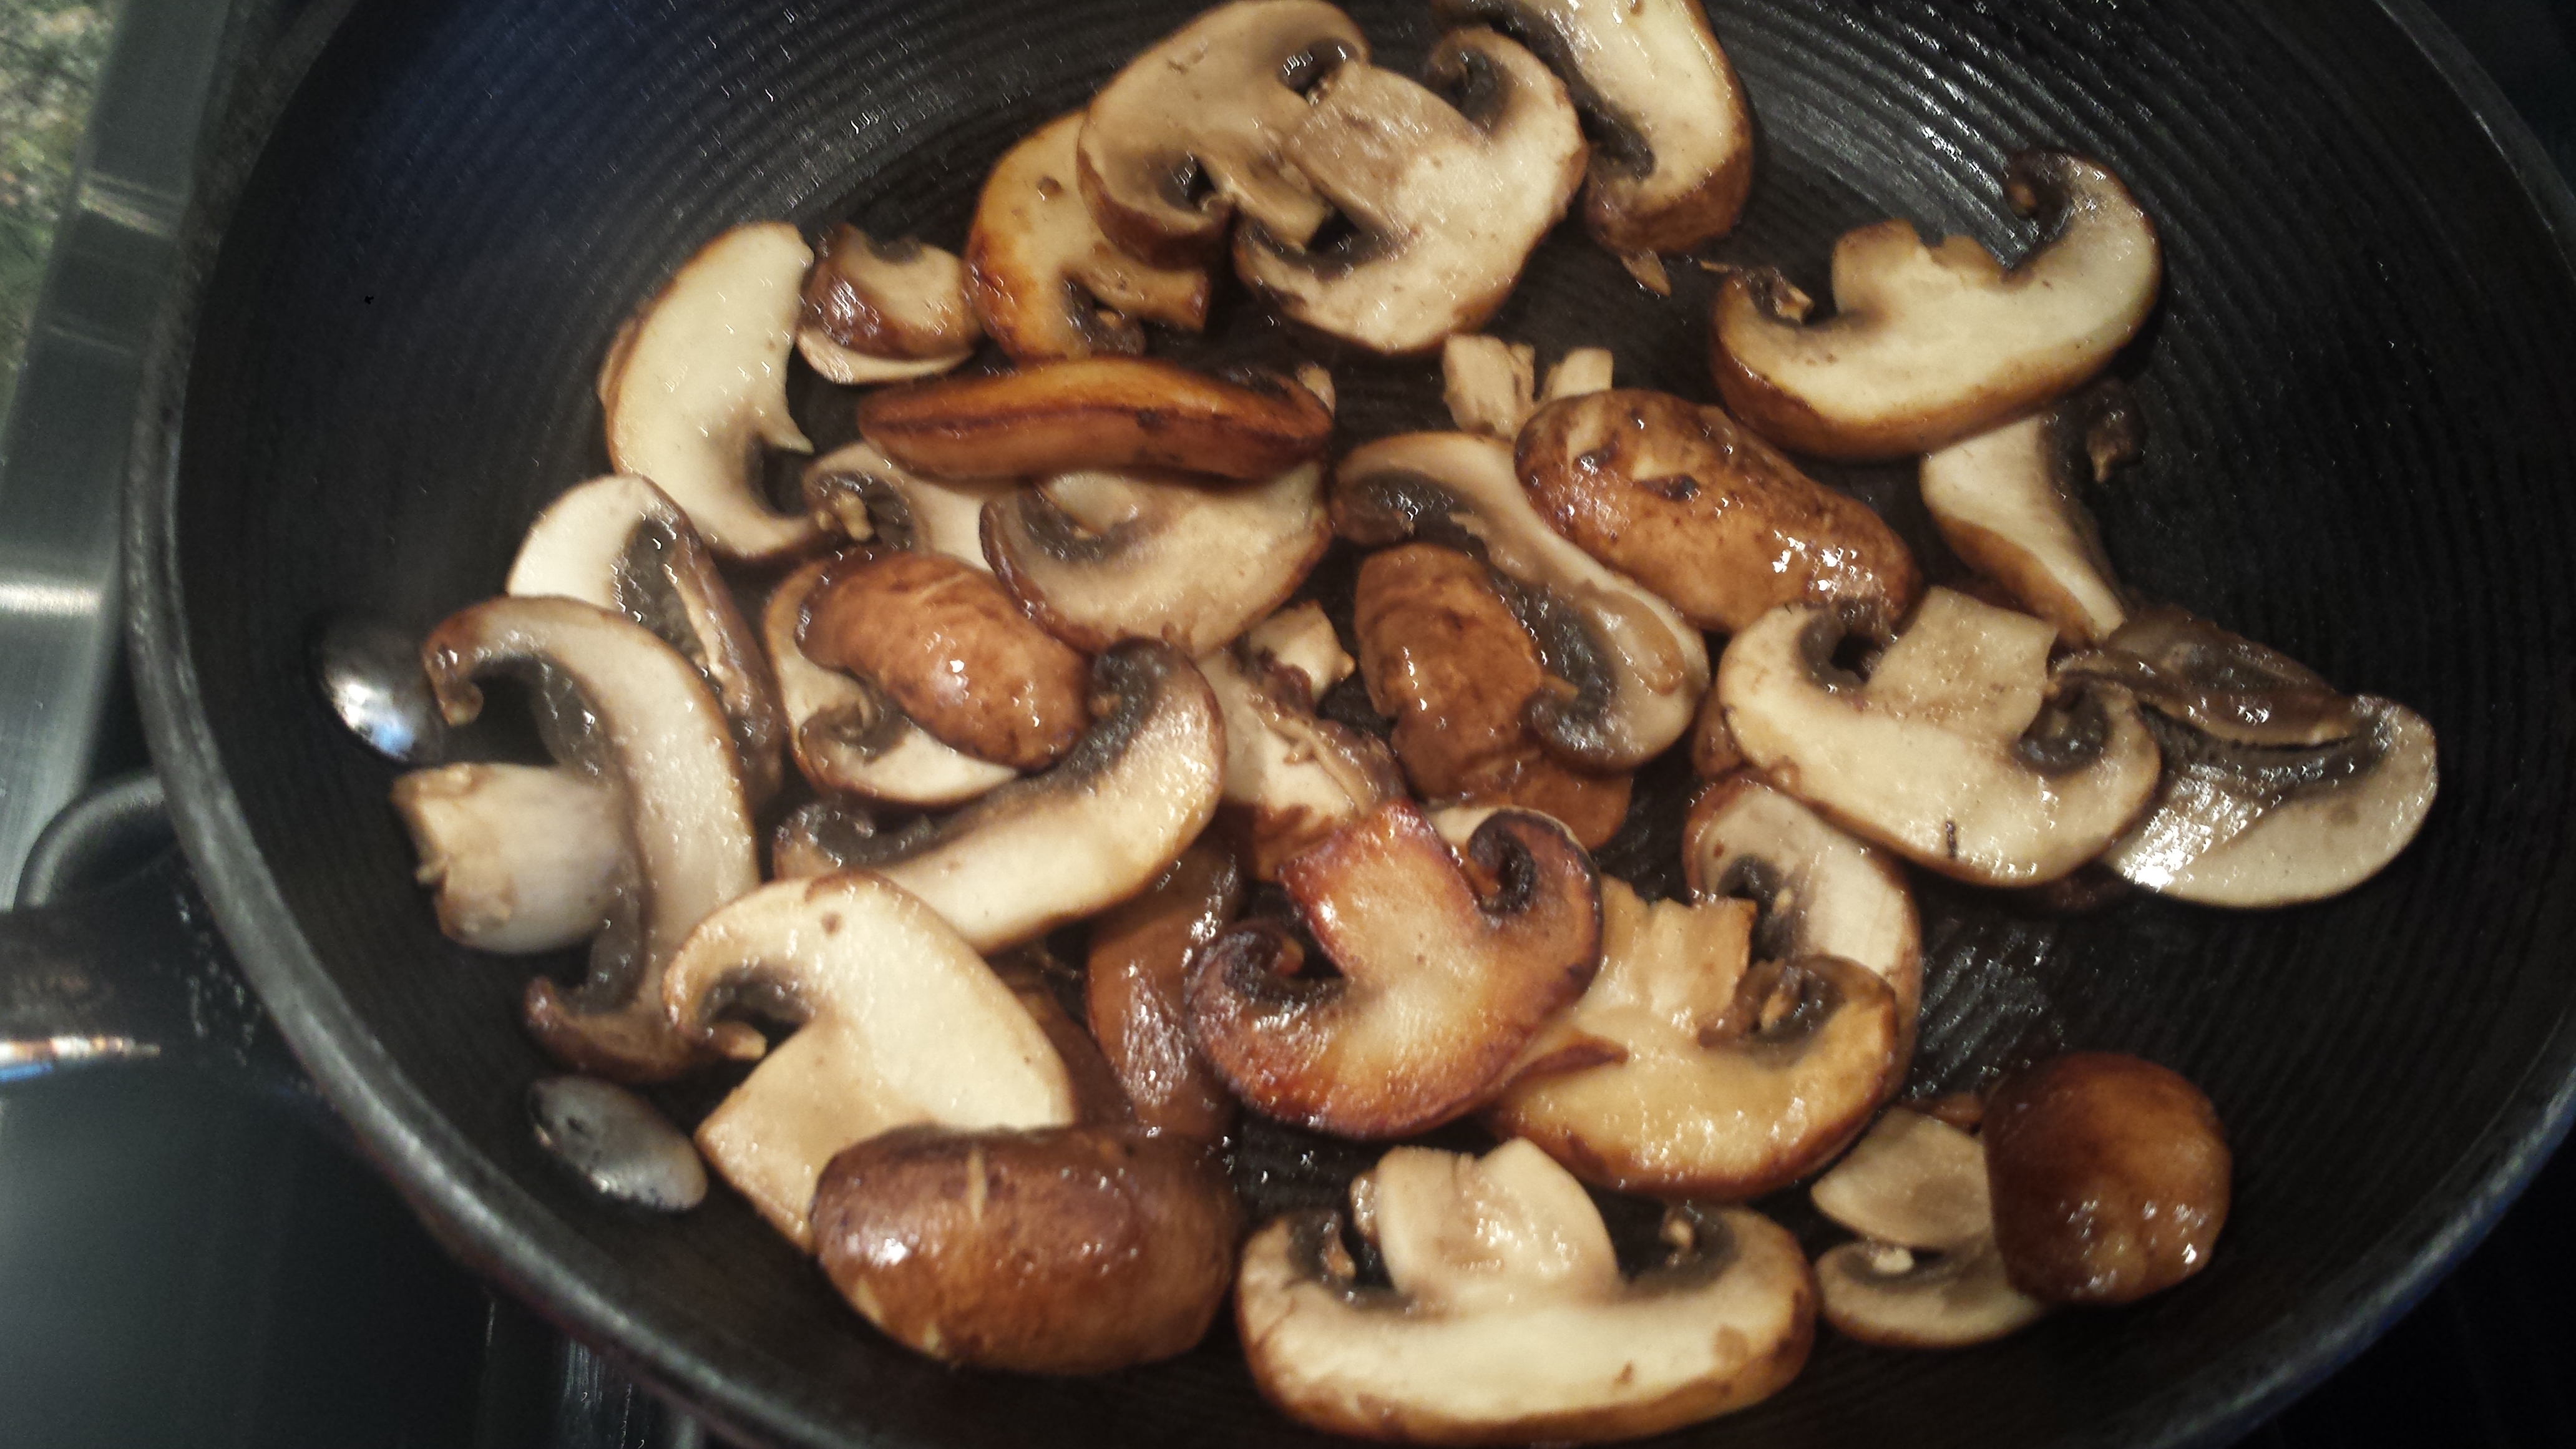
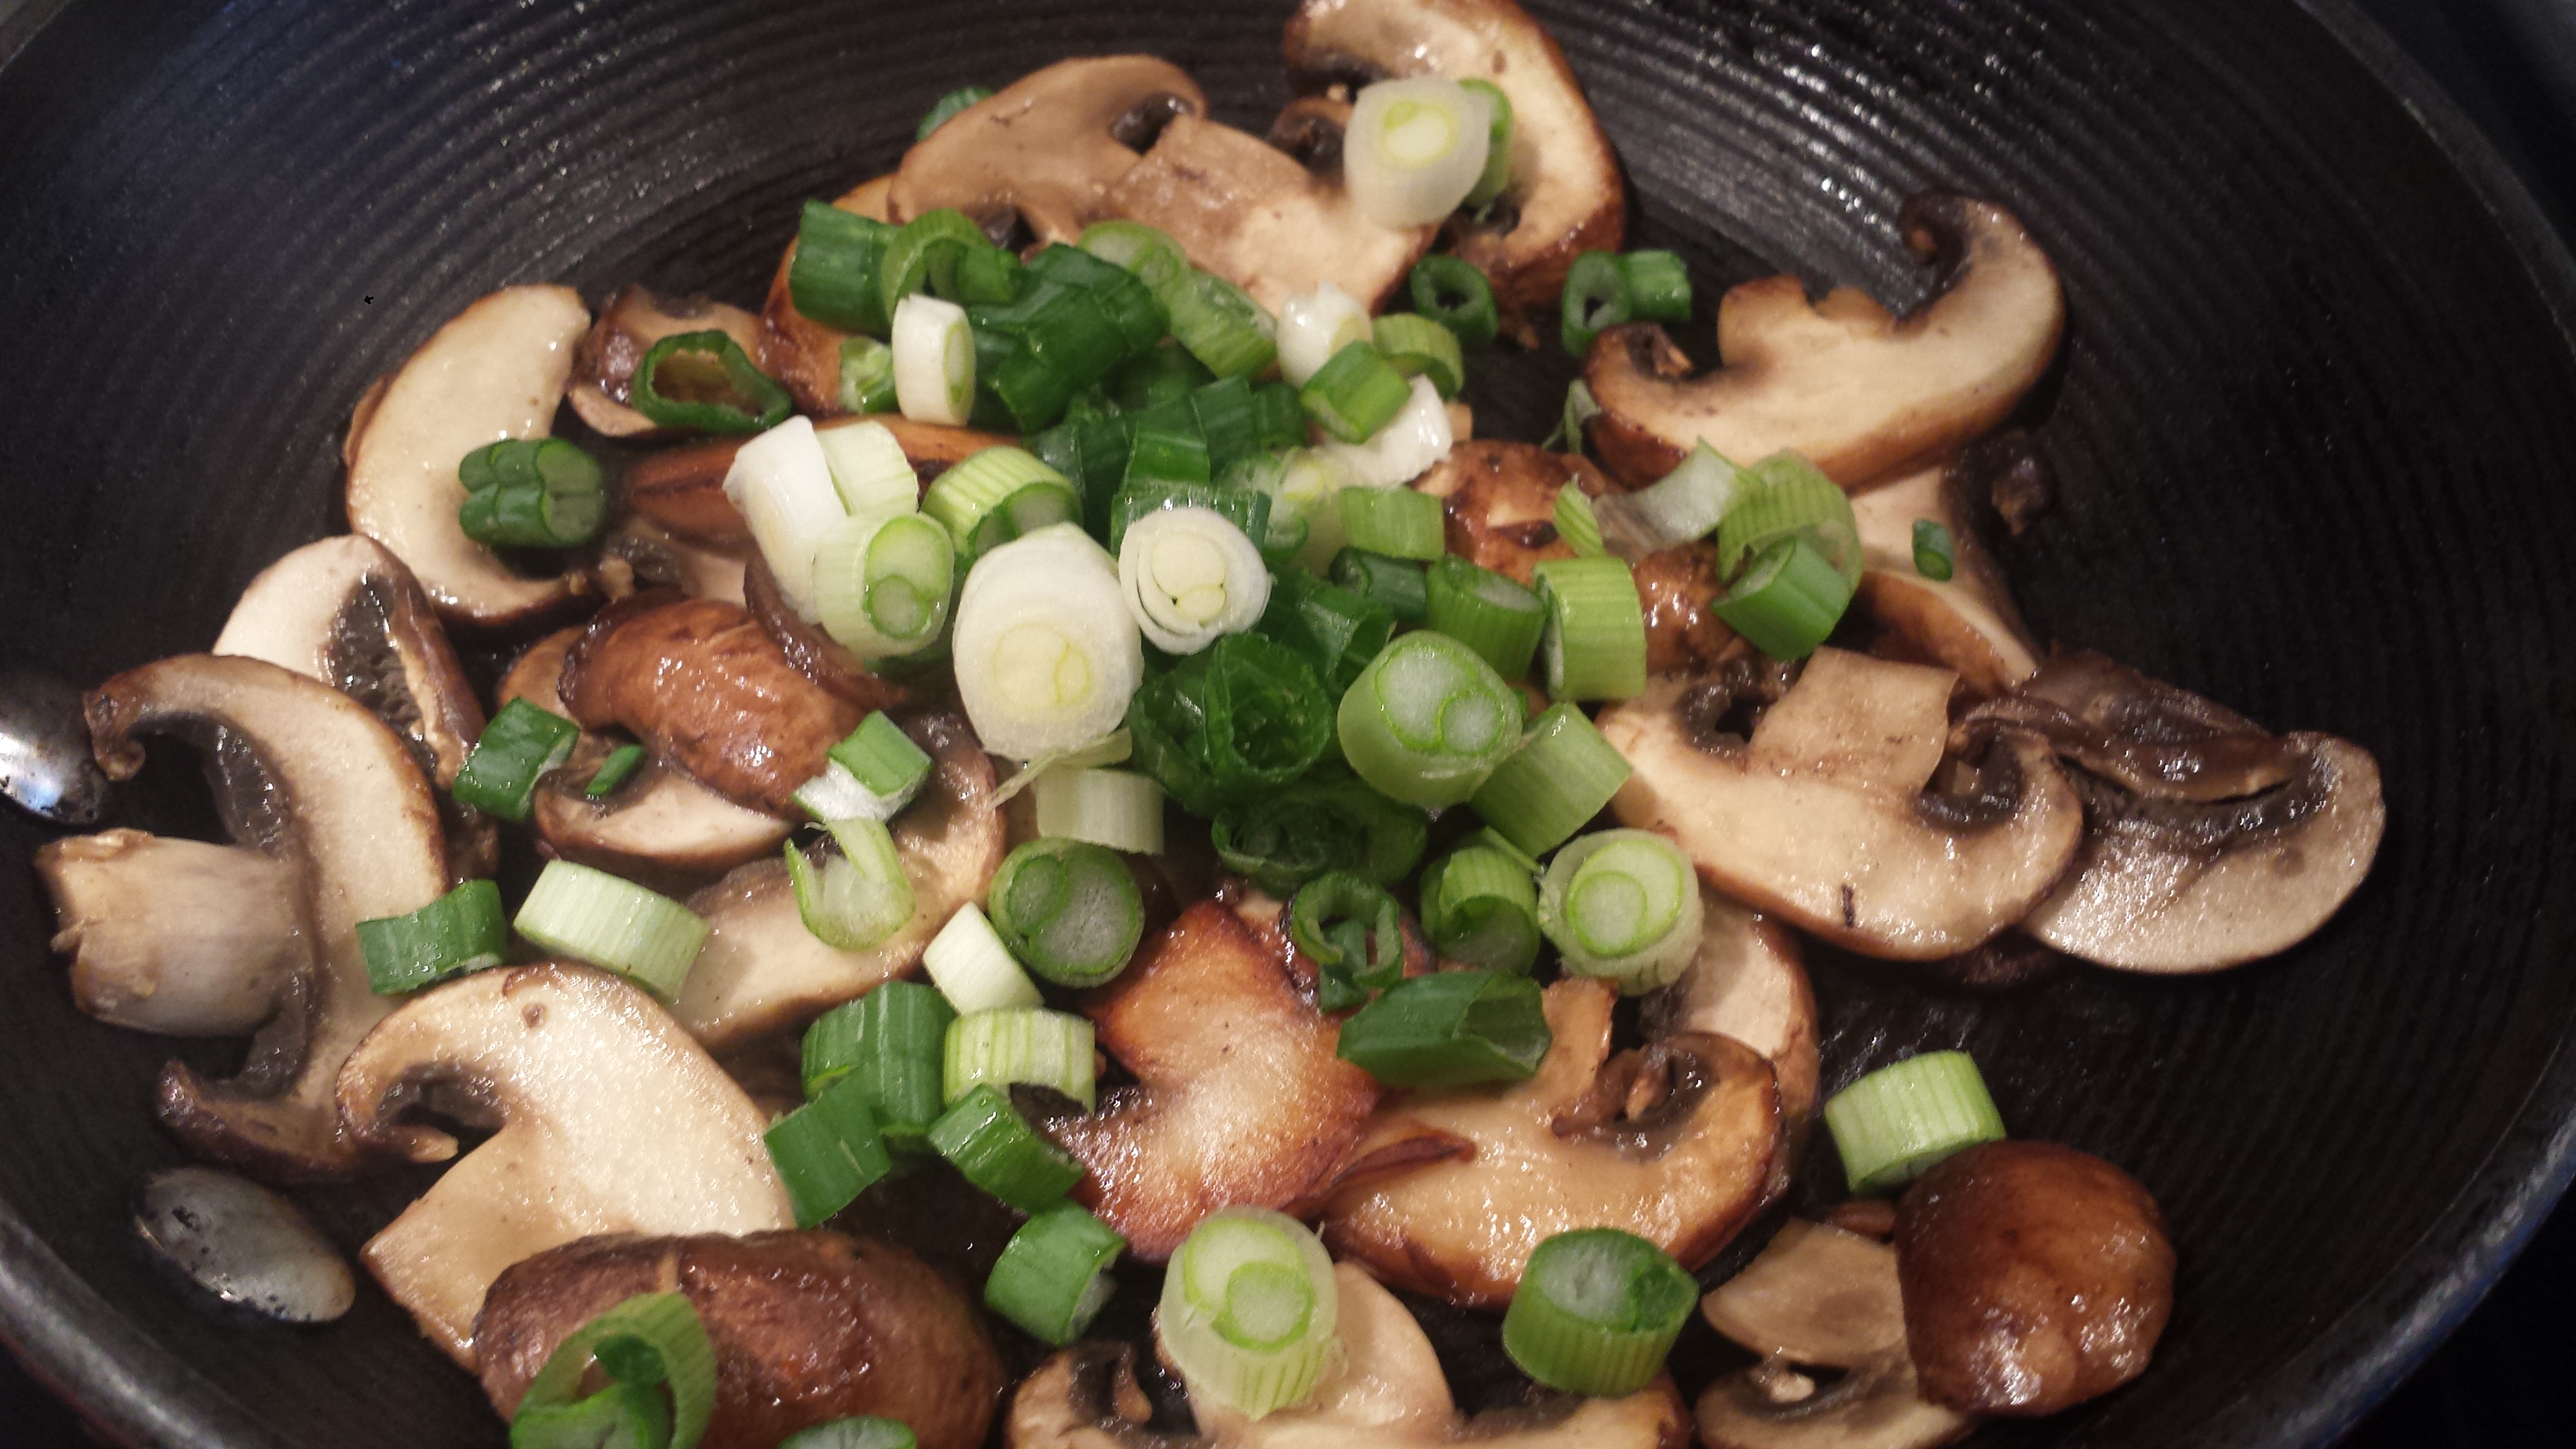
Heat wok and sauté green onion bulbs (save greens to be used for garnish) and thinly sliced shallots over medium high heat until slightly brown.
Add yellow onion and garlic to wok, sauté for 1 minute.
Over medium high heat, sweep onions to the side of the wok and add chicken. Brown on all sides.
Deglaze wok with rice wine.  Add chicken stock, coconut cream, Wild Ginger curry powder and sugar.
Bring to a boil and let sauce reduce and thicken.  Season with fish sauce, to taste.
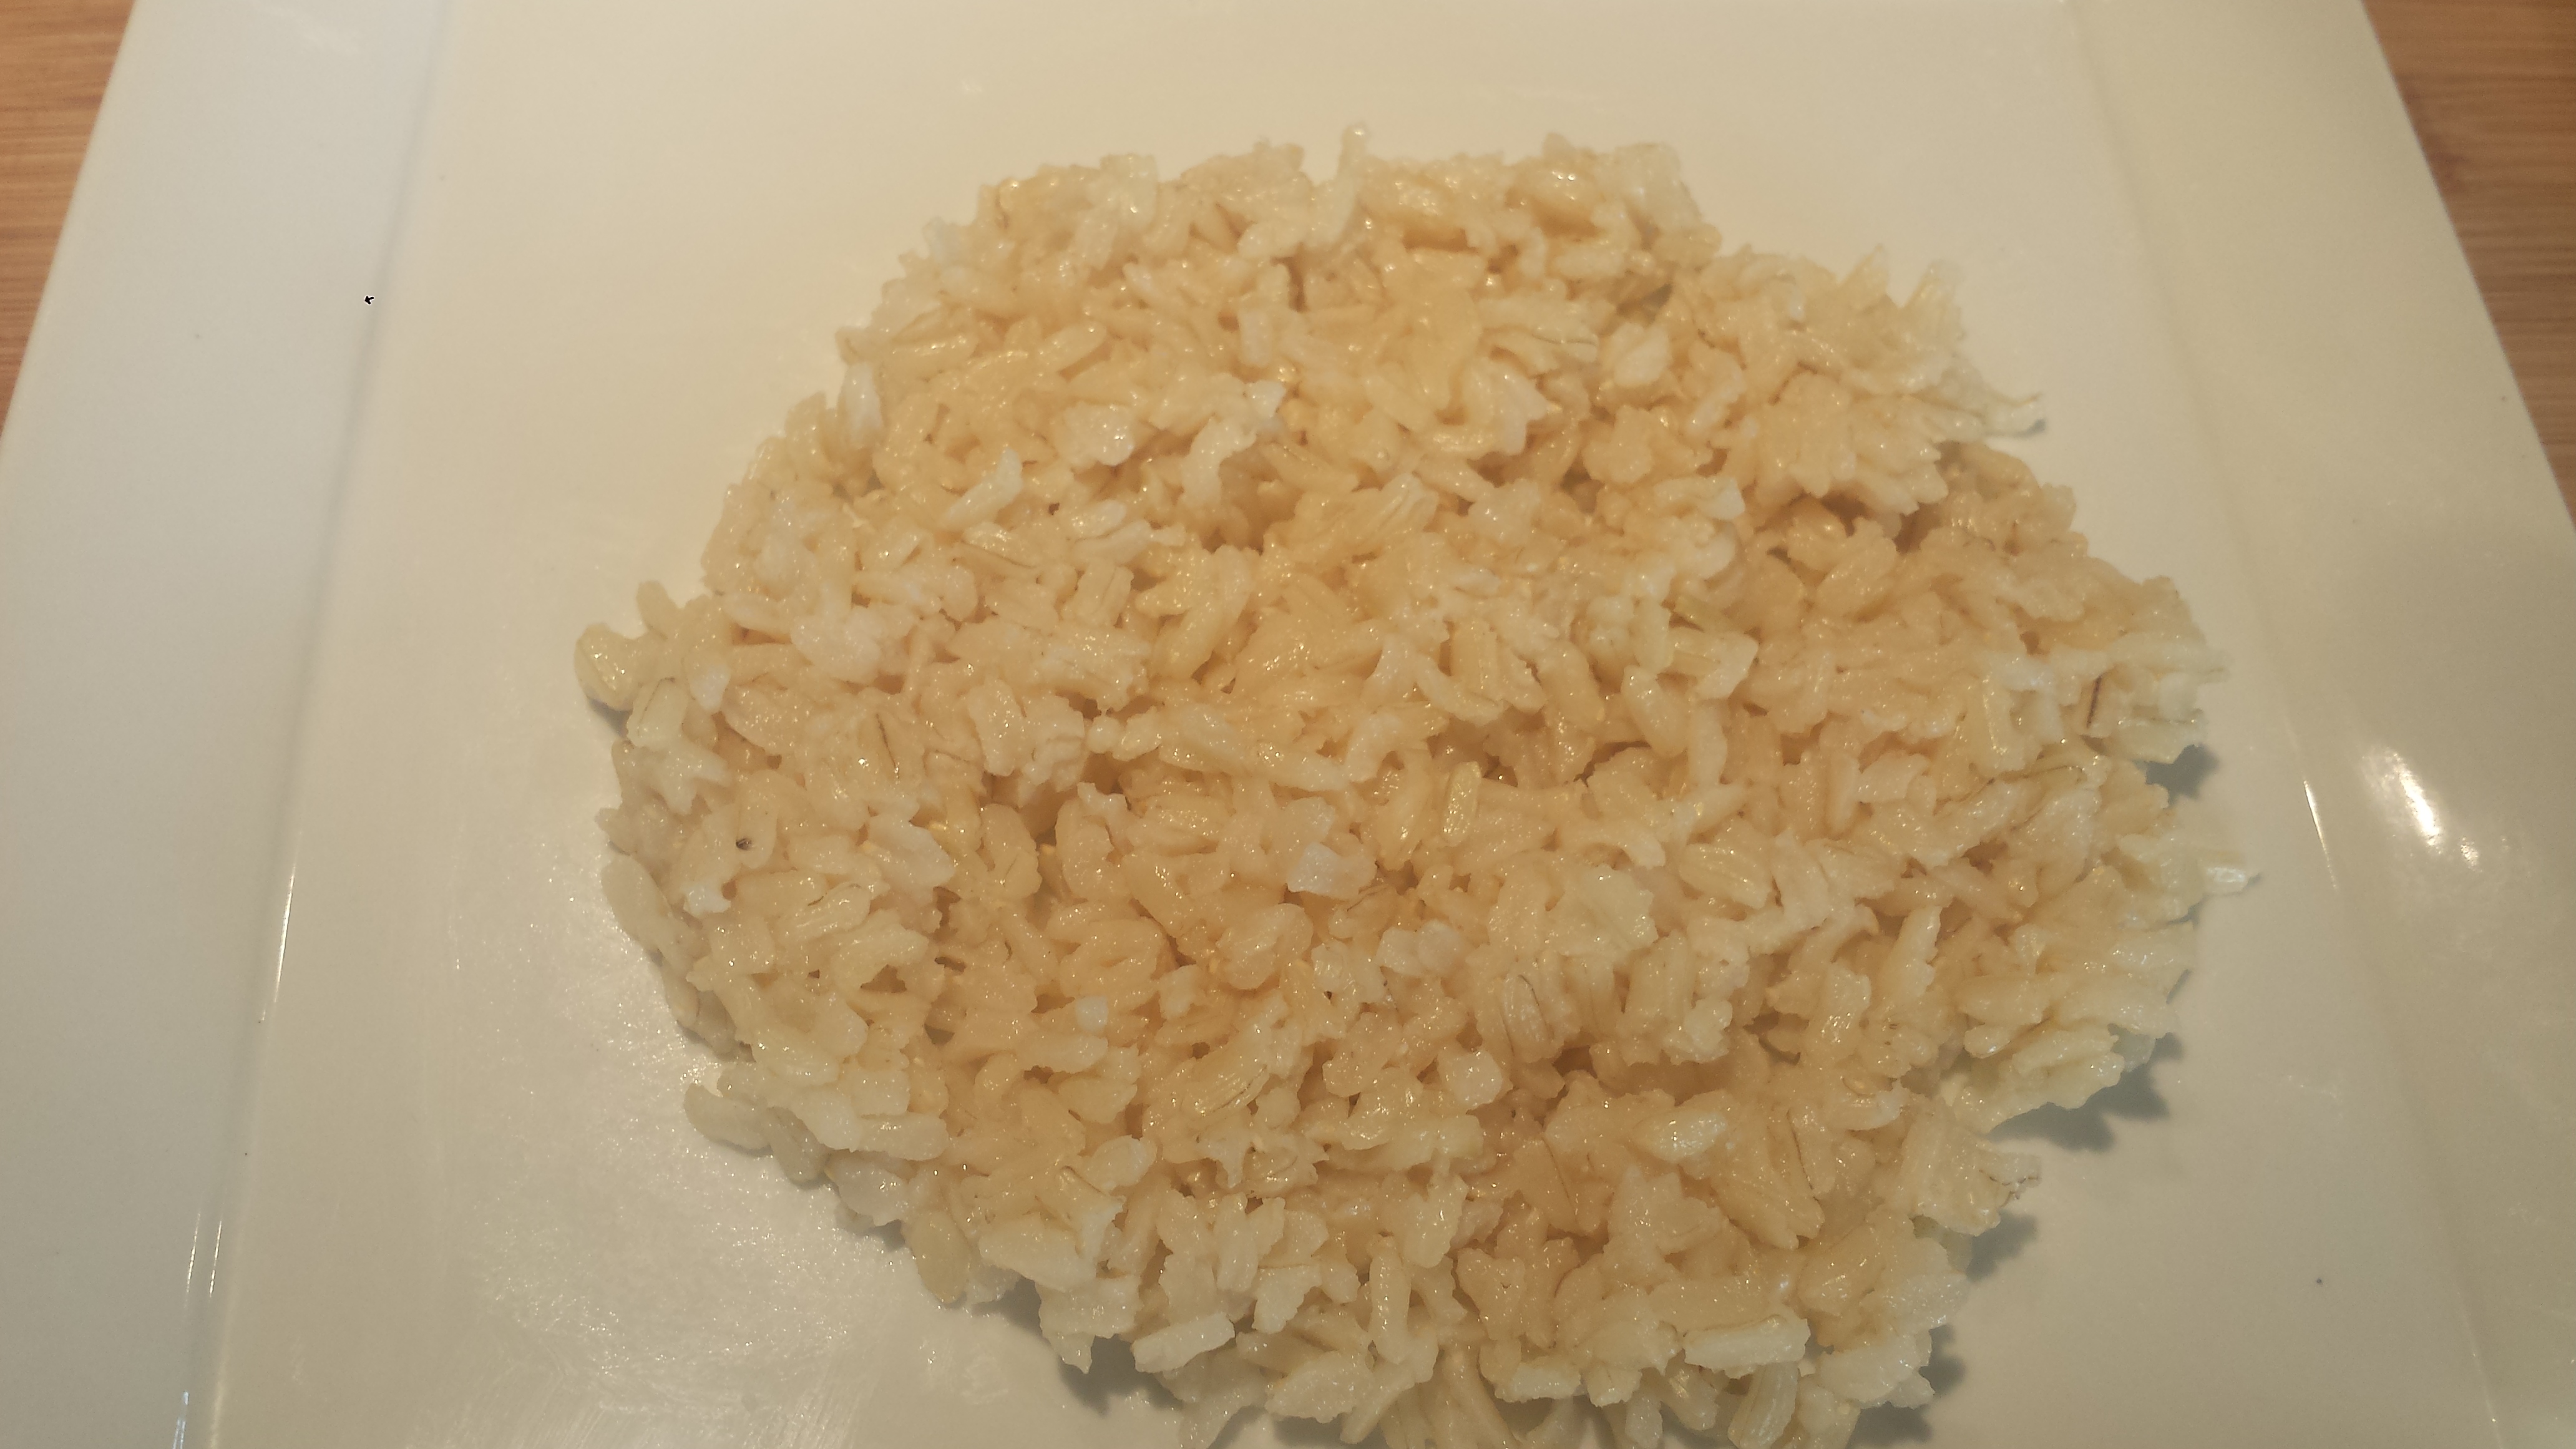
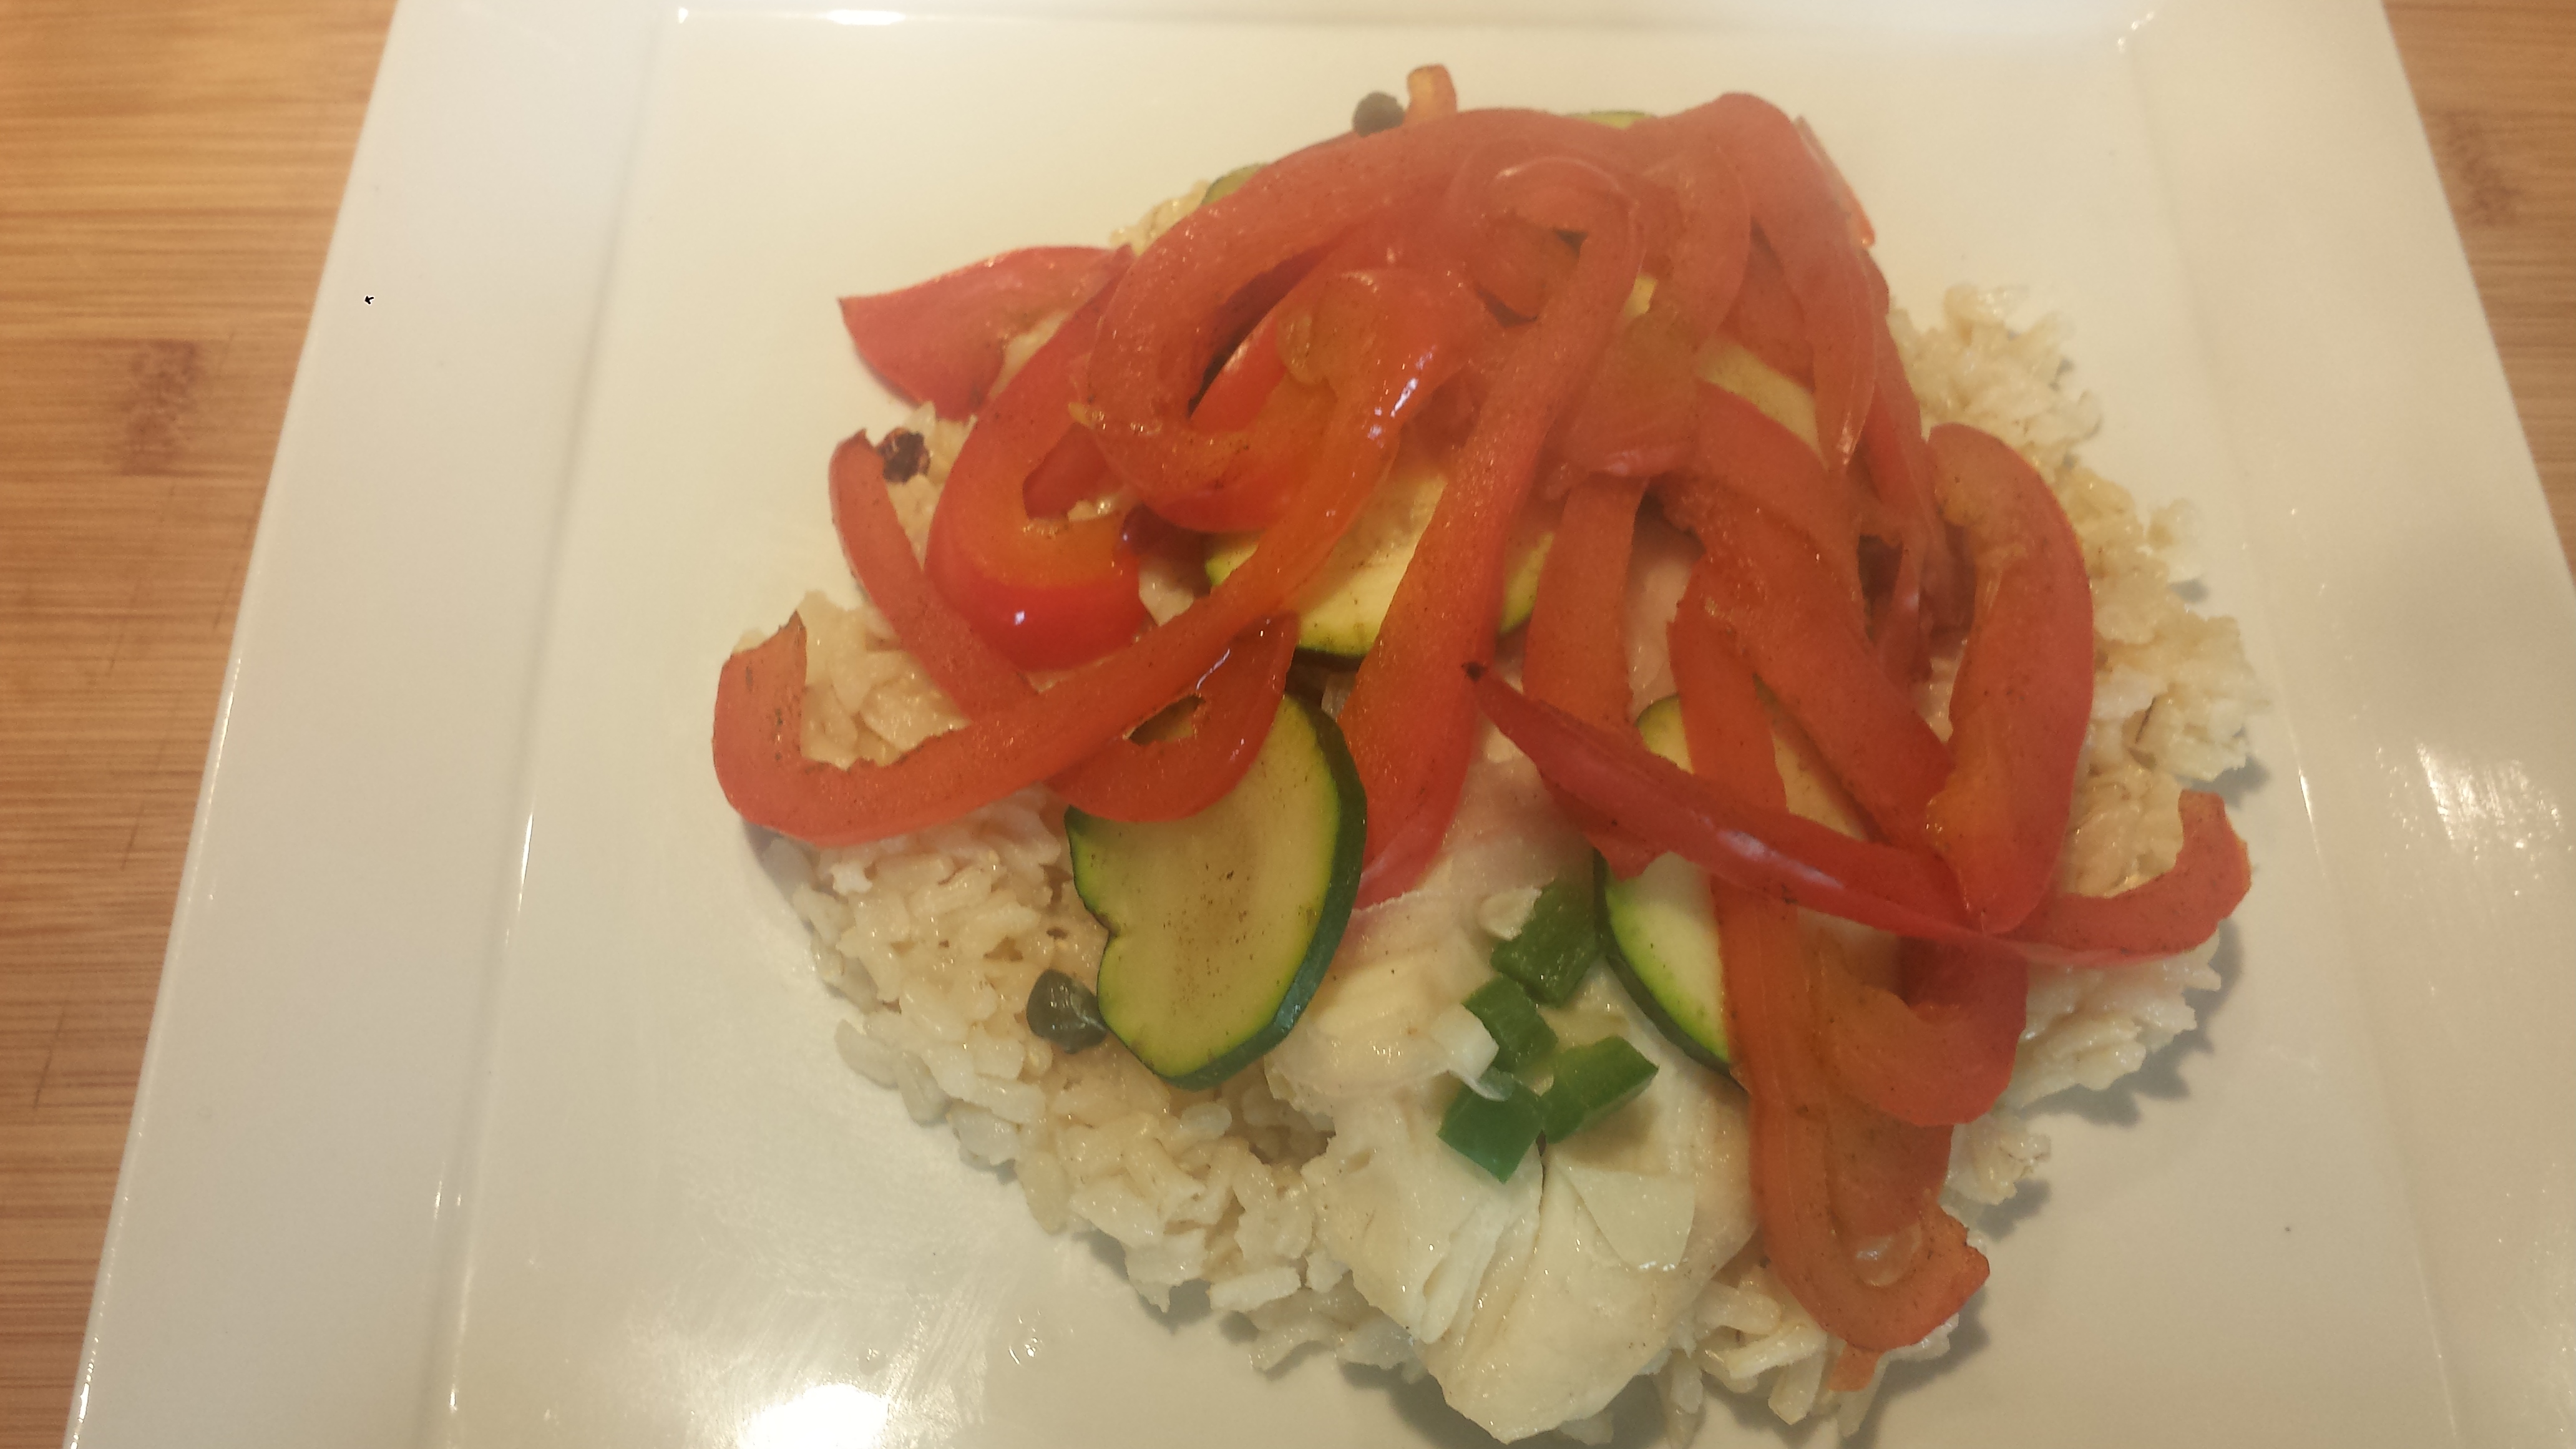
Serve your curry over steamed jasmine or brown rice and garnish with reserved sliced green onions.

Orange-Kissed Seed Crackers with Red Pepper & Rosemary Spread

8

Seed crackers10

I was saved from a Cambazola guilt trip a few days ago when my dog ate almost an entire wedge on the way home from the store. I can’t really blame her as it fell out of the bag as I turned the corner and landed at her feet. I’m sure she couldn’t believe her luck -like manna from heaven! Of course, I had to find something else to serve our guests, but it meant I didn’t get any either.

seeds1

When it comes to appetizers I am a cheese and crackers girl. I will walk straight by the fancy hors d ‘Oeuvres and head right to the cheese platter, especially if it includes Cambazola or some other soft, aromatic (read stinky) cheese or spread. I may hang out at the veggie platter for a while too but I have been known to make crackers with cheese or dip most, if not all of my dinner. Unfortunately, cheese, while delicious, is pretty fat laden and high calorie (especially if you can’t step away from the table) and crackers don’t usually add much nutrition. Knowing my weakness, I am always looking for a healthier alternative and I think I’ve found one!

While perusing the ‘Vegetarian Everyday’ cookbook by Frankiel and Vindahl, I stumbled upon the Orange-Kissed Seed Crackers. The photo was beautiful and the name, oh so cute. They are gluten free and nut free multi-seed crackers that are really good for you. You can use amaranth, quinoa or almond flour, all of which are highly nutritious and make a good cracker base. Three pages later I spotted the Red Pepper & Rosemary Spread, gorgeous orange-red in color, made from roasted red peppers and sunflower seeds with a bit of spice from cayenne pepper and fresh rosemary. This spread uses no oil and gets it’s creaminess from blending the peppers in a food processor with sunflower seeds. The combination of these two is pretty addictive, although the crackers would be pretty good with Cambazola too. 🙂

seed crackers2

The cracker recipe calls for many seeds that I have never used and I wasn’t sure how easy they would be to find. I didn’t find hemp seeds so substituted poppy seeds but I’m sure other seeds can be substituted as long as the total quantity is the same. Here is the rundown on what each seed has to offer from a nutritional standpoint.  Flax seeds are rich in omega-3 fatty acids, fiber, zinc, iron, calcium, and Vitamin E. Pumpkin seeds, also known as pepitas, are chock full of magnesium, manganese, phosphorus, tryptophan, and iron. They’re also a good source of copper, zinc, and Vitamin K. Sesame seeds are loaded with copper and manganese, and also have plenty of calcium, magnesium, tryptophan, and iron. Sunflower seeds are a tremendous source of Vitamin E and are also rich in Vitamin B1.  Hemp seeds are rich in protein, calcium, fiber, and omega-3 fatty acids. (www.qualityhealth.com).  Throw in quinoa flour and you’ve got a grain free, gluten free, protein and vitamin packed and very savory cracker you can gobble up guilt free.  You may not even have to make dinner…

Seed crackers11

Orange-Kissed Seed Crackers

1/2 cup sunflower seeds
1/2 cup sesame seeds
1/2 cup flax seeds, ground
1/2 cup hemp seeds
scant 1 cup amaranth, quinoa or almond flour
1 1/2 tsp sea salt
1/4 cup olive oil
2 Tbsn freshly squeezed orange juice (optional)
1 Tbsn honey or maple syrup(optional)

  • Preheat oven to 300 degrees
  • Combine all the seeds in a medium bowl.  Scoop out about a quarter of them and reserve for the topping.

Seed crackers3

  • Add flour, salt and olive oil with 1 1/4 cups water and stir to combine.  It should be loose.  Add more water if it seems thick.  It will evaporate during cooking.
  • Line 2 12 x 24 in. baking sheets with parchment paper.  Pour half the batter over the paper onto each pan and use a spatula to spread the batter as thinly as you can.

Seed crackers4Seeds7

  • Bake for 25 minutes.
  • Whisk together the honey and orange juice (if desired) in a small bowl.
  • Remove the baking sheet from the oven and brush the cracker with the glaze and sprinkle with the reserved seeds
  • Cut into 2 inch pieces and bake for 30 minutes more or until they are crunchy.
  • Cool on a wire rack.

NOTE:  I followed the recipe pretty closely but next time I would add a bit more maple syrup or honey to make the seeds stick better.   I will also try another type of flour with a less earthy taste and sprinkle some  coarse or flaked sea salt on top as well.

Seed crackers8

Red Pepper & Rosemary Spread

3 large red  bell peppers, halved and seeded
2/3 cup sunflower seeds
pinch of cayenne pepper
sea salt
juice of 1/2 lemon
2 sprigs of rosemary
 Seed crackers5 Seed crackers6
  • Roast the peppers on a baking sheet and roast for about 40 minutes, or until slightly charred.  Remove from the oven and leave to cool.
  • Meanwhile, toast the sunflower seeds, cayenne and salt in a dry frying pan over medium heat for a few minutes.
  • When the peppers have cooled, peel away the skin and roughly chop.
  • Place all ingredients in a food processor or blender and puree until smooth.  Adjust seasoning if necessary.
  • Will keep in an airtight container for 2 weeks.

NOTE:  You can also roast the peppers on broil or on the grill.  They peel more easily if you put them in a paper bag while they cool.

Meatless Monday-Warm Lentil Salad with Roasted Squash & Shaved Brussels Sprouts

2

lentils1

Is it really still winter?  You would never know it by the sun shining outside on this beautiful morning. (Sorry my East Coast friends…)  I’m still hoping for more than four days of rain before I will admit to Spring. Days are still short though,so there isl a chill to the air by dinnertime calling for hearty dishes to fill the belly.   Winter vegetables like gorgeous butternut squash and Brussels sprouts are abundant and so delicious!  Each one of these dishes is great on its own but combine them with lentils and you’ve got a winner.

I am pretty passionate about lentils.  They come in many colors and sizes and I love them all.  Brown and red lentils are great in soups and stews but my absolute favorite is the French green lentil (Le Puy) which is considered the top dog in the lentil world.  Lentils are actually named for their lens shape (Lens culinaris) and green lentils maintain this shape when cooked which is why they don’t get mushy.   Green lentils are delicious  and can transform a salad or side dish into a protein packed meal.   Lentils have the third highest amount of protein of any legume or nut (after soybeans and hemp) and contain dietary fiber, vitamins and minerals, including iron. For this recipe I added roasted red pepper which gives the lentils a distinctive flavor.  Roasting peppers is very easy but in a pinch you can also buy them in jars already roasted.  They can be roasted in the oven on high heat, on your grill or over an open flame on your stove.  I just put the whole pepper on the lowest rack in my oven while preheating it for the squash and turned it every 5 minutes or so to char on all four sides.  Then let it cool in a paper bag and the skin slips off really easily.  Tossing the lentils in vinaigrette is the final touch and gives you a chance to add fresh herbs and spices.

Butternut squash is another versatile and nutrient rich food.  It can be roasted, mashed, stuffed, pureed and baked into muffins and casseroles.  My favorite way to prepare squash is very simple, drizzled with olive oil and roasted with salt and pepper.  Sometimes I splash a bit of balsamic vinegar over it before cooking to intensify the gorgeous orange color and bring out its natural sweetness.

My husband loves Brussels sprouts and I am always looking for new ways to prepare them. Right now they are in season so its a good time to add them into your diet if you haven’t already.   Brussels sprouts are another food powerhouse, in the cruciferous family like broccoli and kale. They contain sulforaphane which is believed to have anticancer properties and indole-3-carbinol which boosts DNA repair and is thought to block the growth of cancer cells.  Boiling Brussels sprouts somewhat lessens their cancer fighting potency (probably the good stuff gets thrown out with the water) but roasting and sautéing does not.  (Wikipedia)  In this dish, I have paired them with sliced shallots, garlic and toasted pumpkin seeds for a tasty and pretty dish.

Warm Lentil Salad

  • Servings: 6
  • Difficulty: easy
  • Print

1 cup green lentils
2 1/2 cups vegetable broth
1 red bell pepper or  4 oz jar roasted red peppers
2 tablespoons coarsely chopped fresh cilantro
1 shallot, finely diced
1 clove garlic, chopped fine
1/2 teaspoon ground cumin
1 Tbsn red wine vinegar
1 tsp balsamic vinegar
1/2 tsp dry mustard
3 tablespoons extra virgin olive oil
Salt and pepper to taste
2 Tbsn crumbled feta(optional)
Lentils11
  • Roast whole red pepper in a hot oven or over an open flame turning to char all four sides.  Put in a paper bag and let cool.  Remove peel and seeds.  Cut into small dice.

Lentils6Lentils4Lentils3

  • Saute shallot and garlic in 1 tablespoon oil.  Add vegetable broth and lentils and  simmer lentils 15 or 20 minutes, or until just soft but not mushy. Set aside with lid off to stop the cooking process.
  •  To make vinaigrette, combine red wine vinegar, balsamic, 2 tablespoons olive oil,, garlic, mustard and cumin in a medium bowl with a fork or whisk. Season with salt and pepper to taste.
  •  Place the lentils, peppers and cilantro in a medium bowl.
  •  Toss with vinaigrette and top with feta if desired.

Lentils10

Roasted Butternut Squash with Cumin and Balsamic

1 butternut squash
2 Tbsn olive oil
1-2 Tbsn balsamic vinegar
1/2 tsp cumin
salt and pepper to taste
Lentils9
  • Peel and seed squash.  Sometimes this is easier if you cut it in half and then crosswise in  half again. Cut into 1 inch dice.
  • Place in a glass pan and drizzle with olive oil.  Sprinkle with cumin, salt and pepper and a splash of balsamic vinegar.
  • Roast in a 400 degree oven for about 30 minutes, stirring several times, until soft.

Lentils7

Shaved Brussels Sprouts and Shallot Saute

  • Servings: 4
  • Difficulty: easy
  • Print

1 3/4 pounds brussels sprouts
2 tablespoons butter
3 tablespoons olive oil
12 medium shallots, thinly sliced (about 2 cups)
6 garlic cloves, thinly sliced
4 tablespoons pine nuts or pepitas (shelled pumpkin seeds)
2 tablespoons fresh lemon juice
  • Thinly slice brussels sprouts into circles.  Easiest done with a food processor or mandolin. Don’t worry if you end up with some loose pieces.
  • Roast pine nuts or pepitas in a small dry pan for several minutes until they turn golden.  Remove from heat and set aside.
  • Saute shallots in butter and olive oil in large pan over medium heat.  about 3 minutes. Add garlic and cook 1 minute.
  • Increase heat to medium high and add brussels sprouts, sauté until tender, about 8 minutes.
  • Add pine nuts and lemon juice.  Season with salt and pepper to taste.  Serve warm.

Lentils2

Wheatless Wednesday – Bittersweet Chocolate Mousse

7

Chocolate Mousse10

This week it’s all about Valentines Day, which means………………chocolate!

Dark Chocolate is known to make people happy by releasing hormones that create euphoria.  Chocolate can relieve a host of ailments, including depression, fatigue, pain and PMS, as well as rev up your sex drive!  Sounds like something we should be eating every day!  So make this decadent dessert for your sweetie and feel free to indulge knowing its all good…

Bittersweet Chocolate Mousse was the first fancy dessert I ever made.  Back in the 80’s  I signed up for a series of cookbooks from Time-Life, Great Meals in Minutes.  I received a different cookbook every month through the mail, each with a theme and wonderful, quick and easy to follow recipes.  I really enjoyed thumbing through each new book and getting great ideas. (This was before we could google everything). As a new cook, I learned how to put together a complete meal and end up with everything ready at the same time, which is really the biggest challenge in cooking. Looking up the recipe again was a bit of a walk down memory lane.  The page is now adorned with a big circle of chocolate, as if a young cook in a hurry put the Cuisinart lid down on top of the open cookbook. Another page with a favorite pasta recipe is splattered with red wine vinegar, remnants from a meal long past.

Many of the recipes I still use came from these books even though over the years I’ve made them my own.  I rarely go back and follow a recipe twice (unless I’m baking and every drop and crumb makes a difference). The Bittersweet Chocolate Mousse recipe by Helen Witty came from the Great Meals in Minutes, “Pasta Menus” cookbook.  I was a newlywed at the time and figuring out what to cook for my new husband.  I came from a large family where chili and casseroles were king and he grew up with meat and potatoes.  To make it even more of a challenge, he doesn’t like foods with mayo or any kind of cream, so it was hard to find recipes that worked for him that were still yummy to me.  I remember feeling lucky to find a dessert recipe at all that isn’t loaded with heavy cream or cream cheese.  I have made this bittersweet mousse several times since then when I’m looking for a special dessert.  It has a nice creamy texture and wonderful flavor.  It looks very elegant, yet it’s deceptively simple.
Chocolate Mousse1
Although this recipe needs several hours in the refrigerator to chill, you can prepare it in just a few minutes with a food processor or blender. The recipe only makes about 2 1/2 cups (2 large or 4 small servings) so chocolate lovers may want to double the recipe.  When I made this so many years ago, I used regular semi-sweet chocolate chips, because that was what was available,  and it was delicious.   You can use regular chocolate chips but a dark chocolate with at least 60% cacao will make it even more divine, as will using real vanilla and a good quality coffee or espresso.  There are so many high quality chocolates available now, Green & Black’s, Divine, CocoaVie and one that is perfect for Valentine’s Day, Chocolove xoxox that even comes with a love poem inside (to name only a few of the many).  Ghirardelli now makes a 60% Cacao bittersweet chocolate chip that is perfect for baking. I made this mousse twice, once with Ghirardelli 60% chips and then with Green & Black’s Dark 85% bar (3.5oz).  Both batches were pretty good but the Green & Black mousse was slightly less sweet and a little more bittersweet.  My taste testers this time (the Zubers) declared the first better with fruit and the second with a bit of whipped cream.  This recipe goes fast so I would recommend having everything pre-measured and ready at room temperature, especially the eggs which are more elastic and create more volume at room temperature.

This mousse would be delicious in a regular dessert dish, but the proper presentation will elevate it to something special.  You can make an exquisite dinner  but slop it on the table and it won’t get the credit it deserves, or conversely, you can beautifully arrange a few random things you have in your kitchen into a pretty nice looking tray for an impromptu gathering and people will think you’re an amazing hostess.  For this romantic and sentimental holiday, I have prepared my husband’s dessert in one of the wedding goblets in which I served the original mousse and mine in one of the beautiful crystal and gold dessert cups that I recently received from my mother in law.  These beautiful crystal dishes belonged to my husband’s grandmother, Nana Rosella and  I thought it perfect, in a time of love to remember  “Big Nana” as she was called among our family, even though she was  4’10” on a good day, because she was very generous and loving and we keep her in our hearts. As we all know, Valentine’s Day is a holiday of hearts.

Bittersweet Chocolate Mousse

  • Servings: 4 small
  • Difficulty: easy
  • Print

Chocolate Mousse9

Bittersweet Chocolate Mousse

 2 Tbsn sugar
1 1/2 Tbsn unsweetened baking cocoa
2 tsp powdered instant coffee or espresso
3/4 cup semisweet chocolate pieces or dark chocolate bar, chopped
1/2 cup boiling water
1/2 tsp pure vanilla extract
2 eggs
strawberries or raspberries for garnish
pirouette cookies (optional)
Chocolate Mousse3
  • Pre-measure everything and have sitting out at room temperature, including the eggs.  Get a couple of cups of water boiling

Chocolate Mousse4

  • In this order, place sugar, cocoa, coffee powder and chocolate pieces in blender or food processor.  Flick motor on and off until ingredients are completely powdered.

Chocolate Mousse5

  • Turn motor on, then pour boiling water through opening in cover and process until it shows no solid bits

Chocolate Mousse6

  • Turn on motor again and add vanilla and eggs.  Process about 15 seconds.

Choclate Mousse7

  • Pour mousse mixture into 4 individual glass dessert cups.  Cool, then chill about 3 hours or until firm.

Chocolate Mousse7 Chocolate Mousse8

  • To prepare strawberries, wash and dry keeping the stem intact.  Turn it on it’s stem and make three slices, vertically, not cutting all the way through the stem.  Gently spread into a ‘flower’ shape.
  • To serve, garnish with berries and a pirouette cookie, if desired.

  valentine_heart_1-929px

Happy Valentine’s Day!


Meatless Monday – Breakfast Galette

0

Breakfast Gallette12

Are you looking for a special Valentine’s Day breakfast treat for your honey? (Or perhaps, a Valentine’s Weekend breakfast)? Here is a festive twist on your traditional omlette or quiche that looks impressive but is easy to make.

During our summers in Maine, we have a lot of house guests and I like to have an assortment of foods available as people start rolling out of bed. Sometimes its hard boiled eggs, cut up fruit and muffins or bagels, cream cheese and smoked salmon. My favorite though, if I get up early enough, is to make a frittata with whatever veggies I have in the refrigerator. Frittatas are very forgiving, will stay warm for quite a while and are still delicious at room temperature. A galette is more of a cross between a pie and a quiche, more of a rustic free form tart. They can be sweet with apples and cinnamon or savory with vegetables and meats.  This version, with veggies, eggs and cheese is perfect for a rainy/snowy morning paired with a little fruit salad and a hot cup of coffee.  The red pepper makes it Valentine colors and the shape of the red pepper strips really lends itself to making hearts.  I usually form the red pepper into a pinwheel shape but for Valentine’s Day the kitschy hearts are pretty cute.

I know its morning and you don’t want to go to the trouble of making a pie crust-sometimes I don’t either.  You can buy an already prepared pie crust or dough that you can easily roll out into a circle.  There is very good wheat, whole grain and gluten-free dough available which makes this really easy. I like to have them on hand, just in case the whim strikes me to whip up an apple pie or something, especially in the fall when fruit is falling off the trees.  Or you can skip the crust altogether and make a frittata.  For that I would recommend using a cast iron pan which can go from sautéing the veggies right into the oven to bake.  A homemade pie crust is delicious though if you have the time.  Click on the link for easy step by step directions and video:  http://allrecipes.com/howto/making-a-pie-crust-step-by-step/

Breakfast Galette

  • Servings: 4-6
  • Difficulty: medium
  • Print

Breakfast Gallette13

1 pie crust
6 fresh eggs
1/4 tsp red pepper flakes
1 small zucchini, thinly sliced
1/Tbsn butter
6-7 mushrooms, sliced
2 scallions, thinly sliced
1 cup assorted cheeses (grated)
1/2 red bell pepper
salt & pepper to taste
Breakfast Gallette2Breakfast Gallette5
  • Roll out dough and place in a pie pan, letting the excess go over the edges.
  • Saute mushrooms until they lose their water, about 2 minutes. Turn off heat and add scallions and mix them in to let them soften.

Breakfast Gallette3 Breakfast Gallette4

  • Crack eggs into a small bowl and beat with a fork.  Reserve a bit of egg white to brush onto crust.  Add red pepper flakes, salt and pepper.

Breakfast Gallette6 Breakfast Gallette7

  • In this order, place veggies into pie crust spreading evenly as you go:  zucchini, mushroom mixture and cheese.  Pour egg mixture over the top.  Arrange red pepper strips into a pinwheel or make them into four hearts.

Breakfast Gallette8 Breakfast Gallette10

  • Fold the edge of the crust over so it overlaps and makes and edge.  Brush exposed crust with egg white

Breakfast Gallette11 Breakfast Gallette14

  • Bake at 350 degrees for about 45 minutes or until the middle has puffed up.  Cut into quarters, it serves four.

Breakfast Gallette16

valentine_heart_1-929px

Happy Valentine’s Day!

Wheatless Wednesday – Fish in Parchment

0

Fish in Parchment13

Do you ever have days where dinner seems impossible?  One kid has basketball practice and another is at play rehearsal, both done at different times. Your spouse is working late and you just walked in the door.  Sometimes the concept of a healthy family dinner is just that, a concept.  Before you pick up the phone to order Chinese takeout (again) check out my very easy fish in parchment which can be assembled in minutes or pre-assembled and cooked whenever you are ready. This has been a go-to dinner for me over the years because it is just so convenient and I can easily cater to each family members’ personal tastes. I pre-assemble each piece of fish in a square of parchment or aluminum foil and write each person’s name with a sharpie and throw them into the oven as needed.  By far the fastest side is couscous (a huge hit with my kids) which only takes 5 minutes, but since this is Wheatless Wednesday, I will be serving my fish over brown Jasmine rice. Most grains can be cooked ahead of time and will sit and wait until you’re ready and they make a perfect pairing with fish in parchment as the delicious juices add a boost of flavor to what is normally a fairly bland side dish.  The best part of this meal though is the presentation.  I love a ‘pretty plate’ and this is certainly nice enough to impress your dinner guests, plus you can prepare everything ahead of time and clean up is easy.

When they were little boys, my kids’  tastes were very finicky, so I was limited to what vegetables or seasonings I could include. Dylan was a purist, butter and salt only. Jackson liked thinly sliced zucchini circles on his and Eric was more adventurous with red peppers.  As they got older their palate grew right along with them, and I started adding jalapenos, sliced red onions, mushrooms, capers, tomatoes, olives, cooked eggplant, pretty much anything I had available.  The trick is to know your customer and prepare with them in mind.  Parents with picky eaters, take heart.  My boys, who at one time couldn’t have any food touching on their plate, have moved on to gourmet and exotic foods like seared ahi, sushi and escargot.

A light fish like red snapper, tilapia or sea bass are very mild and suit themselves to cooking in parchment.  Cooking in parchment is really steaming the fish in its own juices which is a healthy and tasty way to cook.  The juices also pick up the flavors of any vegetables and seasonings you include and create a delicious ‘broth’.  You can use parchment or aluminum foil but foil cooks a bit hotter, so fish might get done more quickly, and some ingredients will react with it, especially lemon juice and wine.

Fish in Parchment

  • Servings: 4
  • Difficulty: easy
  • Print

Fish in Parchment1

4 – 6 oz pieces of fish (red snapper, tilapia or sea bass)
4 Tbsn butter or coconut oil
4 12″ squares parchment or aluminum foil
1 red pepper, thinly sliced
several cloves garlic, chopped
1 small zucchini, thinly sliced
1 – 2 jalapeno peppers, chopped
1 Tbsn capers
1/2 tsp ground oregano
 
  • Preheat oven to 400 degrees.
  • In a small saucepan, dry saute the red peppers with oregano for a few  minutes.  Remove from heat and let cool. (Optional)

Fish in Parchment2Fish in Parchment3

  • Wash and dry fish.  Place each piece of fish in the center of a square of parchment.
  • Dot each piece with butter and sprinkle with a dash of salt.
  • Add jalapenos, garlic and capers.

Fish in Parchment5 Fish in Parchment6

  • Top with onion, zucchini and redpeppers
  • Fold parchment in half the length way of the fish and fold to seal the edges together.  Crimp the sides carefully to keep liquids and steam inside.

Fish in Parchment7 Fish in Parchment8

  • Label your parcels with a sharpie and place on a cookie sheet
  • Bake or broil for 12 to 17 minutes, depending on the thickness of the fish and how many vegetables you include.

Fish in Parchment9 Fish in Parchment10

  • To serve, spread jasmine rice in a circle on the plate.  Place fish parcel in the center and open carefully (It will be steamy).  Rip the parcel in half, lengthwise and slide fish onto the rice.  Be creative and enjoy!

Fish in Parchment11 Fish in Parchment12

Meatless Monday – Black & White Chili with Garlic Toast

0

Black and White Chili

Welcome to my first post as an official blogger for MeatlessMonday.com, a group that started the Monday Campaigns to promote health and being kind to the planet.  Their concept is simple.  Just go meat free one day a week.  Meatless Monday has since turned into a global movement (active in 29 countries) with a wide network of participating hospitals, schools, worksites and restaurants around the world.   You can read more about the history and concept by clicking on my ‘Why Meatless Monday”  tab or the Meatless Monday icon on my sidebar.

Now that it has finally rained in California, and the groundhog has determined another 6 weeks of winter (we are relieved here in the parched West, although our East Coast friends are probably feeling done already) its time to bring back the hearty soups and stews.  Black and White Chili is a tasty vegetarian (vegan, if you omit the dairy toppings) version of an old favorite.  This is a great party or family dish to share with a large group.  Just stack some bowls or mugs next to the pot of hot soup and set up a ‘Toppings Bar” with sliced avocado, scallions, various shredded cheeses, chopped jalapenos, chopped cilantro and sour cream or non-fat yogurt.  The chili goes great with warm corn or flour tortillas that can be rolled into casual burritos.  My favorite side though is garlic toast made with fresh sourdough or ciabatta.  Its a great way to use day old bread too.  Just add a tossed salad and you’ve got a complete meal.  For a creamier chili you can stir up to one cup sour cream right into the chili just before serving . To spice it up add more cayenne. For a less spicy version, reduce or omit the cayenne pepper and use half the green chilis.

Beans are one of nature’s perfect foods. They are an excellent source of protein, fiber and complex carbohydrates and low in saturated fat. They are flavorful, packed with nutrition and inexpensive to boot. Beans are very versatile and can be made to suit any palette. What more could you ask for?

Tip:  Canned beans are very convenient and I like to keep a supply in my pantry, however dry beans are inexpensive and easy to prepare.  They just take a little planning ahead.  Soaking the beans helps remove some of the indigestible sugars that cause a gassy belly.  The traditional way to prepare beans is to rinse and cover with 2-3″ cold water.  Soak 8 hours or overnight. Drain.  Or you can Quick Soak them; rinse dry beans and cover with 2-3″ cold water.  Bring to a boil and boil 2 or 3 minutes.  Remove from heat, Cover and let sit for 1 – 3 hours.  Drain. To cook the beans, cover with 2’ clean water and cook 45 minutes to 3 hours depending on type of bean.  Cooked beans should be tender but not falling apart.

Black and White Chili

  • Servings: 6
  • Difficulty: easy
  • Print

Black and White Chili pot

1 tablespoon extra-virgin olive oil
1 cup chopped onions
2 cloves garlic, minced
2 4 oz cans diced green chilis
1-2 zucchini, chopped
4 cups vegetable broth

1 tablespoon chili powder
1 teaspoon cumin
1/2 teaspoon cayenne pepper (optional) 1/2 teaspoon salt
2 (15.5-ounce) cans black beans or one cup dry beans (cooked-see tip above)
2 (15.5-ounce) cans cannellini or great northern beans or one cup dry beans (cooked-see tip above)
 
  Black and White Chili beansBlack and White Chili veggies

Toppings: (Optional)

Sour Cream or plain yogurt
Shredded jack, jalapeno jack or cheddar cheese
Sliced avocado
Sliced scallions
Minced jalapenos
Chopped cilantro
  • Saute onion in olive oil until translucent.  Add garlic, chilis and  zucchini and cook another couple of minutes
  • Add broth and spices and stir to mix
  • Add cooked beans.  If using canned beans, rinse them well.  Simmer for 20 or 30 minutes.
  • Serve with toppings as desired.

Black and White Chili toppings2

Garlic Toast

4 cloves garlic, minced
2 tablespoons butter
2 tablespoons olive oil
1 loaf crusty bread, sliced
3 tablespoons grated cheese, Parmigiano or Romano, optional
Chopped fresh parsley
  • Combine garlic, butter, and oil in a microwave safe dish or in a small saucepan and heat until butter is melted. Stir to combine.
  • Toast bread under broiler until its golden brown in color. (Watch carefully as it burns quickly)
  • Brush bread liberally with garlic oil. Sprinkle with cheese, if using, and parsley. Return to broiler for about a minute.Black and White Chili toast

Buffalo Wings Two Ways

0

Buffalo Wings 14

SUPERBOWL XLVIII. Looking for the perfect SUPERBOWL SUNDAY appetizer for game day? Look no further. I am posting my Buffalo Chicken Wing recipe by request, which is pretty basic but oh so good! They never make it past the first half.  While I was at it I decided to throw in a vegetarian Buffalo “Wing” recipe for our vegetarian friends or our friends who are counting their calories, although these are pretty yummy, but that could have something to do with the buffalo sauce and blue cheese dressing. You may find yourself guarding the platter to save some for yourself. The “Wings” are really cauliflower dipped in batter then baked on high heat. They are a fun alternative to regular buffalo wings but without the extra fat and calories (or bones). After all it is cauliflower which is loaded with nutrients and naturally low in fat. ‘ Cauliflower heads also contain numerous health benefiting phtyo-nutrients that help prevent prostate, ovarian and cervical cancers’. (Nutrition-and-You.com). Okay, I have to admit that my house is divided for this superbowl game. Now that the Niners are out, I have to root for my home state, and the Seahawks, but my husband is nursing a grudge and going for the Broncos. It’s always fun to be on opposing sides! Even if you’re not a SEAHAWKS or a BRONCOS fan (or a football fan at all) you can check out the adorable Puppy Bowl on the Animal Planet channel, or at the very least, there are always the commercials…

SHOPPING TIPS:  I don’t eat chicken very often but when I do I try to find organic, farm raised chicken. It is a bit more expensive but you are getting less of the bad stuff, like preservatives and additives and more of the healthy nutrients found in animals fed real food. Plus I don’t like to promote the factory farms. I would rather support the Mom and Pop farms whenever possible.  Wouldn’t it be nice if chickens running around outside pecking at bugs on the ground was the norm and not the other way around?  I  found organic free range chicken wings at Whole Foods, although, they weren’t at the counter. I had to ask for them.  Blue Cheese dressing is traditionally served with buffalo wings and I have provided a recipe for homemade, however, there are some good commercial brands available, like Bob’s and Litehouse.  A shortcut is to buy a commercial dressing (the refrigerated dressings are usually best) and add some fresh, crumbled blue cheese.  My favorite wing sauce is Frank’s Buffalo Wing Sauce but you can also make your own by combining hot pepper sauce and melted butter. (Several recipes say not to use Tabasco, not sure why, just passing it along)  The cauliflower recipe can easily be made vegan.  Just replace the melted  butter with vegan margarine.

Buffalo Chicken Wings

  • Servings: 6-8
  • Difficulty: easy
  • Print

2-3 lbs of chicken wings
Cooking spray for pan
1/2 tsp cayenne pepper
1/2 tsp chili powder
1/2 tsp garlic powder
1/2 tsp onion powder
1 cup Buffalo sauce or 2/3 cup hot pepper sauce mixed with 1/3 cup melted butter
  • Wash and dry chicken wings. (Whole wings have to be cut apart at the joint, tips removed. “Party wings”, if you can find them, are already cut for you).
  • Lightly spray bottom of pan to prevent sticking.
  • Mix dry spices together in a small bowl.
  • Place chicken pieces in bottom of pan a single layer.  Sprinkle with half of dry spices.

Buffalo Wings 1

  • Broil for 8 or 10 minutes or until golden brown.  Turn them over and sprinkle with remaining spices.  Cook another 8 or 10 minutes.

Buffalo Wings 2Buffalo Wings 3

  • Brush wings with buffalo sauce and cook another 5 minutes.  Turn and repeat on the other side. (If too many drippings have accumulated in the bottom of the pan, you can remove some of it with a turkey baster before you turn them, so you don’t lose your sauce into the drippings)
  • Serve with blue cheese dressing and celery sticks

Buffalo Wings 10

Buffalo Cauliflower Wings

  • Servings: 6-8
  • Difficulty: easy
  • Print

1 cup water
1 cup flour (any kind will work)
1 tsp. garlic powder
1/4 tsp cayenne pepper
1/4 tsp chili powder
1/4 tsp salt
1 head of cauliflower, cored and cut into florets
1 cup buffalo sauce or 2/3 cup hot sauce mixed with 1/3 cup melted butter)
Buffalo Wings 5 Buffalo Wings 6
  • Preheat the oven to 450°F.
  • Spray a baking dish with non-stick oil.
  •  Combine the water, flour, and  spices in a large bowl and stir  to make a paste. I used coconut flour which is very absorbent so had to add more water.
  • Add the cauliflower pieces and stir to coat.  Place in a shallow  baking dish in a single layer. Bake for 18 minutes.

Buffalo Wings 9Buffalo Wings 12

  • Brush the buffalo sauce on the baked cauliflower and continue baking  for a few more minutes. Turn and repeat.

Blue Cheese Dressing

  • Servings: about 2 cups
  • Difficulty: easy
  • Print

3/4 cup sour cream
1 1/3 cups  mayonnaise
4  ounces blue cheese, crumbled
1/2 teaspoon dry mustard
 1  teaspoon Worcestershire sauce
 1/3 teaspoon garlic powder
1/2 teaspoon  salt
1/2 teaspoon  ground black pepper
  • Whisk all ingredients together in a medium sized bowl. For a smoother dressing, mix in a blender or food processor. Cover and refrigerate.  Best if made the night before.

Buffalo Wings 13