Meatless Monday – Winter Greens with Persimmon, Pomegranate and Glazed Pecans

2

20151206_164048

Winter doesn’t have to be blah!  Some winter fruits are brilliant and colorful, like persimmon and pomegranate, both only availble for a short time of year.  I almost didn’t post this because the photo doesn’t really do it justice.  I was in a hurry as 25 people were about to arrive for dinner and I didn’t have time to take a lot of photos or make sure the lighting was right.  You’ll just have to trust me. This salad is lovely and delicious. The persimmon almost looks like it has been sprinkled with cinnamon and when cut this way, has star shapes (scroll down).  Pomegranate seeds with their brilliant red are show stoppers and add a delicious tangy crunch.  I also added red globe grapes which are really sweet and also in season now and I topped it all off with candied pecans, a crumble of goat cheese and a drizzle of vinaigrette.  Mmmm…

20151206_141807

Persimmons are a widely overlooked fruit, perhaps because people don’t know what to do with them.  They are quite popular in Japan where they originated and they are obviously beloved.  The Latin word for persimmon means “food of the gods.”  There are two types of persimmons available at our markets.  Hachiya persimmons are soft and creamy, great for baking and making puddings but not for eating raw.  The Fuyu, which is called for in this salad, is wonderful to eat raw, peeled or unpeeled. Regardless of type, they’re a fruit with amazingly effective antioxidant capabilities, with powerful vitamins to boot, including 55% of our RDA of Vitamin A and 22% of Vitamin C, which we really need this time of year to combat colds and flu. They are also an excellent source of fiber, B Vitamins and phytonutrients.  They aren’t just pretty and great in a table centerpiece.  They walk the talk.

20151206_145638

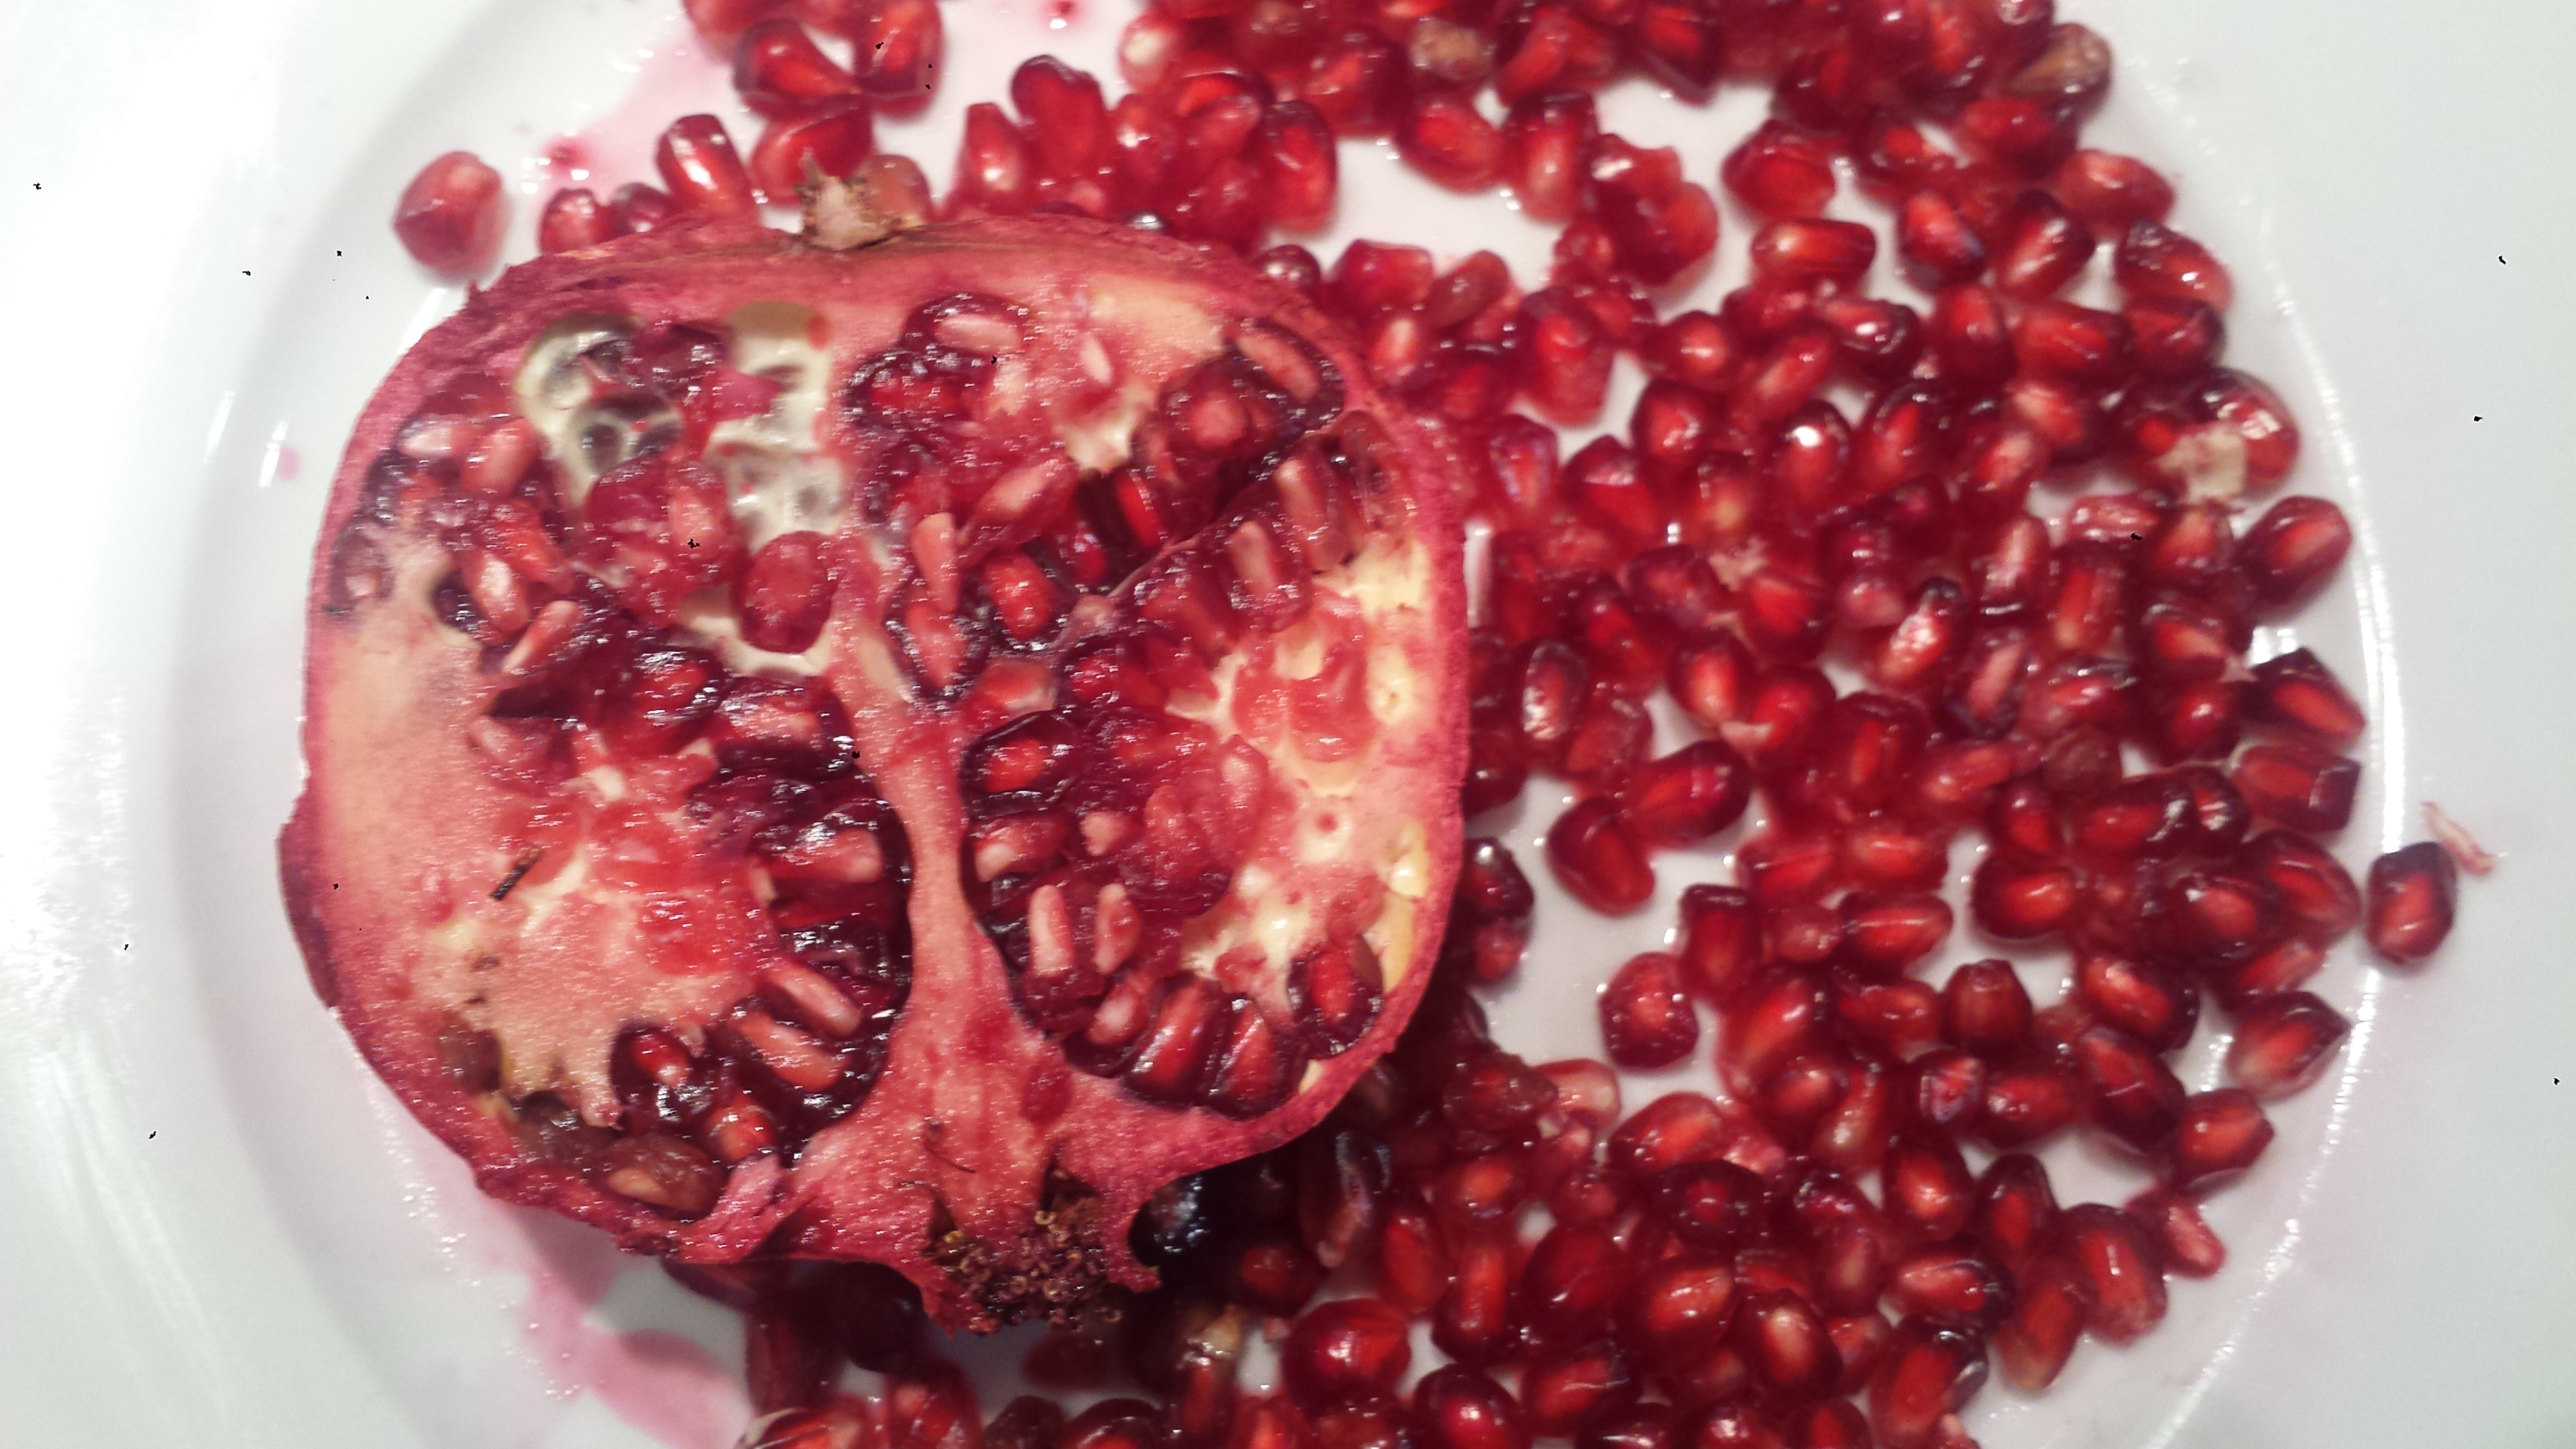
Pomegranates are another gorgeous fruit with it’s brilliant, jewel tones arils (seeds) that is more than just a pretty face.  Pomegranate arils are the most powerful anti-oxidant of all fruits and they are nutrient dense which makes them an important ingredient to immune support and overall good health. They can be messy to seed and stain surfaces, so use a non-porous try or board when removing arils. Although you can often find containers of pomegranate arils already removed, I find it’s worth it to do it yourself.  The results are fresher, have more flavor and last longer.  However, in a pinch, it’s sometimes nice to just be able to toss them on top. Done!

TIPS:  I used Candied Pecans from Trader Joe’s which I really like but they are available in most markets.  They are sometimes labelled Glazed Pecans.  You can also do it yourself if you are feeling industrious. Click HERE for a good recipe for Candied Pecans from All Recipes.  Warning:  they may not make it to your salad…

20151206_141946

WINTER GREENS WITH PERSIMMON, GLOBE GRAPES, POMEGRANATE AND GLAZED PECANS

16 oz fresh greens (spinach, arugula, baby kale, etc)
1 Fuyu persimmon
1/2 cup globe grapes, halved lengthwise
1/2 cup glazed pecans
1/2 cup pomegranate seeds
3 oz goat cheese (optional)

Vinaigrette:
1/4 cup olive oil
1/4 cup red wine or apple cider vinegar (or both)
1/2 tsp salt
1/4 tsp pepper

20151206_143534

  • Wash and dry greens and place them in a large serving bowl.

20151206_144023

  • Cut the top off of the persimmon.  Cut it in half vertically and then slice into flat wedges. Note the lovely star shapes. Leave wedges whole or cut in half.

20151206_144825

  • Add persimmon, grapes and pecans to greens.

20151206_144830


  • On a non-porous surface, cut pomegranate in half and remove seeds.

20151206_164045

  • Add goat cheese if desired. Whisk together vinaigrette ingredients and drizzle over salad.  Toss before serving.

Winter Greens with Persimmon, Globe Grapes, Pomegranate and Glazed Pecans

  • Servings: 4-6
  • Difficulty: easy
  • Print
20151206_164101

 16 oz fresh greens (spinach, arugula, baby kale, etc(
1 Fuyu persimmon
1/2 cup globe grapes, halved lengthwise
1/2 cup glazed pecans
1/2 cup pomegranate seeds
3 oz goat cheese (optional)

Vinaigrette:
1/4 cup olive oil
1/4 cup red wine or apple cider vinegar (or both)
1/2 tsp salt
1/4 tsp pepper

  • Wash and dry greens and place them in a large serving bowl.
  • Cut the top off of the persimmon.  Cut it in half vertically and then slice into flat wedges. Leave wedges whole or cut in half.
  • Add persimmon, grapes, pomegranat seeds and pecans to greens.
  • Whisk together vinaigrette ingredients and drizzle over salad.  Toss before serving.

Easy No-Peel Applesauce

6


20151206_170305

Every year, after the apple pies are baked and enjoyed, I make applesauce with all the rest of the apples from my garden. Of course it’s usually just in time for Hanukkah which means yummy latkes with applesauce and sour cream. Making applesauce is pretty easy but peeling the apples is very tedious and time consuming, so this year I decided to try leaving the peels on. Okay, I’ll admit it, I got lazy, but it worked out for the best. I LOVE this applesauce and it is so easy! It’s got a richer and creamier texture AND it’s more nutritious since most of the nutients and fiber are in or right under the peel which is usually removed and thrown away. Win! Win!  For best results use a combination of both sweet and tart apples.  Fuji, Red Delicious, Pink Lady and Golden Delicious apples are sweeter in taste, while Granny Smith and Pippin apples add a nice tartness.

20151102_160003

Applesauce is a favorite snack for little kids in particular.  The healthiest applesauce is made from organic apples with the skin on and no added sugar. Apples are one fruit in which you can’t wash off the pesticides, so buying organic apples is especially important if you don’t have your own apple trees. Apples are a great source of natural fiber and vitamin C.  The pulp and skin of apples contain flavonoids, which offer numerous health benefits; reduce inflammation, regulate blood pressure. The phytonutrients in apples work as antioxidants to support your heart and helping to lower your bad cholesterol levels.  My weight concious readers will like to hear that eating applesauce can also decrease your risk of developing abdominal fat. Studies show that the pectin in apples suppresses your appetite.  So what are you waiting for?

20151206_170329

Just core the apples, either with a sharp knife or with an apple corer, then cut the apples, peels and all, into slices or chunks. Simmer with a bit of water, lemon juice and a couple of cinnamon sticks until soft. Taste and add sugar if desired. Depending on the apples, it may not need any. Then remove the cinnamon sticks and process the apple mixture until smooth in a blender or food processor. The applesauce can be stored in the refrigerator for a couple of weeks or placed in plastic freezer bags and frozen. It can also be canned while hot. Click HERE for directions from Bell on canning hot applesauce.

Latkes3

Of course, my favorite way to emjoy applesauce is on top of crispy potato pancakes (latkes) with sour cream.  Click HERE for my yummy Latke Recipe.

20151206_170305

EASY NO-PEEL APPLESAUCE

6 lbs apples (about a dozen large)
1 lemon (or 1/4 cup)
2 cinnamon sticks optional
1 cup water

20151127_114518

  • Core apples and slice or cut into chunks.  Place in a large stockpot. Pour water and lemon juice over the top.

20151127_123301

  • Add two cinnamon sticks (or ground cinnamon to taste).  Cover and simmer for about 30 to 45 minutes.  If it starts to stick, add a bit more water but not too much.

20151127_140608

  • When apples are completely soft and falling apart, remove cinnamon sticks and process apples in a food processor or blender until smooth.

20151127_140043

  • For a chunkier applesauce, use a potato masher.

20151127_140739

  • Store in the refrigerator up to 2 weeks.


Easy No-Peel Applesauce

  • Servings: 6 cups
  • Difficulty: easy
  • Print


EASY NO-PEEL APPLESAUCE20151206_170305

6 lbs apples (about a dozen large)
1 lemon (or 1/4 cup)
2 cinnamon sticks optional
1 cup water

  • Core apples and slice or cut into chunks.  Place in a large stockpot.
  • Pour water and lemon juice over the top.
  • Add two cinnamon sticks (or ground cinnamon to taste).  Cover and simmer for about 30 to 45 minutes.  If it starts to stick, add a bit more water but not too much.
  • When apples are completely soft and falling apart, remove cinnamon sticks and process apples in a food processor or blender until smooth.
  • For a chunkier applesauce, use a potato masher.
  • Store in the refrigerator up to 2 weeks.


Wheatless Wednesday – Portobello Mushrooms Stuffed with Eggplant, Tomatoes and Mozzarella

0


20151201_200021

If you are looking for an easy and delicious dinner, this is it!   Lovely and earthy portobello mushrooms are stuffed with a mixture of chopped eggplant, zucchini, tomatoes, mozzarella and parmesan then baked to melty, oozy vegetable goodness.  I served my mushrooms over a spinach and arugula salad with persimmons, spiced pecans and pomegranate seeds tossed in a light oil and vinegar dressing. ( Will feature on GMD soon).  For a heartier meal, serve over a whole grain like farro or brown rice cooked in vegetable broth.  The beauty of this dish is that there is no sauteeing or pre-cooking any of the ingredients.  Except for salting the eggplant and allowing time for them to ‘sweat’ the excess water out, this is an easy to assemble meal.  Just toss the diced veggies, herbs and cheeses together, stuff the mushrooms and bake. Easy!  If you can’t find good ripe tomatoes, which can be hard to get this time of year, just substitute a can of diced tomatoes.  Drain them and reserve the juice for another meal (or add to cooking water if you are making rice for extra flavor).

20151201_194633

I only had three portobello mushrooms and the stuffing easily made enough to fill six, so I cut the tops off of three bell peppers and stuffed those too.  My husband had one of each and loved them both, although I think he liked the mushrooms a bit better.  However, if you have a mushroom detractor, this is a good option, just FYI. Most people will eat only one mushroom but some will eat two, so this recipe should serve four, especially if you are serving them with a sald or other side dish.

20151201_181433

The mushrooms are stuffed with fresh healthy veggies but the mushroom ‘bowls’ themselves are loaded with nutriion.  Just look at this handy list of their health benefits from Mushroom-Appreciation.com.  You might be surprised at what the lowly mushroom has to offer.

  • Protein – Most mushrooms have a high protein content, usually around 20-30% by dry weight. This can be useful for vegetarians or anyone looking to increase the protein content in their diet.
  • Fiber – Helps lower cholesterol and is important for the digestive system.
  • Niacin and other important B vitamins – As certain B vitamins are found in animal tissue but not plants, this can be another good supplement for vegetarians.
  • Vitamin D – Essential for the absorption of calcium.
  • Copper – Aids in helping the body absorb oxygen and create red blood cells.
  • Selenium – An antioxidant that helps neutralize free radicals, thus preventing cell damage and reducing the risk of cancer and other diseases. Mushrooms contain more selenium than any other form of produce.
  • Potassium – An extremely important mineral that regulates blood pressure and keeps cells functioning properly. A large portobello mushroom is said to have more potassium than a banana.
  • Other important minerals – Such as phosphorous, zinc, and magnesium.
  • Low levels of fat, calories, and sodium
  • No cholesterol

20151201_194640

TIPS:  The mushrooms can be stuffed ahead of time and cooked when you are ready.  They can be wrapped and stored in the refrigerator over night or they are fine resting on the kitchen counter for an hour or so.  If you refrigerate them, allow them to come to room temperature before baking.

20151201_195204

PORTOBELLO MUSHROOMS STUFFED WITH EGGPLANT, TOMATOES AND MOZZARELLA

6 large portobello mushrooms
1 small globe eggplant (or 2 japanese)
2 Tbsn Olive Oil (or olive oil spray)
1 medium zucchini
1 large ripe tomato (or 1 can diced tomatoes, drained)
2 cloves garlic, minced
8 oz fresh or 1 cup grated Mozzarella Cheese
½ Cup Parmesan Cheese, grated
1 Tbsn fresh herbs or 1 tsp dried (any combination of basil, oregano or thyme)
1/2 tsp salt
1/2 tsp black pepper
1/4 tsp red pepper flakes (or more to taste)

20151201_181833

  • Dice eggplant and place on a layer of paper towels.  Sprinkle liberally with salt and let sit for at least 15 minutes until they ‘sweat’ the water out.

20151201_182258

  • Dice zucchini, tomato and fresh mozzarell, if using, and mince herbs.

20151201_182932

  • Preheat oven to 375 degrees. In a large mixing bowl combine zucchini, tomato, mozzarella, garlic, fresh herbs, salt, pepper and red pepper flakes and a drizzle of olive oil. Mix to combie and set aside.

20151201_183429

  • Clean the Portobello caps with a damp paper towel, remove the stems then set them aside.

20151201_183904

  • Brush mushroom caps and insides with olive oil (or olive oil spray) and place them cap side down in a baking dish. If you are using bell peppers instead of mushrooms, par-boil them or microwave them one at a time on high for 30 seconds.

20151201_184518

  • Add eggplant and parmesan to the bowl and mix to combine

20151201_185606

  • Spoon about 1/2 cup filling into each cap, pressing into place.

20151201_194633

  • Bake for 30 minutes. Check at the halfway point and readjust toppigs if they have come loose.  If it looks dry on top, spray or brush with olive oil. Broil for an additional 10 minutes if you prefer a golden brown crust.

20151201_200021

  • Serve hot or warm over warm rice or farro or with a colorful green salad.

Portobello Mushrooms Stuffed with Eggplant, Tomatoes and Mozzarella

  • Servings: 4-6
  • Difficulty: easy
  • Print

20151201_195204

6 large portobello mushrooms
1 small globe eggplant (or 2 japanese)
2 Tbsn Olive Oil (or olive oil spray)
1 medium zucchini
1 large ripe tomato
2 cloves garlic, minced
8 oz fresh or 1 cup grated Mozzarella Cheese
½ Cup Parmesan Cheese, grated
1 Tbsn fresh herbs (any combination of basil, oregano or thyme)
1/2 tsp salt
1/2 tsp black pepper
1/4 tsp red pepper flakes (or more to taste

  • Dice eggplant and place on a layer of paper towels.  Sprinkle liberally with salt and let sit for at least 15 minutes until they ‘sweat’ the water out.
  • Dice zucchini and tomato and mince herbs.
  • Preheat oven to 375 degrees. In a large mixing bowl combine zucchini, tomato, garlic, fresh herbs, salt, pepper and red pepper flakes and a drizzle of olive oil. Mix to combie and set aside.
  • Dice fresh mozzarella, if using
  • Clean the Portobello caps with a damp paper towel, remove the stems then set them aside.
  • Brush mushroom caps and insides with olive oil (or olive oil spray) and place them cap side down in a baking dish. If you are using bell peppers instead of mushrooms, par-boil them or microwave them one at a time on high for 30 seconds.
  • Add eggplant, mozzarella and parmesan to the bowl and mix to combine
  • Spoon about 1/2 cup filling into each cap, pressing into place.
  • Bake for 30 minutes. Check at the halfway point and readjust toppigs if they have come loose.  If it looks dry on top, spray or brush with olive oil. Broil for an additional 5-10 minutes if you prefer a golden brown crust.
  • Serve hot or warm.

Wild Rice, Mushroom and ‘Sausage’ Stuffed Pumpkin (Vegan)

0

20151117_203702

JUST IN TIME FOR THANKSGIVING! If you are looking for a glorious edible centerpiece for your table or you just want to stuff something that isn’t a turkey, how about roasting your favorite stuffing (or mine) in a pumpkin?  Pumpkins make a lovely serving dish and the rich and creamy pumpkin flesh gets scooped up along with the flavorful wild rice, mushrooms, pecans and vegan sausage stuffing.  It’s a wonderful and savory dish, sure to satisfy both vegan and meat loving friends.   This recipe makes a perfect Vegan main course or a hearty side dish for about ten people and is naturally gluten free.

20151117_171030

I have always loved the colors of Fall and the view from my window shows why. (Notice that roses in the lower left corner are still blooming too.) The gorgeous orange of pumpkins is the essence of the season. As the pumpkin bakes it gains a gorgeous dark amber color. I bought a Tutti Frutti Sugar Pie Pumpkin just shy of 6 lbs. Who can resist a name like that?  This is a dense, sweet smaller pumpkin that is great for cooking and less so for making jack ‘o lanterns.  ‘The bright orange color of pumpkin is a dead giveaway that pumpkin is loaded with an important antioxidant, beta-carotene. Beta-carotene is one of the plant carotenoids converted to vitamin A in the body. In the conversion to vitamin A, beta carotene performs many important functions in overall health.'(University of Illinois Extension)

Have you heard about the Great Pumpkin Shortage of 2015?  Apparently, it’s true.  If you see pumpkins in your market, don’t wait until the last minute.  Scoop them up or maybe try Farmer’s Markets.  Pumpkins (and all winter squash) can stay quite happily on your counter for  a week or two until you are ready to use them.  ‘The sugar pumpkins are grown primarily in Illinois, which produces about 90% of the supply each year.  But this year heavy rains hit Illinois and cut deeply into the sugar pumpkin crop.’ (CNN)

20151117_170231

Historically, I have stayed away from Vegan ‘meats’ and ‘cheeses’ because I usually don’t like either the taste or the texture but I keep on trying. I am not Vegan but I do believe in using non-dairy products as often as possible, both to promote all the new products (and encourage more) and to boycott the dairy industry, in particular, the factory farming/ Concentrated Animal Feeding Operations (CAFO’s) which are crueltry beyond belief. Click on How Our Food Animals Are Raised it if you don’t already know.  The Vegan world is rapidly changing and there are some really good options out there now that are pretty good.  There are several really good vegan sausages, Beyond Meat Italian Sausages are a favorite.  I first made this using Field Roast Italian Sausages (made with eggplant, fennel garlic and red pepper) They also make some good vegan cheeses under the name of Chao. If you are gluten free, check the labels.  Some are made with vital wheat gluten. I threw these same sausages on the grill a few weeks ago during a family barbecue and we were all pleasantly surprised.  I thought that grilled they were a bit dry but with a great flavor and consistency.  I decided that next time I would brush them in olive oil before grilling or saute them in a pan with oil.  In this recipe I removed the casings and crumbled the ‘meat’ and sauteed it along with the onions and celery.  Of course this step is optional as there are enough other good flavors and textures in this dish without it.  See TIPS for some suggested substitutions.  NOTE: This is not a paid endorsement, just my personal opinion.

20151117_210724

The inspiration for this dish came from Vegetarian Times and I used their directions as a guide but created my own ingredients.  If you are interested in the original recipe which is also Vegan and includes wild rice, beans, corn and spinach, click HERE.

TIPS:  The stuffing can be made two days ahead of time and refrigerated unstuffed.  Substitute any ingredients that you and your family really like.  Some suggestions would be substituting chopped chestnuts instead of pecans, 1 1/2 cups of cooked cannelini, black or kidney beans instead of vegan sausage;  2 cups of fresh spinach instead of mushrooms.  For a bit of sweetness add 1/4 – 1/2 cup dried cranberries, yellow raisins or black currants.

20151117_210945

WILD RICE, MUSHROOM, PECAN & ‘SAUSAGE’ STUFFED PUMPKIN

Note:  Amounts are listed fill a 6 lb pumpkin. An 8lb pumpkin will call for 2 cups wild rice blend. Adjust accordingly.

1 1/2 cup wild rice blend (or 1/2 cup wild rice and 1 cup long grain brown rice)
1/4 cup olive oil, divided
1 large onion, chopped
3 stalks celery, chopped
6 cloves garlic, minced (divided)
2 links vegan sausage (optional)
1 cup criminy mushrooms
2 Tbsn fresh sage, chopped (divided)
2 Tbsn fresh thyme, chopped (divided)
1 cup pecans, roughly chopped
1 6-8 lb pumpkin*See note.
 20151117_180128
  • Prepare wild rice blend according to package directions. Transfer to bowl and allow to cool.

20151117_174213

  • Heat 2 Tbs. oil in skillet over medium heat. Add onion, celery,; sauté 5 minutes.

20151117_174225

  • Remove sausage from casings and crumble.

20151117_175407

  • Wipe mushrooms clean with a damp papertowel and chop. Add sausage and mushrooms, 4 cloves garlic, 1/2 of. sage and thyme to pan with onions and saute another 5 minutes or so until all liquid has evaporated.

20151117_180336

  • Toast pecans in a dry pan for several minutes until aromatic.

20151117_182551

  • Stir mushroom mixture into rice mixture. Fold in pecans. Taste and season with salt and pepper, if desired.

20151117_181934

  • Preheat oven to 350°F. Line rimmed baking sheet with foil. Cut top from pumpkin, and scoop out seeds and pulp. Reserve seeds for roasting if desired.  See below for directions.

20151117_182335

  •  Combine remaining oil, garlic, sage, and thyme in bowl. Brush oil mixture over inside of pumpkin.

20151117_183019

  • Fill pumpkin with rice mixture, cover with top, and bake 1 1/2 to 2 hours, or until pumpkin is tender when side is pierced with knife tip.

20151117_183116

  • Uncover, and bake 10 to 20 minutes more.

20151117_203224

BONUS:

ROASTED PUMPKIN SEEDS

  • Remove the large pieces of pulp from the seeds. Don’t worry, the smaller shreds will disappear in the second step.
  • Boil the seeds in really salty water for about 5 minutes. Drain and let dry.
  • Spread seeds on a baking sheet. Spray or coat with olive oil.  Sprinkle with salt and pepper, cayenne or any other spices you like.
  • Bake for 30 – 45 minutes at 300 degrees or until golden.  Remove from heat and let cool. Store at room temperature for up to a week.
  • Use as toppings for salads or soups if you have any left after you’ve been snacking on them.

20151118_091227


Wild Rice Mushroom Sausage Stuffed Pumpkin

  • Servings: 8-10
  • Difficulty: medium
  • Print
20151117_203702

Note:  Amounts are listed fill a 6 lb pumpkin. An 8 lb pumpkin needs 2 cups uncooked rice. Adjust recipe accordingly.

1 1/2 cup wild rice blend (or 1/2 cup wild rice and 1 cup long grain brown rice)
1/4 cup olive oil, divided
1 large onion, chopped
3 stalks celery, chopped
6 cloves garlic, minced (divided)
2 links vegan sausage (optional)
1 cup criminy mushrooms
2 Tbsn fresh sage, chopped (divided)
2 Tbsn fresh thyme, chopped (divided)
1 cup pecans, chopped
1 6-8 lb pumpkin*See note.
  • Prepare wild rice blend according to package directions. Transfer to bowl and allow to cool.
  • Heat 2 Tbs. oil in skillet over medium heat. Add onion, celery, 4 cloves garlic, 1/2 of. sage and thyme; sauté 5 minutes.
  • Remove sausage from casings and crumble.
  • Wipe mushrooms clean with a damp papertowel and chop.
  • Add sausage and mushrooms to pan with onions and saute another 5 minutes or so until all liquid has evaporated.
  • Stir mushroom mixture into rice mixture.
  • Toast pecans in a dry pan for several minutes until aromatic.
  • Fold in pecans. Taste aand season with salt and pepper, if desired.
  • Preheat oven to 350°F. Line rimmed baking sheet with foil. Cut top from pumpkin, and scoop out seeds and pulp. Reserve seeds for roasting if desired.  See below.
  •  Combine remaining oil, garlic, sage, and thyme in bowl. Brush oil mixture over inside of pumpkin.
  • Fill pumpkin with rice mixture, cover with top, and bake 1 1/2 to 2 hours, or until pumpkin is tender when side is pierced with knife tip.
  • Uncover, and bake 10 to 20 minutes more.

ROASTED PUMPKIN SEEDS

  • Remove the large pieces of pulp from the seeds. Don’t worry, the smaller shreds will disappear in the second step.
  • Boil the seeds in really salty water for about 5 minutes. Drain and let dry.
  • Spread seeds on a baking sheet. Spray or coat with olive oil.  Sprinkle with salt and pepper, cayenne or any other spices you like.
  • Bake for 30 – 45 minutes at 300 degrees or until golden.  Remove from heat and let cool. Store at room temperature for up to a week.
  • Use as toppings for salads or soups if you have any left after you’ve been snacking on them.

Wheatless Wednesday – Curried Carrot, Sweet Potato and Ginger Soup

2

20151111_083542

Happiness is…hot soup on a cold day.

On Monday I shared 25 things to make with sweet potatoes since I had just been gifted a big back of them…So which of the recipes did I decide to make?  Soup!   Curried Carrot, Sweet Potato and Ginger Soup to be specific.  It finally rained more than a few drops here in Northern California and when its cold and wet outside, soup is the ultimate comfort food since it warms you up from the inside out. I love this flavorful gingery soup, made creamy from the sweet potatoes and not from adding cream or butter.  At only 144 calories per serving (1 1/4 cups), this is a low calorie, zero cholesterol meal with a high nutrient payoff; 4.1 grams protein, 3.9 grams fiber, with loads of vitamins, including Vitamin C to help fight winter colds, plus iron and calcium.

This week we are eating orange on the rainbow.  So what does orange do for us?

“Most yellow and orange food is packed with carotenoids, which give them their vibrant colour. Three of the most common carotenoids – alpha-carotene, beta carotene and beta cryptoxanthin – can be converted from foods into vitamin A in the body. This nutrient is needed for good vision in dim light, normal growth and development, a strong immune system and to keep the skin and cells that line the airways, digestive tract and urinary tract healthy. But thanks to their antioxidant activity, there’s also evidence to suggest that carotenoids – and especially beta carotene, found in orange and yellow food – might help to reduce the risk of heart disease and certain cancers.

However, these findings haven’t always been shown with supplements of beta-carotene, so it’s much better to boost intakes through eating foods which are naturally rich in beta-carotene such as carrots and sweet potatoes.” (Weightloss Resources)

20151109_164037

TIPS:  If I have really fresh, youngish carrots, I like to keep their peels on since so many of the nutrients are in or just under the peel and it’s a shame to cut them off.  Just scrub them with a vegetable brush or sponge and rinse.  They should be smooth and shiny.  If you have older carrots, you may have to peel them because the skins can have a bitter flavor that is best removed.

CURRIED CARROT, SWEET POTATO AND GINGER SOUP

1 Tbsn olive oil
1/2 cup chopped shallots (2-3 large)
3 cups peeled sweet potato
1 1/2 cups carrots (2-3 large)
1 tablespoon grated ginger (or ginger paste)
2 tsp curry powder
1 quart vegetable broth
1/2 tsp salt

20151109_165830

  • Peel and cube sweet potato into about 1/2 inch pieces.

20151109_165213

  • Scrub carrots and slice or chop them into 1/2 inch pieces.

20151109_170536

  • Peel  ginger and grate about a tablespoon.

20151109_164905

  • Heat oil in a large saucepan over medium-high heat. Add shallots; saute 3 minutes or until tender.

20151109_170145

  • Add potato, carrots, ginger, and curry; cook 2 minutes.

20151109_170836

  • Add broth; bring to a boil. Cover, reduce heat, and simmer 25 minutes or until vegetables are tender; taste and add salt if necessary.

20151109_180604

  • Pour half of soup in a food processor; pulse until smooth. Repeat procedure with remaining soup.

20151109_181620

  • Clean saucepan and pour soup back in and reheat.

20151111_083542


  • Serve with a swirl of plain yogurt and cilantro with a pinch of paprika (optional).

Curried Carrot, Sweet Potato and Ginger Soup

  • Servings: 4-6
  • Difficulty: easy
  • Print
20151111_083542

1 Tbsn olive oil
1/2 cup chopped shallots (2-3 large)
3 cups peeled sweet potato
1 1/2 cups carrots (2-3 large)
1 tablespoon grated ginger (or ginger paste)
2 tsp curry powder
1 quart vegetable broth
1/2 tsp salt

  • Peel and cube sweet potato into about 1/2 inch pieces.
  • Scrub carrots and slice or chop them into a/2 inch pieces.
  • Peel  ginger and grate about a tablespoon.
  • Heat oil in a large saucepan over medium-high heat. Add shallots; saute 3 minutes or until tender.
  • Add potato, carrots, ginger, and curry; cook 2 minutes.
  • Add broth; bring to a boil. Cover, reduce heat, and simmer 25 minutes or until vegetables are tender; taste and add salt if necessary.
  • Pour half of soup in a food processor; pulse until smooth. Repeat procedure with remaining soup.
  • Clean saucepan and pour soup back in and reheat.
  • Serve with a swirl of plain yogurt and cilantro with a pinch of paprika (optional).

Meatless Monday – 25 Healthy Sweet Potato Recipes

8

20151109_111816

Happy Monday!  I spent the weekend in Seattle surrounded by family and friends to celebrate the life of my beautiful Mother.  I flew home last night with my heart full of happy memories and my suitcase full of sweet potatoes compliments of my brother, Paul.  Paul and his wife, Barbara, own Paradisos del Sol Winery in Zillah, part of Washington’s wine country (They have quite a unique wine tasting room, so check it out if you are in the area) AND they have quite a large vegetable garden.  In addition to delicious wine, Paul brought up a huge box of sweet potatoes for all of us to take home.  I didn’t get a proper photo of some of the ‘monster potatoes’ he grew. They really needed to be seen to be believed. I only took a few of the smaller ones that would fit in my suitcase.  So, I took to Google to figure out what I was going to make with Paul’s sweet potatoes and came across this article by Benjamin Placket for Health.com. He has some really great mostly vegetarian recipes for sweet potato soups, fries, salads, mashed and baked – even a noodle kugel!  I will be making one of these recipes tonight, so stay tuned for Wednesday’s blog post…

“It’s no surprise that sweet potatoes are at the top of nearly everyone’s healthiest foods list. One baked, medium-sized sweet potato contains 438% of your daily value of vitamin A (a white potato contains 1%), 37% of your vitamin C, and some calcium, potassium, and iron too. All this at just 105 calories!

What’s more, they also deliver 4 grams of dietary fiber—16% of the daily value—and absolutely zip in terms of fat.

And luckily there are many ways to whip them up. Here are 25 great (even kid-friendly!) sweet potato recipes from Health.com.”

Just click the link below.

25 Healthy Sweet Potato Recipes

Meatless Monday – Honey Glazed Winter Squash with Pomegranate

5

20151101_200735

It’s finally starting to feel like Fall!  We actually got a few drops of much needed rain here in California last night.  It’s been six months since we have received this manna from heaven and the weatherman was positively giddy during his forecast last night.  With Fall comes a fabulous selection of gorgeous squashes with their colorful but knobby exteriors and rich and sweet interiors. Their gorgeous skins make them a perfect table centerpiece and then you can turn them into a spectacular meal later. This dish combines some of my favorite flavors, rich and earthy winter squash, roasted with shallots, then tossed with toasted pine nuts and pomegranate seeds and finely, drizzled with a sweet and tangy cider vinegar and honey reduction.

20151101_133824

This recipe from “Eating Well, November/December 2015” will work with any winter squash, except for Spaghetti Squash. Each has a unique flavor but all are nutritious and good sources of vitamins and minerals with zero fat. I have been wanting to try Delicata squash but only found three small ones in my supermarket so I also used an Acorn squash but didn’t have room in the pan for the Carnival squash that I couldn’t resist (Who can pass up something called Carnival Tutti Frutti?) so that will have to be another meal.  Look at how different they are from the outside.  From left to right in the photo above, is Carnival (Tutti Frutti), Acorn Squash and three small Delicata.  Delicata squash is named for it’s delicate skin which is thin enough to easily cut, unlike other winter squashes that have hard shells (and you fear losing a hand just cutting them in half).  As an added bonus, the skin is also edible so the squash doesn’t need to be peeled.  If you are using acorn, carnival or kabocha squash, the peel looks just as pretty but it’s not edible.

20151101_190032

I love this time of year when pomegranate seeds are readily available.  Their vivid color transforms any dish into a showstopper and these nutrient rich little gems add a host of vitamins and anti-oxidants to the meal.  One word of caution though; pomegranate juice stains any porous surface including a wood cutting board, so I would recommend cutting over a ceramic plate or other non-porous surface. Sometimes you can find them already seeded in the supermarket as an easy but more expensive shortcut.

20151102_120312

TIPS: Seeds from winter squash make a great snack food, just like the popular pumpkin seeds. Just scoop the pulp and seeds from inside the squash and separate out the seeds. Toss them in olive oil and place them in a single layer on a cookie sheet, sprinkle with salt and lightly roast them at 300 degrees in the oven for about 30 minutes. If you have time, you can try soaking them in salt water for several hours or overnight before roasting for a tastier, cleaner result. Soaking helps the salt permeate the seed and makes it easier to remove the last bits of pulp.

20151101_200729

HONEY GLAZED WINTER SQUASH WITH POMEGRANATE

5 lbs delicata or Acorn squash
4 large shallots
3 Tbsn olive oil
1/4 cup pomegranate seeds
1/4 cup pinenuts
1/2 tsp salt
1/4 tsp pepper
1/4 cup fresh mint, chopped
HONEY GLAZE:
1/2 cup apple cider vinegar
1/3 – 1/2 cup honey
1/4 tsp salt

20151101_173855

  • Preheat oven to 400 degrees. Cut the squash in half and scoop out the seeds.20151101_174404
  • Then cut horizontally into 1 inch slices

20151101_175546

  • Quarter shallots.

20151101_180824

  • Toss the squash slices and shallots with olive oil, salt and pepper and divide between two roasting pans.

20151101_194759

  • Roast for 30-35 minutes, alternating between top and bottom racks, or until squash is tender. (turning halfway through cooking process) While the squash is cooking, combine honey, vinegar and salt in a small saucepan and bring to a boil.  Reduce heat to a simmer until reduced to about a 1/2 cup.

20151101_181513

  • Toast pinenuts in a dry pan for several minutes until golden.  Remove from heat and let cool.

20151101_200657

  • Transfer squash to  a serving platter, top with pomegranate seeds, pine nuts and mint. Drizzle with syrup. Serve warm.

Honey Glazed Winter Squash with Pomegranate

  • Servings: 4-6
  • Difficulty: easy
  • Print

 20151101_200735

5 lbs delicata or Acorn squash
4 large shallots
3 Tbsn olive oil
1/4 cup pomegranate seeds
1/4 cup pinenuts
1/2 tsp salt
1/4 tsp pepper
1/4 cup fresh mint, chopped
HONEY GLAZE:
1/2 cup apple cider vinegar
1/3 – 1/2 cup honey
1/4 tsp salt

  • Preheat oven to 400 degrees. Cut the squash in half and scoop out the seeds.  Then cut horizontally into 1 inch slices
  • Quarter shallots.
  • Toss the squash slices and shallots with olive oil, salt and pepper and divide between two roasting pans.
  • Roast for 30-35 minutes, alternating between top and bottom racks, or until squash is tender. (turning halfway through cooking process)
  • Combine honey, vinegar and salt in a small saucepan and bring to a boil.  Reduce heat to a simmer until reduced to about a 1/2 cup.
  • Toast pinenuts in a dry pan for several minutes until golden.  Remove from heat and let cool.
  • Transfer squash to  a serving platter, top with pomegranate seeds, pine nuts and mint. Drizzle with syrup. Serve warm.

Wheatless Wednesday – Baked Eggs in Kale Cups

4

20151024_105242

Move over eggs and toast, Baked Eggs in Kale Cups is more delicious, nutritious and way cuter!  With easy preparation and few ingredients, breakfast is on the table in 30 minutes or less. This is the perfect weekend treat! The kale is crispy on the sides but creamy and garlicky on the bottom, while the egg is perfectly set with hints of parmesan, red pepper flakes and fresh basil. Delish and easy!  Just pop them in the oven and enjoy a cup of coffee and the newspaper while they bake.  (It will only look like you worked so hard…)  These pretty baked eggs are a good source of protein to start your day and the KALE  adds vitamin B6, dietary fiber, calcium, potassium, vitamin E, vitamin B2, iron, magnesium, vitamin B1, omega-3 fatty acids phosphorus, more protein, folate, and niacin. Whew!  That is why kale is king…. These little beauties are also elegant enough to serve at a brunch or even as a quick and easy dinner. Serve with fresh fruit or a tossed green salad. For a hearty appetite, add roasted or baked potatoes or sweet potatoes.

20151024_110035

I spotted this recipe in the November, 2015 edition of Vegetarian Times and decided to make it for Sunday brunch using  eggs from the backyard chickens next door and fresh kale from my garden.  I have a great arrangement with my neighbor, Sandy.  I give her all of my cooking and vegetable garden scraps and she gives me beautiful organic eggs from happy chickens.  Look at the gorgeous orange of the yolks.  Darker yellow/orange yolks usually means the hen had a varied diet and the resulting egg is richer in Vitamins and micronutrients like vitamins A and E plus omega-3. as compared to the anemic pale yellow, less nutritious standard supermarket egg.  Did you know that egg yolks are one of the foods that naturally contain Vitamin D?  Another egg fact you may not know is that the color of the shell doesn’t indicate how nutritious it is, just the kind of chicken that the egg came from. My Mom raised a variety of chickens who laid eggs that ranged in color from off white to green, blue and brown – all equally nutritious because they were raised the same, happy and on the earth.

20151024_100643

However, if you aren’t lucky enough to have chickens like my brother, Tom, and his wife, Kelle, or have  a neighbor with chickens, try to buy eggs that are labelled “Pasture Raised”.  Other egg labels are often meaningless and lies misleading as producers try to capitalize on people’s desire to make more humane and nutritious choices.  Just because something is labelled ‘Organic’ or ‘Free Range’ doesn’t mean the chickens were given nutritious food or had a chance to go outside and peck at the ground.  There is little to no oversight so producers just decide for themselves what those terms mean. Outside might mean a tiny concrete enclosure that the chickens may not even know is there or have real access. For a breakdown on what egg labels are supposed to mean and what they really mean, click HERE to read an article by NPR.  And, FYI, chickens are NOT vegetarians…

20151024_100109

TIPS:  I used lacinato kale because that is what I had ready in my garden, but you can use any kind of kale you like.  Curly kale would make extra pretty ‘cups’ in this dish.  When forming the nests/cups, use more kale than you think and make sure the muffin tin is completely covered to prevent leakage and that the fronds stick up out of the muffin tin, as the kale shrinks quite a bit during baking.

20151024_105320

BAKED EGGS IN KALE CUPS

      2 Tbs. olive oil, divided
      1 12-oz. bunch kale, stems removed
      2 Tbs. grated Parmesan cheese
      1-2 cloves garlic, minced (1 tsp.)
      6 large eggs
      1 Tbsn fresh basil, chopped (optional)
  • Preheat oven to 375°F. Coat extra-large six-cup muffin pan with 1 Tbs. oil or cooking spray.

20151024_100545

  • Place kale leaves in large bowl, add remaining 1 Tbs. oil, cheese, and garlic. Massage kale until tender and glistening.

20151024_101327

  • Line prepared muffin cups with large kale leaves, covering whole muffin cup, and leaving some of leaf edges sticking up (smaller leaves can be layered in cup).

20151024_101623

  • Crack 1 egg into each kale nest, and season with salt and pepper, more red pepper flakes and a sprinkle of parmesan, if desired.

20151024_103905

  • Bake 17 to 25 minutes, or until egg yolk is set.

20151024_103911

  • Cool 5 minutes before removing kale nests from muffin cups.

20151024_105320

  • Using a large spoon or a knife edge, carefully release the sides from the cupcake tin and place on a platter to serve. Sprinkle with fresh basil, if desired.

Baked EggS in Kale Cups

  • Servings: 3-6
  • Difficulty: easy
  • Print
20151024_105242

        2 Tbs. olive oil, divided
        1 12-oz. bunch curly kale, stems removed
        2 Tbs. grated Parmesan cheese
        1-2 cloves garlic, minced (1 tsp.)
        6 large eggs
        1 Tbsn fresh basil, chopped (optional)
  • Preheat oven to 375°F. Coat extra-large six-cup muffin pan with 1 Tbs. oil or cooking spray.
  • Place kale leaves in large bowl, add remaining 1 Tbs. oil, cheese, and garlic. Massage kale until tender and glistening.
  • Line prepared muffin cups with large kale leaves, covering whole muffin cup, and leaving some of leaf edges sticking up (smaller leaves can be layered in cup).
  • Crack 1 egg into each kale nest, and season with salt and pepper, more red pepper flakes and a sprinkle of parmesan, if desired.
  • Bake 17 to 25 minutes, or until egg yolk is set.
  • Cool 5 minutes before removing kale nests from muffin cups.
  • Using a large spoon or a knife edge, carefully release the sides from the cupcake tin and place on a platter to serve. Sprinkle with fresh basil, if desired

Meatless Monday – Spice Crusted Whole Roasted Cauliflower

6

20151019_193128

If you are looking for a dramatic (and delicious) non-meat entre, I have a goodie for you to try this holiday season.  You have probably roasted cauliflower florets before, or maybe you have even made cauliflower ‘steaks’, but what about roasting the whole darn thing? I have seen photos of cauliflower cooked this way but have never tried it until now. All I can say is ‘What was I waiting for?’

20150927_201050

I have called cauliflower a vegetable chameleon before because it is so adaptable and a great substitute for many less healthy ingredients, so I decided to take it a step further and prepare it like a ‘meat’ for roasting. I removed the stem and leaves, brushed the outer head with a thick spicy sauce made with chili powder, cumin, garlic and cayenne pepper and then roasted in a hot oven for almost an hour.  The sauce becomes a spicy and yummy crust and the interior is creamy goodness.  I served it in wedges. Yum!

20150927_181725

Can cauliflower really serve as a main course and not just a side dish?  It’s just a white veggie, so how can it have enough nutrients to be the star of the show?  Well, in comparison it’s not going to have as much protein as a steak but it’s also not going to have all the fat and calories either.  Cauliflower has a surprising number of nutrients for something so pale and unassuming.  One cup cooked = 2.28 grams of protein. Cauliflower is also a good source of fiber, phytonutrients and omega 3 fatty acids, plus vitamin C, a host of B vitamins and minerals (manganese, phosphorus and potassium). Cauliflower is known to help in fighting cancer and preventing cardiovascular disease.  I’m pretty sure that meat can’t make those ‘health’ claims. Just sayin’.

20151019_192940

TIPS:  For an even more colorful display, try using yellow, purple or green cauliflower. This is a fairly spicy and flavorful coating which can be toned down by reducing the amount of cayenne pepper and/or chili powder.  Or you could add a half cup of plain yogurt (any kind) into the spice mix.  I have made it both ways (with and without yogurt) and it looks pretty much the same either way but the yogurt makes the end result a little more mild.

20151019_192822

SPICE CRUSTED WHOLE ROASTED CAULIFLOWER

1 head cauliflower
2 Tbsn olive oil
1 lemon, juiced (about 1/3 cup)
2 Tbsn chili powder
1 Tbsn cumin
4-5 cloves garlic, minced (or 1 Tbsn garlic powder)
1 tsp cayenne pepper (optional)
1 tsp black pepper
1/2 tsp salt (or more to taste)

20150927_181725

  • Preheat the oven to 400° and lightly grease a small baking dish with vegetable oil. Set aside. Trim the base of the cauliflower to remove any green leaves and the woody stem and place on prepared baking dish.

20150927_182541

  • In a medium bowl, combine the rest of the ingredients

20150927_182813

  • Using a pastry brush, evenly spread the marinade to cover the entire surface of the cauliflower.

20150927_182752

  •  Roast about 45 minutes. Check for doneness (it should be easily pierced with a sharp knife).  Cook for another 15 miinutes, if necessary.

20150927_195101

  • For a pretty presentation, move to a serving platter.  Cut into wedges and serve warm.

20151019_193128


Spice Crusted Whole Roasted Cauliflower

  • Servings: 4
  • Difficulty: easy
  • Print

20151019_193128 

1 head cauliflower
2 Tbsn olive oil
1 lemon, juiced (about 1/3 cup)
2 Tbsn chili powder
1 Tbsn cumin
4-5 cloves garlic, minced (or 1 Tbsn garlic powder)
1 tsp cayenne pepper (optional)
1 tsp black pepper
1/2 tsp salt (or more to taste)

  • Preheat the oven to 400° and lightly grease a small baking dish with vegetable oil. Set aside.
  • Trim the base of the cauliflower to remove any green leaves and the woody stem and place on prepared baking dish..
  • In a medium bowl, combine the rest of the ingredients
  • Using a pastry brush, evenly spread the marinade to cover the entire surface of the cauliflower.
  • Roast about 45 minutes. Check for doneness (it should be easily pierced with a sharp knife).  Cook for another 15 miinutes, if necessary.
  • Cut into wedges and serve warm.


Wheatless Wednesday – Warm Scallop Salad with Lentils and Frisee

0

20150915_203424

I love Autumn salads which are a bit heartier than those we enjoy in summer.  With the advent of chilly evenings, we need more tummy-filling ingredients to keep us warm and satisfied.  It also helps that bikinis are soon to become a distant memory (unless you’re going on a tropical vacation).  I really like adding either grains or legumes to salads, especially if they are the main course and French green lentils are a favorite.  In creating this salad, I started with a bed of frisee which adds texture and interest, then a layer of French green lentils, tomatoes and oranges topped with warm seared scallops.  A final drizzle of mustard vinaigrette completes the dish. To make this dish vegan, substitute sliced hearts of palm instead of scallops. I don’t know how hearts of palm are when seared, so would recommend using them raw unless you are up for a challenge. It could be worth a try, though.  They sure worked well as a meat alternative in my Pulled ‘Pork’ Sliders. I may have to try…

20150915_191143

Frisee is an under-appreciated green, at least in the Univted States.  Frisee, also called curly endive, is part of the chicory family, along with Belgian endive, radicchio, and escarole.  Frisee is packed with nutrients, and very low in calories like most greens. It is an excellent source of folic acid, vitamin A and vitamin C, with approximately one third the daily recommended amount of each, in a single serving. It is also a good source of vitamin K, and manganese. It’s slightly bitter and nutty flavor makes it a nice addition to salads but it works best mixed with milder greens or with complementary flavors like sweet citrus, earthy lentils and a tangy vinaigrette.

20150915_192344

I often use French green lentils (De Puy) which I think are the most flavorful and they keep their shape when cooked, unlike red lentils which are soft and split open, making them perfect for soups and stews.  Brown lentils, which are the most commonly available, can be substituted.  Just be careful not to overcook as they also can become too soft.  Lentils not only delicious, they are high in protein, low in fat and are a good source of fiber and vitamins and minerals, including iron.

TIPS: When purchasing scallops, try to buy dry sea scallops.  Scallops are often labelled ‘dry’ or ‘wet’.  If they aren’t labelled, ask. ‘Wet’ scallops are treated with a solution called STP (sodium tripolyphosphate), which helps the scallops maintain their moisture. The STP solution gives scallops a longer shelf life and keeps them plump and fresh looking. As a result, you’ll not only pay for the added water weight (meaning you get fewer scallops per pound and possibly scallops that are less than fresh)  In addition, you’ll also have trouble browning these scallops—no matter how hot your pan—because of all that excess moisture. If you have had trouble browning scallops in the past, this could be the reason. You will still rinse and dry your scallops which shouldn’t effect the browning as long you dry them well with paper towels.

20150915_203435

WARM SCALLOP SALAD WITH LENTILS AND FRISEE

1 lb large sea scallops
1/2 cup French green lentils
2 ripe tomatoes
1 orange
3-4 scallions, sliced
1 head frisee
2 Tbsn olive oil
salt

VINAIGRETTE
1/4 cup olive oil
1/4 cup apple cider vinegar
1 lemon, juiced
1 tsp dijon mustard
1/4 tsp salt (or to taste)
1/8 tsp pepper

20150915_191350

  • Cook lentils as directed but don’t over cook.  They should be al dente.  Pour off any excess water, remove from heat and set aside to cool with lid off.

20150915_193501

  • Slice tomatoes into wedges.  Peel oranges and slice into rounds and then halves.

20150915_191500

  • Pull frisee apart and place in one a large platter or bowl.

20150915_192031

  • Spread cooled lentils over frisee.

20150915_194535

  • Top with tomatoes, orange slices and scallions.

beets13-e1400011767587.jpg (2817×2301)

  • Whisk all vinaigrette ingredients together in a small bowl and set aside.

20150915_203036

  • Rinse and dry scallops. Heat olive oil over medium high heat until the pan is very hot. Arrange scallops in a single layer, uncrowded.  Sprinkle with salt and pepper.  Cook about 1 1/2 to 2 minutes and flip to cook the other side for another 1 1/2 minutes.

20150915_203435

  • Remove from heat and place on top of salad. Sprinkle with vinaigrette and serve immediately.

20150915_204021

Warm Scallop Salad with Lentils and Frisee

  • Servings: 4
  • Difficulty: easy
  • Print
20150915_203424

 1 lb large sea scallops
1/2 cup French green lentils
2 ripe tomatoes
1 orange
3-4 scallions, sliced
1 head frisee
2 Tbsn olive oil
salt

VINAIGRETTE
1/4 cup olive oil
1/4 cup apple cider vinegar
1 lemon, juiced
1 tsp dijon mustard
1/4 tsp salt (or to taste)
1/8 tsp pepper

  • Cook lentils as directed but don’t over cook.  They should be al dente.  Pour off any excess water, remove from heat and set aside to cool with lid off.
  • Slice tomatoes into wedges.  Peel oranges and slice into rounds and then halves.
  • Pull frisee apart and place in one a large platter or bowl.
  • Spread cooled lentils over frisee.
  • Top with tomatoes, orange slices and scallions.
  • Whisk all vinaigrette ingredients together in a small bowl and set aside.
  • Rinse and dry scallops. Heat olive oil over medium high heat until the pan is very hot. Arrange scallops in a single layer, uncrowded.  Sprinkle with salt and pepper.  Cook about 1 1/2 to 2 minutes and flip to cook the other side for another 1 1/2 minutes.
  • Remove from heat and place on top of salad.
  • Sprinkle with vinaigrette and serve immediately.


Meatless Monday – Roasted Red Pepper and Red Lentil Soup

1


20150928_100643

This is a One Pot Wonder!  Soup is known to be a comforting and healing food. I just got my first cold of the year, possibly a result of the multiple cross country airplane flights I’ve taken or maybe its just a change of season sniffles.  I was craving warm, hearty and a bit spicy to clear everything up.  So soup was a natural choice. My friend, Sandy had just given me a platter of roasted red peppers and tomatoes that she said her family wouldn’t eat.  Their loss was my gain and the inspiration for today’s soup.  I decided to pair both roasted red veggies with red lentils to make a flavorful and spicy soup.  Yum…  Just what the doctor ordered.

20150927_180549

People often ask me  if I’m getting enough protein since I’ve stopped eating meat. The answer is YES! This soup is rich in protein as well as vitamins and minerals, from both the lentils and the veggies. The protein content of Red Lentils is comparable to that of one serving of meat, but generally healthier because they contain low levels of fat. In one cup of red lentils, you consume nearly 18 grams of protein which is the same as one 3-ounce serving of chicken breast but without the 3 grams of fat. Lentils are also rich in slow-digesting carbohydrates and dietary fiber that keep you feeling full and satisfied.  (Read:  Less likely to find yourself standing back in front of the open refrigerator.) I will throw one last little factoid at you.  We learned from Eating the Rainbow that red foods (especially tomatoes) are loaded with lycopene, an important antioxidant which is good for a healthy heart, lowering the risk of some cancers and protecting the skin from ultra-violet light. So dig in!

20150927_180143

TIPS:  Okay. I was just given roasted tomatoes and red peppers, however, if you don’t have the time or inclination to roast them yourself, you can buy them already roasted in jars or substitute a can of fire roasted tomatoes and saute diced red peppers with the onions.

20150928_100651

ROASTED RED PEPPER AND RED LENTIL SOUP

2 Tbsn olive oil
1 large onion, diced
4-5 cloves garlic, minced
2 red bell peppers
2-3 large red tomatoes (or one can of fire roasted tomatoes)
1 red chili pepper (or jalapeno)
2 cups dried red lentils
8 cups vegetable stock
1 tsp cumin
1/4 – 1 tsp cayenne pepper (optional)
1/2 tsp salt (or to taste)

20150927_180334

  • If roasting red peppers (and tomatoes), broil until the skin has blackened, 5-8 minutes.  Turn to broil the other side.  Remove from heat and let cool.  Roughly chop and set aside.

20150927_175912

  • In a large stockpot, heat the olive oil and saute the onion, chili pepper, and garlic and saute several minutes.

20150927_180417

  • Add the red peppers and tomatoes and stir to combine.

20150927_180847

  • Add the lentils, vegetable stock and spices and simmer until the lentils are tender, about 20 minutes.

20150927_183033

  • Let the soup cool slightly and puree in a food processor or blender.  You may have to do it in two batches.

20150927_183742

  • Clean the stockpot and return the soup to the pot.  Reheat.

20150927_200828

  • Serve with a dollop of plain yogurt, sliced chili peppers or fresh herbs.

Roasted Red Pepper and Red Lentil Soup

  • Servings: 4-6
  • Difficulty: easy
  • Print

20150928_100643

2 Tbsn olive oil
1 large onion, diced
4-5 cloves garlic, minced
2 red bell peppers
2-3 large red tomatoes
1 red chili pepper
2 cups dried red lentils
8 cups vegetable stock
1 tsp cumin
1/4 -1 tsp cayenne pepper (optional)
1/2 tsp salt (or to taste)

  • If roasting red peppers(and tomatoes), broil until the skin has blackened, 5-8 minutes.  Turn to broil the other side.  Remove from heat and let cool.  Roughly chop and set aside
  • In a large stockpot, heat the olive oil and saute the onion, chili pepper, and garlic and saute several minutes.
  • Add the red peppers and tomatoes and stir to combine.
  • Add the lentils, vegetable stock and spices and simmer until the lentils are tender, about 20 minutes.
  • Let the soup cool slightly and puree in a food processor or blender.  You may have to do it in two batches.
  • Serve with a dollop of plain yogurt, sliced chili peppers or fresh herbs.

Wheatless Wednesday – Cauliflower Quinoa Chowder Topped with Caramelized Shallots

0

20150915_204149

It’s starting to look like Soup Season – and this one is magic!  I just arrived at my house in Maine, where summer and fall are definitely having a collision. Summer is not over yet; the days are still sunny and beautiful, but once the sun goes down the temperature drops and sweaters come out. School is back in session, so that means that grownups have to actually go back to work too.  It is this time of year when I still eat salads for lunch but start to crave warm homey food for dinner.  Last night I made this savory vegan Cauliflower Quinoa Chowder topped with caramelized shallots (not bacon), parsley and sliced green onion.  Mmmm… a definite Winner!  This is an easy One Pot Meal that serves about 6 adults with generous portions. This will be one I make again and again.

20150915_174802

This soup has two magic ingredients:  cauliflower and quinoa.  Cauliflower is the chameleon of vegetables.  It can take the place of flour (Pizza Crust), pasta (Mac and Cheese), grain (Tabouleh) or potatoes (Cauliflower Puree).  Adding Cauliflower to foods is a sneaky smart way to get some nutrients in your diet.  Cauliflower is an excellent source of vitamin C, vitamin K, folate, pantothenic acid, and vitamin B6. It is a good source of dietary fiber, protein, omega-3 fatty acids and a whole host of vitamins and minerals.  I only used one potato in this dish and the cauliflower stepped in for the rest.  If you are trying to avoid carbs (even though potatoes are good ones), you can elinimate the potato altogether and add a bit more cauliflower.

20150916_170617

Quinoa is another master of illusion and can be the star of a main course casserole or added to veggies in a salad.  In this dish it is mixed in towards the end as a thickener and, as one of the Worlds ‘nearly perfect foods’ (as described on the package) it also provides a huge protein boost.  I used Pearl Quinoa which I have never used before, partially because I thought it would add good texture to soup (it did) but also to support the company, Alter Eco, a Fair Trade company who gets its organic quinoa from Quechua and Aymara farmers in who grow the grain 13,000 feet up on the arid and desolate Soar De Uyuni salt flat of Bolivia.  I want to support that kind of effort!  That said, any kind of quinoa will work, so use what you have.

20150915_172815

I adapted this recipe from  Foodie Crush but made a few changes to make it vegan (trying to use less milk and dairy) and based on what vegetables I had on hand.  She has a great recipe though, so you can click on the link to see the original.  I love the color and sweetness that the carrots added.  The original recipe called for red bell pepper which I didn’t have, so I added more carrots and a stalk of celery.  Follow your own tastes (or pantry).  I also used Original flavor coconut millk instead of regular milk and LOVED the added flavor.  This chowder gets it’s thick and creamy texture from the quinoa but also from pureeing one third to a half of the vegetable mixture before adding the quinoa.  If you like it chunky, puree less, if you like a smoother soup, puree more.  Its that easy!

20150915_194731 (1)

I love toppings and these really turn chowder into something special.  The caramelized shallots are worth the 15 minutes it takes, trust me.  I recommend making the shallots ahead or while the cauliflower and potatoes are cooking.  This is my Go To substitute for bacon and it works!  Be creative – or be a purist and go bare!

20150916_130754

I eased myself into Maine yesterday with a windy and challenging kayak across the lake where the headwinds tossed water into out kayaks at each wave.  Luckily we had the wind at our backs on the way back and breezed home but I definitely earned my dinner.  I was not disappointed.  I hiked Pleasant Mountain this morning instead of writing this blog (Sorry not sorry).  In the photo above you can see the White Mountains in the distance.  Now I’m looking for leftovers…

20150915_204149

CAULIFLOWER AND QUINOA CHOWDER

1/4 cup olive or coconut oil
2-3 cloves garlic, minced
1/2 large onion, diced
1 stalk celery, diced
2 carrots, diced
1 russet potato, peeled and diced
1 small head cauliflower, roughly chopped (about 3 cups)
1 quart vegetable broth
2 cups coconut milk (or any other kind of milk)
2 bay leaves
2 tsp dried thyme
1/2 cup pearled quinoa (or regular quinoa)
1 tsp salt
1/4 tsp pepper

TOPPINGS: (optional)

Carmelized shallots*Recipe below
Chopped parsley
Sliced scallions

20150915_175023

  • In large stock pot, garlic and onions in oil over medium high heat for about 5 minutes, or until onions are opaque. Add celery and carrots and cook for about 10 minutes.

20150915_180723

  • Add potato, cauliflower, vegetable broth, coconut milk, bay leaf and thyme. Bring to boil, then reduce heat to simmer and cook for about 10-12 minutes or until cauliflower and potato are softened.

20150915_192712

  • Remove bay leaf. Ladle about 1/3 to 1/2 of the soup into a food processor or blender and process until smooth. Add back to pot. Add salt and pepper.  Taste and add seasoning if desired.

20150915_193314

  • Rinse 1/2 cup quinoa in cold water and add to cauliflower mixture. Reduce to simmer and cook until quinoa is softened, about 15 minutes. If soup gets too thick add water and lower temperature.

20150915_194731 (1)

  • Add more liquid if needed.  Serve with desired toppings.  I highly recommend carmelized shallots, parsley and sliced scallions.

CARMELIZED SHALLOTS (makes about 1/4 cup)

6-8 shallots
1 Tbsn olive oil
1/2 tsp salt

20150915_190142

  • Peel and thinly slice shallots into rounds.

20150915_191057

  • Saute in oil for 15  minutes or so until golden brown.

20150915_191730

  • Remove from pan and drain on paper towels.

20150915_194731 (1)

  • Place in a small serving dish along with other toppings.

Cauliflower Quinoa Chowder

  • Servings: 6
  • Difficulty: easy
  • Print
20150915_204149

1/4 cup olive or coconut oil
2-3 cloves garlic, minced
1/2 large onion, diced1 teaspoon salt
1 stalk celery, diced
2 carrots, diced
1 russet potato, peeled and diced
1 small head cauliflower, roughly chopped (about 3 cup)
1 quart vegetable broth
2 cups coconut milk (or any other kind of milk)
2 bay leaves
2 tsp dried thyme
1/2 cup pearled quinoa (or regular quinoa)
1 tsp salt
1/4 tsp pepper

  • In large stock pot, garlic and onions in oil over medium high heat for about 5 minutes, or until onions are opaque.
  • Add celery and carrots and cook for about 10 minutes.
  • Add potato, cauliflower, vegetable broth, coconut milk, bay leaf and thyme. Bring to boil, then reduce heat to simmer and cook for about 10-12 minutes or until cauliflower and potato are softened.
  • Remove bay leaf. Ladle about 1/3 to 1/2 of the soup into a food processor or blender and process until smooth.
  • Add back to pot. Add salt and pepper.  Taste and add seasoning if desired.
  • Rinse 1/2 cup quinoa in cold water and add to cauliflower mixture. Reduce to simmer and cook until quinoa is softened, about 15 minutes.
  • Add more liquid if needed.  Serve with desired toppings.  I highly recommend carmelized shallots, parsley and sliced scallions.

CARMELIZED SHALLOTS (makes about 1/4 cup)

6-8 shallots
1 Tbsn olive oil
1/2 tsp salt

  • Peel and thinly slice shallots into rounds.
  • Saute in oil for 15  minutes or so until golden brown.
  • Remove from pan and drain on paper towels.
  • Place in a small serving dish.

Meatless Monday – Veggie Kabobs With Chili Cumin Oil

1

20150912_185910

Grilling is Fun!  That said, can we think outside the veggie burger?  If you are tired of ‘burgers’ and ‘dogs’ being the stars of the grill, rest assured that there are some tasty options available.  Veggie Kabobs are a colorful and tasty alternative that can be adapted to any tastes. I mean, who can resist corn wheels?  You can even set up a ‘Veggie Bar’ and let your guests design their own.  I opted to use sweet corn, summer squash and tomatoes which are still in season, and oh-so-good right now.  I also added potatoes and tofu to help add fullness to the meal and a bit of protein.   Other fun items to round out your skewers would be chunks of crusty sourdough bread, mushrooms, onions and peppers, or even fruit like peaches and mangos.  Don’t be shy.

20150912_153047

Each of these vegetables brings something different to the table in taste, texture and nutritional value, so a combination of ingredients assures a well rounded meal. I tested the recipe on all ingredients mentioned except for the red onion because I didn’t have one (darn!).  I was pleased that each one was enhanced by the chili, cumin marinade but held it’s own once grilled. Charred Grilled bread is surprisingly good (think pizza oven crust with it’s blackened bits) and its a great way to use up day old bread.  Best of all, I guarantee that your meat loving friends will be jealous…  One word of warning; I normally use bamboo skewers but decided to use the longer metal ones this time.  Well, this is probably obvious, but don’t try to turn them with your bare fingers.  You can get away with touching bamboo skewers but metal ones are bleeping hot.    I learned that lesson in a single distacted moment.  I’m holding a cold beverage to my left pointer and index fingers as I type, just FYI. Use tongs!

TIPS:  Make skewers ahead of time and let them rest in marinade until you’re ready to cook, even overnight.  If you have picky eaters (or people who always pick off ‘the good stuff’ and leave the rest) try making some corn, potato or tofu only skewers.  Pile onto a platter and serve.

20150912_185735

If veggie kabobs aren’t for you, check out the following recipes for other vegetarian grilling ideas.  Click on the links for the full recipes:

Grilled Avocado Caprese Salad10

Grilled Avocado Caprese Salad – https://goodmotherdiet.com/2014/07/30/wheatless-wednesday-grilled-avocado-caprese-salad/


VEGGIE KABOBS WITH CHILI CUMIN OIL

20150912_185902

Choose 5 or more of your favorite ingredients from the list below (or get creative):

8-10 baby (or 5 small potatoes)
2 ears of fresh corn
8-10 criminy mushrooms
1-2 red bell pepper (or 8-10 mini sweet peppers)
2  zucchini squash
2 summer squash
1 red onion
1 dozen cherry tomatoes
1 block extra firm tofu
several thick slices of crusty sourdough or ciabatta bread

MARINADE (If you are using more than five skewer ingredients, you may want to double the recipe)
*Use the larger amount of spice if you like extra flavor.

1/2 cup olive oil
4-5 cloves garlic, minced
1 lemon, zest and juice
1-2 tsp cumin
1-2 tsp chili powder
1/4-1/2 tsp cayenne pepper  (Optional)
1/2 tsp salt
1/4 tsp black pepper

20150912_155847 - Copy

  • If using bamboo skewers, soak them in water for 2 hours prior to using to reduce charring.  Cut potatoes in half and parboil in salted water until fork tender but still firm (about 5-10 minutes). Let cool and place in a large bowl.

20150912_153331

  • If using tofu, drain and slice into cubes 1 -2 inches thick. (If you cut them too thin, they could fall off the skewer) Press them between double layers of papertowels to remove excess water.

20150912_155146

  • Shuck corn and cut into 1 or 2 inch wheels.

20150912_155440 - Copy

  • Cut squash into 1 or 2 inch wheels. If using mini peppers, leave them whole.  If using bell peppers, cut them into quarters or eights. Wipe mushrooms with a damp paper towel and cut off any dry stems. Cut onion in half lengthwise and then into wedges, keeping stem end intact.

20150912_160027 - Copy

  • Place all vegetables  in bowl with potatoes.  Do not add bread or tofu at this time.20150912_155007 - Copy
  • Combine all marinade ingredients in a small bowl and stir to combine.

20150912_160344 - Copy

  • Place tofu in a small bowl or zip lock baggie and pour 1/4 cup of marinade over the top and gently stir to coat.  Set aside.

20150912_161952 - Copy

  • Pour the rest of the marinade over vegetables. Let sit for at least 30 minutes or overnight in the refrigerator.

20150912_184448

  • Preheat an outdoor grill to medium heat. Cut bread into 1-2 inch chunks, if using. Brush lightly with marinade. Remove tofu and vegetables from the marinade, reserving marinade. Thread onto skewers.

20150912_185208

  • Cook skewers on grill until vegetables are lightly charred all over, about 10 minutes, basting with reserved marinade and turning occasionally.

20150912_185910

  • Remove skewers to a serving platter and spoon extra sauce over the top.

20150912_192331

Veggie Kabobs With Chili Cumin Oil

  • Servings: 4-6
  • Difficulty: easy
  • Print

20150912_185910 

Choose 5 or more of your favorite ingredients from the list below (or get creative):

1 lb baby or small potatoes (about a dozen)
2-3 ears of fresh corn
8 oz criminy mushrooms
1-2 red bell pepper or mini sweet peppers
1 large or 2 small zucchini squash
1 large or 2 small summer squash
1 red onion
1 dozen cherry tomatoes
1 block extra firm tofu
several thick slices of crusty sourdough bread

MARINADE (If you are using more than five skewer ingredients, you may want to double the recipe)

*Use the larger amount of spice if you like extra flavor.

1/2 cup olive oil
4-5 cloves garlic, minced
1 lemon, zest and juice
1-2 tsp cumin*
1-2 tsp chili powder*
1/4-1/2 tsp cayenne pepper * (Optional)
1/2 tsp salt
1/4 tsp black pepper

  • If using bamboo skewers, soak them in water for 2 hours prior to using to reduce charring.
  • Cut potatoes in half and parboil in salted water until fork tender but still firm (about 5-10 minutes). Let cool and place in a large bowl.
  • If using tofu, drain and slice into cubes 1 -2 inches thick. (If you cut them too thin, they could fall off the skewer)
  • Shuck corn and cut into 1 or 2 inch wheels.
  • Cut squash into 1 or 2 inch wheels
  • If using mini peppers, leave them whole.  If using bell peppers, cut them into quarters or eights.
  • Wipe mushrooms with a damp paper towel and cut off any dry stems.
  • Cut onion in half lengthwise and then into wedges, keeping stem end intact.
  • Place all vegetables in bowl with potatoes.  Do not add bread at this time.
  • Combine all marinade ingredients and stir to combine.
  • Place tofu in a small bowl or zip lock baggie and pour 1/4 cup of marinade over the top and gently stir to coat.  Set aside.
  • Pour the rest of the marinade over vegetables. Let sit for at least 30 minutes or overnight in the refrigerator.
  • Preheat an outdoor grill to medium heat. Cut bread into 1-2 inch chunks, if using. Brush lightly with marinade
  • Remove tofu and vegetables from the marinade, reserving marinade. Thread onto skewers.
  • Cook skewers on grill until vegetables are lightly charred all over, about 10 minutes, basting with reserved marinade and turning occasionally.
  • Remove skewers to a serving platter and spoon sauce over the top.


Wheatless Wednesday – Mexican Street Corn Salad

0

20150906_125510

You’ve heard of Mexican Street Corn, fresh corn on the cob slathered in spices, herbs and savory cheese – delicious but messy.  Here it is ‘off the cob’ and ready to feed a big crowd – the same yummy ingredients but easy to serve. Served off the cob, the dish is called Esquites while the traditional street food grilled or steamed right on the cob is known as Elote. Traditional ingredients include mayonnaise, cotija cheese, lime juice, and chili powder but other herbs and spices are often included.

20150906_124422

I have been visiting family in Seattle for the last week, living like a hobo out of my suitcase and bouncing around the Seattle area from Tacoma to Seattle to Whidbey Island to Bothell.  I was lucky enough to see five of my sisters, two of my brothers and both of my parents.  Yes, I know. This is starting to require higher math, and three sibs were even missing!  As one of eleven children, I am used to large family celebrations where everyone brings something to share.  We are the masters of potluck.  Needless to say I was not in my kitchen, so obviously did no cooking myself, but I did watch my sister, Margaret, prepare this tasty dish for one of our family potlucks over the weekend.  With fresh corn, chili peppers, spicy seasonings and crumbly Mexican cheese, this is a definite crowd-pleaser, great for a family dinner or a potluck party.  For our large crowd, Margaret doubled the recipe.

.20150906_125523

Guest Chef, Margaret Vandenberg, has made this recipe from The Kitchn before and admitted that she and her husband, Scott, have polished off leftovers with grilled salmon and tortillas as a great late night snack.  Sounds yummy to me!  This is the lovely view of Lake Washington from Margaret’s living room.  I can sit there for hours watching boats and birds and clouds….and then she serves wonderful food too.  No wonder I keep going back….

20150906_123021

TIPS:  I have not made this salad yet, but witnessed my sister in action.  This salad is delicious as is but if you want to make it even more ‘street’ you could try grilling or roasting the corn on the cob, before cutting off the kernels, for additional color and flavor.  Spicy food lovers could also add a dash or two of cayenne pepper to add more zest.  You could also serve with additional cotija sprinkled on top.

20150906_140724

Recipe Adapted From The Kitchn

MEXICAN STREET CORN SALAD

6 ears fresh corn kernels from the cob (or 4 cups frozen yellow corn)
2 Tbsn olive oil
2 cloves garlic, minced
1 hot pepper (jalapeno, red chili, etc)
3 Tbsn cotija cheese (goat or feta), crumbled
2 Tbsn mayonaise (vegan mayo or plain yogurt)
2 Tbsn cilanto, chopped
1 1/2 tsp Mexican style chili powder
2 limes, juiced
salt and pepper to taste

20150906_122217

  • In a large cast iron pan, saute the corn in the oil on medium-high heat until toasted, 15 to 20 minutes.  Add the garlic and cook another 30 seconds or so and remove from heat and let cool and place in a large mixing bowl.

20150906_124314

  • Cut the peppers into a fine dice and add to the corn mixture.

20150906_124844

  • Add all the other ingredients to the corn mixture and toss to combine. Taste and adjust seasonings and add ingredients to suit your tastes.

20150906_140714

  • Serve room temperature.

Mexican Street Corn Salad

  • Servings: 4
  • Difficulty: easy
  • Print

20150906_125510

6 ears fresh corn kernels from the cob (or 4 cups frozen yellow corn)
2 Tbsn olive oil
2 cloves garlic, minced
1 hot pepper (jalapeno, red chili, etc)
3 Tbsn cotija cheese (goat or feta), crumbled
2 Tbsn mayonaise (vegan mayo or plain yogurt)
2 Tbsn cilanto, chopped
1 1/2 tsp Mexican style chili powder
2 limes, juiced
salt and pepper to taste

  • In a large cast iron pan, saute the corn in the oil on medium-high heat until toasted, 15 to 20 minutes.
  • Add the garlic and cook another 30 seconds or so and remove from heat and let cool and place in a large mixing bowl.
  • Cut the peppers into a fine dice and add to the corn mixture.
  • Add all the other ingredients to the corn mixture and toss to combine.
  • Taste and adjust seasonings and add ingredients to suit your tastes.
  • Serve room temperature.

Wheatless Wednesday – Black Bean, Corn & Butternut Squash Tacos with Chile Lime Sauce

0

20150901_105437

Now we’re talking!  I’m loving my yummy Mexican food without the extra calories.  I guess you could call these ‘Skinny Tacos’. Black beans and butternut squash are two of my favorite ingredients, especially when the squash is roasted into a rich and tender little bites.  Throw in sweet summer corn, cumin and jalapenos and you’ve got the start of some delicious tacos (or quesadillas-scroll down for more on that).  So what is the skinny part besides the fact that these are vegetarian?  I have a long standing love affair with cheese but for a multitude of reasons (one of them being the calories), I’m trying to cut down.  The nice thing about this flavor combination is that it doesn’t need piles of cheese to make it yummy. Instead of cheese,  I opted to make a creamy yogurt dressing made with green chilis, herbs and jalapenos, which makes it cool but spicy.  Yes, I know, those are contradictory terms but that is what makes the sauce so much fun and the perfect complement for the earthy squash, corn and bean combination.

20150902_082612

Want to make them even skinnier?  Ditch the tortillas and use romaine lettuce leaves and you’ve got “Mexican Lettuce Boats” for a lighter, low-carb option.

20150831_190730

I also happened to have some sweet mini peppers which are delightful when roasted.  They get even sweeter and can be eaten whole, seeds and all, except for maybe the stem (actually, you can probably eat that too if you really want to).  They take virtually no preparation.  Just place them whole on an oiled baking sheet and roast in a hot oven for about 20 minutes, turning once, until charred and blistered on both sides.  Let cool and chop and use in salads or other dishes. You could even add them to this taco filling if you like.  They are great on an antipasti platter and their bright colors also make them a cheerful garnish.

20150831_205730

The black bean, corn and butternut squash filling is fairly loose and well suited for tacos but it also makes for tasty quesadillas if you add some gooey cheese to keep it together.  An alternative would be to mash up some of the beans and squash to give it a stickier consistency.  Regardless of how you serve them, these veggies taste great together and add oodles of fiber, vitamins and minerals to your diet!  Just make sure you buy organic, non GMO corn tortillas to keep your meal healthy.

20150901_113419

BLACK BEAN, CORN & BUTTERNUT SQUASH TACOS WITH CHILI LIME SAUCE

2 cups butternut squash (about one half squash)
1 can black beans
1-2 ears fresh corn kernels (or 1 cup frozen)
1/2 onion, chopped
1 jalapeno, finely diced (optional)
4 cloves garlic
1 Tbsn cilantro, chopped
1 dozen corn tortillas

CHILI LIME SAUCE (Optional)

1/2 cup full fat plain yogurt (vegan or regular)
2 Tbsn canned fire roasted chopped green chilis
1 jalapeno
1/4 cup cilantro
1 Tbsn fresh lime juice
1 tsp cumin
1/2 tsp salt

20150901_133624

  • Process green chilis, jalapeno and cilantro in food processor or blender until finely minced.  Add yogurt, lime juice, cumin and salt.  Pulse until smooth.  Pour into a small serving bowl and let chill in the refrigerator. (It will thicken as it chills)

20150831_184307

  • Peel and dice butternut squash into a half inch dice.  Spread in a single layer in an oiled baking sheet. Slice garlic cloves in half and arrange around the squash. Sprinkle with salt and pepper.  Stir to coat with oil and roast at 450 degrees for about 20 minutes, or until soft and slightly browned on the edges.  Garlic may be brown.

20150831_184319

  • If you are roasting mini peppers, place them whole on an oiled baking dish and stir to coat both sides with oil.  Bake for about 20 minutes, turning once to blacken both sides. I used the same pan as the squash but kept them as separate as possible.

20150831_201202

  • Saute onion and jalapeno for several minutes until starting to soften, then add corn and cook several more minutes.

20150831_201249

  • Add black beans and cook another minute or two.

20150831_204535

  • Lower heat and add butternut squash and carefully stir to combine. Don’t overcook as squash will get too soft.

20150901_104832

  • To heat corn tortillas:
    • In the oven – Wrap stacks of five or so tortillas in aluminum foil and heat them for about 15 minutes in a 350° oven.
    • On the stovetop:  Cook them one at a time in a dry heavy pan and stack them as they are warmed.  For crispy shells, fry them in a good oil (like avocado oil) on one side for 1 or 2 minutes, turn using tongs and fold it in half to crisp then turn to the other side.  Drain on papertowels.
    • In the microwave: Wrap tortillas in barely damp papertowels and microwave in 30-second increments until they are warmed through.20150901_105412
  • Scoop filling into taco shells and top with chili lime sauce.  Serve with more sauce and fresh herbs on the side.

Black Bean, Corn and Butternut Squash Tacos with Chili Lime Sauce

  • Servings: 4-6
  • Difficulty: easy
  • Print

20150901_105437

2 cups butternut squash (about one half squash)
1 can black beans
1-2 ears fresh corn kernels (or 1 cup frozen)
1/2 onion, chopped
1 jalapeno, finely diced (optional)
4 cloves garlic
1 Tbsn cilantro, chopped
1 dozen corn tortillas

CHILI LIME SAUCE (Optional)

1/2 cup full fat plain yogurt (vegan or regular)
2 Tbsn canned fire roasted chopped green chilis
1 jalapeno
1/4 cup cilantro
1 Tbsn fresh lime juice
1 tsp cumin
1/2 tsp salt

    • Process green chilis, jalapeno and cilantro in food processor or blender until finely minced.  Add yogurt, lime juice, cumin and salt.  Pulse until smooth.  Pour into a small serving bowl and let chill in the refrigerator. (It will thicken as it chills)
    • Peel and dice butternut squash into a half inch dice.  Spread in a single layer in an oiled baking sheet. Slice garlic cloves in half and arrange around the squash. Sprinkle with salt and pepper.  Stir to coat with oil and roast at 450 degrees for about 20 minutes, or until soft and slightly browned on the edges.  Garlic may be brown.
    • If you are roasting mini peppers, place them whole on an oiled baking dish and stir to coat both sides with oil.  Bake for about 20 minutes, turning once to blacken both sides.
    • Saute onion and jalapeno for several minutes until starting to soften, then add corn and cook several more minutes.
    • Add black beans and cook another minute or two.
    • Lower heat and add butternut squash and carefully stir to combine. Don’t overcook as squash will get too soft.
    • To heat corn tortillas:
      • In the oven – Wrap stacks of five or so tortillas in aluminum foil and heat them for about 15 minutes in a 350° oven.
      • On the stovetop:  Cook them one at a time in a dry heavy pan and stack them as they are warmed.  For crispy shells, fry them in a good oil (like avocado oil) on one side for 1 or 2 minutes, turn using tongs and fold it in half to crisp then turn to the other side.  Drain on papertowels.
      • In the microwave: Wrap tortillas in barely damp papertowels and microwave in 30-second increments until they are warmed through.
    • Scoop filling into taco shells and top with chili lime sauce.  Serve with more sauce and fresh herbs on the side.