Meatless Monday – Penne with Braised Greens

2

Penne1

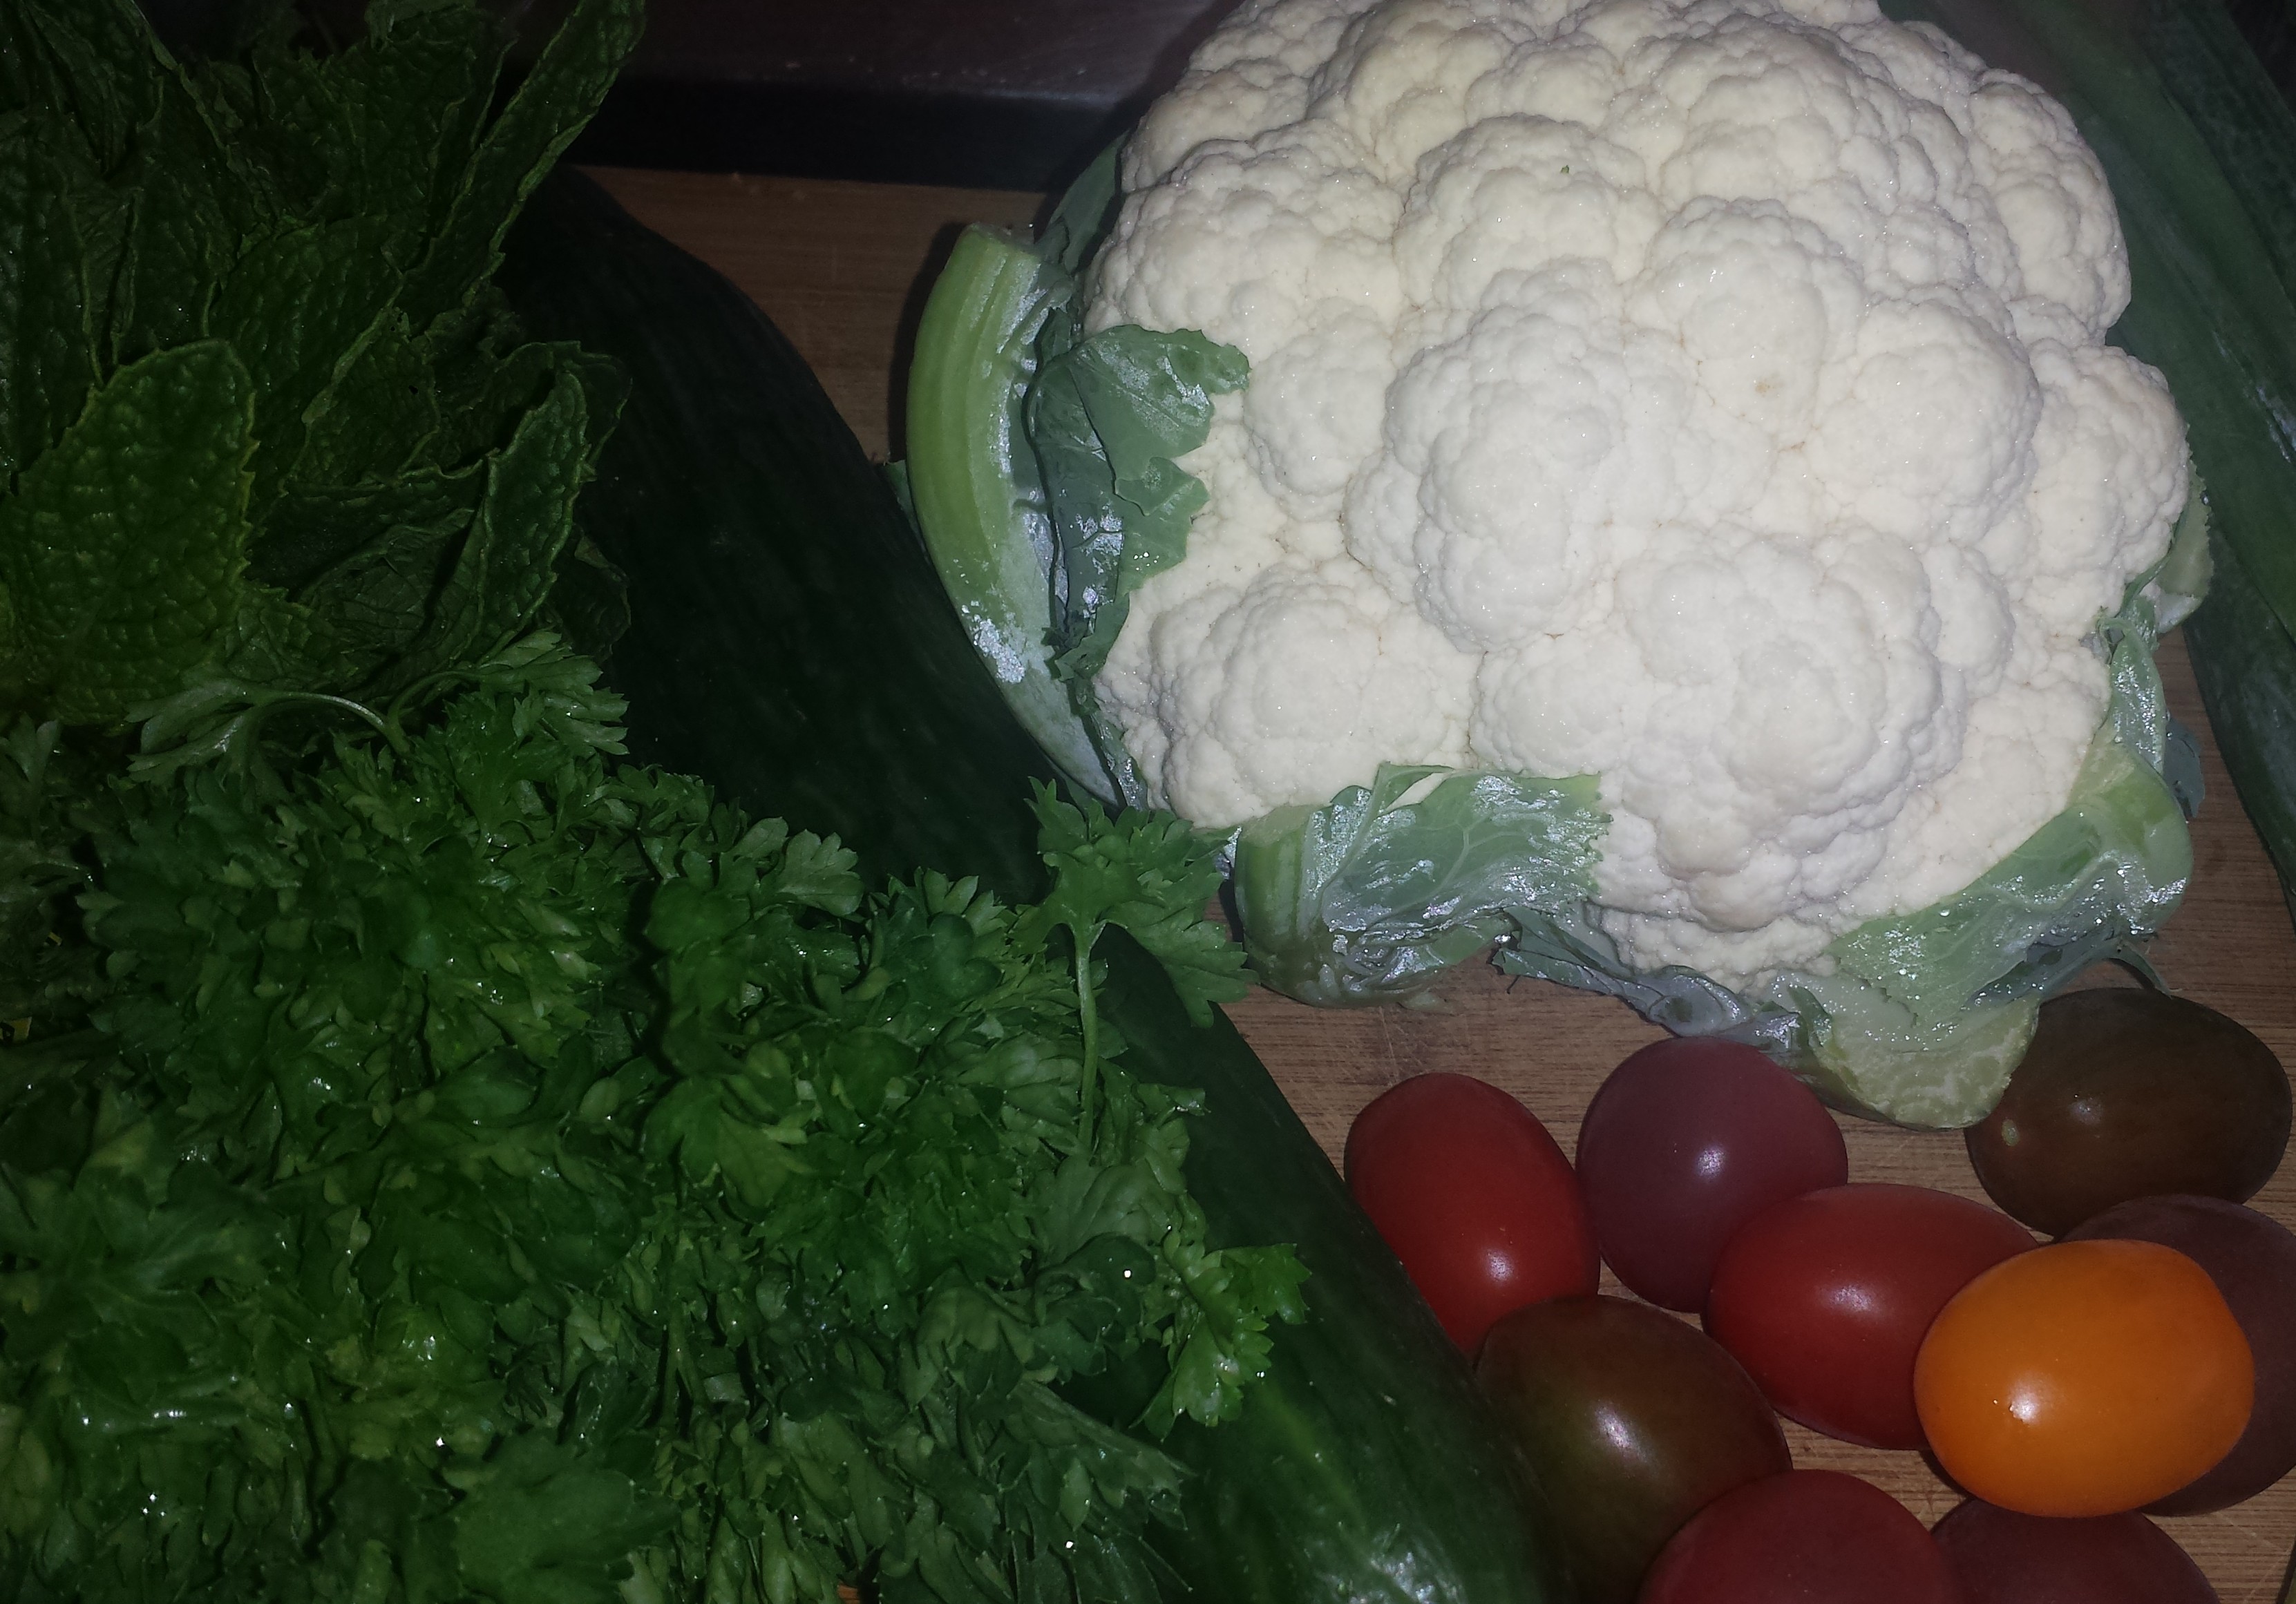
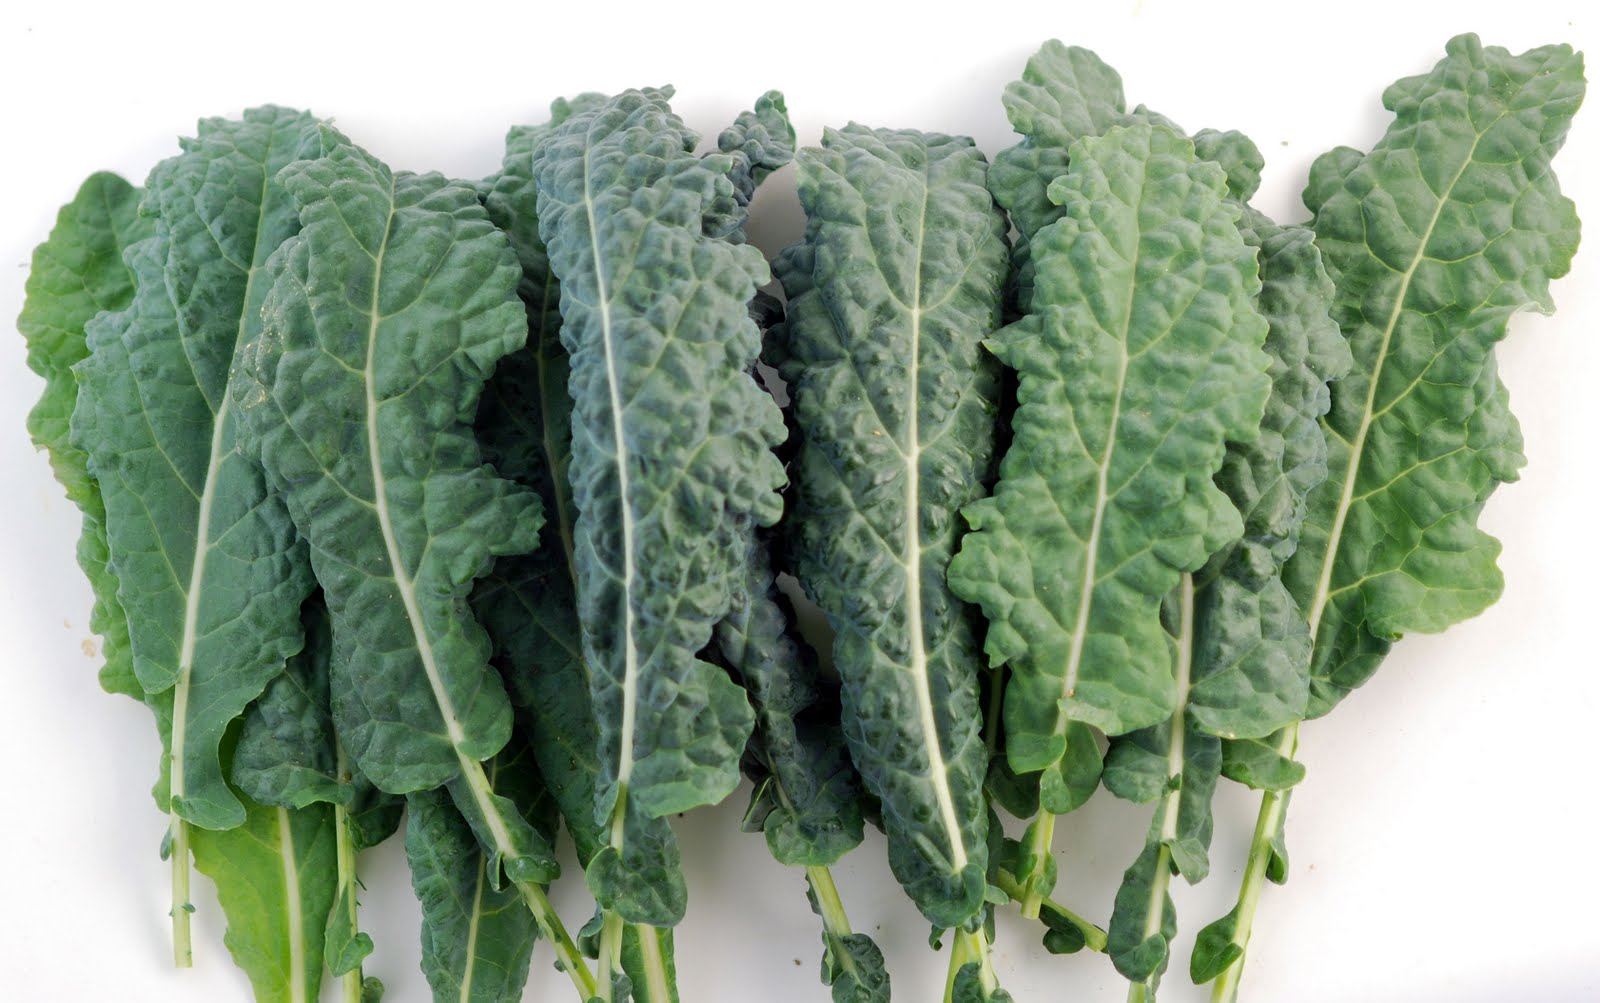
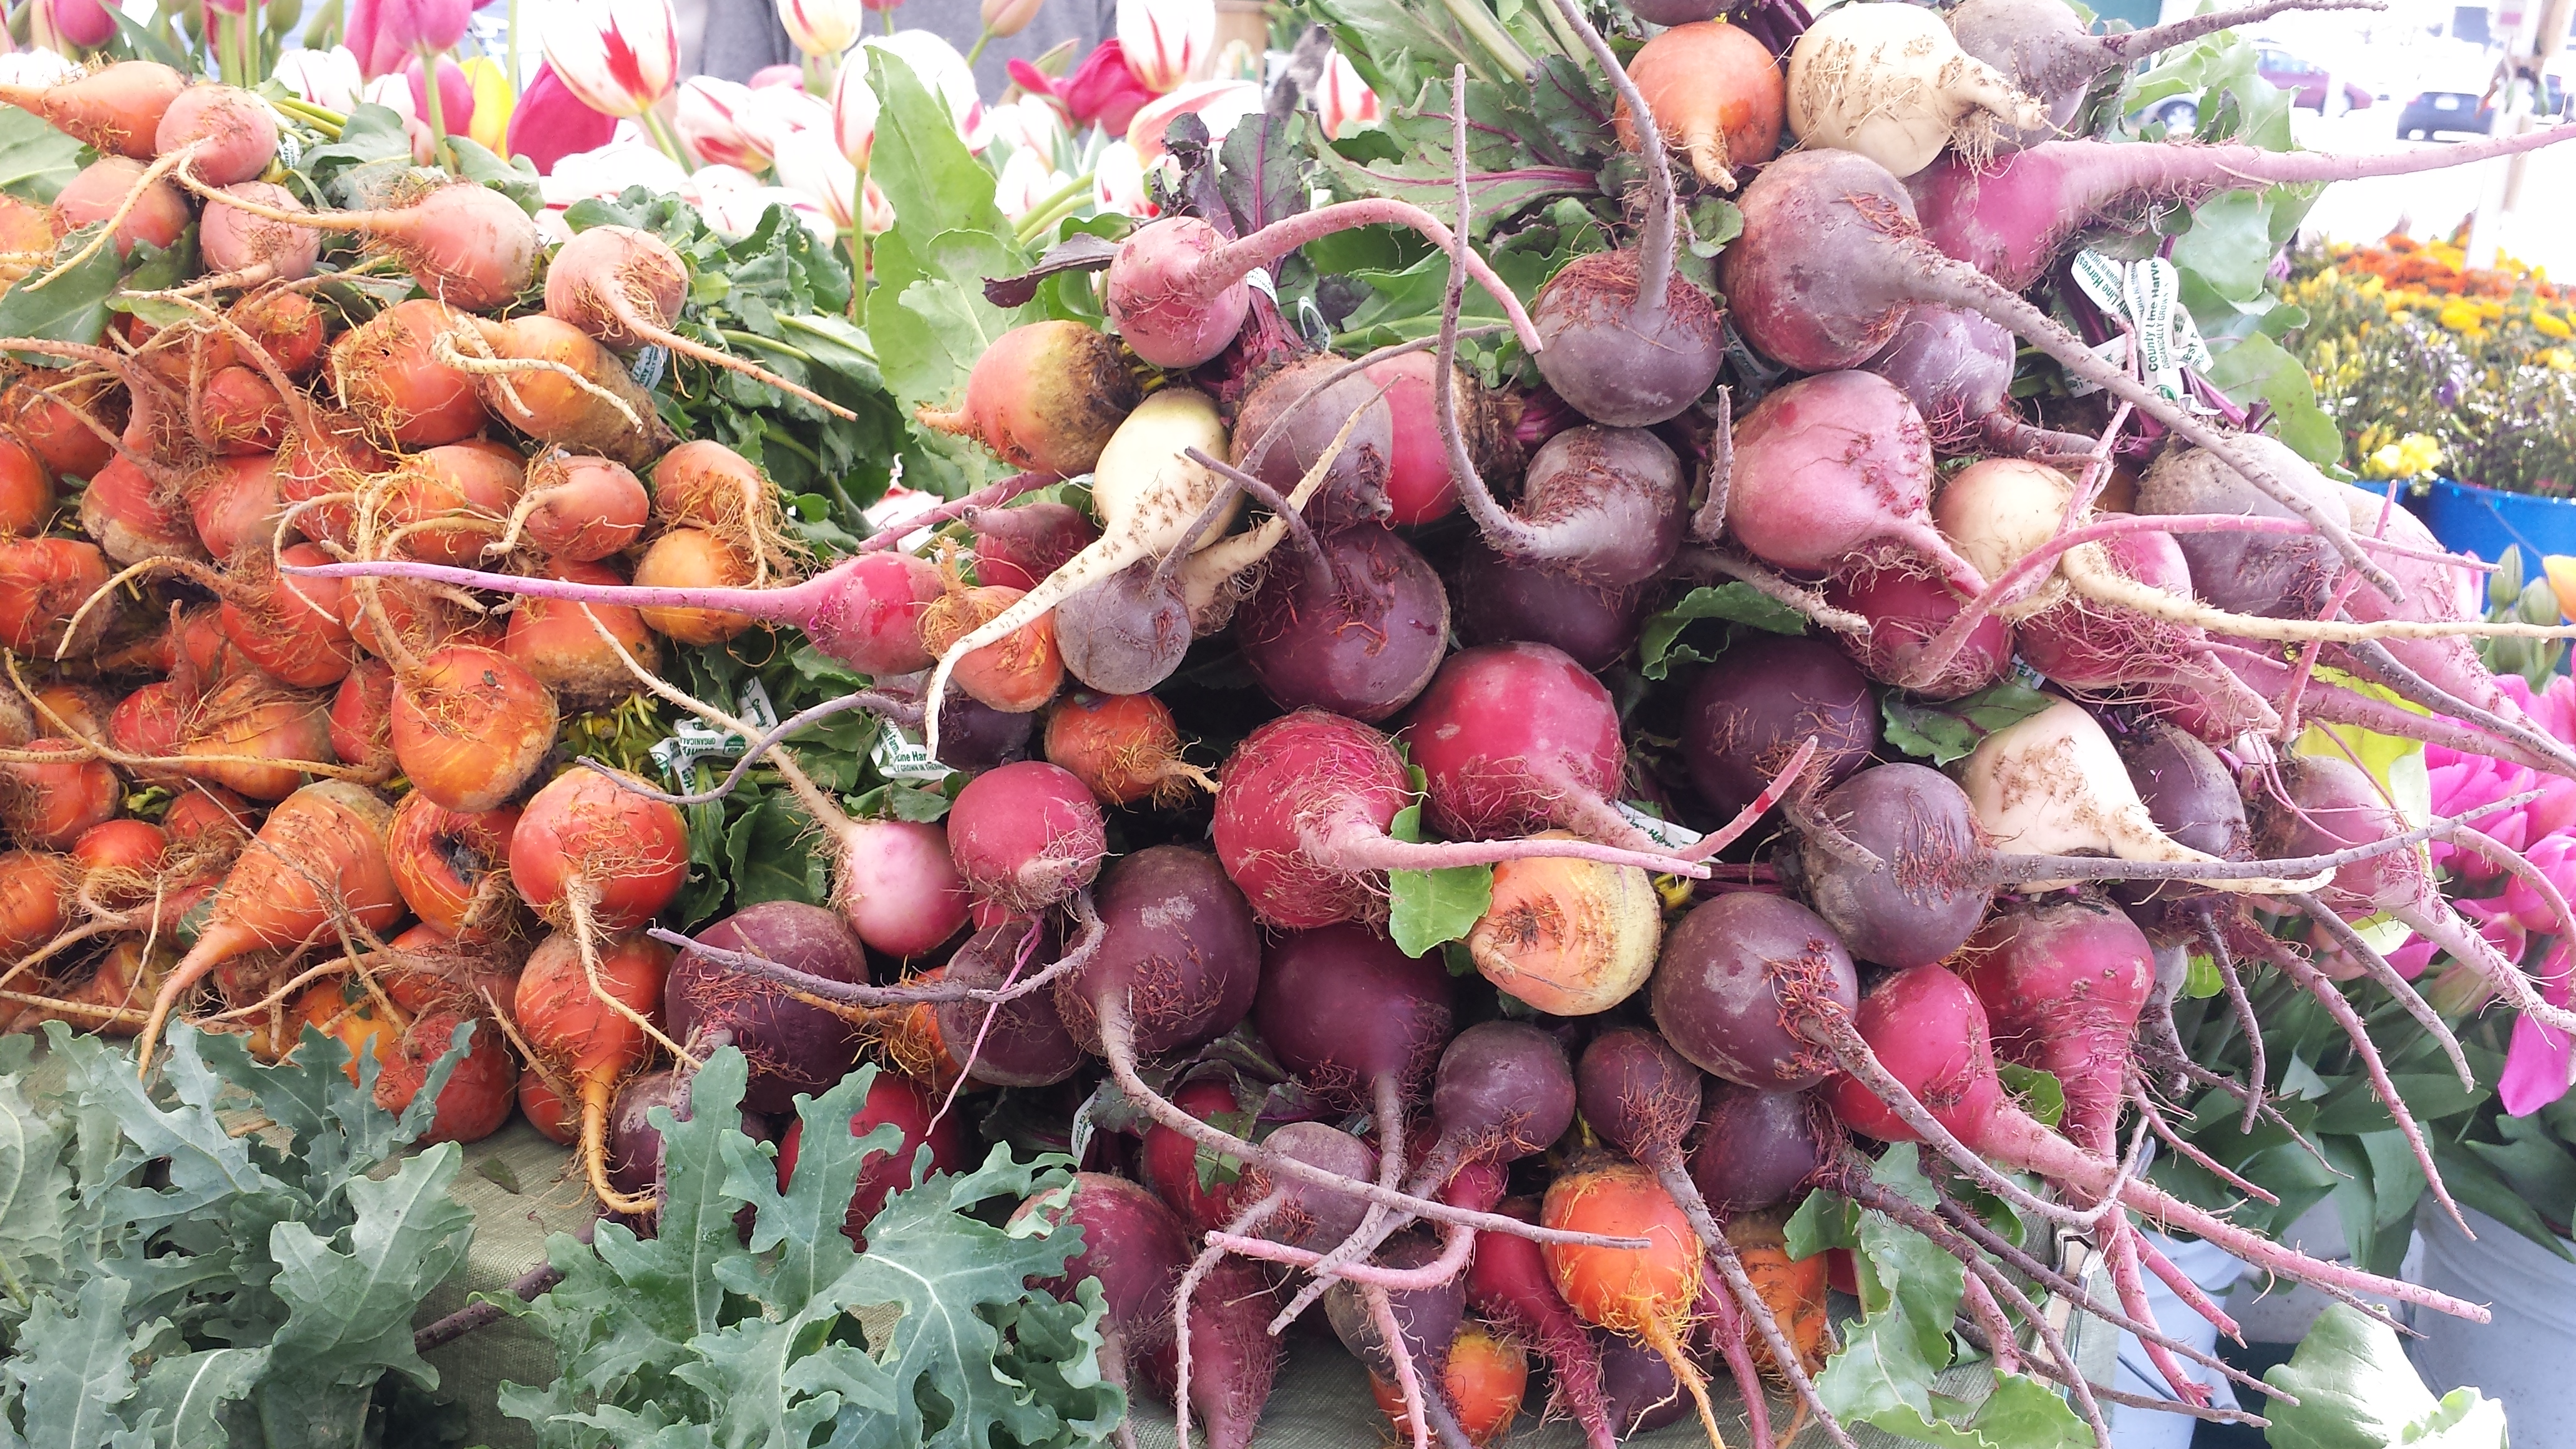
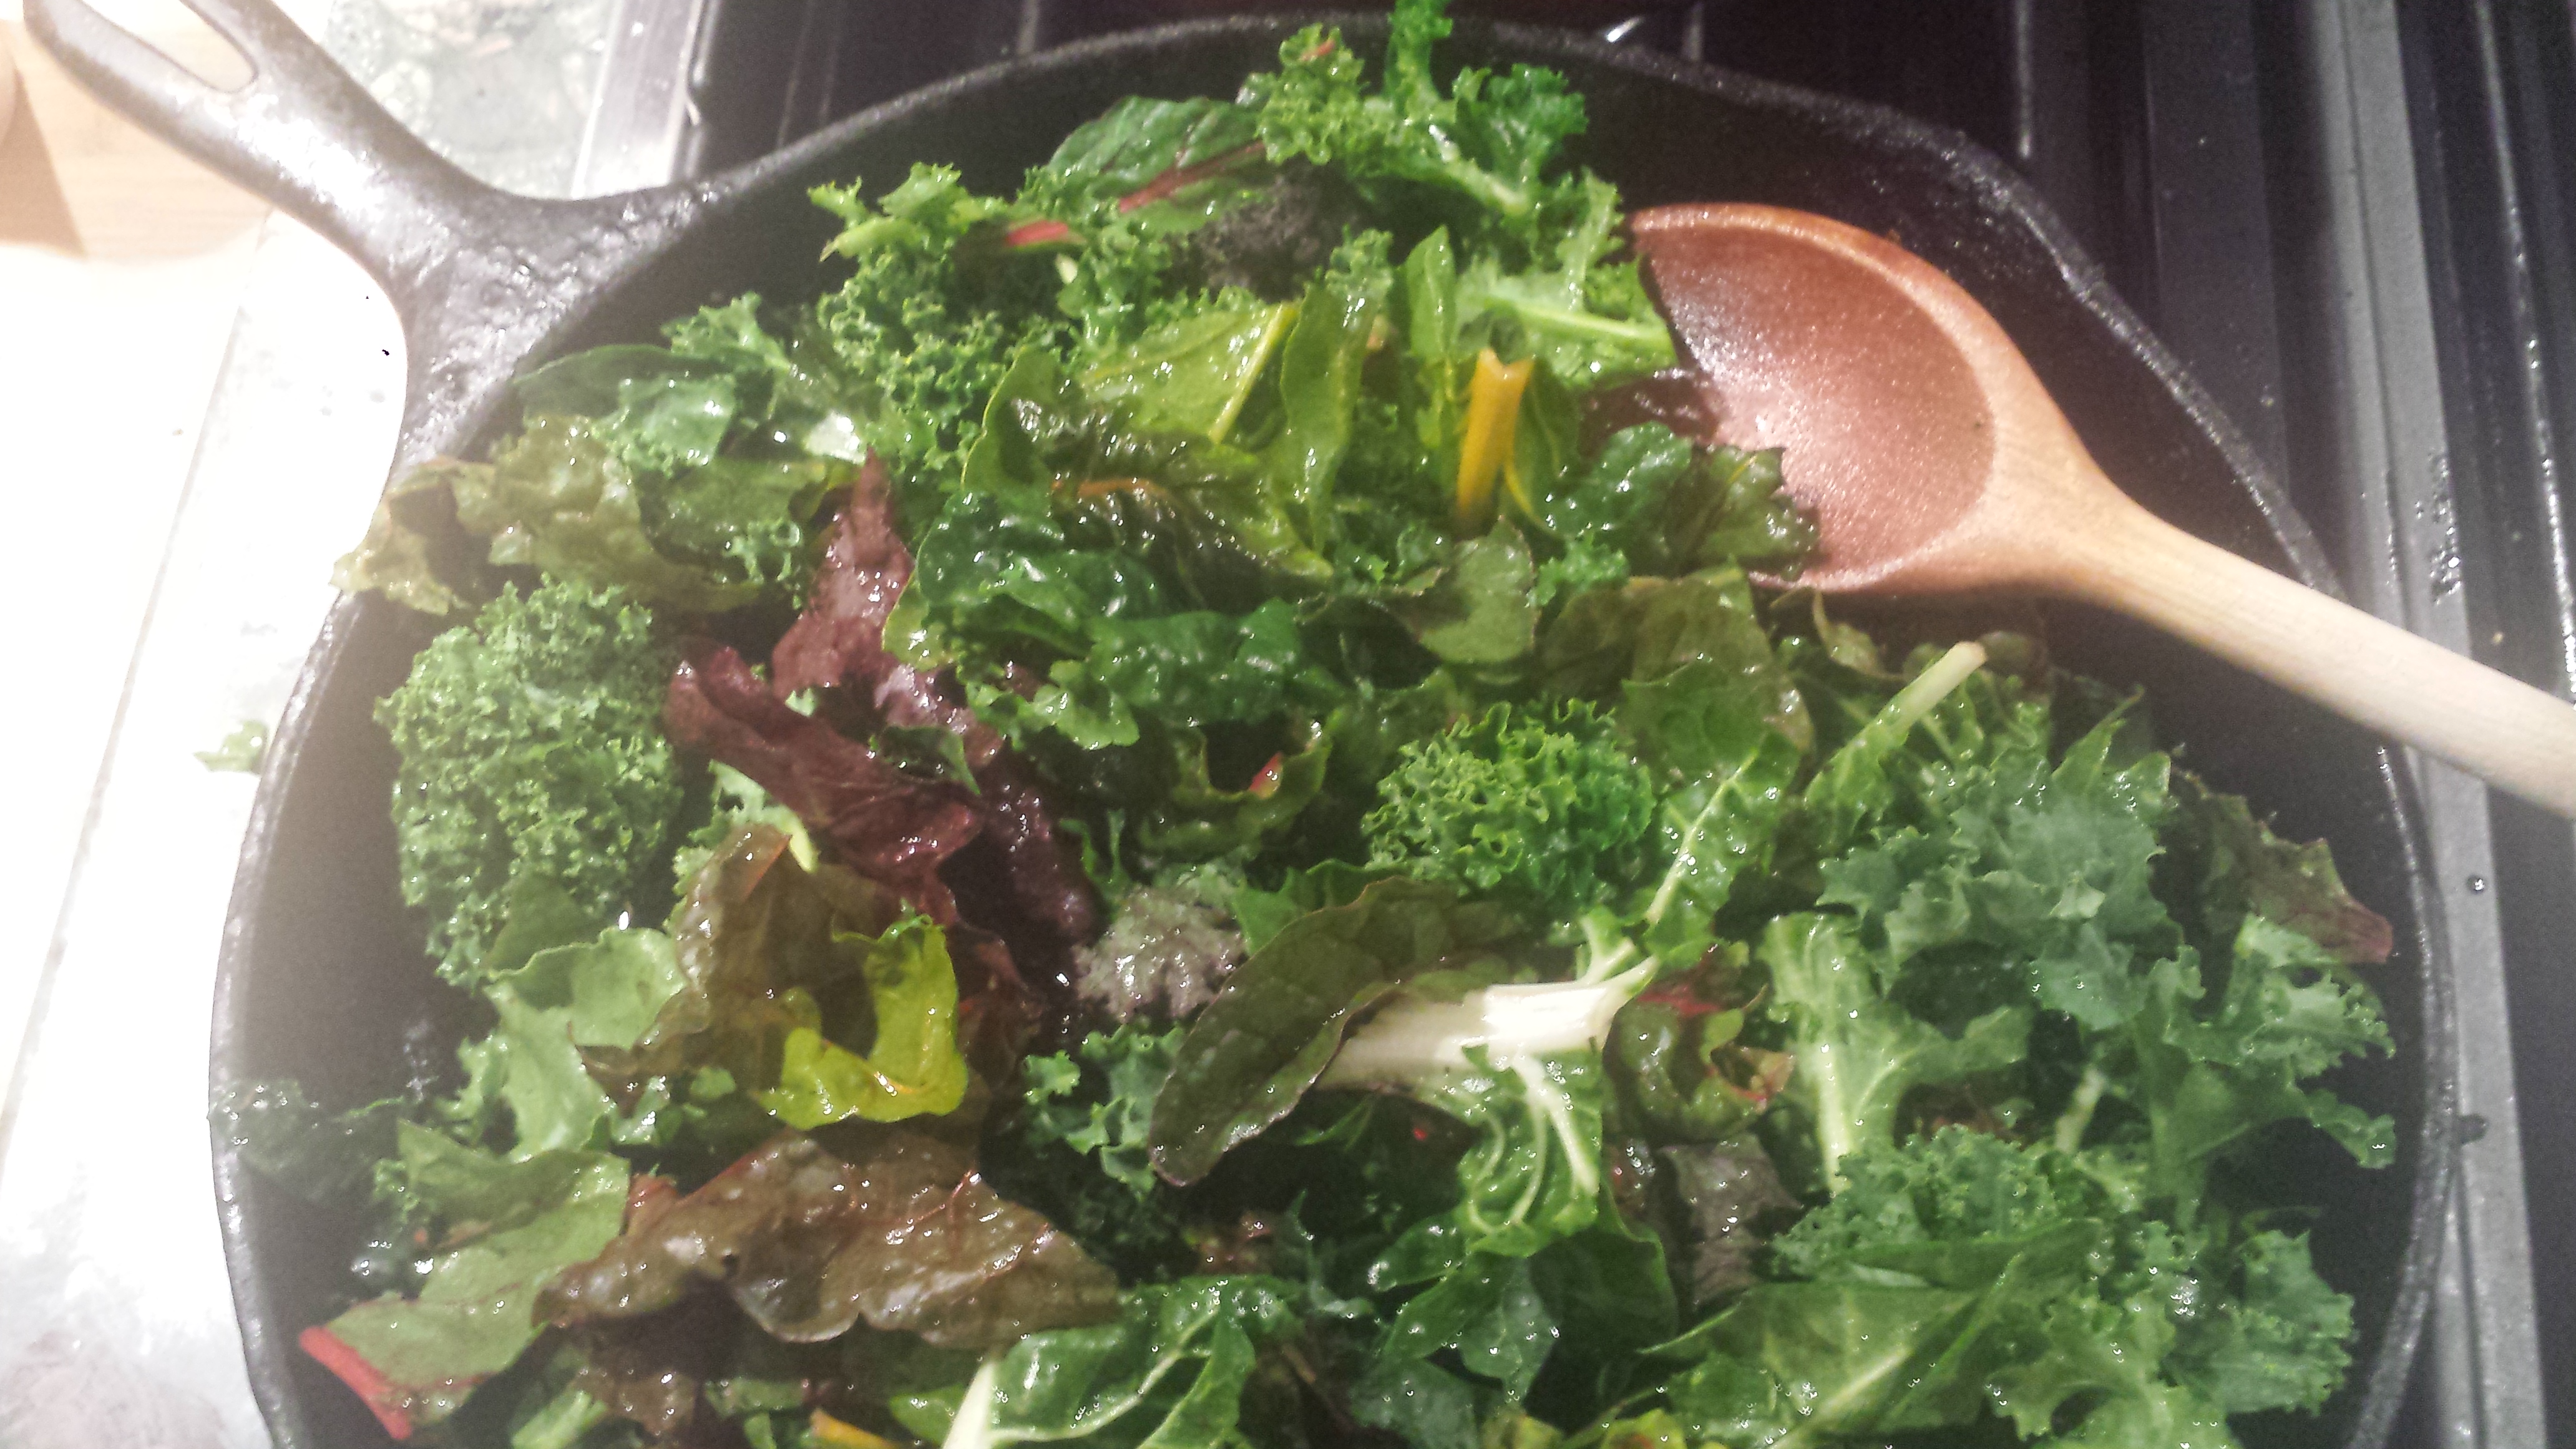
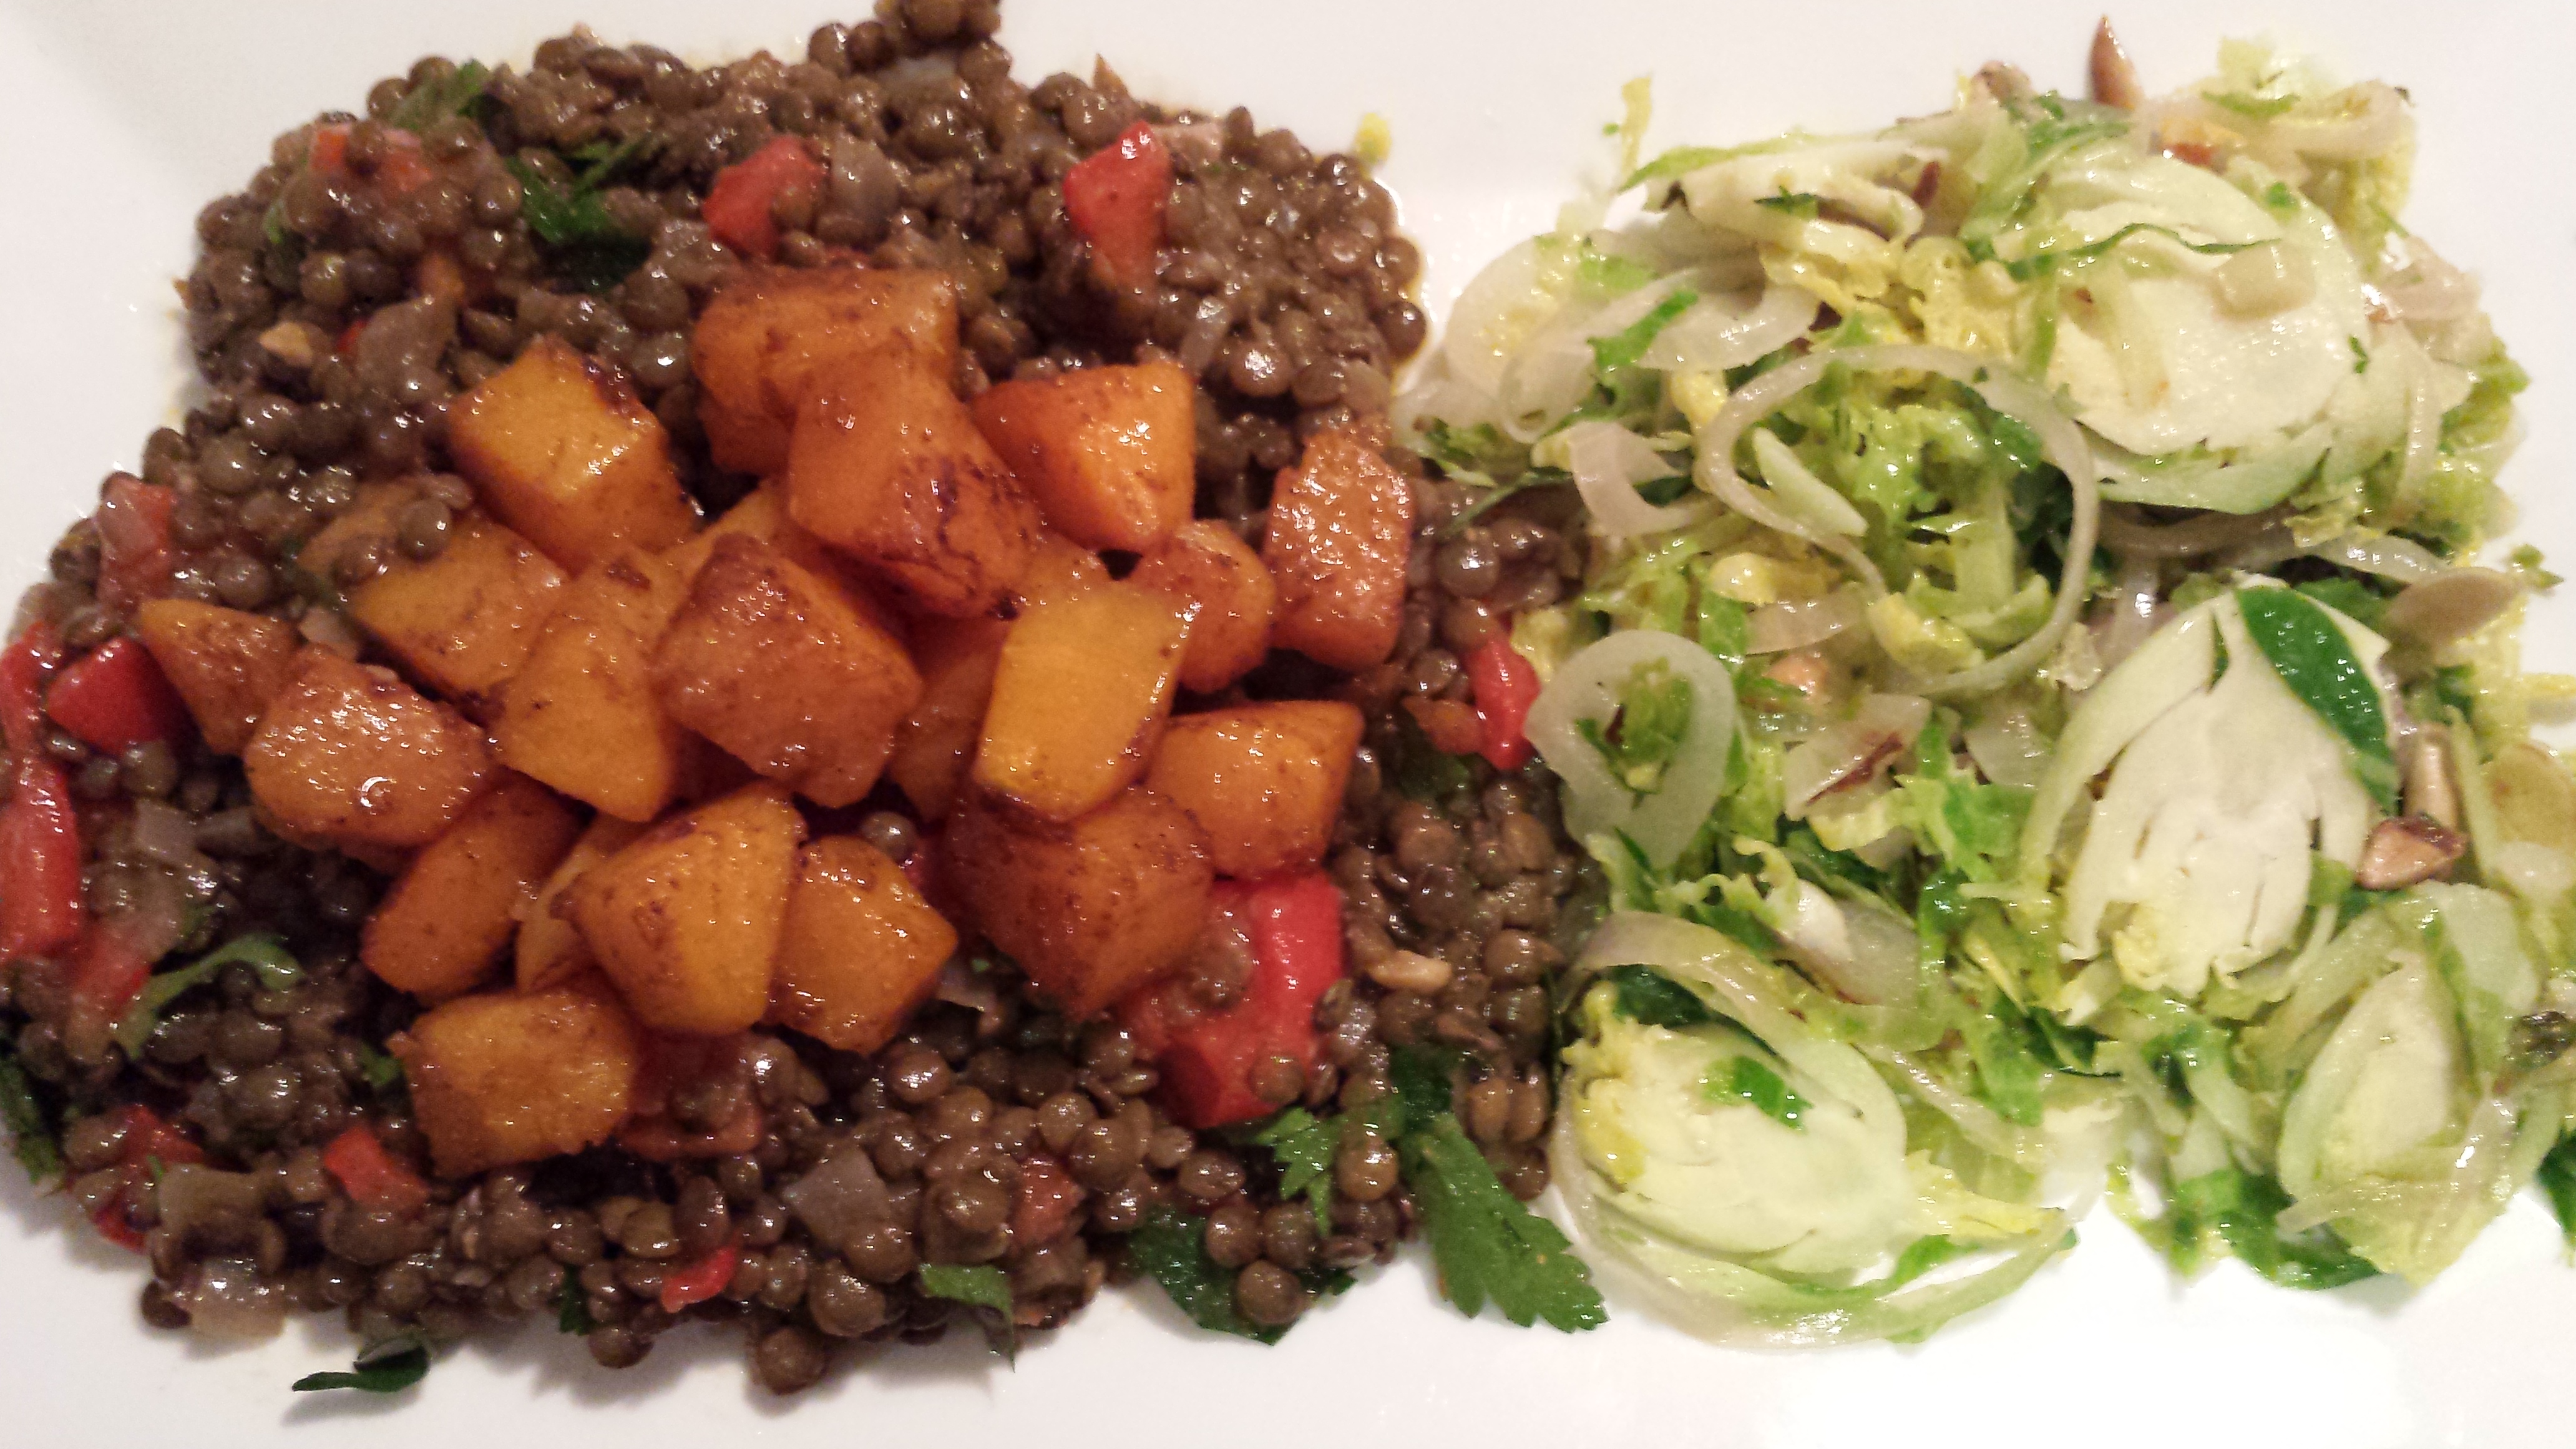
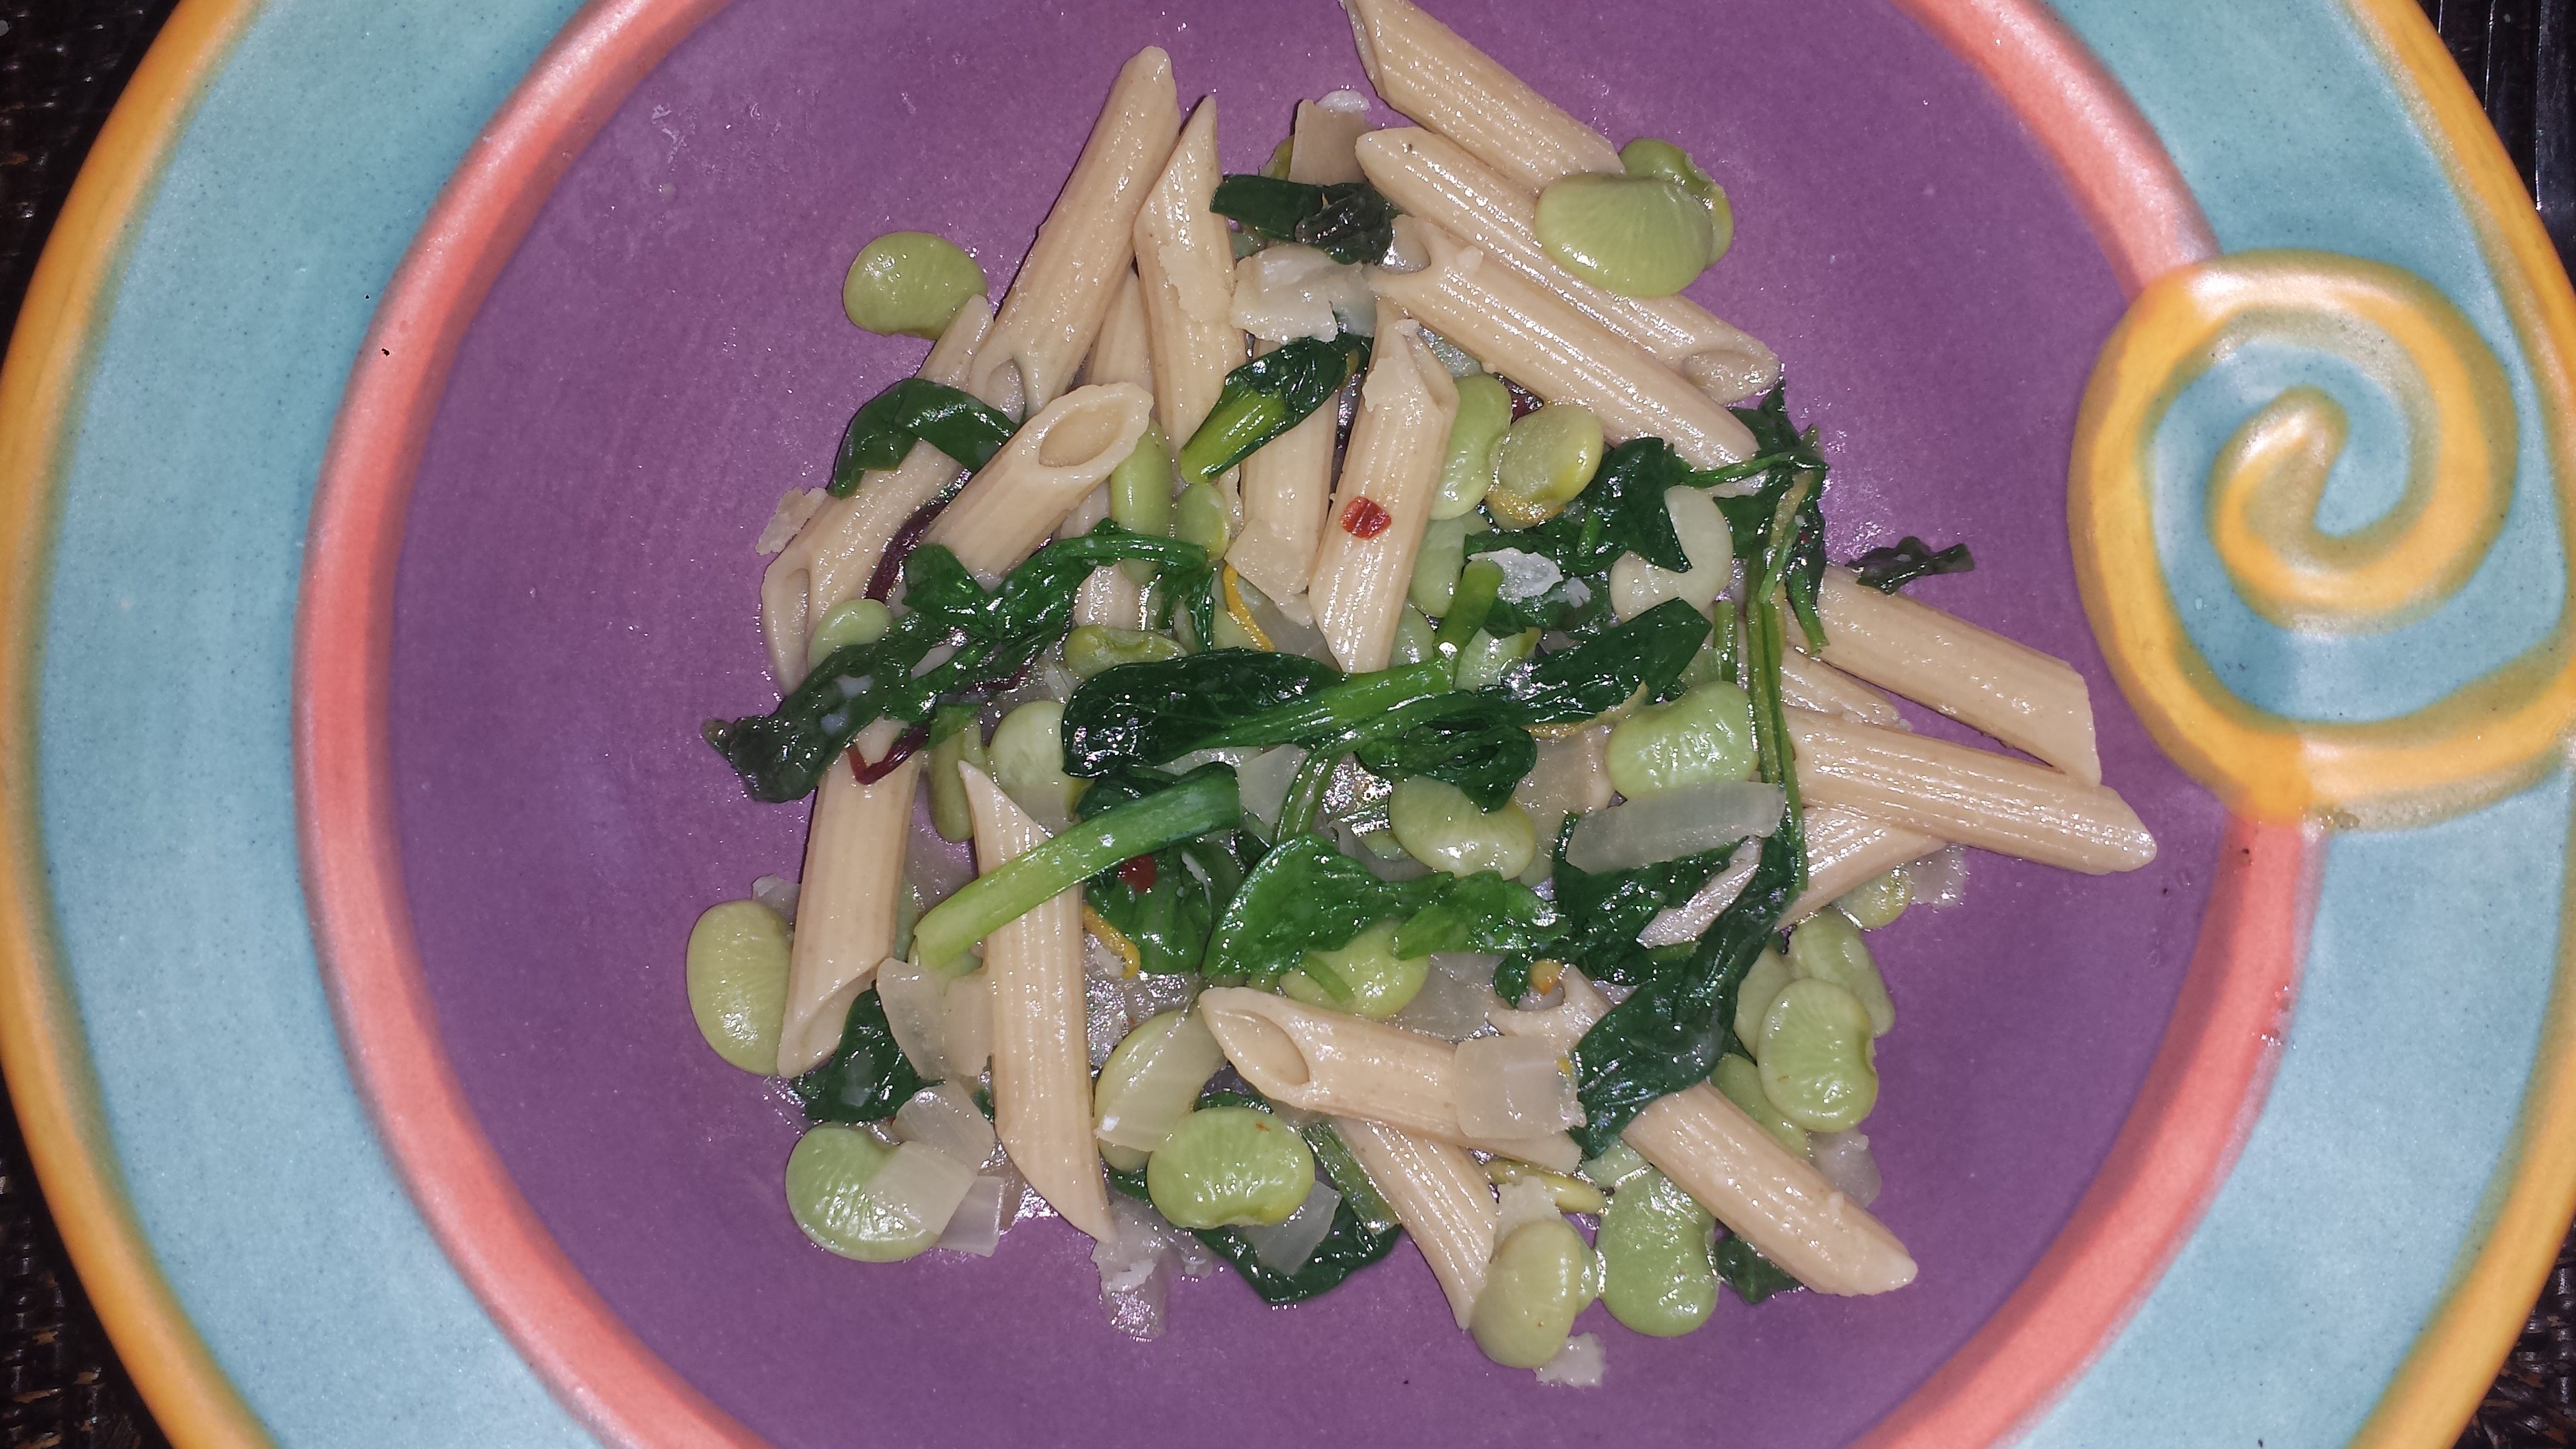
Pasta is the ultimate comfort food.  It is simple and inexpensive to make and very versatile.  Most comfort foods are warm and oozing with creamy sauce and cheeses (think lasagne or mac and cheese), but as I am married to a non-creamy food guy, I usually opt for sauces that are broth based with an optional cheese topping. Cooking with broth adds flavor without all the extra calories.    In this dish I braised the greens in a reduced vegetable broth with onions and garlic and a touch of crushed red pepper flakes.  I added baby lima beans for a protein boost, and to help fill up our tummies, although any bean or legume would work fine.  There is nothing worse than finding yourself back at the refrigerator rooting around  for something to eat 30 minutes after dinner.  Braising greens, or cooking them in a bit of liquid just until they wilt,  is a great way to use excess salad or garden greens, even beet or  turnip tops that you might normally throw away.  Using a combination of greens like spinach, chard, kale, collards, mustard, bok choy or  raddichio makes for a more interesting flavor and braising them brings out the intense greens and reds, unless you cook them too long, then they turn to mush.  Don’t worry if it seems like too many greens, as they reduce quite a bit in volume when they wilt.  You can always add a handful more, if desired, since they cook quickly.

So we all know that greens are good for us but it turns out that the bitter in them actually serves a purpose.  It sends a chemical reaction through our bodies that helps absorb nutrients, cleanses the body, increases metabolism and curbs our sweet tooth, among other things, so feel free to pile them on.  .  Read more.

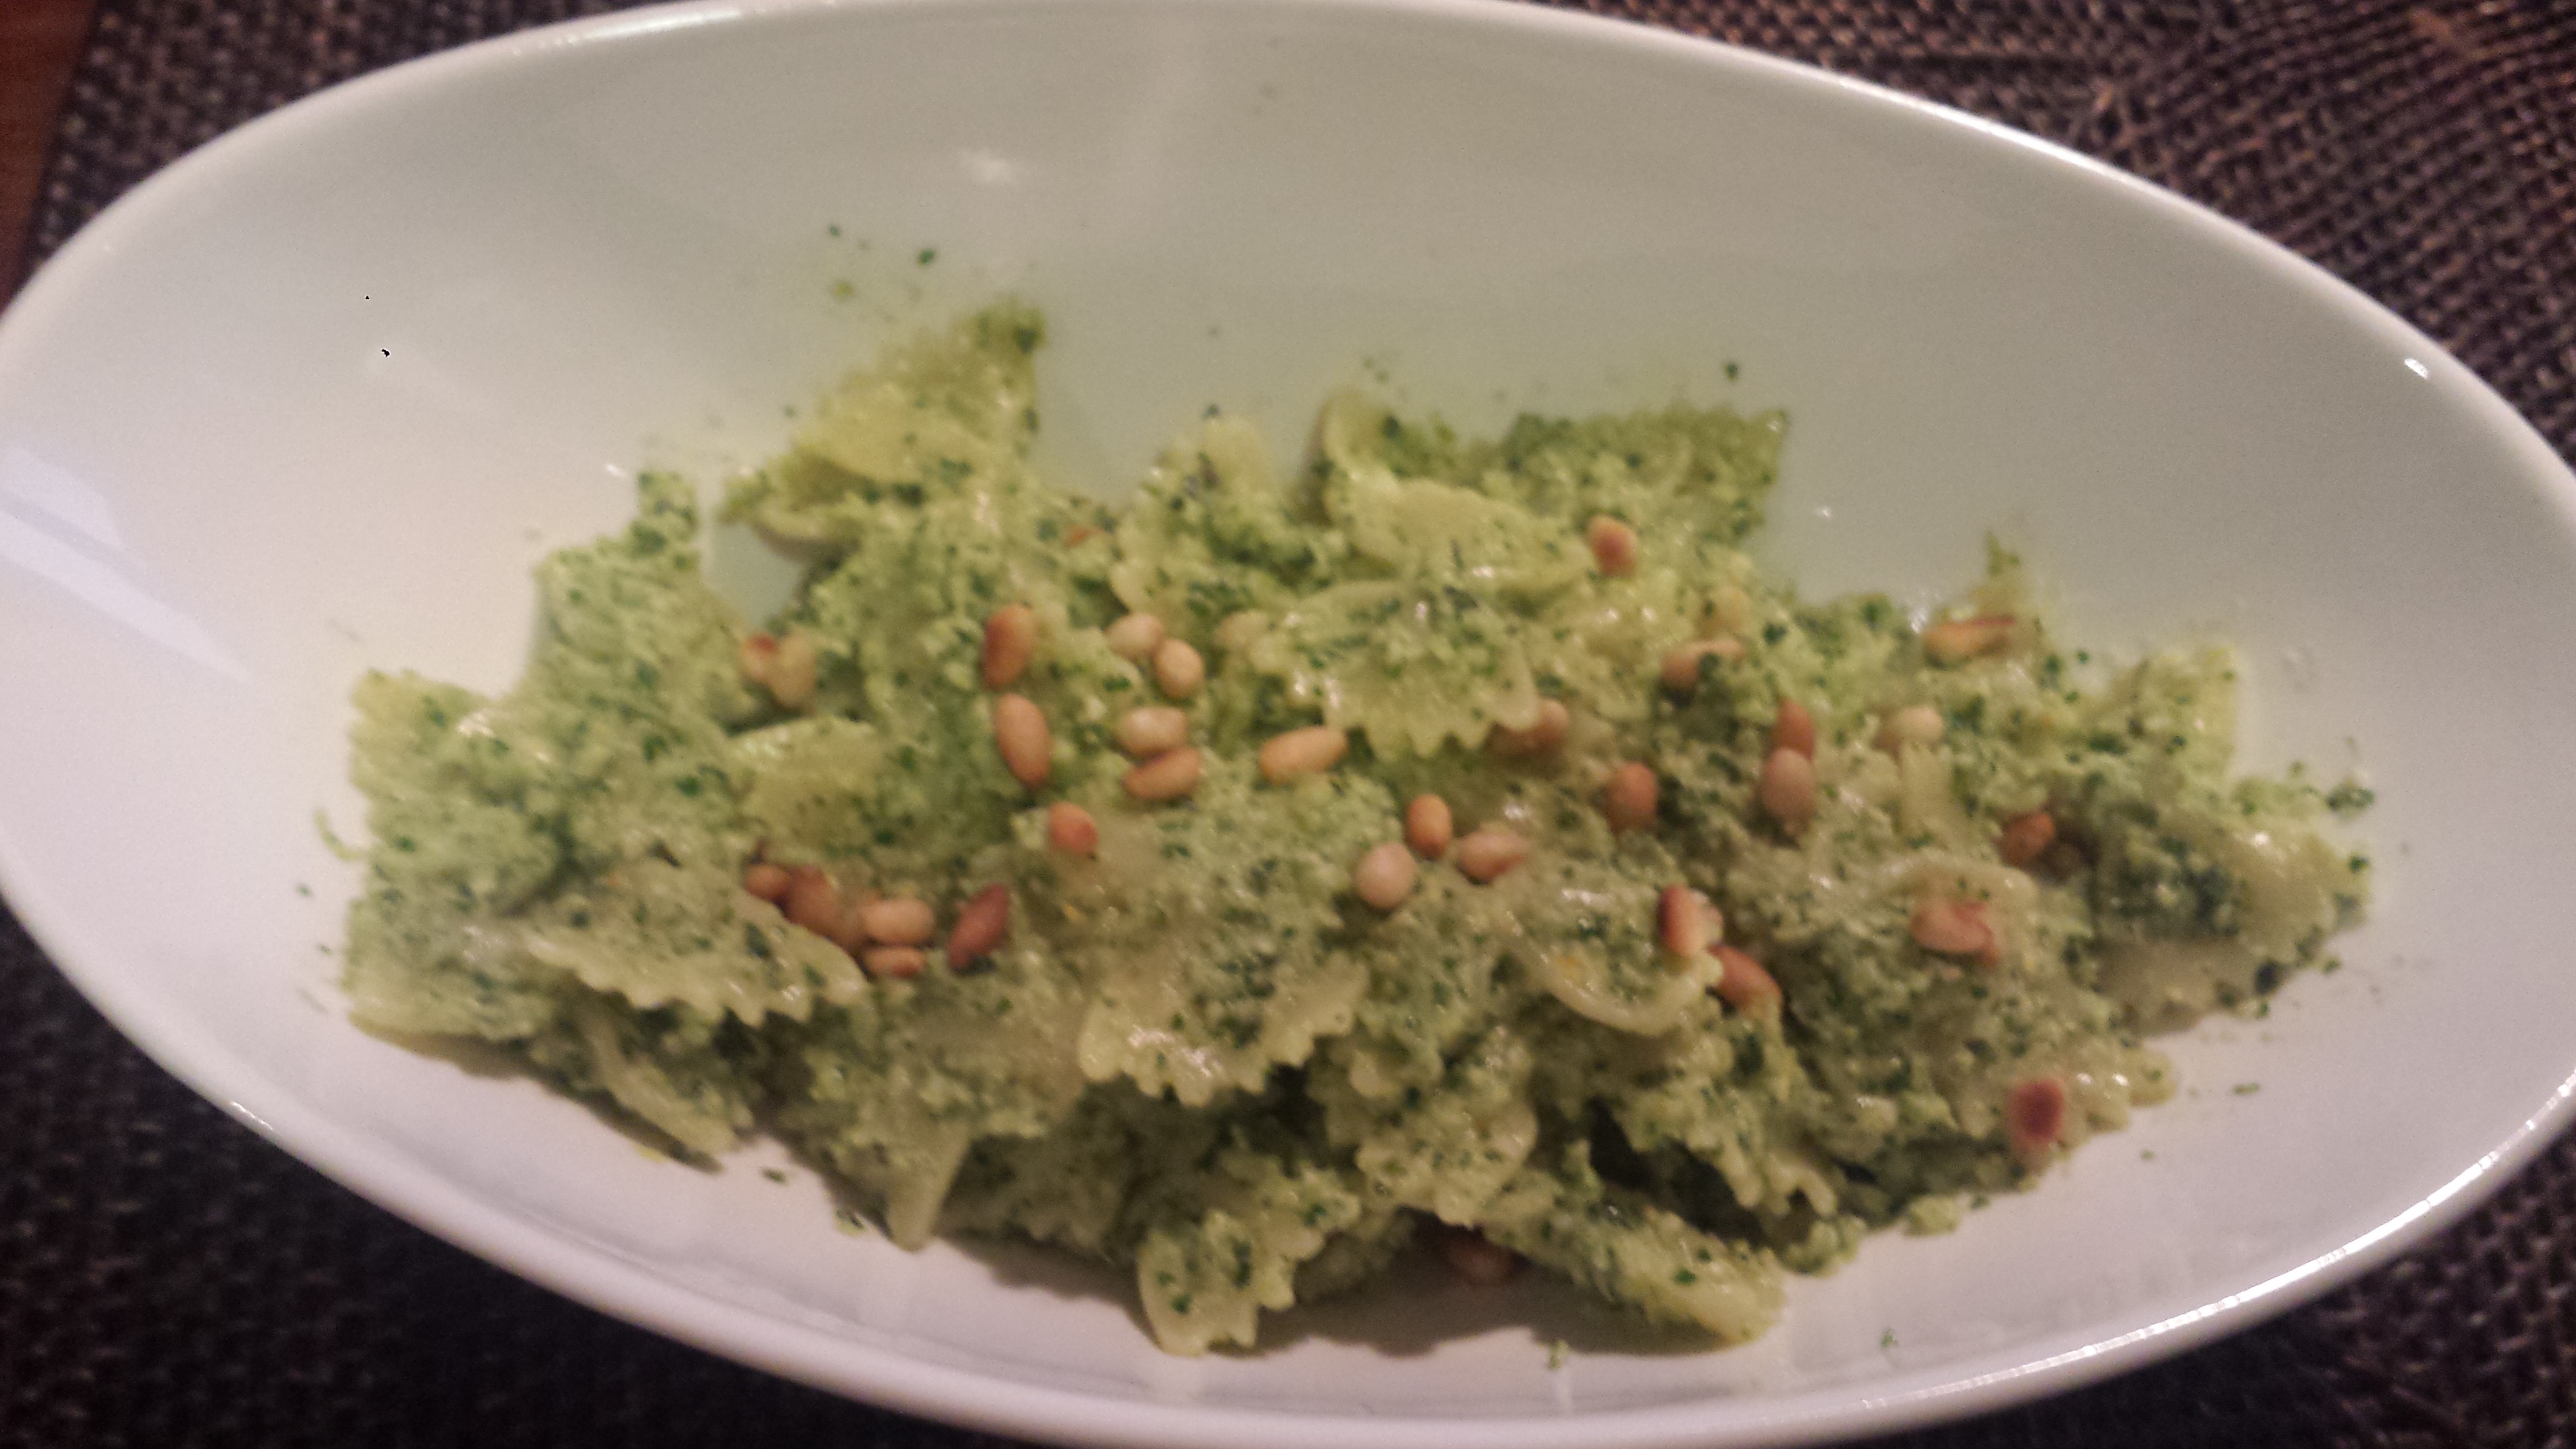
This is a light but satisfying dish that is pleasing to both the eye and the palate.  For a heartier dish, use white cannelini beans and top with shaved or shredded parmesan.  You can also increase the amount of broth, onions and garlic if you like a lot of sauce.  Buon appetito!


Penne with Braised Greens

  • Servings: 4
  • Difficulty: easy
  • Print

3/4 lb dry penne pasta (preferably whole grain)

1 T olive oil

2 garlic cloves, minced

1/2 large or 1 small onion, diced

1 1/2 cups vegetable broth

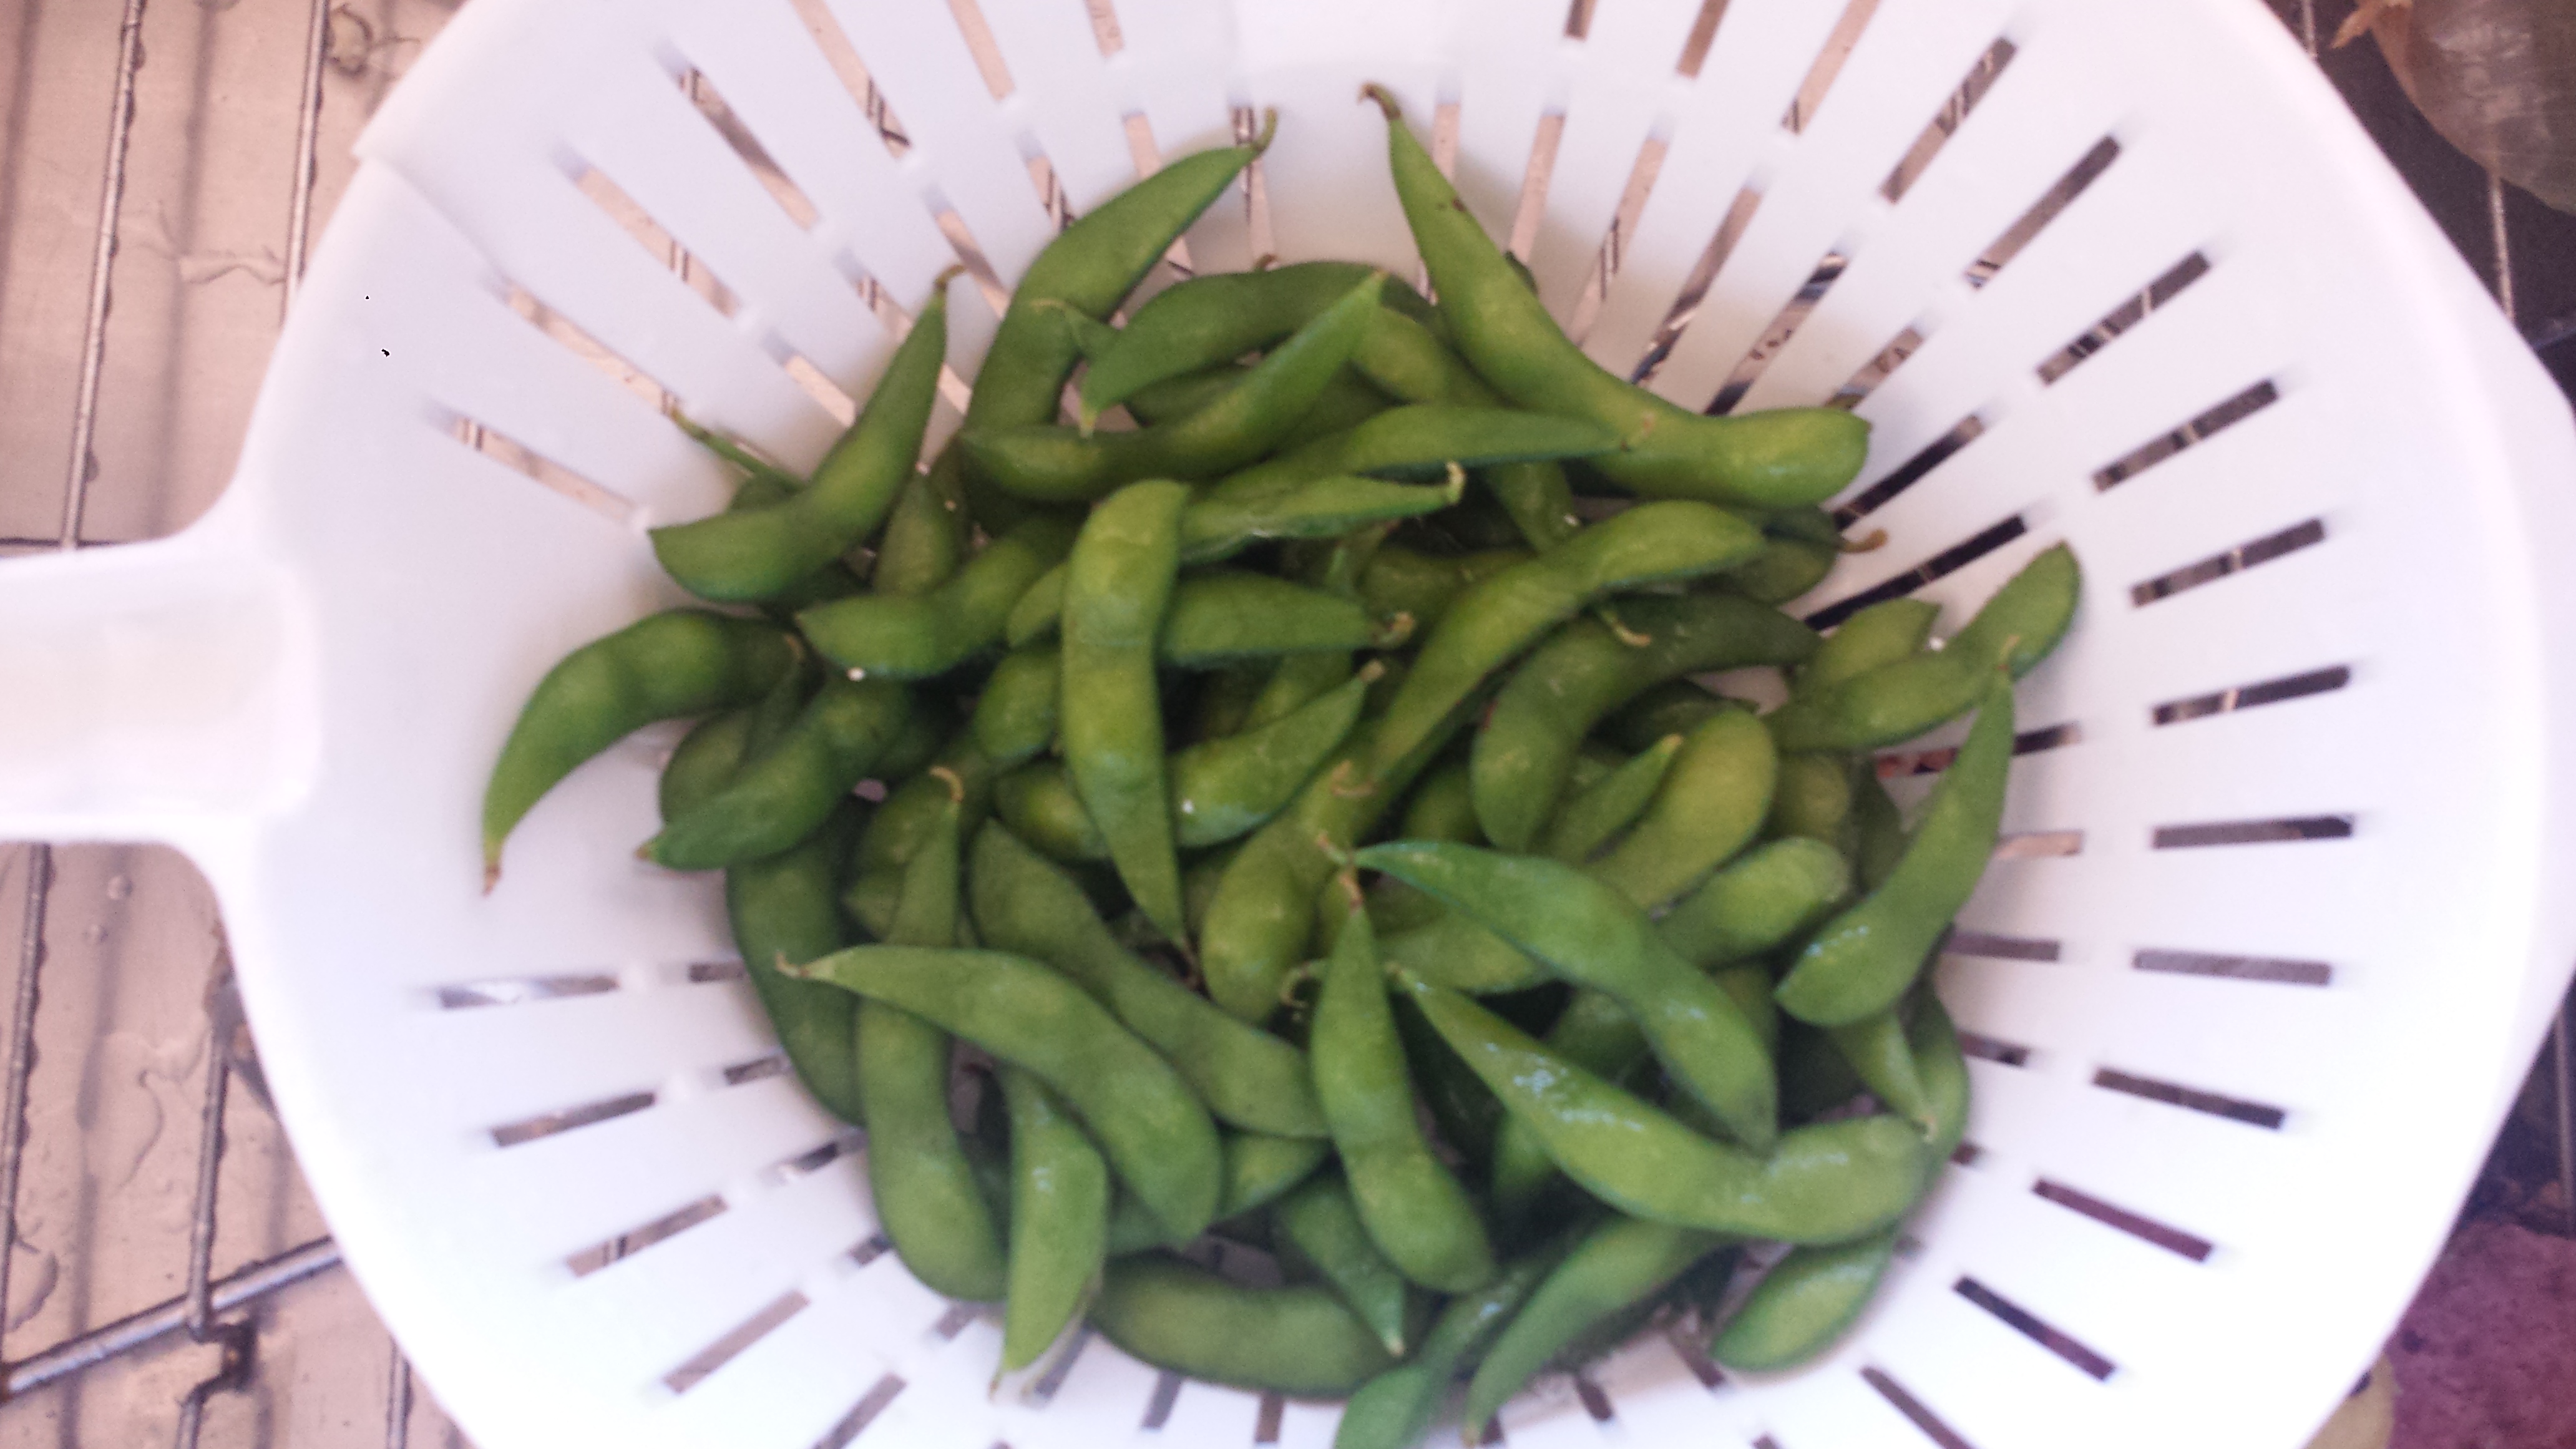
1 cup baby lima beans, edamame or peas (frozen or fresh)

3 -4 cups mixed greens(chard, spinach, kale)

1 tsp lemon zest

1 tsp salt

1/4- 1/2  tsp red pepper flakes


  • Cook the pasta according to package directions in boiling salted water.  Drain  and set aside.  You can drizzle with a bit of olive oil to keep from sticking if desired.
  • In a large skillet or dutch oven, heat the olive oil. Saute the minced garlic, onion and red pepper flakes  for two minutes, until the onion is translucent.

Penne5

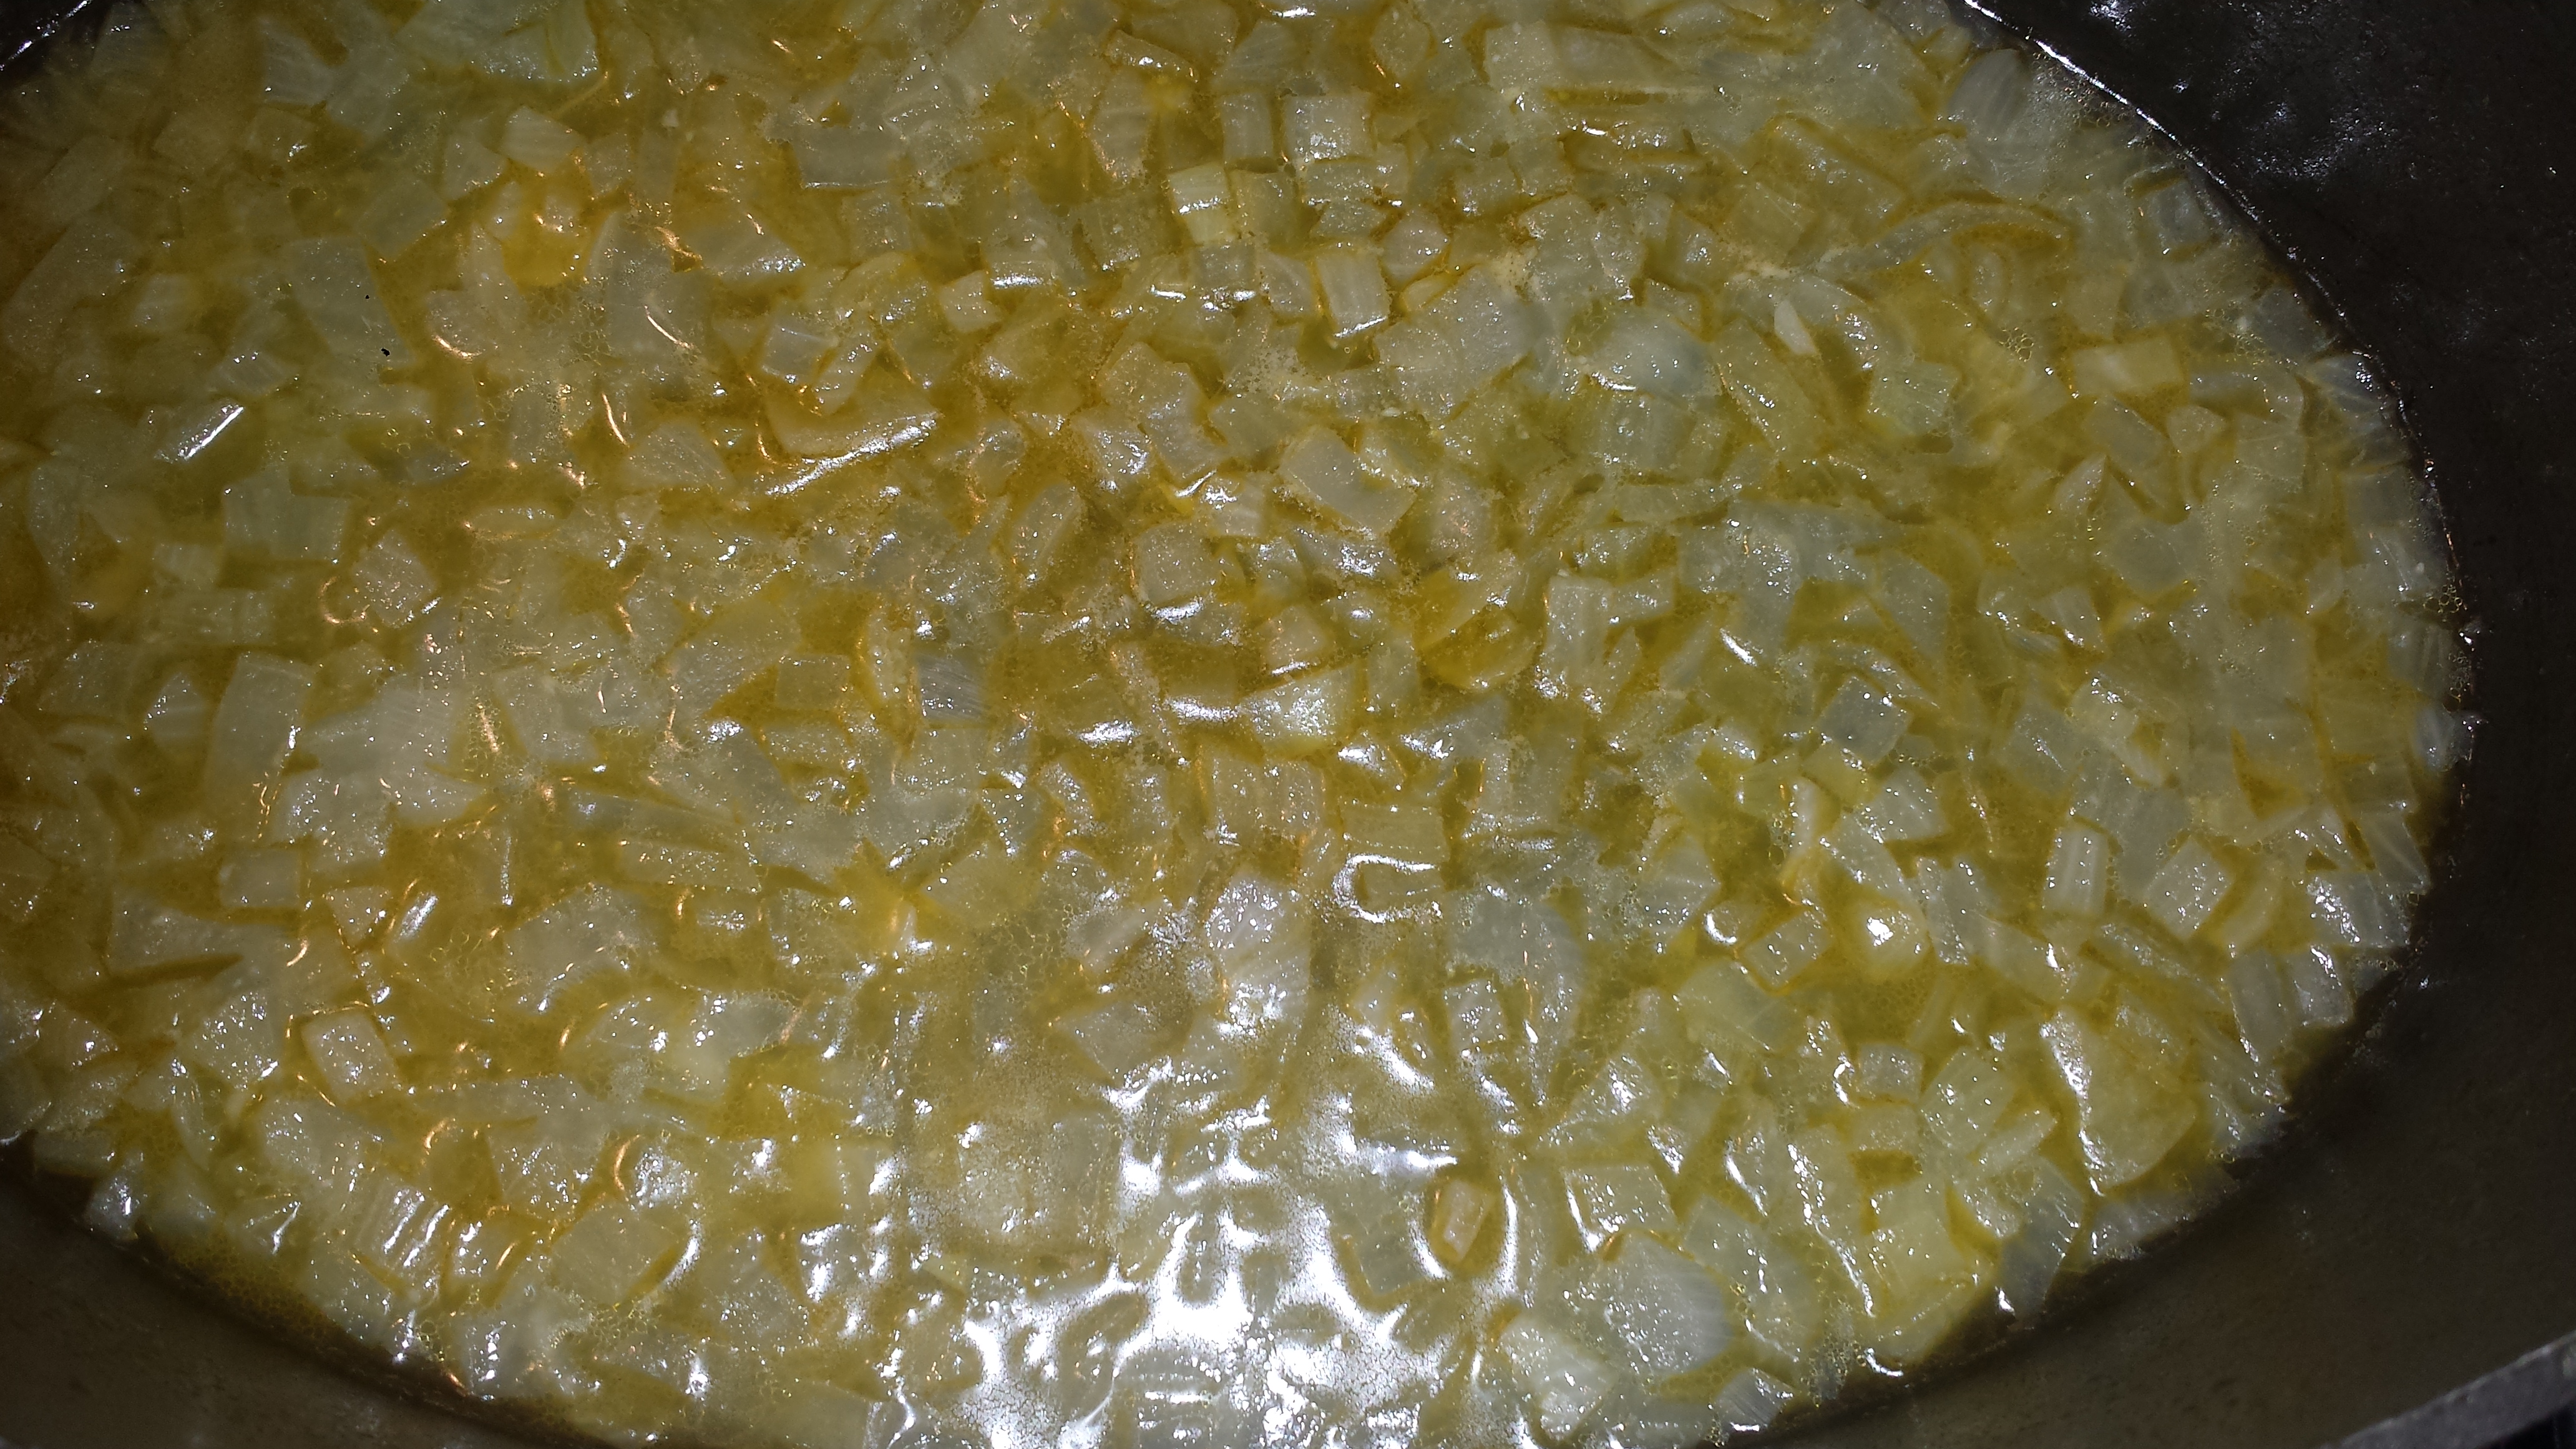
  • Pour in broth and reduce by half, 5 to 10 minutes

Penne4

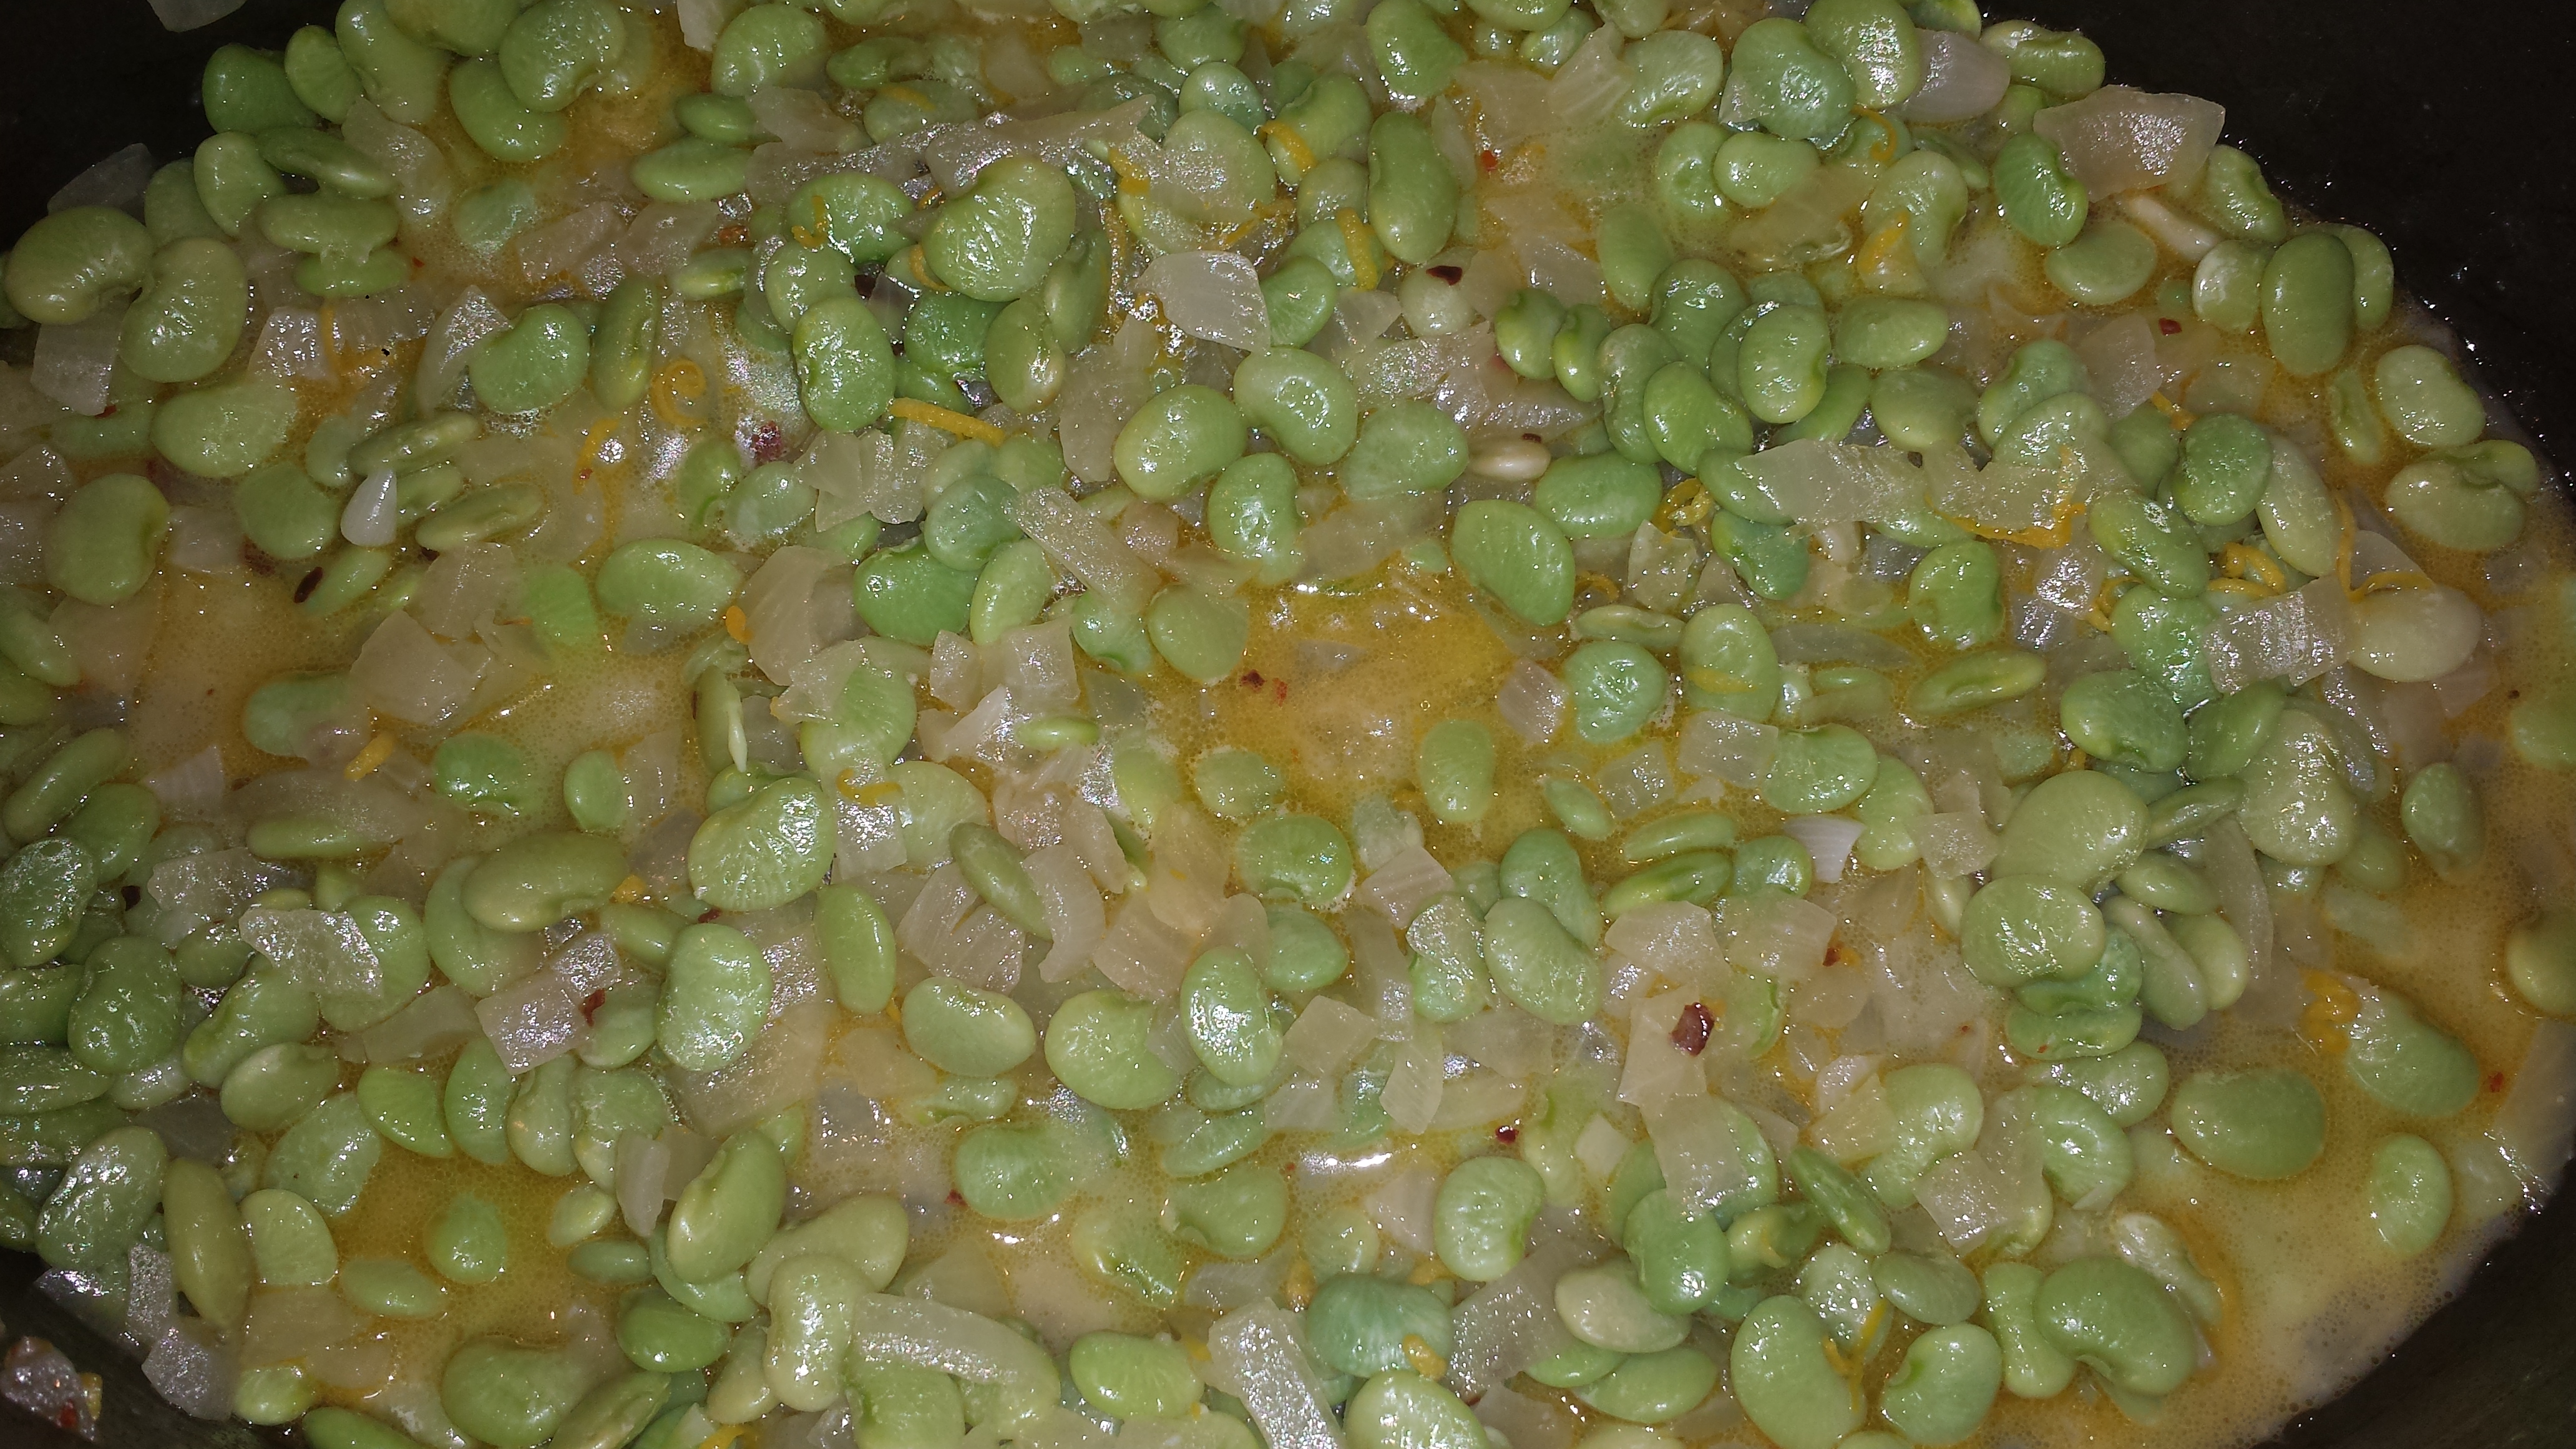
  • Add the  beans and cook for about five minutes.

Penne3

  • Stir in greens and cook several more minutes until they wilt.
  • Add the pasta, lemon zest and salt.  Adjust seasonings if necessary.

Options:  Top with flaked or grated parmesan or toasted nuts, if desired.  For a heartier meal, substitute or add cannelini beans.

Penne2


Wheatless Wednesday – Tabouleh (Grain Free)

4

Tabouleh7

Raw-Vegan-Potluck.  My friend, Karenna Love,  invited me to a vegan potluck at her house.  I love all things food related and immediately knew what I was going to bring – until I re-read the invitation.  Somehow I missed the ‘raw’ part.  I make a lot of vegetarian and vegan food but other than green salads, I generally cook some or all of my foods.  I was stumped. All my go to foods like grains, beans and legumes need to be cooked.   I thought about going out to my garden and picking fresh produce for a salad but other than lettuce and chard, nothing else is ready yet.  Then I remembered how well cauliflower stood in for wheat in my Cauliflower Crust Pizza Recipe and decided to make a traditional tabouleh using cauliflower ‘rice’ instead of the usual couscous or bulgur.  The result is delicious and, even though I know better since I ground up the cauliflower myself, I would swear it’s cooked  bulgur wheat not cauliflower.  This is a great recipe for those on gluten or wheat free diets – even for my Paleo friends.    I would definitely make this again-on purpose!

Why eat raw?  Eating fruits and vegetables raw ensures that you get 100% of the vitamins and minerals, including beneficial enzymes.  Cooking can make some foods easier to digest but some of the vitamins and minerals (and all of the enzymes) are lost in the process.  I’m not quite ready to throw out my pots and pans just yet, but I do see how adding more raw foods into our diets is a worthy goal.

Let’s go back to Karenna Love, founder of wonderful website VeganGreenPlanet, and her Raw Vegan Potluck.  I have to admit to a few apprehensions about going to a vegan event when I’m not even vegetarian.  But then I realized that GMD is all about pushing myself out of my comfort zone, so I went.  It was an interesting mix of caring and non-judgemental people and great food.   I’m so glad I stepped out of my box. My Tabouleh was well received, which after one taste, I knew it was yummy and potluck worthy. The speaker, Mikaele Holzer, health coach and cleansing expert at Green Your Spirit  was pretty interesting and very personable.   I learned a lot about vegan food, cleansing, and detox.  Both  are amazing women-check them out.

Grain Free Tabouleh

  • Servings: 4-6
  • Difficulty: easy
  • Print

1 head cauliflower

1 cup grape or cherry tomatoes, small dice

1 seedless cucumber, small dice

1 1/2 cups fresh parsley, minced

3/4 cup fresh cilantro, minced

1/2 cup fresh mint, minced

1/3 cup olive or avocado oil

3 Tbsn fresh lemon juice

3/4 tsp sea salt

1/4 tsp black pepper

Tabouleh5

  • Remove leaves from cauliflower and break into florets.  Discard leaves, core and stem.  Using a food processor, blend florets into ‘rice’.  Or you can use a hand grater.  Scoop into a large bowl.

Tabouleh6

  • If you are using a food processor, you can mince the parsley, cilantro and mint by machine as a shortcut.

Tabouleh4

  • Add the rest of the diced vegetables and minced herbs to the cauliflower.

Tabouleh2

  • Whisk together the oil, lemon juice, salt and pepper and pour onto salad. Toss to combine.  Adjust seasoning (add salt or lemon juice to taste).
  • Serve immediately or let rest in the refrigerator.  Flavors will continue to develop over several hours.

Tabouleh1


Meatless Monday – Crispy Glazed Tofu and Bok Choy

1


Tofu and Bok Choy9

Is tofu good or evil?  You may not be aware but the great tofu controversy abounds! I like tofu and have always thought of it as a healthful protein which is highly adaptable in recipes from stir frys to salad dressings.  However, I keep hearing that tofu is bad for you, evil even, so I decided to check into it. Tofu is a low fat, plant based, good source of protein, yet it is a processed food, in that it is no longer in its original bean form.  The beans have been made into milk, curdled, drained and pressed into blocks.  The more I looked into the great tofu question, the more confusing the issue.  Studies and opinions contradict each other-no surprise there.  Remember when coconut oil was supposed to be so terrible for us and to be avoided at all costs, and now is being touted as having health benefits ranging from weight loss and prevention of  heart disease to making your skin soft and pretty.   Andrew Weil, a well respected natural health and wellness expert, still recommends tofu as part of a healthy diet.   Click on his name to see why.   The Truth About Soy,  another seemingly unbiased view about tofu and soy (loads of information but long article) thinks the problem is not with soy but what we  have done with soy (read Genetically Modified-Roundup Ready).  90 – 94% of soy is GMO but most of that is fed to our food animals or made into soy products like baby formula (which is a different problem)  and not made into tofu.  If the label says organic or Non GMO Project it’s not genetically modified-one more reason to buy organic.   So, what did I come away with?  If you like tofu, eat it.  If you don’t like tofu, don’t.

For those that DO like tofu, here is a delicious recipe for Crispy Glazed Tofu with Bok Choy, which I adapted from Eating Well, March/April, 2014.  This is the perfect way to cook bok choy, which is delicately flavored with garlic and ginger.  The tofu is browned in a skillet first and then sautéed in a flavorful plum sauce. The outside is a bit crispy and the inside soft and creamy.   I reduced the amount of ketchup, since I’m not a ketchup lover, to let the other flavors shine, however, if you are a ketchup lover you can double or triple the amount.  I also added red pepper flakes and ginger paste for more of a zing.  Don’t skip the step of draining the tofu, which gets rid of excess water and allows the tofu to absorb the flavors.  Otherwise this is a very simple and quick meal to get on the table.  Serve over rice if desired.


Glazed Tofu and Bok Choy

  • Servings: 2-4
  • Difficulty: easy
  • Print

1 14-ounce package extra-firm water-packed tofu, drained
1/4 cup plum (or hoisin) sauce
1 tablespoons ketchup
2 tablespoons soy sauce
1 tablespoon rice wine (or dry sherry/rice wine vinegar)
2 teaspoons oil plus 1 tablespoon, divided (I like avocado or coconut oil)
3 scallions, trimmed and cut into 2-inch lengths and then ribboned
1 teaspoon minced garlic
2 teaspoon minced fresh ginger, divided
1/2 teaspoon red pepper flakes
4-6 baby bok choy, quartered lengthwise
1/4 cup water
1 tsp sesame seeds
Tofu and Bok Choy7
  • Fold a kitchen towel in half and place on a cutting board. Cut tofu in half horizontally, (and then in half again leaving 4 equal pieces) and set on the towel. Put another folded towel and a weight (such as a heavy skillet) on the tofu; let drain for 15 minutes.

Tofu and Bok Choy5

  • Meanwhile, whisk plum sauce, ketchup, soy sauce and rice wine in a small bowl and place near the stove.
  • Cut the pressed tofu into 3/4-inch cubes and place near the stove.
  • Toast sesame seeds in a small pan over medium low heat for a few minutes, or until they turn golden brown.

Tofu and Bok Choy6

  • Heat 2 teaspoons oil in a large nonstick skillet over medium-high heat. Add scallions, garlic and ginger; cook, stirring, for 30 seconds. Add bok choy and cook, turning, until bright green, 1 to 2 minutes. Add water, cover and steam until tender, about 2 minutes. Transfer everything to a plate. Wipe the pan dry.

Tofu and Bok Choy4

  • Return the pan to medium-high heat, add the remaining 1 tablespoon oil and heat until shimmering. Add the tofu in a single layer. Cook, without stirring, until starting to brown, 2 to 3 minutes. Stir and continue cooking, stirring frequently, until brown on all sides, 6 to 8 minutes more. Add the sauce; cook, stirring, until the tofu is well coated, 1 to 2 minutes.  Sprinkle with sesame seeds and serve with the bok choy over brown rice, if desired.

Tofu and Bok Choy2


Mango Margaritas & “Homemade” Tortilla Chips with Grilled Pineapple Salsa!

3

Margaritas2

TGIF! Cinco de Mayo is just around the corner and you know what that means – Margaritas! In the interest of having a good time research, my trusty pals and I decided to go in search of the new perfect margarita. Sure the lime margarita is delicious and traditional but why limit yourself? One click of the keyboard and a multitude of exotic possibilities lay before me-strawberry, blackberry, cucumber, pomegranate, cranberry, mango-avocado, papaya, hibiscus, watermelon and mint! Who knew there were so many? Obviously, a lot of research has already been done on this subject. Since we had fresh mango and pineapple in the refrigerator, we decided to start there.  After much testing and tasting we came up with a fabulous Mango Margarita, which is cool and refreshing with just the right amount of sweet-the perfect grownup dessert, like a mini vacation for your tastebuds. Take me away Calgon…

Crunchy, salty tortilla chips, warm from the oven, topped with spicy, smoky, sweet pineapple salsa are a perfect pairing for the ice-cold mango margaritas.  Sure it’s easy to just pick up a bag from the store (I do it all the time), but making them yourself out of good quality (non GMO) tortillas is so much tastier!  It’s easy too and only takes 15 minutes or so, depending on quantity.  Each 6 inch tortilla makes 6 chips, so do the math to figure out how many you need. (I would say 2 tortillas per person).  This is also a great use for stale or dried out tortillas, so don’t throw those out!  The grilled pineapple salsa is the creation of my son, Eric. Grilling the pineapple is pure genius!  It adds a nice smoky quality and softens the pineapple so that it picks up the other flavors nicely.  His version included habanero peppers and was delicious but pretty spicy (our lips were numb), so I have toned it down with mildly spicy jalapeno peppers.  If you like things super spicy (like my Dad) increase the amount of peppers or add spicier varieties.  This is also a good appetizer for my Fish Tacos, Chile Rellenos or Black Bean and Mango Salad with Avocado Ranch if you want to continue the Mexican theme.

Tips:   You can buy mango pre-cut but it’s very easy to do it yourself if you know the right technique.  How to cut a Mango.  If you like your margies really thick and frozen, you can buy frozen fruit or cut the fruit into chunks, lay them on parchment or waxed paper and freeze them for a half hour or so.  Using frozen fruit reduces the amount of ice you need, resulting in a thicker, fruitier beverage.

Mango Margaritas

  • Servings: 3-4
  • Difficulty: easy
  • Print

Margaritas5

2 cups ripe Mango, large dice
6 Tbsn fresh lime juice
1 Tbsn agave necter
4 ounces Tequila (100% agave blanco)
1-2 cups Ice

Margaritas3

  • Rub the cut side of a lime around the rim of the glass and dip the wet rim in salt. (Optional)
  • Add all the ingredients into the blender and blend until smooth. Add additional ice if a thicker drink is desired.

Margaritas1

  • Pour into prepared glasses.  Cheers!

Homemade Tortilla Chips

  • Servings: 72 tortilla chips
  • Difficulty: easy
  • Print

Margaritas4

12  6″ corn tortillas
1/3 cup vegetable oil(avocado, grapeseed or sunflower)
kosher or sea salt
  • Pre-heat oven to 375 degrees.
  • Brush tortillas with oil on both sides.  Place in a stack.

Margaritas7

  • Cut tortilla stack into 6 triangle shaped wedges.
  • Arrange the tortillas on a baking sheet in a single layer and bake  for about 6 minutes.

Margaritas6

  • Using tongs turn them over, sprinkle with a little salt, and bake for another 6 minutes..
  • Remove from the oven and let cool.

Spicy Grilled Pineapple Salsa

  • Servings: 1 1/2 cups
  • Difficulty: easy
  • Print

Margaritas8

1/4 whole pineapple, sliced into rounds
2 jalapenos, seeded and finely diced(or other hot pepper)
1 small shallot, finely diced
1/2 cup cherry tomatoes, diced
1 tsp fresh lime juice
salt and pepper to taste

mARGARITAS9 mARGARITAS10

  • Grill pineapple slices on a hot grill for several minutes on both sides and remove from heat.

margaritas12

  • Dice pineapple into small chunks

Margaritas11

  • Using gloves, finely mince jalapeno
  • Combine all ingredients.  Serve with chips. Ole!

Margaritas4

Meatless Monday – Coconut Ginger Quinoa

0

Coconut Ginger Quinoa8


Somehow 2013 came and went without my knowing that I was missing “The International Year of the Quinoa”  as officially  declared by The Food and Agricultural Organization of the United Nations. (The World’s Healthiest Foods)  I didn’t ‘discover’ quinoa until December, almost completely missing the superfood’s official year.  I’m on board now, though and always looking to include interesting seeds and grains in my diet.  Interestingly, Quinoa is not a grain but a seed (a Chenopod to be specific) related to  beetroot and spinach.  It is a complete protein and nutrient rich, including a source of calcium. Quinoa is gluten free and easier to digest than many other grains and pseudo-grains.

Coconut Ginger Quinoa is a flavor packed dish, the combination of onion, ginger and coconut providing a great balance of savory and sweet.  In addition to the quinoa, edamame and almonds give it a protein boost.  The apples and raisins add a natural sweetness and help make it kid friendly.  Younger kids might have fun shelling the edamame while you cook the quinoa.   This is a very forgiving dish that can be served warm or at room temperature, making it perfect for making ahead or bringing to a potluck. You can even make the quinoa ahead of time and assemble the ingredients at the last minute. Enjoy!

Coconut Ginger Quinoa

  • Servings: 4-6
  • Difficulty: easy
  • Print

2 tsp. coconut or olive oil
½ cup onion, chopped (optional)
2 Tbs. minced fresh ginger
1 cup quinoa
1 ½ cups vegetable broth

1/2 cup slivered or sliced almonds
1 cup edamame, shelled
1 medium apple, diced
1/4 cup raisins, currants or cranberries (optional)
1/2  cup unsweetened coconut flakes or shreds (I used half and half)
Dressing (optional):  1/2 cup olive oil, 1/4 cup red wine vinegar, 2 tsp honey
Coconut Ginger Quinoa3Coconut Ginger Quinoa9
  • Toast almonds in dry pan over medium heat for several minutes, or until fragrant and golden brown. Remove from heat and let cool. If you are using flake coconut, you can dry toast it as well for a nice nutty flavor.  Set aside.
  •  Sauté onion in oil 2 to 3 minutes, or until translucent.

Coconut Ginger Quinoa2

  •  Add vegetable broth, quinoa and ginger.  Simmer, covered for 15 to 20 minutes, or until all liquid is absorbed. (Note:  Rinse quinoa to remove any last remaining saponin, a naturally occurring but bitter covering.  If you don’t have a fine mesh strainer, just put quinoa in a bowl , fill with water and pour out as much water as possible without pouring out any quinoa.)
  •  Let partially cool and pour into a large serving bowl.

Coconut Ginger Quinoa4 Coconut Ginger Quinoa6

  • Shell the edamame and boil in salted water for 4  minutes. Drain.  (Or you can add the edamame to the quinoa for the last few minutes of cooking)
  • Add edamame, almonds, apple, raisins and coconut to quinoa and toss to mix. Salt to taste.  Drizzle with dressing if using. Serve warm or at room temperature.

Coconut Ginger Quinoa8


Making Preserved Lemons Plus Secret Bonus Recipe

1

Preserved Lemons11


Have you ever wondered what the secret ingredient is to so many  Middle Eastern dishes?  Well the cat’s out of the bag – it’s  lemon – and not just any lemon but Preserved Lemon.  Preserved lemons (preferably Meyer or Eureka with their thicker skins) rest in a heavily salted brine for at least a month which completely changes their character.  They still have a tart lemony flavor but the peel has lost it’s bitterness and has become soft and salty/sweet.  There is really nothing to compare it to. It has it’s own unique flavor.  Preserved lemon is the key ingredient in many Moroccan, Cambodian and Northern African dishes and is often combined with olives, cumin, ginger, turmeric and saffron to make an incredible base for almost any vegetable or protein.  It is also called lemon pickle,  country lemon or leems depending on where you are from.

What do you do with Preserved Lemon?  I remove the seeds and puree the whole lemon (peel and all) in a food processor to put in sauces and stews.  For a less intense flavor, you can cut them into quarters or slices and add them to dishes or chop just the rinds into small pieces.  The salty, lemony brine and lemon pulp is wonderful to add to sauces or salad dressings, so none of it goes to waste.

Preserved Lemons12

Preserved Lemons are very easy to make but you have to think ahead since they have to sit in their brine for a month or so. I have included instructions for making preserved lemons. They make a very unusual gift.  Just add a label and some ribbon.  Check out my Garden to Pantry Page” for more info on labels.  I have also included a link to Moroccan Recipes  which has many recipes that use preserved lemons so maybe it will get your creative juices going. I tried the ‘Moroccan Style Cauliflower” from this list  and loved it so decided to include that recipe on this post  as well.

Preserved Meyer Lemons

  • Servings: 1 jar
  • Difficulty: easy
  • Print

Preserved Lemons2

What you need:

Quart sized bell jar w/ lid
6-7 Meyer lemons (or Eureka)
1/2  Cup of Kosher salt

Directions:

• Sterilize jars In hot water bath or in the dishwasher. Air dry.
• Wash and dry lemons.

Preserved Lemons3 Preserved Lemons4
• Cut a lemon in half horizontally without cutting all the way through the skin (about 3/4 of the way through). Then cut vertically without cutting all the way through. You should still have a lemon in one piece with a deep criss-cross cut.
• Fill the inside of the lemon with as much salt as you can fit. This part is messy so I lay the lemon in a small bowl and pour the salt into the cut.  Then I pour back any salt that has fallen into the bowl

Preserved Lemons5
• Place the lemon in the bell jar, salt side up.
• Repeat with the rest of the lemons, pressing as many as will fit into the jar and allowing the lemons to be covered by lemon juice.  If your lemons don’t make enough juice to cover, wait a few days and trying pressing down on the lemons again.  Sometimes you can even fit another lemon in the jar and then muscle the lid on.

Preserved Lemons6 Preserved Lemons7Preserved Lemons9
• Cover with the lid and let sit at room temperature for four to six weeks. It will take the salt a few days to dissolve, so give it a gentle shake once a day until the brine is clear.
• To use the preserved lemons, you can use the either rind or the whole lemon (which has more flavor). Just remove the seeds, finely dice, or puree in a blender, and put in stews, sauces and salad dressings.
• Once the jar has been opened, it should be stored in the refrigerator.


Moroccan Style Cauliflower

  • Servings: 4-6
  • Difficulty: easy
  • Print


Preserved Lemons10

• 1 large head of cauliflower
• 1 1/2 teaspoons cumin
• 1 teaspoon ginger
• 1 teaspoon salt
• 1/2 teaspoon paprika
• 1/2 teaspoon turmeric
• black or cayenne pepper, to taste
• 1 onion, sliced or coarsely chopped
• 3 cloves garlic, finely chopped or pressed
• 1/4 to 1/3 cup olive oil
• 1 preserved lemon, quartered
• 1 handful red or violet olives
• 1/2 cup water
• 2 to 3 tablespoons chopped fresh cilantro
Preparation:
Break the cauliflower into small florets; wash and drain. Mix the cauliflower with the spices and set aside.
In a wide, deep skillet or Dutch oven, saute the onions and garlic in the olive oil over medium heat for just a few minutes. Add the cauliflower, preserved lemon, olives and water and bring to a simmer. Cover and cook for about 10 minutes, stirring gently once or twice, until the cauliflower is just tender. Continue cooking, uncovered, to reduce the liquids to oil only.
Sprinkle the fresh cilantro over the cauliflower and serve.


Click on the following link for more recipes that use preserved lemon: Moroccan Recipes

Wheatless Wednesday – Rancho La Puerta Granola

4

Granola6

‘THE RANCH’, as it is affectionately called by those people who are lucky enough to have been there, is one of my favorite places in the world. Rancho La Puerta, basking in the shadow of rugged Mount Kuchumaa in Baja California, is a fitness and wellness oasis, and gorgeous retreat. I went for the first time when I had three little boys at home. It was the first time I had left my kids to go on a trip by myself and my mother and father in law came to help my husband. It was quite liberating to not have to worry about anyone else for a whole week, a rarity for most moms.   I loved everything about The Ranch; getting up at 6am to do the Pilgrim hike before breakfast; going to pilates, yoga, then circuit training before lunch; pool-time, spa treatments and naptime restorative yoga before dinner. Ahh, what a day –every day for a week!

Rancho La Puerta1

What I loved best though is the food, which is ovo-lacto vegetarian, with small amounts of seafood. The wonderful food made me realize that I really like vegetarian food when it’s done this well. Meals are flavorful, healthful and creative. Most of the produce comes from Rancho Tres Estrellas, the 6-acre organic farm on the property which is available to visit.  Foodies take note, a wonderful cooking school rests in the center of the farm, La Cocina Que Canta (“The Kitchen That Sings!”) which also takes advantage of the fresh produce. Classes are available to Ranch guests.

la-cocina-entry

I have been back several times, with friends and by myself. Every day I was there, I did something I had never done before; Crystal Bowls (Sound Healing), Silent Dinner, Tai Chi or even a walk through the labyrinth. It’s a magical place and I can’t wait to go back, for both the experience and the food.  So I thought I would share their most requested recipe, Rancho La Puerta Granola (which I have been wanting to make for the last 10 years or so).  It is lower in fat and sugar than most recipes and truly delicious. Upon arrival at the San Diego airport, we were each given a baggie of granola for the bus ride to The Ranch and with just one mouthful we were all hooked.   As I recall a bag of granola was one of the most coveted prizes at Bingo night, (The Ranch is not known for its rocking nightlife, although Bingo night is legendary).

morninghike5

I stayed true to the recipe with the following exceptions.  I am allergic to canola oil (and no longer think its so great anyway) and substituted coconut oil which I melted in the microwave on low power.  I also used a coconut oil spray to coat the pan. I made this recipe twice since the first time it turned brown too fast as my oven was too hot.  The second time I had the oven at 250 degrees, as recommended, not 350. Note to self:  “Do not attempt to make a recipe for the first time without your reading glasses.  I would recommend using the top rack in the oven as the granola turns from golden to brown pretty quickly even at 250, so start watching at the 60 minute mark.

labyrinth_0

Enjoy your little bit of The Ranch!  Even better, share with friends!  Rancho La Puerta Granola makes great gifts.  One batch makes four cup and a half servings.  Just bag, label and tie with a ribbon. (Check out my Canning and Preserving Page for more info on labels).  Voila!  Hostess gifts solved.

PHOTOS OF RANCHO LA PUERTA REPRINTED WITH PERMISSION FROM RANCHO LA PUERTA Rancho La Puerta Website

Granola5

Rancho La Puerta Granola

  • Servings: 4
  • Difficulty: easy
  • Print

  • Vegetable oil spray
  • 3 cups old-fashioned rolled oats
  • ½ cup chopped almonds
  • ½ cup sunflower seeds
  • ¼ cup whole wheat flour (or a nut flour, like almond flour to make gluten free)
  • ¼ cup oat bran
  • 1 tablespoon ground cinnamon
  • ¾ teaspoon ground ginger
  • ¾ teaspoon ground cardamom
  • ¾ cup honey
  • ½ cup unsweetened unfiltered apple juice
  • 2 tablespoons vanilla extract
  • 2 teaspoons canola oil
  • 2 teaspoons grated orange zest
  • 2 tablespoons fresh orange juice (optional)

Instructions:

1. Preheat oven to 250ºF.
2. Lightly coat a baking sheet with vegetable oil spray. (I love an extra coconut flavor so I used a coconut oil spray).
3. In a large mixing bowl, combine the rolled oats, almonds, seeds, coconut, flour, oat bran, cinnamon, ginger and cardamom.

Granola4Granola3
4. In another bowl, whisk together the honey, apple juice, vanilla and oil until the honey is thoroughly incorporated. Add the orange zest and the orange juice if desired.

Granola2
5. Pour the wet ingredients over the dry ingredients and mix well. Spread the granola evenly over the baking sheet and bake about an hour and a half, checking and stirring every fifteen minutes.  Take care that the outside edges do not burn. When golden and dry, scrape onto a plate or cool baking sheet and set aside to cool.

Granola8

Store in an airtight container until ready to use.
Calories per serving: 25, 1 tablespoon per serving
Granola6

Meatless Monday – White Bean & Kale Dip

0

White Bean and Kale Dip4

Kale is the current ‘It’ food. We have Kale Chips, Kale Smoothies, Sauteed Kale and Kale salads. I guarantee if you show up at a party bearing anything with Kale, you will be heralded as a hip Foodanista.  I don’t want to knock kale, because it really is a nutritional powerhouse definitely worthy of being the star of the latest food fad. It’s not called ‘The Queen of Greens’ for nothing!   “One cup of chopped kale contains 33 calories and 9% of the daily value of calcium, 206% of vitamin A, 134% of vitamin C, and a whopping 684% of vitamin K. It is also a good source of minerals copper, potassium, iron, manganese, and phosphorus. (www.webmd.com)

Combine kale with white beans which are high in minerals, fiber and protein and you’ve got a snack worthy of superman. White Bean and Kale Dip combines some of my favorite flavors, white beans (cannellini), kale, cayenne, cumin, lemon, tahini and pine nuts and has none of the fattening creams or cheeses (which I love but am trying to cut back on).  The creaminess in this dip comes from the white beans, pine nuts and a bit of olive oil, all healthy and nutritious.  More importantly, it is delicious! If you are looking for a yummy but healthy appetizer, then this is for you.  I served it with pita crackers but its also great with carrots and other raw veggies.  You can also spread it on toasted bread and add a sprig of arugula and tomato. Yum!

white Bean and Kale Dip5

There are a surprising number of recipes out there for White Bean and Kale Dip (or perhaps not so surprising given kale’s goddess status).  Variations include walnuts or cashews instead of pine nuts and spinach instead of kale.  I would recommend Lacinato (Dinosaur) Kale, which is sweeter and less tough(chewy) than the curly type, for this recipe since we are using it raw. If you include nuts, I would recommend running them through the food processor or blender to make a fine powder before adding the other ingredients. You could probably also use an almond or cashew butter if you have it  instead.  Otherwise, this dip only takes a few minutes to put together but it needs at least an hour to chill in the refrigerator to firm up. I actually thought it tasted better the next day.  So time to jump on the Kale Bandwagon if you haven’t done so already!

White Bean and Kale Dip

  • Servings: 8
  • Difficulty: easy
  • Print

kale-1

1 can white cannellini beans,- drained and rinsed
1 cup kale, roughly chopped
1/4 cup flat leaf parsley
1/4 cup pine nuts (optional)
2 Tbsp tahini
2 cloves garlic
1/3 cup olive oil
2 Tbsn balsamic vinegar
2 tsp lemon juice (1/2 lemon)
Zest from ½ lemon
1 tsp cumin (optional)
 1/2 tsp black pepper
½ tsp cayenne (or more to taste)
Salt to taste
1/4 cup water, if needed

White Bean and Kale Dip

Directions:

  •  If you’re using nuts, process them into a fine powder in the food processor before adding the other ingredients.
  • Add the rest of the ingredients and blend until smooth. Add water if needed to blend ingredients.
  • Pour into a serving dish and chill in fridge for 1 hour or more.  It will thicken quite a bit and the flavors will meld.
  • Serve with crackers or raw veggies.

White Bean and Kale Dip4


Meatless Monday – Bow Ties with Broccoli Pesto

0


Broccoli Pesto4

Is it time to put away the roasted root vegetables and bring on the fresh herbs?  Well maybe not quite, but it’s feeling and looking more like spring.  The days are longer and new growth is peeking out from under last year’s dry brush.  Forget-Me-Knots and California Poppies adorn the hillsides and instantly make me feel happy.  Perhaps they are working in cahoots with Pharrell on his happiness project.  For those few who haven’t heard Pharrell’s “Happy” song (if that’s even possible) click here:  http://www.youtube.com/watch?v=y6Sxv-sUYtM  (Or maybe you just want to listen to it while you read the rest of this post which is fine because I listened to it while I was writing it).  More on the garden this Friday so gardeners stay tuned.

California PoppiesForget Me Knots

Spring Pasta Recipe:  My son, Dylan, loves pesto on pasta, pizza and sandwiches (and he just came home for spring break), so this Vegetarian Times  recipe for Broccoli Pesto caught my eye. I actually loved this pasta! I could stand at the kitchen counter and eat the pesto by the spoonful (and just maybe I did).  It’s delicious and simple.  It tastes like it has cheese and/or something creamy. but it is vegan and fairly low calorie.  I used pine nuts (instead of hazelnuts because I wanted a creamier sauce).  I left them raw for the pesto and dry toasted as a topping.  The combination of herbs, including fresh mint, make it taste spring fresh. The addition of broccoli is a nice twist which also ramps up the nutritional value of the meal. As a Superfood, broccoli is low in fat and calories (only 31 per cup), rich in vitamins, minerals, beneficial phytochemicals and a good source of fiber.  Somehow it doesn’t taste like broccoli so you  may be able to slip some extra veggies into someone you love.  My Carb-fearing husband had three portions!  I will definitely make Pasta with Broccoli Pesto again.  Store any leftover pesto in a container and pour a thin layer of olive oil on top to prevent it from turning brown.

Bow Ties with Broccoli Pesto

  • Servings: 4
  • Difficulty: easy
  • Print

Broccoli Peso1

Ingredients:

6 Tbsn hazelnuts, plus more for garnish (or pistachios/pine nuts)
2 cups broccoli florets
12 oz farfalle pasta (bowtie)
1 1/2 cups loosely packed parsley leaves
1/4 cup plus 2 Tbsn olive oil, plus more for drizzling
1/2 cup mint leaves
4 tsp lemon juice
1 1/2 tsp grated lemon zest
1 1/2 tsp capers, rinsed and drained
5 large garlic cloves, peeled


Directions:

  • Put large pot of salted water on to boil.
  • Toast hazelnuts (pine nuts) in dry skillet, 3 – 5 minutes, or until golden.  Let cool.
  • Add broccoli to boiling water and cook 2 to 3 minutes.  Remove broccoli with slotted spoon.
  • Add farfalle to broccoli water and cook according to package instructions

Broccoli Pesto3

  • Drain farfalle, reserving 1/4 cup cooking water.
  • Process nuts, broccoli, parsley, oil, mint, lemon juice, zest, capers and garlic in food processor or blender until smooth (Add some of the cooking water if it’s too thick).
  • Toss farfalle with pesto and reserved water (if needed).  Garnish with toasted nuts, sprinkle with salt and drizzle with olive oil(if desired).

Broccoli Pesto4


Wheatless Wednesday – Spicy Roasted Chickpeas

4

Roasted Garbanzos6

Warning – Highly Addictive! If you like Corn Nuts you’ve got to try these.   I got this recipe idea from my friend, Laura, who makes these snacks for her two teenaged boys, who gobble them up and ask for more without actually knowing what they are eating.  When they would first ask,  Laura’s answer was really vague (sudden attack of coughing) or evasive  (urgent phone call). She finally decided to call them Bean Pops. Clever Mama!  Regardless of the mommy maneuvering, she is getting her boys away from bad fat and preservative laden junk foods to protein and nutrient rich, yet still yummy chickpea snacks, or what I think of as healthy ‘corn nuts’ (if there can be such a thing).  Garbanzo beans are a source of several vitamins including vitamin C, B6 and folate. Many dietary minerals are also available from garbanzo beans, including manganese, phosphorus, copper, iron, magnesium, selenium, zinc and calcium. (www.livestrong.com )

Dieters take note!  ‘Furthermore, there is a recent study in which participants consumed fewer processed foods and less food overall when the diet was supplemented with garbanzo beans.  Research suggests that the fiber benefits of garbanzo beans may go beyond the fiber benefits of other foods’.  For more information on this study click here: http://www.whfoods.com/genpage.php?tname=foodspice&dbid=58

When I was a teenager, my Mom went through a garbanzo (also called chickpeas or ceci beans) phase where they showed repeatedly up in our salads and main dishes – even as flour in bread. (My Mom was way ahead of her time – by 25 years or so). I checked with my sister, Margaret, who also remembers the time when we had garbanzos coming out of our ears.  She admitted though that they are now her favorite bean and she puts them in everything she can, so I guess the apple doesn’t fall far from the tree.   I didn’t appreciate my Mom’s creativity at the time, especially since I wasn’t a garbanzo fan as a kid.  I am a huge fan now though (same apple tree, I guess).  I called my Mom to see what she had to say on the subject and she was about to start some garbanzo sprouts which nutritionally speaking is like garbanzos on steroids (increased vitamin content among a host of other benefits).  So there you go.  At 86, Mom  is still way ahead of everyone else!

Shameless PlugTIP: Spicy Roasted Chickpeas are particularly delicious when paired with a glass of red wine. I’m enjoying  the 2009 Paradisos Red Wine from my brother, Paul’s winery, Paradisos del Sol in Zillah, Washington.  It retails for $28 per bottle but if you mention my blog you will get the $14 family rate.  They deliver to Seattle too!  Check them out at http://www.paradisosdelsol.com/  Cheers!

Spicy Roasted Chickpeas

  • Servings: 3 cups
  • Difficulty: easy
  • Print

2 Tbsn olive oil
1 Tbsn ground cumin
1 tsp garlic powder
½ tsp chili powder
1 tsp salt (or to taste)
¼ tsp cayenne pepper (or more if you like spicy)
2 cans chickpeas/garbanzo beans (or 2 -3 cups cooked dry beans)

  • Preheat oven to 400  degrees
  • Rinse and dry garbanzo beans.  You can either air dry them on paper towels or pat dry with additional papertowels.

Roasted Garbanzos 1

  • Whisk the oil, cumin, garlic powder, chili powder, salt,  and red pepper together in a medium sized bowl.;

Roasted Garbanzos 2


  • Add the chickpeas and toss to coat.


Roasted Garbanzos 3

  •  Spread into a single layer on a baking sheet. Shake the pan back and forth a bit to disperse them evenly.

Roasted Garbanzos 4


  • Roast, stirring occasionally, until nicely browned and slightly crispy, about 40 to 45 minutes or until desired crispness.  They will continue to crisp a bit while cooling on the pan.


Roasted Garbanzos5

  •  Serve warm or cold.

Roasted Garbanzos6

Meatless Monday – Avocado Toast with Coconut ‘Bacon’

4

Avocado Toast 1

BACON – NEED I SAY MORE? I stopped eating meat last June and I must say I don’t really miss it. BACON, however, which really should be it’s own food group, is a different story… There is something about bacon’s crispy, fatty, salty deliciousness that is just so irresistible! I know people who are vegetarians, except for bacon.  I mean, there is a Bacon of the Month Club!   So when I stumbled upon a recipe for Sweet Smokey Coconut Bacon on Pintarest (via www.tohealthblog.wordpress.com ), I realized a stroke of brilliance was before me, bacon without the guilt.

I have been hooked on Avocado Toast for breakfast these past couple of weeks. I’ve been trying to recreate my favorite appetizer, Avocado Bruschetta, from Picco Restaurant in Larkspur, which has chorizo crumbled on top. I have been substituting dry toasted pine nuts and flakes of Maldon Sea Salt which I was pretty happy with -Until I heard about COCONUT BACON! I let my fingers do the walking (thank you google) only to find that there are many, many recipes for coconut bacon on the internet. How did I not know this? Two of my favorite flavors together sounds like a match made in heaven. The recipes call for varying combinations of coconut flakes, maple syrup, smoked paprika, cloves, Braggs Amino Acids, Liquid Smoke or Soy Sauce. For those, unenlightened folks like me, Braggs Amino Acids is a gluten free soy sauce substitute that has beneficial amino acids.  I tried one batch with liquid smoke and one without and I liked it better without, but that is a personal taste. I know a lot of men people love that smoky flavor .  So does it really taste like bacon?  Not really, but it makes a tasty substitute that is  mostly monosaturated fat and Omega-6 fatty acids, which are extremely beneficial for  the body.  For nutritional info on coconut click here:  (http://www.ehow.com/about_5304349_health-benefits-coconut-flakes.html)

Avocados have gotten a bad rap as a high fat, high calorie food when they  are actually quite healthy and are nutrient dense. (Calories that Count).   ‘Nutrient density is a measure of the amount of nutrients a food contains in comparison to the number of calories. One-fifth of a medium avocado (1 oz.) has 50 calories and contributes nearly 20 vitamins and minerals, making it a nutrient-dense food choice.  They are naturally sodium and cholesterol free and contain mono and poly unsaturated fats (good fats).’  For more information on the benefits of amazing avocados click here. (http://www.californiaavocado.com/avocado-nutrients/)

Avocado Toast 2Avocado Toast 3

Avocado Toast with Coconut 'Bacon'

  • Servings: 2
  • Difficulty: easy
  • Print


2 slices good bread (sourdough, ciabatta or whole grain )
1 Tbsn olive oil, coconut oil or butter (optional)
1 half ripe avocado
Salt (I like coarse or flaked sea salt)
2 Tbsn pine nuts (optional)
2 Tbsn coconut ‘bacon’ (recipe below)

  • Brush tops of bread with oil and broil for a few minutes until golden.  Or you can toast in a toaster and then brush with a bit of oil.
  • Dry roast pine nuts in a medium fry pan until golden.  Remove from heat.
  • Pit, peel and half avocado.  Slice.  Place half of slices on each piece of toast. Or you can ‘smash’ it on the toast with a fork.
  • Top with coconut bacon and pine nuts.  Sprinkle with salt.  Enjoy!

Coconut Bacon 5

Coconut ‘Bacon’

1 cup  coconut flakes
1 Tbsn liquid aminos (or soy sauce)
2 tsp liquid smoke (optional)
1 tsp maple syrup
1/2 tsp smoked paprika
4-6 cloves ground (or 1/4 tsp pre-ground cloves)
2 tsp  water
Coconut Bacon 1 Coconut Bacon 2
  • Mix the aminos, syrup, paprika, cloves, liquid smoke and water together in a bowl until well combined.  Gently stir in the coconut flakes, trying to coat them each thoroughly and soak up the liquid.  Let sit for 5 minutes, then stir again gently.

Coconut Bacon 3 Coconut Bacon 4

  • Preheat over to 300°F, then bake for 20 to 25 minutes.  Store them in a plastic bag or container.  Does not need to be refrigerated.

Coconut Bacon 5

Avocado Toast 1

[/recipe]

Meatless Monday – Farmer’s Market Pasta & Balsamic Marinated Beets

0

Farmers Market 17

Do you know where your food has been?  Do you care?  I finally got around to checking out the Farmer’s Market at Marin Country Mart in Larkspur (California) and I can’t believe it took me so long.  I have really been missing out! This is an open air market where you can buy gorgeous fresh vegetables, fruit, nuts, wild caught seafood, artisan cheeses, flowers and baked goods, all locally grown and crafted.

Farmers Market

While I perused the various stands, my husband stood in line at the Santa Rosa Seafood stand.

Farmers Market 5Farmers Market 11

It was a beautiful sunny day.   The only problem is that I had a terrible case of buyer indecision.  I wanted everything, even to grind my own flour!   Do I buy gluten free goodies from Flour Craft Bakery or Granola from Café Fanny?  Why didn’t I bring my knives which could really stand to be sharpened?  Why didn’t I learn to knit? (I almost bought the yarn anyway…)

Farmers Market 13 Farmers Market 12

This market is also a great family destination with live music, kid crafts and several hot food stands, including one that specializes in grilled cheese. Yum!  It’s open Saturdays from 9am to 2pm. Click here for a listing of vendors and schedule of events. (http://marincountrymart.com/farmers-market)

Farmers Market 27

Why buy local?
Buying locally-produced food is good for your body, for the earth, and for our local economy.  Because your food doesn’t travel long distances to get to you, it is more nutritious.  Fewer fossil fuels are used in distribution and shipping when you buy local.  Supporting GROWN LOCAL helps keep farming families in business and our dollars in our own communities. (www.buylocalmarin.org )

Farmers Market 26 Farmers Market 9

To find a farmer’s market in your area, check out the USDA National Farmers Market Directory, an interactive site with information on farmer’s markets all over the US.   (http://search.ams.usda.gov/farmersmarkets/)  Here is another great (and more complete) source for finding farmer’s markets, , family farms, and other sources of sustainably grown food in your area http://www.localharvest.org/.

Farmers Market 6 Farmers Market 7

So what did we end up with?  My husband came home with two kinds of oysters (which I will get to on Wednesday so oyster lovers stay tuned).  After much agonizing, I bought a gorgeous bunch of multi-colored beets, purple asparagus (which I couldn’t resist because of the color) and a bag of mixed greens (chard, kale, mustard and a few I don’t recognize).  I also bought Devil’s Gulch cheese from Cowgirl Creamery and Fig and Black Sesame Jam from Blue Chair Farms which made an excellent and simple appetizer.  Just add crackers.

Farmers Market 25I didn’t have any particular dish in mind when I selected these vegetables.  I was buying purely with my senses and allowed myself to be seduced by their glorious colors.  Once home I decided to make a winter version of pasta primavera and serve roasted, marinated beets on the side.  The resulting dish was very colorful and delicious!  Plus I could feel good knowing I was supporting some local hardworking folks.

Farmers Market 4

Fusilli with Braised Greens and Asparagus

  • Servings: 4
  • Difficulty: easy
  • Print

Fusilli with Braised Greens and Asparagus

3/4 pound whole-wheat fusilli
4-6 cups mixed greens (chard, kale, etc), chopped and rinsed
1 bunch asparagus, sliced into 1 or 2 inch pieces
1/3 cup pine nuts
2 tablespoons olive oil (or a combination of butter and olive oil)
4 sliced garlic cloves
1/4 teaspoon red chile flakes
1/2 teaspoon kosher salt
1/2 cup vegetable broth
Freshly shredded parmesan cheese (optional)
Farmers Market 21Farmers Market 22
  • Cook pasta as package directs. Drain and set aside.
  • If your pine nuts are not toasted, heat them in a dry pan over medium heat for a few minutes.  Set aside.
  • Add oil to pan, add garlic and chile flakes.  Cook stirring until fragrant, about a minute.
  • Add asparagus and salt. Cook for a minute or two.
  • Add greens and broth.  Cover and cook until greens are tender, about 5 minutes, stirring several times.
  • Stir in pasta and pine nuts.
  • Top with parmesan cheese (optional)

Farmers Market 24

Balsamic Marinated Beets

  • Servings: 2-4
  • Difficulty: easy
  • Print

Balsamic Marinated Beets

small bunch of beets
1-2 Tbsn olive oil
1 orange (optional)
Marinade/Dressing(see directions below)
Farmers Market 19 Farmers Market 20
  • Cut tops off of beets taking care not to cut into beet.  Leave skin and tails intact.  Wash, dry and place beets in a baking dish (or a large piece of aluminum foil).  Drizzle with olive oil.  Cover with foil and cook for about an hour at 425 degrees.  Larger beets might take longer.  They should be easy to slice with a knife. 
  • Remove from heat and let cool.  Skins will come off easily.  Use a papertowel to keep your hands from getting red.
  • Peel orange and slice crosswise into thick slices.  Section into triangles.
  • Slice beets.  You can marinate them for 30 minutes or overnight, or you can arrange them on a plate, top with orange sections and drizzle with balsamic dressing.

Marinade:  Combine 1/4 cup balsamic vinegar, 1/4 cup red wine vinegar, 1/4 cup olive oil, 1 minced shallot, salt and pepper.

Wheatless Wednesday – Mushroom & Barley Soup with Cannelini Beans

1

Mushroom Barley Soup 1

Is Barley the smarter but less popular sister? Back in Medieval times barley was widely consumed and was one of the first grains cultivated by humans. Barley beer was thought to be one of the first alcoholic drinks developed by Neolithic humans. (Yes, that long ago)  Barley later on was used as currency which makes me think it was pretty important back then. (Wikipedia)  Barley is a nutritional powerhouse.  According to the FDA, barley’s soluble fiber reduces the risk of coronary heart disease and can lower cholesterol. Barley also contains insoluble fiber, which reduces the risk of Type 2 diabetes and colon cancer. Barley is virtually fat-free, cholesterol-free and gluten free.  Who knew our ancestors were so smart?

Did you know that barley is the number 4 produced grain in the US (behind wheat, rice and corn)? It is grown in more than half of US states, so why is barley not thought of as a regular rice, potato, wheat option at our dinner table?    Where is it going?  According to the Barley Growers Association  over half of barley goes to feed animals sold for food, 44% is made into malt for beer and whisky, 3% is for seed and just 2% is food for humans.  I guess we are more likely to be drinking our barley than eating it.

I admit that I’m guilty.  I have never made anything with barley.  My son and creative chef, Eric, who knows I have a new-found quest to seek out wheat free options, suggested I make a version of his barley soup (and  I just happened to have a package of Black Barley in my pantry that I didn’t know what to do with). Now that California is finally getting our winter (read seven days in a row of much needed rain) the thought of a big pot of soup bubbling away in my kitchen sounds pretty appealing.  It warms up your house and your heart from the inside out.

Black barley is a whole grain that has been prized for generations in Ethiopia. It has a chewy texture and dark purplish black appearance. It can also take 3 or 4 hours to cook so be forwarned.  Pearl barley, which is the variety typically found in supermarkets, is processed to remove some of the outer bran layer, but unlike with processed rice which has lost most of it’s food value, barley retains significant amounts of fiber and nutrients because the fiber in barley is located throughout the entire kernel and not just in the outer layer. Pearl barley cooks in about 30 to 40 minutes. I have also heard that there is a fast cooking barley but I don’t know where you can get it.  Regardless of which kind you use, follow the cooking instructions on the package and then incorporate it into the recipe.  You can substitute any bean or legume for the cannellini beans which adds a little protein boost. I think Eric often uses lentils which sounds like a good combination.  Feel free to use beer instead of sherry for twice the barley power. Stay warm and dry…
BarleyLarge2

Mushroom and Barley Soup with Cannelini Beans

  • Servings: 4-6
  • Difficulty: easy
  • Print

1 cup barley, black, pearled or quick cooking
1 cup cannellini beans, cooked
1 Tbsn olive oil
1 small or 1/2 large onion, diced
1 garlic clove, minced
1 large carrot, chopped
1 small zucchini, chopped
10 ounces sliced mushrooms, any kind
1/2 tsp dried thyme
1 tsp dried oregano
1 quart vegetable broth
2 tbsp dry sherry
  • Rinse barley to remove any lingering dust or debris and cook according to directions, as different types of barley require varying cooking times.
  • Heat oil in a soup pot or Dutch oven. Cook onion, garlic and carrots on medium heat until softened
  • Add dried herbs, vegetable broth, beans, barley, sherry, zucchini and mushrooms and simmer for about 20 minutes.
  • Salt and pepper to taste.

.

Orange-Kissed Seed Crackers with Red Pepper & Rosemary Spread

8

Seed crackers10

I was saved from a Cambazola guilt trip a few days ago when my dog ate almost an entire wedge on the way home from the store. I can’t really blame her as it fell out of the bag as I turned the corner and landed at her feet. I’m sure she couldn’t believe her luck -like manna from heaven! Of course, I had to find something else to serve our guests, but it meant I didn’t get any either.

seeds1

When it comes to appetizers I am a cheese and crackers girl. I will walk straight by the fancy hors d ‘Oeuvres and head right to the cheese platter, especially if it includes Cambazola or some other soft, aromatic (read stinky) cheese or spread. I may hang out at the veggie platter for a while too but I have been known to make crackers with cheese or dip most, if not all of my dinner. Unfortunately, cheese, while delicious, is pretty fat laden and high calorie (especially if you can’t step away from the table) and crackers don’t usually add much nutrition. Knowing my weakness, I am always looking for a healthier alternative and I think I’ve found one!

While perusing the ‘Vegetarian Everyday’ cookbook by Frankiel and Vindahl, I stumbled upon the Orange-Kissed Seed Crackers. The photo was beautiful and the name, oh so cute. They are gluten free and nut free multi-seed crackers that are really good for you. You can use amaranth, quinoa or almond flour, all of which are highly nutritious and make a good cracker base. Three pages later I spotted the Red Pepper & Rosemary Spread, gorgeous orange-red in color, made from roasted red peppers and sunflower seeds with a bit of spice from cayenne pepper and fresh rosemary. This spread uses no oil and gets it’s creaminess from blending the peppers in a food processor with sunflower seeds. The combination of these two is pretty addictive, although the crackers would be pretty good with Cambazola too. 🙂

seed crackers2

The cracker recipe calls for many seeds that I have never used and I wasn’t sure how easy they would be to find. I didn’t find hemp seeds so substituted poppy seeds but I’m sure other seeds can be substituted as long as the total quantity is the same. Here is the rundown on what each seed has to offer from a nutritional standpoint.  Flax seeds are rich in omega-3 fatty acids, fiber, zinc, iron, calcium, and Vitamin E. Pumpkin seeds, also known as pepitas, are chock full of magnesium, manganese, phosphorus, tryptophan, and iron. They’re also a good source of copper, zinc, and Vitamin K. Sesame seeds are loaded with copper and manganese, and also have plenty of calcium, magnesium, tryptophan, and iron. Sunflower seeds are a tremendous source of Vitamin E and are also rich in Vitamin B1.  Hemp seeds are rich in protein, calcium, fiber, and omega-3 fatty acids. (www.qualityhealth.com).  Throw in quinoa flour and you’ve got a grain free, gluten free, protein and vitamin packed and very savory cracker you can gobble up guilt free.  You may not even have to make dinner…

Seed crackers11

Orange-Kissed Seed Crackers

1/2 cup sunflower seeds
1/2 cup sesame seeds
1/2 cup flax seeds, ground
1/2 cup hemp seeds
scant 1 cup amaranth, quinoa or almond flour
1 1/2 tsp sea salt
1/4 cup olive oil
2 Tbsn freshly squeezed orange juice (optional)
1 Tbsn honey or maple syrup(optional)

  • Preheat oven to 300 degrees
  • Combine all the seeds in a medium bowl.  Scoop out about a quarter of them and reserve for the topping.

Seed crackers3

  • Add flour, salt and olive oil with 1 1/4 cups water and stir to combine.  It should be loose.  Add more water if it seems thick.  It will evaporate during cooking.
  • Line 2 12 x 24 in. baking sheets with parchment paper.  Pour half the batter over the paper onto each pan and use a spatula to spread the batter as thinly as you can.

Seed crackers4Seeds7

  • Bake for 25 minutes.
  • Whisk together the honey and orange juice (if desired) in a small bowl.
  • Remove the baking sheet from the oven and brush the cracker with the glaze and sprinkle with the reserved seeds
  • Cut into 2 inch pieces and bake for 30 minutes more or until they are crunchy.
  • Cool on a wire rack.

NOTE:  I followed the recipe pretty closely but next time I would add a bit more maple syrup or honey to make the seeds stick better.   I will also try another type of flour with a less earthy taste and sprinkle some  coarse or flaked sea salt on top as well.

Seed crackers8

Red Pepper & Rosemary Spread

3 large red  bell peppers, halved and seeded
2/3 cup sunflower seeds
pinch of cayenne pepper
sea salt
juice of 1/2 lemon
2 sprigs of rosemary
 Seed crackers5 Seed crackers6
  • Roast the peppers on a baking sheet and roast for about 40 minutes, or until slightly charred.  Remove from the oven and leave to cool.
  • Meanwhile, toast the sunflower seeds, cayenne and salt in a dry frying pan over medium heat for a few minutes.
  • When the peppers have cooled, peel away the skin and roughly chop.
  • Place all ingredients in a food processor or blender and puree until smooth.  Adjust seasoning if necessary.
  • Will keep in an airtight container for 2 weeks.

NOTE:  You can also roast the peppers on broil or on the grill.  They peel more easily if you put them in a paper bag while they cool.

Meatless Monday-Warm Lentil Salad with Roasted Squash & Shaved Brussels Sprouts

2

lentils1

Is it really still winter?  You would never know it by the sun shining outside on this beautiful morning. (Sorry my East Coast friends…)  I’m still hoping for more than four days of rain before I will admit to Spring. Days are still short though,so there isl a chill to the air by dinnertime calling for hearty dishes to fill the belly.   Winter vegetables like gorgeous butternut squash and Brussels sprouts are abundant and so delicious!  Each one of these dishes is great on its own but combine them with lentils and you’ve got a winner.

I am pretty passionate about lentils.  They come in many colors and sizes and I love them all.  Brown and red lentils are great in soups and stews but my absolute favorite is the French green lentil (Le Puy) which is considered the top dog in the lentil world.  Lentils are actually named for their lens shape (Lens culinaris) and green lentils maintain this shape when cooked which is why they don’t get mushy.   Green lentils are delicious  and can transform a salad or side dish into a protein packed meal.   Lentils have the third highest amount of protein of any legume or nut (after soybeans and hemp) and contain dietary fiber, vitamins and minerals, including iron. For this recipe I added roasted red pepper which gives the lentils a distinctive flavor.  Roasting peppers is very easy but in a pinch you can also buy them in jars already roasted.  They can be roasted in the oven on high heat, on your grill or over an open flame on your stove.  I just put the whole pepper on the lowest rack in my oven while preheating it for the squash and turned it every 5 minutes or so to char on all four sides.  Then let it cool in a paper bag and the skin slips off really easily.  Tossing the lentils in vinaigrette is the final touch and gives you a chance to add fresh herbs and spices.

Butternut squash is another versatile and nutrient rich food.  It can be roasted, mashed, stuffed, pureed and baked into muffins and casseroles.  My favorite way to prepare squash is very simple, drizzled with olive oil and roasted with salt and pepper.  Sometimes I splash a bit of balsamic vinegar over it before cooking to intensify the gorgeous orange color and bring out its natural sweetness.

My husband loves Brussels sprouts and I am always looking for new ways to prepare them. Right now they are in season so its a good time to add them into your diet if you haven’t already.   Brussels sprouts are another food powerhouse, in the cruciferous family like broccoli and kale. They contain sulforaphane which is believed to have anticancer properties and indole-3-carbinol which boosts DNA repair and is thought to block the growth of cancer cells.  Boiling Brussels sprouts somewhat lessens their cancer fighting potency (probably the good stuff gets thrown out with the water) but roasting and sautéing does not.  (Wikipedia)  In this dish, I have paired them with sliced shallots, garlic and toasted pumpkin seeds for a tasty and pretty dish.

Warm Lentil Salad

  • Servings: 6
  • Difficulty: easy
  • Print

1 cup green lentils
2 1/2 cups vegetable broth
1 red bell pepper or  4 oz jar roasted red peppers
2 tablespoons coarsely chopped fresh cilantro
1 shallot, finely diced
1 clove garlic, chopped fine
1/2 teaspoon ground cumin
1 Tbsn red wine vinegar
1 tsp balsamic vinegar
1/2 tsp dry mustard
3 tablespoons extra virgin olive oil
Salt and pepper to taste
2 Tbsn crumbled feta(optional)
Lentils11
  • Roast whole red pepper in a hot oven or over an open flame turning to char all four sides.  Put in a paper bag and let cool.  Remove peel and seeds.  Cut into small dice.

Lentils6Lentils4Lentils3

  • Saute shallot and garlic in 1 tablespoon oil.  Add vegetable broth and lentils and  simmer lentils 15 or 20 minutes, or until just soft but not mushy. Set aside with lid off to stop the cooking process.
  •  To make vinaigrette, combine red wine vinegar, balsamic, 2 tablespoons olive oil,, garlic, mustard and cumin in a medium bowl with a fork or whisk. Season with salt and pepper to taste.
  •  Place the lentils, peppers and cilantro in a medium bowl.
  •  Toss with vinaigrette and top with feta if desired.

Lentils10

Roasted Butternut Squash with Cumin and Balsamic

1 butternut squash
2 Tbsn olive oil
1-2 Tbsn balsamic vinegar
1/2 tsp cumin
salt and pepper to taste
Lentils9
  • Peel and seed squash.  Sometimes this is easier if you cut it in half and then crosswise in  half again. Cut into 1 inch dice.
  • Place in a glass pan and drizzle with olive oil.  Sprinkle with cumin, salt and pepper and a splash of balsamic vinegar.
  • Roast in a 400 degree oven for about 30 minutes, stirring several times, until soft.

Lentils7

Shaved Brussels Sprouts and Shallot Saute

  • Servings: 4
  • Difficulty: easy
  • Print

1 3/4 pounds brussels sprouts
2 tablespoons butter
3 tablespoons olive oil
12 medium shallots, thinly sliced (about 2 cups)
6 garlic cloves, thinly sliced
4 tablespoons pine nuts or pepitas (shelled pumpkin seeds)
2 tablespoons fresh lemon juice
  • Thinly slice brussels sprouts into circles.  Easiest done with a food processor or mandolin. Don’t worry if you end up with some loose pieces.
  • Roast pine nuts or pepitas in a small dry pan for several minutes until they turn golden.  Remove from heat and set aside.
  • Saute shallots in butter and olive oil in large pan over medium heat.  about 3 minutes. Add garlic and cook 1 minute.
  • Increase heat to medium high and add brussels sprouts, sauté until tender, about 8 minutes.
  • Add pine nuts and lemon juice.  Season with salt and pepper to taste.  Serve warm.

Lentils2