Meatless Monday – Mushroom Pappardelle with Braised Greens

0

Mushroom Pappardelle8

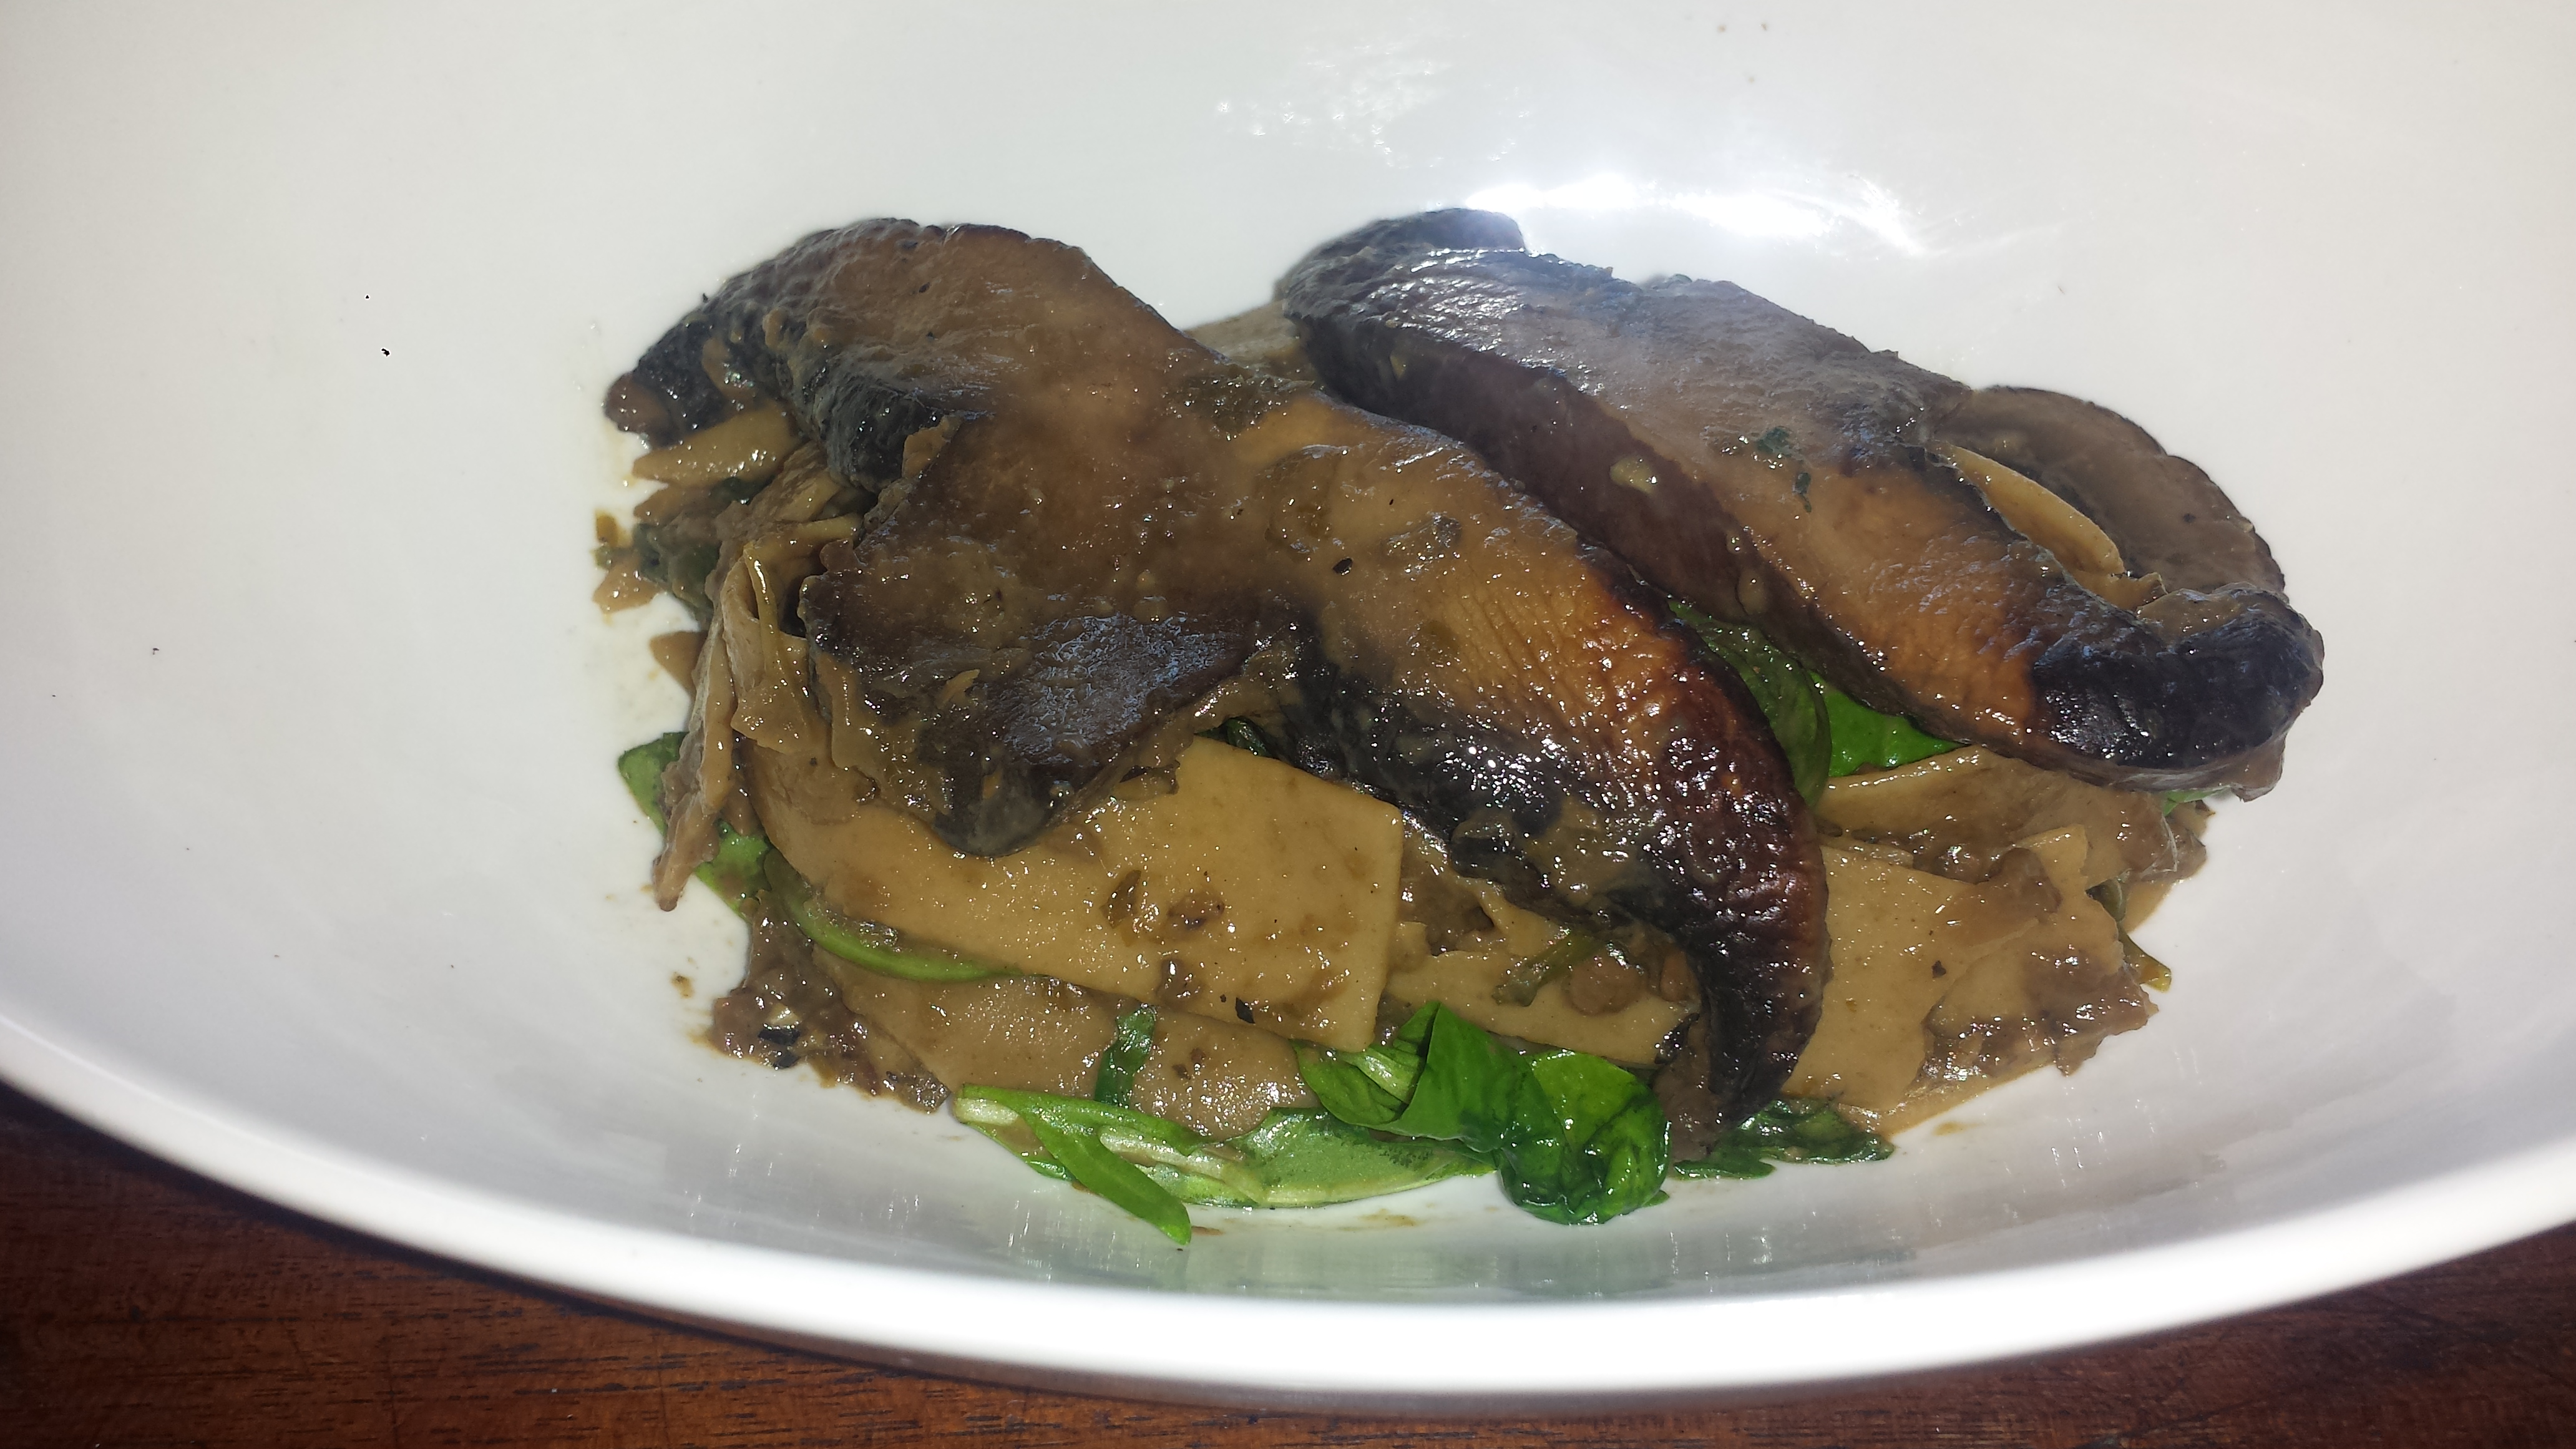
Calling all Mushroom Lovers!  This one is for you (of course I had to choose between mushrooms and wild boar-more on that later).  I am an official blogger for the Meatless Monday website, as you can see by the cute logo on my sidebar.  The Meatless Monday campaign is working with the Mushroom Council and looking for recipes that substitute mushrooms in traditional meat dishes for their ‘Swap it Out’ contest.  I have already done a Portobello Mushroom Stuffed with Eggplant and Gorgonzola which was pretty tasty but I wanted to come up with something new.  Then I was perusing the pasta aisle and came across  a box of Pappardelle, a California product by Community Grains using 100% whole grain hard amber durum.  Perhaps I got sucked in by the packaging which states that it is “stone milled on a granite wheel”.  That sounds really labor intensive, and almost reminiscent of the Flintstones and their really cool stone age car and gadgets (Yabba Dabba Doo!) so it must be great, right?  I also loved the Tip on the package, “Pasta water should taste like the ocean.”  I had never heard that before, but now I know what I’m aiming for.  So I bought the pappardelle- and it was delicious!  The pasta had great texture and the sauce clung to the surface ensuring that every bite was flavorful.  It is also nice to know that they mill 100% of the grain, the germ, bran and endosperm all together instead of milling them separately and adding them back together (reconstituted), which is more common.  I’m kind of liking the re-emergence of the old tried and true, dare I say Stone Age, methods.

Mushroom Pappardelle6

Pappardelle are large, very broad, flat pasta noodles, similar to wide fettuccine (about the width of a finger). The name derives from the verb “pappare”, to gobble up (in Italian).  I would say this is an appropriate name, since I found myself doing just that with this yummy dish!  Pappardelle is usually topped with heavy sauces that include game like rabbit, duck and wild boar, however, for Meatless Monday, I chose to use the “meaty” mushroom, Portobello, as a stand in for wild boar.  I marinated them first, then seared them on high heat to intensify their flavor before adding them to the sauce.  I also included dried Porcini mushrooms along with garlic, herbs and shallots to give the sauce an earthy and rich flavor.  I threw in a few fresh Criminis for a wonderful mushroom trifecta!  I love braised greens and threw in a few handfuls of arugula and spinach, which really help lighten up a heavy sauce.   We tend to stay away from creamy sauces in our house, as my husband is not a fan, however, sour cream or plain yogurt can be added to this sauce if you crave rich and creamy.

Mushroom Pappardelle1

Of course you have to be a big fan of mushrooms to enjoy this dish, but if you are, lucky you!   ‘Mushrooms are a good source of Vitamin B, potassium and selenium and the only plant based source of Vitamin D.  Low calorie, fat free and gluten free, they have a great nutrient value at little cost.  In addition, mushrooms help satisfy our desire for Umami, which is the fifth basic taste after sweet, salty, bitter and sour. Derived from the Japanese word umai, meaning “delicious,” umami (pronounced oo-MAH-mee) is described as a savory, brothy, rich or meaty taste sensation. It’s a satisfying sense of deep, complete flavor, balancing savory flavors and full-bodied taste with distinctive qualities of aroma and mouthfeel.  The more umami present in food, the more flavorful it will be. All mushrooms are a rich source of umami and the darker the mushroom the more umami it contains.’ – See more at: http://mushroominfo.com/benefits/#sthash.NbUzgRtx.dpuf

So next time you plan to serve pasta with Wild Boar  meat, try a few mushrooms instead…

Mushroom Pappardelle with Braised Greens

  • Servings: 4
  • Difficulty: easy
  • Print

Mushroom Pappardelle8

3 large Portobello mushrooms, sliced
6-8 crimini mushrooms, sliced
2-3 cups vegetable broth
¼ cup dried porcini or mixed mushrooms(about 6 oz)
1/4  cup roughly chopped parsley
3 fresh sage leaves
3 cloves garlic, peeled
3 shallots or 1 small onion, roughly chopped
¼ cup olive oil
1/2 tsp salt(depending on the saltiness of the broth)
1/4 tsp black pepper (or more to taste)
½ cup dry white wine
2 cups fresh spinach, arugula or other dark leafy greens
8 oz. fresh or dried pappardelle (about 3/4 box)
½ cup grated parmesan(optional)
 
Mushroom Pappardelle2
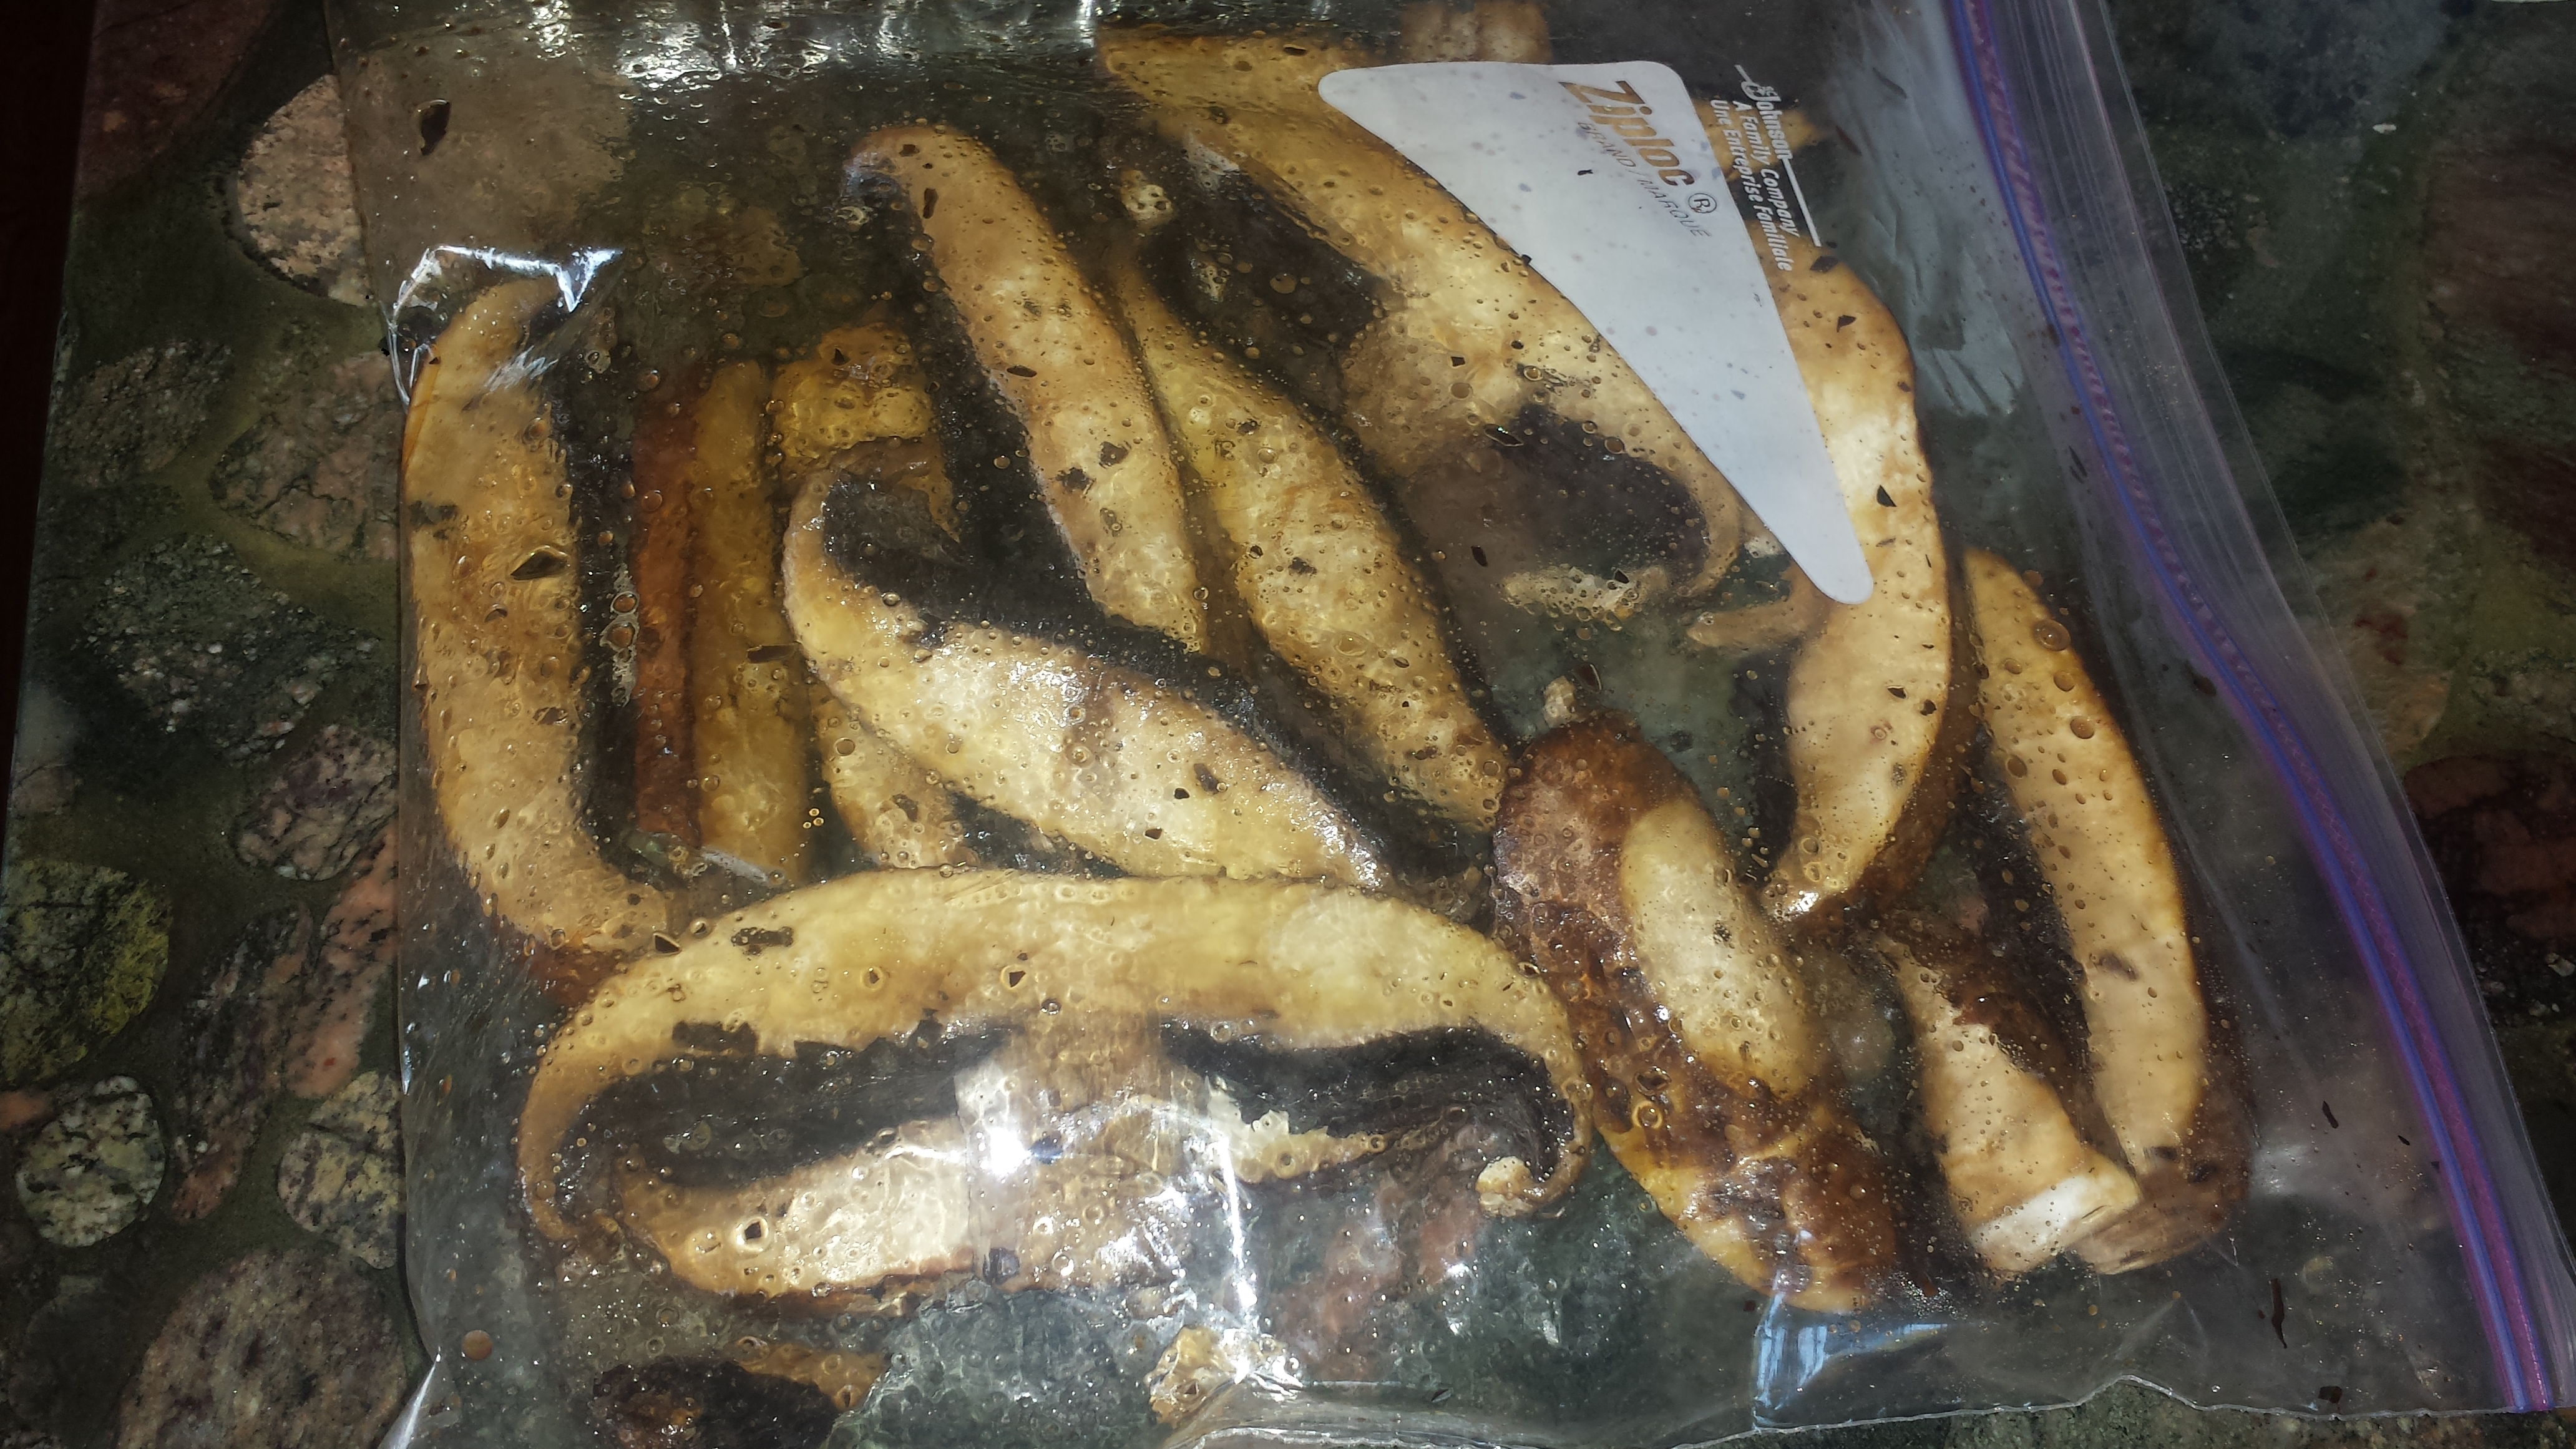
  • Marinate the sliced, fresh mushrooms in 1-2 Tablespoons olive oil, 1 Tablespoons red wine vinegar, 1 teaspoon balsamic vinegar, pinch of Italian seasoning, salt and pepper (a zip lock baggie works great) and let rest.  The marinade should coat all pieces but they shouldn’t be swimming in liquid.
 Mushroom Pappardelle3
  • Pour 1 cup boiling water over dried mushrooms and let sit until soft, about 20 minutes.  Remove mushrooms with a slotted spoon and strain mushroom liquid to remove any sediment.  Reserve liquid.
  • In a food processor (or by hand) finely dice parsley, sage, garlic and shallots in a food processor until smooth; set aside.  Finely dice reconstituted mushrooms.

Mushroom Pappardelle4

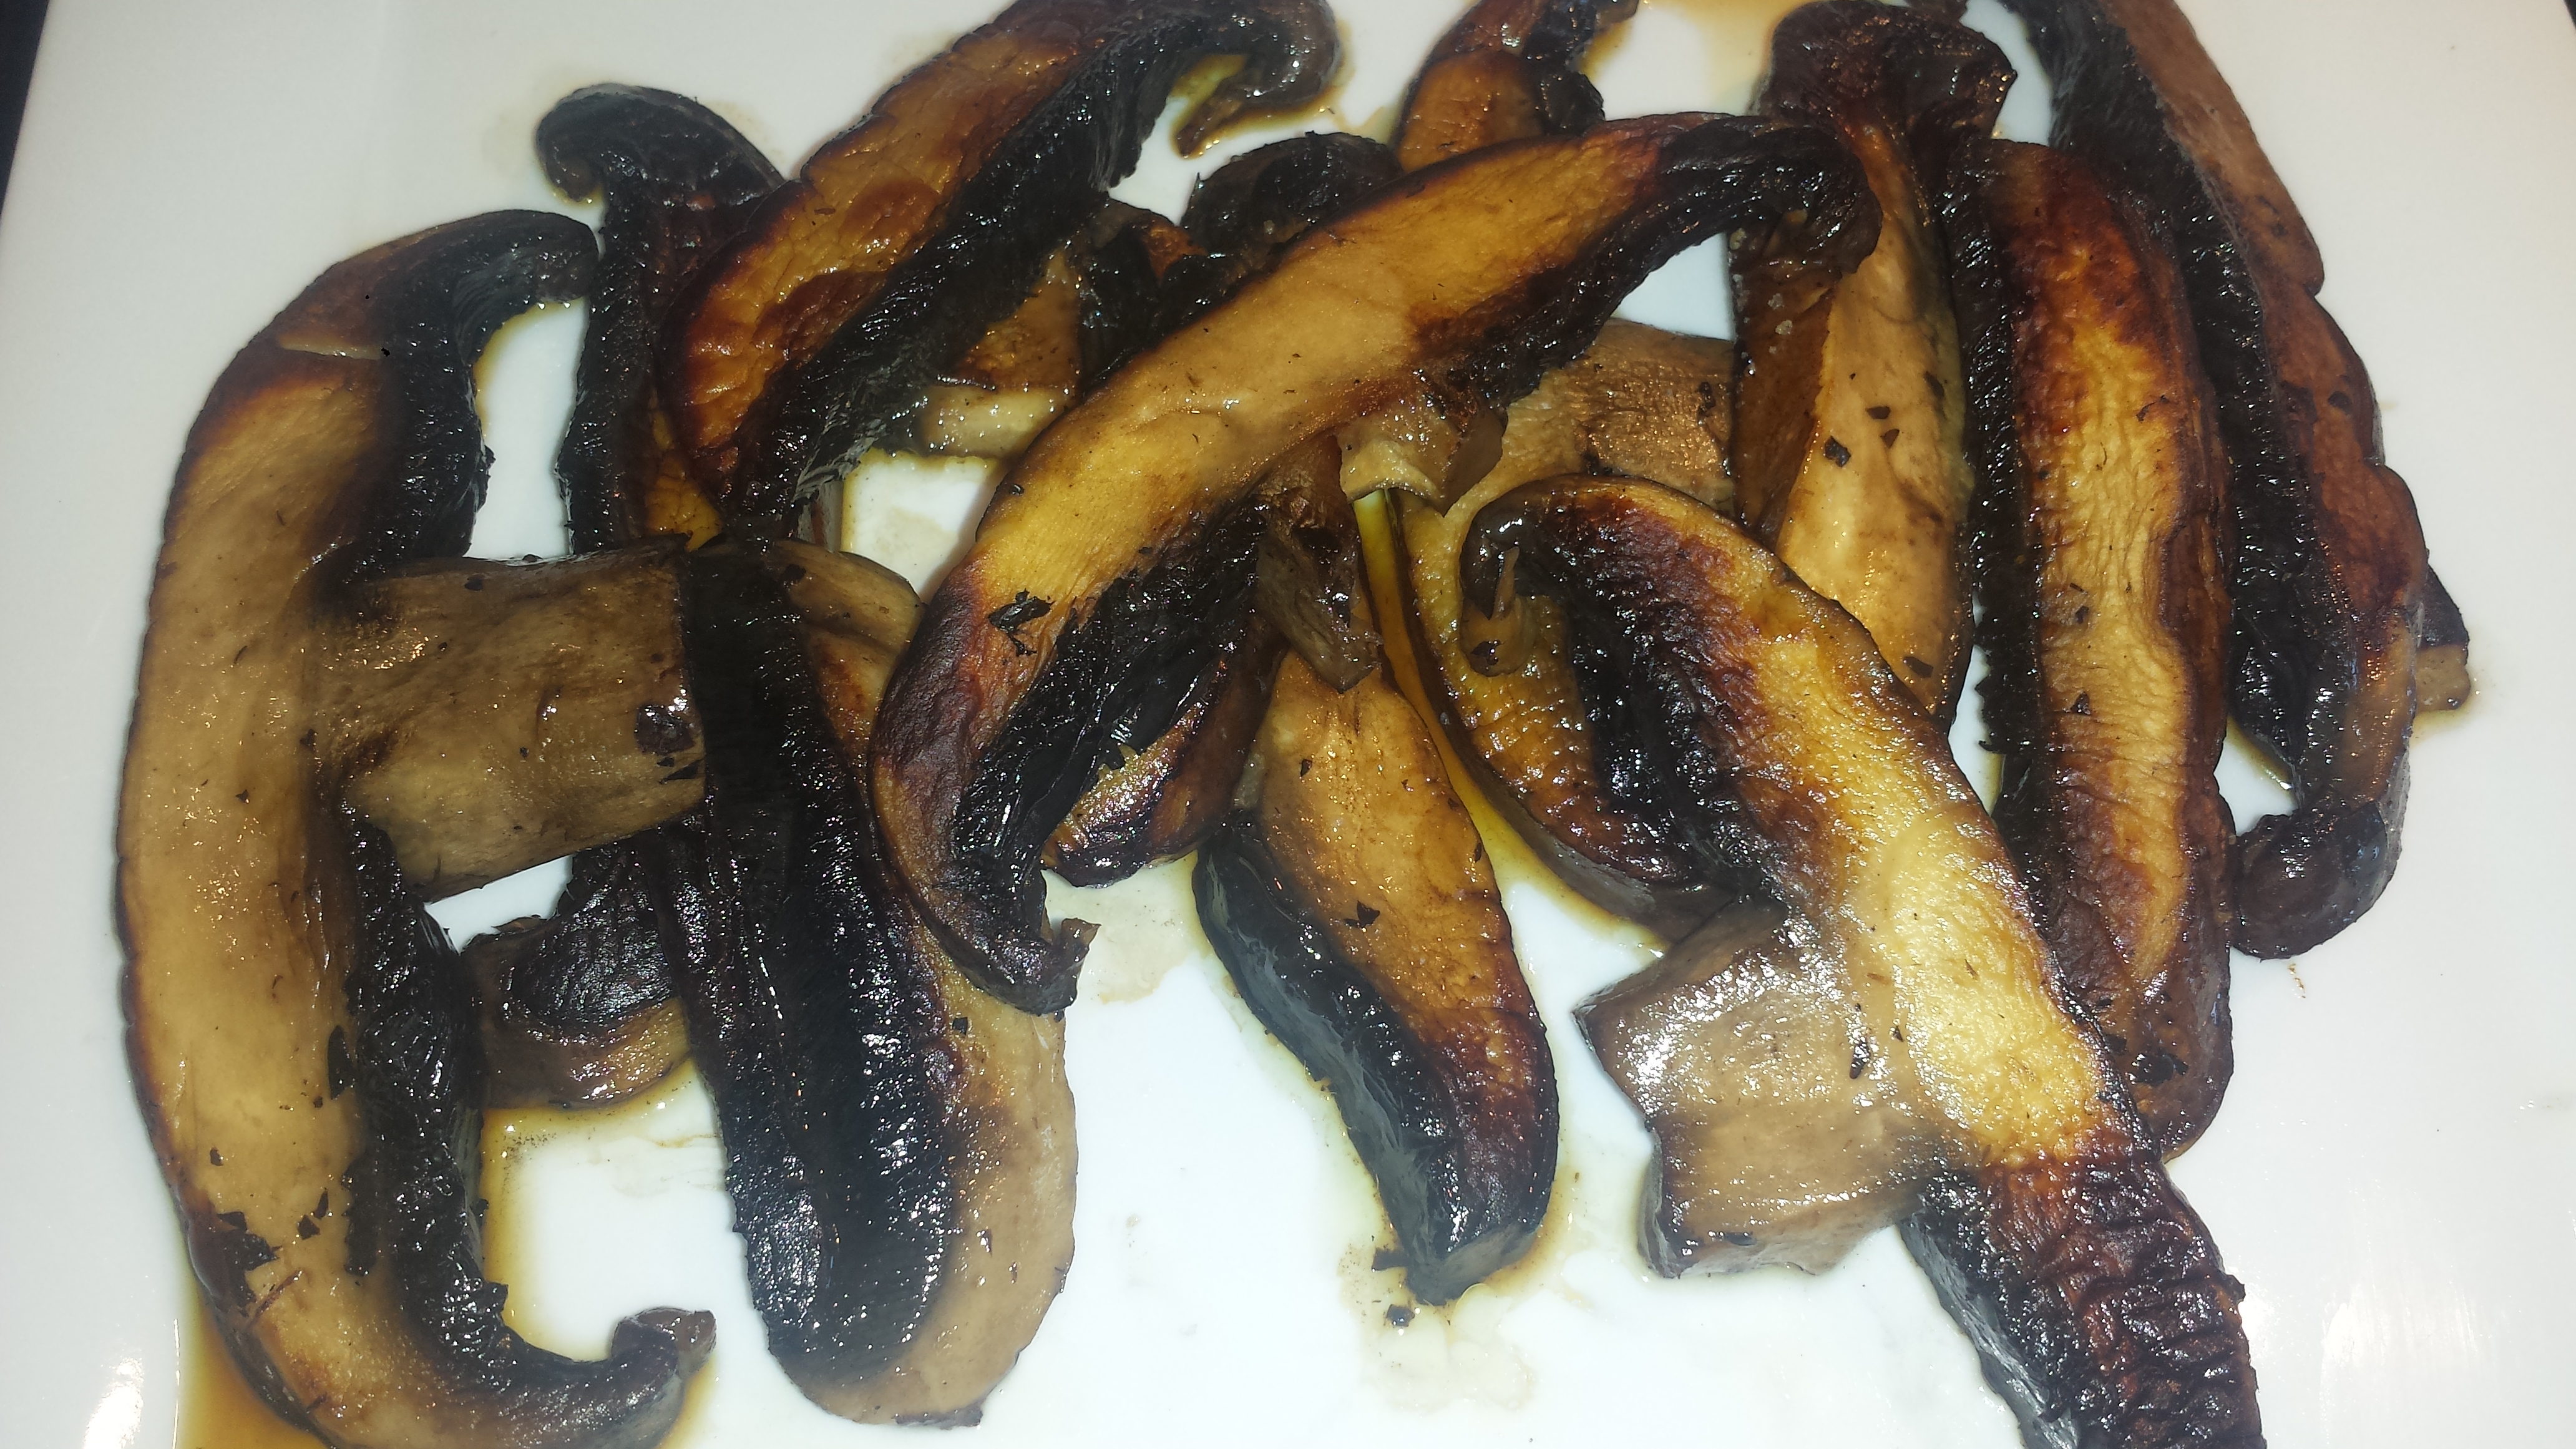
  • Heat 1 Tbsp oil in a skillet(preferably cast iron) on medium high heat.  Sear/brown fresh mushrooms one layer at a time and turn to brown the other side.  Remove  and set aside.
  • Saute vegetable purée in about 2 Tablespoons oil, stirring occasionally, for 5 -6 minutes.  Stir in diced mushrooms.
  • Add wine, broth and mushroom liquid and cook, until almost completely reduced, about 10- 15 minutes.
  • Cook pasta in salted boiling water according to package instructions. Drain pasta; add to sauce
  • Stir in greens and let wilt.
  • Add seared mushrooms and half the parmesan ( if using) and toss to combine.
  • Transfer pasta to a serving dish; garnish with finely chopped parsley and remaining parmesan.
 VARIATIONS:  If you prefer a creamy sauce, stir in 1/2 cup sour cream or plain yogurt before adding pasta.  Fettuccine or other larger shaped pastas will work fine with this dish.
 Mushroom Pappardelle9


Wheatless Wednesday – Black Bean Quinoa Salad

6

Black Bean Mango Quinoa Salad4

Tired of green salad?  This flavor filled quinoa salad with mango and avocado topped with an orange cumin vinaigrette is my new favorite!  I promise you won’t be bored. It’s a little bit spicy from the jalapenos, a little bit sweet from the mango, the black beans add a rich salty flavor and fresh avocado, purple onion, bell pepper and cilantro make it salad worthy.  Yum!

Quinoa is the perfect backdrop for these beautiful flavors.  It also happens to be a nutritional powerhouse, high in protein, low in fat, gluten free and loaded with lovely vitamins and minerals (but you don’t have to tell your family that).  What I didn’t know is that Mango is also a superfood, providing over 20 vitamins and minerals in every delicious bite. ( This puts a whole new light on my recipe for Mango Margaritas!)  Black beans add another protein and nutrient boost and their high fiber content helps keep your tummy full. Then there is the Avocado, which we now know is a good fat that is highly nutritious.   The best part of this salad though, is how great it tastes!  I can’t wait to have it again for lunch…

This is the perfect dish to throw together for an easy dinner or bring to a potluck, especially if you have leftover quinoa on hand (or you make it ahead), then it’s only about ten minutes of chopping, mixing and you’re done!  This salad can be made a day ahead, without the avocado.  Bring to room temperature then gently toss in the avocado, if using, before serving.

TIP:  You can buy mango pre-cut but it’s very easy to do it yourself (and less expensive) if you know the right technique.  How to cut a Mango

VARIATIONS:  If you don’t have, or like, mango, you can substitute orange or nectarine segments (or even canned or frozen corn).  Use a combination of yellow, orange, red and green bell peppers for lots of color.  This recipe is only mildly spicy using one red jalapeno pepper so double the amount of jalapeno peppers and add a bit more cumin if you like it hot.

Black Bean Mango Quinoa Salad

Black Bean Quinoa with Cumin Orange Vinaigrette

  • Difficulty: easy
  • Print

 Black Bean Mango Quinoa Salad4

1 cup quinoa
1 cup mango, diced
1 red bell pepper, diced
1 red or green jalapeno, seeded and diced
1 cup canned black beans, drained and rinsed
1/2 red onion, diced
1/3 cup fresh cilantro or parsley leaves, chopped
1 avocado, peeled, seeded and diced
 
 vinaigrette
1/4 cup olive oil
1/4 cup apple cider vinegar
1/4 cup freshly squeezed orange juice
1 tsp cumin
1 tsp salt

Black Bean Mango Quinoa Salad3

  • Rinse quinoa to remove bitterness and cook according to package instructions; set aside and let cool.
  • To make the vinaigrette, whisk together olive oil, apple cider vinegar, orange juice, cumin and salt in a small bowl; set aside.
  • In a large bowl, combine quinoa, mango, bell pepper, jalapeno, black beans, avocado, onion and cilantro. Pour the vinaigrette on top of the salad and gently toss to combine.
  • If you aren’t serving immediately, place the avocado pit on top of the salad to keep the avocado from turning brown, or add the avocado right before serving .  Serve at room temperature.

Black Bean Mango Quinoa Salad8


Meatless Monday – Grilled Nectarines and Summer Squash with Balsamic Glaze

1

Grilled Vegetables10

I know I’m late to the grilled fruit game.  I never understood the fascination with throwing everything on the grill, but I am now a believer.  Grilling transforms something simple and delicious into a spectacular crowdpleaser.  Grilling enhances the natural flavors of fruits and vegetables and caramelizes the sugars in them, which is why grilled fruits are particularly delicious.   I came home to find a beautiful display of summer squash, nectarines and spring onions sitting on my counter, compliments of our local farmers market.  The squash had such interesting shapes that I immediately wanted to showcase.  I especially love the star shaped yellow squash!   I thought slicing them into rounds and grilling them would make a visually interesting dish.

Grilled Vegetables8

Then, once I added the nectarines and purple onion to the mix, I thought, “They look so beautiful all together, why not grill them all?  Sometimes dinner just  has to be dictated by what you have on hand.

Grilled Vegetables7


Vegetables can be grilled dry, but many of them taste better and are less prone to sticking if they are marinated first, or at least drizzled with oil.  Fruit, on the other hand, with its natural sugar content, is great when placed directly on the hot grill.  I marinated the squash in olive oil, garlic and herbs before grilling, then carmelized the onions on high heat in a cast iron pan and made the balsamic glaze (or rather, my sous chef, Veronica, made the glaze while I grilled the zucchini).  Lastly, I grilled the nectarines and piled everything together in a large tray and drizzled with the balsamic glaze.  I sprinkled with a bit of feta and a handful of blueberries, the first from my garden this year.  My final result was a pretty spectacular vegetable/fruit platter with gorgeous colors.  The balsamic glaze complimented the grilled fruit and combined nicely with the savory squash.  I will definitely be mixing more veggies and fruits this summer!

If you’re interested in more grilled fruit recipes, check out my recipe for Tortillas with Grilled Pineapple Salsa (with Mango Margaritas, of course)

Grilled Nectarines and Summer Squash with Balsamic Glaze

  • Servings: 4
  • Difficulty: easy
  • Print

4 -6 summer squash (any variety)

Marinade:  1/4 cup olive oil, 1 clove minced garlic, 1 Tbsn lemon juice, 1/4 tsp salt, 1 tsp fresh herbs(oregano, thyme, parsley or marjoram)

1 large spring onion (or Walla Walla or Maui sweet)

2 Tbsn avocado oil, or other high heat oil
6 nectarines
1/4 cup olive oil
2 oz feta (optional)
1/2 cup blueberries (optional)
Balsamic glaze:  1/4 cup basamic vinegar, 1 Tbsn honey, pinch of salt
salt and pepper to taste

Grilled Vegetables5

  • Place all marinade ingredients into a large ziploc baggie or container.  Slice squash into rounds and put into marinade until ready to grill.

Grilled Vegetables3

  • Heat balsamic vinegar in a small saucepan until reduced by about half.  Stir in honey and add a pinch of salt.  Remove from heat.
  • Slice onion into thick rounds.  If you don’t completely remove the stem, the top slice becomes a ‘rose’ which is a nice centerpiece.

Grilled Vegetables1

  • Saute the onion slices on high heat, keeping the sections together, turning with a spatula to brown both sides.  Then break apart and saute a few more minutes. Or you can marinate and grill the onions until they are softened and browned.  Remove to a platter.

Grilled Vegetables4

  • Grill the zucchini rounds until brown on both sides.  Remove to platter with onions.

Grilled Vegetables2

  • Half and pit the nectarines and place on a hot oiled grill, a few minutes per side until grill marks appear.  Remove to platter with veggies.
  • Sprinkle with feta and blueberries, if using.  Drizzle with balsamic glaze. Coarse salt and pepper to taste.
  • Serve warm or room temperature with reserved balsamic glaze on the side.

Grilled Vegetables9


Meatless Monday – Penne with Braised Greens

2

Penne1

Pasta is the ultimate comfort food.  It is simple and inexpensive to make and very versatile.  Most comfort foods are warm and oozing with creamy sauce and cheeses (think lasagne or mac and cheese), but as I am married to a non-creamy food guy, I usually opt for sauces that are broth based with an optional cheese topping. Cooking with broth adds flavor without all the extra calories.    In this dish I braised the greens in a reduced vegetable broth with onions and garlic and a touch of crushed red pepper flakes.  I added baby lima beans for a protein boost, and to help fill up our tummies, although any bean or legume would work fine.  There is nothing worse than finding yourself back at the refrigerator rooting around  for something to eat 30 minutes after dinner.  Braising greens, or cooking them in a bit of liquid just until they wilt,  is a great way to use excess salad or garden greens, even beet or  turnip tops that you might normally throw away.  Using a combination of greens like spinach, chard, kale, collards, mustard, bok choy or  raddichio makes for a more interesting flavor and braising them brings out the intense greens and reds, unless you cook them too long, then they turn to mush.  Don’t worry if it seems like too many greens, as they reduce quite a bit in volume when they wilt.  You can always add a handful more, if desired, since they cook quickly.

So we all know that greens are good for us but it turns out that the bitter in them actually serves a purpose.  It sends a chemical reaction through our bodies that helps absorb nutrients, cleanses the body, increases metabolism and curbs our sweet tooth, among other things, so feel free to pile them on.  .  Read more.

This is a light but satisfying dish that is pleasing to both the eye and the palate.  For a heartier dish, use white cannelini beans and top with shaved or shredded parmesan.  You can also increase the amount of broth, onions and garlic if you like a lot of sauce.  Buon appetito!


Penne with Braised Greens

  • Servings: 4
  • Difficulty: easy
  • Print

3/4 lb dry penne pasta (preferably whole grain)

1 T olive oil

2 garlic cloves, minced

1/2 large or 1 small onion, diced

1 1/2 cups vegetable broth

1 cup baby lima beans, edamame or peas (frozen or fresh)

3 -4 cups mixed greens(chard, spinach, kale)

1 tsp lemon zest

1 tsp salt

1/4- 1/2  tsp red pepper flakes


  • Cook the pasta according to package directions in boiling salted water.  Drain  and set aside.  You can drizzle with a bit of olive oil to keep from sticking if desired.
  • In a large skillet or dutch oven, heat the olive oil. Saute the minced garlic, onion and red pepper flakes  for two minutes, until the onion is translucent.

Penne5

  • Pour in broth and reduce by half, 5 to 10 minutes

Penne4

  • Add the  beans and cook for about five minutes.

Penne3

  • Stir in greens and cook several more minutes until they wilt.
  • Add the pasta, lemon zest and salt.  Adjust seasonings if necessary.

Options:  Top with flaked or grated parmesan or toasted nuts, if desired.  For a heartier meal, substitute or add cannelini beans.

Penne2


Wheatless Wednesday – Tabouleh (Grain Free)

4

Tabouleh7

Raw-Vegan-Potluck.  My friend, Karenna Love,  invited me to a vegan potluck at her house.  I love all things food related and immediately knew what I was going to bring – until I re-read the invitation.  Somehow I missed the ‘raw’ part.  I make a lot of vegetarian and vegan food but other than green salads, I generally cook some or all of my foods.  I was stumped. All my go to foods like grains, beans and legumes need to be cooked.   I thought about going out to my garden and picking fresh produce for a salad but other than lettuce and chard, nothing else is ready yet.  Then I remembered how well cauliflower stood in for wheat in my Cauliflower Crust Pizza Recipe and decided to make a traditional tabouleh using cauliflower ‘rice’ instead of the usual couscous or bulgur.  The result is delicious and, even though I know better since I ground up the cauliflower myself, I would swear it’s cooked  bulgur wheat not cauliflower.  This is a great recipe for those on gluten or wheat free diets – even for my Paleo friends.    I would definitely make this again-on purpose!

Why eat raw?  Eating fruits and vegetables raw ensures that you get 100% of the vitamins and minerals, including beneficial enzymes.  Cooking can make some foods easier to digest but some of the vitamins and minerals (and all of the enzymes) are lost in the process.  I’m not quite ready to throw out my pots and pans just yet, but I do see how adding more raw foods into our diets is a worthy goal.

Let’s go back to Karenna Love, founder of wonderful website VeganGreenPlanet, and her Raw Vegan Potluck.  I have to admit to a few apprehensions about going to a vegan event when I’m not even vegetarian.  But then I realized that GMD is all about pushing myself out of my comfort zone, so I went.  It was an interesting mix of caring and non-judgemental people and great food.   I’m so glad I stepped out of my box. My Tabouleh was well received, which after one taste, I knew it was yummy and potluck worthy. The speaker, Mikaele Holzer, health coach and cleansing expert at Green Your Spirit  was pretty interesting and very personable.   I learned a lot about vegan food, cleansing, and detox.  Both  are amazing women-check them out.

Grain Free Tabouleh

  • Servings: 4-6
  • Difficulty: easy
  • Print

1 head cauliflower

1 cup grape or cherry tomatoes, small dice

1 seedless cucumber, small dice

1 1/2 cups fresh parsley, minced

3/4 cup fresh cilantro, minced

1/2 cup fresh mint, minced

1/3 cup olive or avocado oil

3 Tbsn fresh lemon juice

3/4 tsp sea salt

1/4 tsp black pepper

Tabouleh5

  • Remove leaves from cauliflower and break into florets.  Discard leaves, core and stem.  Using a food processor, blend florets into ‘rice’.  Or you can use a hand grater.  Scoop into a large bowl.

Tabouleh6

  • If you are using a food processor, you can mince the parsley, cilantro and mint by machine as a shortcut.

Tabouleh4

  • Add the rest of the diced vegetables and minced herbs to the cauliflower.

Tabouleh2

  • Whisk together the oil, lemon juice, salt and pepper and pour onto salad. Toss to combine.  Adjust seasoning (add salt or lemon juice to taste).
  • Serve immediately or let rest in the refrigerator.  Flavors will continue to develop over several hours.

Tabouleh1


Meatless Monday – Crispy Glazed Tofu and Bok Choy

1


Tofu and Bok Choy9

Is tofu good or evil?  You may not be aware but the great tofu controversy abounds! I like tofu and have always thought of it as a healthful protein which is highly adaptable in recipes from stir frys to salad dressings.  However, I keep hearing that tofu is bad for you, evil even, so I decided to check into it. Tofu is a low fat, plant based, good source of protein, yet it is a processed food, in that it is no longer in its original bean form.  The beans have been made into milk, curdled, drained and pressed into blocks.  The more I looked into the great tofu question, the more confusing the issue.  Studies and opinions contradict each other-no surprise there.  Remember when coconut oil was supposed to be so terrible for us and to be avoided at all costs, and now is being touted as having health benefits ranging from weight loss and prevention of  heart disease to making your skin soft and pretty.   Andrew Weil, a well respected natural health and wellness expert, still recommends tofu as part of a healthy diet.   Click on his name to see why.   The Truth About Soy,  another seemingly unbiased view about tofu and soy (loads of information but long article) thinks the problem is not with soy but what we  have done with soy (read Genetically Modified-Roundup Ready).  90 – 94% of soy is GMO but most of that is fed to our food animals or made into soy products like baby formula (which is a different problem)  and not made into tofu.  If the label says organic or Non GMO Project it’s not genetically modified-one more reason to buy organic.   So, what did I come away with?  If you like tofu, eat it.  If you don’t like tofu, don’t.

For those that DO like tofu, here is a delicious recipe for Crispy Glazed Tofu with Bok Choy, which I adapted from Eating Well, March/April, 2014.  This is the perfect way to cook bok choy, which is delicately flavored with garlic and ginger.  The tofu is browned in a skillet first and then sautéed in a flavorful plum sauce. The outside is a bit crispy and the inside soft and creamy.   I reduced the amount of ketchup, since I’m not a ketchup lover, to let the other flavors shine, however, if you are a ketchup lover you can double or triple the amount.  I also added red pepper flakes and ginger paste for more of a zing.  Don’t skip the step of draining the tofu, which gets rid of excess water and allows the tofu to absorb the flavors.  Otherwise this is a very simple and quick meal to get on the table.  Serve over rice if desired.


Glazed Tofu and Bok Choy

  • Servings: 2-4
  • Difficulty: easy
  • Print

1 14-ounce package extra-firm water-packed tofu, drained
1/4 cup plum (or hoisin) sauce
1 tablespoons ketchup
2 tablespoons soy sauce
1 tablespoon rice wine (or dry sherry/rice wine vinegar)
2 teaspoons oil plus 1 tablespoon, divided (I like avocado or coconut oil)
3 scallions, trimmed and cut into 2-inch lengths and then ribboned
1 teaspoon minced garlic
2 teaspoon minced fresh ginger, divided
1/2 teaspoon red pepper flakes
4-6 baby bok choy, quartered lengthwise
1/4 cup water
1 tsp sesame seeds
Tofu and Bok Choy7
  • Fold a kitchen towel in half and place on a cutting board. Cut tofu in half horizontally, (and then in half again leaving 4 equal pieces) and set on the towel. Put another folded towel and a weight (such as a heavy skillet) on the tofu; let drain for 15 minutes.

Tofu and Bok Choy5

  • Meanwhile, whisk plum sauce, ketchup, soy sauce and rice wine in a small bowl and place near the stove.
  • Cut the pressed tofu into 3/4-inch cubes and place near the stove.
  • Toast sesame seeds in a small pan over medium low heat for a few minutes, or until they turn golden brown.

Tofu and Bok Choy6

  • Heat 2 teaspoons oil in a large nonstick skillet over medium-high heat. Add scallions, garlic and ginger; cook, stirring, for 30 seconds. Add bok choy and cook, turning, until bright green, 1 to 2 minutes. Add water, cover and steam until tender, about 2 minutes. Transfer everything to a plate. Wipe the pan dry.

Tofu and Bok Choy4

  • Return the pan to medium-high heat, add the remaining 1 tablespoon oil and heat until shimmering. Add the tofu in a single layer. Cook, without stirring, until starting to brown, 2 to 3 minutes. Stir and continue cooking, stirring frequently, until brown on all sides, 6 to 8 minutes more. Add the sauce; cook, stirring, until the tofu is well coated, 1 to 2 minutes.  Sprinkle with sesame seeds and serve with the bok choy over brown rice, if desired.

Tofu and Bok Choy2


Mango Margaritas & “Homemade” Tortilla Chips with Grilled Pineapple Salsa!

3

Margaritas2

TGIF! Cinco de Mayo is just around the corner and you know what that means – Margaritas! In the interest of having a good time research, my trusty pals and I decided to go in search of the new perfect margarita. Sure the lime margarita is delicious and traditional but why limit yourself? One click of the keyboard and a multitude of exotic possibilities lay before me-strawberry, blackberry, cucumber, pomegranate, cranberry, mango-avocado, papaya, hibiscus, watermelon and mint! Who knew there were so many? Obviously, a lot of research has already been done on this subject. Since we had fresh mango and pineapple in the refrigerator, we decided to start there.  After much testing and tasting we came up with a fabulous Mango Margarita, which is cool and refreshing with just the right amount of sweet-the perfect grownup dessert, like a mini vacation for your tastebuds. Take me away Calgon…

Crunchy, salty tortilla chips, warm from the oven, topped with spicy, smoky, sweet pineapple salsa are a perfect pairing for the ice-cold mango margaritas.  Sure it’s easy to just pick up a bag from the store (I do it all the time), but making them yourself out of good quality (non GMO) tortillas is so much tastier!  It’s easy too and only takes 15 minutes or so, depending on quantity.  Each 6 inch tortilla makes 6 chips, so do the math to figure out how many you need. (I would say 2 tortillas per person).  This is also a great use for stale or dried out tortillas, so don’t throw those out!  The grilled pineapple salsa is the creation of my son, Eric. Grilling the pineapple is pure genius!  It adds a nice smoky quality and softens the pineapple so that it picks up the other flavors nicely.  His version included habanero peppers and was delicious but pretty spicy (our lips were numb), so I have toned it down with mildly spicy jalapeno peppers.  If you like things super spicy (like my Dad) increase the amount of peppers or add spicier varieties.  This is also a good appetizer for my Fish Tacos, Chile Rellenos or Black Bean and Mango Salad with Avocado Ranch if you want to continue the Mexican theme.

Tips:   You can buy mango pre-cut but it’s very easy to do it yourself if you know the right technique.  How to cut a Mango.  If you like your margies really thick and frozen, you can buy frozen fruit or cut the fruit into chunks, lay them on parchment or waxed paper and freeze them for a half hour or so.  Using frozen fruit reduces the amount of ice you need, resulting in a thicker, fruitier beverage.

Mango Margaritas

  • Servings: 3-4
  • Difficulty: easy
  • Print

Margaritas5

2 cups ripe Mango, large dice
6 Tbsn fresh lime juice
1 Tbsn agave necter
4 ounces Tequila (100% agave blanco)
1-2 cups Ice

Margaritas3

  • Rub the cut side of a lime around the rim of the glass and dip the wet rim in salt. (Optional)
  • Add all the ingredients into the blender and blend until smooth. Add additional ice if a thicker drink is desired.

Margaritas1

  • Pour into prepared glasses.  Cheers!

Homemade Tortilla Chips

  • Servings: 72 tortilla chips
  • Difficulty: easy
  • Print

Margaritas4

12  6″ corn tortillas
1/3 cup vegetable oil(avocado, grapeseed or sunflower)
kosher or sea salt
  • Pre-heat oven to 375 degrees.
  • Brush tortillas with oil on both sides.  Place in a stack.

Margaritas7

  • Cut tortilla stack into 6 triangle shaped wedges.
  • Arrange the tortillas on a baking sheet in a single layer and bake  for about 6 minutes.

Margaritas6

  • Using tongs turn them over, sprinkle with a little salt, and bake for another 6 minutes..
  • Remove from the oven and let cool.

Spicy Grilled Pineapple Salsa

  • Servings: 1 1/2 cups
  • Difficulty: easy
  • Print

Margaritas8

1/4 whole pineapple, sliced into rounds
2 jalapenos, seeded and finely diced(or other hot pepper)
1 small shallot, finely diced
1/2 cup cherry tomatoes, diced
1 tsp fresh lime juice
salt and pepper to taste

mARGARITAS9 mARGARITAS10

  • Grill pineapple slices on a hot grill for several minutes on both sides and remove from heat.

margaritas12

  • Dice pineapple into small chunks

Margaritas11

  • Using gloves, finely mince jalapeno
  • Combine all ingredients.  Serve with chips. Ole!

Margaritas4

Meatless Monday – Fava & Spring Pea Risotto with Greens

6

Risotto2

I just harvested the last of my fava beans in an effort to make way for more tomatoes in my garden.  Fava beans (also called broad beans and horse or pigeon beans) aren’t actually a bean at all but a member of the pea family.  Fava beans have a delicate flavor and buttery consistency which makes any dish special.  I paired them with peas for two reasons.  I love fava beans but I also really like green peas in risotto, plus it takes a mountain of fava bean pods to make enough fava beans. (You could also make this risotto without the fava beans and it would still be tasty).   I harvested a large bowl of bean pods from my garden (about 10 or 12 cups).  Favas require a double shelling process which is not hard but time consuming. How to shell fava beans.  Once I removed the pods I had 2 cups which shrank to a scant 1 cup once I removed the second peel.

Risotto8 Risotto5

I usually don’t cook white rice but with risotto I had to make an exception.  Arborio rice has a creamy quality that you just can’t get with brown rice, although I might give it a try next time.  Luckily the fava beans, peas, pine nuts and greens add loads of nutrition to this dish.  Even though it tastes and feels like comfort food this risotto is pretty healthful and low in fat.  Favas are a good source of fiber,  protein, folate. potassium, calcium, manganese, and phosphorus. (LiveStrong) The peas and greens add another nutritional boost.  Plus I love the gorgeous green color. It tastes like Spring!

Fava and Spring Pea Risotto with Greens

  • Servings: 4-6
  • Difficulty: easy
  • Print
1/2 cup pine nuts

1 quart vegetable broth
2 Tbsn olive oil
4 scallions, sliced
1 cup Arborio rice
1/4 – 1/2 tsp salt (optional)
1/4 – 1/2 tsp pepper(optional)
2 cups combination fava beans and shelled peas (fresh or frozen)
2 cups greens (spinach, arugula or fava leaves)
1/2 cup shredded parmesan (optional)
Risotto10Risotto6
  • Shell fava beans.  First remove the outer shell (pod). I like to slit the seam open with a sharp knife.  It’s okay if you slice through the beans.  It actually makes them easier to shell.  Then blanch in boiling water for one minute and put immediately in an ice bath.  Then remove the second shell.How to shell fava beans

Risotto4

  • Heat a heavy pan (cast iron is great if you have it) and dry toast the pine nuts for a few minutes until they are fragrant and turning golden brown. Remove from pan and let cool.
  • In a separate pan, bring broth plus one cup of water to a simmer
  • In cast iron pan, add olive oil, scallions and rice and cook for a few minutes until the rice is opaque.

Risotto3

  • Add broth 1/2 cup at a time, stirring until the liquid has been absorbed. Repeat until rice is tender (about 20 minutes) Add salt and pepper to taste.  (Vegetable broths greatly differ in their saltiness which is why I add salt at the end).
  • Add fava beans, peas and greens and cook until the greens wilt, 4 or 5 minutes.
  • Fold in  pine nuts and parmesan.  Risotto should be slightly soupy.  Add more water if it’s too dry.  Serve hot.

Risotto1


Meatless Monday – Coconut Ginger Quinoa

0

Coconut Ginger Quinoa8


Somehow 2013 came and went without my knowing that I was missing “The International Year of the Quinoa”  as officially  declared by The Food and Agricultural Organization of the United Nations. (The World’s Healthiest Foods)  I didn’t ‘discover’ quinoa until December, almost completely missing the superfood’s official year.  I’m on board now, though and always looking to include interesting seeds and grains in my diet.  Interestingly, Quinoa is not a grain but a seed (a Chenopod to be specific) related to  beetroot and spinach.  It is a complete protein and nutrient rich, including a source of calcium. Quinoa is gluten free and easier to digest than many other grains and pseudo-grains.

Coconut Ginger Quinoa is a flavor packed dish, the combination of onion, ginger and coconut providing a great balance of savory and sweet.  In addition to the quinoa, edamame and almonds give it a protein boost.  The apples and raisins add a natural sweetness and help make it kid friendly.  Younger kids might have fun shelling the edamame while you cook the quinoa.   This is a very forgiving dish that can be served warm or at room temperature, making it perfect for making ahead or bringing to a potluck. You can even make the quinoa ahead of time and assemble the ingredients at the last minute. Enjoy!

Coconut Ginger Quinoa

  • Servings: 4-6
  • Difficulty: easy
  • Print

2 tsp. coconut or olive oil
½ cup onion, chopped (optional)
2 Tbs. minced fresh ginger
1 cup quinoa
1 ½ cups vegetable broth

1/2 cup slivered or sliced almonds
1 cup edamame, shelled
1 medium apple, diced
1/4 cup raisins, currants or cranberries (optional)
1/2  cup unsweetened coconut flakes or shreds (I used half and half)
Dressing (optional):  1/2 cup olive oil, 1/4 cup red wine vinegar, 2 tsp honey
Coconut Ginger Quinoa3Coconut Ginger Quinoa9
  • Toast almonds in dry pan over medium heat for several minutes, or until fragrant and golden brown. Remove from heat and let cool. If you are using flake coconut, you can dry toast it as well for a nice nutty flavor.  Set aside.
  •  Sauté onion in oil 2 to 3 minutes, or until translucent.

Coconut Ginger Quinoa2

  •  Add vegetable broth, quinoa and ginger.  Simmer, covered for 15 to 20 minutes, or until all liquid is absorbed. (Note:  Rinse quinoa to remove any last remaining saponin, a naturally occurring but bitter covering.  If you don’t have a fine mesh strainer, just put quinoa in a bowl , fill with water and pour out as much water as possible without pouring out any quinoa.)
  •  Let partially cool and pour into a large serving bowl.

Coconut Ginger Quinoa4 Coconut Ginger Quinoa6

  • Shell the edamame and boil in salted water for 4  minutes. Drain.  (Or you can add the edamame to the quinoa for the last few minutes of cooking)
  • Add edamame, almonds, apple, raisins and coconut to quinoa and toss to mix. Salt to taste.  Drizzle with dressing if using. Serve warm or at room temperature.

Coconut Ginger Quinoa8


Making Preserved Lemons Plus Secret Bonus Recipe

1

Preserved Lemons11


Have you ever wondered what the secret ingredient is to so many  Middle Eastern dishes?  Well the cat’s out of the bag – it’s  lemon – and not just any lemon but Preserved Lemon.  Preserved lemons (preferably Meyer or Eureka with their thicker skins) rest in a heavily salted brine for at least a month which completely changes their character.  They still have a tart lemony flavor but the peel has lost it’s bitterness and has become soft and salty/sweet.  There is really nothing to compare it to. It has it’s own unique flavor.  Preserved lemon is the key ingredient in many Moroccan, Cambodian and Northern African dishes and is often combined with olives, cumin, ginger, turmeric and saffron to make an incredible base for almost any vegetable or protein.  It is also called lemon pickle,  country lemon or leems depending on where you are from.

What do you do with Preserved Lemon?  I remove the seeds and puree the whole lemon (peel and all) in a food processor to put in sauces and stews.  For a less intense flavor, you can cut them into quarters or slices and add them to dishes or chop just the rinds into small pieces.  The salty, lemony brine and lemon pulp is wonderful to add to sauces or salad dressings, so none of it goes to waste.

Preserved Lemons12

Preserved Lemons are very easy to make but you have to think ahead since they have to sit in their brine for a month or so. I have included instructions for making preserved lemons. They make a very unusual gift.  Just add a label and some ribbon.  Check out my Garden to Pantry Page” for more info on labels.  I have also included a link to Moroccan Recipes  which has many recipes that use preserved lemons so maybe it will get your creative juices going. I tried the ‘Moroccan Style Cauliflower” from this list  and loved it so decided to include that recipe on this post  as well.

Preserved Meyer Lemons

  • Servings: 1 jar
  • Difficulty: easy
  • Print

Preserved Lemons2

What you need:

Quart sized bell jar w/ lid
6-7 Meyer lemons (or Eureka)
1/2  Cup of Kosher salt

Directions:

• Sterilize jars In hot water bath or in the dishwasher. Air dry.
• Wash and dry lemons.

Preserved Lemons3 Preserved Lemons4
• Cut a lemon in half horizontally without cutting all the way through the skin (about 3/4 of the way through). Then cut vertically without cutting all the way through. You should still have a lemon in one piece with a deep criss-cross cut.
• Fill the inside of the lemon with as much salt as you can fit. This part is messy so I lay the lemon in a small bowl and pour the salt into the cut.  Then I pour back any salt that has fallen into the bowl

Preserved Lemons5
• Place the lemon in the bell jar, salt side up.
• Repeat with the rest of the lemons, pressing as many as will fit into the jar and allowing the lemons to be covered by lemon juice.  If your lemons don’t make enough juice to cover, wait a few days and trying pressing down on the lemons again.  Sometimes you can even fit another lemon in the jar and then muscle the lid on.

Preserved Lemons6 Preserved Lemons7Preserved Lemons9
• Cover with the lid and let sit at room temperature for four to six weeks. It will take the salt a few days to dissolve, so give it a gentle shake once a day until the brine is clear.
• To use the preserved lemons, you can use the either rind or the whole lemon (which has more flavor). Just remove the seeds, finely dice, or puree in a blender, and put in stews, sauces and salad dressings.
• Once the jar has been opened, it should be stored in the refrigerator.


Moroccan Style Cauliflower

  • Servings: 4-6
  • Difficulty: easy
  • Print


Preserved Lemons10

• 1 large head of cauliflower
• 1 1/2 teaspoons cumin
• 1 teaspoon ginger
• 1 teaspoon salt
• 1/2 teaspoon paprika
• 1/2 teaspoon turmeric
• black or cayenne pepper, to taste
• 1 onion, sliced or coarsely chopped
• 3 cloves garlic, finely chopped or pressed
• 1/4 to 1/3 cup olive oil
• 1 preserved lemon, quartered
• 1 handful red or violet olives
• 1/2 cup water
• 2 to 3 tablespoons chopped fresh cilantro
Preparation:
Break the cauliflower into small florets; wash and drain. Mix the cauliflower with the spices and set aside.
In a wide, deep skillet or Dutch oven, saute the onions and garlic in the olive oil over medium heat for just a few minutes. Add the cauliflower, preserved lemon, olives and water and bring to a simmer. Cover and cook for about 10 minutes, stirring gently once or twice, until the cauliflower is just tender. Continue cooking, uncovered, to reduce the liquids to oil only.
Sprinkle the fresh cilantro over the cauliflower and serve.


Click on the following link for more recipes that use preserved lemon: Moroccan Recipes

Wheatless Wednesday – Rancho La Puerta Granola

4

Granola6

‘THE RANCH’, as it is affectionately called by those people who are lucky enough to have been there, is one of my favorite places in the world. Rancho La Puerta, basking in the shadow of rugged Mount Kuchumaa in Baja California, is a fitness and wellness oasis, and gorgeous retreat. I went for the first time when I had three little boys at home. It was the first time I had left my kids to go on a trip by myself and my mother and father in law came to help my husband. It was quite liberating to not have to worry about anyone else for a whole week, a rarity for most moms.   I loved everything about The Ranch; getting up at 6am to do the Pilgrim hike before breakfast; going to pilates, yoga, then circuit training before lunch; pool-time, spa treatments and naptime restorative yoga before dinner. Ahh, what a day –every day for a week!

Rancho La Puerta1

What I loved best though is the food, which is ovo-lacto vegetarian, with small amounts of seafood. The wonderful food made me realize that I really like vegetarian food when it’s done this well. Meals are flavorful, healthful and creative. Most of the produce comes from Rancho Tres Estrellas, the 6-acre organic farm on the property which is available to visit.  Foodies take note, a wonderful cooking school rests in the center of the farm, La Cocina Que Canta (“The Kitchen That Sings!”) which also takes advantage of the fresh produce. Classes are available to Ranch guests.

la-cocina-entry

I have been back several times, with friends and by myself. Every day I was there, I did something I had never done before; Crystal Bowls (Sound Healing), Silent Dinner, Tai Chi or even a walk through the labyrinth. It’s a magical place and I can’t wait to go back, for both the experience and the food.  So I thought I would share their most requested recipe, Rancho La Puerta Granola (which I have been wanting to make for the last 10 years or so).  It is lower in fat and sugar than most recipes and truly delicious. Upon arrival at the San Diego airport, we were each given a baggie of granola for the bus ride to The Ranch and with just one mouthful we were all hooked.   As I recall a bag of granola was one of the most coveted prizes at Bingo night, (The Ranch is not known for its rocking nightlife, although Bingo night is legendary).

morninghike5

I stayed true to the recipe with the following exceptions.  I am allergic to canola oil (and no longer think its so great anyway) and substituted coconut oil which I melted in the microwave on low power.  I also used a coconut oil spray to coat the pan. I made this recipe twice since the first time it turned brown too fast as my oven was too hot.  The second time I had the oven at 250 degrees, as recommended, not 350. Note to self:  “Do not attempt to make a recipe for the first time without your reading glasses.  I would recommend using the top rack in the oven as the granola turns from golden to brown pretty quickly even at 250, so start watching at the 60 minute mark.

labyrinth_0

Enjoy your little bit of The Ranch!  Even better, share with friends!  Rancho La Puerta Granola makes great gifts.  One batch makes four cup and a half servings.  Just bag, label and tie with a ribbon. (Check out my Canning and Preserving Page for more info on labels).  Voila!  Hostess gifts solved.

PHOTOS OF RANCHO LA PUERTA REPRINTED WITH PERMISSION FROM RANCHO LA PUERTA Rancho La Puerta Website

Granola5

Rancho La Puerta Granola

  • Servings: 4
  • Difficulty: easy
  • Print

  • Vegetable oil spray
  • 3 cups old-fashioned rolled oats
  • ½ cup chopped almonds
  • ½ cup sunflower seeds
  • ¼ cup whole wheat flour (or a nut flour, like almond flour to make gluten free)
  • ¼ cup oat bran
  • 1 tablespoon ground cinnamon
  • ¾ teaspoon ground ginger
  • ¾ teaspoon ground cardamom
  • ¾ cup honey
  • ½ cup unsweetened unfiltered apple juice
  • 2 tablespoons vanilla extract
  • 2 teaspoons canola oil
  • 2 teaspoons grated orange zest
  • 2 tablespoons fresh orange juice (optional)

Instructions:

1. Preheat oven to 250ºF.
2. Lightly coat a baking sheet with vegetable oil spray. (I love an extra coconut flavor so I used a coconut oil spray).
3. In a large mixing bowl, combine the rolled oats, almonds, seeds, coconut, flour, oat bran, cinnamon, ginger and cardamom.

Granola4Granola3
4. In another bowl, whisk together the honey, apple juice, vanilla and oil until the honey is thoroughly incorporated. Add the orange zest and the orange juice if desired.

Granola2
5. Pour the wet ingredients over the dry ingredients and mix well. Spread the granola evenly over the baking sheet and bake about an hour and a half, checking and stirring every fifteen minutes.  Take care that the outside edges do not burn. When golden and dry, scrape onto a plate or cool baking sheet and set aside to cool.

Granola8

Store in an airtight container until ready to use.
Calories per serving: 25, 1 tablespoon per serving
Granola6

Meatless Monday – White Bean & Kale Dip

0

White Bean and Kale Dip4

Kale is the current ‘It’ food. We have Kale Chips, Kale Smoothies, Sauteed Kale and Kale salads. I guarantee if you show up at a party bearing anything with Kale, you will be heralded as a hip Foodanista.  I don’t want to knock kale, because it really is a nutritional powerhouse definitely worthy of being the star of the latest food fad. It’s not called ‘The Queen of Greens’ for nothing!   “One cup of chopped kale contains 33 calories and 9% of the daily value of calcium, 206% of vitamin A, 134% of vitamin C, and a whopping 684% of vitamin K. It is also a good source of minerals copper, potassium, iron, manganese, and phosphorus. (www.webmd.com)

Combine kale with white beans which are high in minerals, fiber and protein and you’ve got a snack worthy of superman. White Bean and Kale Dip combines some of my favorite flavors, white beans (cannellini), kale, cayenne, cumin, lemon, tahini and pine nuts and has none of the fattening creams or cheeses (which I love but am trying to cut back on).  The creaminess in this dip comes from the white beans, pine nuts and a bit of olive oil, all healthy and nutritious.  More importantly, it is delicious! If you are looking for a yummy but healthy appetizer, then this is for you.  I served it with pita crackers but its also great with carrots and other raw veggies.  You can also spread it on toasted bread and add a sprig of arugula and tomato. Yum!

white Bean and Kale Dip5

There are a surprising number of recipes out there for White Bean and Kale Dip (or perhaps not so surprising given kale’s goddess status).  Variations include walnuts or cashews instead of pine nuts and spinach instead of kale.  I would recommend Lacinato (Dinosaur) Kale, which is sweeter and less tough(chewy) than the curly type, for this recipe since we are using it raw. If you include nuts, I would recommend running them through the food processor or blender to make a fine powder before adding the other ingredients. You could probably also use an almond or cashew butter if you have it  instead.  Otherwise, this dip only takes a few minutes to put together but it needs at least an hour to chill in the refrigerator to firm up. I actually thought it tasted better the next day.  So time to jump on the Kale Bandwagon if you haven’t done so already!

White Bean and Kale Dip

  • Servings: 8
  • Difficulty: easy
  • Print

kale-1

1 can white cannellini beans,- drained and rinsed
1 cup kale, roughly chopped
1/4 cup flat leaf parsley
1/4 cup pine nuts (optional)
2 Tbsp tahini
2 cloves garlic
1/3 cup olive oil
2 Tbsn balsamic vinegar
2 tsp lemon juice (1/2 lemon)
Zest from ½ lemon
1 tsp cumin (optional)
 1/2 tsp black pepper
½ tsp cayenne (or more to taste)
Salt to taste
1/4 cup water, if needed

White Bean and Kale Dip

Directions:

  •  If you’re using nuts, process them into a fine powder in the food processor before adding the other ingredients.
  • Add the rest of the ingredients and blend until smooth. Add water if needed to blend ingredients.
  • Pour into a serving dish and chill in fridge for 1 hour or more.  It will thicken quite a bit and the flavors will meld.
  • Serve with crackers or raw veggies.

White Bean and Kale Dip4


Limoncello

12

Limoncello1
“I believe when life gives you lemons, you should make lemonade…and try to find someone whose life has given them vodka, and have a party.” (Ron White, Author)

…Or you can combine the two and make Limoncello! I am lucky to have a beautiful, and bountiful, Meyer Lemon tree right outside my kitchen door. Most citrus trees bear two crops a year, a smaller one in the summer and the heaviest crop in winter.  Meyer lemon trees, however, are known for bearing fruit all year long, although their largest crop is now. With such an abundance of fruit, I am always looking for ways to use lots of lemons at once. I don’t mind sharing but I hate when they are wasted. Limoncello is an easy way to use extra lemons, although is not instantly gratifying since there is a considerable wait time until you have a final product. Limoncello is a crowd pleaser and makes a great gift, so our problem is that it goes too quickly. For that reason, as soon as I bottle one batch, I often start another.  Even if you don’t have a tree in your backyard, its easy to find Meyer lemons this time of year at your supermarket or even at Costco. You can also use regular lemons with good results, so use what you have.   It’s not too late!

The Limoncello I have made in the past is more “California style”, rather than Italian. I found the recipe on the internet from someone in Berkeley who has a prolific meyer lemon tree in her backyard and came up with a recipe in an attempt to use up her lemons. Sounded familiar so I gave it a whirl. I can’t credit her for the recipe since I could never find her post again. I liked the fact that she uses whole lemons and not just the peel. The results were good and I’ve had no complaints, however, after our trip to Italy last summer, I decided to attempt the Italian version, which uses only the peel. Purists believe that this makes the best quality limoncello, so I decided to put it to the test.  Here are a couple of photos from the ‘California style’ batch.

  1. making limoncelloLimoncello

In selecting the lemons, try to get organic since the peel is where most of the insecticides reside and often they are waxed to give them a longer shelf life. If you can’t find organic lemons, just scrub them with warm soapy water and dry them with a towel.   I have divided the process into two steps. Since the limoncello needs to sit for 6 to 8 weeks before bottling, you don’t have to have everything on hand just to get started. The large Bell containers are easy to find at hardware  or department stores like Target.   The Container Store and Pier One Imports both carry a nice selection of flip cap bottles that are perfect for bottling. Lastly, think about ‘your’ label which is the finishing touch and gives it personality and helps to make it the perfect gift. http://www.onlinelabels.com has pretty much every size and shape label you could ever want and they have a downloadable template which makes it very easy.

Limoncello

  • Servings: 8-12 oz bottles
  • Difficulty: medium
  • Print

STEP 1

 What you Need:

18 Meyer Lemons
1 handle or 2 fifths of Everclear or vodka
2 gallon glass jar with a lid(found at most hardware stores)
Potato peeler or microplaner (to zest)
• Wash and dry lemons. If not using organic scrub them with a vegetable brush in warm soapy water. Drying helps remove any remaining residue.

Limoncello3 Limoncello4

  •  Using a potato peeler, zester or a microplaner, carefully remove the peel trying not to get any of the bitter white pith. I used a potato peeler to cut long strips and then scraped any white from the back with a sharp knife.
  • Place all of the peels in the glass jar and pour the alcohol/vodka over the top to fill. Cover with a tight lid. (Note: The photo below shows a double batch.)
  • Squeeze the juice from the lemons.  Add sugar and water to make lemonade or freeze in ice cube trays, then put in baggies when frozen and save for another use.

Limoncello5
• Let sit covered with a kitchen towel or two for 6 to 8 weeks. I like to give it a little shake every few days for the first couple of weeks, just to make sure it’s evenly mixed. After that you can store it somewhere dark and out of the way.

STEP 2

What you Need:

Funnel
Fine mesh strainer
2 or 3 paper coffee filters
large bowl
ladle
2 1/2 cups sugar
2 1/2 cups water (filtered preferred)
8 12 oz bottles
labels (optional)
  • Wash and air dry bottles.  Can be done in a hot dishwasher. (Drying with a towel can reintroduce germs.)
  • Heat water and sugar in a pot until the sugar dissolves and the simple syrup is clear. /Remove from heat and let cool to room temperature.

Limoncello8 Limoncello9

  • Line your mesh strainer with coffee filters and place it over the large bowl (or have someone hold it for you).  Carefully pour lemon/vodka mixture over the strainer, taking care not to let the liquid go over the top of the filters.

Limoncello7

  • Discard lemon peels.
  • Clean Bell jar and pour filtered vodka mixture back into the jar (I would filter at least twice).

Limoncello10

  • Pour simple syrup into the jar and mix to combine.
  • Place a funnel into one of the bottles (with a coffee filter if you want to filter again) and carefully ladle limoncello into the bottle leaving 1 inch clearance at the top.

Limoncello12

  • Seal the cap and repeat with remaining bottles.

Limoncello13Limoncello15

  • The Limoncello will continue to mellow and improve over the next several weeks.
  • Label the bottles if desired. I’m testing a new label.  What do you think?
  • Store in a cool place.  Serve icy cold from the freezer.

So what was the final verdict?  The Italian style version requires more preparation time, in the peeling of so  many lemons,  but the final product is smoother and tastes more like the Limoncello we had in Italy, although less sweet since we also reduced the amount of sugar.   I think its worth the extra effort.  Cheers!

Wheatless Wednesday – Spicy Roasted Chickpeas

4

Roasted Garbanzos6

Warning – Highly Addictive! If you like Corn Nuts you’ve got to try these.   I got this recipe idea from my friend, Laura, who makes these snacks for her two teenaged boys, who gobble them up and ask for more without actually knowing what they are eating.  When they would first ask,  Laura’s answer was really vague (sudden attack of coughing) or evasive  (urgent phone call). She finally decided to call them Bean Pops. Clever Mama!  Regardless of the mommy maneuvering, she is getting her boys away from bad fat and preservative laden junk foods to protein and nutrient rich, yet still yummy chickpea snacks, or what I think of as healthy ‘corn nuts’ (if there can be such a thing).  Garbanzo beans are a source of several vitamins including vitamin C, B6 and folate. Many dietary minerals are also available from garbanzo beans, including manganese, phosphorus, copper, iron, magnesium, selenium, zinc and calcium. (www.livestrong.com )

Dieters take note!  ‘Furthermore, there is a recent study in which participants consumed fewer processed foods and less food overall when the diet was supplemented with garbanzo beans.  Research suggests that the fiber benefits of garbanzo beans may go beyond the fiber benefits of other foods’.  For more information on this study click here: http://www.whfoods.com/genpage.php?tname=foodspice&dbid=58

When I was a teenager, my Mom went through a garbanzo (also called chickpeas or ceci beans) phase where they showed repeatedly up in our salads and main dishes – even as flour in bread. (My Mom was way ahead of her time – by 25 years or so). I checked with my sister, Margaret, who also remembers the time when we had garbanzos coming out of our ears.  She admitted though that they are now her favorite bean and she puts them in everything she can, so I guess the apple doesn’t fall far from the tree.   I didn’t appreciate my Mom’s creativity at the time, especially since I wasn’t a garbanzo fan as a kid.  I am a huge fan now though (same apple tree, I guess).  I called my Mom to see what she had to say on the subject and she was about to start some garbanzo sprouts which nutritionally speaking is like garbanzos on steroids (increased vitamin content among a host of other benefits).  So there you go.  At 86, Mom  is still way ahead of everyone else!

Shameless PlugTIP: Spicy Roasted Chickpeas are particularly delicious when paired with a glass of red wine. I’m enjoying  the 2009 Paradisos Red Wine from my brother, Paul’s winery, Paradisos del Sol in Zillah, Washington.  It retails for $28 per bottle but if you mention my blog you will get the $14 family rate.  They deliver to Seattle too!  Check them out at http://www.paradisosdelsol.com/  Cheers!

Spicy Roasted Chickpeas

  • Servings: 3 cups
  • Difficulty: easy
  • Print

2 Tbsn olive oil
1 Tbsn ground cumin
1 tsp garlic powder
½ tsp chili powder
1 tsp salt (or to taste)
¼ tsp cayenne pepper (or more if you like spicy)
2 cans chickpeas/garbanzo beans (or 2 -3 cups cooked dry beans)

  • Preheat oven to 400  degrees
  • Rinse and dry garbanzo beans.  You can either air dry them on paper towels or pat dry with additional papertowels.

Roasted Garbanzos 1

  • Whisk the oil, cumin, garlic powder, chili powder, salt,  and red pepper together in a medium sized bowl.;

Roasted Garbanzos 2


  • Add the chickpeas and toss to coat.


Roasted Garbanzos 3

  •  Spread into a single layer on a baking sheet. Shake the pan back and forth a bit to disperse them evenly.

Roasted Garbanzos 4


  • Roast, stirring occasionally, until nicely browned and slightly crispy, about 40 to 45 minutes or until desired crispness.  They will continue to crisp a bit while cooling on the pan.


Roasted Garbanzos5

  •  Serve warm or cold.

Roasted Garbanzos6

Meatless Monday – Avocado Toast with Coconut ‘Bacon’

4

Avocado Toast 1

BACON – NEED I SAY MORE? I stopped eating meat last June and I must say I don’t really miss it. BACON, however, which really should be it’s own food group, is a different story… There is something about bacon’s crispy, fatty, salty deliciousness that is just so irresistible! I know people who are vegetarians, except for bacon.  I mean, there is a Bacon of the Month Club!   So when I stumbled upon a recipe for Sweet Smokey Coconut Bacon on Pintarest (via www.tohealthblog.wordpress.com ), I realized a stroke of brilliance was before me, bacon without the guilt.

I have been hooked on Avocado Toast for breakfast these past couple of weeks. I’ve been trying to recreate my favorite appetizer, Avocado Bruschetta, from Picco Restaurant in Larkspur, which has chorizo crumbled on top. I have been substituting dry toasted pine nuts and flakes of Maldon Sea Salt which I was pretty happy with -Until I heard about COCONUT BACON! I let my fingers do the walking (thank you google) only to find that there are many, many recipes for coconut bacon on the internet. How did I not know this? Two of my favorite flavors together sounds like a match made in heaven. The recipes call for varying combinations of coconut flakes, maple syrup, smoked paprika, cloves, Braggs Amino Acids, Liquid Smoke or Soy Sauce. For those, unenlightened folks like me, Braggs Amino Acids is a gluten free soy sauce substitute that has beneficial amino acids.  I tried one batch with liquid smoke and one without and I liked it better without, but that is a personal taste. I know a lot of men people love that smoky flavor .  So does it really taste like bacon?  Not really, but it makes a tasty substitute that is  mostly monosaturated fat and Omega-6 fatty acids, which are extremely beneficial for  the body.  For nutritional info on coconut click here:  (http://www.ehow.com/about_5304349_health-benefits-coconut-flakes.html)

Avocados have gotten a bad rap as a high fat, high calorie food when they  are actually quite healthy and are nutrient dense. (Calories that Count).   ‘Nutrient density is a measure of the amount of nutrients a food contains in comparison to the number of calories. One-fifth of a medium avocado (1 oz.) has 50 calories and contributes nearly 20 vitamins and minerals, making it a nutrient-dense food choice.  They are naturally sodium and cholesterol free and contain mono and poly unsaturated fats (good fats).’  For more information on the benefits of amazing avocados click here. (http://www.californiaavocado.com/avocado-nutrients/)

Avocado Toast 2Avocado Toast 3

Avocado Toast with Coconut 'Bacon'

  • Servings: 2
  • Difficulty: easy
  • Print


2 slices good bread (sourdough, ciabatta or whole grain )
1 Tbsn olive oil, coconut oil or butter (optional)
1 half ripe avocado
Salt (I like coarse or flaked sea salt)
2 Tbsn pine nuts (optional)
2 Tbsn coconut ‘bacon’ (recipe below)

  • Brush tops of bread with oil and broil for a few minutes until golden.  Or you can toast in a toaster and then brush with a bit of oil.
  • Dry roast pine nuts in a medium fry pan until golden.  Remove from heat.
  • Pit, peel and half avocado.  Slice.  Place half of slices on each piece of toast. Or you can ‘smash’ it on the toast with a fork.
  • Top with coconut bacon and pine nuts.  Sprinkle with salt.  Enjoy!

Coconut Bacon 5

Coconut ‘Bacon’

1 cup  coconut flakes
1 Tbsn liquid aminos (or soy sauce)
2 tsp liquid smoke (optional)
1 tsp maple syrup
1/2 tsp smoked paprika
4-6 cloves ground (or 1/4 tsp pre-ground cloves)
2 tsp  water
Coconut Bacon 1 Coconut Bacon 2
  • Mix the aminos, syrup, paprika, cloves, liquid smoke and water together in a bowl until well combined.  Gently stir in the coconut flakes, trying to coat them each thoroughly and soak up the liquid.  Let sit for 5 minutes, then stir again gently.

Coconut Bacon 3 Coconut Bacon 4

  • Preheat over to 300°F, then bake for 20 to 25 minutes.  Store them in a plastic bag or container.  Does not need to be refrigerated.

Coconut Bacon 5

Avocado Toast 1

[/recipe]