Wheatless Wednesday – Spicy Roasted Chickpeas

4

Roasted Garbanzos6

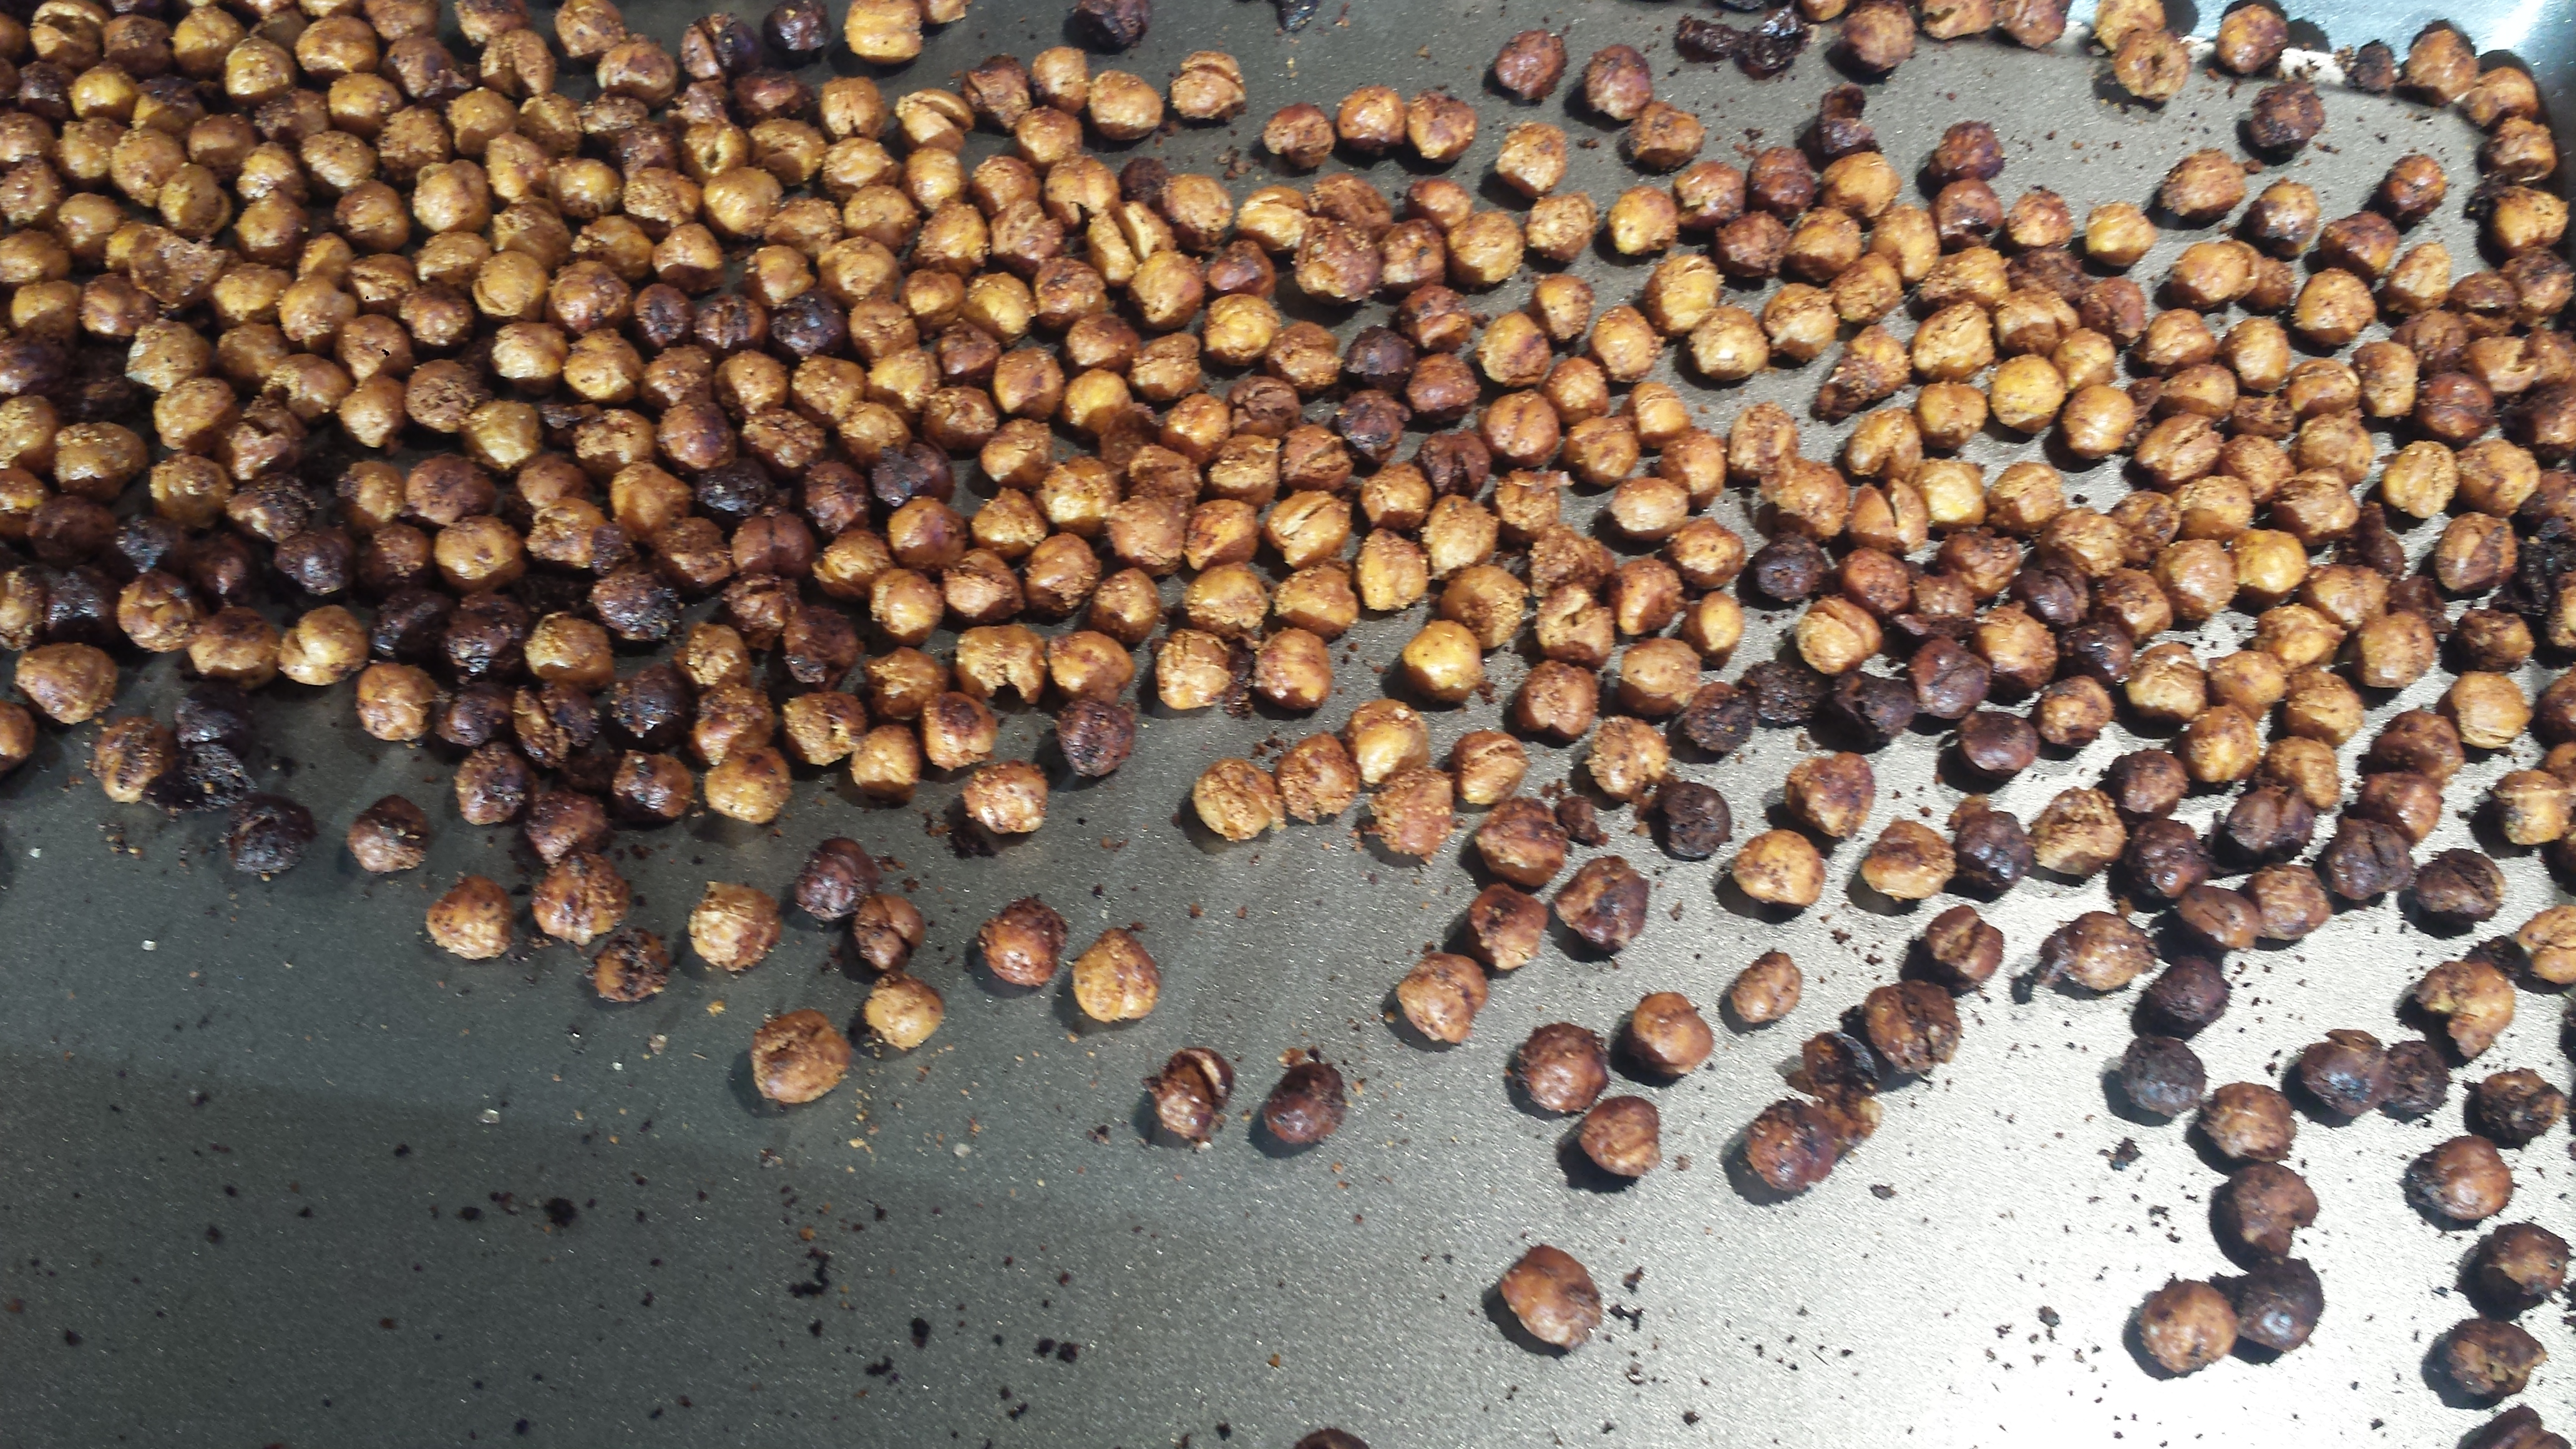
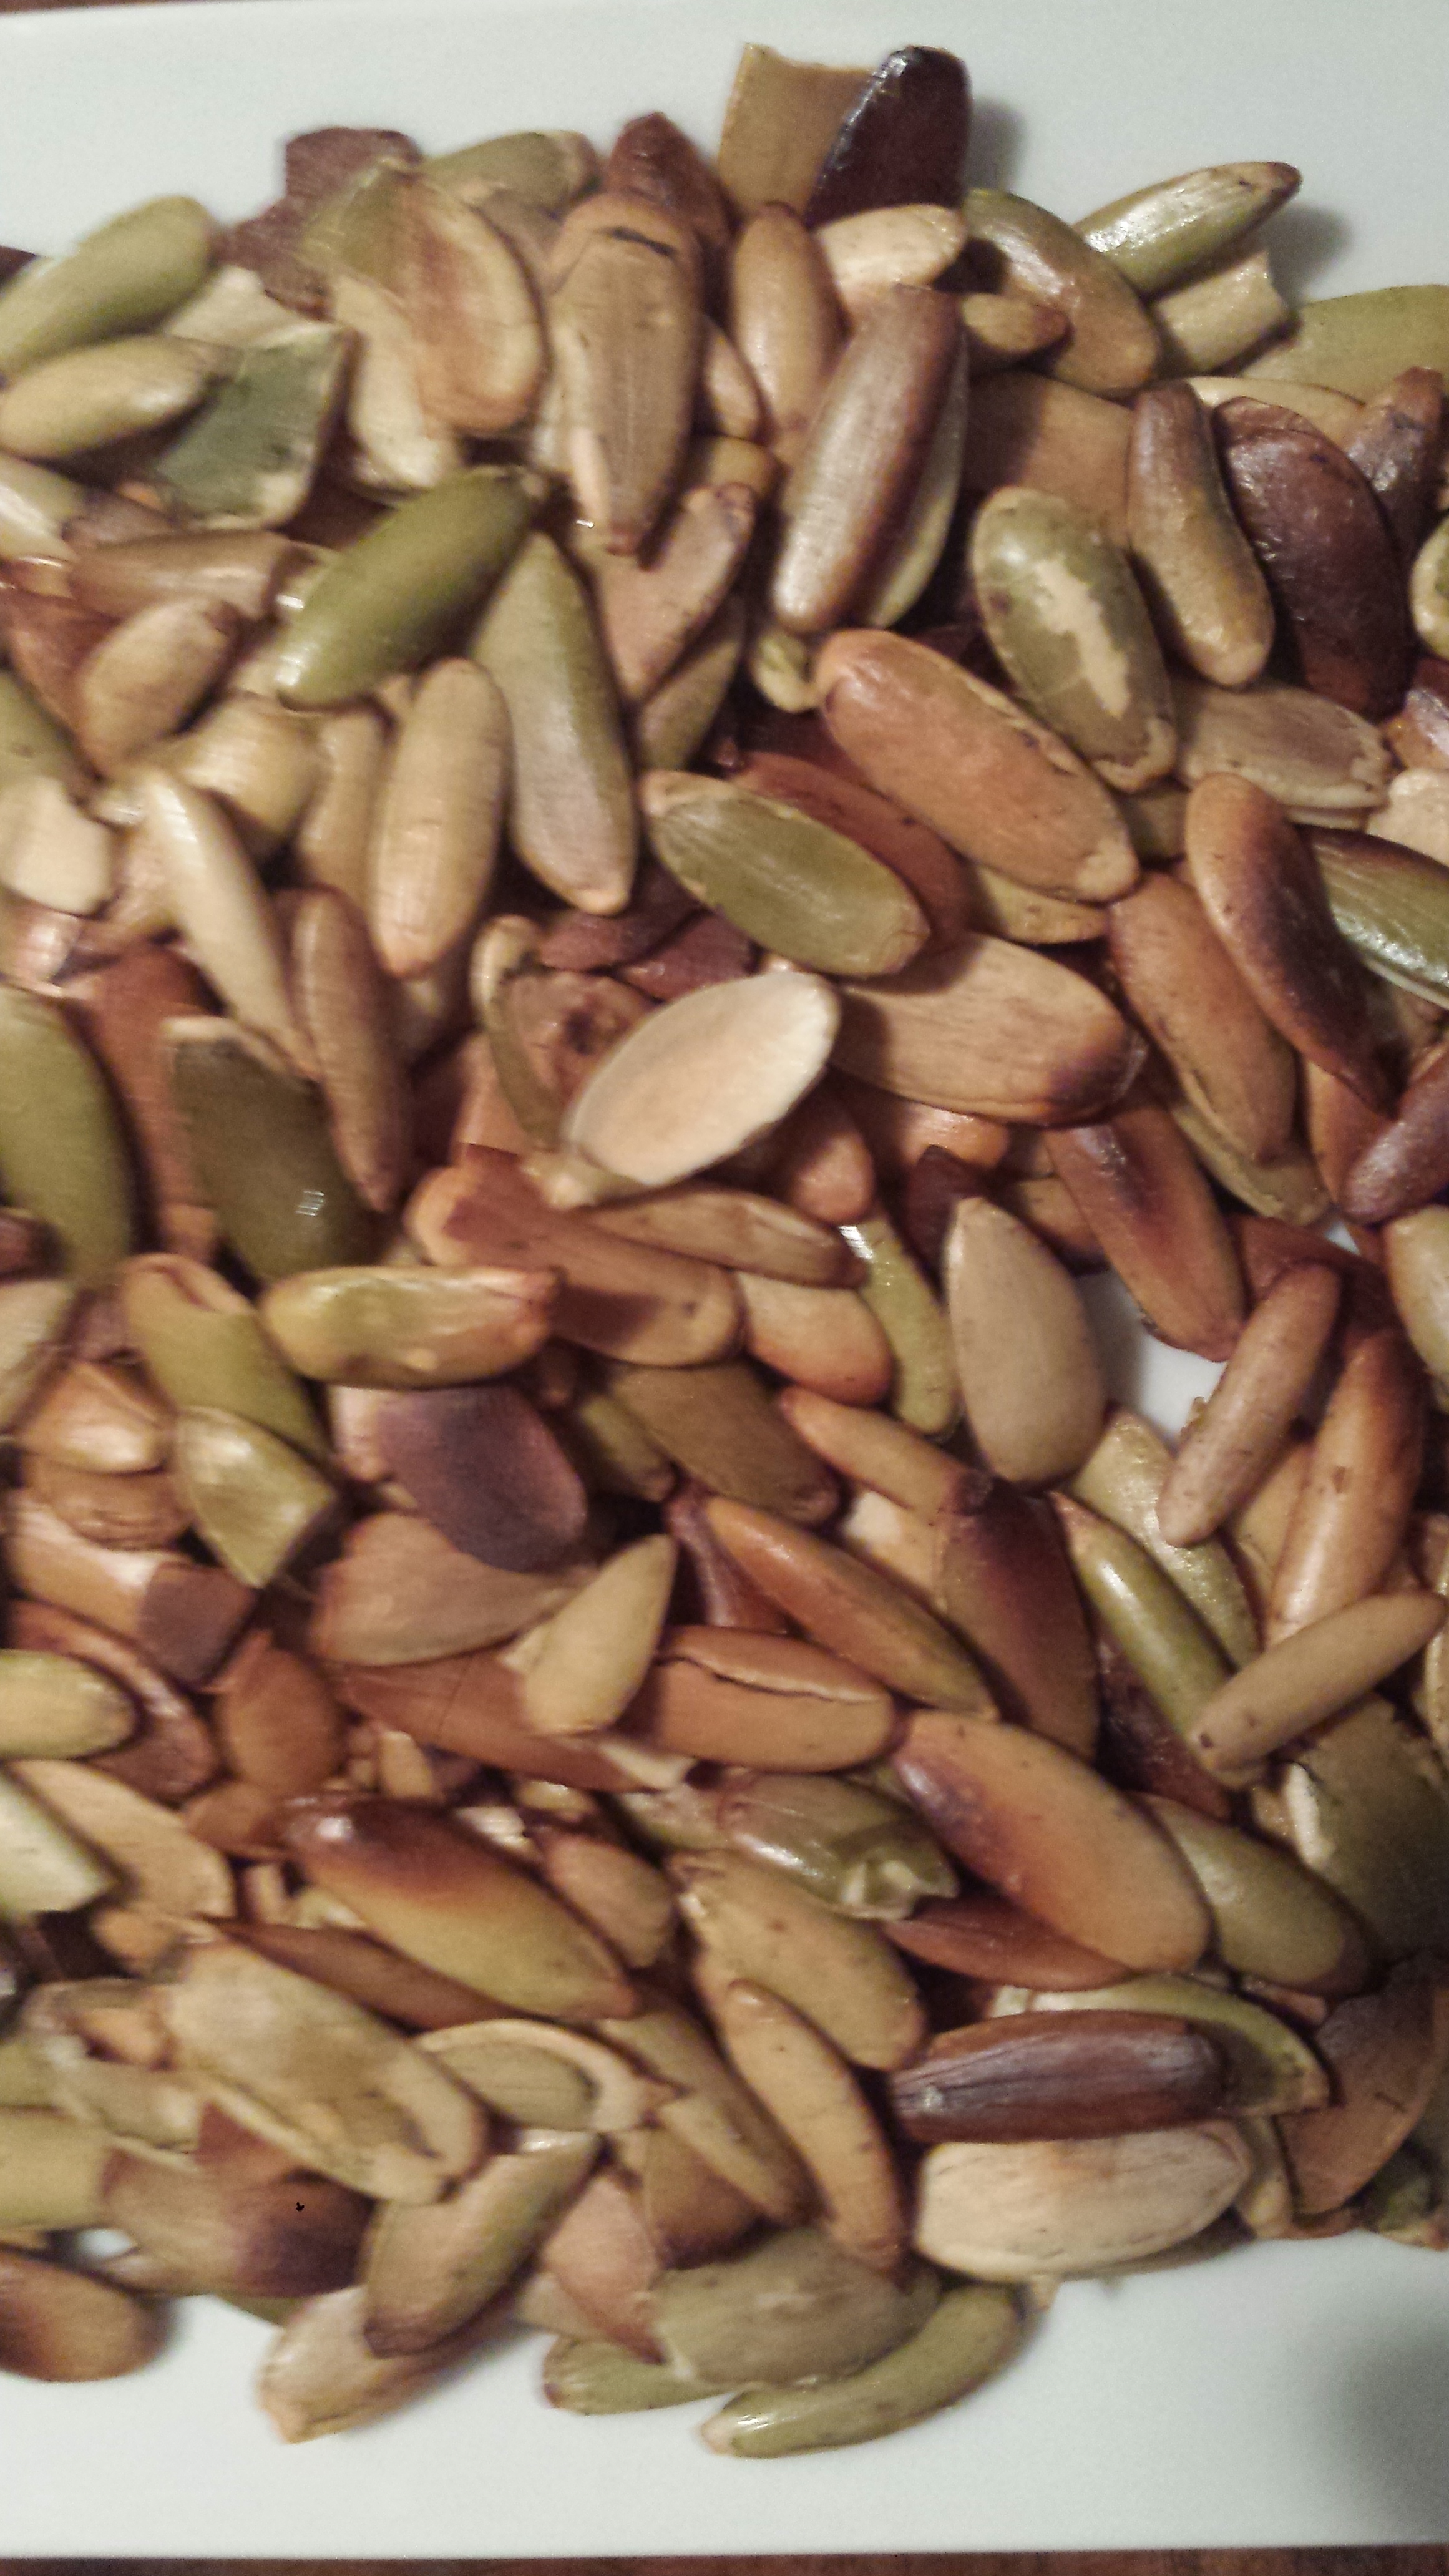
Warning – Highly Addictive! If you like Corn Nuts you’ve got to try these.   I got this recipe idea from my friend, Laura, who makes these snacks for her two teenaged boys, who gobble them up and ask for more without actually knowing what they are eating.  When they would first ask,  Laura’s answer was really vague (sudden attack of coughing) or evasive  (urgent phone call). She finally decided to call them Bean Pops. Clever Mama!  Regardless of the mommy maneuvering, she is getting her boys away from bad fat and preservative laden junk foods to protein and nutrient rich, yet still yummy chickpea snacks, or what I think of as healthy ‘corn nuts’ (if there can be such a thing).  Garbanzo beans are a source of several vitamins including vitamin C, B6 and folate. Many dietary minerals are also available from garbanzo beans, including manganese, phosphorus, copper, iron, magnesium, selenium, zinc and calcium. (www.livestrong.com )

Dieters take note!  ‘Furthermore, there is a recent study in which participants consumed fewer processed foods and less food overall when the diet was supplemented with garbanzo beans.  Research suggests that the fiber benefits of garbanzo beans may go beyond the fiber benefits of other foods’.  For more information on this study click here: http://www.whfoods.com/genpage.php?tname=foodspice&dbid=58

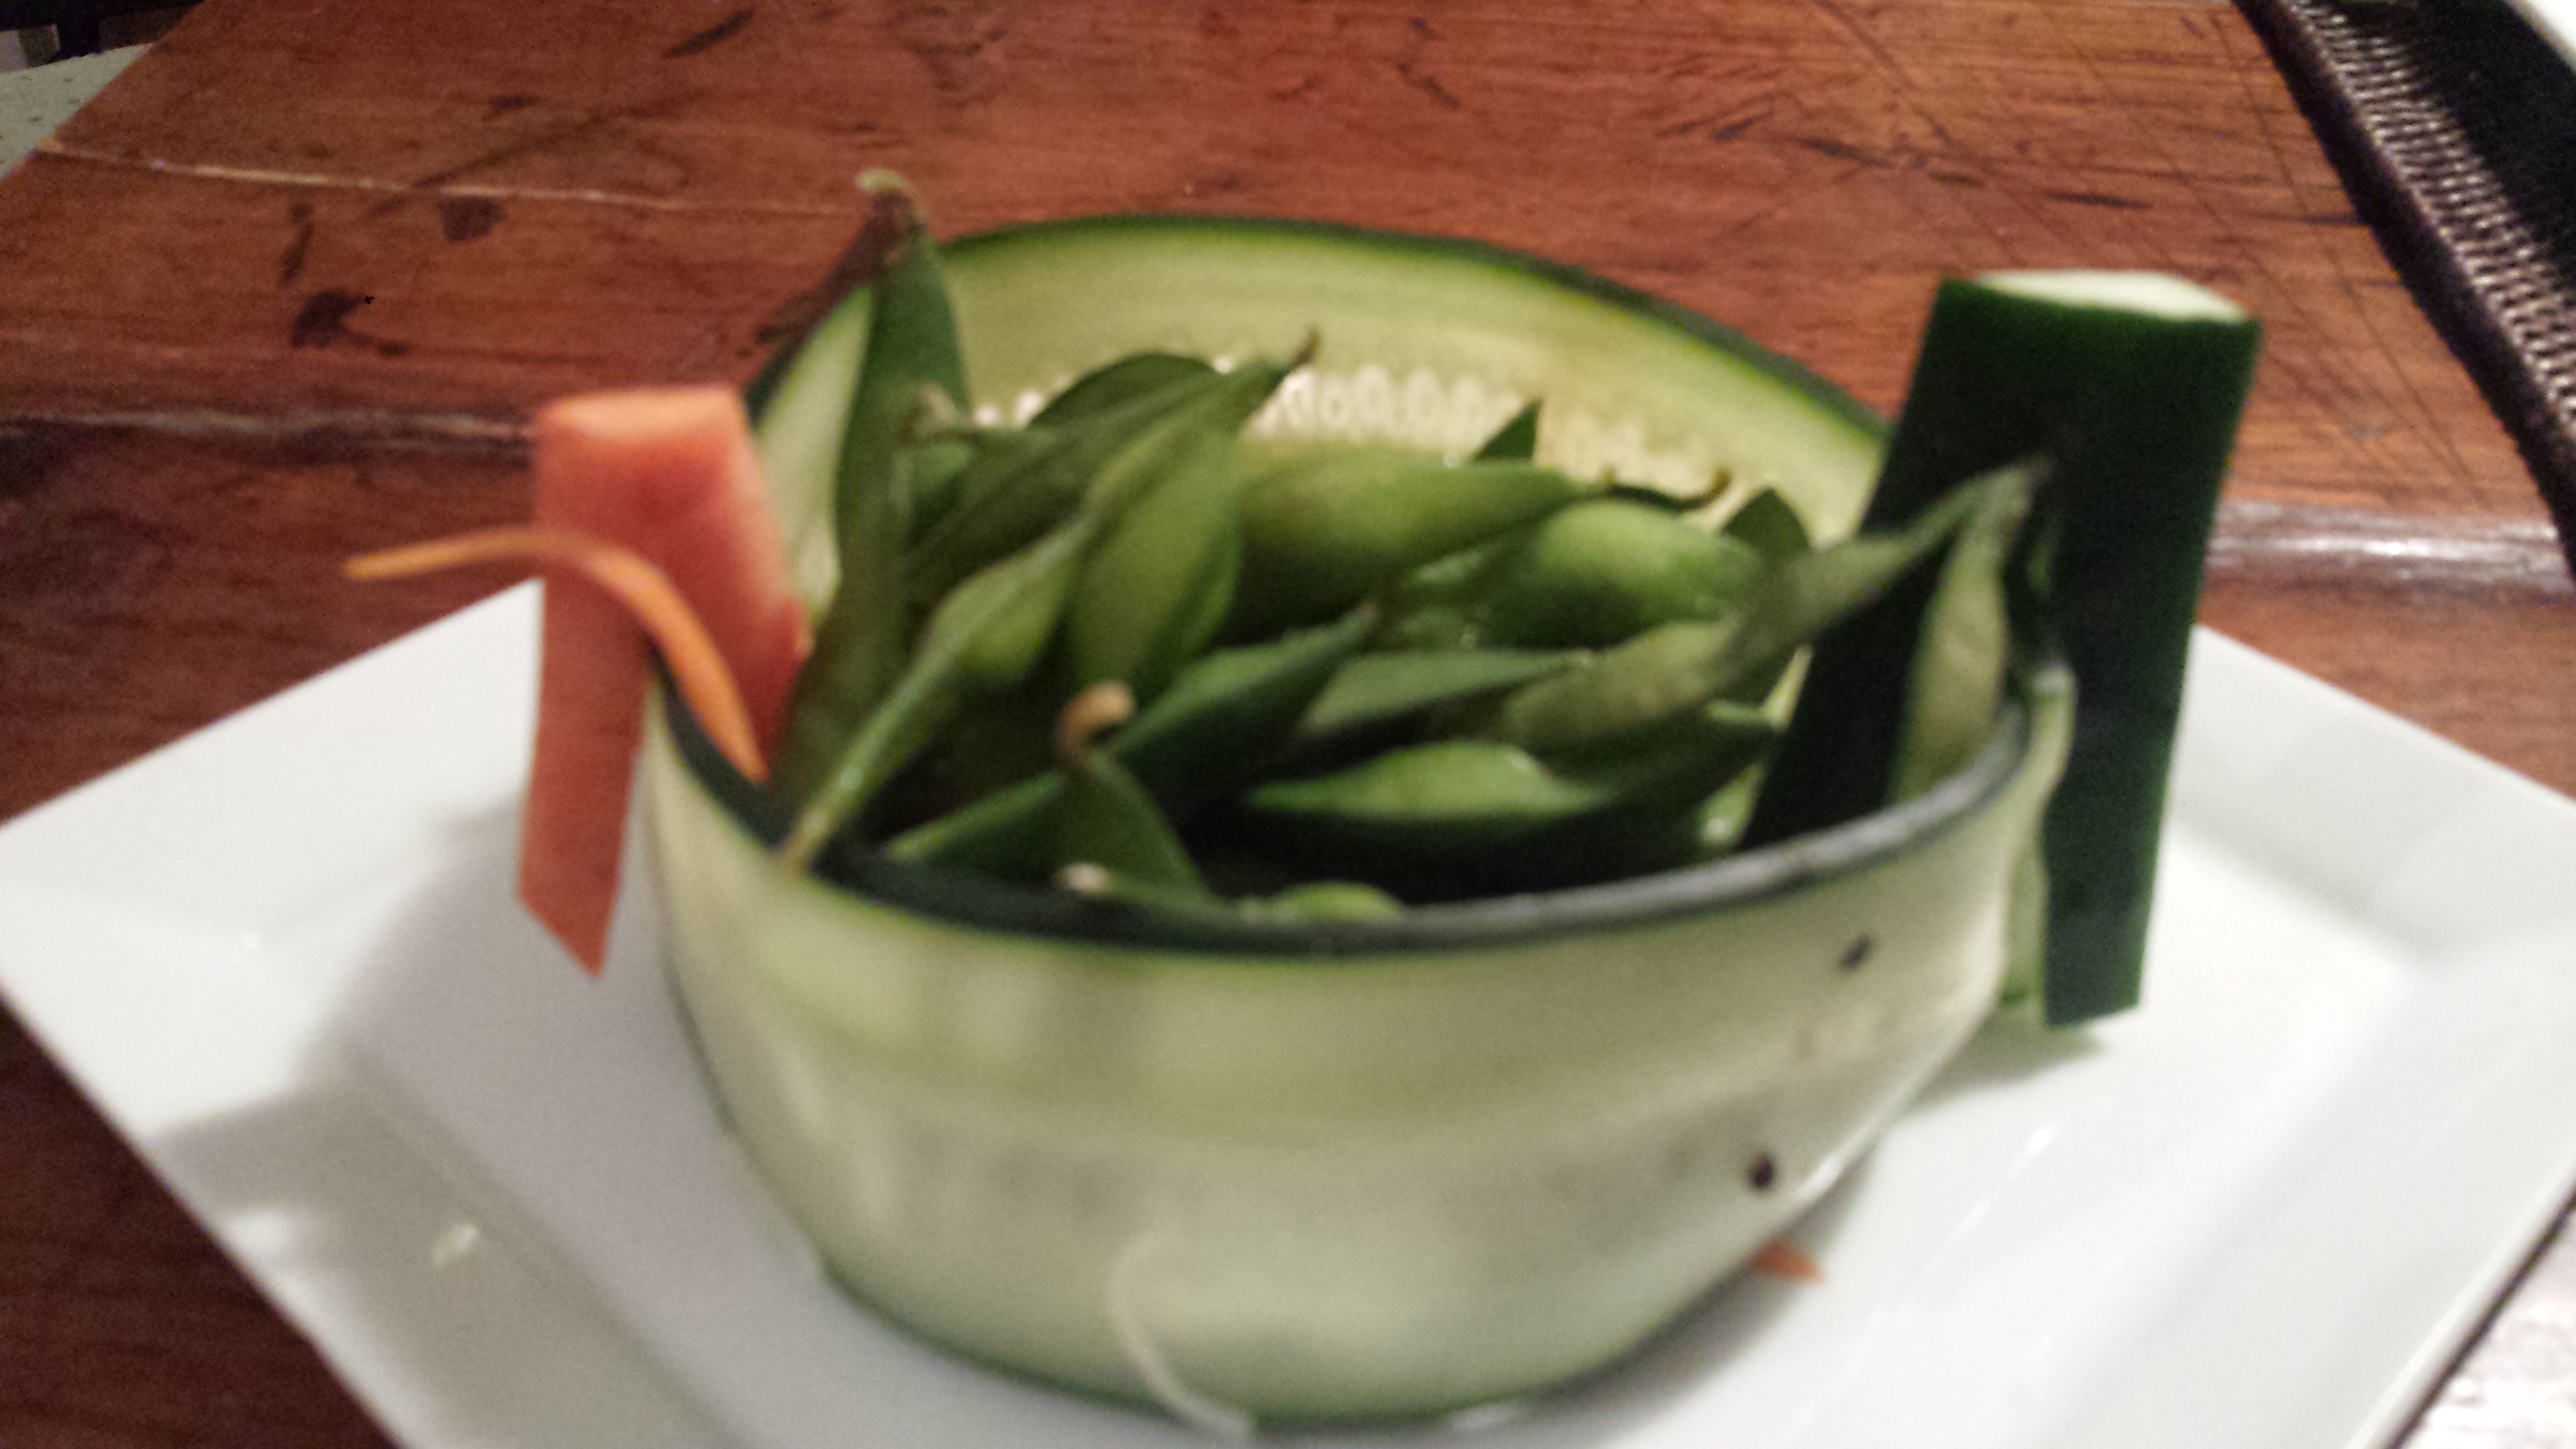
When I was a teenager, my Mom went through a garbanzo (also called chickpeas or ceci beans) phase where they showed repeatedly up in our salads and main dishes – even as flour in bread. (My Mom was way ahead of her time – by 25 years or so). I checked with my sister, Margaret, who also remembers the time when we had garbanzos coming out of our ears.  She admitted though that they are now her favorite bean and she puts them in everything she can, so I guess the apple doesn’t fall far from the tree.   I didn’t appreciate my Mom’s creativity at the time, especially since I wasn’t a garbanzo fan as a kid.  I am a huge fan now though (same apple tree, I guess).  I called my Mom to see what she had to say on the subject and she was about to start some garbanzo sprouts which nutritionally speaking is like garbanzos on steroids (increased vitamin content among a host of other benefits).  So there you go.  At 86, Mom  is still way ahead of everyone else!

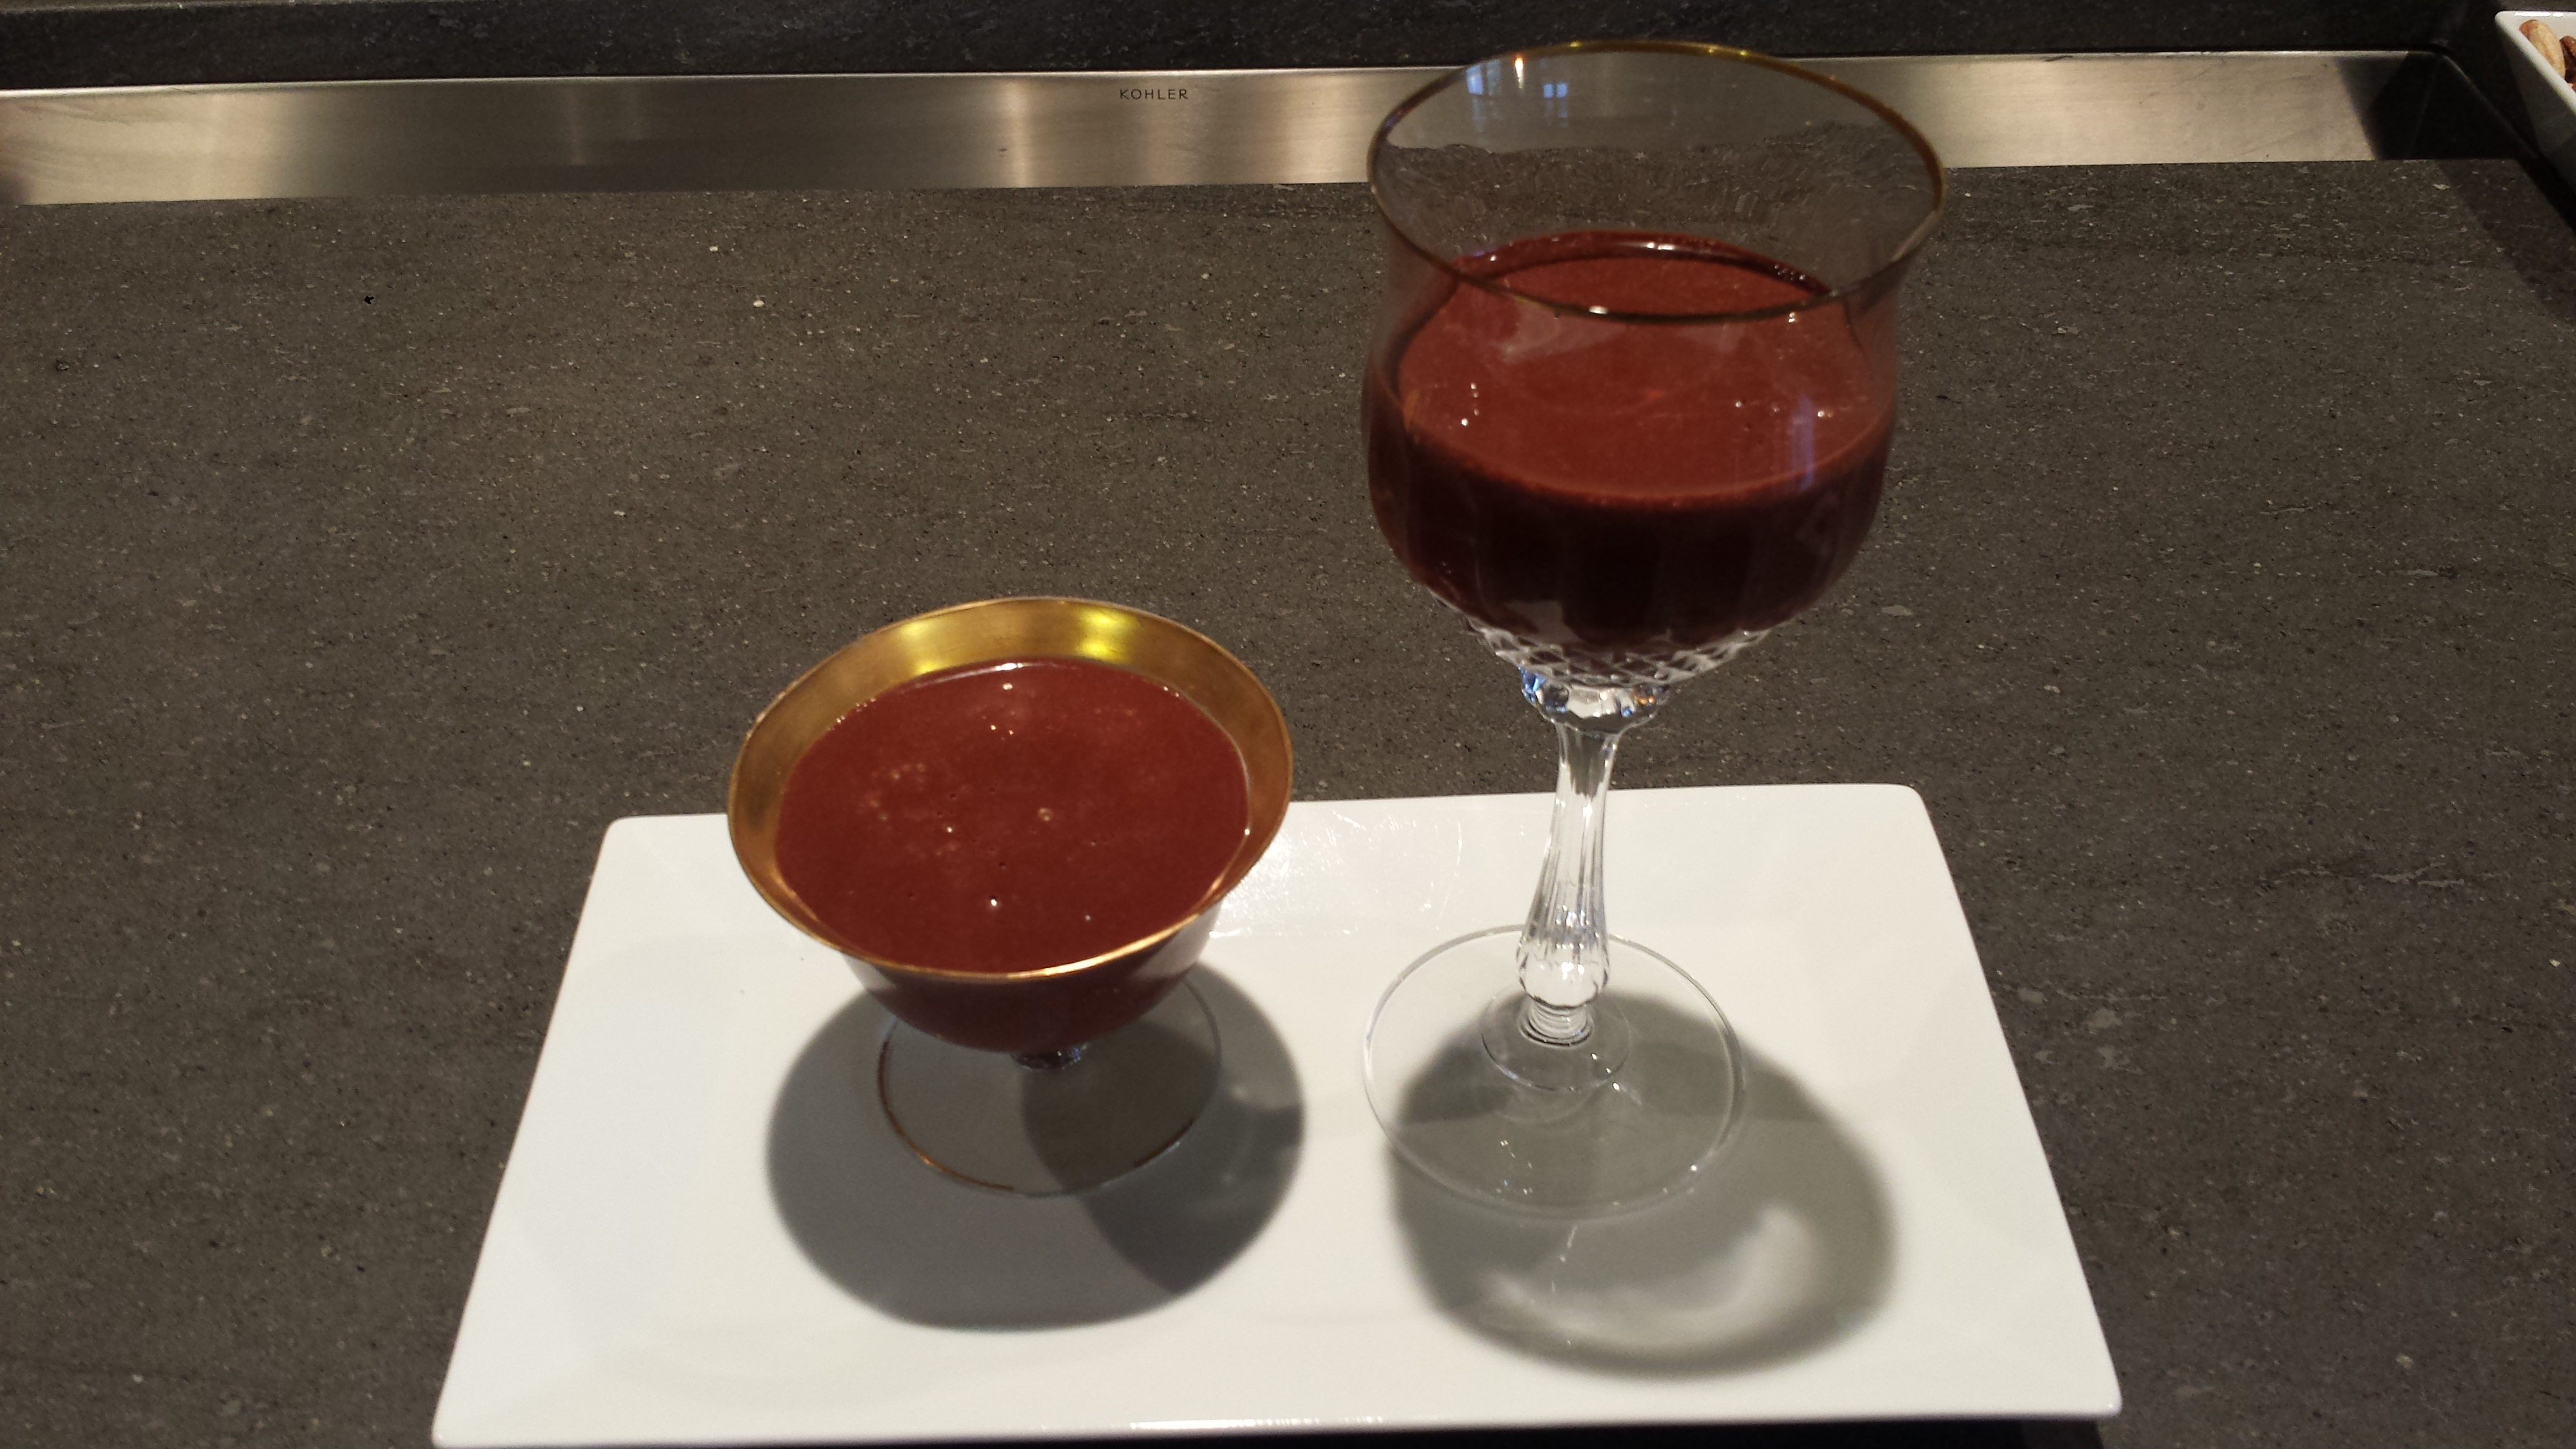
Shameless PlugTIP: Spicy Roasted Chickpeas are particularly delicious when paired with a glass of red wine. I’m enjoying  the 2009 Paradisos Red Wine from my brother, Paul’s winery, Paradisos del Sol in Zillah, Washington.  It retails for $28 per bottle but if you mention my blog you will get the $14 family rate.  They deliver to Seattle too!  Check them out at http://www.paradisosdelsol.com/  Cheers!
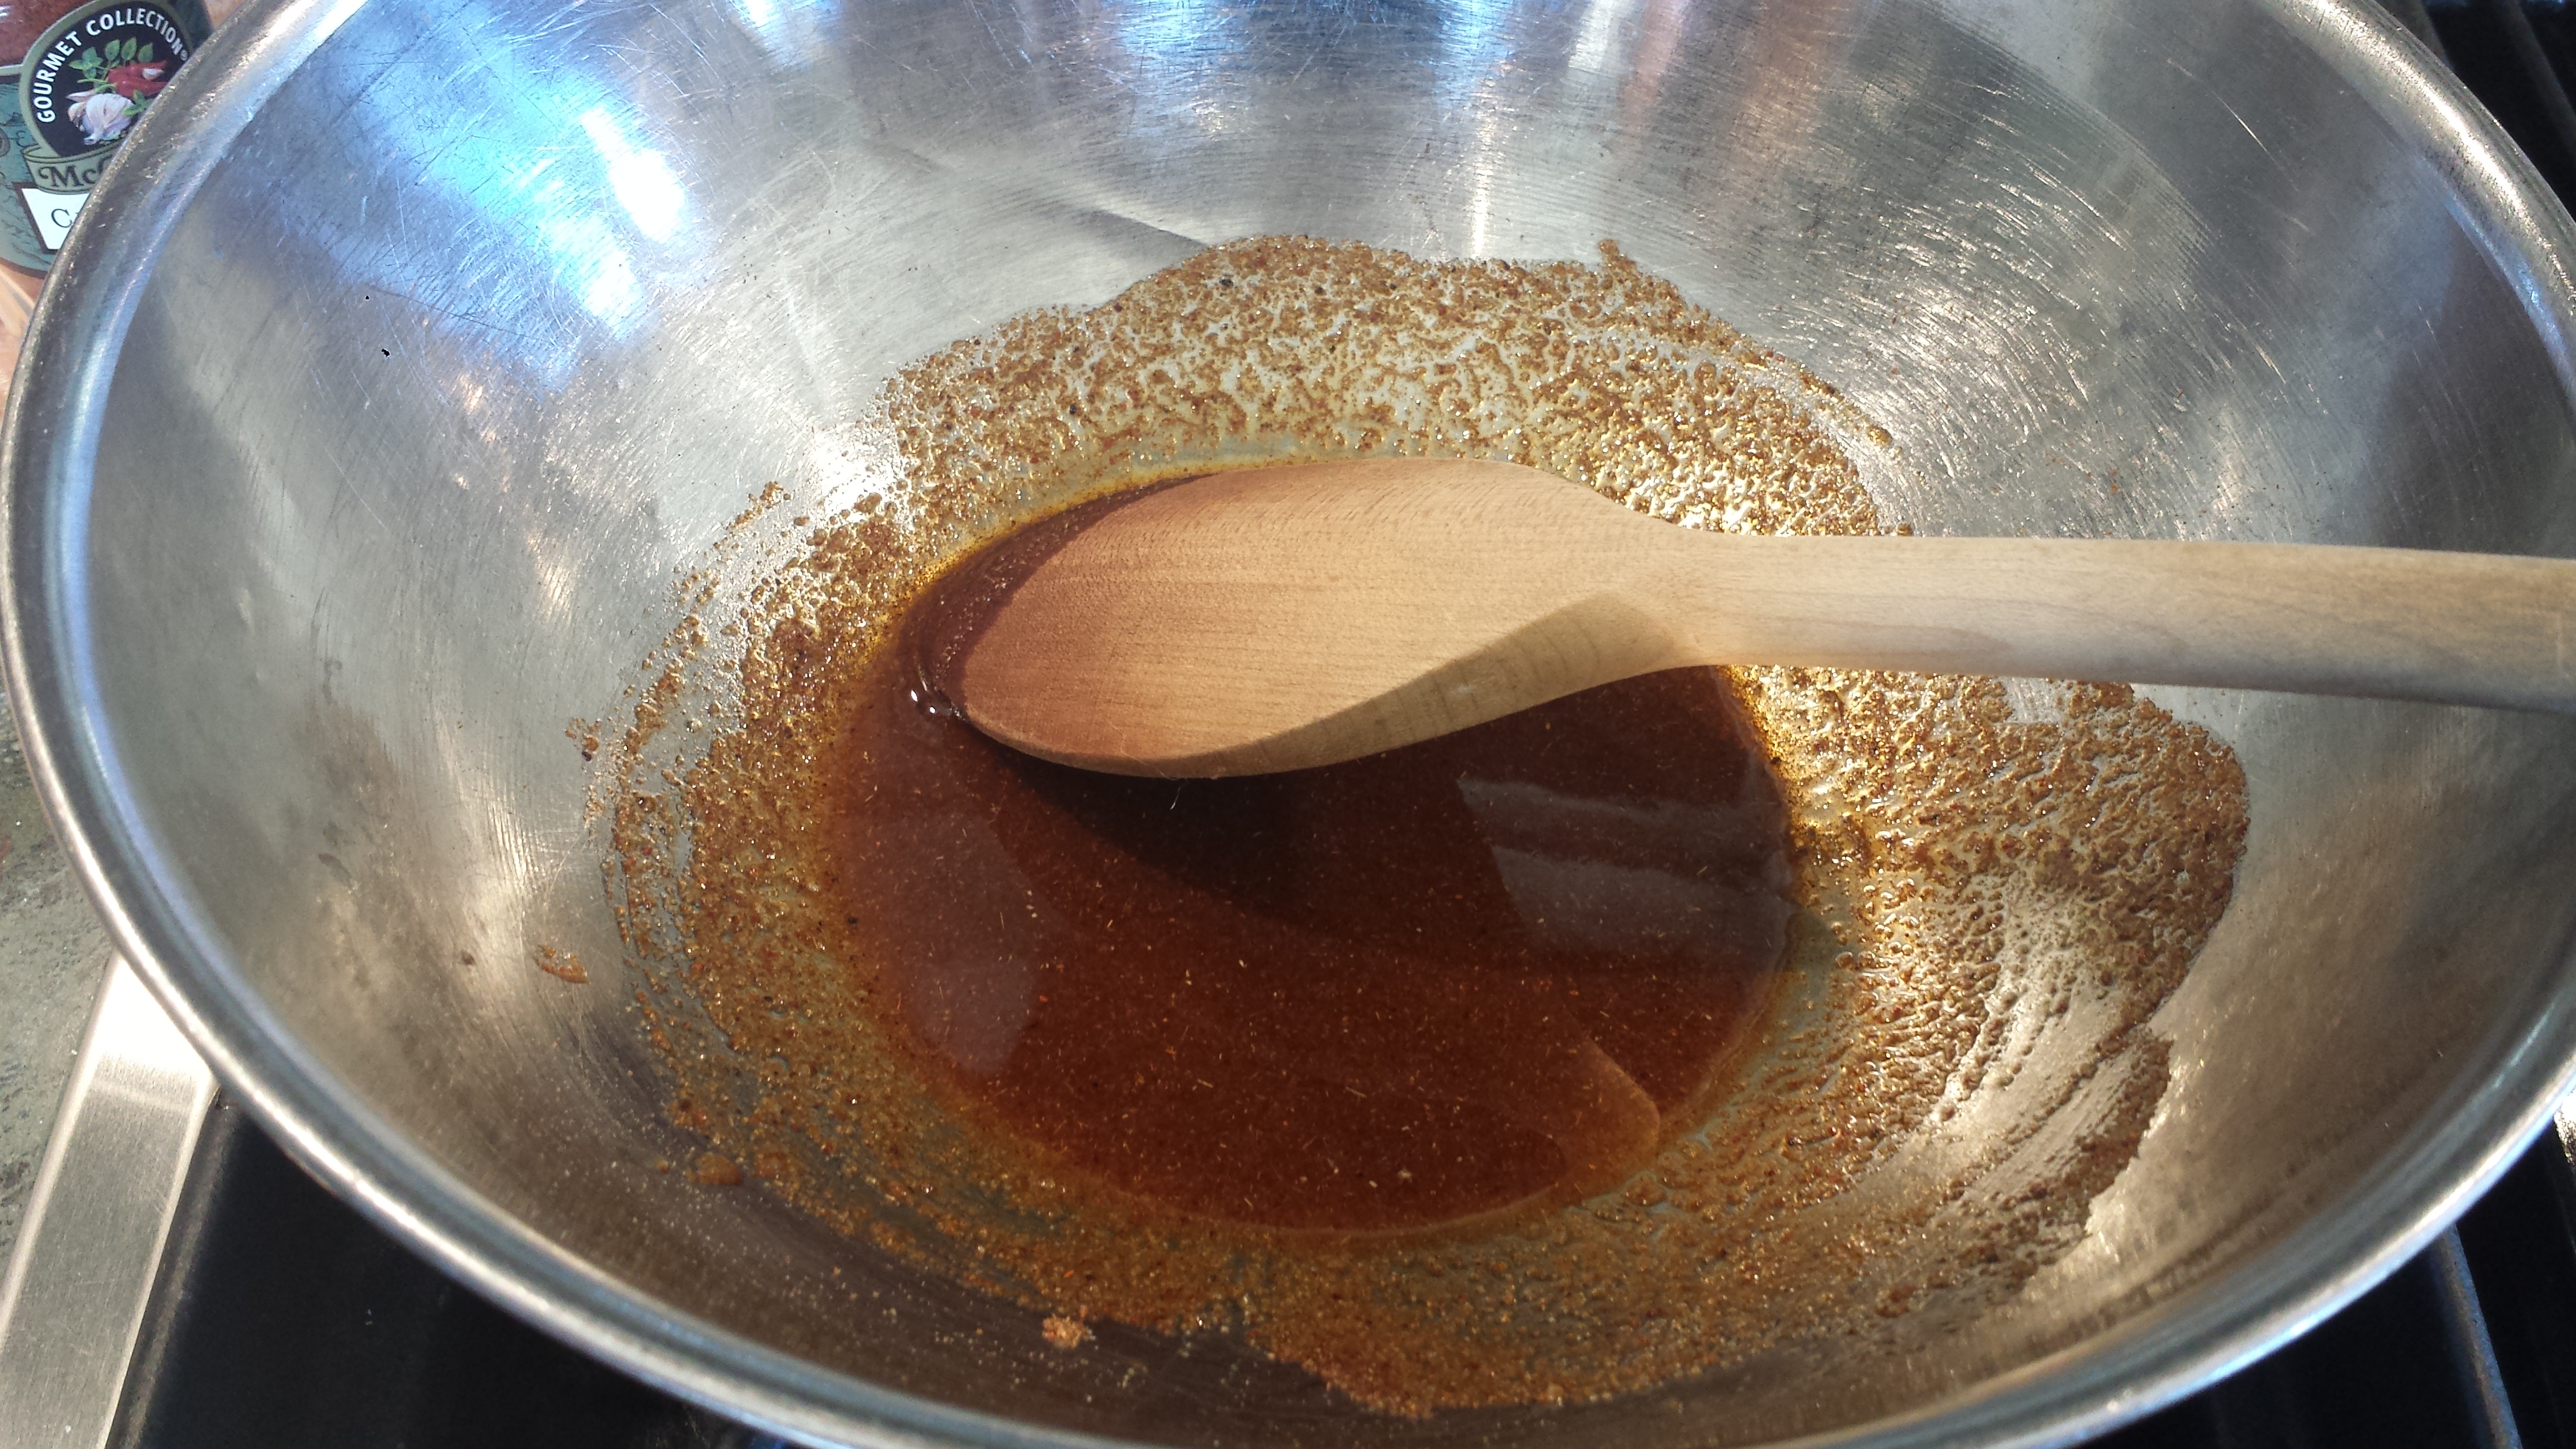
Spicy Roasted Chickpeas

  • Servings: 3 cups
  • Difficulty: easy
  • Print

2 Tbsn olive oil
1 Tbsn ground cumin
1 tsp garlic powder
½ tsp chili powder
1 tsp salt (or to taste)
¼ tsp cayenne pepper (or more if you like spicy)
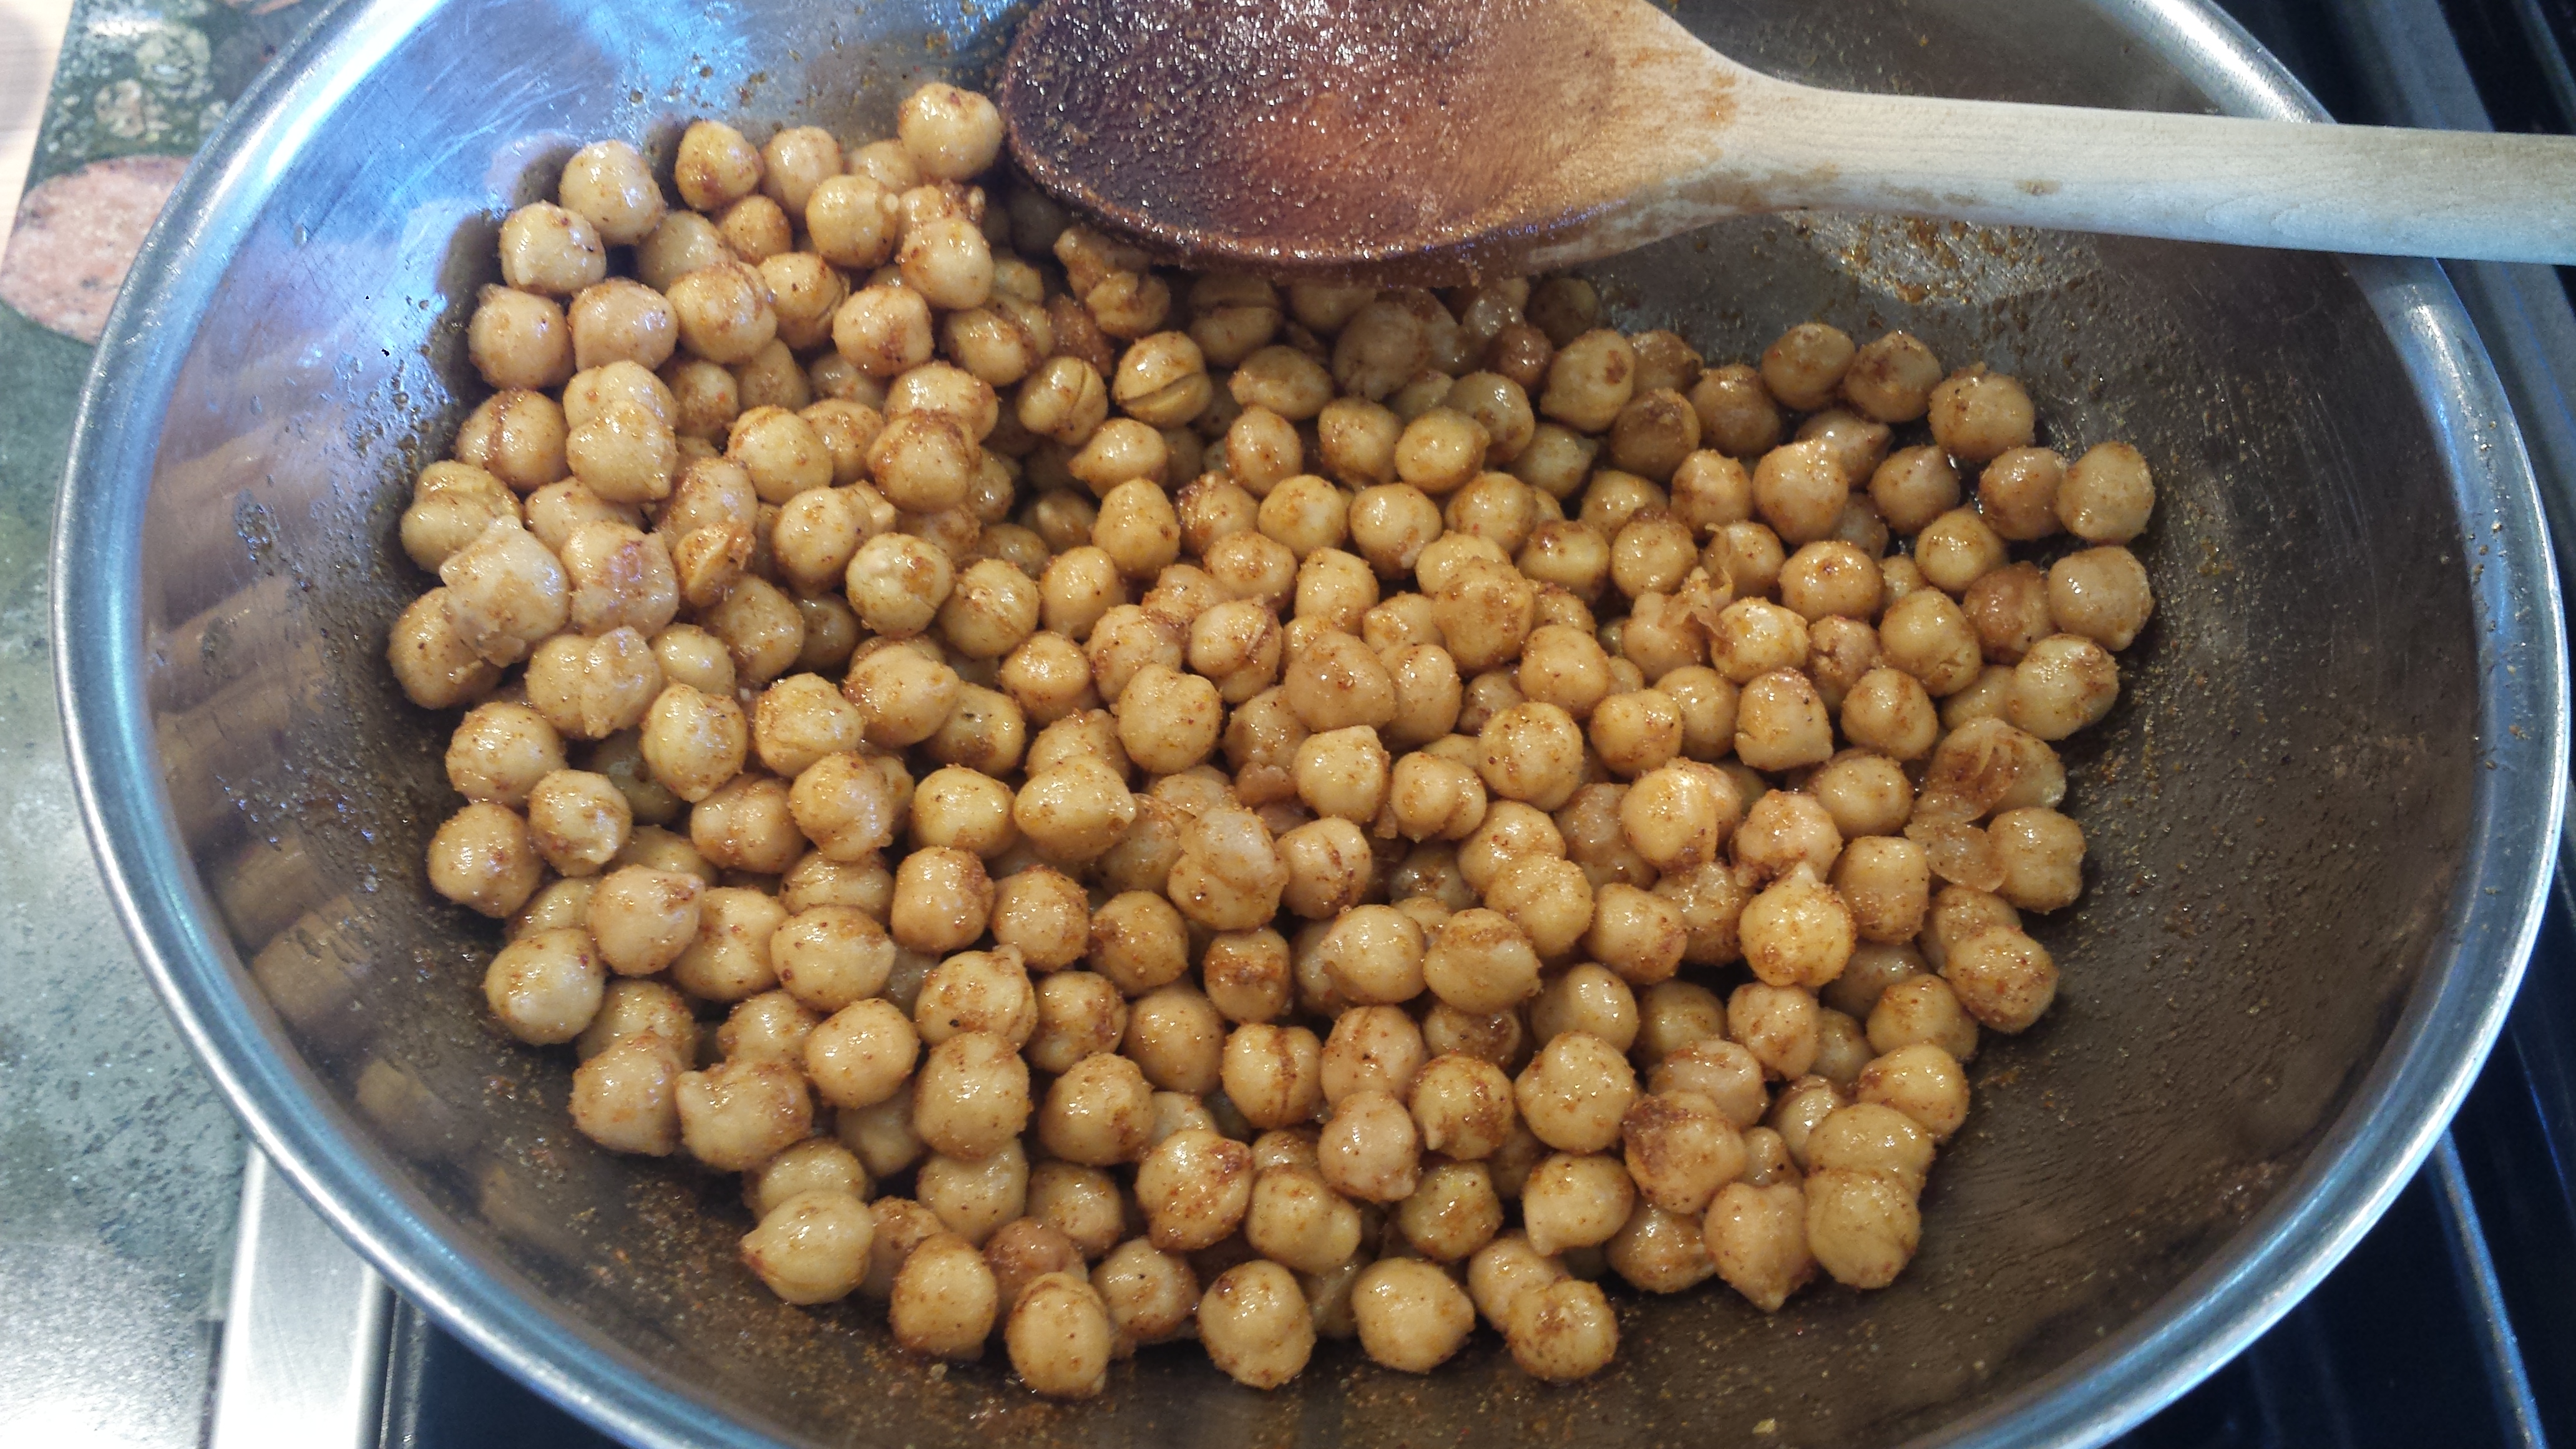
2 cans chickpeas/garbanzo beans (or 2 -3 cups cooked dry beans)

  • Preheat oven to 400  degrees
  • Rinse and dry garbanzo beans.  You can either air dry them on paper towels or pat dry with additional papertowels.

Roasted Garbanzos 1

  • Whisk the oil, cumin, garlic powder, chili powder, salt,  and red pepper together in a medium sized bowl.;

Roasted Garbanzos 2


  • Add the chickpeas and toss to coat.


Roasted Garbanzos 3

  •  Spread into a single layer on a baking sheet. Shake the pan back and forth a bit to disperse them evenly.

Roasted Garbanzos 4


  • Roast, stirring occasionally, until nicely browned and slightly crispy, about 40 to 45 minutes or until desired crispness.  They will continue to crisp a bit while cooling on the pan.


Roasted Garbanzos5

  •  Serve warm or cold.

Roasted Garbanzos6

Wheatless Wednesday – Kusshi Oysters with Jalapeno Mignonette

0

Oysters2
I’m not sure if oysters really make you fall in love, or even lust, but the possibility is certainly a fun concept.  The last two times he’s been to the Farmer’s Market my husband has come home with fresh oysters. Hmmm…  ‘Oysters have always been linked with love. When Aphrodite, the Greek goddess of  love, sprang forth from the sea on an oyster shell and promptly gave birth to  Eros, the word “aphrodisiac” was born. The dashing lover Casanova also used to  start a meal eating 12 dozen oysters.” (www.globalgourmet.com)  Regardless of their effect on our love lives, oysters are at the very least  nutrient rich and low in fat and calories (57 for 6 medium for those counting).  High in protein and low in fat, oysters are an excellent source of vitamins A, B1(thiamin), B2 (riboflavin), B3 (niacin), C and D. Four or five medium size oysters supply your daily allowance of iron, copper, iodine, magnesium, calcium, manganese and phosphorus. Oysters also provide large amounts of zinc;  a mineral which boosts prostate health, so maybe there is a germ of truth to the folklore.  (Nutritional Data from www.hogislandoysters.com)

We bought two kinds of oysters from the Santa Rosa Seafood Company at the Marin Country Mart Farmer’s Market on Saturday.  Kusshi ( meaning precious in Japanese) is a West Coast oyster, grown in Deep Bay, British Columbia.  They are small, sweet and very clean tasting so we decided to serve them raw with a tasty jalapeno mignonette called “Hog Wash” by the Hog Island Oyster Company.  My husband has become quite an expert shucker, armed with an oyster knife and oven mitts to protect his hands from the sharp shells.  I would not suggest trying to shuck your own oysters without the proper tools.  Click here for a video on how to shuck oysters: http://hogislandoysters.com/kitchen/shucking-oysters

Oysters3

The other oysters, local Drake’s Bay, are very large and meaty, more than bite size, so we just popped them on the grill whole. Once you hear them ‘pop’, you can pry the top shell off and top them with barbecue sauce.   We used the rest of the yummy Chipotle Butter (also a  Hog Island recipe) left over from the  last time we made them. Since I have already posted that recipe I won’t repeat it.   To see that original post with complete recipe and directions click here:  https://goodmotherdiet.com/2013/12/21/grilled-oysters-with-garlic-chipotle-butter/

Oysters4

Jalapeno Mignonette

  • Servings: 3/4 cup
  • Difficulty: easy
  • Print

Jalapeno Mignonette (aka Hog Wash)

1/4 cup seasoned rice vinegar
1/4 cup natural rice vinegar
1 large shallot, peeled and roughly chopped
1 large Jalapeno pepper, seeded and roughly chopped
1/2 bunch of cilantro
juice of 1 lime
  • Put all ingredients in a food processor or blender and process until smooth. For a chunkier mignonette, just dice the shallots, jalapeno and cilantro finely and combine ingredients.  This is mildly spicy, so for more spice, include some or all of the jalapeno seeds.

Oysters6Oysters2

Wheatless Wednesday – Mushroom & Barley Soup with Cannelini Beans

1

Mushroom Barley Soup 1

Is Barley the smarter but less popular sister? Back in Medieval times barley was widely consumed and was one of the first grains cultivated by humans. Barley beer was thought to be one of the first alcoholic drinks developed by Neolithic humans. (Yes, that long ago)  Barley later on was used as currency which makes me think it was pretty important back then. (Wikipedia)  Barley is a nutritional powerhouse.  According to the FDA, barley’s soluble fiber reduces the risk of coronary heart disease and can lower cholesterol. Barley also contains insoluble fiber, which reduces the risk of Type 2 diabetes and colon cancer. Barley is virtually fat-free, cholesterol-free and gluten free.  Who knew our ancestors were so smart?

Did you know that barley is the number 4 produced grain in the US (behind wheat, rice and corn)? It is grown in more than half of US states, so why is barley not thought of as a regular rice, potato, wheat option at our dinner table?    Where is it going?  According to the Barley Growers Association  over half of barley goes to feed animals sold for food, 44% is made into malt for beer and whisky, 3% is for seed and just 2% is food for humans.  I guess we are more likely to be drinking our barley than eating it.

I admit that I’m guilty.  I have never made anything with barley.  My son and creative chef, Eric, who knows I have a new-found quest to seek out wheat free options, suggested I make a version of his barley soup (and  I just happened to have a package of Black Barley in my pantry that I didn’t know what to do with). Now that California is finally getting our winter (read seven days in a row of much needed rain) the thought of a big pot of soup bubbling away in my kitchen sounds pretty appealing.  It warms up your house and your heart from the inside out.

Black barley is a whole grain that has been prized for generations in Ethiopia. It has a chewy texture and dark purplish black appearance. It can also take 3 or 4 hours to cook so be forwarned.  Pearl barley, which is the variety typically found in supermarkets, is processed to remove some of the outer bran layer, but unlike with processed rice which has lost most of it’s food value, barley retains significant amounts of fiber and nutrients because the fiber in barley is located throughout the entire kernel and not just in the outer layer. Pearl barley cooks in about 30 to 40 minutes. I have also heard that there is a fast cooking barley but I don’t know where you can get it.  Regardless of which kind you use, follow the cooking instructions on the package and then incorporate it into the recipe.  You can substitute any bean or legume for the cannellini beans which adds a little protein boost. I think Eric often uses lentils which sounds like a good combination.  Feel free to use beer instead of sherry for twice the barley power. Stay warm and dry…
BarleyLarge2

Mushroom and Barley Soup with Cannelini Beans

  • Servings: 4-6
  • Difficulty: easy
  • Print

1 cup barley, black, pearled or quick cooking
1 cup cannellini beans, cooked
1 Tbsn olive oil
1 small or 1/2 large onion, diced
1 garlic clove, minced
1 large carrot, chopped
1 small zucchini, chopped
10 ounces sliced mushrooms, any kind
1/2 tsp dried thyme
1 tsp dried oregano
1 quart vegetable broth
2 tbsp dry sherry
  • Rinse barley to remove any lingering dust or debris and cook according to directions, as different types of barley require varying cooking times.
  • Heat oil in a soup pot or Dutch oven. Cook onion, garlic and carrots on medium heat until softened
  • Add dried herbs, vegetable broth, beans, barley, sherry, zucchini and mushrooms and simmer for about 20 minutes.
  • Salt and pepper to taste.

.

Meatless Monday-Warm Lentil Salad with Roasted Squash & Shaved Brussels Sprouts

2

lentils1

Is it really still winter?  You would never know it by the sun shining outside on this beautiful morning. (Sorry my East Coast friends…)  I’m still hoping for more than four days of rain before I will admit to Spring. Days are still short though,so there isl a chill to the air by dinnertime calling for hearty dishes to fill the belly.   Winter vegetables like gorgeous butternut squash and Brussels sprouts are abundant and so delicious!  Each one of these dishes is great on its own but combine them with lentils and you’ve got a winner.

I am pretty passionate about lentils.  They come in many colors and sizes and I love them all.  Brown and red lentils are great in soups and stews but my absolute favorite is the French green lentil (Le Puy) which is considered the top dog in the lentil world.  Lentils are actually named for their lens shape (Lens culinaris) and green lentils maintain this shape when cooked which is why they don’t get mushy.   Green lentils are delicious  and can transform a salad or side dish into a protein packed meal.   Lentils have the third highest amount of protein of any legume or nut (after soybeans and hemp) and contain dietary fiber, vitamins and minerals, including iron. For this recipe I added roasted red pepper which gives the lentils a distinctive flavor.  Roasting peppers is very easy but in a pinch you can also buy them in jars already roasted.  They can be roasted in the oven on high heat, on your grill or over an open flame on your stove.  I just put the whole pepper on the lowest rack in my oven while preheating it for the squash and turned it every 5 minutes or so to char on all four sides.  Then let it cool in a paper bag and the skin slips off really easily.  Tossing the lentils in vinaigrette is the final touch and gives you a chance to add fresh herbs and spices.

Butternut squash is another versatile and nutrient rich food.  It can be roasted, mashed, stuffed, pureed and baked into muffins and casseroles.  My favorite way to prepare squash is very simple, drizzled with olive oil and roasted with salt and pepper.  Sometimes I splash a bit of balsamic vinegar over it before cooking to intensify the gorgeous orange color and bring out its natural sweetness.

My husband loves Brussels sprouts and I am always looking for new ways to prepare them. Right now they are in season so its a good time to add them into your diet if you haven’t already.   Brussels sprouts are another food powerhouse, in the cruciferous family like broccoli and kale. They contain sulforaphane which is believed to have anticancer properties and indole-3-carbinol which boosts DNA repair and is thought to block the growth of cancer cells.  Boiling Brussels sprouts somewhat lessens their cancer fighting potency (probably the good stuff gets thrown out with the water) but roasting and sautéing does not.  (Wikipedia)  In this dish, I have paired them with sliced shallots, garlic and toasted pumpkin seeds for a tasty and pretty dish.

Warm Lentil Salad

  • Servings: 6
  • Difficulty: easy
  • Print

1 cup green lentils
2 1/2 cups vegetable broth
1 red bell pepper or  4 oz jar roasted red peppers
2 tablespoons coarsely chopped fresh cilantro
1 shallot, finely diced
1 clove garlic, chopped fine
1/2 teaspoon ground cumin
1 Tbsn red wine vinegar
1 tsp balsamic vinegar
1/2 tsp dry mustard
3 tablespoons extra virgin olive oil
Salt and pepper to taste
2 Tbsn crumbled feta(optional)
Lentils11
  • Roast whole red pepper in a hot oven or over an open flame turning to char all four sides.  Put in a paper bag and let cool.  Remove peel and seeds.  Cut into small dice.

Lentils6Lentils4Lentils3

  • Saute shallot and garlic in 1 tablespoon oil.  Add vegetable broth and lentils and  simmer lentils 15 or 20 minutes, or until just soft but not mushy. Set aside with lid off to stop the cooking process.
  •  To make vinaigrette, combine red wine vinegar, balsamic, 2 tablespoons olive oil,, garlic, mustard and cumin in a medium bowl with a fork or whisk. Season with salt and pepper to taste.
  •  Place the lentils, peppers and cilantro in a medium bowl.
  •  Toss with vinaigrette and top with feta if desired.

Lentils10

Roasted Butternut Squash with Cumin and Balsamic

1 butternut squash
2 Tbsn olive oil
1-2 Tbsn balsamic vinegar
1/2 tsp cumin
salt and pepper to taste
Lentils9
  • Peel and seed squash.  Sometimes this is easier if you cut it in half and then crosswise in  half again. Cut into 1 inch dice.
  • Place in a glass pan and drizzle with olive oil.  Sprinkle with cumin, salt and pepper and a splash of balsamic vinegar.
  • Roast in a 400 degree oven for about 30 minutes, stirring several times, until soft.

Lentils7

Shaved Brussels Sprouts and Shallot Saute

  • Servings: 4
  • Difficulty: easy
  • Print

1 3/4 pounds brussels sprouts
2 tablespoons butter
3 tablespoons olive oil
12 medium shallots, thinly sliced (about 2 cups)
6 garlic cloves, thinly sliced
4 tablespoons pine nuts or pepitas (shelled pumpkin seeds)
2 tablespoons fresh lemon juice
  • Thinly slice brussels sprouts into circles.  Easiest done with a food processor or mandolin. Don’t worry if you end up with some loose pieces.
  • Roast pine nuts or pepitas in a small dry pan for several minutes until they turn golden.  Remove from heat and set aside.
  • Saute shallots in butter and olive oil in large pan over medium heat.  about 3 minutes. Add garlic and cook 1 minute.
  • Increase heat to medium high and add brussels sprouts, sauté until tender, about 8 minutes.
  • Add pine nuts and lemon juice.  Season with salt and pepper to taste.  Serve warm.

Lentils2

Wheatless Wednesday – Bittersweet Chocolate Mousse

7

Chocolate Mousse10

This week it’s all about Valentines Day, which means………………chocolate!

Dark Chocolate is known to make people happy by releasing hormones that create euphoria.  Chocolate can relieve a host of ailments, including depression, fatigue, pain and PMS, as well as rev up your sex drive!  Sounds like something we should be eating every day!  So make this decadent dessert for your sweetie and feel free to indulge knowing its all good…

Bittersweet Chocolate Mousse was the first fancy dessert I ever made.  Back in the 80’s  I signed up for a series of cookbooks from Time-Life, Great Meals in Minutes.  I received a different cookbook every month through the mail, each with a theme and wonderful, quick and easy to follow recipes.  I really enjoyed thumbing through each new book and getting great ideas. (This was before we could google everything). As a new cook, I learned how to put together a complete meal and end up with everything ready at the same time, which is really the biggest challenge in cooking. Looking up the recipe again was a bit of a walk down memory lane.  The page is now adorned with a big circle of chocolate, as if a young cook in a hurry put the Cuisinart lid down on top of the open cookbook. Another page with a favorite pasta recipe is splattered with red wine vinegar, remnants from a meal long past.

Many of the recipes I still use came from these books even though over the years I’ve made them my own.  I rarely go back and follow a recipe twice (unless I’m baking and every drop and crumb makes a difference). The Bittersweet Chocolate Mousse recipe by Helen Witty came from the Great Meals in Minutes, “Pasta Menus” cookbook.  I was a newlywed at the time and figuring out what to cook for my new husband.  I came from a large family where chili and casseroles were king and he grew up with meat and potatoes.  To make it even more of a challenge, he doesn’t like foods with mayo or any kind of cream, so it was hard to find recipes that worked for him that were still yummy to me.  I remember feeling lucky to find a dessert recipe at all that isn’t loaded with heavy cream or cream cheese.  I have made this bittersweet mousse several times since then when I’m looking for a special dessert.  It has a nice creamy texture and wonderful flavor.  It looks very elegant, yet it’s deceptively simple.
Chocolate Mousse1
Although this recipe needs several hours in the refrigerator to chill, you can prepare it in just a few minutes with a food processor or blender. The recipe only makes about 2 1/2 cups (2 large or 4 small servings) so chocolate lovers may want to double the recipe.  When I made this so many years ago, I used regular semi-sweet chocolate chips, because that was what was available,  and it was delicious.   You can use regular chocolate chips but a dark chocolate with at least 60% cacao will make it even more divine, as will using real vanilla and a good quality coffee or espresso.  There are so many high quality chocolates available now, Green & Black’s, Divine, CocoaVie and one that is perfect for Valentine’s Day, Chocolove xoxox that even comes with a love poem inside (to name only a few of the many).  Ghirardelli now makes a 60% Cacao bittersweet chocolate chip that is perfect for baking. I made this mousse twice, once with Ghirardelli 60% chips and then with Green & Black’s Dark 85% bar (3.5oz).  Both batches were pretty good but the Green & Black mousse was slightly less sweet and a little more bittersweet.  My taste testers this time (the Zubers) declared the first better with fruit and the second with a bit of whipped cream.  This recipe goes fast so I would recommend having everything pre-measured and ready at room temperature, especially the eggs which are more elastic and create more volume at room temperature.

This mousse would be delicious in a regular dessert dish, but the proper presentation will elevate it to something special.  You can make an exquisite dinner  but slop it on the table and it won’t get the credit it deserves, or conversely, you can beautifully arrange a few random things you have in your kitchen into a pretty nice looking tray for an impromptu gathering and people will think you’re an amazing hostess.  For this romantic and sentimental holiday, I have prepared my husband’s dessert in one of the wedding goblets in which I served the original mousse and mine in one of the beautiful crystal and gold dessert cups that I recently received from my mother in law.  These beautiful crystal dishes belonged to my husband’s grandmother, Nana Rosella and  I thought it perfect, in a time of love to remember  “Big Nana” as she was called among our family, even though she was  4’10” on a good day, because she was very generous and loving and we keep her in our hearts. As we all know, Valentine’s Day is a holiday of hearts.

Bittersweet Chocolate Mousse

  • Servings: 4 small
  • Difficulty: easy
  • Print

Chocolate Mousse9

Bittersweet Chocolate Mousse

 2 Tbsn sugar
1 1/2 Tbsn unsweetened baking cocoa
2 tsp powdered instant coffee or espresso
3/4 cup semisweet chocolate pieces or dark chocolate bar, chopped
1/2 cup boiling water
1/2 tsp pure vanilla extract
2 eggs
strawberries or raspberries for garnish
pirouette cookies (optional)
Chocolate Mousse3
  • Pre-measure everything and have sitting out at room temperature, including the eggs.  Get a couple of cups of water boiling

Chocolate Mousse4

  • In this order, place sugar, cocoa, coffee powder and chocolate pieces in blender or food processor.  Flick motor on and off until ingredients are completely powdered.

Chocolate Mousse5

  • Turn motor on, then pour boiling water through opening in cover and process until it shows no solid bits

Chocolate Mousse6

  • Turn on motor again and add vanilla and eggs.  Process about 15 seconds.

Choclate Mousse7

  • Pour mousse mixture into 4 individual glass dessert cups.  Cool, then chill about 3 hours or until firm.

Chocolate Mousse7 Chocolate Mousse8

  • To prepare strawberries, wash and dry keeping the stem intact.  Turn it on it’s stem and make three slices, vertically, not cutting all the way through the stem.  Gently spread into a ‘flower’ shape.
  • To serve, garnish with berries and a pirouette cookie, if desired.

  valentine_heart_1-929px

Happy Valentine’s Day!


Wheatless Wednesday – Fish in Parchment

0

Fish in Parchment13

Do you ever have days where dinner seems impossible?  One kid has basketball practice and another is at play rehearsal, both done at different times. Your spouse is working late and you just walked in the door.  Sometimes the concept of a healthy family dinner is just that, a concept.  Before you pick up the phone to order Chinese takeout (again) check out my very easy fish in parchment which can be assembled in minutes or pre-assembled and cooked whenever you are ready. This has been a go-to dinner for me over the years because it is just so convenient and I can easily cater to each family members’ personal tastes. I pre-assemble each piece of fish in a square of parchment or aluminum foil and write each person’s name with a sharpie and throw them into the oven as needed.  By far the fastest side is couscous (a huge hit with my kids) which only takes 5 minutes, but since this is Wheatless Wednesday, I will be serving my fish over brown Jasmine rice. Most grains can be cooked ahead of time and will sit and wait until you’re ready and they make a perfect pairing with fish in parchment as the delicious juices add a boost of flavor to what is normally a fairly bland side dish.  The best part of this meal though is the presentation.  I love a ‘pretty plate’ and this is certainly nice enough to impress your dinner guests, plus you can prepare everything ahead of time and clean up is easy.

When they were little boys, my kids’  tastes were very finicky, so I was limited to what vegetables or seasonings I could include. Dylan was a purist, butter and salt only. Jackson liked thinly sliced zucchini circles on his and Eric was more adventurous with red peppers.  As they got older their palate grew right along with them, and I started adding jalapenos, sliced red onions, mushrooms, capers, tomatoes, olives, cooked eggplant, pretty much anything I had available.  The trick is to know your customer and prepare with them in mind.  Parents with picky eaters, take heart.  My boys, who at one time couldn’t have any food touching on their plate, have moved on to gourmet and exotic foods like seared ahi, sushi and escargot.

A light fish like red snapper, tilapia or sea bass are very mild and suit themselves to cooking in parchment.  Cooking in parchment is really steaming the fish in its own juices which is a healthy and tasty way to cook.  The juices also pick up the flavors of any vegetables and seasonings you include and create a delicious ‘broth’.  You can use parchment or aluminum foil but foil cooks a bit hotter, so fish might get done more quickly, and some ingredients will react with it, especially lemon juice and wine.

Fish in Parchment

  • Servings: 4
  • Difficulty: easy
  • Print

Fish in Parchment1

4 – 6 oz pieces of fish (red snapper, tilapia or sea bass)
4 Tbsn butter or coconut oil
4 12″ squares parchment or aluminum foil
1 red pepper, thinly sliced
several cloves garlic, chopped
1 small zucchini, thinly sliced
1 – 2 jalapeno peppers, chopped
1 Tbsn capers
1/2 tsp ground oregano
 
  • Preheat oven to 400 degrees.
  • In a small saucepan, dry saute the red peppers with oregano for a few  minutes.  Remove from heat and let cool. (Optional)

Fish in Parchment2Fish in Parchment3

  • Wash and dry fish.  Place each piece of fish in the center of a square of parchment.
  • Dot each piece with butter and sprinkle with a dash of salt.
  • Add jalapenos, garlic and capers.

Fish in Parchment5 Fish in Parchment6

  • Top with onion, zucchini and redpeppers
  • Fold parchment in half the length way of the fish and fold to seal the edges together.  Crimp the sides carefully to keep liquids and steam inside.

Fish in Parchment7 Fish in Parchment8

  • Label your parcels with a sharpie and place on a cookie sheet
  • Bake or broil for 12 to 17 minutes, depending on the thickness of the fish and how many vegetables you include.

Fish in Parchment9 Fish in Parchment10

  • To serve, spread jasmine rice in a circle on the plate.  Place fish parcel in the center and open carefully (It will be steamy).  Rip the parcel in half, lengthwise and slide fish onto the rice.  Be creative and enjoy!

Fish in Parchment11 Fish in Parchment12

Wheatless Wednesday – Oat Nut Bars

11

Oat Nut Bars

WARNING – HIGHLY ADDICTIVE!  I am often looking around the kitchen for something quick to eat with my morning coffee without making a whole production.  Most  convenience foods are not very good for you, even if the packaging tells you otherwise.  So when I saw this recipe in Bon Appetite (January, 2014) I thought it could be just the thing.  Boy was I right (or wrong)!  These are so delicious that its hard to eat just one.  Luckily, they are loaded with nutrition.  They are made with 100% whole grains, seeds and nuts which means the bran and the germ are left intact which is where most of the nutrients are. I used whole almonds, sesame seeds and added coconut flakes, since I love all things coconut, and really like the result.  I would also recommend having coconut oil in your pantry as one of the ‘good’ oils with many health benefits.  The maple syrup, even though it’s natural, is mostly sugar, but unlike white sugar it is also a very good source of zinc and Manganese and the dates add multiple vitamins and minerals.

When I first tasted them, I thought chewy was the way to go, until I re-baked half of the slices and tried them crunchy.  Wow, they got even better!!  My taste testers also preferred the crunchy over the chewy by a slight margin.  I can easily see these oat nut bars becoming an easy breakfast go-to as well as a great energy boost to get through the afternoon slump.  Try them toasted and topped with yogurt or cream cheese or my favorite way, just on their own.

Oat Nut Bars

  • Servings: 16-18 bars
  • Difficulty: easy
  • Print

Oat Nut Bars 9

Oat Nut Bars with Coconut

Nonstick vegetable cooking spray

6 large Medjool dates, pitted and finely chopped

1 cup pure maple syrup

2 Tbsp unsalted butter or coconut oil

2 cups old-fashioned oats

1/2 cup raw almonds, hazelnuts, pecans, walnuts or cashews

1/2 cup shelled pumpkin seeds (pepitas)

2 Tbsp amaranth or sesame seeds

1 cup unsweetened coconut flakes (optional)

1/2 tsp kosher salt

  • Preheat oven to 350 degrees.  Lightly coat an 8 1/2×4″ loaf pan with nonstick spray and line with parchment paper, leaving an overhang on long sides. Spray parchment.

Oat Nut Bars 10Oat Nut Bars 7

  • Bring dates and maple syrup to a boil in a small saucepan, reduce heat to medium-high, stirring often, until dates are very soft and maple syrup is slightly reduced, 8-10 minutes.  Remove from heat and stir in butter/coconut oil until it is melted.  You can mash the dates with a fork or blender if desired.

Oat Nut Bars 6Oat Nut Bars 5

  • Toss all other ingredients in a large bowl.  Pour date mixture over the top and mix until evenly coated.  Scrape half of the mixture into prepared pan and press very firmly and evenly with a wooden spoon or spatula to compress it as much as possible (Important)
  • Add remaining oat mixture and press until very tightly packed into pan.
  • Oat Nut Bars 2 Bake until loaf is darkened in color and firm around the edges, and center gives just slightly when pressed, 45-50 minutes. Tent with foil if browning too quickly.

Oat Nut Bars 3

  • Transfer pan to a wire rack and let cool in pan before turning out (it can even sit overnight).  Cut into 1/2’thick slices with a serrated knife.

Oat Nut Bars 11

  • For crisp bars, lay slices on a baking sheet and bake at 350 degrees until golden brown 8-10 minutes (turning once), or toast in a toaster oven.
  • Makes about 16 bars.  Bars should keep five days, tightly wrapped at room temperature (if they last that long!)

Wheatless Wednesday – Mojo Bass with Beans and Rice

0

Mojo Bass with Beans and Rice

Mojo Bass with Beans and Rice

After spending a week sampling food in Cuba, I couldn’t wait to get home and try some of my favorites. I had an opportunity to try many types of fish, Bass, Pargo (red snapper) and Dorado (mahi mahi).   One of my favorite preparations included fish seasoned with Mojo, which is a very popular sour orange/garlic/herb sauce topped with a combination of fruit and vegetables.  Mojo can also be cooked with chopped onions and used as a dipping sauce. I topped the fish here with chopped avocado and mango which go nicely with the Mojo sauce.

A typical Cuban meal would consist of rice and beans, cooked together or apart. When cooked together the recipe is called “Moros y Cristianos” (black beans and rice).  (We all had a laugh at this because the English translation is literally Moors and Christians which is not helpful on a menu.) If cooked separately it is called “Arroz con/y Frijoles” (rice and beans). A main course is usually pork or beef, which is not on the Good Mother Diet, however seafood is plentiful (as Cuba is an island) and it is traditional to serve some sort of side dishes like tubers, such as yuca, malanga, and potato all served either hervidas (boiled) or fritas (fried), as well as plantains and bananas). So even for vegetarians, even though it’s a meat heavy diet, there are plenty of yummy things to eat.

Mojo Fruits and Vegetables

I had some form of beans and rice for most meals, many of which had sauteed peppers or other vegetables, but I found that my favorite was a simple black beans and rice.  White rice is traditional in Cuba but I prefer a long grain brown rice which has more flavor as well as better food value.  You can soak the beans overnight and cook them as described on the label, or you can use canned beans that have been drained and rinsed. Authentic beans and rice is made using the water from the cooking calls for cooking the garlic and onions in bacon, however, I have modified this recipe from “Cuban Home Cooking,” by Cossio and Lafray, to be vegetarian/vegan.

Mojo Yucca

I also loved trying the varieties of fruits and vegetables available on this tropical island. My favorites were steamed or fried yucca, also known as cassava, and fried sweet potato.  I am not a fan of plantain but loved fried bananas.  I was skeptical that I could find yucca in my supermarket (and I didn’t even know what it looked like) so was surprised to see a sign for fresh yucca, which turns out to be a long, squashlike vegetable with a hard brown shell right in my local Whole Foods.  Ideally, I would try to eat more seasonal, local foods, however, if I want to try cooking something like yucca or mango that doesn’t grow around here, my only option is to buy it imported from Mexico or South America.  Later this week I’ll try out a few Cuban desserts and share my results.   Enjoy

Mojo Bass

  • Servings: 4
  • Difficulty: easy
  • Print

2 Tbsp fresh orange juice

2 Tbsp fresh lime juice

1 tsp minced garlic

1 Tbsp olive oil

1 tsp ground coriander

1/2 tsp ground cumin

¼ tsp ground oregano

1/8 tsp salt

4 5 or 6 oz bass fillets (or another white fish like snapper or cod, 1 inch thick)

cooking spray or oil for the pan

1 small mango

1 avocado, peeled, seeded and chopped

2 Tbsp fresh mint, sliced crossways into slivers

  • Preheat broiler.
  • Combine first 8 ingredients, stirring with a whisk or briskly with a fork.
  • To chop mango, cut in ‘half’ vertically just to the side of the seed on the flat side.  Then make a row of cuts in the flesh, taking care not to cut through the skin.  Then turn and make a row of cuts crosswise.  Flip the skin inside out and you can easily cut off the cubes. Click the link below for a video on how to cut a mango. http://www.youtube.com/watch?v=Go-n27Zkv4k

Mojo MangoMojo Avocado Mango

  • Combine mango, avocado and mint in a small bowl and set aside.  Placing the avocado pit on top will prevent it from turning brown.

Mojo Bass in marinade

  • Arrange fish, skin side down, on a baking sheet coated with cooking spray or olive oil. Brush half of orange juice mixture over fish (you can marinate up to an hour); broil 4 minutes. Brush with remaining orange juice mixture; broil 4 minutes or until fish flakes easily when tested with a fork. Top with avocado/mango mixture.

Mojo Bass Cooked

Cuban Beans and Rice (Moros y Christianos)

1 cup uncooked rice

1 cup cooked and drained black beans

2 Tbsp olive oil

1 ½ cup vegetable broth (1/3  cup more if using brown rice)

½ onion, minced

2 cloves garlic, crushed

  • Saute onion and garlic in 1 Tbsn oil on medium heat until onion is translucent. Remove from pan and set aside.
  • Add rice to the pan and saute until it starts to crackle.
  • Add vegetable broth, cover and let cook over medium low until the rice is tender but not mushy (brown rice will take longer).
  • Add the beans and onion/garlic mixture and 1 Tbsn oil and cook a few minutes longer. Serve warm.

Mojo yucca3Mojo Yucca2

Yucca (Cassava)

1 or 2 fresh Yucca(or frozen)

1 tsp salt

2 garlic cloves, finely minced

2 Tbsn lemon juice

1/3  cup olive oil

  • Cut the ends off the yucca, then cut it in half, peel with a sharp knife and cut into large pieces.
  • Place yucca into a large pot and cover with water. Add salt. Boil until tender (about 30 minutes).
  • Drain off water and set aside.
  • Sprinkle with garlic and add lemon juice.
  • In a separate pan, heat olive oil until it begins to bubble. Pour over yucca and gently mix. Serve warm.

Fried Sweet Potato and Banana

1-2  sweet potatoes

2-4 bananas (unripe to medium ripe)

2-3 Tbsn olive oil, coconut oil or  avocado oil

  • Peel sweet potatoes and slice horizontally
  • Peel and slice bananas and slice horizontally
  • Heat oil in a heavy pan and fry on medium high heat until browned on both sides.
  • Serve immediately

Mojo Bass with Beans and Rice

Meatless Monday-White Bean & Swiss Chard Soup, Arugula Salad and Dark Chocolate Bark

1

White Bean and Swiss Chard Soup

Looking for a great NFL Playoff Game dinner idea? I had the pleasure of trying this lovely soup at a football party last week, compliments of Barbara McCrum. It was really delicious.  I know I went back for seconds! Barbara served the soup with an arugula salad with toasted marcone almonds and crumbled goat cheese tossed in vinaigrette. To top it off, Dawn O’Dell made the most decadent dark chocolate bark with coconut, dried fruit and sea salt.  We were all licking every last bit of chocolate off our fingers, it was that good.   I am off to Cuba this week so will not be in my kitchen, however, I am featuring Barbara and Dawn as my guest chefs today.  Thank you Barbara and Dawn for sharing!

The White Bean & Swiss Chard Soup is vegan, low fat and loaded with nutrients and protein. It is surprisingly creamy even though there is no milk or cream (due to pureeing some of the beans). You can substitute any dark leafy green for the swiss chard.  The chocolate bark is also vegan and using a 70% chocolate makes it super rich in antioxidants and considered a superfood.  The nuts and fruits add good oils plus vitamins and minerals, so this is a yummy dessert you can feel good about eating!

Of course after that fun party and delicious meal, I had to run out and buy the cookbook that both of these recipes came from, “It’s All Good” by Gwyneth Paltrow. This is a great cookbook for those on special diets, like vegan, gluten free or elimination, or even just for people who want to eat well.  It is not vegetarian but features really healthy and fairly simple but delicious recipes.  If we can all look like Gwyneth Paltrow, even better!   I’m sure GMD will be seeing more from this cookbook…

White Bean and Swiss Chard Soup

  • Servings: 6
  • Difficulty: easy
  • Print

2 Tbsn olive oil

2 leeks, thoroughly washed and finely chopped

1 large yellow onion, finely diced

2 garlic cloves, minced

1 bay leaf

Coarse sea salt

4 cups vegetable stock

14 oz can cannellini or gigante beans

1 bunch swiss chard, leaves roughly chopped and stems discarded

Freshly ground pepper

  • Heat the oil in a large, heavy pot over medium heat.  Add the leeks, onion, garlic and bay leaf along with a heavy pinch of salt and cook, stirring now and then, until softened but not browned, 10 minutes.
  • Add the vegetable stock and the beans to the pot and turn up the heat.  Once the soup comes to a boil, lower the heat and simmer until everything has completely softened and the soup is wonderfully fragrant, about 20 minutes. Remove and discard the bay leaf.
  • Carefully puree 2 cups of the soup in a blender or food processor and return it to the pot.  Add the swiss chard and cook over medium high heat just until they’ve wilted, about 3 minutes.  Season the soup with salt and pepper to taste.
  • Serve with a fresh tossed salad.
White Bean & Swiss Chard Soup

White Bean & Swiss Chard Soup

Dark Chocolate Bark

  • Servings: 6-8
  • Difficulty: easy
  • Print

Chocolate Bark

Dark Chocolate Bark with Coconut, Almonds & Sea Salt

7 oz good quality dark chocolate (like Green & Black’s 70% bars), roughly chopped

2 Tbsn sliced almonds, roasted

2 Tbsn combination dried apricots, cherries and golden raisins, chopped

2 Tbsn unsweetened coconut flakes

1 tsp Maldon sea salt

  • Line a sheet pan with parchment paper and set aside.
  • Bring a small pot of water to a boil, then lower to a simmer.  Put the chocolate in a glass or stainless steel bowl and set it over the pot of water.  Stir the chocolate until it’s completely melted and immediately pour it onto the prepared pan.
  • Evenly sprinkle the rest of the ingredients over the chocolate.
  • Put the pan in the freezer until the chocolate sets, about 15 minutes.  Break the chocolate into pieces and eat immediately, or store at room temperature in an airtight container if your house is cool or in the refrigerator if its summertime.

Chef’s Tip:  The more you stir or whisk the chocolate, the shinier it gets.  Feel free to use other dried fruits and nuts like cashews, hazelnuts, dried cherries, spicy red chili flakes,

etc.

Wheatless Wednesday- Dhal Lentil Soup with Quinoa Cauliflower Cakes

0

Dhal Lentil Sou[p

Red Lentil Soup with Quinoa  Cauliflower Cakes

I have an ongoing love affair with lentils which come in various colors and sizes.  I’m not picky.  My favorites are the French Green and the Black Beluga, both which hold their shape and don’t turn to mush unless you overcook them. I use them often for salads or side dishes.   I have opted to use Red Lentils which are traditional for this dish. Red lentils are softer and do get mushy which works well with soup.  The original recipe calls a lot of coconut milk.  I don’t want the extra calories so substituted vegetable broth for two-thirds of the liquid.

Dhal is usually served with rice but since its Wheatless Wednesday, I have decided to get more creative and have paired the soup with Quinoa & Cauliflower Cakes.  Since the quinoa cake recipe calls for only half the cauliflower, I thought it would be interesting to add the rest of the cauliflower to the soup, so we get cauliflower (one of my other current loves) two ways.

I got the idea for the Dhal and the Quinoa & Cauliflower Cakes from the ‘Vegetarian Everyday’ cookbook, which is also where I got the cauliflower pizza crust so I had high hopes. I did a test run of the cakes recipe over the weekend while my college boys were still home.  They were quite a hit, very tasty and a great use for leftover quinoa (although other grains would probably work too). This is not a carb free recipe, although they are all good carbs.  The oats are high in fiber and rich in antioxidants, and the quinoa is high in protein, magnesium, iron and calcium and its gluten free. Gluten free oats are available as a gluten free alternative. The quinoa needs to be rinsed before cooking to wash off the saponin powder which is a naturally occurring protectant to make the seeds unpalatable to birds.  Rinse until the water is clear and use a fine mesh colander as the seeds are pretty small and you will lose them down the drain.

The recipe also calls for ramps, which are a type of wild garlic usually only available in spring or summer.  I remember buying ramps at a farmer’s market in Maine last summer but didn’t really know what to do with them.  I think I added them to sautéed vegetables.  They are fresh and mild, not sharp like regular garlic.  I was unable to find ramps here in December so substituted spinach and garlic. My taste testers all agreed that the cakes would be even better with a sauce, so I paired the leftovers with a homemade Tzatziki sauce and brought them to a Niners game the next day where every last crumb was devoured.  They were just as good the next day, warmed up in the oven.  The yield is large so feel free to cut the recipe in half.

Dhal Red Lentil Soup

½ Tbsn coriander seeds or ground coriander

½ tsp mustard seeds or ground mustard

½ tsp cardamom seeds or ground cardamom

2 teaspoons curry powder

½ tsp ground cloves

½ tsp  ground ginger

¼ tsp chili powder

6 dried apricots, chopped

1-2 cups vegetable stock

1 can coconut milk

1 cup dry red lentils, rinsed

3 Tablespoons olive or coconut oil

1 small onion, diced

2 cloves garlic, minced

salt and pepper, to taste


2 carrots, sliced

½ -1 head cauliflower, cut into florets

Handful of fresh spinach


  • If you are using whole seeds, crush them into a powder with a mortar and pestle.  Combine the spices and the apricot into a small bowl.
  • Heat oil in a large saucepan over medium heat. Add the spice mix and saute, stir continuously, until its fragrant.  Add the onion and garlic and saute until onion is translucent.
  • Add the cauliflower and carrots and stir to coat. Then add the lentils and broth.  Simmer for 15 to 20 minutes.
  • Add salt and pepper to taste. If you want it a bit spicier add red curry paste and/or red pepper flakes to taste.  Just before serving add spinach and stir to combine.

Dhal Lentil Sou[p

[/recipe]

Quinoa Cauliflower Cakes with Tzatziki Sauce

  • Servings: 8-12
  • Difficulty: easy
  • Print

Dhal Lentil Sou[p

Quinoa Cauliflower Cakes with Tzatziki Sauce

(Makes 12 large or 24 small cakes)

1 cup quinoa

1 2/3 cups cauliflower florets

1 large handful wild garlic or ramps (or 1 cup fresh spinach cut into ribbons and 2 cloves garlic, minced)

4 large eggs

1 1.3 cups crumbled feta cheese

¾ cup rolled oats

Sea salt and freshly ground black pepper

2 Tbsp coconut, avocado or olive oil for frying


  • Combine 2 ¼ cups water, the quinoa and a pinch of salt in a medium sized saucepan.  Bring to a boil, reduce the heat and gently simmer for about 15 minutes or until you see small tails (the germ) on the quinoa seeds.  Drain any excess water and set aside to cool.
  • Place cauliflower in a food processor and pulse until it is a rice-like texture.  Transfer to a bowl and add the quinoa, beaten eggs, ramps (or spinach and garlic), feta, oats and salt and pepper.  Stir until well combined.  Refrigerate for 30 minutes.
  • Form the mixture into 12 patties with your hands.  Heat the oil in a large frying pan on medium high heat.  Add 4 patties at a time and cook for 3-4 minutes, or until golden brown.  Flip carefully and brown the other side a few more minutes.  Continue until all patties are cooked. Drain on paper towels.

Spinach ribbons
TIp:  An easy way to cut spinach is to stack the leaves and slice widthwise into thin ribbons.

Tzatziki Sauce

1 16oz container plain non-fat yogurt

1 cucumber, peeled, seeded and diced

1 Tbsn olive oil

1 Tbsn lemon juice

1-2 tsp fresh dill

2 cloves garlic

  • Combine all ingredients in a food processor or blender and blend until smooth. Add salt and pepper to taste. If it’s watery or too sour for your taste, add a bit of mayonnaise which will thicken it up and offset the sour.Tzatziki can be made ahead and stored in the refrigerator several days.


Meatless Monday – Tom Kha Tofu & Spicy Thai Salad

2

Tom Kha Tofu and Spicy Thai Salad

Tom Kha Tofu & Spicy Thai Salad

Tom Kha Gai, or Thai Coconut Chicken soup is a very flavorful soup usually made with coconut milk, galangal and lemongrass.   I had it the first time in the 80’s at San Francisco’s Thep Lela Restaurant and fell in love.  I wanted to try a vegetarian version so opted for Tom Kha Teohu (tofu). Tofu works really well in this dish, which as a main course is a nice but light dinner. I paired it with a Thai inspired salad featuring napa cabbage and other julienned veggies tossed in a spicy Asian style vinaigrette.

I tried to include many substitutions for hard to find ingredients.  I don’t think you should have to restock your pantry for one meal, however, if you like Thai or Asian food, many of these ingredients are worth having on hand. I’m sure purists wouldn’t agree with me but I would rather make a great meal with what I have on hand and not worry if it’s not perfect or authentic.  I figure my only truly authentic Thai meals will be consumed while on vacation in Thailand surrounded by all the beauty and color of the country.  Lime zest and juice can be substituted for kaffir and ginger root or paste for galangal root. Several options are listed for red chili peppers which are fairly seasonal. I would not recommend using lite coconut milk unless you reduce the volume of broth which also reduced your yield. Vegans can use 1 teaspoon salt instead of fish sauce. To make this a more filling dish add more vegetables (snow peas and red bell pepper are good choices). Enjoy!

Tom Kha Tofu

1 can coconut milk

3  cups vegetable broth

6 kaffir lime leaves (or 1 T lime zest and1/8 cup lime juice

4-5 quarter-size slices, peeled fresh galangal or ginger

1 stalk fresh lemongrass or lemongrass paste

1 container extra firm tofu

2 cups shitake, button or crimini mushrooms

1  zucchini, halved lengthwise and thinly sliced into half circles

1 tablespoon Thai or Vietnamese fish sauce (Optional)

1 teaspoon sugar

1 red chili pepper, sliced into thin rings, 8-10 dried Thai birds eye peppers or 1 teaspoon Thai chili paste

small bunch fresh basil, leaves only or 1 T dried Thai basil

Thai veggies

  • Drain the tofu and slice it lengthwise into 8 equal pieces. Place the pieces on a couple of layers of papertowels and cover with a couple more.  Press gently to get out water.  Set aside.
  • Cut the lemongrass into a 6 inch piece, using only the bottom white part. Pound it with the side of a cleaver or mallot to release the flavor. You should be able to smell the lemongrass.   Cut into 2 inch pieces and pull apart
  • Bring the broth to a boil in a medium stockpot.  Add the galangal, lemongrass, sugar and lime.  Simmer 10 to 15 minutes.
  • Taste the broth.  If it has enough flavor, you can remove the solids with a slotted spoon.  Or you can leave them in for added flavor but you will have to warm your guests which items aren’t edible.
  • Add the coconut milk, chilies, fish sauce and simmer for another 5 minutes or so.
  • Taste your broth.  If it is too sour, add a bit more sugar.  Or you can add salt to taste.
  • Add the tofu. Turn down or off until shortly before you are ready to serve.
  • Turn the heat to medium, add mushrooms,zucchini and fresh basil leaves and cook about 5 minutes.  Serve hot.

Spicy Asian Salad

1/2 red bell pepper

3 Green Onions

1/2 Napa cabbage

1 large carrot

1/2 cup slivered almonds toasted in a dry skillet for about 5 minutes or until slightly golden

Slice red pepper and napa cabbage thinly and separate.  Julienne carrot(a Cuisinart or mandolin makes it easy).  Cut scallions into 2 or 3 inch sections and sliver.  Combine all ingredients.

Dressing:

1/4 cup white vinegar

1/4 cup vegetable oil

1/8 cup rice vinegar

dash sesame oil

1T Soy Sauce

1 tsp .Chili Paste (Optional)

1 Garlic Clove (minced)

1/2 tsp sugar

Combine vinaigrette ingredients and toss with veggies.

Spicy Thai Salad

Wheatless Wednesday – Singapore Chili Crab

2

Twenty Five years ago, today, at 8:39pm, we welcomed our first child into the world, an entire month early.  What a Christmas miracle!  Little did we know how our lives were about to change.  Now he is a grown man, college graduate and out in the working world. For this special “25 on the 25th” birthday/Christmas dinner I want to serve a memorable feast worthy of the occasion.  I have made Singapore Crab one time before and it was really tasty, a bit messy but fun to eat – a real crowd pleaser.  It sounds perfect! Traditionally, Singapore Chili Crab is made with live crab but that is not my style.  You can buy crab already cracked and cleaned which will save some time (and mess) but it’s not that difficult to do yourself.  I have included directions below.  I couldn’t find red chili peppers since they are out of season, so I used chili pepper paste.  If you are using fresh chili peppers, make sure you wear gloves to protect your hands from the chili oil, which is almost impossible to remove from your skin.  Singapore Chili Crab is a pretty spicy dish, so you may need to cut down on the chili peppers or use a less hot variety.  Serve over rice or rice noodles and pair with a tossed green salad to offset the heat. Merry Christmas!

Singapore Chili CrabMe and Eric 25th

 Singapore Chili Crab

Serves 4-6

2 whole Dungeness crab (cooked)

¾ cup ketchup

2 cups water

¼ cup cornstarch

1 Tbsn soy sauce

¾ cup vegetable oil

14 cloves garlic, minced

½  cup minced shallots

20 red chili peppers, minced with seeds (or chili pepper paste)

2 tsp lemon juice

2 eggs, beaten

6-8 scallions, minced

Crack and clean the crab. Make sure you make several cracks in each leg to allow the sauce to get inside.  Directions below.

  • In a large bowl, mix the ketchup, water, cornstarch and soy sauce.
  • Heat a pan (large enough to fit the crab) and saute the garlic and shallots in the oil for a few minutes.  Add chili peppers and saute for a few more minutes.  Pour sauce mixture into the pan and stir to combine.
  • Add the crab and mix to evenly coat.  Cover and let simmer until the crab is heated through.
  • Remove cover and add the lemon juice.  Stir in the beaten egg.  Sprinkle with scallions to serve.

CRACKING AND CLEANING A CRAB

crab1crab2crab3crab5

  • Place the cooked crab on a cutting board on its back. Hold the body in one hand and gently twist each of the legs and claws off with the other.  Set them aside.
  • Remove the tail flap and both flaps near the eyes.  Discard.
  • Pull off the back shell and remove the ‘dead man’, the spongy gills and the orange ‘skin’.
  • Rinse the body then cut in quarters.
  • Using a metal or wooden meat tenderizer, give several hammers to each leg, enough to crack the shell and allow access to the meat.

Meatless Monday – Roasted Acorn Squash with Wild Rice Stuffing

4

Acorn Squash with Wild Rice Stuffing

Acorn Squash with Wild Rice Stuffing & Pear and Cambozola Salad

When I was a kid, my Mom used to roast acorn squash with butter and brown sugar.  My favorite part was the little pool of melted brown sugar and butter that would form in the hollow. Yum!  This is a more grown up version, suitable as a vegan main course.  It kind of reminds me of a Thanksgiving stuffing but without the turkey.  This dish is very impressive looking and is great for dinner parties or as a holiday centerpiece.  It has that perfect salty, sweet combination and the toasted pecans give it a satisfying ‘meatiness’.  I love the natural heart shape.  It would be a great Valentine’s Day dish!  Vegans should omit the Campozola or replace it with sliced avocado or vegan cheese.  Serves 4-6 (Makes enough stuffing to fill 2 large or 3 small squash)

Acorn Squash with Wild Rice Stuffing

Ingredients:

½  cup dried brown rice
¼ cup dried wild rice
2 cups vegetable broth
1 cup fresh brown mushrooms, wiped clean and sliced
2 acorn squash
1-2 Tbsp. maple syrup or brown sugar
1 -2 Tbsp olive oil
1 medium onion, finely diced
¼ cup dried currants (or unsweetened dried cranberries)
¼  tsp salt
¼ tsp. pepper
½ cup pecans

  • Cook the brown and wild rice together with vegetable broth.
  • Heat the oven to 400° and place a rack in the middle position.
  • Cut squash in half with a sharp knife and remove the seeds. Use a dry paper towel to get the rest of the stringy bits.
  • Place the squash, cut side up, on a baking sheet, and brush olive oil on the tops and insides of the squash halves. Brush maple syrup (or sprinkle with brown sugar) on the tops and insides as well, and season with salt and fresh pepper. Roast in the oven for about 30 minutes, until you can pierce it with a fork but not yet soft.

Acorn Squash 1Acorn Squash 2

  • Toast the pecans in a dry pan for a few minutes, until they become aromatic and start turning brown.(You can also toss them first in melted butter or coconut spread for an even more delicious taste).  Let cool.
  • Saute the onion in 1 Tbsp olive oil in a large pot until soft.  Add fresh mushrooms, if using, and cook another couple of minutes.
  • Remove from heat and stir in the cooked rice, pecans, and currants. Add salt and fresh pepper to taste.
  • Scoop one quarter of the rice filling into each of the roasted squash halves. It’s a bit messy, so I found it easier to move the squash to a plate for filling and then put it back into the pan.

Acorn Squash 3Acorn Squash 4

  • Continue roasting the squash for 20 to 30 minutes more. It should be completely tender and the stuffing hot. You should hear it sizzling.
  • Serve warm.

Pear and Cheese

Pear and Cambozola Salad

1-2  d’Anjou or Bosc pears

8 red globe grapes

1 wedge Cambazola Blue cheese (camembert or brie work well too)

2-3 cups mache or mixed salad greens

Vinaigrette (2 Tbsn olive or avocado oil, 1 Tbsn red wine vinegar, 1/4 tsp Dijon mustard, dash salt and pepper)

Pear 1Pear 2

  • Cut pears in half lengthwise, core using a melon baller and thinly slice lengthwise.(Easiest done with cut side down)
  • Slice grapes
  • Cut 4 thick slices of cambazola
  • Wash and dry greens and toss in vinaigrette.
  • Place ¼ of the greens on a salad plate and arrange ¼ of the pear slices, grapes and 1 slice cambozola on top for each serving.

Acorn Squash with Wild Rice Stuffing

Wheatless Wednesday – Seared Ahi Tuna & Sunomono

0

Ahi Tuna Dinner

Wheatless Wednesday – Seared Ahi Tuna with Sunomono, Edamame & Ahi Poke

With Guest Chef, Eric Porter

ahi eric

 We are filled with great joy to have all three of our sons home for Christmas, the first time we have all been together since June.  Our oldest son, Eric, has been interested in cooking since he was a toddler, standing on a stepstool and helping me make peanut butter cookies, pancakes and other kid favorites.  When he was older, he learned cooking basics from me and grilling techniques from his Dad.  Then he moved out and has taken cooking to a whole new level.  For the past several years, Eric and I have engaged in what I think of as friendly ‘cooking wars’, where we take photos of whatever gourmet meal we just made and text it to each other. Eric has created quite a reputation as a great cook among his friends and rightly so.  I have had the pleasure of Eric’s famous Seared Ahi Tuna several times and am pleased to have him as the first guest chef for Good Mother Diet.

Notes from the Chef – A dish like this is delicious, beautiful and looks decadent but is actually very easy once you get comfortable working with Ahi.  Ahi is a fish that is generally served raw to rare. People are sometimes are afraid of working with raw or rare fish, however if you buy your fish from a reputable local source, the fish should be good.  Keep in mind that most if not all tuna is flash frozen on the boat which is a means to preserve the flavor and keep it fresh.  Pickling the daikon takes out all the sharpness and adds a pleasant sweetness.  This is best done days before but in a pinch, it can be done that day as well.  Kept in the refrigerator, it only gets better and will last for 2 weeks.  In making the dry rub for the tuna, I find that dry ginger works best in this dish rather than fresh, because it’s easier to blend evenly with the rest of the dry spices.  The hardest part of this dish is in removing what I call ‘the horn’, the fibrous tip on each piece of tuna. It’s easy to see what to remove when you look at the grain of the fish.  There are two parts of the Ahi steak, a large piece where the grain goes one way and a small piece where the grain goes the other direction.  You need to remove the small piece which is too fibrous for this dish.  I hate to throw it out so I usually use it to make Ahi Poke.  You can also make poke with a prime piece of tuna, which makes a prettier dish, but for our purposes, we are going to make use of the less desirable bits. If I have one thing to say about Ahi tuna, less is more, because it is so good on its own. I believe that everything on your plate should look good and I like to use edible ingredients in my presentation.

Seared Ahi Tuna over Marinated Daikon

2 cups fresh Daikon radish

1 Tbsp fresh ginger, finely minced or ginger paste

¼ cup carrot or beet juice to color (optional)

Up to ½ cup rice vinegar

2 lbs fresh Ahi tuna

1 Tbsn salt

2 tsp pepper

1 tsp garlic powder

1 tsp onion powder

1 tsp ginger powder

1 tsp sesame oil

1 Tbsn Wasabi powder

Pickled ginger

  • Using a mandolin or grater, shred the radish into long strips.
  • Combine radish, ginger and juice in a container. Add ½ to ½ rice vinegar and water to cover.  Cover and refrigerate. (The longer it marinates, the better)
  • Combine all dry ingredients in a medium bowl, or a pie plate.

Ahi1Ahi2Ahi 3Ahi 4

  • Place Ahi tuna on a cutting board.  You need to remove the tough fibrous part of the tuna (the small tip section).  Using a knife, beginning at the ‘knotch’ where the grain of the fish changes, cut, as shown, taking care to remove the fibrous tissue.  Reserve the small piece of fish to make Ahi Poke.  Recipe below.
  • Dredge each piece of fish in dry rub on both sides, including edges, and brush off excess.
  • Add sesame oil to bowl and toss fish to coat evenly.  Cover and refrigerate 1 to 2 hours. You don’t want it to come to room temperature before cooking.

Ahi

  • Make wasabi paste by combining one Tablespoon wasabi powder with 1 Tablespoon water. Mix and shape into a cone.  Let sit ten minutes.
  • Heat a heavy pan until it’s almost smoking.  Sear the tuna 30 seconds to 1 minute on each side.  Remove from heat and put in the freezer for 2 minutes.
  • Remove from freezer.  Press sesame seeds into both sides. Slice and serve.

Ahi done

Ahi Poke

½ lb Ahi Tuna (whatever scraps are left from the Ahi steaks)

½ tsp sesame oil

1 tsp soy sauce

½ Tbsn lemon zest (from about half a lemon)

1 firm avocado

  • Working from the long end toward the tip of each piece, run the knife between the sections to remove the white fibrous tissue.  You will need to use your hands to pull the meat off as well. Some of it will be small scraps.  Cut the longer pieces into cubes.
  • Put tuna pieces in a bowl.  Add remaining ingredients and toss well.  Cover and refrigerate. (Best if marinated overnight or 24 hours).
  • Cut slices of avocado and arrange tuna mixture on top. Serve

Ahi Poke

Sunomono

1/2  lb salad shrimp

2 cucumbers

2 large carrots

¼ cup rice vinegar

½ tsp salt

8/8 oz package thin rice noodles

Bring a large pot of water to a boil.  Remove from heat.  Add rice noodles and let stand 3 to 5 minutes, stirring occasionally.  Drain and rinse with cold water until they are no longer hot. Noodles should be soft but firm. Gently press the water out.  Set aside.

  • Using a mandolin or grater, cut carrots into long strips
  • Using a mandolin, Cuisinart or knife, cut cucumber into thin circles
  • Rinse shrimp
  • Combine all ingredients.  You may need to use your hands.
  • Top with shrimp

CHEF TIP-You can make a pretty cool dish to hold your edamame, or anything else, by shaving the side s of a cucumber on the wide setting.  Form them into rounds and clip together with carrot or zucchini pins.

zuxxhini bowl2

Edamame

Boil fresh or frozen edamame for 3 to 5 minutes.  Drain and sprinkle liberally with salt.  Serve.

Ahi Tuna Dinner


Meatless Monday – Butternut Squash Soup & Polenta Towers

2

Butternut Squash Soup and Polenta Tower2

Butternut Squash Soup & Polenta Towers

Although the sun is shining in Northern California this mid-December, it has been deceptively chilly outside, especially once the sun goes down.  With temperatures  below normal this past week, and another “Spare the Air Day” (an Only in Marin phenomenon, I believe, where we are not allowed to burn wood or use pellet stoves), the best way I can think of to make my house feel warm and cozy is to have a big pot of hot soup bubbling away on the stove. It won’t necessarily warm up your house like a good, old fashioned fire, but it will help your kitchen feel homey and welcoming, and smell divine.  I remember my friend, Kim, once telling me that when she wanted her family to think she cooked all day, she would throw onions and garlic in a saute pan for a few minutes.  She was very smart and I’m sure her family loved coming home to the wonderful smells coming from her kitchen.  You can also greet your holiday guests with hot apple cider (apple cider with cinnamon sticks and cloves) which makes your home smell like Christmas.

Butternut squash soup is my standard this time of year. It’s flavorful and low fat, as are most of my dishes, since I use vegetable or chicken broth instead of the cream or cream cheese called for in many recipes.  Roasting the squash first, makes it very easy to peel and retains more vitamins than peeling and boiling. The recipe calls for fresh ginger which must be minced very finely.  An alternative would be to add a 1 inch peeled chunk of ginger to the soup after it has been pureed and then remove before serving.  Another good short cut would be to use a teaspoon of ginger paste.  This soup is especially delicious served piping hot with a dollop of cold sour cream or non-fat yogurt (My favorite is local, Straus Family European Style yogurt, made here in Marin County) and topped with toasted pumpkin seeds.

The Polenta Tower is an easy dish to make and fun to serve.  It also works great on a buffet or as a fancy dish to bring to a potluck, although it works better to omit the marinara sauce.  I am a big believer that cooking should be as easy as possible and will take shortcuts when available. For some recipes I would make my own polenta from scratch but not for this dish.  The Food Merchants Brand, pre-cooked polenta in the tube, is perfect for this recipe.  It is organic, (non-GMO), fat free, wheat free and gluten free.  Best of all, it’s already in the perfect shape.  There may be other brands that are just as good but this is what is in my refrigerator. The vegetables in this recipe can be altered for what is in season or what you already have.  Vegetables that can be sliced into rounds work the best.  Be creative and have fun with your food!  Vegans should omit the mozzarella and sour cream.

Butternut Squash Soup

1 butternut squash

1 large or 2 small leeks

1 medium onion, chopped

2 Tbsn olive oil or butter

1 tsp finely minced ginger, or to taste

6 cups vegetable broth

sour cream or non-fat yogurt (optional)

¼ cup pumpkin seeds or pepitas (optional)

LeeksButternut Squash

  • Cut butternut squash in half lengthwise and scoop out the seeds. You can use a dry paper towel to get the last bits of pulp. Oil a glass baking dish and place squash in the dish cut side down.  Cook at 375 degrees for about an hour, or until a fork easily pierces the thickest part of the squash.  Let cool.
  • Cut the leeks lengthwise and wash thoroughly under running water, fanning the layers of the leek like a deck of cards to remove any grit hidden in between. Slice lengthwise and chop, using the white part only.
  • In a large stock pot, saute leek, onion and ginger in olive oil until soft.
  • Scoop out squash from the shell and add to the stock pot, breaking it up with a wooden spoon.
  • Add 2 cups of broth and stir, cooking for another 10 minutes. Let cool slightly.
  • Puree the squash mixture in a food processor or blender until smooth.  You may have to do it in two batches. If your puree does not come out silky smooth or you can see bits of leek, you may want to cook it a bit longer and puree it again.
  • Return it to a clean stock pot and add the rest of the broth. Heat on medium to low heat another 10 to 20 minutes to let the flavors blend.
  • Toast the pumpkin seeds in a small, dry saute pan over medium heat for a couple of minutes until they are golden and lose their raw taste. Let cool.
  • Ladle soup into bowls and top with sour cream and toasted pumpkin seeds.

Polenta Towers

(Makes about 8 towers)

2 cups marinara sauce (Use your favorite or make your own, recipe below)

1 18 oz tube of cooked polenta

1 ball or 3-4 boccoccini fresh mozzarella (optional)

4 smaller portobella or crimini mushrooms,

1  japanese eggplant

1  zucchini

1-2 ripe tomatoes

1 small bunch fresh basil

2-3 Tbsn olive oil

BasilPepitas

  • Remove plastic from polenta, cut off curved ends and cut into ½ inch rounds.
  • Drain mozzarella and cut into  ½ inch rounds
  • Wash and dry eggplant, zucchini and tomato and slice them into rounds as well. Cut stems from mushrooms even with the cap and sliced in half horizontally.  If they are small, leave whole. Slice mozzarella.
  • Wash and dry about 6 large basil leaves and slice them into ribbons.
  • Heat 1 Tablespoon olive oil in a pan over medium to medium high heat and saute polenta until golden on both sides.  Remove and set aside.
  • Add another tablespoon oil, a bit of chopped garlic and saute the eggplant and then the zucchini and mushrooms, adding more oil if necessary.  (Note:  If you have time, you can salt the eggplant slices and let sit for 10  minutes or so.  Eggplant which has ‘sweated’ usually absorbs less oil.) Remove from and set aside.
  • To assemble the ‘towers’, ladle ½ cup marinara sauce onto the middle of a plate. Place a polenta circle on top of the sauce, then top with mozzarella, tomato, eggplant, mushroom and zucchini, depending on their size.  I usually go from biggest on the bottom to smallest on the top.
  • Garnish with fresh basil.

Polenta Towers

Marinara Sauce

Makes 3 cups

1 28 oz can crushed tomatoes

2 Tbsn fresh basil, finely chopped

2 cloves garlic, minced

1 Tbsn olive oil

½ tsp salt

1 tsp balsamic vinegar

  •  Heat olive oil in a saucepan and saute garlic for a few minutes.  Add basil and crushed tomatoes and stir to combine.
  • Bring to a boil and add salt.  Simmer about 45 minutes.
  • Before serving add balsamic vinegar and stir to combine

Butternut Squash Soup and Polenta Tower3