Nostalgic Sunday – Old Fashioned Pancakes

0

Pancakes
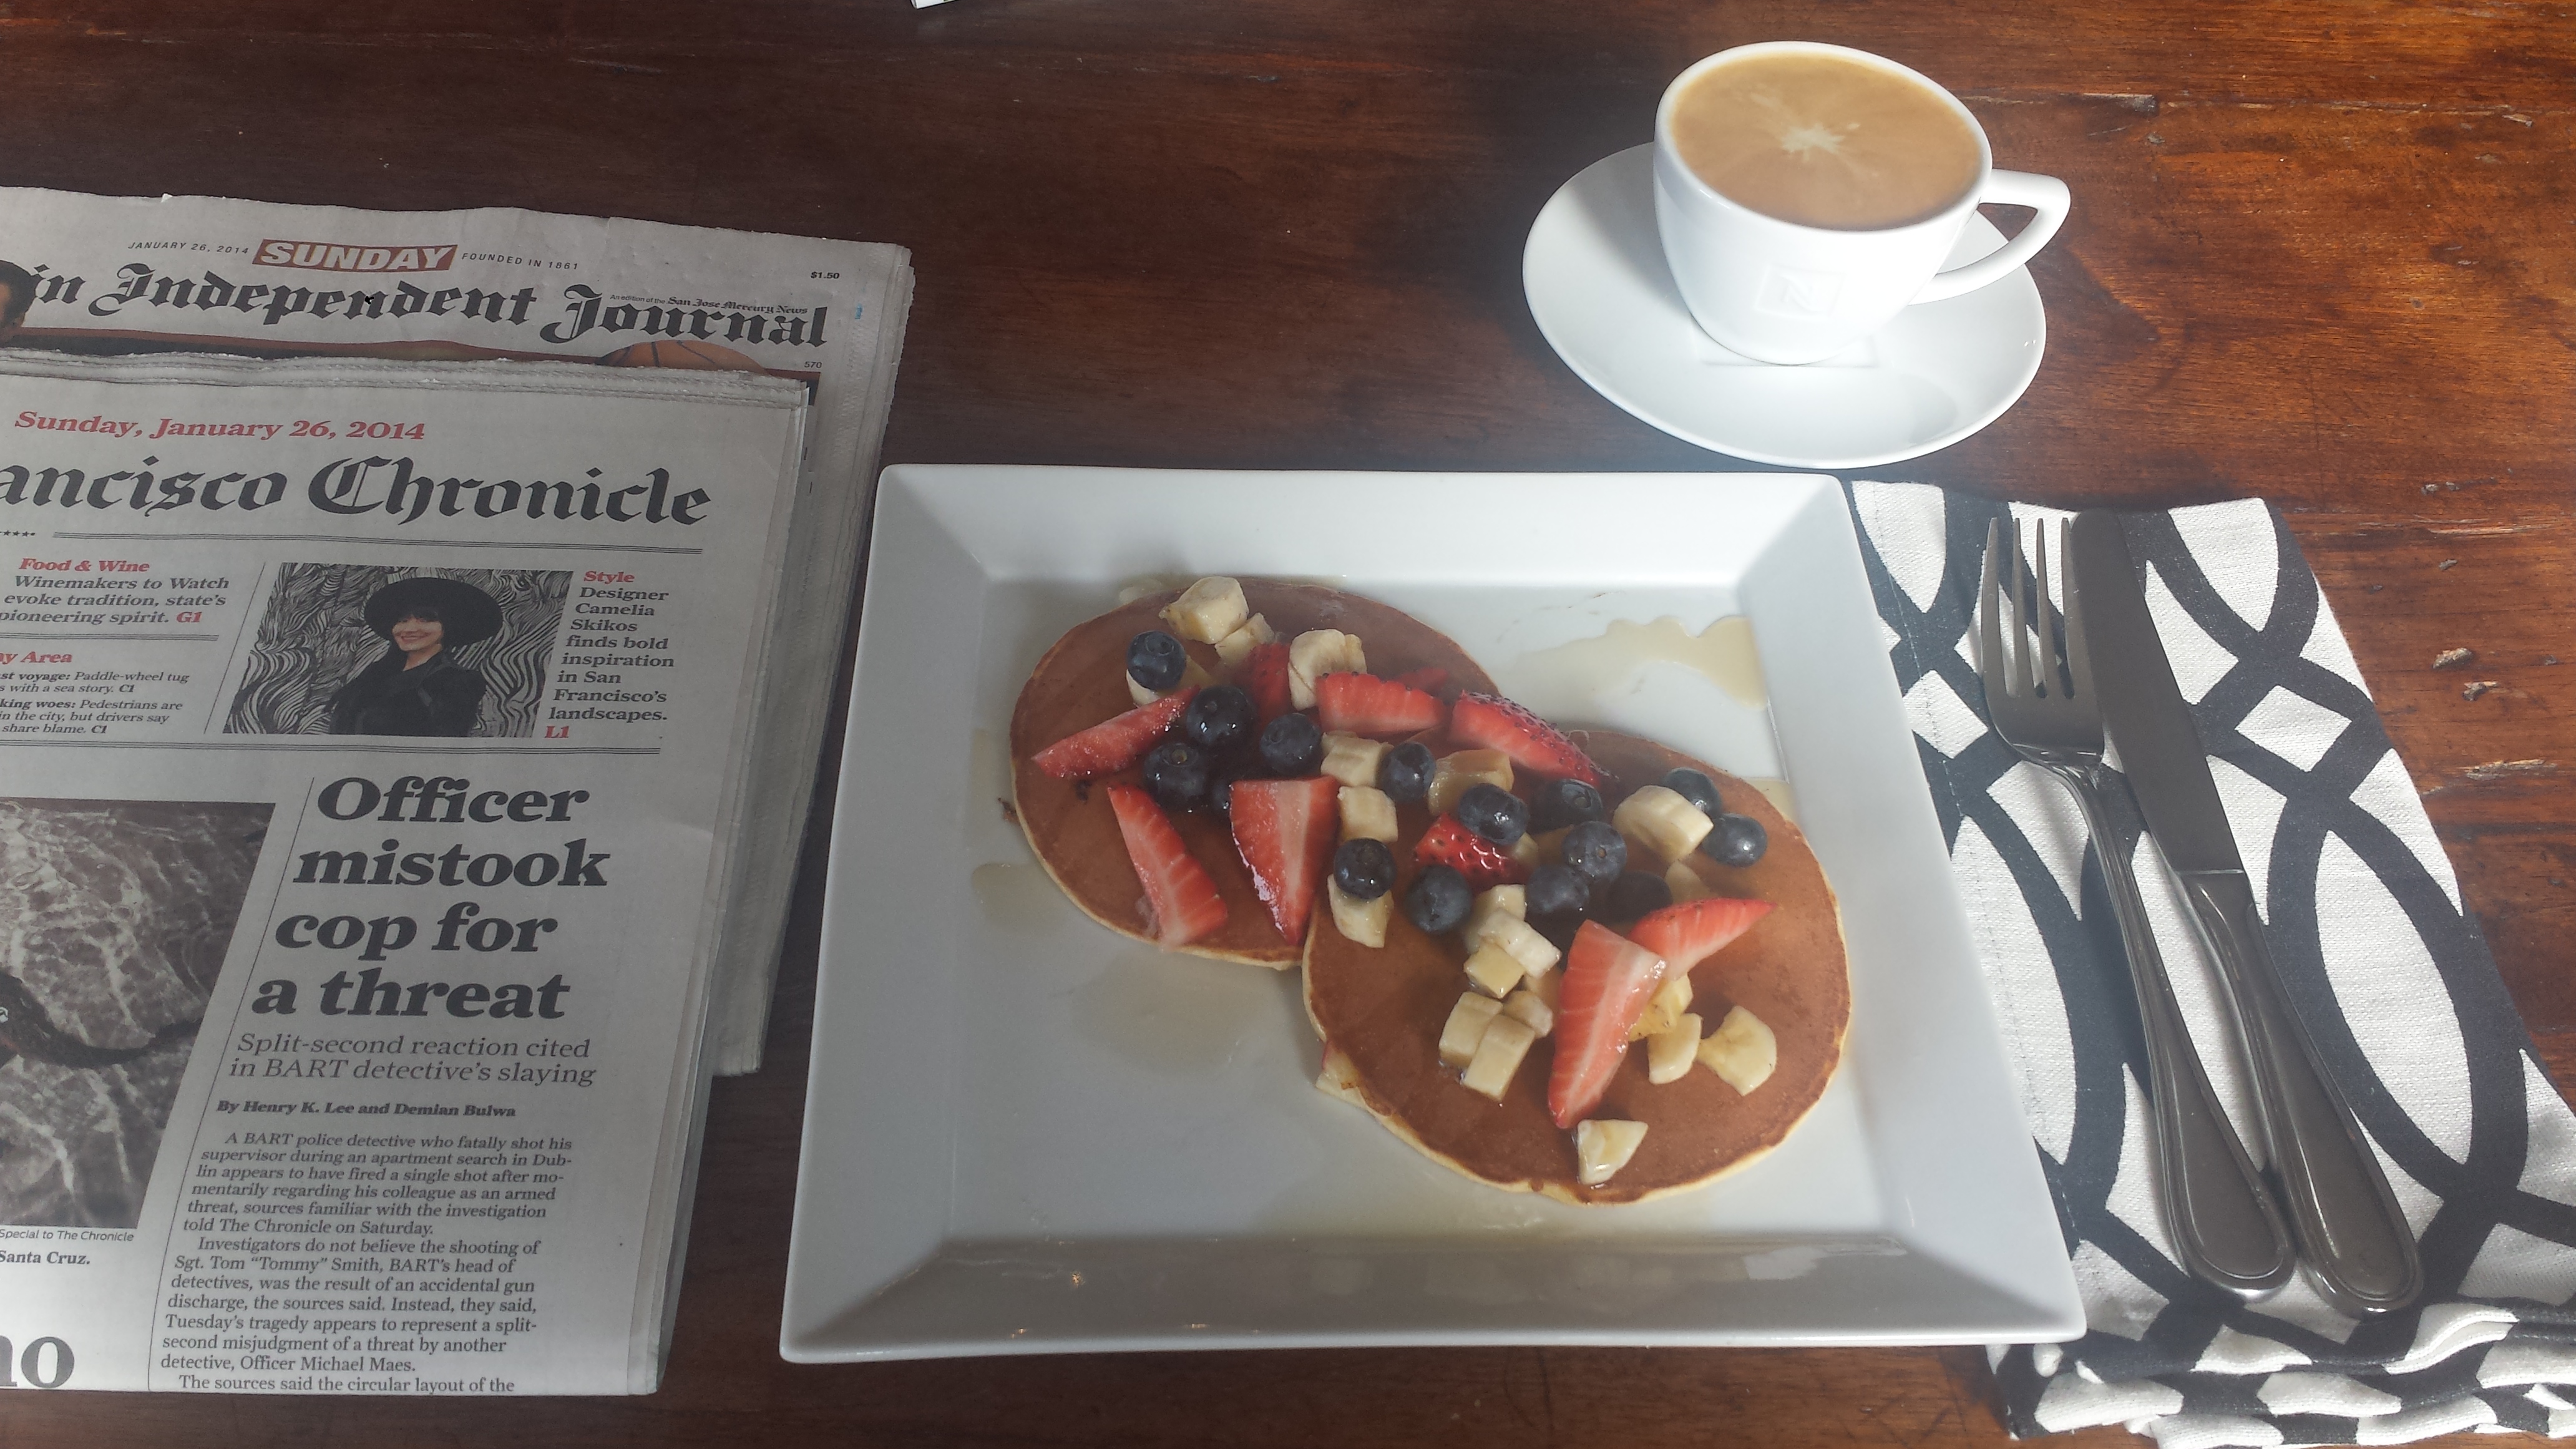
As an empty nester, I have the luxury to take my cup of coffee and laptop back to bed in the morning if I so choose, but I recall the days when I got up early every morning and made breakfast for three hungry boys before school. Those days are long gone though. Now when my kids come home to visit, they are rarely up before noon. Feeling a bit nostalgic for the ‘good old days’ this Sunday morning, I decided to make one of my classic breakfasts, good old fashioned pancakes, which I used to make several times a week. They are easy, delicious and full of wonderful hidden nutrients, your family will never know its eating. These are not your giant restaurant pancakes which soak up syrup like a sponge and leave you feeling like you’ve eaten wet concrete. These are light and creamy, a more healthful version of the old silver dollar pancakes.

I have been a fan of Adelle Davis, a visionary nutritionist who wrote books on nutrition from 1948 through the 70’s. She was among the first to believe that eating right can make you healthy. She believed in unprocessed foods, good fats, whole grains and cooking to maximize nutrition and taste. It’s probably due to her that I never jumped onto the fat free bandwagon, which we now know is actually making people fatter, due to the added sugar and empty calories substituted for the fat. She also believed that “Good food is a symbol of love” and can help satisfy your “spiritual and emotional hungers”. Perhaps, as a mother, this is why I have identified with her approach. I have always felt that preparing a beautiful meal is the easiest way to share the love, so to speak, perhaps my own take on the saying “The fastest way to the heart is through the stomach”.

Pancakes flour

I have adapted this pancake recipe (and many others over the years) from her “Let’s Cook It Right” cookbook which my mom gave me many years ago. One of the things I like about her cookbook is that she offers so many options that make her recipes very flexible. This recipe calls for a cup of flour, a combination of any types of flour as long as they are whole grain, so it’s easy to make this gluten free and wheat free, and use whatever is in your pantry. I like to use oat flour, brown rice flour, and coconut flour (which is high in protein) but there are many great options available now. If you use whole wheat flour, I would recommend using whole wheat pastry flour which is lighter as it is ground more finely. You can also buy combination flour mixes for convenience. Bob’s Red Mill has a good gluten-free flour mix. I usually use non-fat or 1% milk (since that is what we drink) and add non-fat powdered milk to boost calcium and protein levels, which was especially important back when I was trying to feed finicky eaters, but using whole milk, buttermilk or yogurt all add more food value and create a creamier pancake.

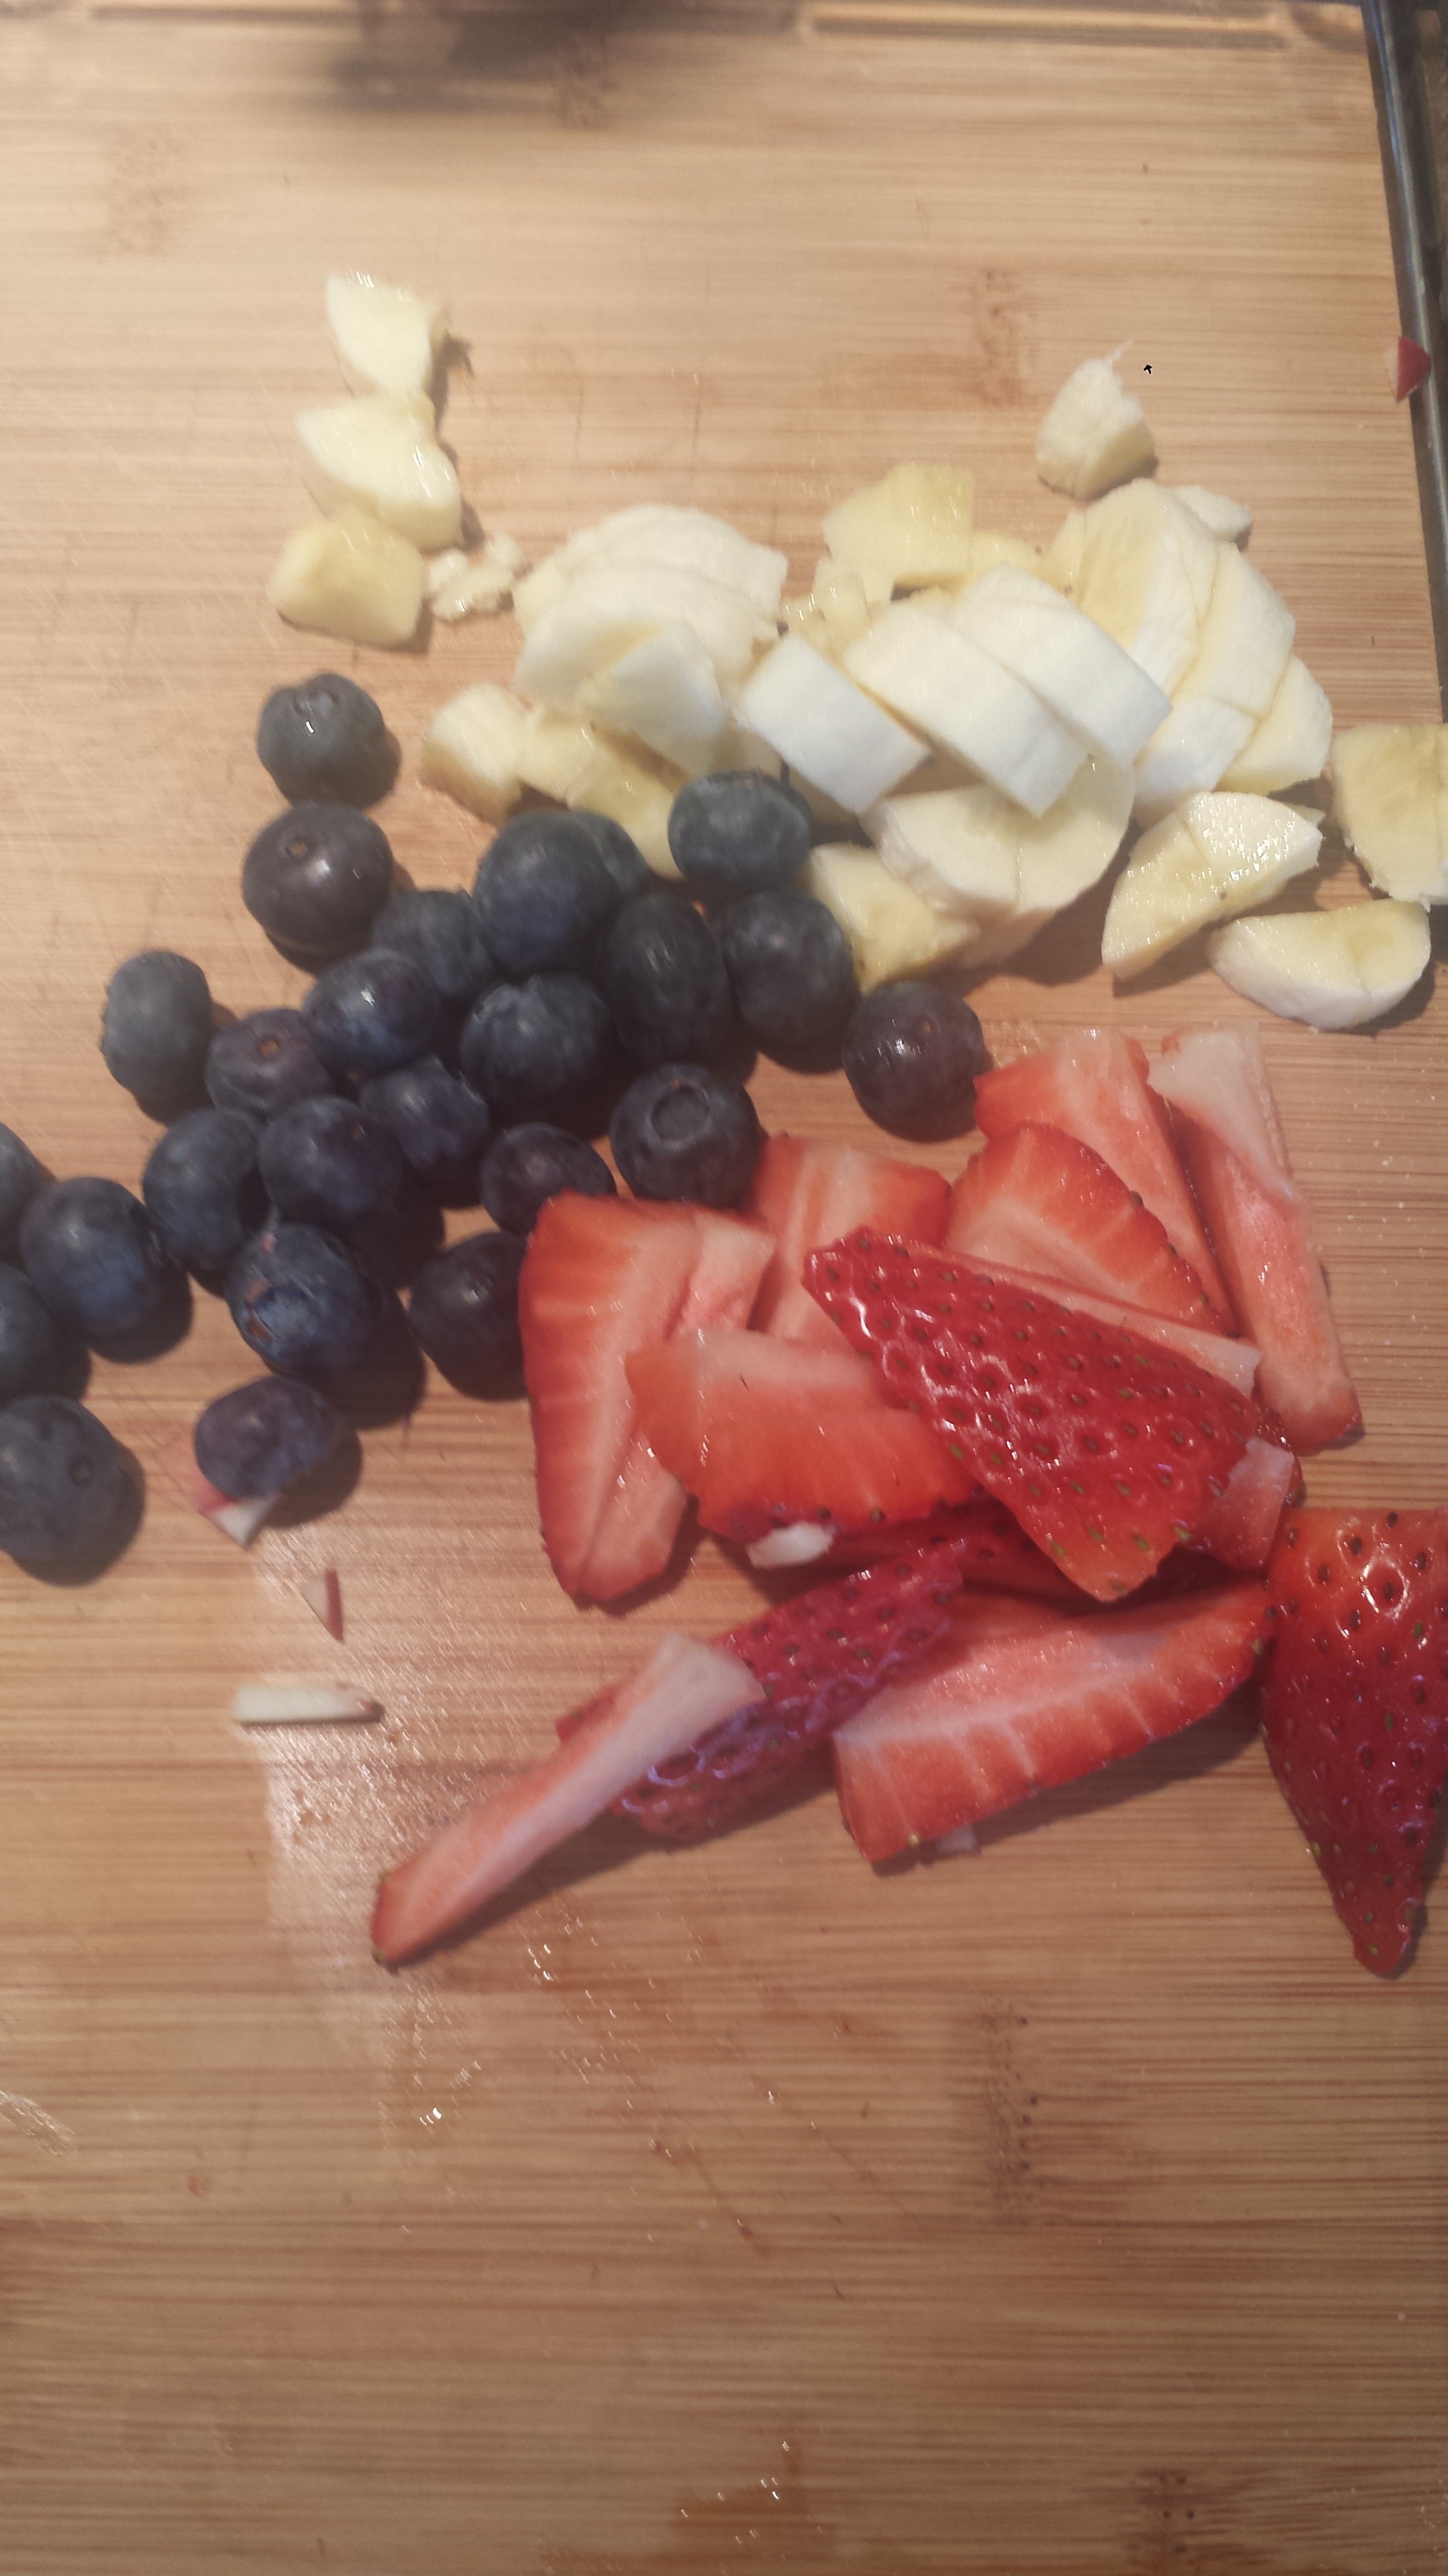
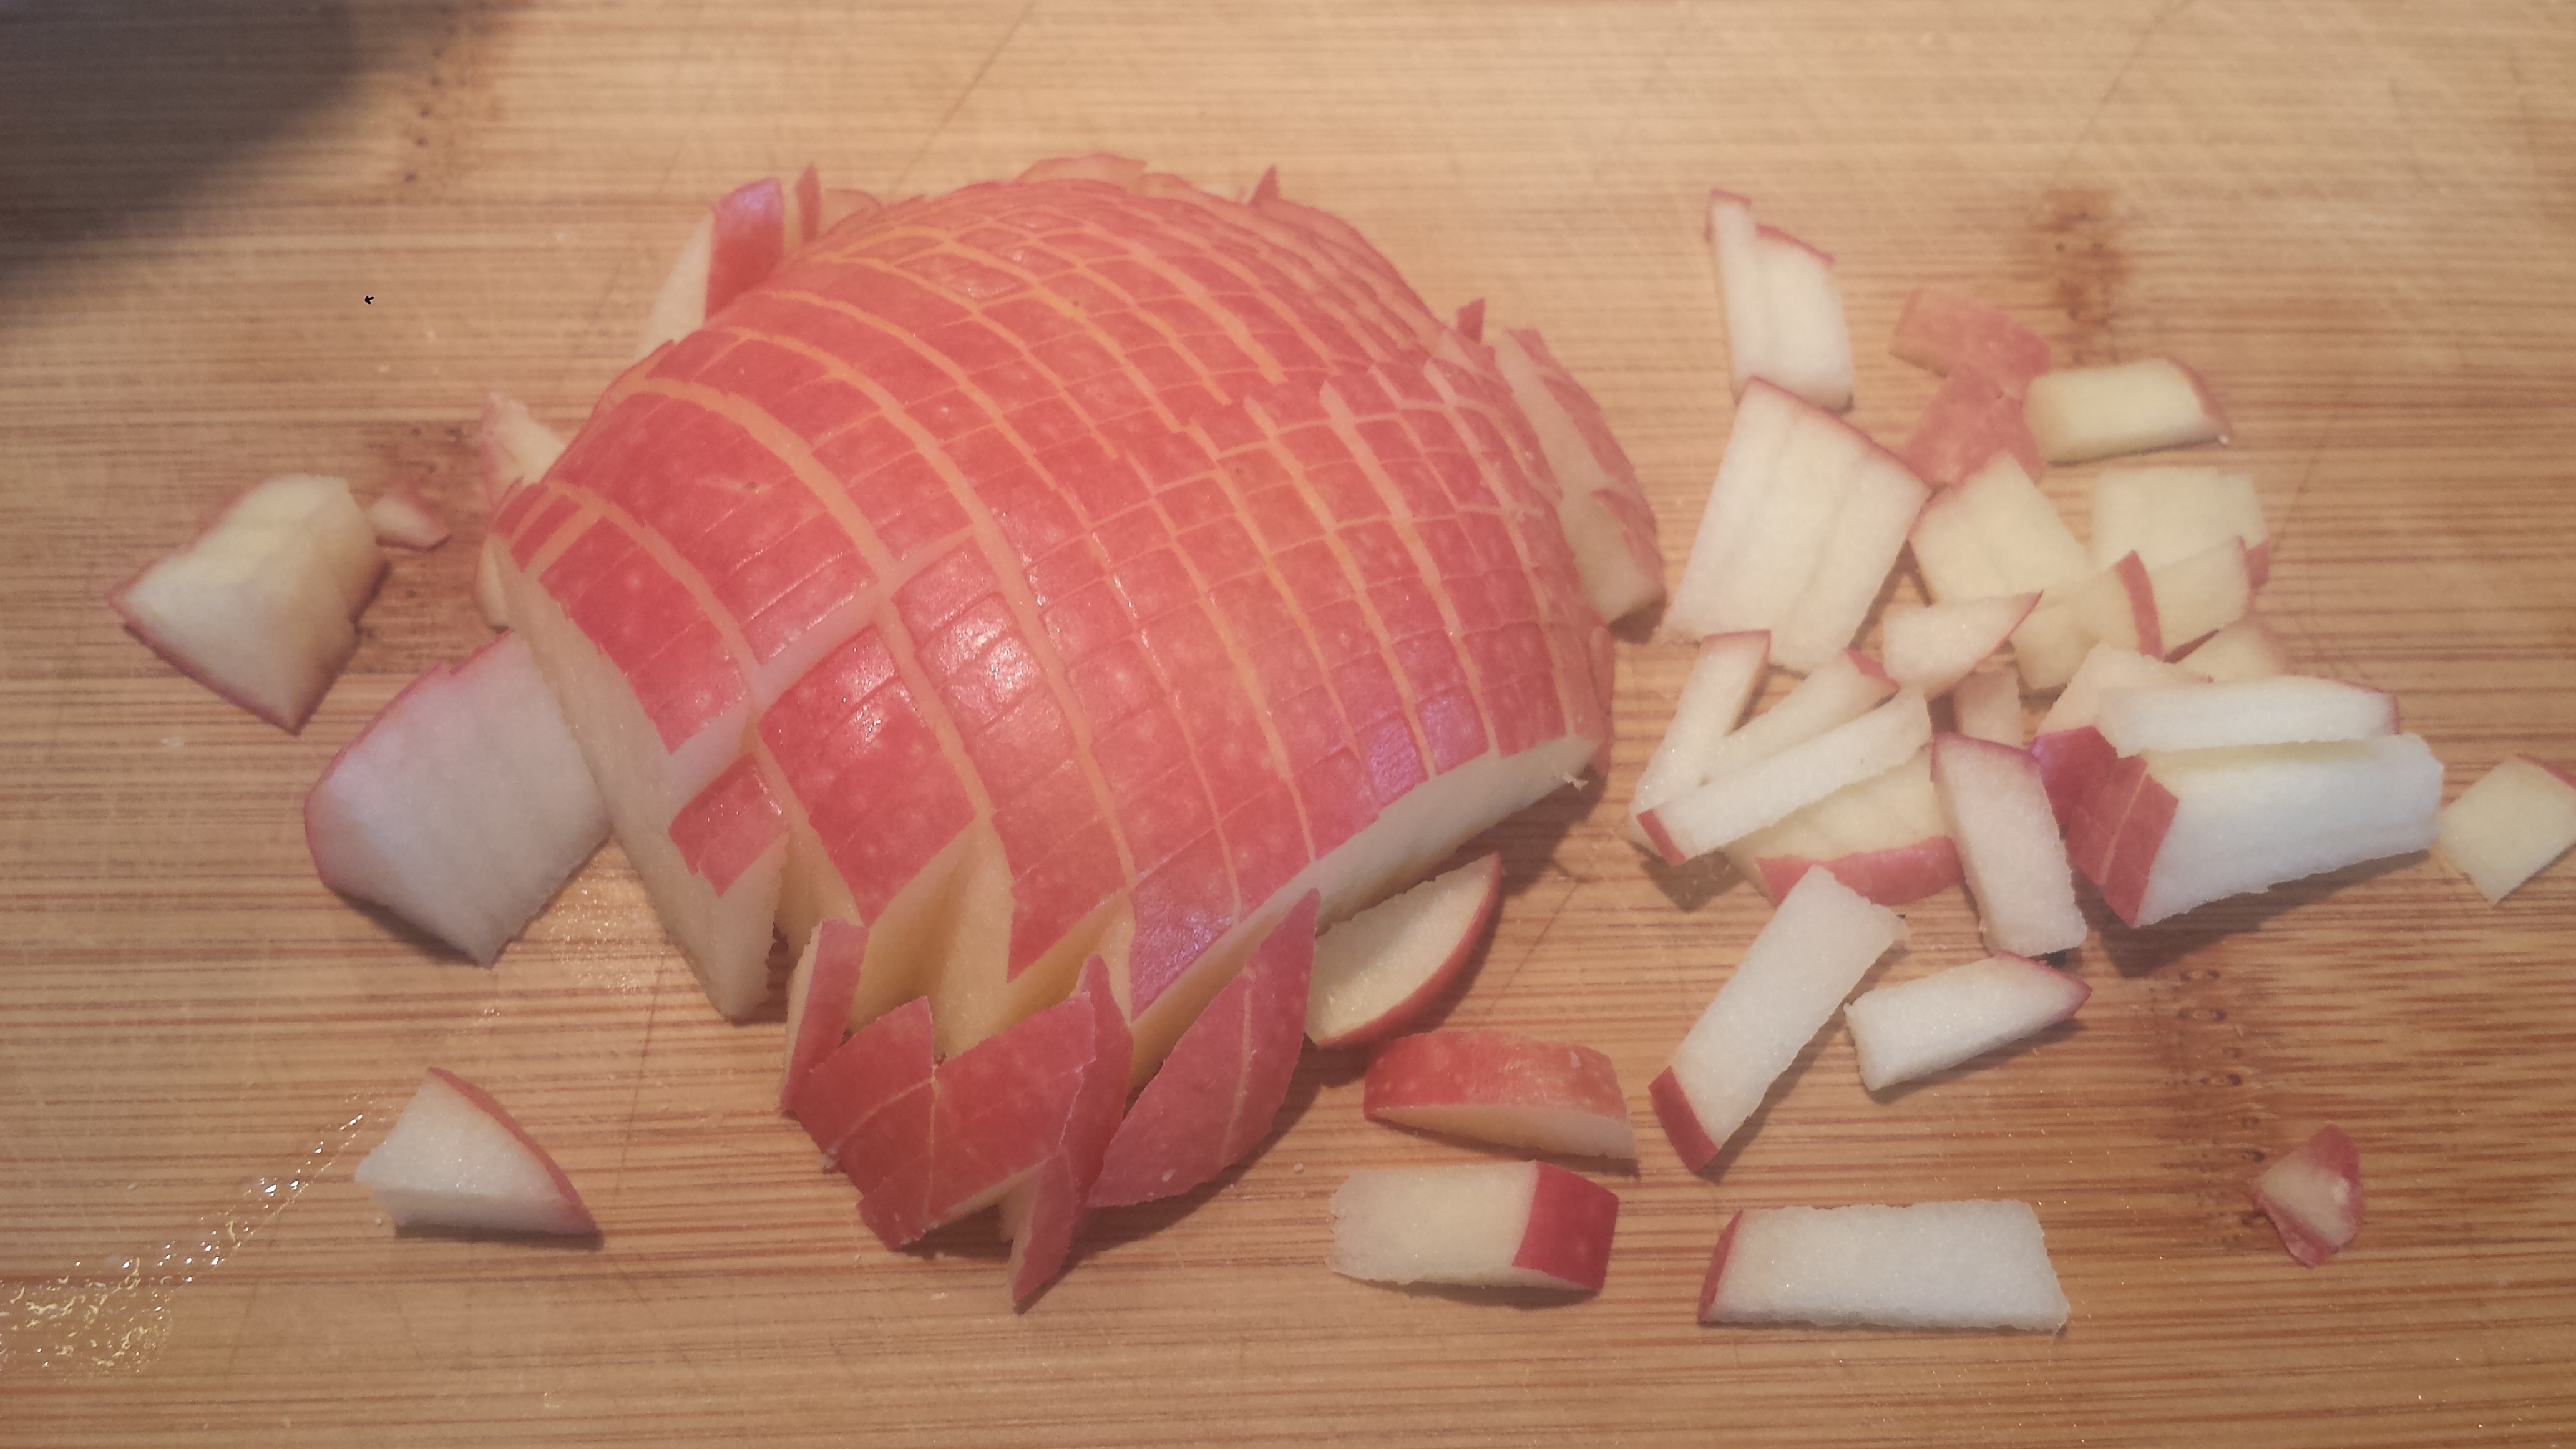
I can remember personalizing each pancake, special to each person. The thought of this still makes me smile.  Dylan liked his plain with butter and syrup, bananas and blueberries on the side (not touching). Jackson’s were plain, strawberries no blueberries. Eric loved blueberry pancakes and my husband preferred finely diced apples cooked inside with fresh fruit on top. My favorites had a little bit of everything cooked inside and on top.

Old Fashioned Pancakes

  • Servings: 4
  • Difficulty: easy
  • Print

Pancakes2

Whole Grain Pancakes

1 cup whole grain flour (any combination)

1/2 cup powdered milk (optional)

1 tsp salt

2 tsp baking powder

1 1/2 cups milk, buttermilk or yogurt

2 eggs

2 Tbsn vegetable oil

Assorted fruit, sliced or diced thinly

Pancakes fruitPancakes apples

  • Sift dry ingredients together into a mixing bowl.
  • Add milk, eggs and oil and stir to mix but as little as possible (no more than 50 strokes) as the texture can become tough.  Add more milk if it seems too thick.  A thick batter will make thick pancakes.

Pancakes cookingPancakes cooking2

  • Pour or drop by spoonfuls onto preheated griddle.  If you are using brown rice flour or powdered milk, lower the heat so it doesn’t burn.  Top with fruit if desired and spread with a spoon to ensure even cooking.  When bubbles pop, turn and brown the other side.  If you are using apples, pancakes need to cook a bit longer.
  • Top with fresh fruit and maple syrup. Enjoy!

Pancakes2

Wheatless Wednesday – Mojo Bass with Beans and Rice

0

Mojo Bass with Beans and Rice

Mojo Bass with Beans and Rice

After spending a week sampling food in Cuba, I couldn’t wait to get home and try some of my favorites. I had an opportunity to try many types of fish, Bass, Pargo (red snapper) and Dorado (mahi mahi).   One of my favorite preparations included fish seasoned with Mojo, which is a very popular sour orange/garlic/herb sauce topped with a combination of fruit and vegetables.  Mojo can also be cooked with chopped onions and used as a dipping sauce. I topped the fish here with chopped avocado and mango which go nicely with the Mojo sauce.

A typical Cuban meal would consist of rice and beans, cooked together or apart. When cooked together the recipe is called “Moros y Cristianos” (black beans and rice).  (We all had a laugh at this because the English translation is literally Moors and Christians which is not helpful on a menu.) If cooked separately it is called “Arroz con/y Frijoles” (rice and beans). A main course is usually pork or beef, which is not on the Good Mother Diet, however seafood is plentiful (as Cuba is an island) and it is traditional to serve some sort of side dishes like tubers, such as yuca, malanga, and potato all served either hervidas (boiled) or fritas (fried), as well as plantains and bananas). So even for vegetarians, even though it’s a meat heavy diet, there are plenty of yummy things to eat.

Mojo Fruits and Vegetables

I had some form of beans and rice for most meals, many of which had sauteed peppers or other vegetables, but I found that my favorite was a simple black beans and rice.  White rice is traditional in Cuba but I prefer a long grain brown rice which has more flavor as well as better food value.  You can soak the beans overnight and cook them as described on the label, or you can use canned beans that have been drained and rinsed. Authentic beans and rice is made using the water from the cooking calls for cooking the garlic and onions in bacon, however, I have modified this recipe from “Cuban Home Cooking,” by Cossio and Lafray, to be vegetarian/vegan.

Mojo Yucca

I also loved trying the varieties of fruits and vegetables available on this tropical island. My favorites were steamed or fried yucca, also known as cassava, and fried sweet potato.  I am not a fan of plantain but loved fried bananas.  I was skeptical that I could find yucca in my supermarket (and I didn’t even know what it looked like) so was surprised to see a sign for fresh yucca, which turns out to be a long, squashlike vegetable with a hard brown shell right in my local Whole Foods.  Ideally, I would try to eat more seasonal, local foods, however, if I want to try cooking something like yucca or mango that doesn’t grow around here, my only option is to buy it imported from Mexico or South America.  Later this week I’ll try out a few Cuban desserts and share my results.   Enjoy

Mojo Bass

  • Servings: 4
  • Difficulty: easy
  • Print

2 Tbsp fresh orange juice

2 Tbsp fresh lime juice

1 tsp minced garlic

1 Tbsp olive oil

1 tsp ground coriander

1/2 tsp ground cumin

¼ tsp ground oregano

1/8 tsp salt

4 5 or 6 oz bass fillets (or another white fish like snapper or cod, 1 inch thick)

cooking spray or oil for the pan

1 small mango

1 avocado, peeled, seeded and chopped

2 Tbsp fresh mint, sliced crossways into slivers

  • Preheat broiler.
  • Combine first 8 ingredients, stirring with a whisk or briskly with a fork.
  • To chop mango, cut in ‘half’ vertically just to the side of the seed on the flat side.  Then make a row of cuts in the flesh, taking care not to cut through the skin.  Then turn and make a row of cuts crosswise.  Flip the skin inside out and you can easily cut off the cubes. Click the link below for a video on how to cut a mango. http://www.youtube.com/watch?v=Go-n27Zkv4k

Mojo MangoMojo Avocado Mango

  • Combine mango, avocado and mint in a small bowl and set aside.  Placing the avocado pit on top will prevent it from turning brown.

Mojo Bass in marinade

  • Arrange fish, skin side down, on a baking sheet coated with cooking spray or olive oil. Brush half of orange juice mixture over fish (you can marinate up to an hour); broil 4 minutes. Brush with remaining orange juice mixture; broil 4 minutes or until fish flakes easily when tested with a fork. Top with avocado/mango mixture.

Mojo Bass Cooked

Cuban Beans and Rice (Moros y Christianos)

1 cup uncooked rice

1 cup cooked and drained black beans

2 Tbsp olive oil

1 ½ cup vegetable broth (1/3  cup more if using brown rice)

½ onion, minced

2 cloves garlic, crushed

  • Saute onion and garlic in 1 Tbsn oil on medium heat until onion is translucent. Remove from pan and set aside.
  • Add rice to the pan and saute until it starts to crackle.
  • Add vegetable broth, cover and let cook over medium low until the rice is tender but not mushy (brown rice will take longer).
  • Add the beans and onion/garlic mixture and 1 Tbsn oil and cook a few minutes longer. Serve warm.

Mojo yucca3Mojo Yucca2

Yucca (Cassava)

1 or 2 fresh Yucca(or frozen)

1 tsp salt

2 garlic cloves, finely minced

2 Tbsn lemon juice

1/3  cup olive oil

  • Cut the ends off the yucca, then cut it in half, peel with a sharp knife and cut into large pieces.
  • Place yucca into a large pot and cover with water. Add salt. Boil until tender (about 30 minutes).
  • Drain off water and set aside.
  • Sprinkle with garlic and add lemon juice.
  • In a separate pan, heat olive oil until it begins to bubble. Pour over yucca and gently mix. Serve warm.

Fried Sweet Potato and Banana

1-2  sweet potatoes

2-4 bananas (unripe to medium ripe)

2-3 Tbsn olive oil, coconut oil or  avocado oil

  • Peel sweet potatoes and slice horizontally
  • Peel and slice bananas and slice horizontally
  • Heat oil in a heavy pan and fry on medium high heat until browned on both sides.
  • Serve immediately

Mojo Bass with Beans and Rice

Meatless Monday-White Bean & Swiss Chard Soup, Arugula Salad and Dark Chocolate Bark

1

White Bean and Swiss Chard Soup

Looking for a great NFL Playoff Game dinner idea? I had the pleasure of trying this lovely soup at a football party last week, compliments of Barbara McCrum. It was really delicious.  I know I went back for seconds! Barbara served the soup with an arugula salad with toasted marcone almonds and crumbled goat cheese tossed in vinaigrette. To top it off, Dawn O’Dell made the most decadent dark chocolate bark with coconut, dried fruit and sea salt.  We were all licking every last bit of chocolate off our fingers, it was that good.   I am off to Cuba this week so will not be in my kitchen, however, I am featuring Barbara and Dawn as my guest chefs today.  Thank you Barbara and Dawn for sharing!

The White Bean & Swiss Chard Soup is vegan, low fat and loaded with nutrients and protein. It is surprisingly creamy even though there is no milk or cream (due to pureeing some of the beans). You can substitute any dark leafy green for the swiss chard.  The chocolate bark is also vegan and using a 70% chocolate makes it super rich in antioxidants and considered a superfood.  The nuts and fruits add good oils plus vitamins and minerals, so this is a yummy dessert you can feel good about eating!

Of course after that fun party and delicious meal, I had to run out and buy the cookbook that both of these recipes came from, “It’s All Good” by Gwyneth Paltrow. This is a great cookbook for those on special diets, like vegan, gluten free or elimination, or even just for people who want to eat well.  It is not vegetarian but features really healthy and fairly simple but delicious recipes.  If we can all look like Gwyneth Paltrow, even better!   I’m sure GMD will be seeing more from this cookbook…

White Bean and Swiss Chard Soup

  • Servings: 6
  • Difficulty: easy
  • Print

2 Tbsn olive oil

2 leeks, thoroughly washed and finely chopped

1 large yellow onion, finely diced

2 garlic cloves, minced

1 bay leaf

Coarse sea salt

4 cups vegetable stock

14 oz can cannellini or gigante beans

1 bunch swiss chard, leaves roughly chopped and stems discarded

Freshly ground pepper

  • Heat the oil in a large, heavy pot over medium heat.  Add the leeks, onion, garlic and bay leaf along with a heavy pinch of salt and cook, stirring now and then, until softened but not browned, 10 minutes.
  • Add the vegetable stock and the beans to the pot and turn up the heat.  Once the soup comes to a boil, lower the heat and simmer until everything has completely softened and the soup is wonderfully fragrant, about 20 minutes. Remove and discard the bay leaf.
  • Carefully puree 2 cups of the soup in a blender or food processor and return it to the pot.  Add the swiss chard and cook over medium high heat just until they’ve wilted, about 3 minutes.  Season the soup with salt and pepper to taste.
  • Serve with a fresh tossed salad.
White Bean & Swiss Chard Soup

White Bean & Swiss Chard Soup

Dark Chocolate Bark

  • Servings: 6-8
  • Difficulty: easy
  • Print

Chocolate Bark

Dark Chocolate Bark with Coconut, Almonds & Sea Salt

7 oz good quality dark chocolate (like Green & Black’s 70% bars), roughly chopped

2 Tbsn sliced almonds, roasted

2 Tbsn combination dried apricots, cherries and golden raisins, chopped

2 Tbsn unsweetened coconut flakes

1 tsp Maldon sea salt

  • Line a sheet pan with parchment paper and set aside.
  • Bring a small pot of water to a boil, then lower to a simmer.  Put the chocolate in a glass or stainless steel bowl and set it over the pot of water.  Stir the chocolate until it’s completely melted and immediately pour it onto the prepared pan.
  • Evenly sprinkle the rest of the ingredients over the chocolate.
  • Put the pan in the freezer until the chocolate sets, about 15 minutes.  Break the chocolate into pieces and eat immediately, or store at room temperature in an airtight container if your house is cool or in the refrigerator if its summertime.

Chef’s Tip:  The more you stir or whisk the chocolate, the shinier it gets.  Feel free to use other dried fruits and nuts like cashews, hazelnuts, dried cherries, spicy red chili flakes,

etc.

Meatless Monday – Portobello Mushroom Stuffed with Eggplant & Gorgonzola & Fennel Citrus Salad

6

Portobello Mushroom Stuffed with Eggplant and Gorgonzola

Eggplant and portobello mushrooms are a perfect marriage.  Throw in a bit of gorgonzola and some spices and you have a delicious meal.  Yum! “Portobello mushrooms are rich in potassium, essential amino acids, and vitamin B. They are low in calories and fat-free, but a great source of protein which is why they are so popular among vegetarians.  Eggplant is a species of nightshade commonly known in British English as aubergine and also known as brinjal, brinjal eggplant, melongene, garden egg, or guinea squash. As a member of the genus Solanum, it is related to both the tomato and the potato.  Surprisingly, it is botanically classified as a berry with its small edible seeds”. (Wikipedia)  Who knew?

This recipe calls for marinating the mushrooms in balsamic vinegar first, which creates a meatier texture and richer flavor, however, this step is optional, especially if you prefer the original mushroom taste but you may need to add oil or vegetable broth so the mushrooms don’t dry out. Serve with a light salad or a fresh baguette.  I’ve included a citrus salad because they are so good this time of year and I bought navel oranges and grapefruit at the farmer’s market last week. My favorite simple  vinaigrette is equal parts avocado or olive oil with vinegar and salt and pepper.  But my favorite vinegar is from my brother, Paul’s winery, Paradisos Del Sol in Washington State.  It may not be fair to share this since I don’t know if the vinegar is for sale (but the wine is). Bon Appetite

Portobello Mushrooms Stuffed with Eggplant and Gorgonzola

4 large portobello mushrooms

½ tsp each of garlic and onion powder

½ cup balsamic vinegar

1/4 cup olive oil

1 small  or ½ large onion, diced

2 Japanese eggplants

2-3 plum or roma tomatoes, chopped or 1 can diced tomatoes

2-4 garlic cloves, minced

6 ounces crumbled Gorgonzola, feta or mozzarella cheese

2 tablespoons chopped fresh basil

1/4 cup freshly grated Parmesan cheese (Optional)

Marinated Portobello Mushrooms

  • Wipe mushroom caps clean with a damp papertowel. Do not immerse mushrooms in water as they will get waterlogged.   Remove stems, chop and set aside.
  • Combine the balsamic vinegar, garlic powder, and onion powder together in a large resealable plastic bag. Add mushrooms, seal bag turn until mushrooms are evenly coated. Refrigerate for 1 hour.
  • Wipe eggplant dry, chop and sprinkle with salt. Let sit for a few minutes, until it sweats.
  • Heat oil in heavy medium skillet over medium heat. Add onion, eggplant, and garlic. Sauté until onions are translucent and eggplant is soft, about 5 minutes. Add tomatoes and mushroom stems and cook another 2 minutes. If you are using canned tomatoes, drain and reserve juice for another use. Remove from heat; stir in Gorgonzola cheese and 1 tablespoon basil. Season with salt and pepper to taste.

portobello mushrooms uncooked

  • Preheat oven to 375°F. Arrange mushrooms, rounded side down, on large baking sheet. Spoon mixture evenly into mushroom caps. Sprinkle with Parmesan cheese. Cover mushrooms with aluminum foil. Bake mushrooms for 15 minutes. Remove foil and continue baking until cheese melts, filling bubbles and mushrooms are tender when pierced with sharp knife, about 10 minutes(Larger mushrooms may need to cook longer). Sprinkle mushrooms with remaining 1 tablespoon basil and serve warm

Fennel Citrus Salad

1 stalk fennel, cleaned and thinly sliced horizontally(white part only)

2 pink grapefruit or navel oranges, segmented

1 avocado, sliced

1 bunch mixed greens

Toss ingredients with your favorite vinaigrette.

Meatless Monday – Tom Kha Tofu & Spicy Thai Salad

2

Tom Kha Tofu and Spicy Thai Salad

Tom Kha Tofu & Spicy Thai Salad

Tom Kha Gai, or Thai Coconut Chicken soup is a very flavorful soup usually made with coconut milk, galangal and lemongrass.   I had it the first time in the 80’s at San Francisco’s Thep Lela Restaurant and fell in love.  I wanted to try a vegetarian version so opted for Tom Kha Teohu (tofu). Tofu works really well in this dish, which as a main course is a nice but light dinner. I paired it with a Thai inspired salad featuring napa cabbage and other julienned veggies tossed in a spicy Asian style vinaigrette.

I tried to include many substitutions for hard to find ingredients.  I don’t think you should have to restock your pantry for one meal, however, if you like Thai or Asian food, many of these ingredients are worth having on hand. I’m sure purists wouldn’t agree with me but I would rather make a great meal with what I have on hand and not worry if it’s not perfect or authentic.  I figure my only truly authentic Thai meals will be consumed while on vacation in Thailand surrounded by all the beauty and color of the country.  Lime zest and juice can be substituted for kaffir and ginger root or paste for galangal root. Several options are listed for red chili peppers which are fairly seasonal. I would not recommend using lite coconut milk unless you reduce the volume of broth which also reduced your yield. Vegans can use 1 teaspoon salt instead of fish sauce. To make this a more filling dish add more vegetables (snow peas and red bell pepper are good choices). Enjoy!

Tom Kha Tofu

1 can coconut milk

3  cups vegetable broth

6 kaffir lime leaves (or 1 T lime zest and1/8 cup lime juice

4-5 quarter-size slices, peeled fresh galangal or ginger

1 stalk fresh lemongrass or lemongrass paste

1 container extra firm tofu

2 cups shitake, button or crimini mushrooms

1  zucchini, halved lengthwise and thinly sliced into half circles

1 tablespoon Thai or Vietnamese fish sauce (Optional)

1 teaspoon sugar

1 red chili pepper, sliced into thin rings, 8-10 dried Thai birds eye peppers or 1 teaspoon Thai chili paste

small bunch fresh basil, leaves only or 1 T dried Thai basil

Thai veggies

  • Drain the tofu and slice it lengthwise into 8 equal pieces. Place the pieces on a couple of layers of papertowels and cover with a couple more.  Press gently to get out water.  Set aside.
  • Cut the lemongrass into a 6 inch piece, using only the bottom white part. Pound it with the side of a cleaver or mallot to release the flavor. You should be able to smell the lemongrass.   Cut into 2 inch pieces and pull apart
  • Bring the broth to a boil in a medium stockpot.  Add the galangal, lemongrass, sugar and lime.  Simmer 10 to 15 minutes.
  • Taste the broth.  If it has enough flavor, you can remove the solids with a slotted spoon.  Or you can leave them in for added flavor but you will have to warm your guests which items aren’t edible.
  • Add the coconut milk, chilies, fish sauce and simmer for another 5 minutes or so.
  • Taste your broth.  If it is too sour, add a bit more sugar.  Or you can add salt to taste.
  • Add the tofu. Turn down or off until shortly before you are ready to serve.
  • Turn the heat to medium, add mushrooms,zucchini and fresh basil leaves and cook about 5 minutes.  Serve hot.

Spicy Asian Salad

1/2 red bell pepper

3 Green Onions

1/2 Napa cabbage

1 large carrot

1/2 cup slivered almonds toasted in a dry skillet for about 5 minutes or until slightly golden

Slice red pepper and napa cabbage thinly and separate.  Julienne carrot(a Cuisinart or mandolin makes it easy).  Cut scallions into 2 or 3 inch sections and sliver.  Combine all ingredients.

Dressing:

1/4 cup white vinegar

1/4 cup vegetable oil

1/8 cup rice vinegar

dash sesame oil

1T Soy Sauce

1 tsp .Chili Paste (Optional)

1 Garlic Clove (minced)

1/2 tsp sugar

Combine vinaigrette ingredients and toss with veggies.

Spicy Thai Salad

Meatless Monday – Roasted Acorn Squash with Wild Rice Stuffing

4

Acorn Squash with Wild Rice Stuffing

Acorn Squash with Wild Rice Stuffing & Pear and Cambozola Salad

When I was a kid, my Mom used to roast acorn squash with butter and brown sugar.  My favorite part was the little pool of melted brown sugar and butter that would form in the hollow. Yum!  This is a more grown up version, suitable as a vegan main course.  It kind of reminds me of a Thanksgiving stuffing but without the turkey.  This dish is very impressive looking and is great for dinner parties or as a holiday centerpiece.  It has that perfect salty, sweet combination and the toasted pecans give it a satisfying ‘meatiness’.  I love the natural heart shape.  It would be a great Valentine’s Day dish!  Vegans should omit the Campozola or replace it with sliced avocado or vegan cheese.  Serves 4-6 (Makes enough stuffing to fill 2 large or 3 small squash)

Acorn Squash with Wild Rice Stuffing

Ingredients:

½  cup dried brown rice
¼ cup dried wild rice
2 cups vegetable broth
1 cup fresh brown mushrooms, wiped clean and sliced
2 acorn squash
1-2 Tbsp. maple syrup or brown sugar
1 -2 Tbsp olive oil
1 medium onion, finely diced
¼ cup dried currants (or unsweetened dried cranberries)
¼  tsp salt
¼ tsp. pepper
½ cup pecans

  • Cook the brown and wild rice together with vegetable broth.
  • Heat the oven to 400° and place a rack in the middle position.
  • Cut squash in half with a sharp knife and remove the seeds. Use a dry paper towel to get the rest of the stringy bits.
  • Place the squash, cut side up, on a baking sheet, and brush olive oil on the tops and insides of the squash halves. Brush maple syrup (or sprinkle with brown sugar) on the tops and insides as well, and season with salt and fresh pepper. Roast in the oven for about 30 minutes, until you can pierce it with a fork but not yet soft.

Acorn Squash 1Acorn Squash 2

  • Toast the pecans in a dry pan for a few minutes, until they become aromatic and start turning brown.(You can also toss them first in melted butter or coconut spread for an even more delicious taste).  Let cool.
  • Saute the onion in 1 Tbsp olive oil in a large pot until soft.  Add fresh mushrooms, if using, and cook another couple of minutes.
  • Remove from heat and stir in the cooked rice, pecans, and currants. Add salt and fresh pepper to taste.
  • Scoop one quarter of the rice filling into each of the roasted squash halves. It’s a bit messy, so I found it easier to move the squash to a plate for filling and then put it back into the pan.

Acorn Squash 3Acorn Squash 4

  • Continue roasting the squash for 20 to 30 minutes more. It should be completely tender and the stuffing hot. You should hear it sizzling.
  • Serve warm.

Pear and Cheese

Pear and Cambozola Salad

1-2  d’Anjou or Bosc pears

8 red globe grapes

1 wedge Cambazola Blue cheese (camembert or brie work well too)

2-3 cups mache or mixed salad greens

Vinaigrette (2 Tbsn olive or avocado oil, 1 Tbsn red wine vinegar, 1/4 tsp Dijon mustard, dash salt and pepper)

Pear 1Pear 2

  • Cut pears in half lengthwise, core using a melon baller and thinly slice lengthwise.(Easiest done with cut side down)
  • Slice grapes
  • Cut 4 thick slices of cambazola
  • Wash and dry greens and toss in vinaigrette.
  • Place ¼ of the greens on a salad plate and arrange ¼ of the pear slices, grapes and 1 slice cambozola on top for each serving.

Acorn Squash with Wild Rice Stuffing

Grilled Oysters with Garlic Chipotle Butter

4

Grilled Oysters

Today my husband came back from the Farmers Market at Country Mart with a bag of really large fresh oysters in the shell and I knew immediately what I wanted to do with them.  A couple of years ago, our friends, Chris and Carrie, gifted us with a bag of fresh oysters they had brought back from their weekend at Point Reyes.  Not having prepared oysters before, I went on to the Hog Island Oyster Company website and found many great recipes for both raw and cooked oysters.  We opted to try their “Hog Wash” mignonette and their barbecued oysters with Garlic Chipotle Butter. We really liked the Hog Wash for dipping raw oysters, but we Loved the Garlic Chipotle Butter. We were practically licking the shells clean!

Following is the Hog Island recipe. I took a shortcut and used one whole tube of garlic paste which was much easier than peeling and chopping ¾ cup of fresh garlic.  I had a 7 oz can of chipotle chiles in adobo sauce so I used the whole thing, rather than wasting some of it.  Otherwise, I followed the recipe pretty closely. I have now done both the ‘burrito’ method and the bowl and spoon and think both work just as well..

In preparing the oysters, you can pre-shuck them using an oyster knife or put them on the grill whole until the shell pops (it is an audible pop) and you can more easily remove the top shell.  Make sure you have an oyster knife.  A regular knife will not work and is unsafe.  Click on this link for a video of proper oyster shucking technique from Hog Island.  http://hogislandoysters.com/kitchen/shucking-oysters  Enjoy!

Grilled Oysters with Garlic Chipotle Butter

The Ingredients

50 Hog Island sweet water Oysters

1/2 lb (two sticks) unsalted butter softened to room temp

1/2 cup brown sugar

1/2 cup bourbon

3/4 cup finely chopped garlic

Half of (10 oz) can of chipotle chilies in adobo sauce,chopped.

Raw Oysters

The Butter (can be made up to one week in advance, keep refrigerated)

In a medium bowl, dissolve the brown sugar with the bourbon. In a food processor or blender, combine the softened butter with the bourbon/brown sugar mixture and add the garlic and chipotles. Mix on medium/high speed until well blended (OK if some chunks remain). Lay down a sheet of parchment paper (12″ or so), scoop the butter compound onto the sheet working to form a long row. Roll the butter in the parchment, like a burrito, folding the ends as you go. Refrigerate for about two hours or until firm. The finished roll should be the dimension of a cube of butter, only longer (about a foot). When you are ready to grill, slice 1/8″ pats of butter from the butter log and place on top of your shucked, raw oysters. Allowing the butter to melt as the oysters cook. *You can also skip the log-roll and leave the butter in a airtight covered bowl (refrigerate after making). Scoop a tablespoon of the mixture onto each oyster as they grill.

Tip:  I opted for the burrito method for the butter and found it a bit gloppy at first.  It was easier to work with once it was in the refrigerator for a bit.  I rolled it in the parchment paper and went back a couple of time to form it into a more rectangular shape as it hardened.
Chipotle butter burrito Chipotle butter

The Grill

Preheat the grill to medium hot. You can pre-shuck the oysters or just place them whole on the grill.  Once you hear them pop, they will be easier to open.  Wearing an oven mitt, pick up the hot oyster and insert the tip of an oyster knife in the opening at the skinny tip of the oyster and pry the top shell off.  Place a pat of butter onto each shucked oyster and place back on the grill.  After about 2-4 minutes of bubbling and sizzling remove the oysters from the heat.  The oysters will be ready when the edges of their meat begins to curl and the butter sauce is bubbling hot.  Remove from heat and let cool slightly before eating.

Grilled Oysters wholeGrilled Oysters openingGrilled Oysters 2Grilled Oysters

Wheatless Wednesday – Seared Ahi Tuna & Sunomono

0

Ahi Tuna Dinner

Wheatless Wednesday – Seared Ahi Tuna with Sunomono, Edamame & Ahi Poke

With Guest Chef, Eric Porter

ahi eric

 We are filled with great joy to have all three of our sons home for Christmas, the first time we have all been together since June.  Our oldest son, Eric, has been interested in cooking since he was a toddler, standing on a stepstool and helping me make peanut butter cookies, pancakes and other kid favorites.  When he was older, he learned cooking basics from me and grilling techniques from his Dad.  Then he moved out and has taken cooking to a whole new level.  For the past several years, Eric and I have engaged in what I think of as friendly ‘cooking wars’, where we take photos of whatever gourmet meal we just made and text it to each other. Eric has created quite a reputation as a great cook among his friends and rightly so.  I have had the pleasure of Eric’s famous Seared Ahi Tuna several times and am pleased to have him as the first guest chef for Good Mother Diet.

Notes from the Chef – A dish like this is delicious, beautiful and looks decadent but is actually very easy once you get comfortable working with Ahi.  Ahi is a fish that is generally served raw to rare. People are sometimes are afraid of working with raw or rare fish, however if you buy your fish from a reputable local source, the fish should be good.  Keep in mind that most if not all tuna is flash frozen on the boat which is a means to preserve the flavor and keep it fresh.  Pickling the daikon takes out all the sharpness and adds a pleasant sweetness.  This is best done days before but in a pinch, it can be done that day as well.  Kept in the refrigerator, it only gets better and will last for 2 weeks.  In making the dry rub for the tuna, I find that dry ginger works best in this dish rather than fresh, because it’s easier to blend evenly with the rest of the dry spices.  The hardest part of this dish is in removing what I call ‘the horn’, the fibrous tip on each piece of tuna. It’s easy to see what to remove when you look at the grain of the fish.  There are two parts of the Ahi steak, a large piece where the grain goes one way and a small piece where the grain goes the other direction.  You need to remove the small piece which is too fibrous for this dish.  I hate to throw it out so I usually use it to make Ahi Poke.  You can also make poke with a prime piece of tuna, which makes a prettier dish, but for our purposes, we are going to make use of the less desirable bits. If I have one thing to say about Ahi tuna, less is more, because it is so good on its own. I believe that everything on your plate should look good and I like to use edible ingredients in my presentation.

Seared Ahi Tuna over Marinated Daikon

2 cups fresh Daikon radish

1 Tbsp fresh ginger, finely minced or ginger paste

¼ cup carrot or beet juice to color (optional)

Up to ½ cup rice vinegar

2 lbs fresh Ahi tuna

1 Tbsn salt

2 tsp pepper

1 tsp garlic powder

1 tsp onion powder

1 tsp ginger powder

1 tsp sesame oil

1 Tbsn Wasabi powder

Pickled ginger

  • Using a mandolin or grater, shred the radish into long strips.
  • Combine radish, ginger and juice in a container. Add ½ to ½ rice vinegar and water to cover.  Cover and refrigerate. (The longer it marinates, the better)
  • Combine all dry ingredients in a medium bowl, or a pie plate.

Ahi1Ahi2Ahi 3Ahi 4

  • Place Ahi tuna on a cutting board.  You need to remove the tough fibrous part of the tuna (the small tip section).  Using a knife, beginning at the ‘knotch’ where the grain of the fish changes, cut, as shown, taking care to remove the fibrous tissue.  Reserve the small piece of fish to make Ahi Poke.  Recipe below.
  • Dredge each piece of fish in dry rub on both sides, including edges, and brush off excess.
  • Add sesame oil to bowl and toss fish to coat evenly.  Cover and refrigerate 1 to 2 hours. You don’t want it to come to room temperature before cooking.

Ahi

  • Make wasabi paste by combining one Tablespoon wasabi powder with 1 Tablespoon water. Mix and shape into a cone.  Let sit ten minutes.
  • Heat a heavy pan until it’s almost smoking.  Sear the tuna 30 seconds to 1 minute on each side.  Remove from heat and put in the freezer for 2 minutes.
  • Remove from freezer.  Press sesame seeds into both sides. Slice and serve.

Ahi done

Ahi Poke

½ lb Ahi Tuna (whatever scraps are left from the Ahi steaks)

½ tsp sesame oil

1 tsp soy sauce

½ Tbsn lemon zest (from about half a lemon)

1 firm avocado

  • Working from the long end toward the tip of each piece, run the knife between the sections to remove the white fibrous tissue.  You will need to use your hands to pull the meat off as well. Some of it will be small scraps.  Cut the longer pieces into cubes.
  • Put tuna pieces in a bowl.  Add remaining ingredients and toss well.  Cover and refrigerate. (Best if marinated overnight or 24 hours).
  • Cut slices of avocado and arrange tuna mixture on top. Serve

Ahi Poke

Sunomono

1/2  lb salad shrimp

2 cucumbers

2 large carrots

¼ cup rice vinegar

½ tsp salt

8/8 oz package thin rice noodles

Bring a large pot of water to a boil.  Remove from heat.  Add rice noodles and let stand 3 to 5 minutes, stirring occasionally.  Drain and rinse with cold water until they are no longer hot. Noodles should be soft but firm. Gently press the water out.  Set aside.

  • Using a mandolin or grater, cut carrots into long strips
  • Using a mandolin, Cuisinart or knife, cut cucumber into thin circles
  • Rinse shrimp
  • Combine all ingredients.  You may need to use your hands.
  • Top with shrimp

CHEF TIP-You can make a pretty cool dish to hold your edamame, or anything else, by shaving the side s of a cucumber on the wide setting.  Form them into rounds and clip together with carrot or zucchini pins.

zuxxhini bowl2

Edamame

Boil fresh or frozen edamame for 3 to 5 minutes.  Drain and sprinkle liberally with salt.  Serve.

Ahi Tuna Dinner


Meatless Monday – Butternut Squash Soup & Polenta Towers

2

Butternut Squash Soup and Polenta Tower2

Butternut Squash Soup & Polenta Towers

Although the sun is shining in Northern California this mid-December, it has been deceptively chilly outside, especially once the sun goes down.  With temperatures  below normal this past week, and another “Spare the Air Day” (an Only in Marin phenomenon, I believe, where we are not allowed to burn wood or use pellet stoves), the best way I can think of to make my house feel warm and cozy is to have a big pot of hot soup bubbling away on the stove. It won’t necessarily warm up your house like a good, old fashioned fire, but it will help your kitchen feel homey and welcoming, and smell divine.  I remember my friend, Kim, once telling me that when she wanted her family to think she cooked all day, she would throw onions and garlic in a saute pan for a few minutes.  She was very smart and I’m sure her family loved coming home to the wonderful smells coming from her kitchen.  You can also greet your holiday guests with hot apple cider (apple cider with cinnamon sticks and cloves) which makes your home smell like Christmas.

Butternut squash soup is my standard this time of year. It’s flavorful and low fat, as are most of my dishes, since I use vegetable or chicken broth instead of the cream or cream cheese called for in many recipes.  Roasting the squash first, makes it very easy to peel and retains more vitamins than peeling and boiling. The recipe calls for fresh ginger which must be minced very finely.  An alternative would be to add a 1 inch peeled chunk of ginger to the soup after it has been pureed and then remove before serving.  Another good short cut would be to use a teaspoon of ginger paste.  This soup is especially delicious served piping hot with a dollop of cold sour cream or non-fat yogurt (My favorite is local, Straus Family European Style yogurt, made here in Marin County) and topped with toasted pumpkin seeds.

The Polenta Tower is an easy dish to make and fun to serve.  It also works great on a buffet or as a fancy dish to bring to a potluck, although it works better to omit the marinara sauce.  I am a big believer that cooking should be as easy as possible and will take shortcuts when available. For some recipes I would make my own polenta from scratch but not for this dish.  The Food Merchants Brand, pre-cooked polenta in the tube, is perfect for this recipe.  It is organic, (non-GMO), fat free, wheat free and gluten free.  Best of all, it’s already in the perfect shape.  There may be other brands that are just as good but this is what is in my refrigerator. The vegetables in this recipe can be altered for what is in season or what you already have.  Vegetables that can be sliced into rounds work the best.  Be creative and have fun with your food!  Vegans should omit the mozzarella and sour cream.

Butternut Squash Soup

1 butternut squash

1 large or 2 small leeks

1 medium onion, chopped

2 Tbsn olive oil or butter

1 tsp finely minced ginger, or to taste

6 cups vegetable broth

sour cream or non-fat yogurt (optional)

¼ cup pumpkin seeds or pepitas (optional)

LeeksButternut Squash

  • Cut butternut squash in half lengthwise and scoop out the seeds. You can use a dry paper towel to get the last bits of pulp. Oil a glass baking dish and place squash in the dish cut side down.  Cook at 375 degrees for about an hour, or until a fork easily pierces the thickest part of the squash.  Let cool.
  • Cut the leeks lengthwise and wash thoroughly under running water, fanning the layers of the leek like a deck of cards to remove any grit hidden in between. Slice lengthwise and chop, using the white part only.
  • In a large stock pot, saute leek, onion and ginger in olive oil until soft.
  • Scoop out squash from the shell and add to the stock pot, breaking it up with a wooden spoon.
  • Add 2 cups of broth and stir, cooking for another 10 minutes. Let cool slightly.
  • Puree the squash mixture in a food processor or blender until smooth.  You may have to do it in two batches. If your puree does not come out silky smooth or you can see bits of leek, you may want to cook it a bit longer and puree it again.
  • Return it to a clean stock pot and add the rest of the broth. Heat on medium to low heat another 10 to 20 minutes to let the flavors blend.
  • Toast the pumpkin seeds in a small, dry saute pan over medium heat for a couple of minutes until they are golden and lose their raw taste. Let cool.
  • Ladle soup into bowls and top with sour cream and toasted pumpkin seeds.

Polenta Towers

(Makes about 8 towers)

2 cups marinara sauce (Use your favorite or make your own, recipe below)

1 18 oz tube of cooked polenta

1 ball or 3-4 boccoccini fresh mozzarella (optional)

4 smaller portobella or crimini mushrooms,

1  japanese eggplant

1  zucchini

1-2 ripe tomatoes

1 small bunch fresh basil

2-3 Tbsn olive oil

BasilPepitas

  • Remove plastic from polenta, cut off curved ends and cut into ½ inch rounds.
  • Drain mozzarella and cut into  ½ inch rounds
  • Wash and dry eggplant, zucchini and tomato and slice them into rounds as well. Cut stems from mushrooms even with the cap and sliced in half horizontally.  If they are small, leave whole. Slice mozzarella.
  • Wash and dry about 6 large basil leaves and slice them into ribbons.
  • Heat 1 Tablespoon olive oil in a pan over medium to medium high heat and saute polenta until golden on both sides.  Remove and set aside.
  • Add another tablespoon oil, a bit of chopped garlic and saute the eggplant and then the zucchini and mushrooms, adding more oil if necessary.  (Note:  If you have time, you can salt the eggplant slices and let sit for 10  minutes or so.  Eggplant which has ‘sweated’ usually absorbs less oil.) Remove from and set aside.
  • To assemble the ‘towers’, ladle ½ cup marinara sauce onto the middle of a plate. Place a polenta circle on top of the sauce, then top with mozzarella, tomato, eggplant, mushroom and zucchini, depending on their size.  I usually go from biggest on the bottom to smallest on the top.
  • Garnish with fresh basil.

Polenta Towers

Marinara Sauce

Makes 3 cups

1 28 oz can crushed tomatoes

2 Tbsn fresh basil, finely chopped

2 cloves garlic, minced

1 Tbsn olive oil

½ tsp salt

1 tsp balsamic vinegar

  •  Heat olive oil in a saucepan and saute garlic for a few minutes.  Add basil and crushed tomatoes and stir to combine.
  • Bring to a boil and add salt.  Simmer about 45 minutes.
  • Before serving add balsamic vinegar and stir to combine

Butternut Squash Soup and Polenta Tower3

Seared Scallops with Zucchini “Pasta”

2

Seared scallops with zucchini pasta

Seared Scallops with Zucchini “Pasta” and Roasted Beet Salad

Last summer, spent at our Maine house, was a balancing act when it came to dinner, which we rotated among friends and took turns hosting.  I had just begun the Good Mother Diet, my husband was protein heavy and mostly carb free and our friend, Rick went back to our ancestral roots with the Paleo diet.  Well here is a meal that satisfies all three!  The pasta is not real pasta, but noodles made by slicing zucchini into long, skinny spaghetti-like ribbons.  For this a mandolin works best, however, you can also use a grater, zester or potato peeler but it won’t look as nice.  If you want it to look even more like spaghetti, you can peel the zucchini before cutting it but I prefer to keep the skins (and vitamins) in the dish.

This is my favorite way to prepare beets.  Roasting, rather than boiling, intensifies the color and flavor, plus it is by far the easiest way to remove the skin.  Using varieties with different colors makes for a prettier dish.  If making the entire meal, start by roasting the beets since that can take a half hour or so, depending on the size of your beets and get the zucchini ‘pasta’ going.  The beets can be made ahead of time and will last in the refrigerator several days.  The actual cooking time of everything else is pretty short and should be done just before serving.  Paleos, like Rick, should omit the pistachios, cheese and seasoning/salt.

Serves 4

Beet Salad

Roasted Beet Salad

4 beets

1-2 Tbsn olive oil

1 head butter lettuce (washed and separated)

Vinaigrette ( ¼ cup olive oil, ¼ cup red wine vinegar, 1 Tbsn Dijon Mustard, salt and pepper)

Feta (optional)

  • Cut leafy stalks off the beets, taking care not to cut into the flesh. (You want to keep all the juice inside).  Reserve leaves for another use or chop them and saute in olive or butter with garlic and serve on the side.

raw beets Beet packages

  • Wash and dry beets but don’t peel them. (The peel will slide off easily after they are roasted).  Lay them on a large piece of aluminum foil. Brush them with olive oil and fold the foil up and seal into a leak-proof package, or you can use a covered baking dish. Bake at 400 degrees for about 45 minutes or until you can easily pierce them with a fork.  Larger beets can take up to an hour, so check often. Be careful when you open the pouches, as they will be very steamy and can burn your fingers.
  • Remove from heat and let cool.  Once they are cool enough to handle, slip the skins off by hand or with a papertowel.  (You will be surprised how easy it is).
  • Slice and serve with lettuce and sliced apple.  Drizzle with vinaigrette and top with feta, if desired.

Roasted Beets

Seared Sea Scallops and Zucchini “Pasta”

1 lb large sea scallops

2 Tbsn avocado oil (or another oil that does well in high heat)

1/2 tsp creole seasoning (like Tony Chachere’s) or just salt and pepper

¼ cup white wine

4 – 6 zucchini (depending on size)

1 Tbsn olive oil plus 1 Tbsn butter (or all olive oil)

¼ cup shelled pistachios, coarsely chopped (Optional)

2 oz parmesan, grated or thinly sliced Optional)

  • Using a mandolin, cut the unpeeled zucchini into thin pasta sized ribbons. (A grater or potato peeler will work as well). Place the ‘pasta’ strands on a papertowel and sprinkle with salt. . Cover
    with a papertowel and press down gently.  Let them ‘sweat’ for about 30 minutes to remove the extra moisture.

zucchini noodlesPistachios

  • Toast the chopped pistachios in a small, dry pan on medium heat for a few minutes (until you can smell them cooking). Let cool.
  • Heat olive oil and butter in a saute pan over medium heat. Add the garlic and saute for a few minutes.  Turn off the heat and add ‘pasta’ and pistachios. Toss gently.  Top with parmesan if desired..
  • Wash and dry scallops.  Put them in a bowl with the oil and seasoning.  Gently mix until scallops are coated. The oil should not pool in the bottom of the bowl.  Pour off excess oil that doesn’t mix back in. The scallops won’t sear if there is too much moisture or oil.
  • Heat a cast iron, or other skillet, on medium high to high heat.  The pan should be very hot.  Cook scallops in a single layer, without crowding.  You may have to cook them in two batches.  Cook for about 2 minutes or until golden brown.  Turn and cook the other side 2 minutes.
  • Remove scallops from the pan.  Add wine to the hot pan and stir to deglaze and reduce the liquid to make a sauce. If you overcook and too much liquid goes away, just add a bit of water.
  • To serve, place ¼ of the ‘pasta’ mixture on each plate.  Top with ¼ of the scallops.  Drizzle with wine sauce.

Seared scallops with zucchini pasta

Meatless Monday – Pizza with Cauliflower Crust

6

Cauliflower Pizza

Cauliflower Crust Pizza with Mushrooms and Carmelized Onions

Yes, a pizza crust made with cauliflower!  Much to my carb fearing husband’s dismay, I really like pizza.  He actually likes it too but not what it does to his waistline.  I, however, can’t resist.  I love deep dish, thin crust, thick crust, flat bread, you name it.  So I was very excited to stumble upon this recipe for pizza made with a flour free crust in the “Vegetarian Everyday” cookbook (by David Frenkiel and Luise Vindahl).  The recipe calls for cauliflower which sounds completely crazy but I couldn’t wait to try it out. I was not disappointed.  The crust also includes ground almonds, which I have learned can be used for half of the flour in most baking and cooking recipes.  Almond flour and almond meal are interchangeable in recipes.  Almond flour is made from peeled, blanched almonds while almond meal includes the skin. I used almond meal that I found easily at Trader Joes.  “It is gluten free.  Half a cup of ground almonds contains 10 grams of carbohydrates, 6 of which are fiber, for a net carb count of 4.  That half cup also contains 10 grams of protein, 23 grams of fat and 273 calories” (www.about.com).  Compare that with 1/2 cup white flour which has 47.7 grams of carbohydrates, 1.7 grams of fiber, 6.5 grams protein, .61 grams of fat and 228 calories.  Since almond meal is nutrient rich but also calorie dense, combining it with cauliflower makes for a nutritious, low carb and surprisingly yummy pizza.

Pizza Crust
1 head cauliflower
¾ cup ground almonds (almond flour or almond meal)
1Tbsp dried oregano
3 large eggs, beaten
Pizza Toppings
 
1 medium onion
1-2 Tbsp balsamic vinegar
8 oz mixed mushrooms (crimini, portobello, etc)
¼ cup olive oil
2-3 cloves garlic, chopped
1 cup any combination shredded cheeses (mozzarella, fontina, parmesan, asiago, provolone )
  • Chop garlic and place in a small bowl with the olive oil and let sit to blend the flavors while you prepare the crust.
  • Preheat the oven to 400 degrees and line a baking sheet or pizza pan with parchment paper.
  • Roughly chop the cauliflower then blend it in a food processor until it’s a fine rice-like texture.
  • Measure 3 cups of the cauliflower mixture and place in a mixing bowl.  Add the ground almonds, oregano and salt and pepper and mix with your hands.  Make a well in the center and add the eggs.  Use your hands to pull the dry ingredients towards the middle until everything is combined and you can shape it into a ball.  It should be more loose and sticky than traditional pizza dough.
  • Transfer to the parchment-lined baking sheet or pizza pan and form into a pizza shape by flattening the dough with your hands.  Make the edges slightly higher.  Bake for 25-30 minutes, or until golden.

Cauliflower Pizza crust

  • While the crust is baking. Slice the onion and saute the slices over medium high heat in 1 Tbsp olive oil mixture until golden, keeping the rings intact.  Flip them like pancakes to cook the other side.  Break the rings apart and add a splash of balsamic vinegar.  Saute a few more minutes, then remove from pan and reserve
  • Wipe the mushrooms with a damp papertowel and slice. Sautee them over medium high heat in 1 Tbsp olive oil mixture for a few minutes, or until they start to lose their water. Remove from pan and reserve.

Mushrooms and onions

  • Remove the pizza from the oven.  Spoon the remaining olive oil mixture over the pizza crust, spreading evenly. Add most of the cheeses then top with onions and mushrooms. Sprinkle remaining cheese over the top.
  •  Return to the oven for 5-10 more minutes. Serve immediately. Does not reheat well.

Cauliflower Pizza