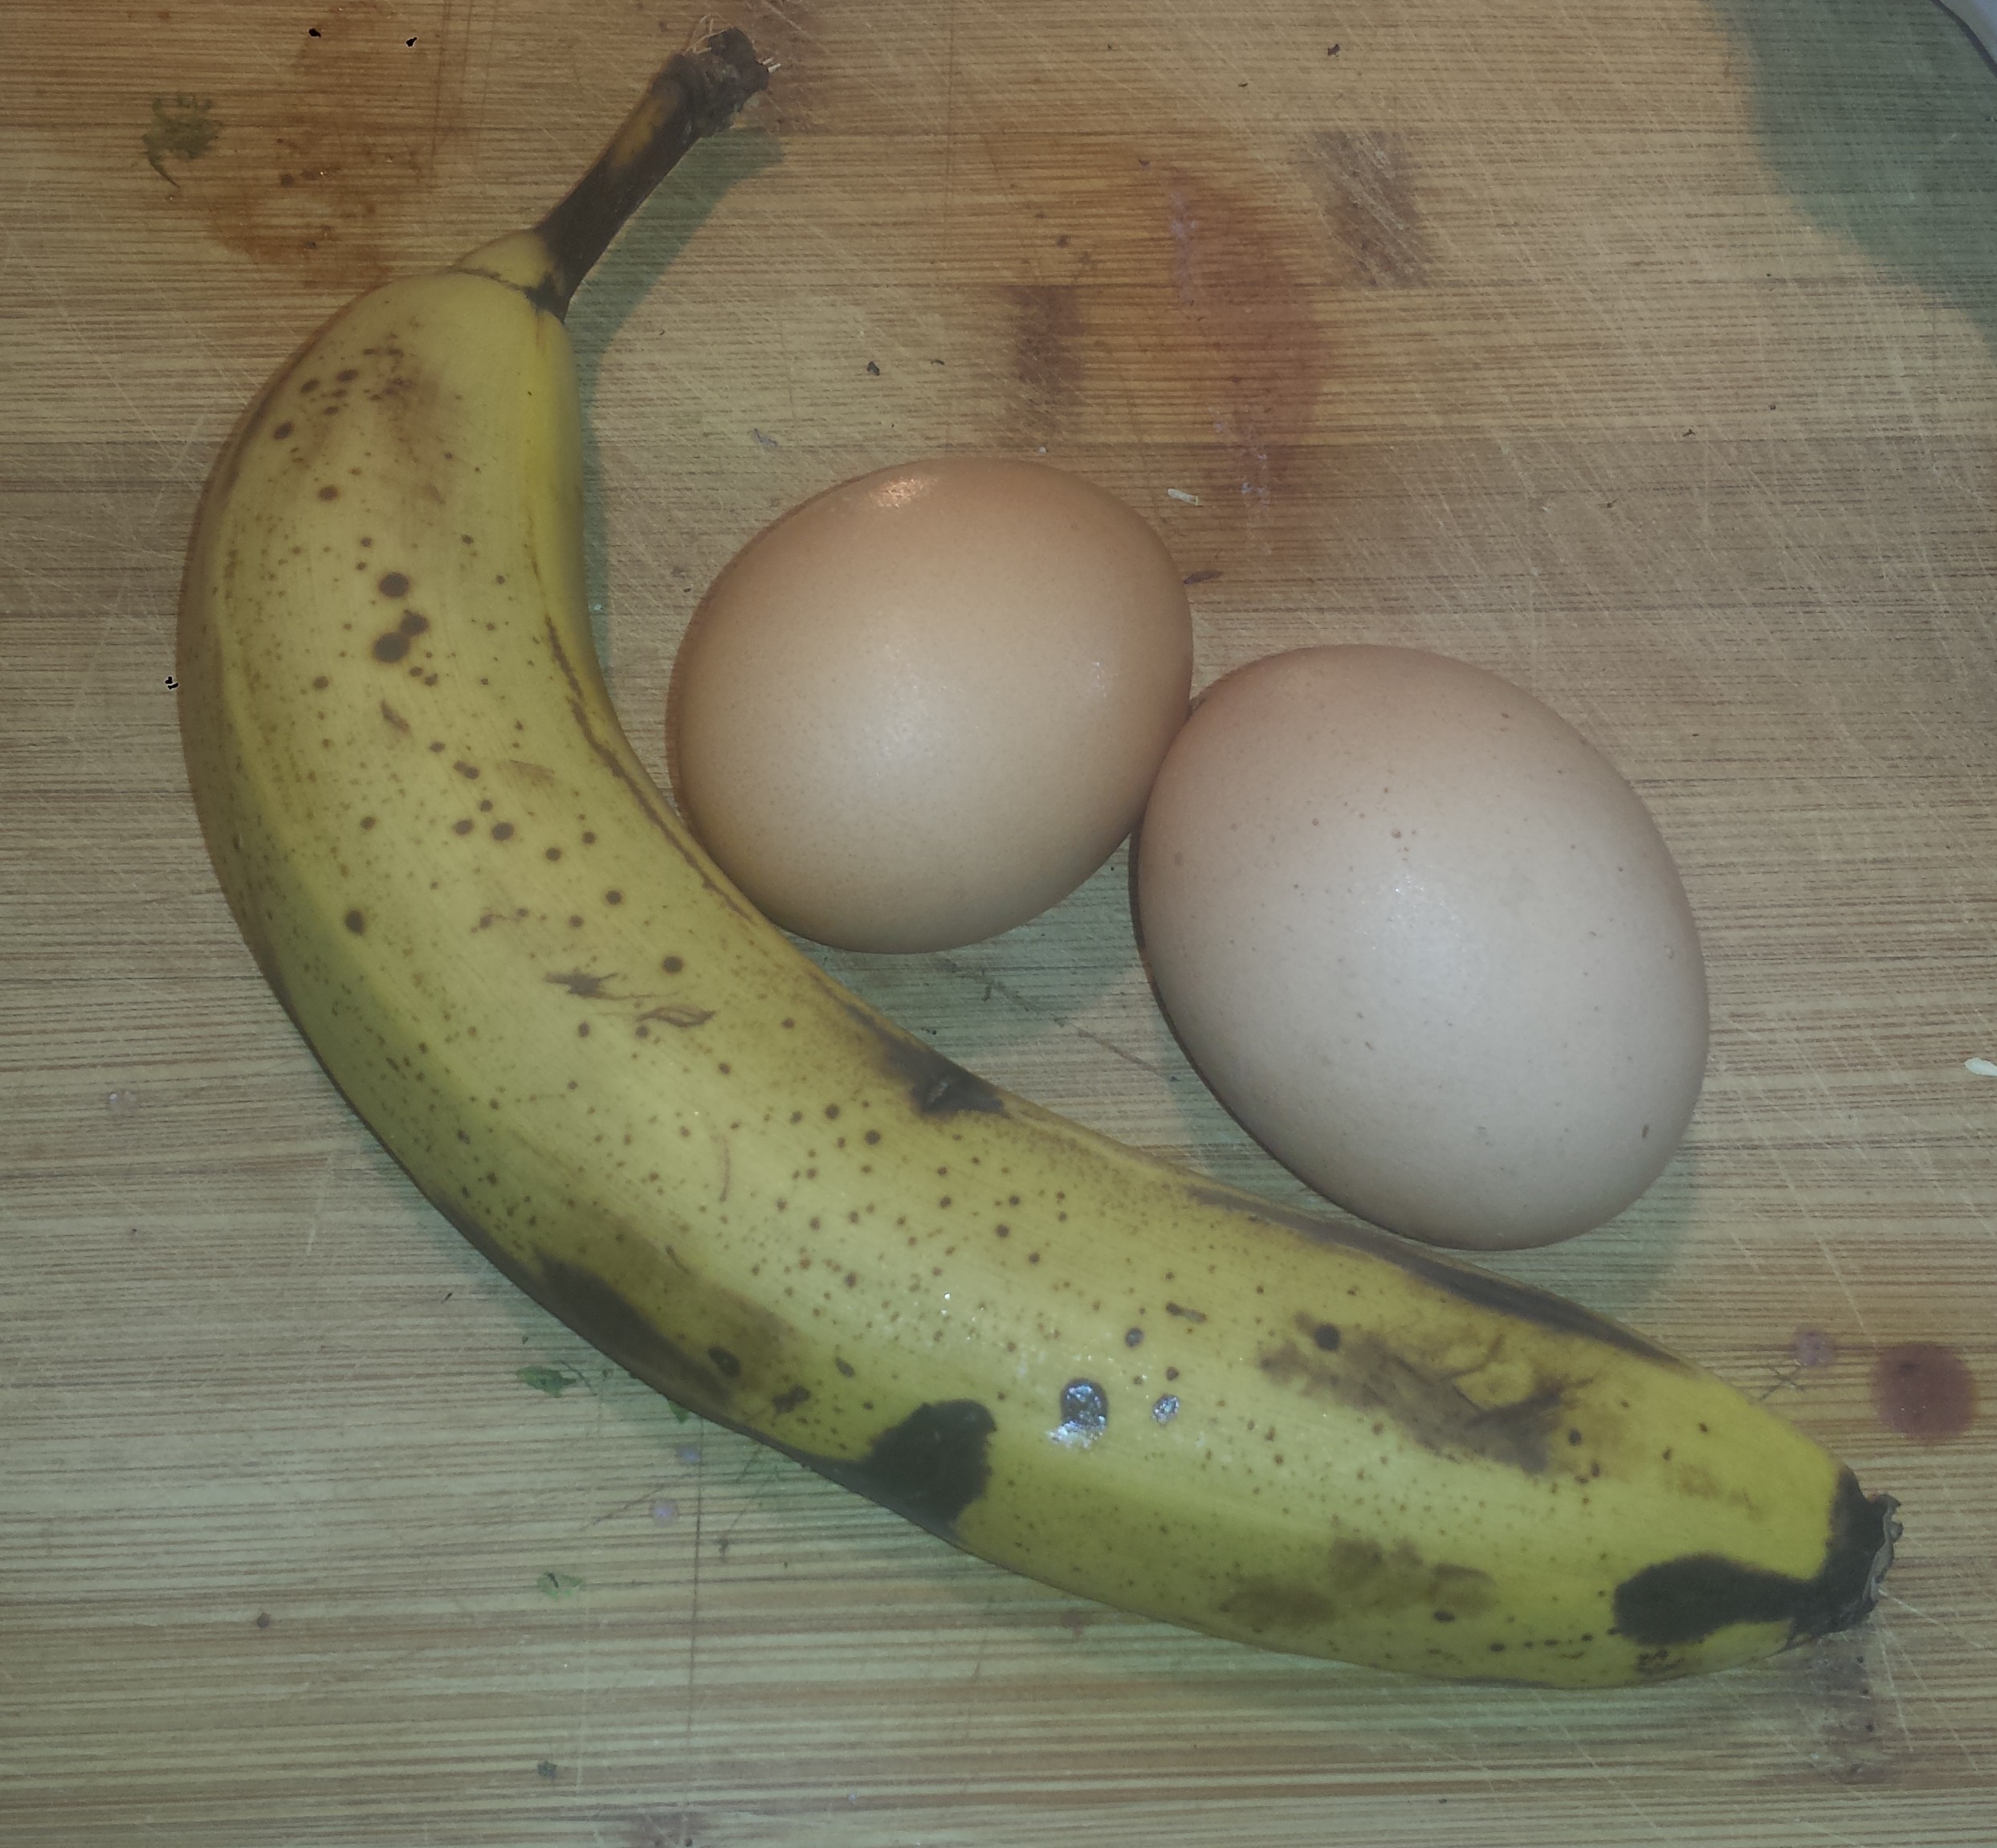
Here is a recipe with ONLY TWO INGREDIENTS! Yes, you read that right. Yesterday while I was on Facebook looking at my friend, Lis’ photos from her Mexico trip, a random video that I didn’t click on started to play. Usually these spontaneous videos really irritate me. I don’t know what those annoying video clips are called (other than obnoxious intrustions). For some inexplicable reason, I call them ‘drive byes”. But I digress. This particular drive-bye grabbed my attention (so I guess that makes me a sucker…) as it claimed to have a recipe for making delicious pancakes with only 2 ingredients. Drum roll please…..1 banana and 2 eggs. I just happened to have fresh eggs from my neighbor, Sandy, next door and a bunch of bananas in my fruit bowl just hovering at the almost too ripe phase. I was intrigued and decided to give it a try. All I can say is that I wish I had known this ‘recipe’ when my boys were little. These pancakes are light and sweet, just the perfect breakfast for a mother who has little time but wants to feed a healthy breakfast to a picky or gluten intolerant eater. The ingredients are simple and the technique takes about a minute. Just slice a ripe banana into a bowl. Add two eggs (preferably pasture raised). Whisk together until frothy and cook on a hot griddle. It couldn’t be easier!
This isn’t normally a recipe I would blog about but it’s simplicity is brilliant in that both ingredients are loaded with nutrients so these pancakes, unlike those made with white flour, are super nutritious and since they have no flour they are naturally gluten free. Contrary to what we’ve been told, eggs are not the enemy. In fact, one egg has lots of vitamins and minerals, high-quality protein and antioxidants, all for 70 calories. And bananas, well if you think you know everything about the unassuming banana, check out these facts you may not know about this tropical fruit:
1. Hands and Fingers – Bananas do not grow on trees. The banana plant is classified as an arborescent (tree-like) perennial herb and the banana itself is actually considered a berry. The correct name for bunch of bananas is a hand of bananas; a single banana is a finger.
2. Heart Health – One banana contains 467mg of potassium, providing powerful protection to the cardiovascular system. Regular consumption of the potassium-packed fruit helps guard against high blood pressure, atherosclerosis and stroke.
3. Bones – Although bananas do not contain high amounts of calcium, they do supply the body with an abundance of fructooligosaccharide, a prebiotic substance (one which encourages probiotics, the friendly bacteria in the digestive system). As fructooligosaccharides ferment in the digestive tract, they enhance the body’s ability to absorb calcium.
4. Energy and Mood Balancing – Another benefit to bananas high potassium content derives from that mineral’s role as an energy-supplying electrolyte. Since bananas also contain tryptophan, serotonin and norepinephrine, they help prevent depression while encouraging feelings of well-being and relaxation. In addition, the vitamin B6 in bananas helps protect against sleeplessness, mood swings and irritability.
5. Vision – Bananas, combined with the African herb orinol, have been used to treat cataracts in Nigeria. They also share with other fruits the ability to prevent macular degeneration, the leading cause of vision loss in adults. According to a study published in the Archives of Opthmalogy in 2004, people who eat 3 servings of fruit per day are statistically unlike to develop the vision-diminishing disease.
6. Better Digestion – Bananas suppress acid in the digestive tract, alleviating heartburn and helping guard against ulcers. Since bananas contain pectin, a soluble fiber, they aid in the elimination process, helping prevent constipation.

GRAIN FREE PANCAKES
1 ripe banana
2 eggs

- Slice banana into a medium bowl

- Add two raw eggs.

- Using a large whisk, smash the banana into small bits and whisk the mixture until it’s frothy.

- Pour by Tablespoons onto a hot griddle and cook until bubbles begin to break.
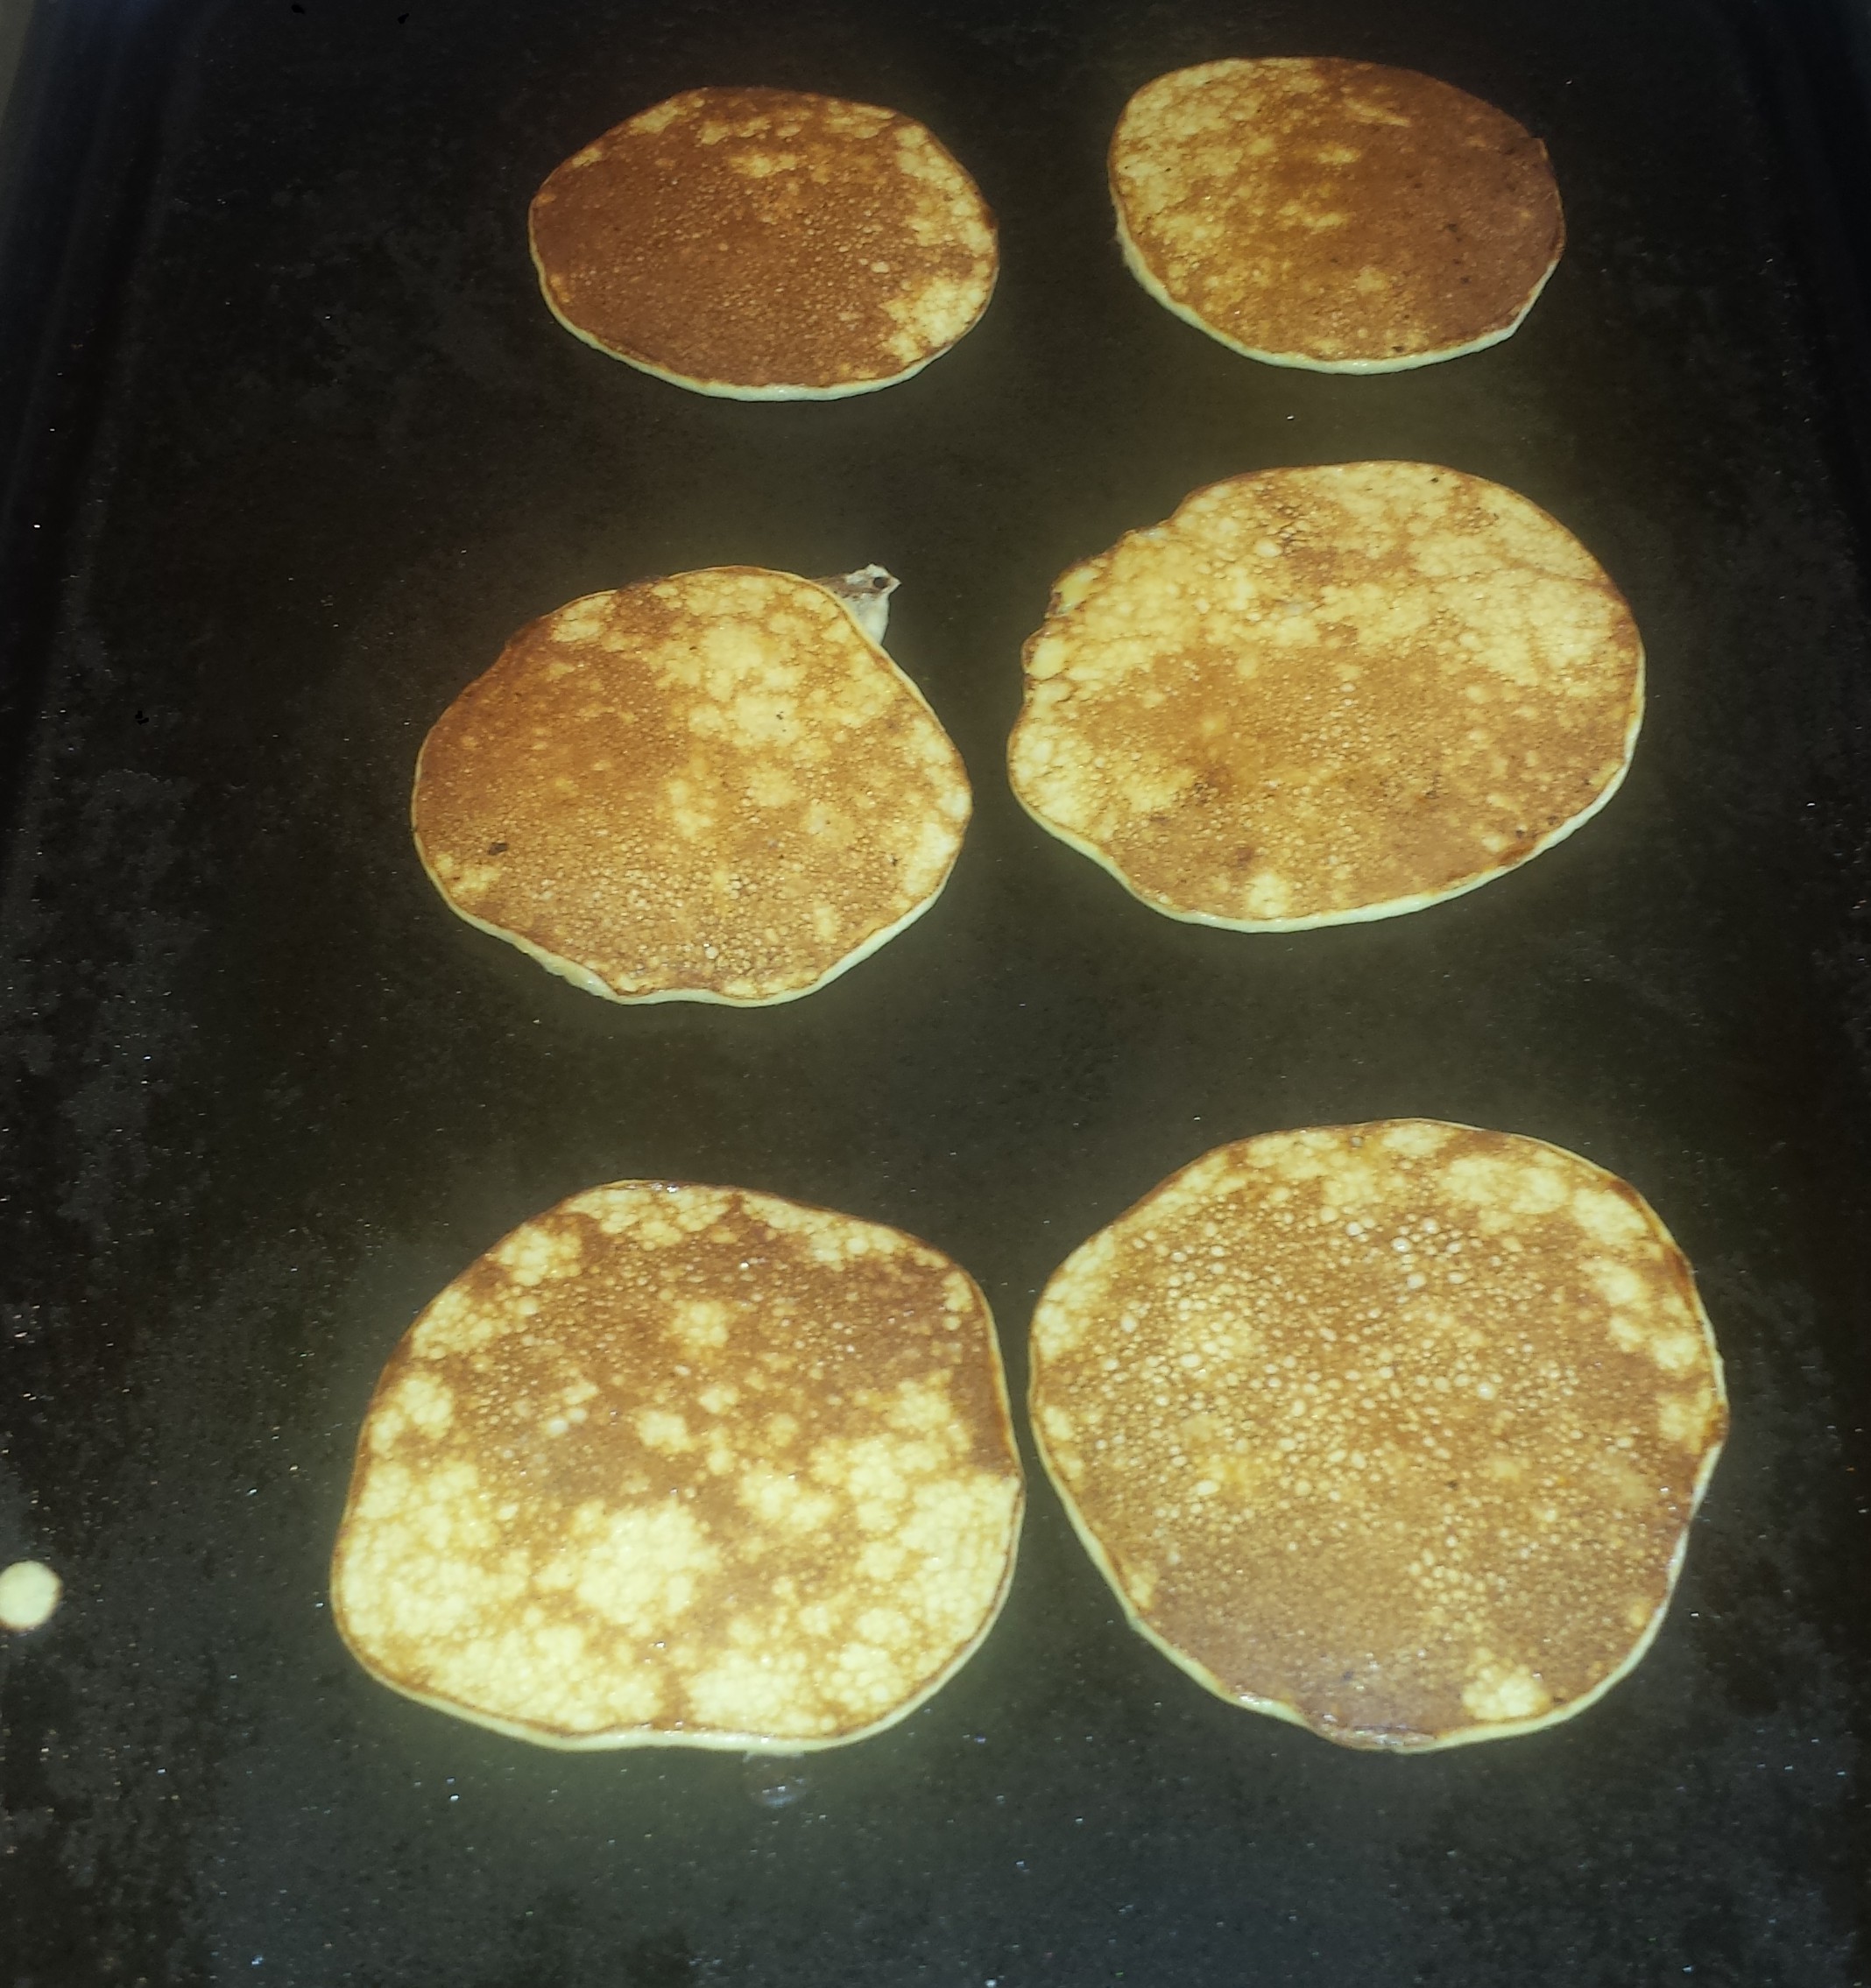
- Flip pancakes to cook the other side another minute or two.

- Serve plain or with butter, maple syrup or fruit.
1 ripe bananaGrain Free Pancakes
2 eggs