Creative Vegetable Garden Ideas

2

VeganFoodMedium


Do you dream about picking fresh herbs and sun ripened tomatoes right from your own back yard?  Have you always wanted to have a vegetable garden but didn’t think you had the space or weren’t sure how to get started?   If you have even the smallest space or a super short growing season you can stilll have a garden. I am always amazed at how creative people can be.  I have been gardening for years and still keep coming accross great new ideas to incorporate into my vegetable garden so that my garden gets better every year.

Garden Ideas19Garden Ideas17

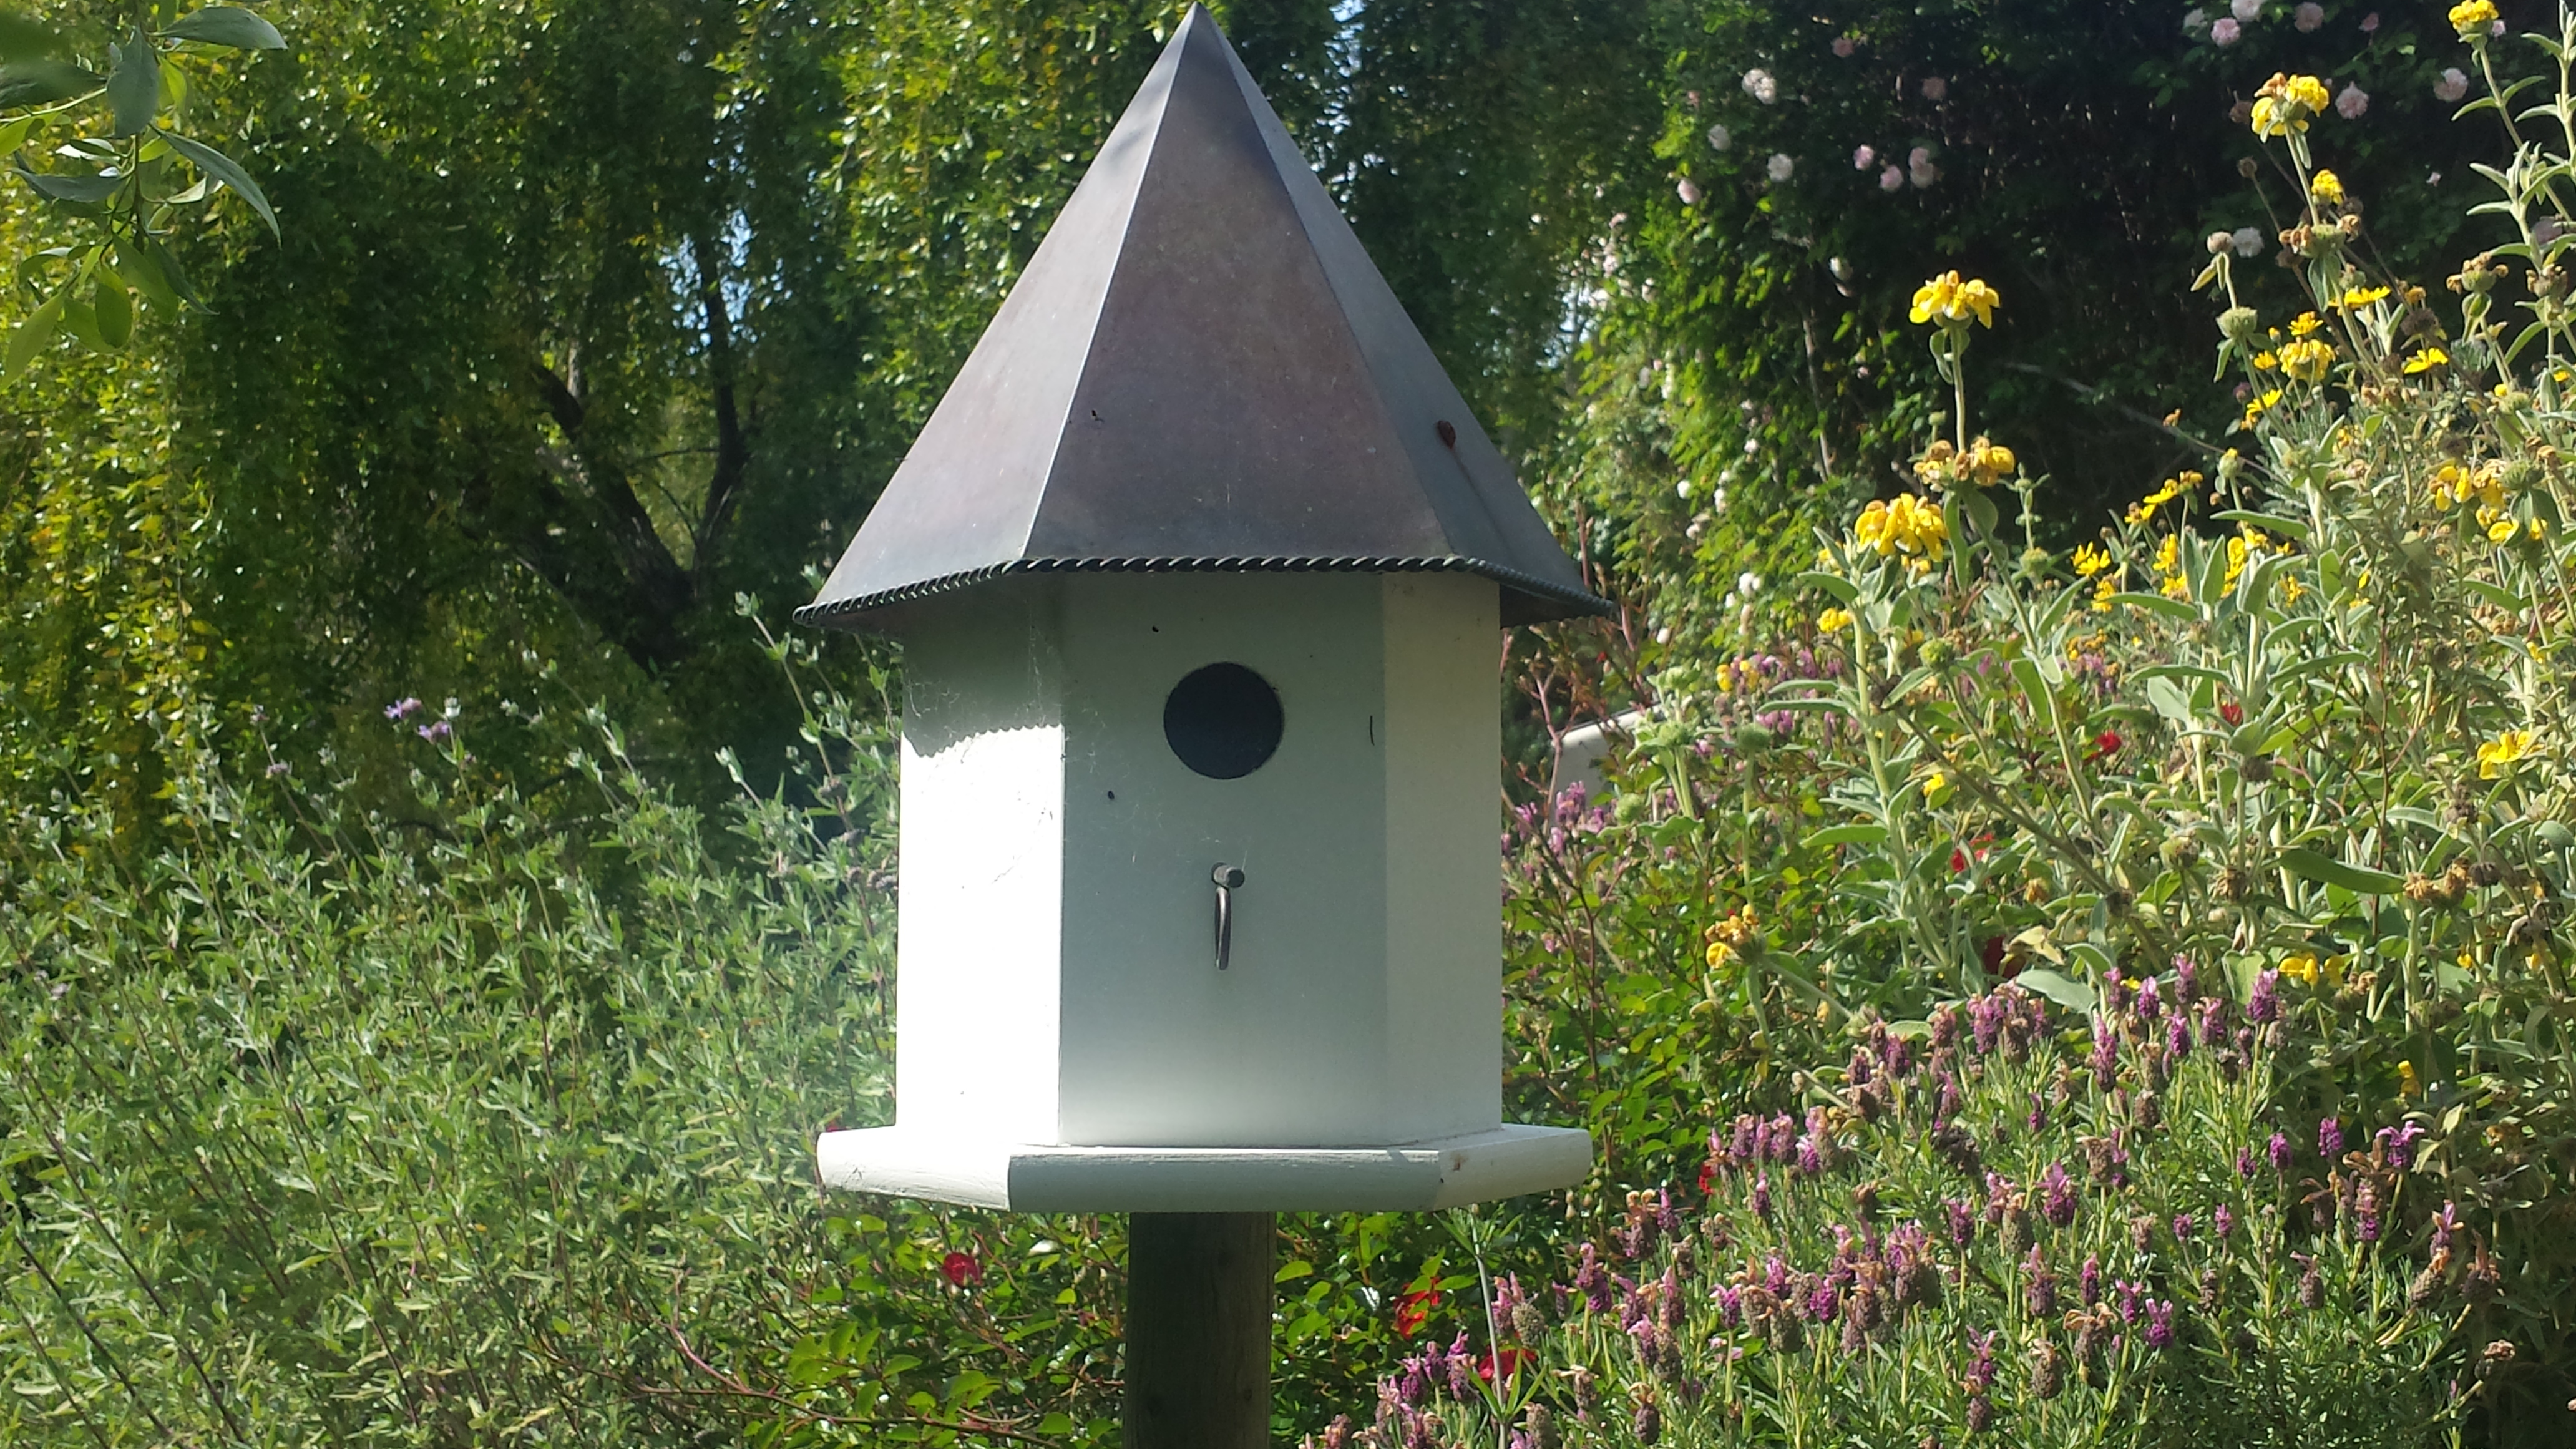
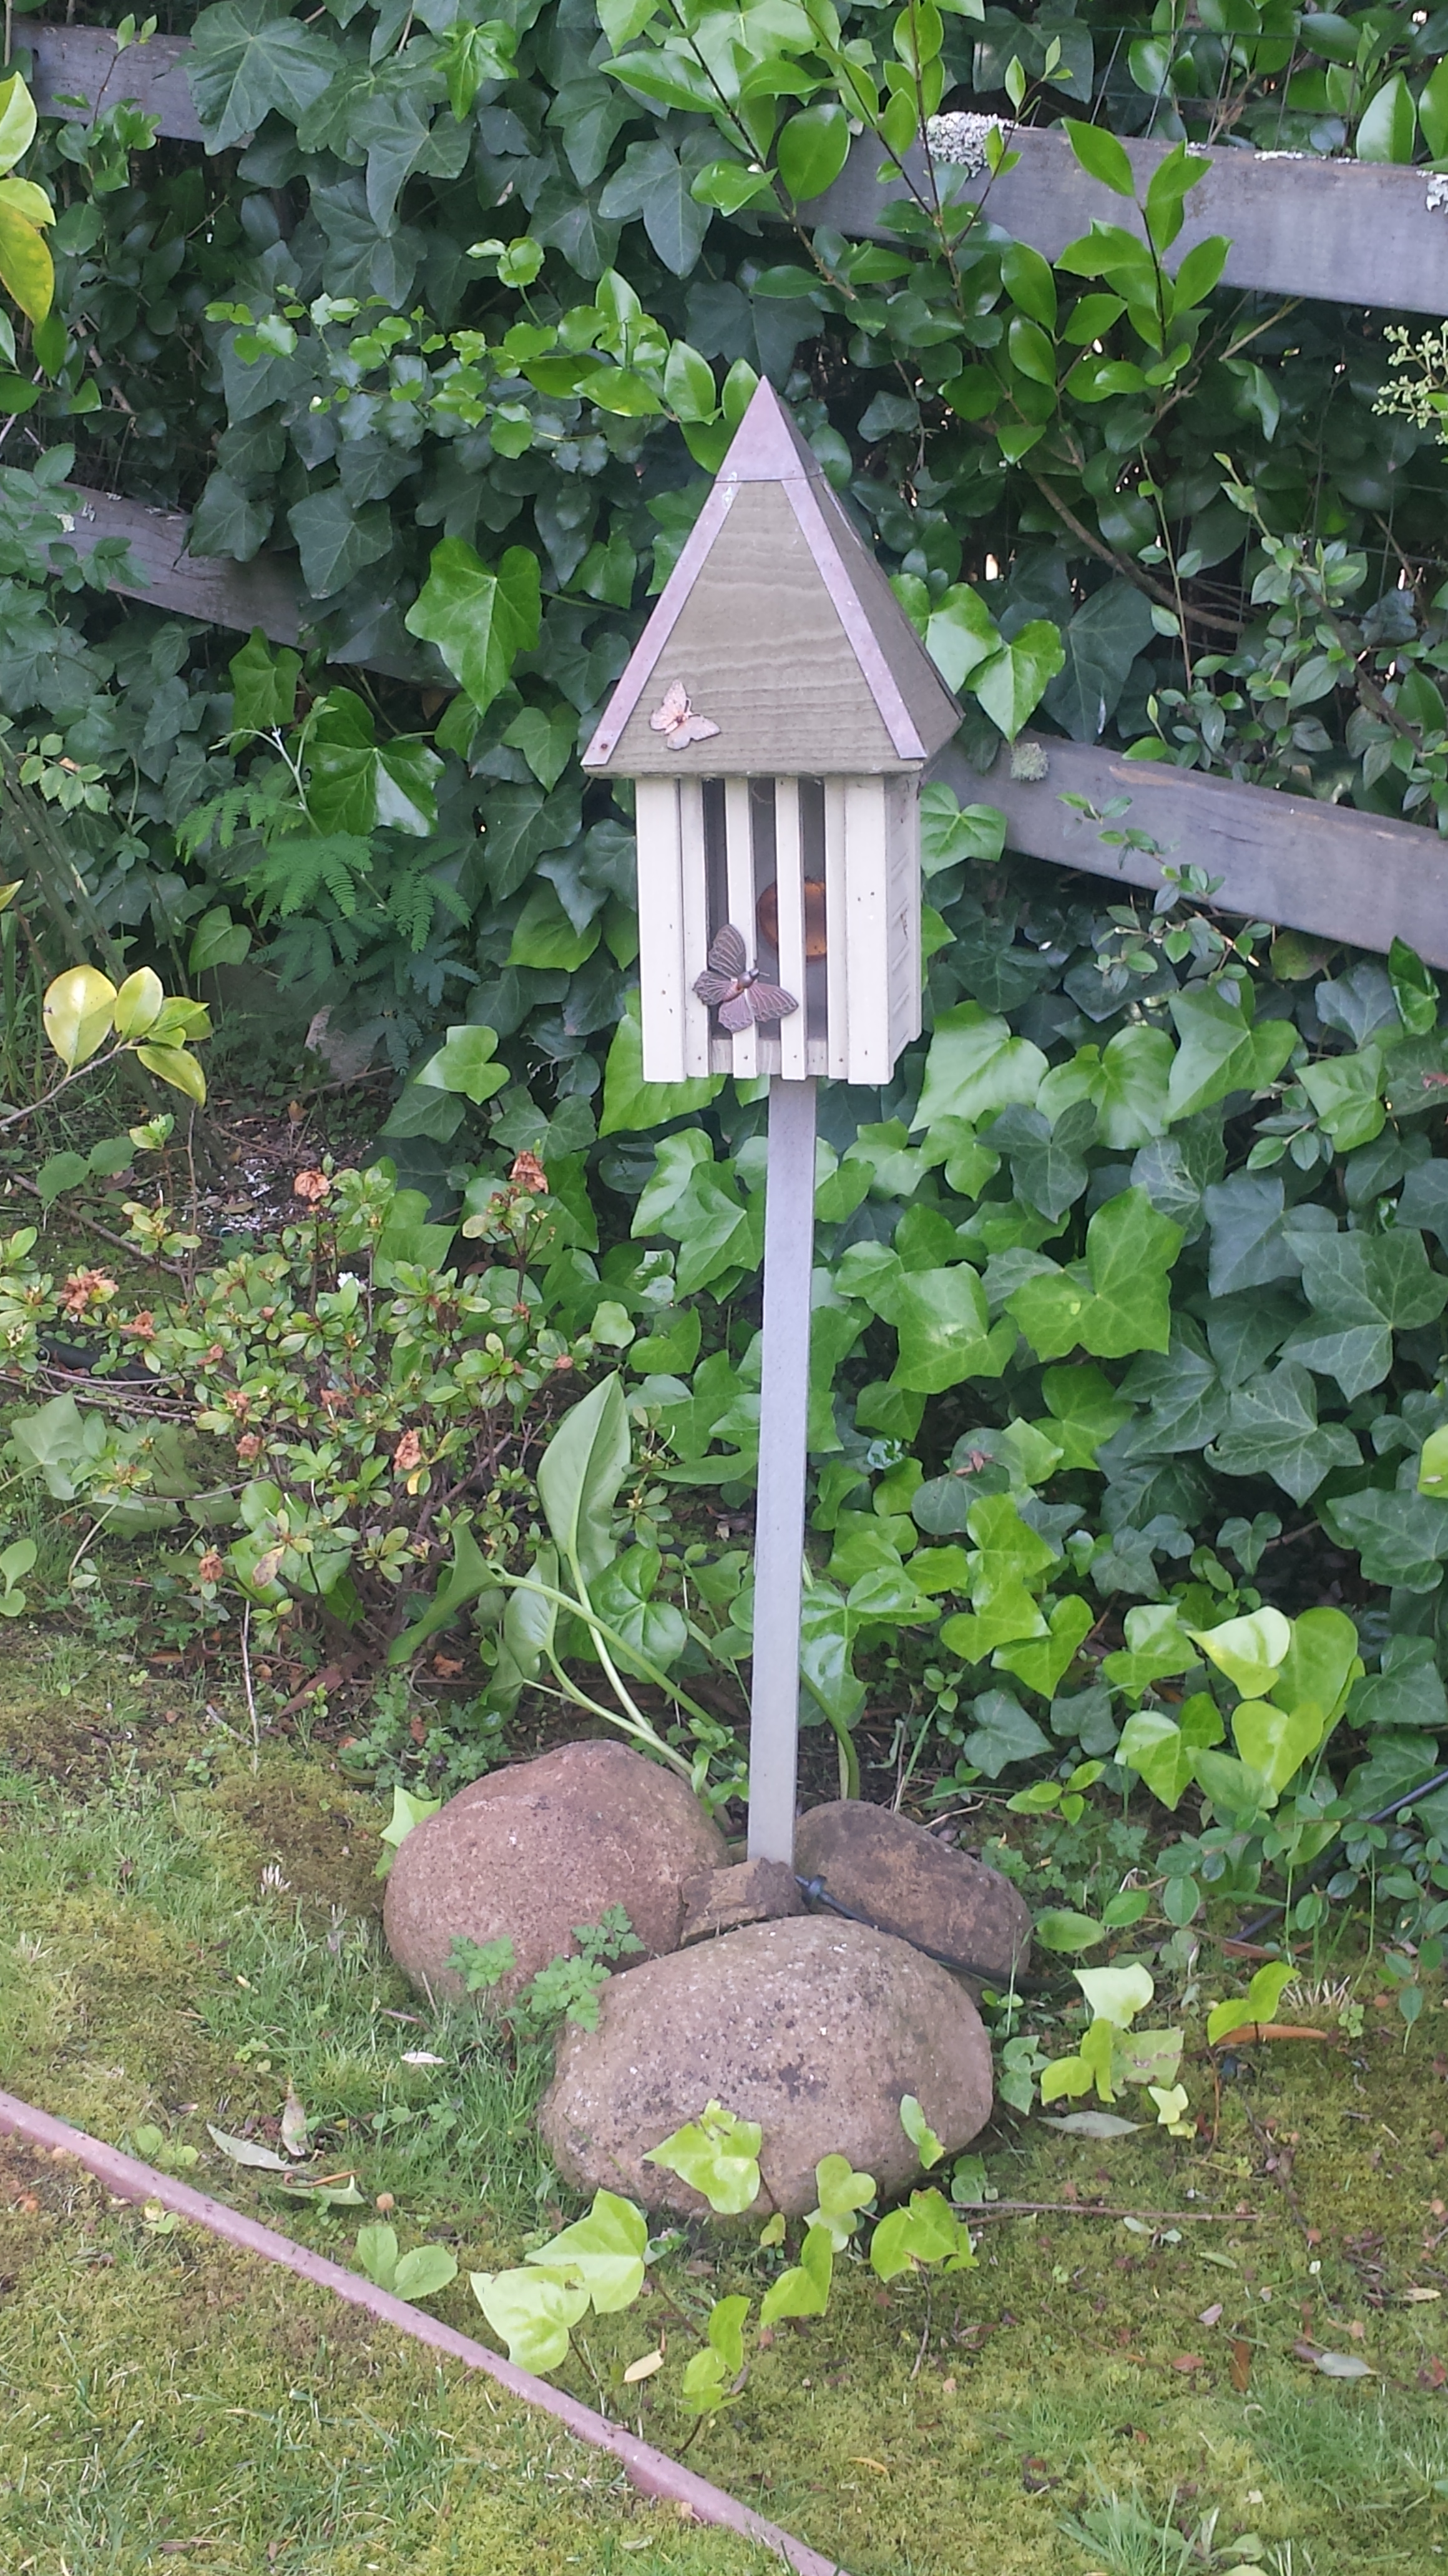
 So what is your garden style? Are you neat and orderly or creative and artistic? Do you like garden art, bird houses, or even a butterfly house?  Do you want a place to sit and enjoy your garden or somewhere to put your gardening tools?  How about an ‘owl’ to guard your veggies or a fabulous way to preserve time by placing stepping stones with special dates or footprints.

Garden Ideas29Garden Ideas20Garden Ideas18

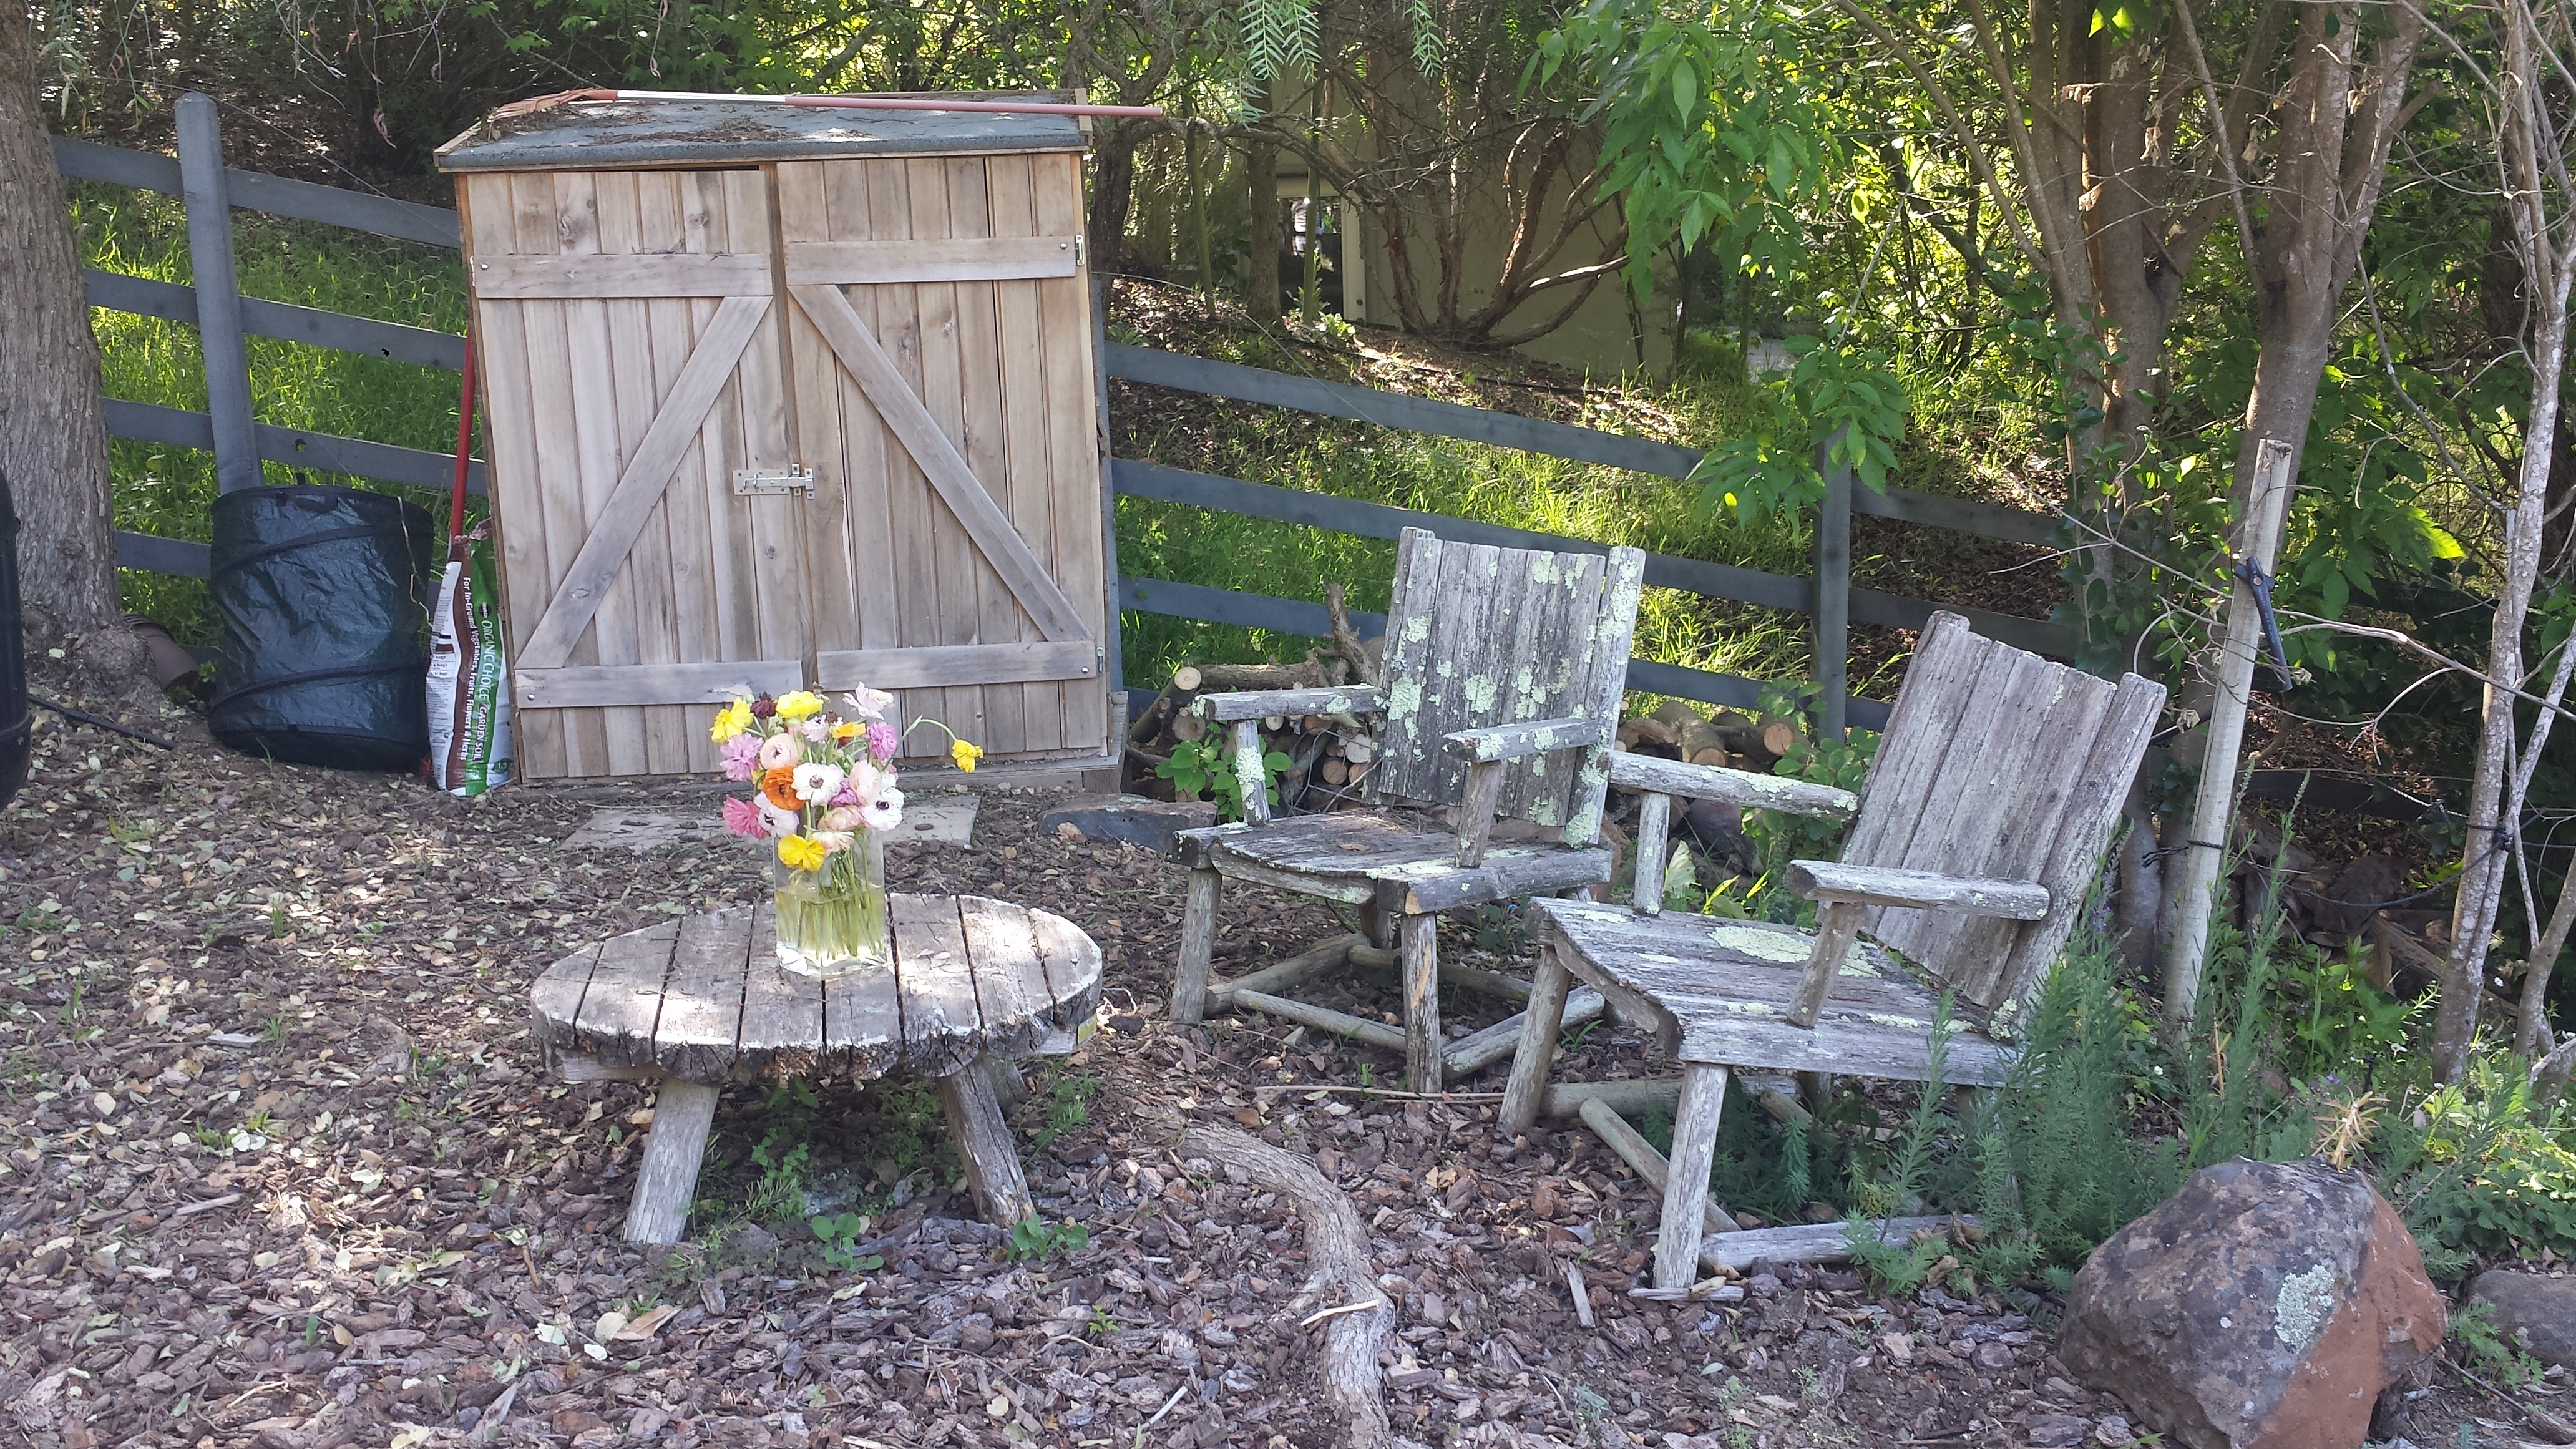
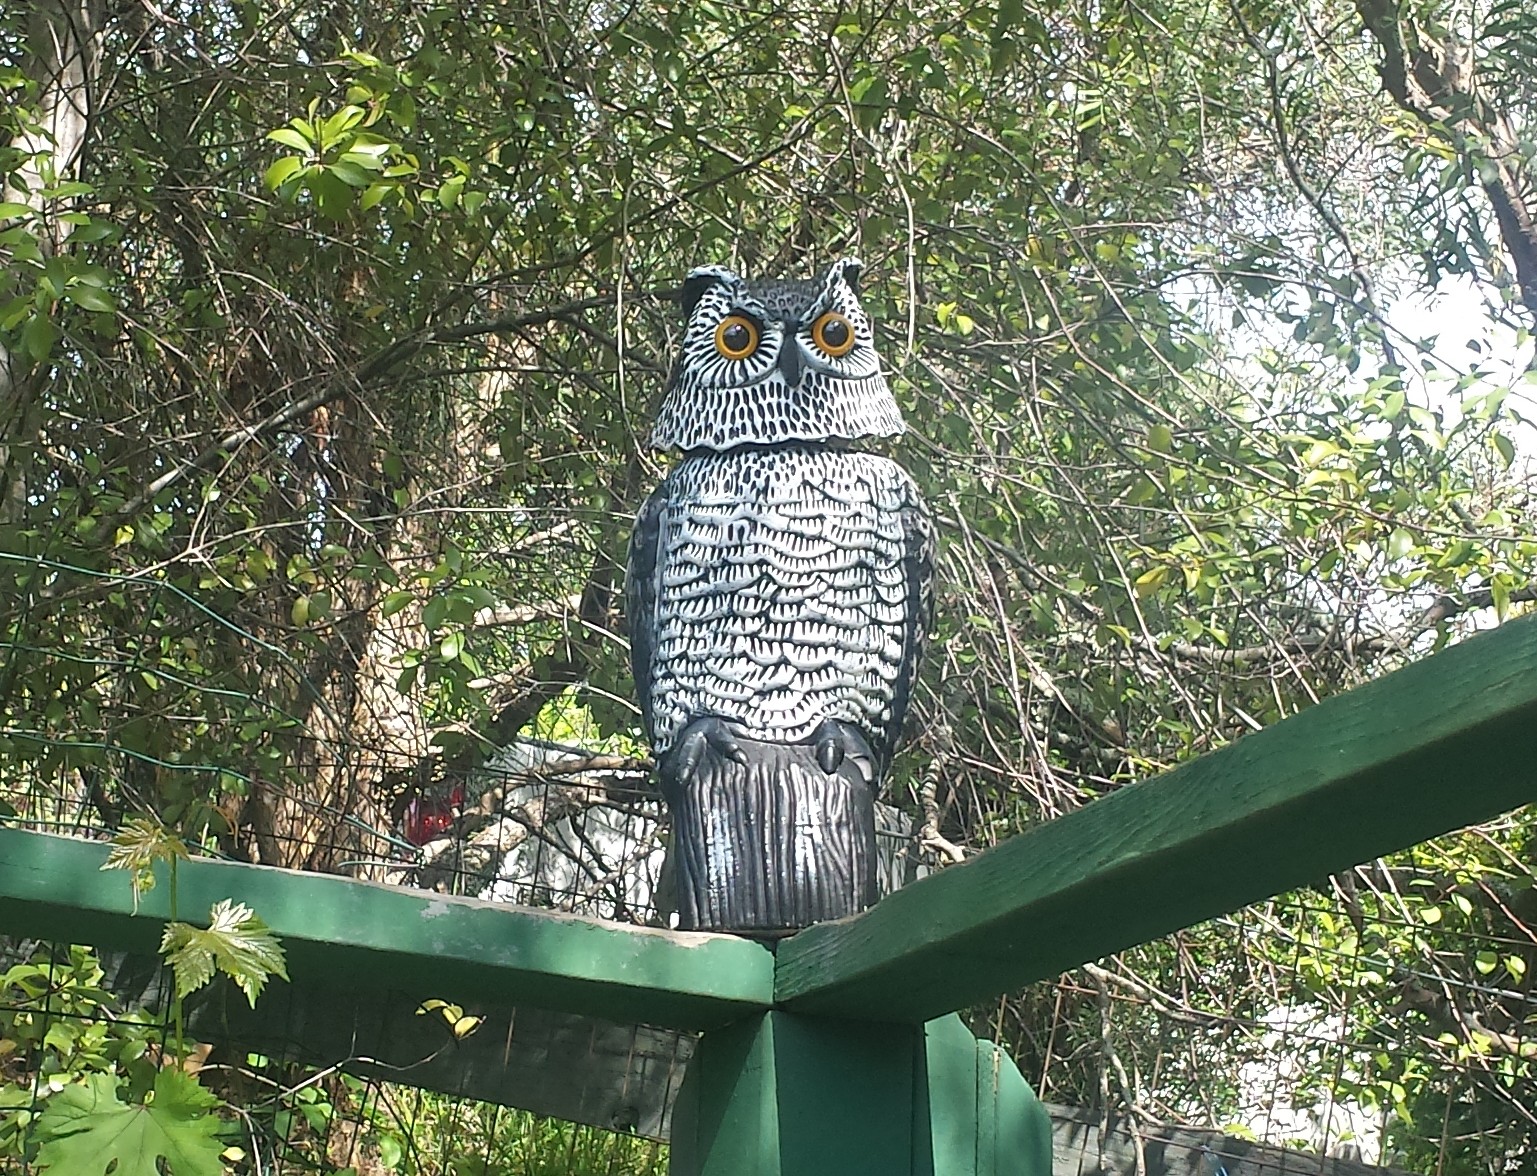
There are many ways to design a vegetable garden.  You can plan a dedicated vegetable garden or you can have a mixed garden where you also plant vegetables in the ground alongside your marigolds and petunias.  For those with  limited space, if you have a glimmer of sunshine, you can usually find a place for at least one small planter even if you have to think outside of the box and go vertically.  If you live on a hill try terrace planting.  Or you can do what my friend, Elizabeth, did and dig up your entire front yard and plant a giant vegetable patch.

Garden Ideas16Garden Ideas26

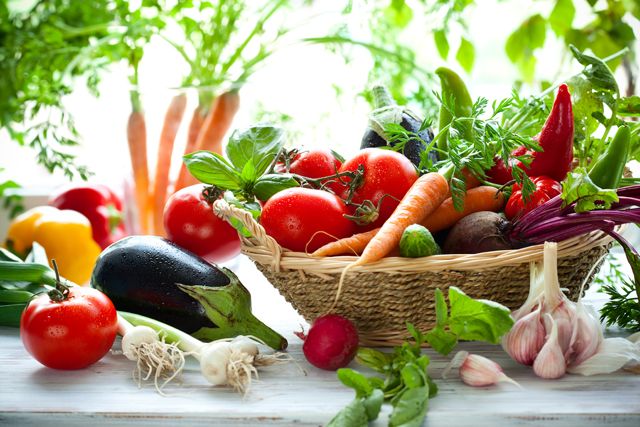
Garden types:   Gardens are as different as people are.  What  gardeners share though is the almost ridiculous sense of satisfaction we  derive from the bounty that is harvested from our gardens. Nothing can compare to harvesting your first beautiful head of lettuce or that perfect purple globe eggplant, right when you need it, and eating it minutes after it has been picked,(and bursting with flavor and nutrients) not days or weeks.  So look through the following gardens to find your inspiration and start planting.  Soon you will be reaping! Thank you to my friends, Patti, Judy and Elizabeth for sharing their beautiful gardens with us!
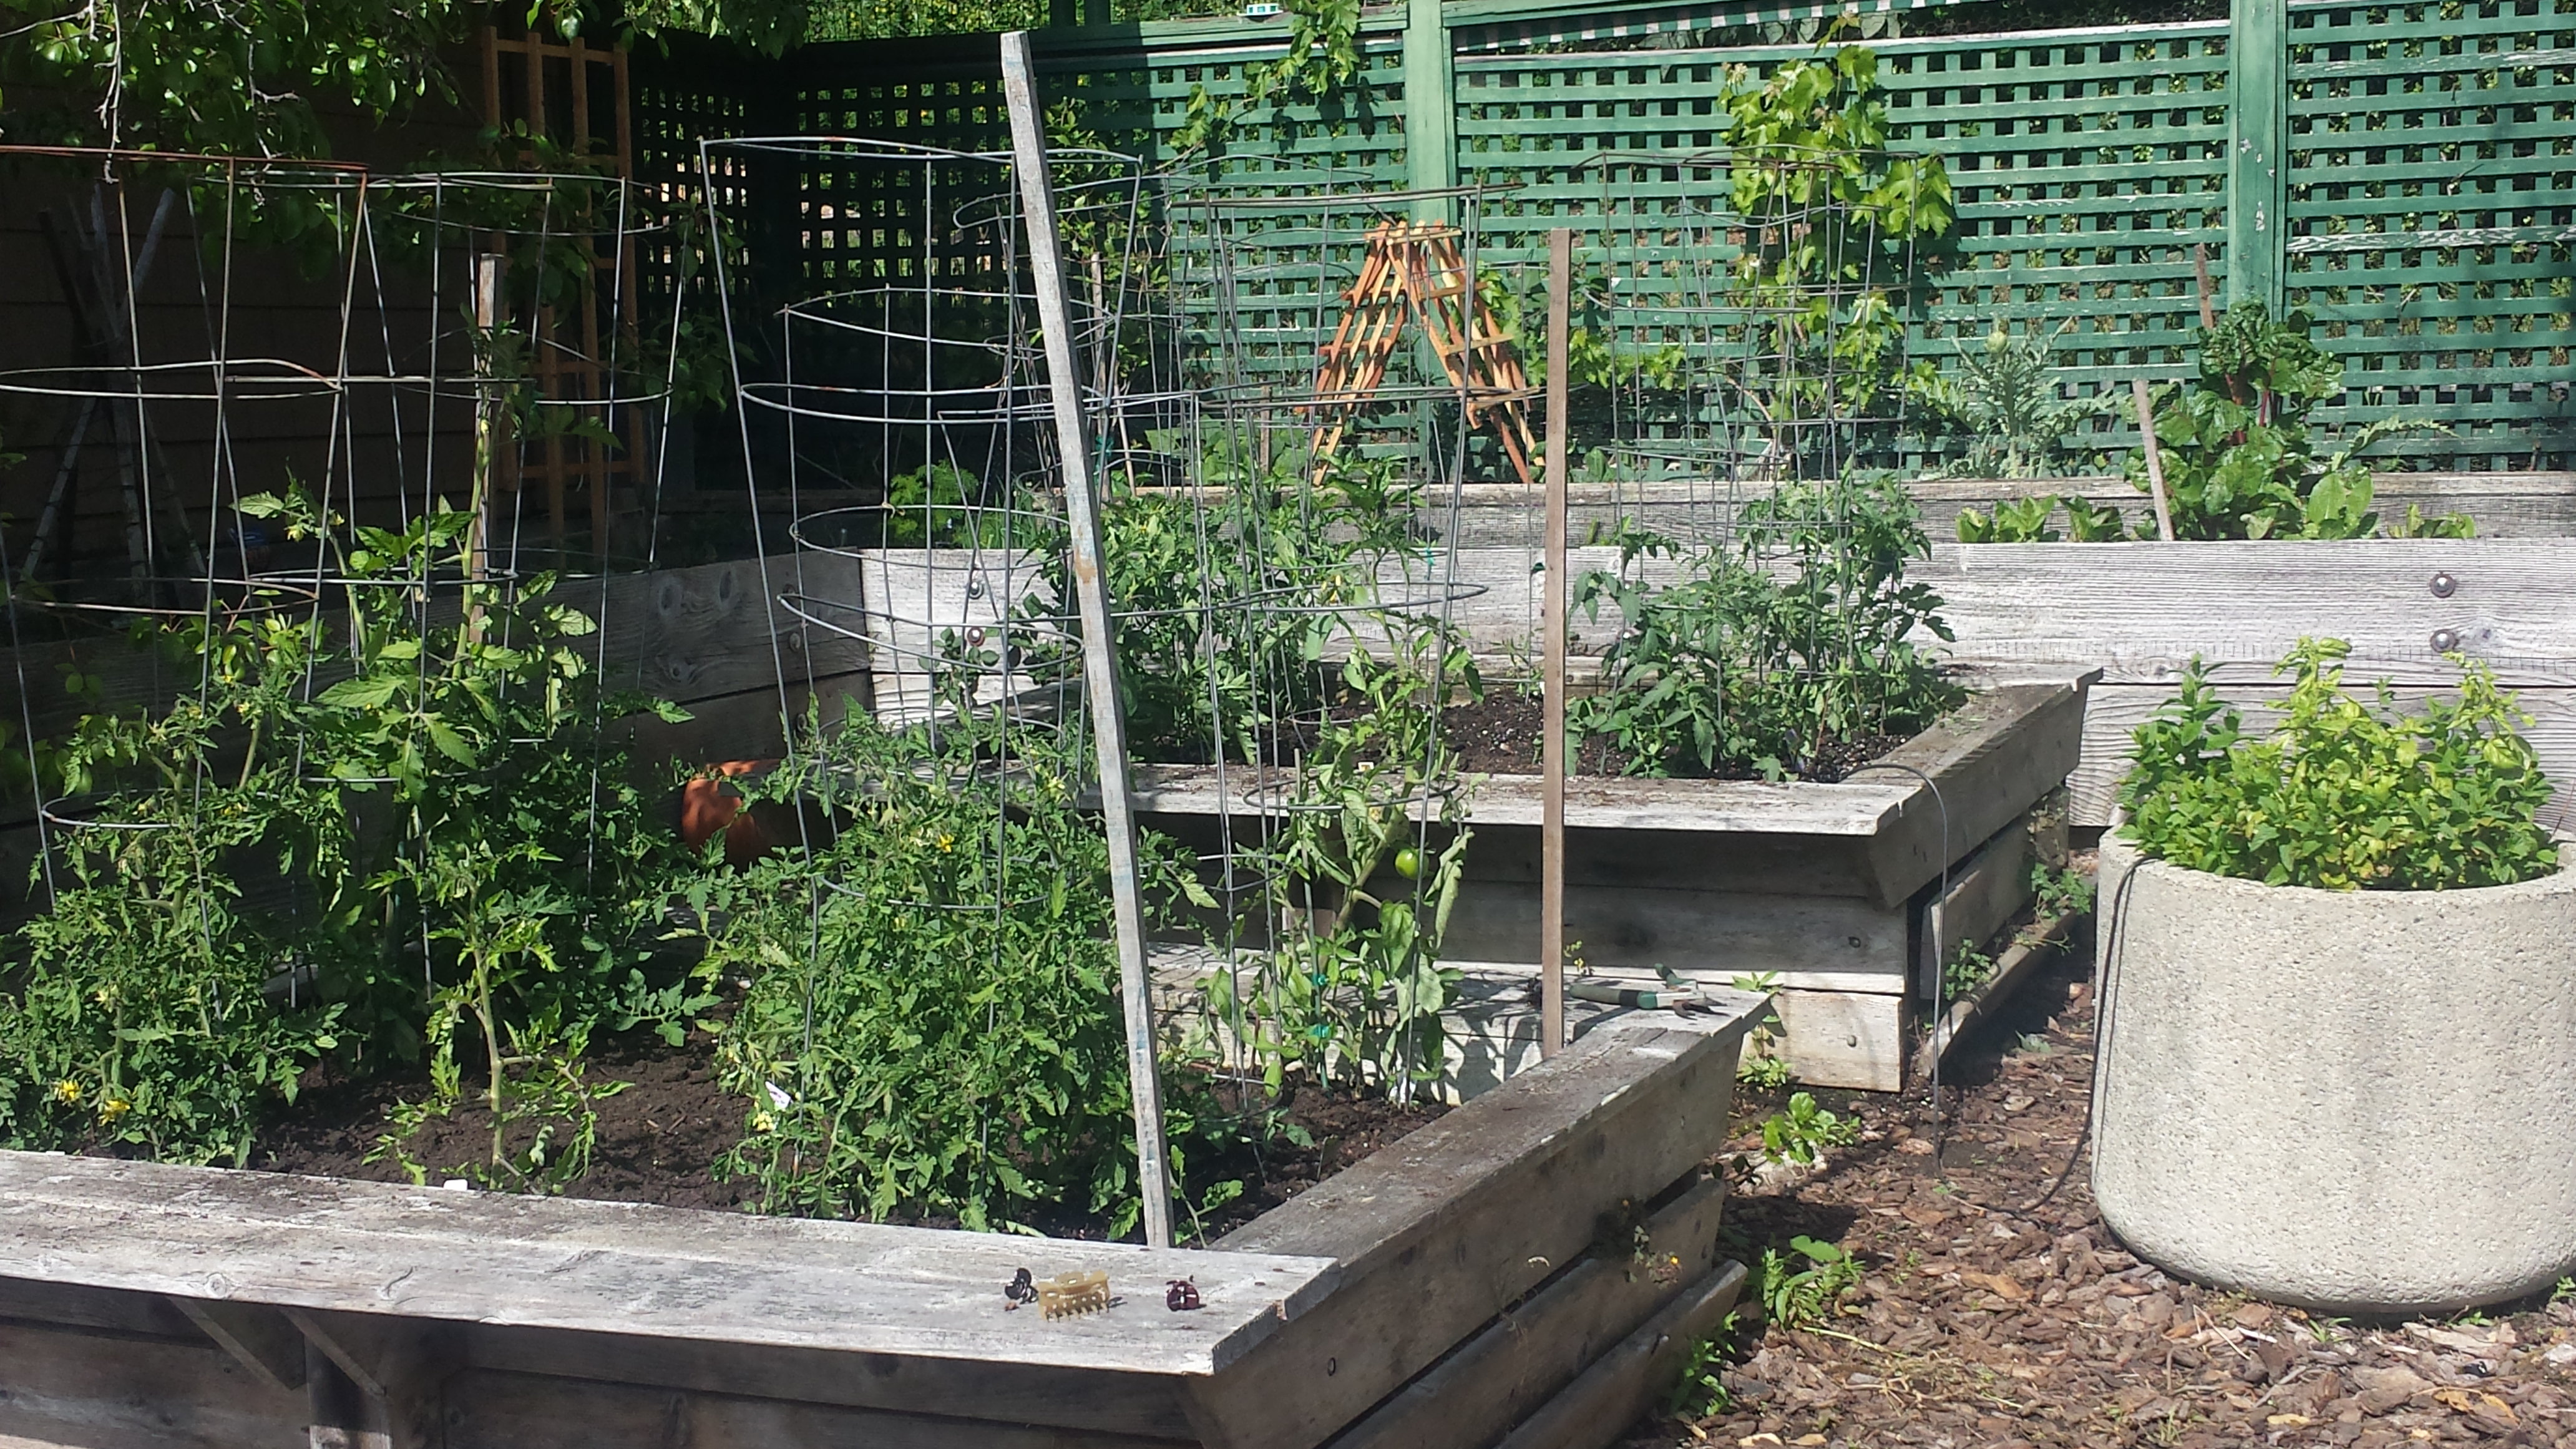
 

Garden Ideas22

Garden Ideas25

Dedicated Garden

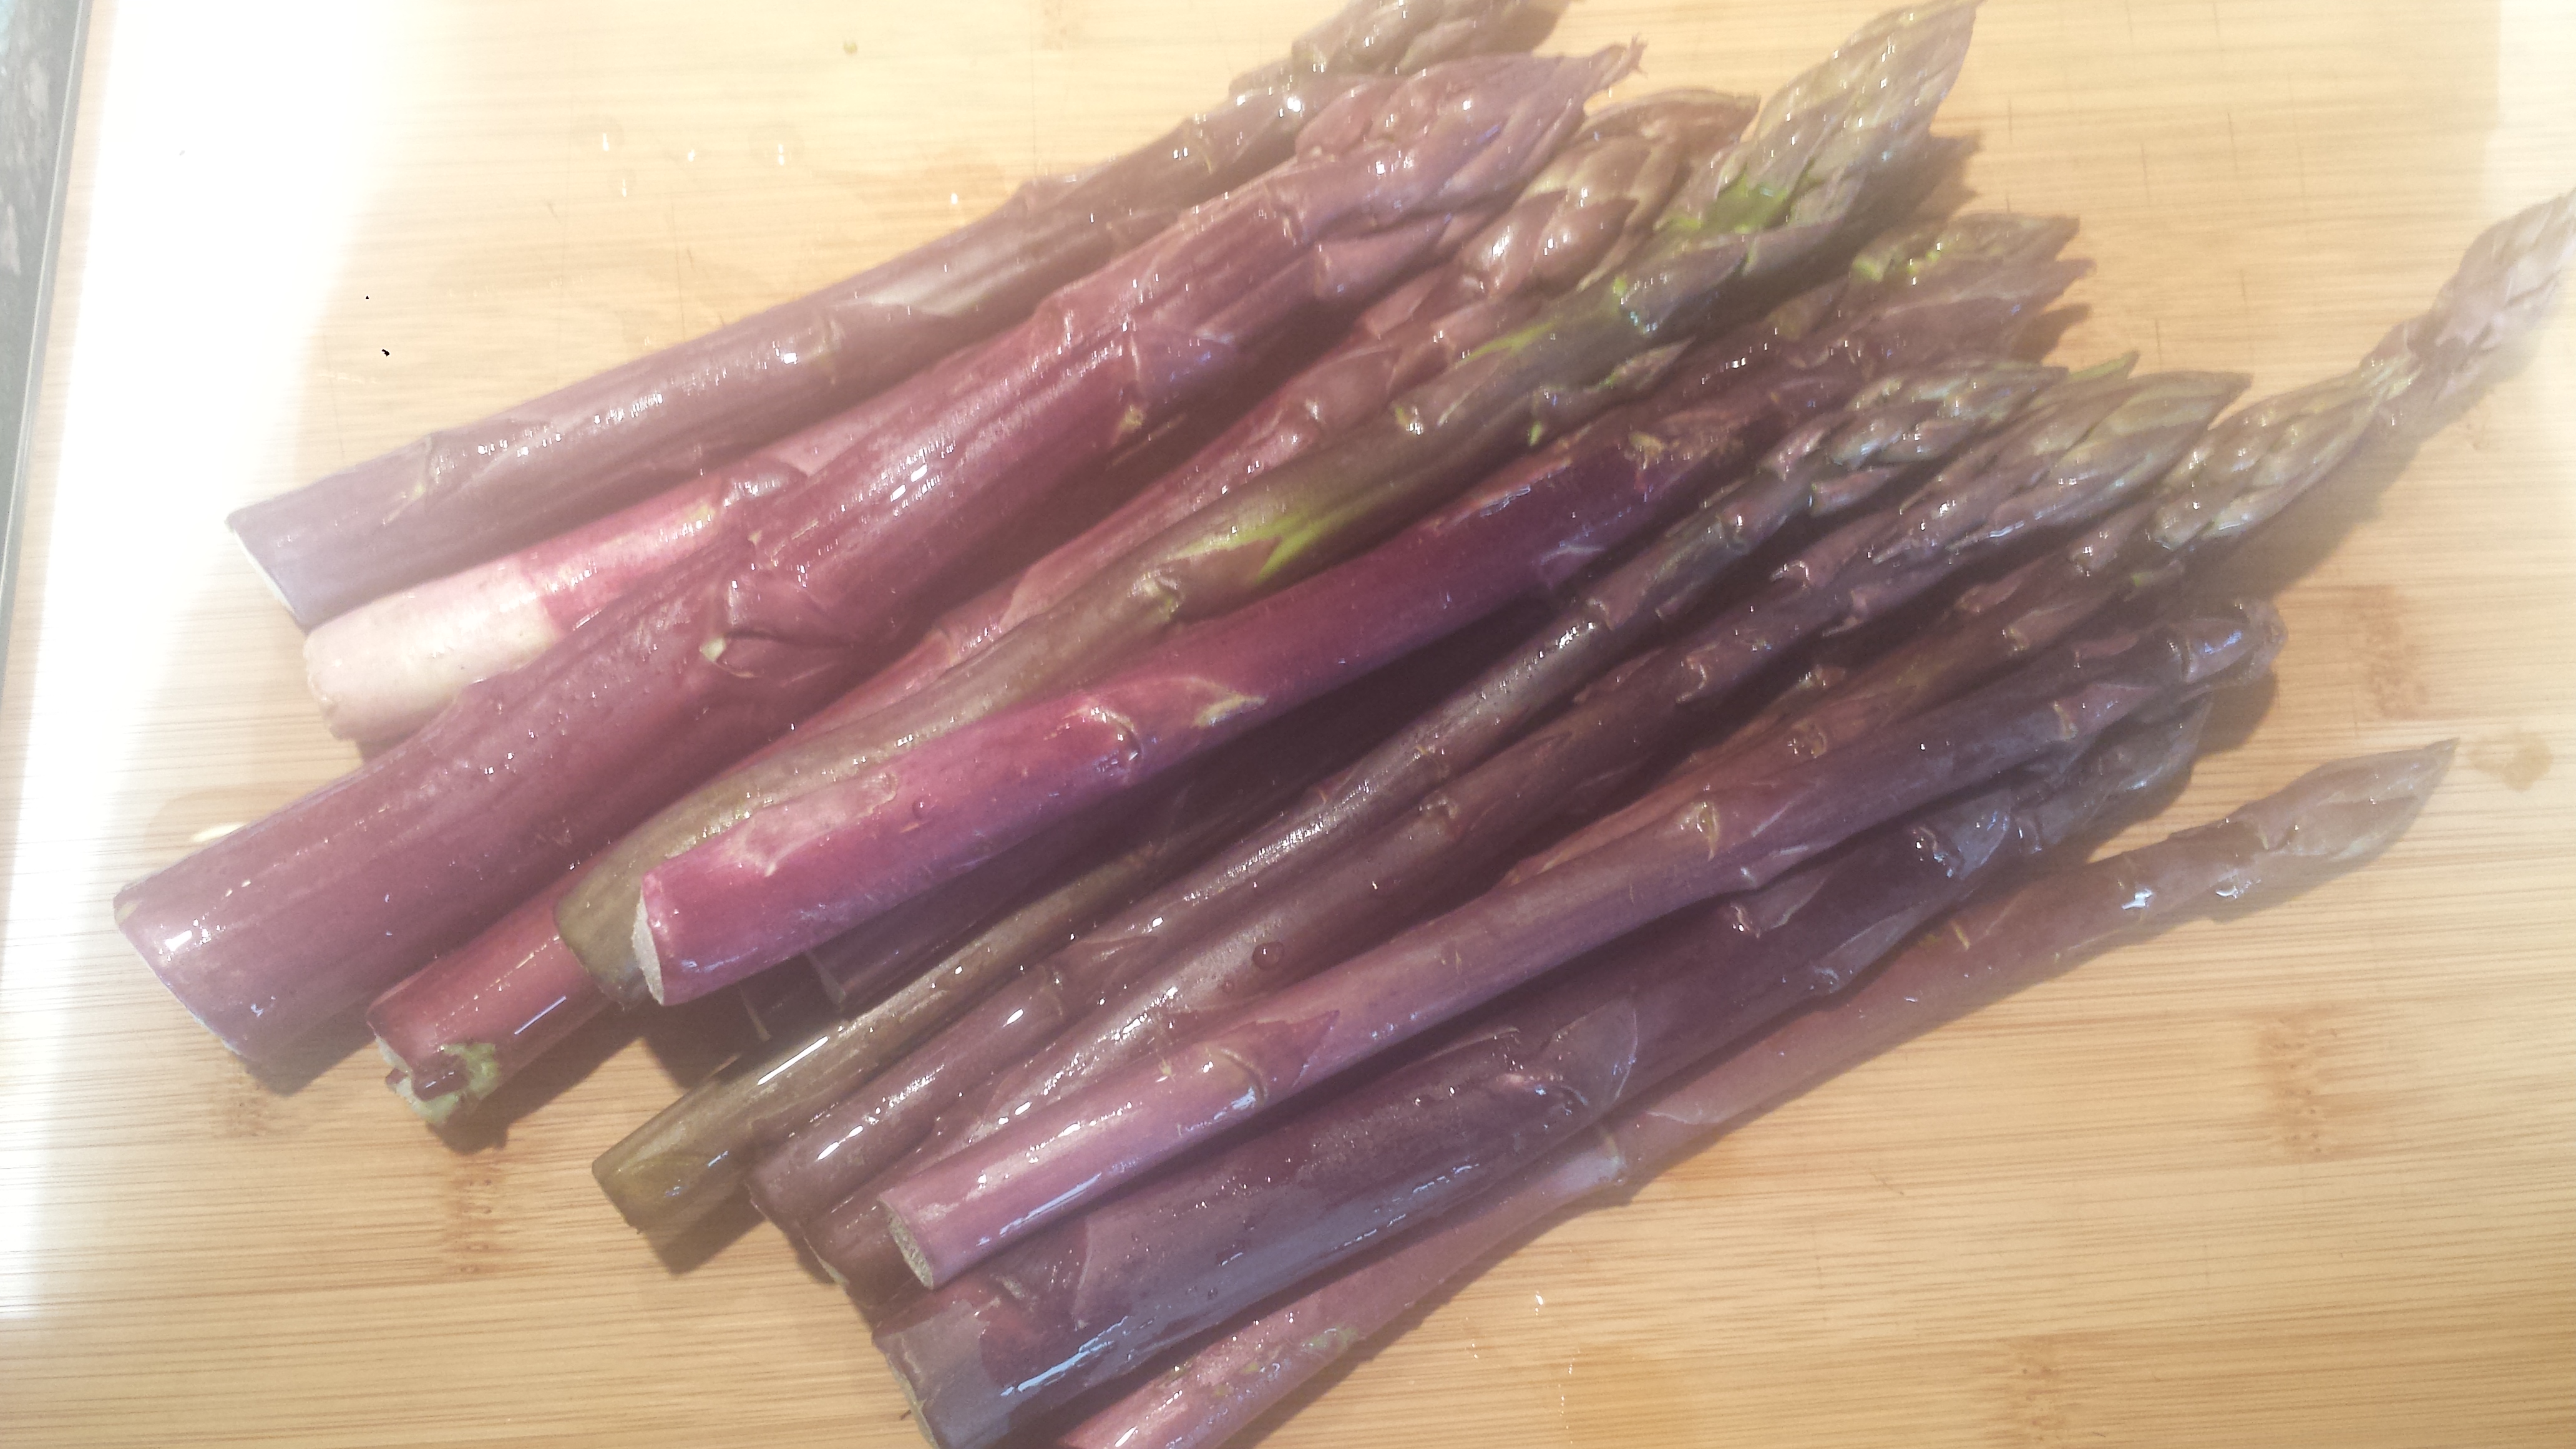
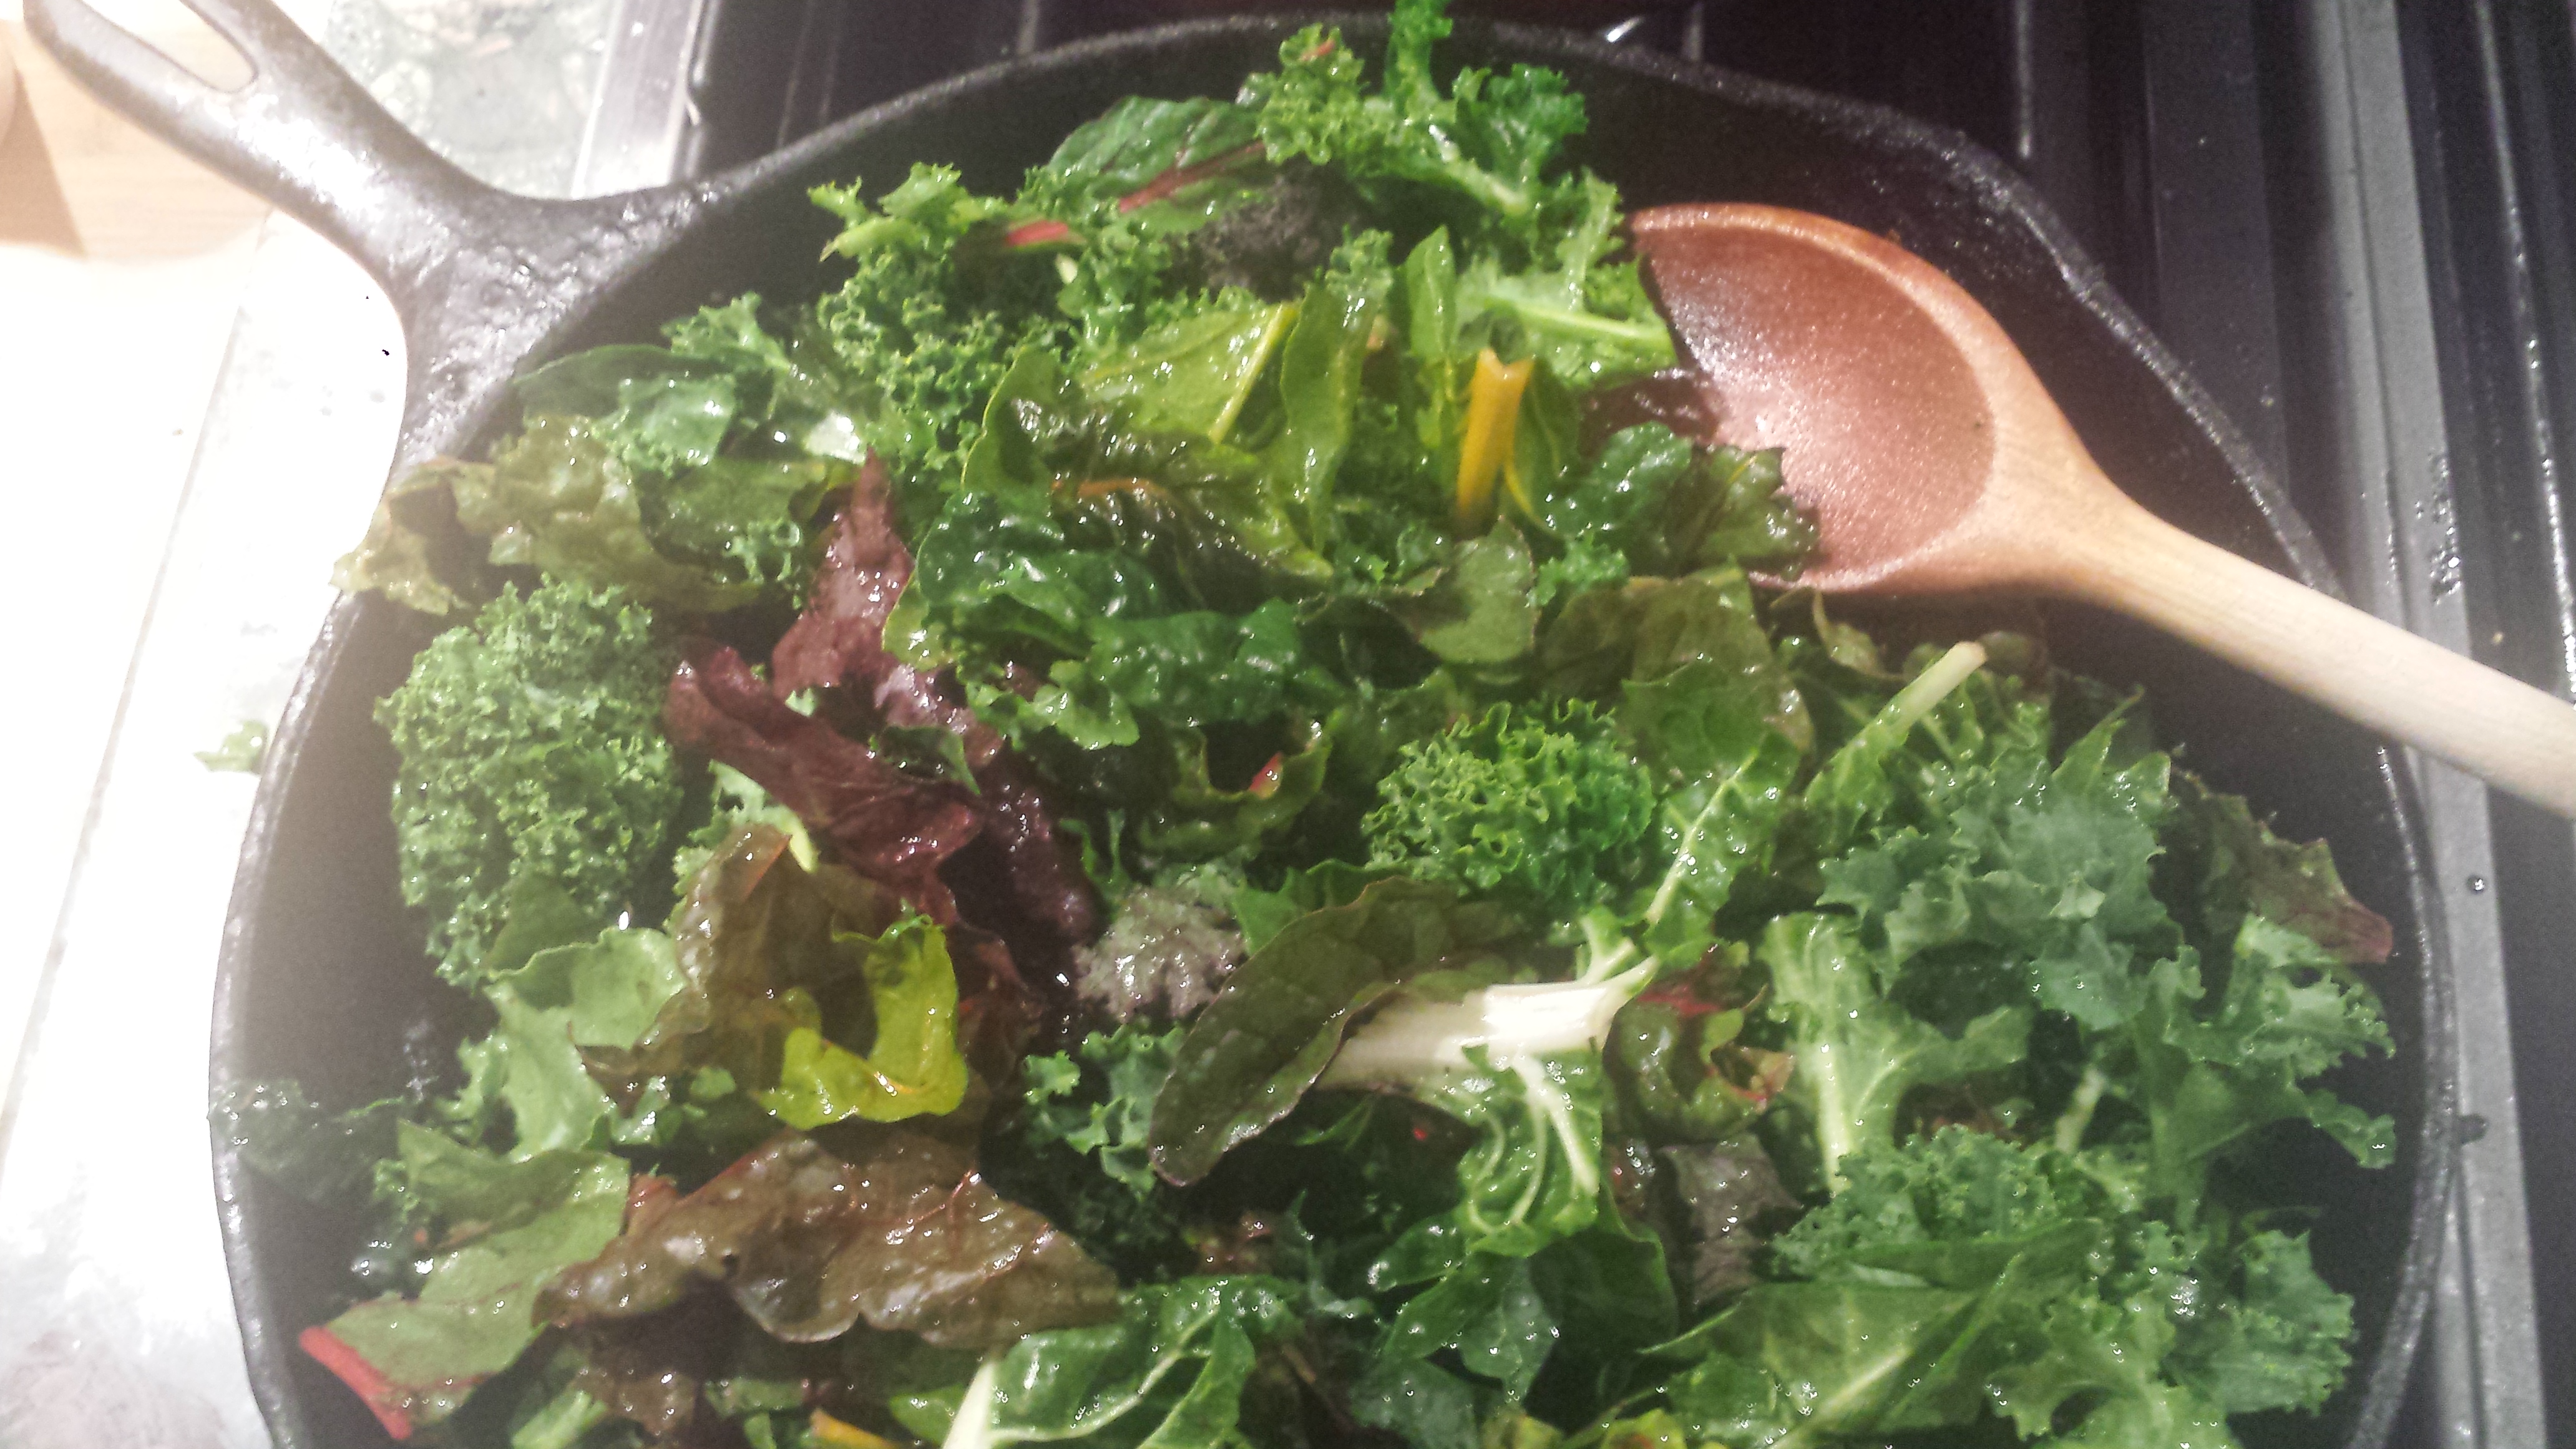
My vegetable garden is in one area of my yard, specifically dedicated to veggies.  I have a tiered L shape raised bed in which I grow lettuces, chard, beets, many pepper varieties, onions and leeks on the right L.  Behind that are artichokes, squash, grapes, blueberries, and hopefully soon a towering row of sunflowers.  On the left L, I have radish and rainbow carrot seeds started, along with pole beans, snow peas and assorted herbs.  I also have two large planter boxes (which may be in their last year of service) designated for tomatoes.  If I were to grow only one thing it would be tomatoes.  Nothing can compare to eating a fresh tomato still warm from the sun.  I am trying vertical gardening this year to keep the veggies that like to sprawl (like squash) off the ground and support tall veggies (like beans and peas) with trellis and teepees.  They are small now but soon they will be twining their way up to the top.  I have used the teepee for years.  It works great and is easy to put together.  Mine is just spare wood held together with twine.  The trellises I purchased at Home Depot but they are available at most garden stores.

Garden Ideas23Garden Ideas27Garden Ideas28Garden ideas30

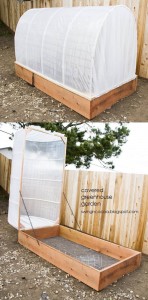
Tip:  I plant tomatoes early, in part because I’m anxious to get started, but also because I sometimes lose out on the varieties I want if I don’t buy them when I see them.  Since it’s still chilly at night (below 55 degrees) which stunts plant growth and causes blossoms to drop without producing fruit, I wrap my tomatoes in garden cloth at night which can raise the temperature inside their little garden ‘beds’ a surprising 8 or 9 degrees. I use hairclips for easy wrapping and unwrapping.  As a result, I already have a few tomatoes!

Container garden.

My friend, Judy uses a variety of containers, in particular these galvanized stock tanks which are sleek and modern.  She can actually grow quite a bit of produce in each of them.  She added irrigation so growing tomatoes, chard, beans, lettuce, peppers and other veggies is pretty easy for her to maintain  once she got them going.
Garden Ideas4Garden Ideas3Garden Ideas1Garden Ideas2


Combination Garden.

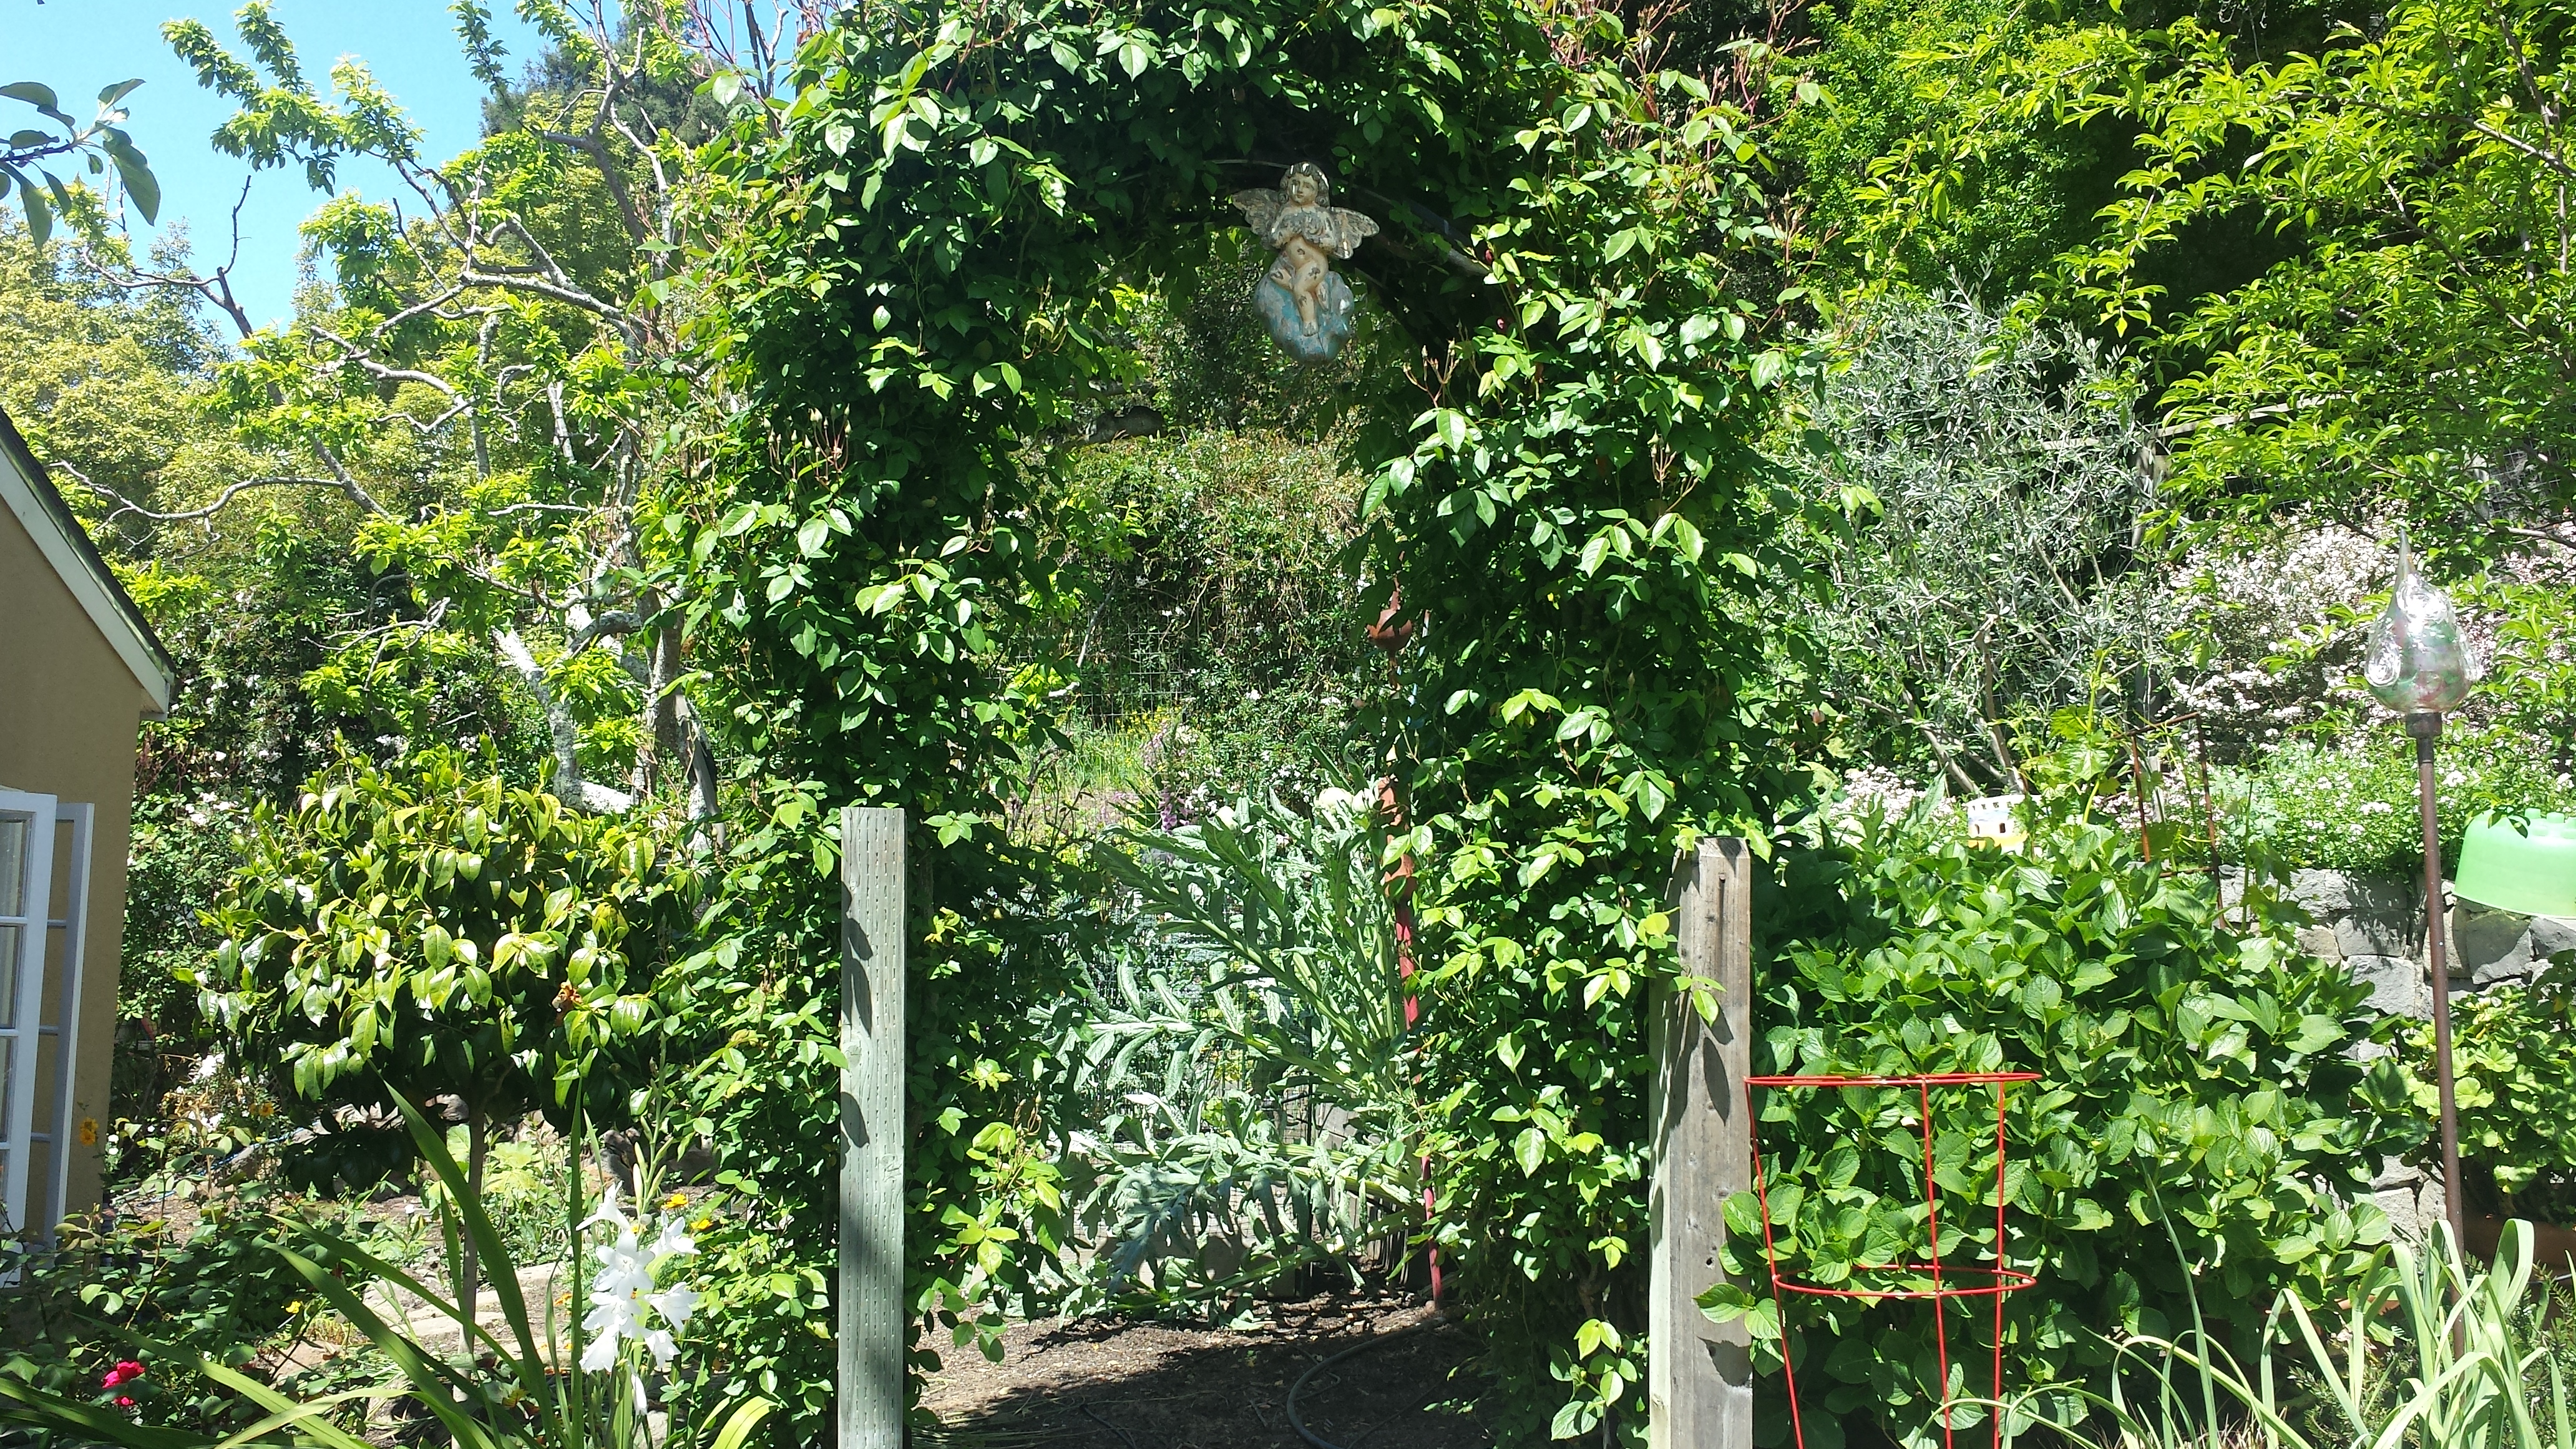
Another local friend, Patty incorporates her vegetable plantings throughout her back yard.  She has some raised beds but also looks for sunny spots in her garden that are empty and plants veggies, tomatoes in particular. Patti is growing the most enormous in-ground artichokes which come back stronger and larger each year, along with kale, chard and many lettuces. She also uses living archways to create  outdoor ‘rooms’ which are quite charming.  After spending some time in Patti’s garden, I am inspired to add some archways at both entrances to my garden which will be a fun project this spring.

Garden Ideas5Garden Ideas6

Garden Ideas7 Garden Ideas8

Back/Front Yard In Ground Gardening

When Elizabeth remodeled her backyard into a beautiful courtyard, she no longer had room for a vegetable garden, so she dug up her front yard and created quite a beautiful garden.  She is off on a fabulous trip and hasn’t planted her garden yet this year but was kind enough to send me photos of last year’s garden. As I recall, there were many vegetables planted between the flowers and sunflowers resulting in a beautiful and bountiful garden.

Garden Ideas15

For more cool gardening ideas and info on what to plant, when to plant and how to plant, check out the great links below:

Click on SproutRobot and enter your zipcode for a week by week planting guide in your area.

Click on Better Homes and Gardens for vegetable garden plans for every season.

 Click on the photos below to see the original post or for more information.  Some of these people have really good ideas!

Garden Ideas9Garden Ideas10Garden Ideas11Garden Ideas13Garden Ideas12Garden Ideas142012_0212miscebay0019


Wheatless Wednesday – Jerusalem Chicken with Fava & Spring Vegetable Saute

0

bRoasted Chicken1

Can there really be a cookbook co-written by an Israeli and a Palestinian?  Yes, and it is a work of art!   Yotam Ottelenghi, from the Jewish West, and Sami Tamimi, from the Arab East, have written a gloriously beautiful book, “Jerusalem”, which is a cookbook with wonderful recipes but also gorgeous photos and personal commentary that portray life in Jerusalem where they both grew up, albeit in different parts of the city.  They didn’t know each other in Jerusalem but met later in London and became good friends and then business partners.  They now own many successful restaurants together. They claim that this book was a walk down memory lane for them, “a nostalgic trip into their pasts”.  More about “Jerusalem”

Jerusalem

My friend, Stephanie, brought this book back from Israel for my birthday last year and I thought it appropriate to try one of it’s dishes for Passover.  I made their Roasted Chicken with Jerusalem Artichoke and Lemon which was delicious.  The combination of lemon, artichoke,  halved shallots, garlic and sliced lemon combined with saffron and fresh herbs was really flavorful.  I couldn’t find Jerusalem artichoke so substituted canned artichoke quarters packed in water.  I used local, free range chicken, herbs from my garden and lemons from my tree in an effort to make a smaller footprint (and frankly, to support the small local growers because if it’s a profitable to let chickens run around in the sunshine, maybe more will follow suit).

Roasted Chicken12

So now I know why fava beans are so expensive.  I had planted fava beans as a cover crop to introduce nitrogen into the soil for my summer tomatoes, not realizing that you are supposed to pull or plow under cover crops when they are flowering and not let them fruit or they pull all the nitrogen back out of the soil. ( More Info on Cover Crops Thank you Sean for all the cover crop info! )  I had already messed up on the cover crop thing since I had quite a few fava bean pods growing on my plants already, so I decided to let them go a bit longer and enjoy a mini harvest.  It seemed a shame to throw out such beautiful, healthy plants so I procrastinated a bit more.  Then we had dinner at a great local restaurant, Farmshop, which offered a roasted halibut on a bed of spring vegetables with fava leaves.  What?  You can eat the leaves?  I had to order the dish just to see for myself.  The dish was delicious but more importantly I now know what to do with my favas.  Finally I can feel good about pulling out my plants before their time.  So why are fava beans so expensive?  First, a big pile of fava beans in their pods shrinks into a small bowl of edible beans.  Secondly, they require a four step process before they are edible.  First they need to be shelled, then parboiled and put straight into an ice bath and finally their skins have to be removed.  Luckily I had two capable helpers, Veronica and Eric who made quick work of the favas.  How to shell fava beans.

I paired the chicken with a spring vegetable medley which includes fava beans, fava leaves, zucchini, asparagus and baby bella mushrooms all diced to be the same size as your average fava bean.  I was really wishing my Dad was in the kitchen to help out as well.  He is the world’s best sous chef.  He wields the paring knife like a master, cutting everything beautifully into  the perfect same size so everything cooks at the same rate.  Luckily, I learned from the best!.

Jerusalem Chicken aka Roasted Chicken with Jerusalem Artichoke and Lemon

  • Servings: 4-6
  • Difficulty: easy
  • Print


Roasted Chicken8 Roasted Chicken7

  • 1 lbs Artichokes, peeled and cut lengthwise so they are 2/3 thick
  • 3 tbsp lemon juice
  • 4 bone-in chicken breasts
  • 12 shallots, halved lengthwise
  • 12 large garlic cloves, sliced
  • 1 medium lemon, halved and thinly sliced
  • 1 tspn saffron threads
  • 3.5 tbsp of olive oil
  • 2/3 cup of cold water
  • 1.5 tbsp of crushed peppercorns
  • 1/4 fresh thyme
  • 1 cup of tarragon leaves, chopped
  • 1 tsp salt
  • 1/2 tsp ground black pepper

Roasted Chicken11 Roasted Chicken10

  • Combine artichoke, water and half of the lemon juice in a medium saucepan. Bring to boil, and then lower to simmer for 10-20 minutes. If you are using canned or marinated artichokes, this is not necessary.

Roasted Chicken6 Roasted Chicken5

  • Mix all ingredients (except the lemon juice and half of the tarragon) in a bowl. Cover and let marinade overnight, or at least 2 hours.

  • Preheat oven to 475degrees. Arrange chicken with the skin up in the center of the pan. Place the remaining ingredients around them.

  • Roast for 30 minutes uncovered.

  • Roast for additional 15 minutes, covered with foil or top, or until full cooked.

  • Add the reserve tarragon and lemon juice.

Stir, taste and add salt if necessary.

Roasted Chicken2

Fava & Spring Vegetable Saute

2 – 3 dozen fava bean pods
large bunch fava leaves (optional)
1/2  bunch asparagus
1 zucchini
6 large mushrooms
3 cloves garlic, minced
1/4 cup olive oil
1 tsp each  of fresh thyme and oregano
Roasted Chicken4 Roasted Chicken3
 
  • Dice all vegetables (except for fava beans and leaves) and set aside.
  • Heat oil in a heavy pan and sauté garlic and diced vegetables. 


  • Add herbs, fava beans and leaves and stir until leaves are wilted.
  • Salt and pepper to taste.


Passover Redux – 2014

2

2014-04-09-matzo-recipes-main

I’m heading out of town for the weekend to go to a family wedding, so won’t be in my kitchen or in my garden, but ran across a wonderful blog, “Nosh On It”, with some truly inspired Passover menu ideas. This article includes some traditional dishes like Matzo Brie and Matzo Ball Soup and also some very creative new treats. Highlights (for me) are Dark Chocolate-Toffee Matzo Bark, Matzo Lasagna and Coconut Rocky-Road Matzo. I’m pretty sure that  Deep Fried Matzo Balls with Wasabi Cream Sauce has my son, Eric’s name written all over it as an appetizer this year.  It sounds pretty good to me too!   Since Passover is next week, I thought I would help you WOW your guests, or at least get you through eight days of matzo.  Happy Passover!
Click on the photo or the following link to get the recipes and see the original post from Noshon.It:  Lotsa Matzo: 13 Creative Matzo Recipes for Passover

nosh-logo-165x165

Meatless Monday – Coconut Ginger Quinoa

0

Coconut Ginger Quinoa8


Somehow 2013 came and went without my knowing that I was missing “The International Year of the Quinoa”  as officially  declared by The Food and Agricultural Organization of the United Nations. (The World’s Healthiest Foods)  I didn’t ‘discover’ quinoa until December, almost completely missing the superfood’s official year.  I’m on board now, though and always looking to include interesting seeds and grains in my diet.  Interestingly, Quinoa is not a grain but a seed (a Chenopod to be specific) related to  beetroot and spinach.  It is a complete protein and nutrient rich, including a source of calcium. Quinoa is gluten free and easier to digest than many other grains and pseudo-grains.

Coconut Ginger Quinoa is a flavor packed dish, the combination of onion, ginger and coconut providing a great balance of savory and sweet.  In addition to the quinoa, edamame and almonds give it a protein boost.  The apples and raisins add a natural sweetness and help make it kid friendly.  Younger kids might have fun shelling the edamame while you cook the quinoa.   This is a very forgiving dish that can be served warm or at room temperature, making it perfect for making ahead or bringing to a potluck. You can even make the quinoa ahead of time and assemble the ingredients at the last minute. Enjoy!

Coconut Ginger Quinoa

  • Servings: 4-6
  • Difficulty: easy
  • Print

2 tsp. coconut or olive oil
½ cup onion, chopped (optional)
2 Tbs. minced fresh ginger
1 cup quinoa
1 ½ cups vegetable broth

1/2 cup slivered or sliced almonds
1 cup edamame, shelled
1 medium apple, diced
1/4 cup raisins, currants or cranberries (optional)
1/2  cup unsweetened coconut flakes or shreds (I used half and half)
Dressing (optional):  1/2 cup olive oil, 1/4 cup red wine vinegar, 2 tsp honey
Coconut Ginger Quinoa3Coconut Ginger Quinoa9
  • Toast almonds in dry pan over medium heat for several minutes, or until fragrant and golden brown. Remove from heat and let cool. If you are using flake coconut, you can dry toast it as well for a nice nutty flavor.  Set aside.
  •  Sauté onion in oil 2 to 3 minutes, or until translucent.

Coconut Ginger Quinoa2

  •  Add vegetable broth, quinoa and ginger.  Simmer, covered for 15 to 20 minutes, or until all liquid is absorbed. (Note:  Rinse quinoa to remove any last remaining saponin, a naturally occurring but bitter covering.  If you don’t have a fine mesh strainer, just put quinoa in a bowl , fill with water and pour out as much water as possible without pouring out any quinoa.)
  •  Let partially cool and pour into a large serving bowl.

Coconut Ginger Quinoa4 Coconut Ginger Quinoa6

  • Shell the edamame and boil in salted water for 4  minutes. Drain.  (Or you can add the edamame to the quinoa for the last few minutes of cooking)
  • Add edamame, almonds, apple, raisins and coconut to quinoa and toss to mix. Salt to taste.  Drizzle with dressing if using. Serve warm or at room temperature.

Coconut Ginger Quinoa8


Making Preserved Lemons Plus Secret Bonus Recipe

1

Preserved Lemons11


Have you ever wondered what the secret ingredient is to so many  Middle Eastern dishes?  Well the cat’s out of the bag – it’s  lemon – and not just any lemon but Preserved Lemon.  Preserved lemons (preferably Meyer or Eureka with their thicker skins) rest in a heavily salted brine for at least a month which completely changes their character.  They still have a tart lemony flavor but the peel has lost it’s bitterness and has become soft and salty/sweet.  There is really nothing to compare it to. It has it’s own unique flavor.  Preserved lemon is the key ingredient in many Moroccan, Cambodian and Northern African dishes and is often combined with olives, cumin, ginger, turmeric and saffron to make an incredible base for almost any vegetable or protein.  It is also called lemon pickle,  country lemon or leems depending on where you are from.

What do you do with Preserved Lemon?  I remove the seeds and puree the whole lemon (peel and all) in a food processor to put in sauces and stews.  For a less intense flavor, you can cut them into quarters or slices and add them to dishes or chop just the rinds into small pieces.  The salty, lemony brine and lemon pulp is wonderful to add to sauces or salad dressings, so none of it goes to waste.

Preserved Lemons12

Preserved Lemons are very easy to make but you have to think ahead since they have to sit in their brine for a month or so. I have included instructions for making preserved lemons. They make a very unusual gift.  Just add a label and some ribbon.  Check out my Garden to Pantry Page” for more info on labels.  I have also included a link to Moroccan Recipes  which has many recipes that use preserved lemons so maybe it will get your creative juices going. I tried the ‘Moroccan Style Cauliflower” from this list  and loved it so decided to include that recipe on this post  as well.

Preserved Meyer Lemons

  • Servings: 1 jar
  • Difficulty: easy
  • Print

Preserved Lemons2

What you need:

Quart sized bell jar w/ lid
6-7 Meyer lemons (or Eureka)
1/2  Cup of Kosher salt

Directions:

• Sterilize jars In hot water bath or in the dishwasher. Air dry.
• Wash and dry lemons.

Preserved Lemons3 Preserved Lemons4
• Cut a lemon in half horizontally without cutting all the way through the skin (about 3/4 of the way through). Then cut vertically without cutting all the way through. You should still have a lemon in one piece with a deep criss-cross cut.
• Fill the inside of the lemon with as much salt as you can fit. This part is messy so I lay the lemon in a small bowl and pour the salt into the cut.  Then I pour back any salt that has fallen into the bowl

Preserved Lemons5
• Place the lemon in the bell jar, salt side up.
• Repeat with the rest of the lemons, pressing as many as will fit into the jar and allowing the lemons to be covered by lemon juice.  If your lemons don’t make enough juice to cover, wait a few days and trying pressing down on the lemons again.  Sometimes you can even fit another lemon in the jar and then muscle the lid on.

Preserved Lemons6 Preserved Lemons7Preserved Lemons9
• Cover with the lid and let sit at room temperature for four to six weeks. It will take the salt a few days to dissolve, so give it a gentle shake once a day until the brine is clear.
• To use the preserved lemons, you can use the either rind or the whole lemon (which has more flavor). Just remove the seeds, finely dice, or puree in a blender, and put in stews, sauces and salad dressings.
• Once the jar has been opened, it should be stored in the refrigerator.


Moroccan Style Cauliflower

  • Servings: 4-6
  • Difficulty: easy
  • Print


Preserved Lemons10

• 1 large head of cauliflower
• 1 1/2 teaspoons cumin
• 1 teaspoon ginger
• 1 teaspoon salt
• 1/2 teaspoon paprika
• 1/2 teaspoon turmeric
• black or cayenne pepper, to taste
• 1 onion, sliced or coarsely chopped
• 3 cloves garlic, finely chopped or pressed
• 1/4 to 1/3 cup olive oil
• 1 preserved lemon, quartered
• 1 handful red or violet olives
• 1/2 cup water
• 2 to 3 tablespoons chopped fresh cilantro
Preparation:
Break the cauliflower into small florets; wash and drain. Mix the cauliflower with the spices and set aside.
In a wide, deep skillet or Dutch oven, saute the onions and garlic in the olive oil over medium heat for just a few minutes. Add the cauliflower, preserved lemon, olives and water and bring to a simmer. Cover and cook for about 10 minutes, stirring gently once or twice, until the cauliflower is just tender. Continue cooking, uncovered, to reduce the liquids to oil only.
Sprinkle the fresh cilantro over the cauliflower and serve.


Click on the following link for more recipes that use preserved lemon: Moroccan Recipes

Wheatless Wednesday – Ginger Shrimp & Sugar Snap Peas

0

Shrimp & Sugar Snap Peas1

“What’s for dinner?”  That is the number one question asked when my boys are home.  The second most asked question?  “Have you seen my shoes/my phone/ my keys?”  It can be hard coming up with interesting and delicious meals, day after day.  I can remember my Mom saying “The cooking part is not hard, it’s coming up with the ideas and having all the ingredients that is so exhausting”.    “I hear you, Mom!”  I battle menu fatigue by keeping a pantry stocked with beans, grains and legumes and I try to have a lot of fresh produce around so I have more options without having to order takeout run out to the store with a long grocery list.  I also try to keep my freezer stocked with flash frozen raw shrimp and scallops that thaw quickly.

I often get dinner inspiration from wonderful produce I find at the farmer’s market, or if I’m lucky, right from my own garden.  Yesterday, my late fall gardening efforts were rewarded with  an abundance of juicy, fat sugar snap peas hanging off their vines.  I harvested a giant bowl of them and started to think about the best way to showcase these emerald gems.  Their color is fabulous so I decided to pair them with colorful bell peppers, mushrooms and shrimp for a very spring-like meal.  The beauty of this dish is that it is very simple, only a few really good ingredients, but delicious and pleasing to the eye.

Shrimp & Sugar Snap Peas2

I never learned to properly stir-fry. I understand the concept of starting with the vegetables that need to cook the longest and ending with those that are fastest cooking.  I just never really mastered the technique of pushing the cooked food up on the sides of the wok.  I’m sure it was operator error but everything always ended up down in the bottom in a big jumble.  I prefer to cook everything separately so I can more easily control the level of cooking, plus each vegetable maintains it’s distinct flavor and character.  I cooked the snow peas and peppers first, then the mushrooms and lastly the shrimp.  Then I threw all the vegetables back in the pot with the shrimp and tossed them together.   I served it over brown rice, but any grain, or even pasta, is a great setting for this dish.  A very simple way to add more flavor to rice, without resorting to heavy sauces,  is to cook it with vegetable broth instead of water and toss in a one inch piece of fresh ginger, peeled but not chopped.  Just remove the ginger before serving.

Shrimp & Sugar Snap Peas3

Ginger Shrimp and Sugar Snap Peas

  • Servings: 4
  • Difficulty: easy
  • Print

1 lb raw extra large shrimp

2 cups fresh sugar snap peas
1 red bell pepper
1 yellow bell pepper
8 crimini or baby bella mushrooms
2 Tbsn grated ginger
3 cloves garlic, minced
3 Tbsn coconut or olive oil
dash Creole Seasoning
Salt and pepper to taste

Shrimp & Sugar Snap Peas5

  • Using a sharp knife, shell and devein shrimp. VIDEO on how to shell and devein shrimp  Wash shrimp and dry with papertowels.
  •  Cut off the stem of the sugar snap peas and remove the string
  • Slice the bell peppers into strips, discarding seeds and pith.
  • Wipe mushrooms clean with a damp papertowel.  Cut off dry end of stem and slice.

Shrimp & Sugar Snap Peas4

  • Heat 1 tbsn of oil in a heavy pan (I love cast iron) on medium heat.  Saute sugar snap peas and peppers (together or separately)for 4 or 5 minutes  with half the garlic and ginger.  Transfer to a large plate or bowl and leave uncovered (so they don’t continue to cook).

Shrimp & Sugar Snap Peas8

  • Add a bit more oil if necessary and sauté the mushrooms with the rest of the ginger and garlic, 2 or 3 minutes or until slightly browned on the edges. Transfer to plate with vegetables.

Shrimp & Sugar Snap Peas7

  • Add a bit more oil if necessary and sauté the shrimp about a minute per side, or until pink and firm.  Sprinkle with creole seasoning or just salt and pepper.
  • Add vegetables back into the pan along with any juice made by the veggies and stir until hot. Add salt and papper to taste.
  • Serve over long grain brown rice, or any grain or pasta

Shrimp & Sugar Snap Peas1


Wheatless Wednesday – Rancho La Puerta Granola

4

Granola6

‘THE RANCH’, as it is affectionately called by those people who are lucky enough to have been there, is one of my favorite places in the world. Rancho La Puerta, basking in the shadow of rugged Mount Kuchumaa in Baja California, is a fitness and wellness oasis, and gorgeous retreat. I went for the first time when I had three little boys at home. It was the first time I had left my kids to go on a trip by myself and my mother and father in law came to help my husband. It was quite liberating to not have to worry about anyone else for a whole week, a rarity for most moms.   I loved everything about The Ranch; getting up at 6am to do the Pilgrim hike before breakfast; going to pilates, yoga, then circuit training before lunch; pool-time, spa treatments and naptime restorative yoga before dinner. Ahh, what a day –every day for a week!

Rancho La Puerta1

What I loved best though is the food, which is ovo-lacto vegetarian, with small amounts of seafood. The wonderful food made me realize that I really like vegetarian food when it’s done this well. Meals are flavorful, healthful and creative. Most of the produce comes from Rancho Tres Estrellas, the 6-acre organic farm on the property which is available to visit.  Foodies take note, a wonderful cooking school rests in the center of the farm, La Cocina Que Canta (“The Kitchen That Sings!”) which also takes advantage of the fresh produce. Classes are available to Ranch guests.

la-cocina-entry

I have been back several times, with friends and by myself. Every day I was there, I did something I had never done before; Crystal Bowls (Sound Healing), Silent Dinner, Tai Chi or even a walk through the labyrinth. It’s a magical place and I can’t wait to go back, for both the experience and the food.  So I thought I would share their most requested recipe, Rancho La Puerta Granola (which I have been wanting to make for the last 10 years or so).  It is lower in fat and sugar than most recipes and truly delicious. Upon arrival at the San Diego airport, we were each given a baggie of granola for the bus ride to The Ranch and with just one mouthful we were all hooked.   As I recall a bag of granola was one of the most coveted prizes at Bingo night, (The Ranch is not known for its rocking nightlife, although Bingo night is legendary).

morninghike5

I stayed true to the recipe with the following exceptions.  I am allergic to canola oil (and no longer think its so great anyway) and substituted coconut oil which I melted in the microwave on low power.  I also used a coconut oil spray to coat the pan. I made this recipe twice since the first time it turned brown too fast as my oven was too hot.  The second time I had the oven at 250 degrees, as recommended, not 350. Note to self:  “Do not attempt to make a recipe for the first time without your reading glasses.  I would recommend using the top rack in the oven as the granola turns from golden to brown pretty quickly even at 250, so start watching at the 60 minute mark.

labyrinth_0

Enjoy your little bit of The Ranch!  Even better, share with friends!  Rancho La Puerta Granola makes great gifts.  One batch makes four cup and a half servings.  Just bag, label and tie with a ribbon. (Check out my Canning and Preserving Page for more info on labels).  Voila!  Hostess gifts solved.

PHOTOS OF RANCHO LA PUERTA REPRINTED WITH PERMISSION FROM RANCHO LA PUERTA Rancho La Puerta Website

Granola5

Rancho La Puerta Granola

  • Servings: 4
  • Difficulty: easy
  • Print

  • Vegetable oil spray
  • 3 cups old-fashioned rolled oats
  • ½ cup chopped almonds
  • ½ cup sunflower seeds
  • ¼ cup whole wheat flour (or a nut flour, like almond flour to make gluten free)
  • ¼ cup oat bran
  • 1 tablespoon ground cinnamon
  • ¾ teaspoon ground ginger
  • ¾ teaspoon ground cardamom
  • ¾ cup honey
  • ½ cup unsweetened unfiltered apple juice
  • 2 tablespoons vanilla extract
  • 2 teaspoons canola oil
  • 2 teaspoons grated orange zest
  • 2 tablespoons fresh orange juice (optional)

Instructions:

1. Preheat oven to 250ºF.
2. Lightly coat a baking sheet with vegetable oil spray. (I love an extra coconut flavor so I used a coconut oil spray).
3. In a large mixing bowl, combine the rolled oats, almonds, seeds, coconut, flour, oat bran, cinnamon, ginger and cardamom.

Granola4Granola3
4. In another bowl, whisk together the honey, apple juice, vanilla and oil until the honey is thoroughly incorporated. Add the orange zest and the orange juice if desired.

Granola2
5. Pour the wet ingredients over the dry ingredients and mix well. Spread the granola evenly over the baking sheet and bake about an hour and a half, checking and stirring every fifteen minutes.  Take care that the outside edges do not burn. When golden and dry, scrape onto a plate or cool baking sheet and set aside to cool.

Granola8

Store in an airtight container until ready to use.
Calories per serving: 25, 1 tablespoon per serving
Granola6

Meatless Monday – White Bean & Kale Dip

0

White Bean and Kale Dip4

Kale is the current ‘It’ food. We have Kale Chips, Kale Smoothies, Sauteed Kale and Kale salads. I guarantee if you show up at a party bearing anything with Kale, you will be heralded as a hip Foodanista.  I don’t want to knock kale, because it really is a nutritional powerhouse definitely worthy of being the star of the latest food fad. It’s not called ‘The Queen of Greens’ for nothing!   “One cup of chopped kale contains 33 calories and 9% of the daily value of calcium, 206% of vitamin A, 134% of vitamin C, and a whopping 684% of vitamin K. It is also a good source of minerals copper, potassium, iron, manganese, and phosphorus. (www.webmd.com)

Combine kale with white beans which are high in minerals, fiber and protein and you’ve got a snack worthy of superman. White Bean and Kale Dip combines some of my favorite flavors, white beans (cannellini), kale, cayenne, cumin, lemon, tahini and pine nuts and has none of the fattening creams or cheeses (which I love but am trying to cut back on).  The creaminess in this dip comes from the white beans, pine nuts and a bit of olive oil, all healthy and nutritious.  More importantly, it is delicious! If you are looking for a yummy but healthy appetizer, then this is for you.  I served it with pita crackers but its also great with carrots and other raw veggies.  You can also spread it on toasted bread and add a sprig of arugula and tomato. Yum!

white Bean and Kale Dip5

There are a surprising number of recipes out there for White Bean and Kale Dip (or perhaps not so surprising given kale’s goddess status).  Variations include walnuts or cashews instead of pine nuts and spinach instead of kale.  I would recommend Lacinato (Dinosaur) Kale, which is sweeter and less tough(chewy) than the curly type, for this recipe since we are using it raw. If you include nuts, I would recommend running them through the food processor or blender to make a fine powder before adding the other ingredients. You could probably also use an almond or cashew butter if you have it  instead.  Otherwise, this dip only takes a few minutes to put together but it needs at least an hour to chill in the refrigerator to firm up. I actually thought it tasted better the next day.  So time to jump on the Kale Bandwagon if you haven’t done so already!

White Bean and Kale Dip

  • Servings: 8
  • Difficulty: easy
  • Print

kale-1

1 can white cannellini beans,- drained and rinsed
1 cup kale, roughly chopped
1/4 cup flat leaf parsley
1/4 cup pine nuts (optional)
2 Tbsp tahini
2 cloves garlic
1/3 cup olive oil
2 Tbsn balsamic vinegar
2 tsp lemon juice (1/2 lemon)
Zest from ½ lemon
1 tsp cumin (optional)
 1/2 tsp black pepper
½ tsp cayenne (or more to taste)
Salt to taste
1/4 cup water, if needed

White Bean and Kale Dip

Directions:

  •  If you’re using nuts, process them into a fine powder in the food processor before adding the other ingredients.
  • Add the rest of the ingredients and blend until smooth. Add water if needed to blend ingredients.
  • Pour into a serving dish and chill in fridge for 1 hour or more.  It will thicken quite a bit and the flavors will meld.
  • Serve with crackers or raw veggies.

White Bean and Kale Dip4


Wheatless Wednesday – Flourless Chocolate Brownie Cookies

3

Flourless Chocolate Brownie Cookie1

Chocolate is one of the world’s favorite foods and GoodMotherDiet  is not immune.  Sometimes we need a break from cauliflower, quinoa and butternut squash.  Can dark chocolate really be part of a healthy diet (and not just wishful thinking)?   There are reputable claims  that dark chocolate is good for your heart (lower blood pressure +),  brain (improved cognitive function), blood sugar (what?), teeth (no way!) and even your cells (antioxidants). Dark chocolate is also high in vitamins and minerals (copper, potassium, magnesium and iron).  For specific nutritional data (or if you don’t believe me that dark chocolate is good for your teeth) click here:  http://www.fitday.com/fitness-articles/nutrition/healthy-eating/6-health-benefits-of-dark-chocolate.html

Sometimes we do know what we need.  So now the question is Cookies or Brownies?  Why choose?  These tasty morsels are a cross between a fudgy brownie and a chewy chocolate chip cookie. Need I say more?  They are also flour free and gluten free (as long as you are using a powdered sugar that doesn’t have flour added for fluffiness – yes they do that so check the label).  Should I go on or do you just want to make them now?

Flourless Chocolate Brownie Cookie

  • Servings: 24
  • Difficulty: easy
  • Print

Flourless Chocolate Brownie Cookie2

3 cups powdered sugar
3/4 cup unsweetened cocoa powder
1 tsp kosher salt
2 large egg whites
1 large egg
4 oz. bittersweet chocolate or 2/3 cup bittersweet chocolate chips
3 Tbsn dark chocolate (70% or higher cacao)
 
Flourless Chocolate Brownie Cookie3
  • Chop chocolate into small pieces.
  • Mix powdered sugar, cocoa powder and salt in a large bowl, then whisk in egg whites and egg.

Flourless Chocolate Brownie Cookie4Flourless Chocolate Brownie Cookie5

  • Fold in chopped chocolate.

Flourless Chocolate Brownie Cookie6

  • Spoon batter by the tablespoonful onto parchment-lined baking sheets, spacing 2″ apart.
  • Bake  at 350 degrees until cookies are puffed, cracked, and set just around the edges, 14-16 minutes.
  • Transfer baking sheets to wire racks and let cookies cool before removing them from parchment.

Flourless Chocolate Brownie Cookie7

Meatless Monday – Bow Ties with Broccoli Pesto

0


Broccoli Pesto4

Is it time to put away the roasted root vegetables and bring on the fresh herbs?  Well maybe not quite, but it’s feeling and looking more like spring.  The days are longer and new growth is peeking out from under last year’s dry brush.  Forget-Me-Knots and California Poppies adorn the hillsides and instantly make me feel happy.  Perhaps they are working in cahoots with Pharrell on his happiness project.  For those few who haven’t heard Pharrell’s “Happy” song (if that’s even possible) click here:  http://www.youtube.com/watch?v=y6Sxv-sUYtM  (Or maybe you just want to listen to it while you read the rest of this post which is fine because I listened to it while I was writing it).  More on the garden this Friday so gardeners stay tuned.

California PoppiesForget Me Knots

Spring Pasta Recipe:  My son, Dylan, loves pesto on pasta, pizza and sandwiches (and he just came home for spring break), so this Vegetarian Times  recipe for Broccoli Pesto caught my eye. I actually loved this pasta! I could stand at the kitchen counter and eat the pesto by the spoonful (and just maybe I did).  It’s delicious and simple.  It tastes like it has cheese and/or something creamy. but it is vegan and fairly low calorie.  I used pine nuts (instead of hazelnuts because I wanted a creamier sauce).  I left them raw for the pesto and dry toasted as a topping.  The combination of herbs, including fresh mint, make it taste spring fresh. The addition of broccoli is a nice twist which also ramps up the nutritional value of the meal. As a Superfood, broccoli is low in fat and calories (only 31 per cup), rich in vitamins, minerals, beneficial phytochemicals and a good source of fiber.  Somehow it doesn’t taste like broccoli so you  may be able to slip some extra veggies into someone you love.  My Carb-fearing husband had three portions!  I will definitely make Pasta with Broccoli Pesto again.  Store any leftover pesto in a container and pour a thin layer of olive oil on top to prevent it from turning brown.

Bow Ties with Broccoli Pesto

  • Servings: 4
  • Difficulty: easy
  • Print

Broccoli Peso1

Ingredients:

6 Tbsn hazelnuts, plus more for garnish (or pistachios/pine nuts)
2 cups broccoli florets
12 oz farfalle pasta (bowtie)
1 1/2 cups loosely packed parsley leaves
1/4 cup plus 2 Tbsn olive oil, plus more for drizzling
1/2 cup mint leaves
4 tsp lemon juice
1 1/2 tsp grated lemon zest
1 1/2 tsp capers, rinsed and drained
5 large garlic cloves, peeled


Directions:

  • Put large pot of salted water on to boil.
  • Toast hazelnuts (pine nuts) in dry skillet, 3 – 5 minutes, or until golden.  Let cool.
  • Add broccoli to boiling water and cook 2 to 3 minutes.  Remove broccoli with slotted spoon.
  • Add farfalle to broccoli water and cook according to package instructions

Broccoli Pesto3

  • Drain farfalle, reserving 1/4 cup cooking water.
  • Process nuts, broccoli, parsley, oil, mint, lemon juice, zest, capers and garlic in food processor or blender until smooth (Add some of the cooking water if it’s too thick).
  • Toss farfalle with pesto and reserved water (if needed).  Garnish with toasted nuts, sprinkle with salt and drizzle with olive oil(if desired).

Broccoli Pesto4


Limoncello

12

Limoncello1
“I believe when life gives you lemons, you should make lemonade…and try to find someone whose life has given them vodka, and have a party.” (Ron White, Author)

…Or you can combine the two and make Limoncello! I am lucky to have a beautiful, and bountiful, Meyer Lemon tree right outside my kitchen door. Most citrus trees bear two crops a year, a smaller one in the summer and the heaviest crop in winter.  Meyer lemon trees, however, are known for bearing fruit all year long, although their largest crop is now. With such an abundance of fruit, I am always looking for ways to use lots of lemons at once. I don’t mind sharing but I hate when they are wasted. Limoncello is an easy way to use extra lemons, although is not instantly gratifying since there is a considerable wait time until you have a final product. Limoncello is a crowd pleaser and makes a great gift, so our problem is that it goes too quickly. For that reason, as soon as I bottle one batch, I often start another.  Even if you don’t have a tree in your backyard, its easy to find Meyer lemons this time of year at your supermarket or even at Costco. You can also use regular lemons with good results, so use what you have.   It’s not too late!

The Limoncello I have made in the past is more “California style”, rather than Italian. I found the recipe on the internet from someone in Berkeley who has a prolific meyer lemon tree in her backyard and came up with a recipe in an attempt to use up her lemons. Sounded familiar so I gave it a whirl. I can’t credit her for the recipe since I could never find her post again. I liked the fact that she uses whole lemons and not just the peel. The results were good and I’ve had no complaints, however, after our trip to Italy last summer, I decided to attempt the Italian version, which uses only the peel. Purists believe that this makes the best quality limoncello, so I decided to put it to the test.  Here are a couple of photos from the ‘California style’ batch.

  1. making limoncelloLimoncello

In selecting the lemons, try to get organic since the peel is where most of the insecticides reside and often they are waxed to give them a longer shelf life. If you can’t find organic lemons, just scrub them with warm soapy water and dry them with a towel.   I have divided the process into two steps. Since the limoncello needs to sit for 6 to 8 weeks before bottling, you don’t have to have everything on hand just to get started. The large Bell containers are easy to find at hardware  or department stores like Target.   The Container Store and Pier One Imports both carry a nice selection of flip cap bottles that are perfect for bottling. Lastly, think about ‘your’ label which is the finishing touch and gives it personality and helps to make it the perfect gift. http://www.onlinelabels.com has pretty much every size and shape label you could ever want and they have a downloadable template which makes it very easy.

Limoncello

  • Servings: 8-12 oz bottles
  • Difficulty: medium
  • Print

STEP 1

 What you Need:

18 Meyer Lemons
1 handle or 2 fifths of Everclear or vodka
2 gallon glass jar with a lid(found at most hardware stores)
Potato peeler or microplaner (to zest)
• Wash and dry lemons. If not using organic scrub them with a vegetable brush in warm soapy water. Drying helps remove any remaining residue.

Limoncello3 Limoncello4

  •  Using a potato peeler, zester or a microplaner, carefully remove the peel trying not to get any of the bitter white pith. I used a potato peeler to cut long strips and then scraped any white from the back with a sharp knife.
  • Place all of the peels in the glass jar and pour the alcohol/vodka over the top to fill. Cover with a tight lid. (Note: The photo below shows a double batch.)
  • Squeeze the juice from the lemons.  Add sugar and water to make lemonade or freeze in ice cube trays, then put in baggies when frozen and save for another use.

Limoncello5
• Let sit covered with a kitchen towel or two for 6 to 8 weeks. I like to give it a little shake every few days for the first couple of weeks, just to make sure it’s evenly mixed. After that you can store it somewhere dark and out of the way.

STEP 2

What you Need:

Funnel
Fine mesh strainer
2 or 3 paper coffee filters
large bowl
ladle
2 1/2 cups sugar
2 1/2 cups water (filtered preferred)
8 12 oz bottles
labels (optional)
  • Wash and air dry bottles.  Can be done in a hot dishwasher. (Drying with a towel can reintroduce germs.)
  • Heat water and sugar in a pot until the sugar dissolves and the simple syrup is clear. /Remove from heat and let cool to room temperature.

Limoncello8 Limoncello9

  • Line your mesh strainer with coffee filters and place it over the large bowl (or have someone hold it for you).  Carefully pour lemon/vodka mixture over the strainer, taking care not to let the liquid go over the top of the filters.

Limoncello7

  • Discard lemon peels.
  • Clean Bell jar and pour filtered vodka mixture back into the jar (I would filter at least twice).

Limoncello10

  • Pour simple syrup into the jar and mix to combine.
  • Place a funnel into one of the bottles (with a coffee filter if you want to filter again) and carefully ladle limoncello into the bottle leaving 1 inch clearance at the top.

Limoncello12

  • Seal the cap and repeat with remaining bottles.

Limoncello13Limoncello15

  • The Limoncello will continue to mellow and improve over the next several weeks.
  • Label the bottles if desired. I’m testing a new label.  What do you think?
  • Store in a cool place.  Serve icy cold from the freezer.

So what was the final verdict?  The Italian style version requires more preparation time, in the peeling of so  many lemons,  but the final product is smoother and tastes more like the Limoncello we had in Italy, although less sweet since we also reduced the amount of sugar.   I think its worth the extra effort.  Cheers!

Wheatless Wednesday – Spicy Roasted Chickpeas

4

Roasted Garbanzos6

Warning – Highly Addictive! If you like Corn Nuts you’ve got to try these.   I got this recipe idea from my friend, Laura, who makes these snacks for her two teenaged boys, who gobble them up and ask for more without actually knowing what they are eating.  When they would first ask,  Laura’s answer was really vague (sudden attack of coughing) or evasive  (urgent phone call). She finally decided to call them Bean Pops. Clever Mama!  Regardless of the mommy maneuvering, she is getting her boys away from bad fat and preservative laden junk foods to protein and nutrient rich, yet still yummy chickpea snacks, or what I think of as healthy ‘corn nuts’ (if there can be such a thing).  Garbanzo beans are a source of several vitamins including vitamin C, B6 and folate. Many dietary minerals are also available from garbanzo beans, including manganese, phosphorus, copper, iron, magnesium, selenium, zinc and calcium. (www.livestrong.com )

Dieters take note!  ‘Furthermore, there is a recent study in which participants consumed fewer processed foods and less food overall when the diet was supplemented with garbanzo beans.  Research suggests that the fiber benefits of garbanzo beans may go beyond the fiber benefits of other foods’.  For more information on this study click here: http://www.whfoods.com/genpage.php?tname=foodspice&dbid=58

When I was a teenager, my Mom went through a garbanzo (also called chickpeas or ceci beans) phase where they showed repeatedly up in our salads and main dishes – even as flour in bread. (My Mom was way ahead of her time – by 25 years or so). I checked with my sister, Margaret, who also remembers the time when we had garbanzos coming out of our ears.  She admitted though that they are now her favorite bean and she puts them in everything she can, so I guess the apple doesn’t fall far from the tree.   I didn’t appreciate my Mom’s creativity at the time, especially since I wasn’t a garbanzo fan as a kid.  I am a huge fan now though (same apple tree, I guess).  I called my Mom to see what she had to say on the subject and she was about to start some garbanzo sprouts which nutritionally speaking is like garbanzos on steroids (increased vitamin content among a host of other benefits).  So there you go.  At 86, Mom  is still way ahead of everyone else!

Shameless PlugTIP: Spicy Roasted Chickpeas are particularly delicious when paired with a glass of red wine. I’m enjoying  the 2009 Paradisos Red Wine from my brother, Paul’s winery, Paradisos del Sol in Zillah, Washington.  It retails for $28 per bottle but if you mention my blog you will get the $14 family rate.  They deliver to Seattle too!  Check them out at http://www.paradisosdelsol.com/  Cheers!

Spicy Roasted Chickpeas

  • Servings: 3 cups
  • Difficulty: easy
  • Print

2 Tbsn olive oil
1 Tbsn ground cumin
1 tsp garlic powder
½ tsp chili powder
1 tsp salt (or to taste)
¼ tsp cayenne pepper (or more if you like spicy)
2 cans chickpeas/garbanzo beans (or 2 -3 cups cooked dry beans)

  • Preheat oven to 400  degrees
  • Rinse and dry garbanzo beans.  You can either air dry them on paper towels or pat dry with additional papertowels.

Roasted Garbanzos 1

  • Whisk the oil, cumin, garlic powder, chili powder, salt,  and red pepper together in a medium sized bowl.;

Roasted Garbanzos 2


  • Add the chickpeas and toss to coat.


Roasted Garbanzos 3

  •  Spread into a single layer on a baking sheet. Shake the pan back and forth a bit to disperse them evenly.

Roasted Garbanzos 4


  • Roast, stirring occasionally, until nicely browned and slightly crispy, about 40 to 45 minutes or until desired crispness.  They will continue to crisp a bit while cooling on the pan.


Roasted Garbanzos5

  •  Serve warm or cold.

Roasted Garbanzos6

Meatless Monday – Avocado Toast with Coconut ‘Bacon’

4

Avocado Toast 1

BACON – NEED I SAY MORE? I stopped eating meat last June and I must say I don’t really miss it. BACON, however, which really should be it’s own food group, is a different story… There is something about bacon’s crispy, fatty, salty deliciousness that is just so irresistible! I know people who are vegetarians, except for bacon.  I mean, there is a Bacon of the Month Club!   So when I stumbled upon a recipe for Sweet Smokey Coconut Bacon on Pintarest (via www.tohealthblog.wordpress.com ), I realized a stroke of brilliance was before me, bacon without the guilt.

I have been hooked on Avocado Toast for breakfast these past couple of weeks. I’ve been trying to recreate my favorite appetizer, Avocado Bruschetta, from Picco Restaurant in Larkspur, which has chorizo crumbled on top. I have been substituting dry toasted pine nuts and flakes of Maldon Sea Salt which I was pretty happy with -Until I heard about COCONUT BACON! I let my fingers do the walking (thank you google) only to find that there are many, many recipes for coconut bacon on the internet. How did I not know this? Two of my favorite flavors together sounds like a match made in heaven. The recipes call for varying combinations of coconut flakes, maple syrup, smoked paprika, cloves, Braggs Amino Acids, Liquid Smoke or Soy Sauce. For those, unenlightened folks like me, Braggs Amino Acids is a gluten free soy sauce substitute that has beneficial amino acids.  I tried one batch with liquid smoke and one without and I liked it better without, but that is a personal taste. I know a lot of men people love that smoky flavor .  So does it really taste like bacon?  Not really, but it makes a tasty substitute that is  mostly monosaturated fat and Omega-6 fatty acids, which are extremely beneficial for  the body.  For nutritional info on coconut click here:  (http://www.ehow.com/about_5304349_health-benefits-coconut-flakes.html)

Avocados have gotten a bad rap as a high fat, high calorie food when they  are actually quite healthy and are nutrient dense. (Calories that Count).   ‘Nutrient density is a measure of the amount of nutrients a food contains in comparison to the number of calories. One-fifth of a medium avocado (1 oz.) has 50 calories and contributes nearly 20 vitamins and minerals, making it a nutrient-dense food choice.  They are naturally sodium and cholesterol free and contain mono and poly unsaturated fats (good fats).’  For more information on the benefits of amazing avocados click here. (http://www.californiaavocado.com/avocado-nutrients/)

Avocado Toast 2Avocado Toast 3

Avocado Toast with Coconut 'Bacon'

  • Servings: 2
  • Difficulty: easy
  • Print


2 slices good bread (sourdough, ciabatta or whole grain )
1 Tbsn olive oil, coconut oil or butter (optional)
1 half ripe avocado
Salt (I like coarse or flaked sea salt)
2 Tbsn pine nuts (optional)
2 Tbsn coconut ‘bacon’ (recipe below)

  • Brush tops of bread with oil and broil for a few minutes until golden.  Or you can toast in a toaster and then brush with a bit of oil.
  • Dry roast pine nuts in a medium fry pan until golden.  Remove from heat.
  • Pit, peel and half avocado.  Slice.  Place half of slices on each piece of toast. Or you can ‘smash’ it on the toast with a fork.
  • Top with coconut bacon and pine nuts.  Sprinkle with salt.  Enjoy!

Coconut Bacon 5

Coconut ‘Bacon’

1 cup  coconut flakes
1 Tbsn liquid aminos (or soy sauce)
2 tsp liquid smoke (optional)
1 tsp maple syrup
1/2 tsp smoked paprika
4-6 cloves ground (or 1/4 tsp pre-ground cloves)
2 tsp  water
Coconut Bacon 1 Coconut Bacon 2
  • Mix the aminos, syrup, paprika, cloves, liquid smoke and water together in a bowl until well combined.  Gently stir in the coconut flakes, trying to coat them each thoroughly and soak up the liquid.  Let sit for 5 minutes, then stir again gently.

Coconut Bacon 3 Coconut Bacon 4

  • Preheat over to 300°F, then bake for 20 to 25 minutes.  Store them in a plastic bag or container.  Does not need to be refrigerated.

Coconut Bacon 5

Avocado Toast 1

[/recipe]

Wheatless Wednesday – Kusshi Oysters with Jalapeno Mignonette

0

Oysters2
I’m not sure if oysters really make you fall in love, or even lust, but the possibility is certainly a fun concept.  The last two times he’s been to the Farmer’s Market my husband has come home with fresh oysters. Hmmm…  ‘Oysters have always been linked with love. When Aphrodite, the Greek goddess of  love, sprang forth from the sea on an oyster shell and promptly gave birth to  Eros, the word “aphrodisiac” was born. The dashing lover Casanova also used to  start a meal eating 12 dozen oysters.” (www.globalgourmet.com)  Regardless of their effect on our love lives, oysters are at the very least  nutrient rich and low in fat and calories (57 for 6 medium for those counting).  High in protein and low in fat, oysters are an excellent source of vitamins A, B1(thiamin), B2 (riboflavin), B3 (niacin), C and D. Four or five medium size oysters supply your daily allowance of iron, copper, iodine, magnesium, calcium, manganese and phosphorus. Oysters also provide large amounts of zinc;  a mineral which boosts prostate health, so maybe there is a germ of truth to the folklore.  (Nutritional Data from www.hogislandoysters.com)

We bought two kinds of oysters from the Santa Rosa Seafood Company at the Marin Country Mart Farmer’s Market on Saturday.  Kusshi ( meaning precious in Japanese) is a West Coast oyster, grown in Deep Bay, British Columbia.  They are small, sweet and very clean tasting so we decided to serve them raw with a tasty jalapeno mignonette called “Hog Wash” by the Hog Island Oyster Company.  My husband has become quite an expert shucker, armed with an oyster knife and oven mitts to protect his hands from the sharp shells.  I would not suggest trying to shuck your own oysters without the proper tools.  Click here for a video on how to shuck oysters: http://hogislandoysters.com/kitchen/shucking-oysters

Oysters3

The other oysters, local Drake’s Bay, are very large and meaty, more than bite size, so we just popped them on the grill whole. Once you hear them ‘pop’, you can pry the top shell off and top them with barbecue sauce.   We used the rest of the yummy Chipotle Butter (also a  Hog Island recipe) left over from the  last time we made them. Since I have already posted that recipe I won’t repeat it.   To see that original post with complete recipe and directions click here:  https://goodmotherdiet.com/2013/12/21/grilled-oysters-with-garlic-chipotle-butter/

Oysters4

Jalapeno Mignonette

  • Servings: 3/4 cup
  • Difficulty: easy
  • Print

Jalapeno Mignonette (aka Hog Wash)

1/4 cup seasoned rice vinegar
1/4 cup natural rice vinegar
1 large shallot, peeled and roughly chopped
1 large Jalapeno pepper, seeded and roughly chopped
1/2 bunch of cilantro
juice of 1 lime
  • Put all ingredients in a food processor or blender and process until smooth. For a chunkier mignonette, just dice the shallots, jalapeno and cilantro finely and combine ingredients.  This is mildly spicy, so for more spice, include some or all of the jalapeno seeds.

Oysters6Oysters2

Meatless Monday – Farmer’s Market Pasta & Balsamic Marinated Beets

0

Farmers Market 17

Do you know where your food has been?  Do you care?  I finally got around to checking out the Farmer’s Market at Marin Country Mart in Larkspur (California) and I can’t believe it took me so long.  I have really been missing out! This is an open air market where you can buy gorgeous fresh vegetables, fruit, nuts, wild caught seafood, artisan cheeses, flowers and baked goods, all locally grown and crafted.

Farmers Market

While I perused the various stands, my husband stood in line at the Santa Rosa Seafood stand.

Farmers Market 5Farmers Market 11

It was a beautiful sunny day.   The only problem is that I had a terrible case of buyer indecision.  I wanted everything, even to grind my own flour!   Do I buy gluten free goodies from Flour Craft Bakery or Granola from Café Fanny?  Why didn’t I bring my knives which could really stand to be sharpened?  Why didn’t I learn to knit? (I almost bought the yarn anyway…)

Farmers Market 13 Farmers Market 12

This market is also a great family destination with live music, kid crafts and several hot food stands, including one that specializes in grilled cheese. Yum!  It’s open Saturdays from 9am to 2pm. Click here for a listing of vendors and schedule of events. (http://marincountrymart.com/farmers-market)

Farmers Market 27

Why buy local?
Buying locally-produced food is good for your body, for the earth, and for our local economy.  Because your food doesn’t travel long distances to get to you, it is more nutritious.  Fewer fossil fuels are used in distribution and shipping when you buy local.  Supporting GROWN LOCAL helps keep farming families in business and our dollars in our own communities. (www.buylocalmarin.org )

Farmers Market 26 Farmers Market 9

To find a farmer’s market in your area, check out the USDA National Farmers Market Directory, an interactive site with information on farmer’s markets all over the US.   (http://search.ams.usda.gov/farmersmarkets/)  Here is another great (and more complete) source for finding farmer’s markets, , family farms, and other sources of sustainably grown food in your area http://www.localharvest.org/.

Farmers Market 6 Farmers Market 7

So what did we end up with?  My husband came home with two kinds of oysters (which I will get to on Wednesday so oyster lovers stay tuned).  After much agonizing, I bought a gorgeous bunch of multi-colored beets, purple asparagus (which I couldn’t resist because of the color) and a bag of mixed greens (chard, kale, mustard and a few I don’t recognize).  I also bought Devil’s Gulch cheese from Cowgirl Creamery and Fig and Black Sesame Jam from Blue Chair Farms which made an excellent and simple appetizer.  Just add crackers.

Farmers Market 25I didn’t have any particular dish in mind when I selected these vegetables.  I was buying purely with my senses and allowed myself to be seduced by their glorious colors.  Once home I decided to make a winter version of pasta primavera and serve roasted, marinated beets on the side.  The resulting dish was very colorful and delicious!  Plus I could feel good knowing I was supporting some local hardworking folks.

Farmers Market 4

Fusilli with Braised Greens and Asparagus

  • Servings: 4
  • Difficulty: easy
  • Print

Fusilli with Braised Greens and Asparagus

3/4 pound whole-wheat fusilli
4-6 cups mixed greens (chard, kale, etc), chopped and rinsed
1 bunch asparagus, sliced into 1 or 2 inch pieces
1/3 cup pine nuts
2 tablespoons olive oil (or a combination of butter and olive oil)
4 sliced garlic cloves
1/4 teaspoon red chile flakes
1/2 teaspoon kosher salt
1/2 cup vegetable broth
Freshly shredded parmesan cheese (optional)
Farmers Market 21Farmers Market 22
  • Cook pasta as package directs. Drain and set aside.
  • If your pine nuts are not toasted, heat them in a dry pan over medium heat for a few minutes.  Set aside.
  • Add oil to pan, add garlic and chile flakes.  Cook stirring until fragrant, about a minute.
  • Add asparagus and salt. Cook for a minute or two.
  • Add greens and broth.  Cover and cook until greens are tender, about 5 minutes, stirring several times.
  • Stir in pasta and pine nuts.
  • Top with parmesan cheese (optional)

Farmers Market 24

Balsamic Marinated Beets

  • Servings: 2-4
  • Difficulty: easy
  • Print

Balsamic Marinated Beets

small bunch of beets
1-2 Tbsn olive oil
1 orange (optional)
Marinade/Dressing(see directions below)
Farmers Market 19 Farmers Market 20
  • Cut tops off of beets taking care not to cut into beet.  Leave skin and tails intact.  Wash, dry and place beets in a baking dish (or a large piece of aluminum foil).  Drizzle with olive oil.  Cover with foil and cook for about an hour at 425 degrees.  Larger beets might take longer.  They should be easy to slice with a knife. 
  • Remove from heat and let cool.  Skins will come off easily.  Use a papertowel to keep your hands from getting red.
  • Peel orange and slice crosswise into thick slices.  Section into triangles.
  • Slice beets.  You can marinate them for 30 minutes or overnight, or you can arrange them on a plate, top with orange sections and drizzle with balsamic dressing.

Marinade:  Combine 1/4 cup balsamic vinegar, 1/4 cup red wine vinegar, 1/4 cup olive oil, 1 minced shallot, salt and pepper.