Feta, Chili & Lemon Dip

0

Feta Dip1

How about an app to go with that TGIF cocktail?  (And, I’m not talking about an app for your iPhone).  If you’re inviting friends over this weekend, here is a very simple dip that takes less than 5 minutes and just involves throwing all the ingredients into a food processor.  Voila!  Add crackers or veggies and you’ve got a great appetizer.  I found this recipe on Simply Delicious.  It’s easy, quick and very tasty!  The combination of zesty feta cheese with garlic, hot red chili peppers, lemon and fresh mint leaves is surprisingly delicious.  I used one chili pepper with the seeds and it was pretty spicy, so you can lessen the heat by not including the seeds and increase the heat by adding a second chili pepper. You can also add more olive oil if you want a thinner dip for dipping rather than spreading. Happy Friday!

Feta Dip10

Feta, Chili and Lemon Dip

  • Servings: 6-8
  • Difficulty: easy
  • Print

 •6 oz feta cheese
•1 garlic clove, peeled
•zest and juice from 1 lemon
•1-2 red chilies, roughly chopped
•1/4 cup fresh mint leaves
•pepper to taste
•½ cup extra virgin olive oil

Feta Dip9

  • Put garlic, lemon zest chilies and mint in a food processor and blend until finely minced.

Feta Dip8

  •  Add the feta to the food processor and blend until everything is combined.

Feta Dip7

  •  With the motor running, pour in the olive oil and blend until the dip is smooth and the desired consistency.

Feta Dip6

  •  Transfer the dip to a serving bowl and serve.  Garnish with mint. Drizzle with more olive oil if desired.

Feta Dip3


Wheatless Wednesday – Grilled Avocado Caprese Salad

2


Grilled Avocado Caprese Salad10

Insalata Caprese, the ubiquitous tomato, mozzarella, and basil salad, is one of the most popular dishes in summer when tomatoes are in season and so, so good.  It also happens to be one of my favorites and a great way to use up extra tomatoes.  I sometimes include avocado to increase the nutritional value and make it a bit more filling as a main dish.  I must admit that I am on quite a grilling kick this summer which has taken an interesting turn since I am no longer just throwing steaks and burgers on the grill.  I have had to get more creative with ingredients and have started grilling fruits and vegetables that I would not have considered in the past,  including recent dishes,  Grilled Nectarines and Summer Squash with Balsamic Glaze and Grilled Artichoke Mixed Veggie Platter.

Grilled Vegetables1

Grilled Nectarines and Summer Squash with Balsamic Glaze

Grilled Veggies1

Grilled Artichoke Mixed Veggie Platter.

So when it came to making my first Caprese Salad of the summer, I decided to give it a twist by using the tiny sized mozzarella ‘Pearls’ and cherry tomatoes to top a grilled avocado.  Grilling the avocado gives it a wonderfully warm and creamy, slightly smoky flavor. In addition to being delicious, avocado is a great addition to any diet for health and weight loss.  “According to a study by the Haas Avocado Board, adding avocado to a lunch meal caused a 23-percent increase in satisfaction and a 28-percent decreased desire to eat over the next five hours after eating, compared with the avocado-free lunch. And, over a three-hour period, adding avocado to lunch meant a 26-percent increase in satisfaction and 40-percent decreased desire to eat later on.  Half an avocado has about 112 calories and 6 grams of fiber. Avocados are filled with heart-healthy fats, protein, potassium, and vitamins (such as B6, C, K, and B)” (Glamour.com)  So next time you have the grill going, throw on a couple of avocados.  You’ll like it!

Grilled Avocado Caprese Salad5

Grilled Avocado Caprese Salad

  • Servings: 2
  • Difficulty: easy
  • Print

1 ripe but firm avocado
2 Tbsn olive oil
1 tsp lemon juice
1/2 cup ciliglene, tiny fresh mozzarella balls (or larger mozzarella ball, diced)
1/2 cup cherry tomatoes, sliced in half
1/4 cup fresh basil, sliced crosswise into strips (chiffonade)
1 Tbsn balsamic vinegar
salt and pepper to taste

Grilled Avocado Caprese Salad

  • Using a sharp knife, slice avocado in half lengthwise.  To remove the pit easily, strike the pit with the sharp blade and twist slightly.  The pit should pop right out.

Grilled Avocado Caprese Salad3

  • Brush the cut sides of the avocado with olive oil, lemon juice and season with salt and pepper.  Place cut side down on a hot grill and grill for about 5 minutes, or until you see nice grill marks.  You can place the avocados on the grill perpendicular or horizontal, depending on how you want the grill marks to look.


Grilled Avocado Caprese Salad12

  • Or you can get fancy and grill diagonally

.Grilled Avocado Caprese Salad11

  • Get crisscross grill marks by turning the avocado 90 degrees half way through.

Grilled Avocado Caprese Salad13

  • Remove avocados from heat and let cool slightly.

Grilled Avocado Caprese Salad8

  • Place each avocado half on a plate and fill with tomatoes, mozzarella and basil, divided between the two.
  • Drizzle with olive oil and balsamic vinegar

Grilled Avocado Caprese Salad7

Grilled Avocado Photo Credits:

1) Horizontal- http://www.foodandstyle.com

2) Diagonal- http://www.glamour.com/health-fitness

3) Criss-Cross- http://www.grillinfools.com

Meatless Monday – Eggplant Parm Minis

7

Eggplant Parm5

“I enjoy cooking with wine and sometimes I put it in the food.” – Julia Child.

I’m not sure Julia Child would have appreciated Good Mother Diet as she was quite the meat lover and on her cooking show she was always throwing raw meat around or making raw chickens dance, but I can like her anyway as she was ground breaking in her approach to cooking.  She had a no nonsense approach in the kitchen and a great sense of humor.  In response to critics who thought she used too much butter,  she said “We should enjoy food and have fun. It is one of the simplest and nicest pleasures in life.”  I can certainly agree with her on that!

Eggplant Parm1

Eggplant is considered one of the worlds healthiest foods and it has a meaty texture that makes it a good substitute for meat.  Globe eggplants, in particular, are best if they are salted and drained (known as “degorging”) before cooking, to soften them and to reduce the amount of fat absorbed during cooking.  Raw eggplant can absorb an incredible amount of oil which adds unnecessary calories and fat.  Eggplant is naturally low fat and low carb.   Salting also removes any bitterness from the eggplant.

Eggplant Parm16

I spotted this eggplant recipe on Kalyns Kitchen and loved the simplicity.  It is inspired by Julia’s original recipe for what she calls Eggplant Pizza in her cookbook,  From Julia Child’s Kitchen.  Rather than making a traditional Eggplant Parmesan where the eggplant is breaded and fried before baking with layers of sauce and cheese, this version is grain free and brushed with olive oil and herbs before baking.  Slicing the eggplant into thick circles and making individual portions makes it very easy to serve.  I made this dish for a potluck where we needed to serve a lot of people, so I doubled the recipe. Needless to say, I came home with an empty platter!  I love a homemade sauce (and not just because it makes my kitchen smell divine) but you can skip that step and use any sauce you like from a jar as a shortcut.  I loved this recipe, which is not fussy but really delicious, and I will definitely make it again. Next time I’m hoping for leftovers!   Thanks Julia!

Julia-Child-Quotes

Photo Credit:  http://www.werecommend.com

Eggplant Parm Minis

  • Servings: 4
  • Difficulty: easy
  • Print

1 globe eggplant
1 T salt
2 T olive oil
2 tsp. dried Italian seasoning
10 large basil leaves, cut in chiffonade strips
1/2 cup freshly Parmesan
1/2 cup grated mozzarella
red pepper flakes(optional)

Sauce:
1 Tbsn extra-virgin olive oil
3-4 large garlic cloves, chopped
1 can (14.5 oz.) diced tomatoes with liquid (or 2 cups peeled and diced fresh tomatoes)
1/4 tsp. dried oregano (or1 Tbsn fresh oregano, minced)
1 Tbsn fresh basil, minced
salt and pepper to taste

  • Slice eggplant into 3/4 inch thick slices (trying to make them the same thickness to insure even cooking.) Put the eggplant pieces on a double layer of paper towels and sprinkle both sides generously with salt. Let the eggplant sit with the salt on it for 20- 30 minutes to draw out the liquid.

Eggplant Parm2

  • While the eggplant sits, make the sauce. Saute the garlic in olive oil until it becomes fragrant.  Add the tomatoes with the juice, oregano and basil and let it cook at a low simmer until it’s thickened.  You can break up the tomatoes with a fork as it softens to make the mixture more sauce like.

Eggplant Parm11

  • After 20- 30 minutes, the eggplant slices should be dotted with drops of water and the paper towels wet.  Wipe the slices  dry with paper towels, which also removes most of the salt.

Eggplant Parm8

  •  Coat the bottom of a baking pan with olive oil and arrange the eggplant slices in a single layer. Brush the tops of the eggplant with olive oil, and sprinkle with oregano, salt and pepper.

Eggplant Parm12

  • Roast the eggplant about 25 minutes in a 375 degree oven.

Eggplant Parm6

  • Thinly slice the fresh basil into chiffonade strips.  This is easily done by stacking the leaves and slicing into thin strips.

Eggplant Parm10

  •  Combine Parmesan and mozzarella. After 25 minutes remove eggplant from the oven. Spread a few tablespoons of sauce on the top of each eggplant slice.

Eggplant Parm13

  • Place several slices of basil on each slice.

Eggplant Parm14

  • Top with a generous amount of cheese and sprinkle with red pepper flakes, if using.

Eggplant Parm15

  • Turn oven to broil and cook until cheese melts and is slightly browned.

Eggplant Parm18

  • Remove from oven and sprinkle with more fresh basil, if desired

Eggplant Parm5


Wheatless Wednesday – Maine Lobster Bake

0

Lobster Bake14

Maine is famous for it’s lobsters and summer is not considered complete here without at least one old fashioned lobster bake.  Traditional lobster dinners include lobster with drawn butter, corn on the cob and steamers (Ipswich clams) and sometimes potatoes or eggs, often served on these inexpensive, but iconic, blue platters that mimic retro diner tablecloths.   I tried lobster for the first time on my first trip to Maine, way back when my husband and I were just dating.  He went to summer camp in Maine as a kid and he has many fond memories (and good friends) and still loves to come here.   I’m pretty sure he brought me up here all those years ago as a relationship test, which luckily I passed with flying colors.  I learned how to eat lobster, waterskied in Bear Pond and slept on a cot in one of the old cabins, three actions which, I’m sure, made me marriage worthy.  My three sons followed in their father’s footsteps and consider themselves Wigwammers to the core, first as campers, then as counselors.    It’s no coincidence that we have a house across the lake from Camp Wigwam and come to Maine as often as possible.  It’s a little slice of heaven on earth.

Lobster Bake16

We were lucky enough to be invited to an authentic Maine Lobster Bake that was catered by our friend, Tom DeLois.  He provided and prepared everything, freshly procured that morning, including the seaweed which they gathered by boat from the ocean.  I was not involved in the preparations in any way, except for taking lots of pictures to document the process, which is simple but takes some effort.  It’s also a great way to feed a large group in a casual but festive manner.

Lobster Bake2

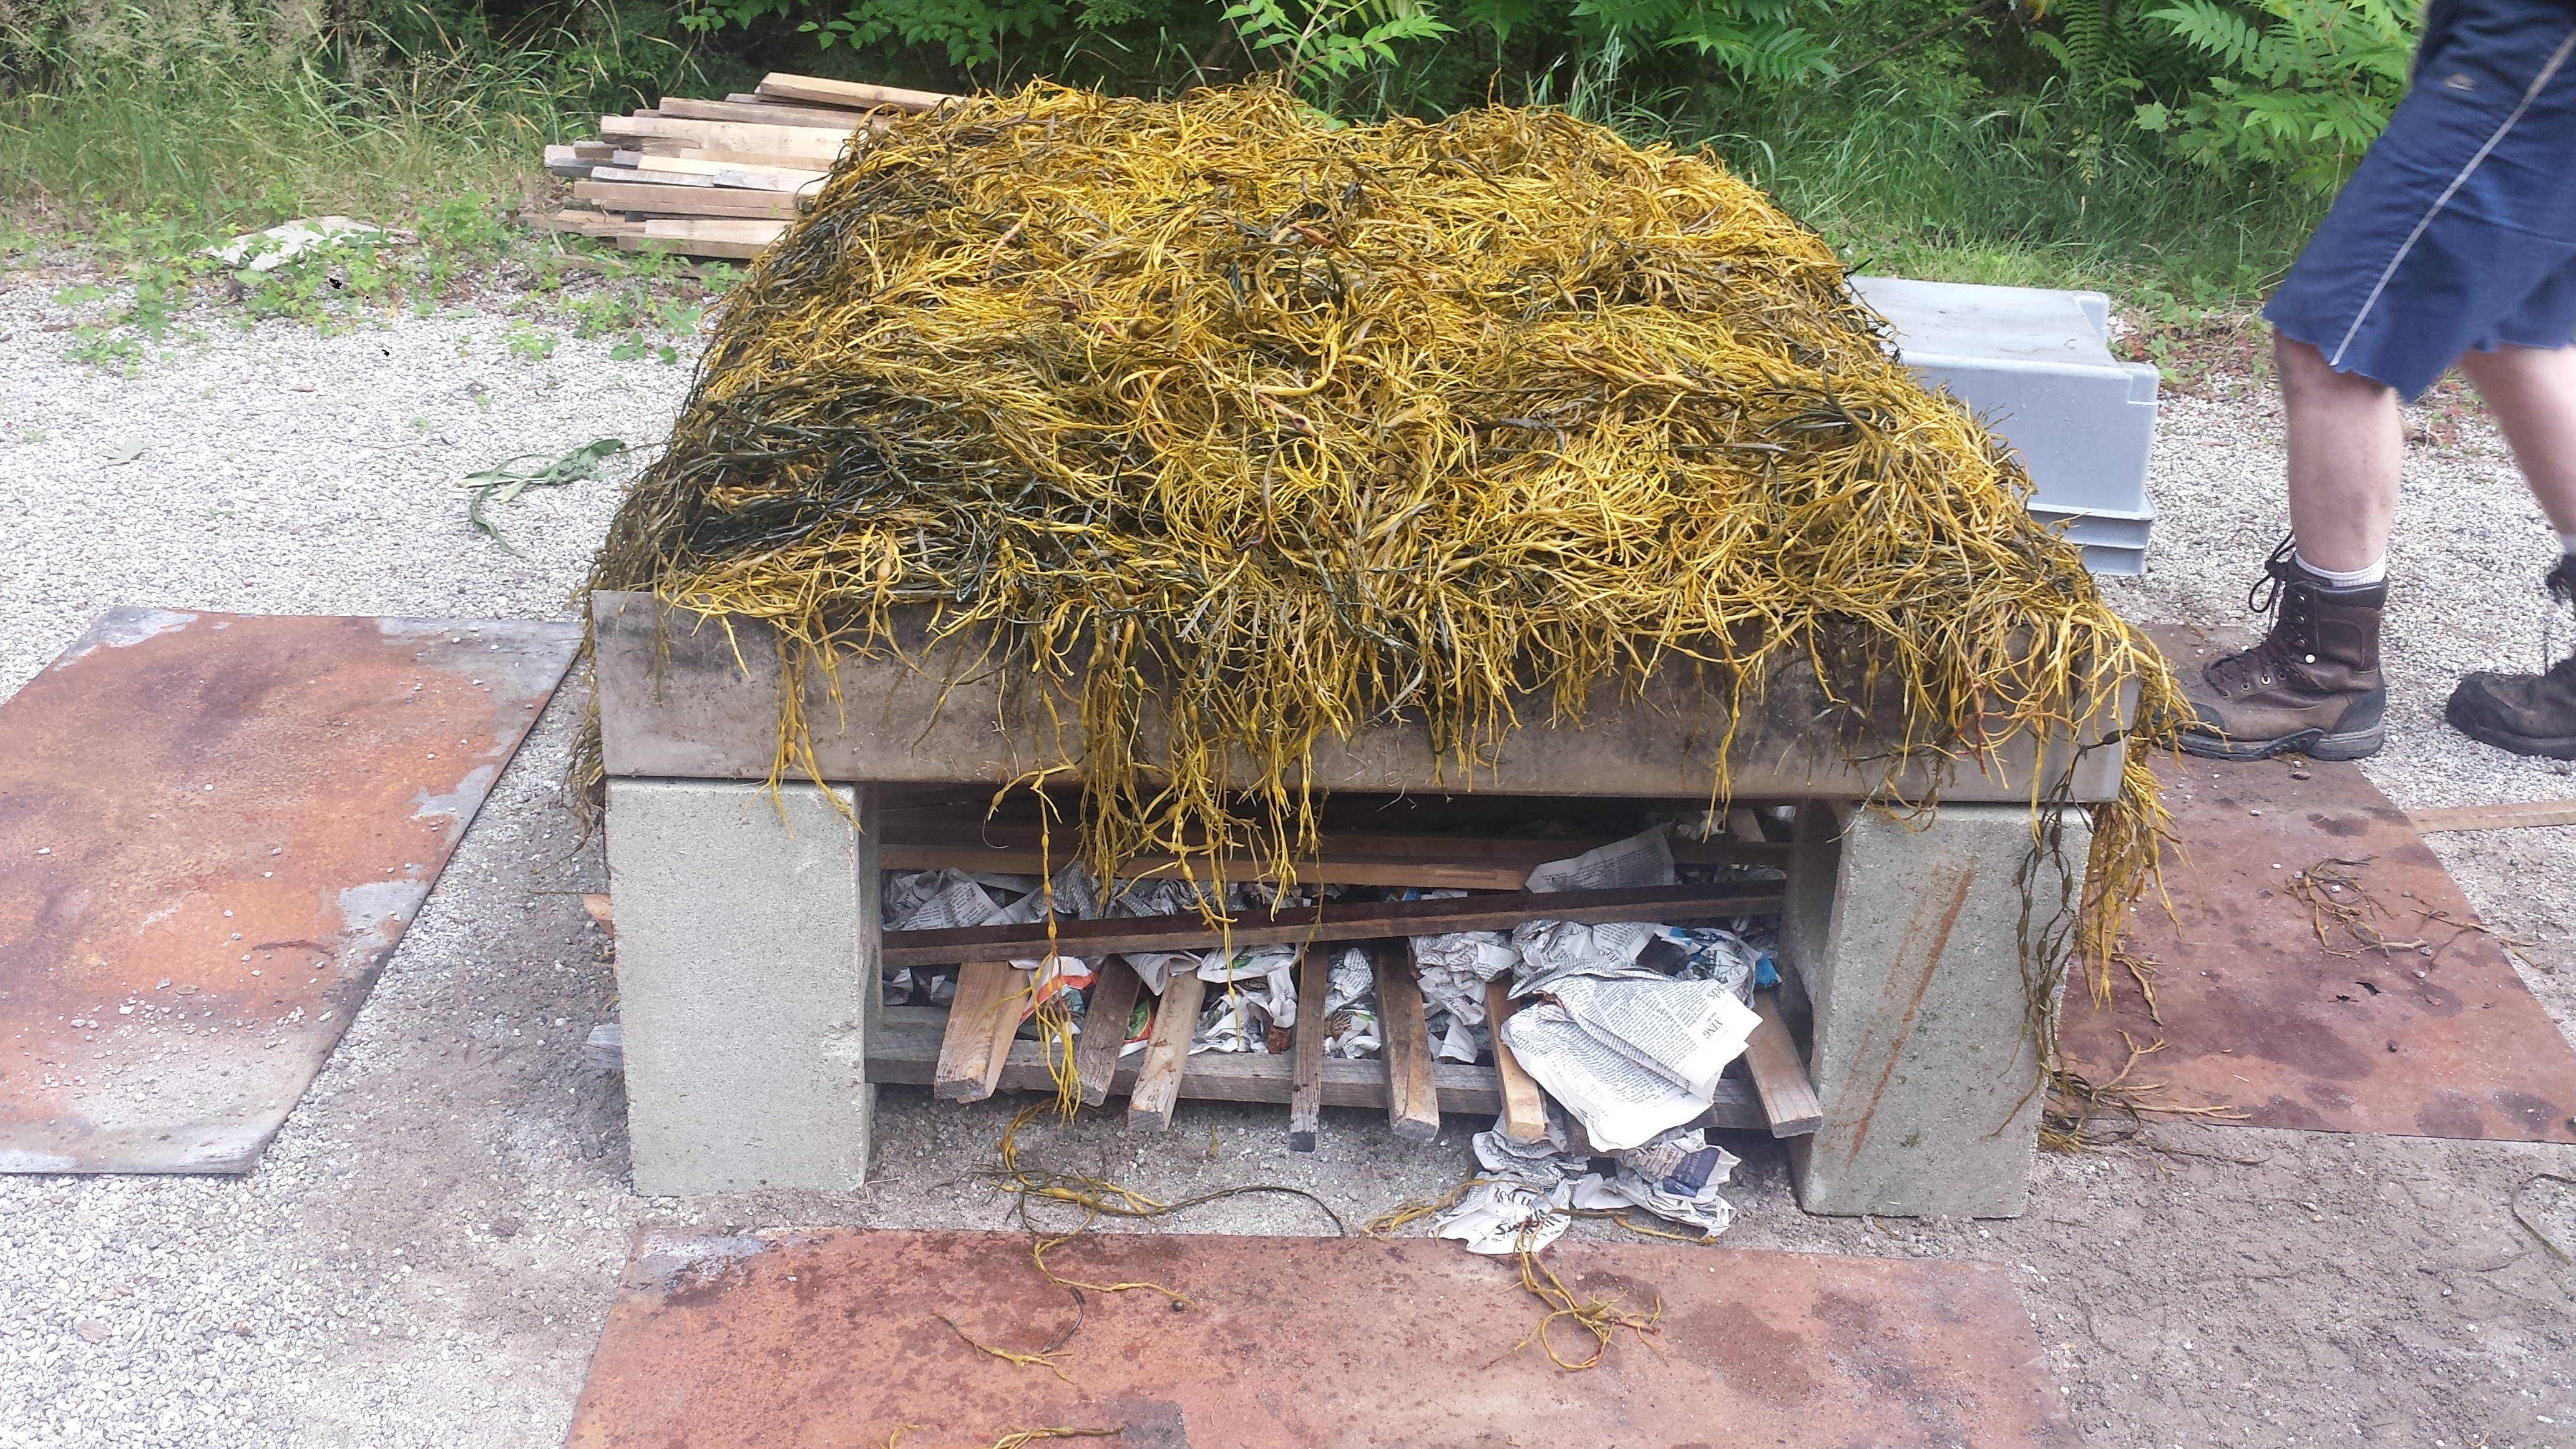
This technique can easily be done on the beach but we used a flat gravel driveway.  Just use something to elevate the cooking surface, a flat metal sheet or galvanized tub.  Layer your chosen ingredients with seaweed and  light the fire.  Tom and his crew were veterans and really knew what they were doing.  I have to admit it was nice to have someone else take care of dinner…

Lobster Bake5

In an effort to minimize damage to the area, they cleared the gravel down to the bare dirt, then set up the cooking area with four concrete blocks and a metal tray.  They stacked layers of wood and newspaper.  The four metal sides(on the ground in the photo) are to block the wind if necessary.

Lobster Bake1

The first layer is wet seaweed which they collected themselves from the ocean.

Lobster Bake6

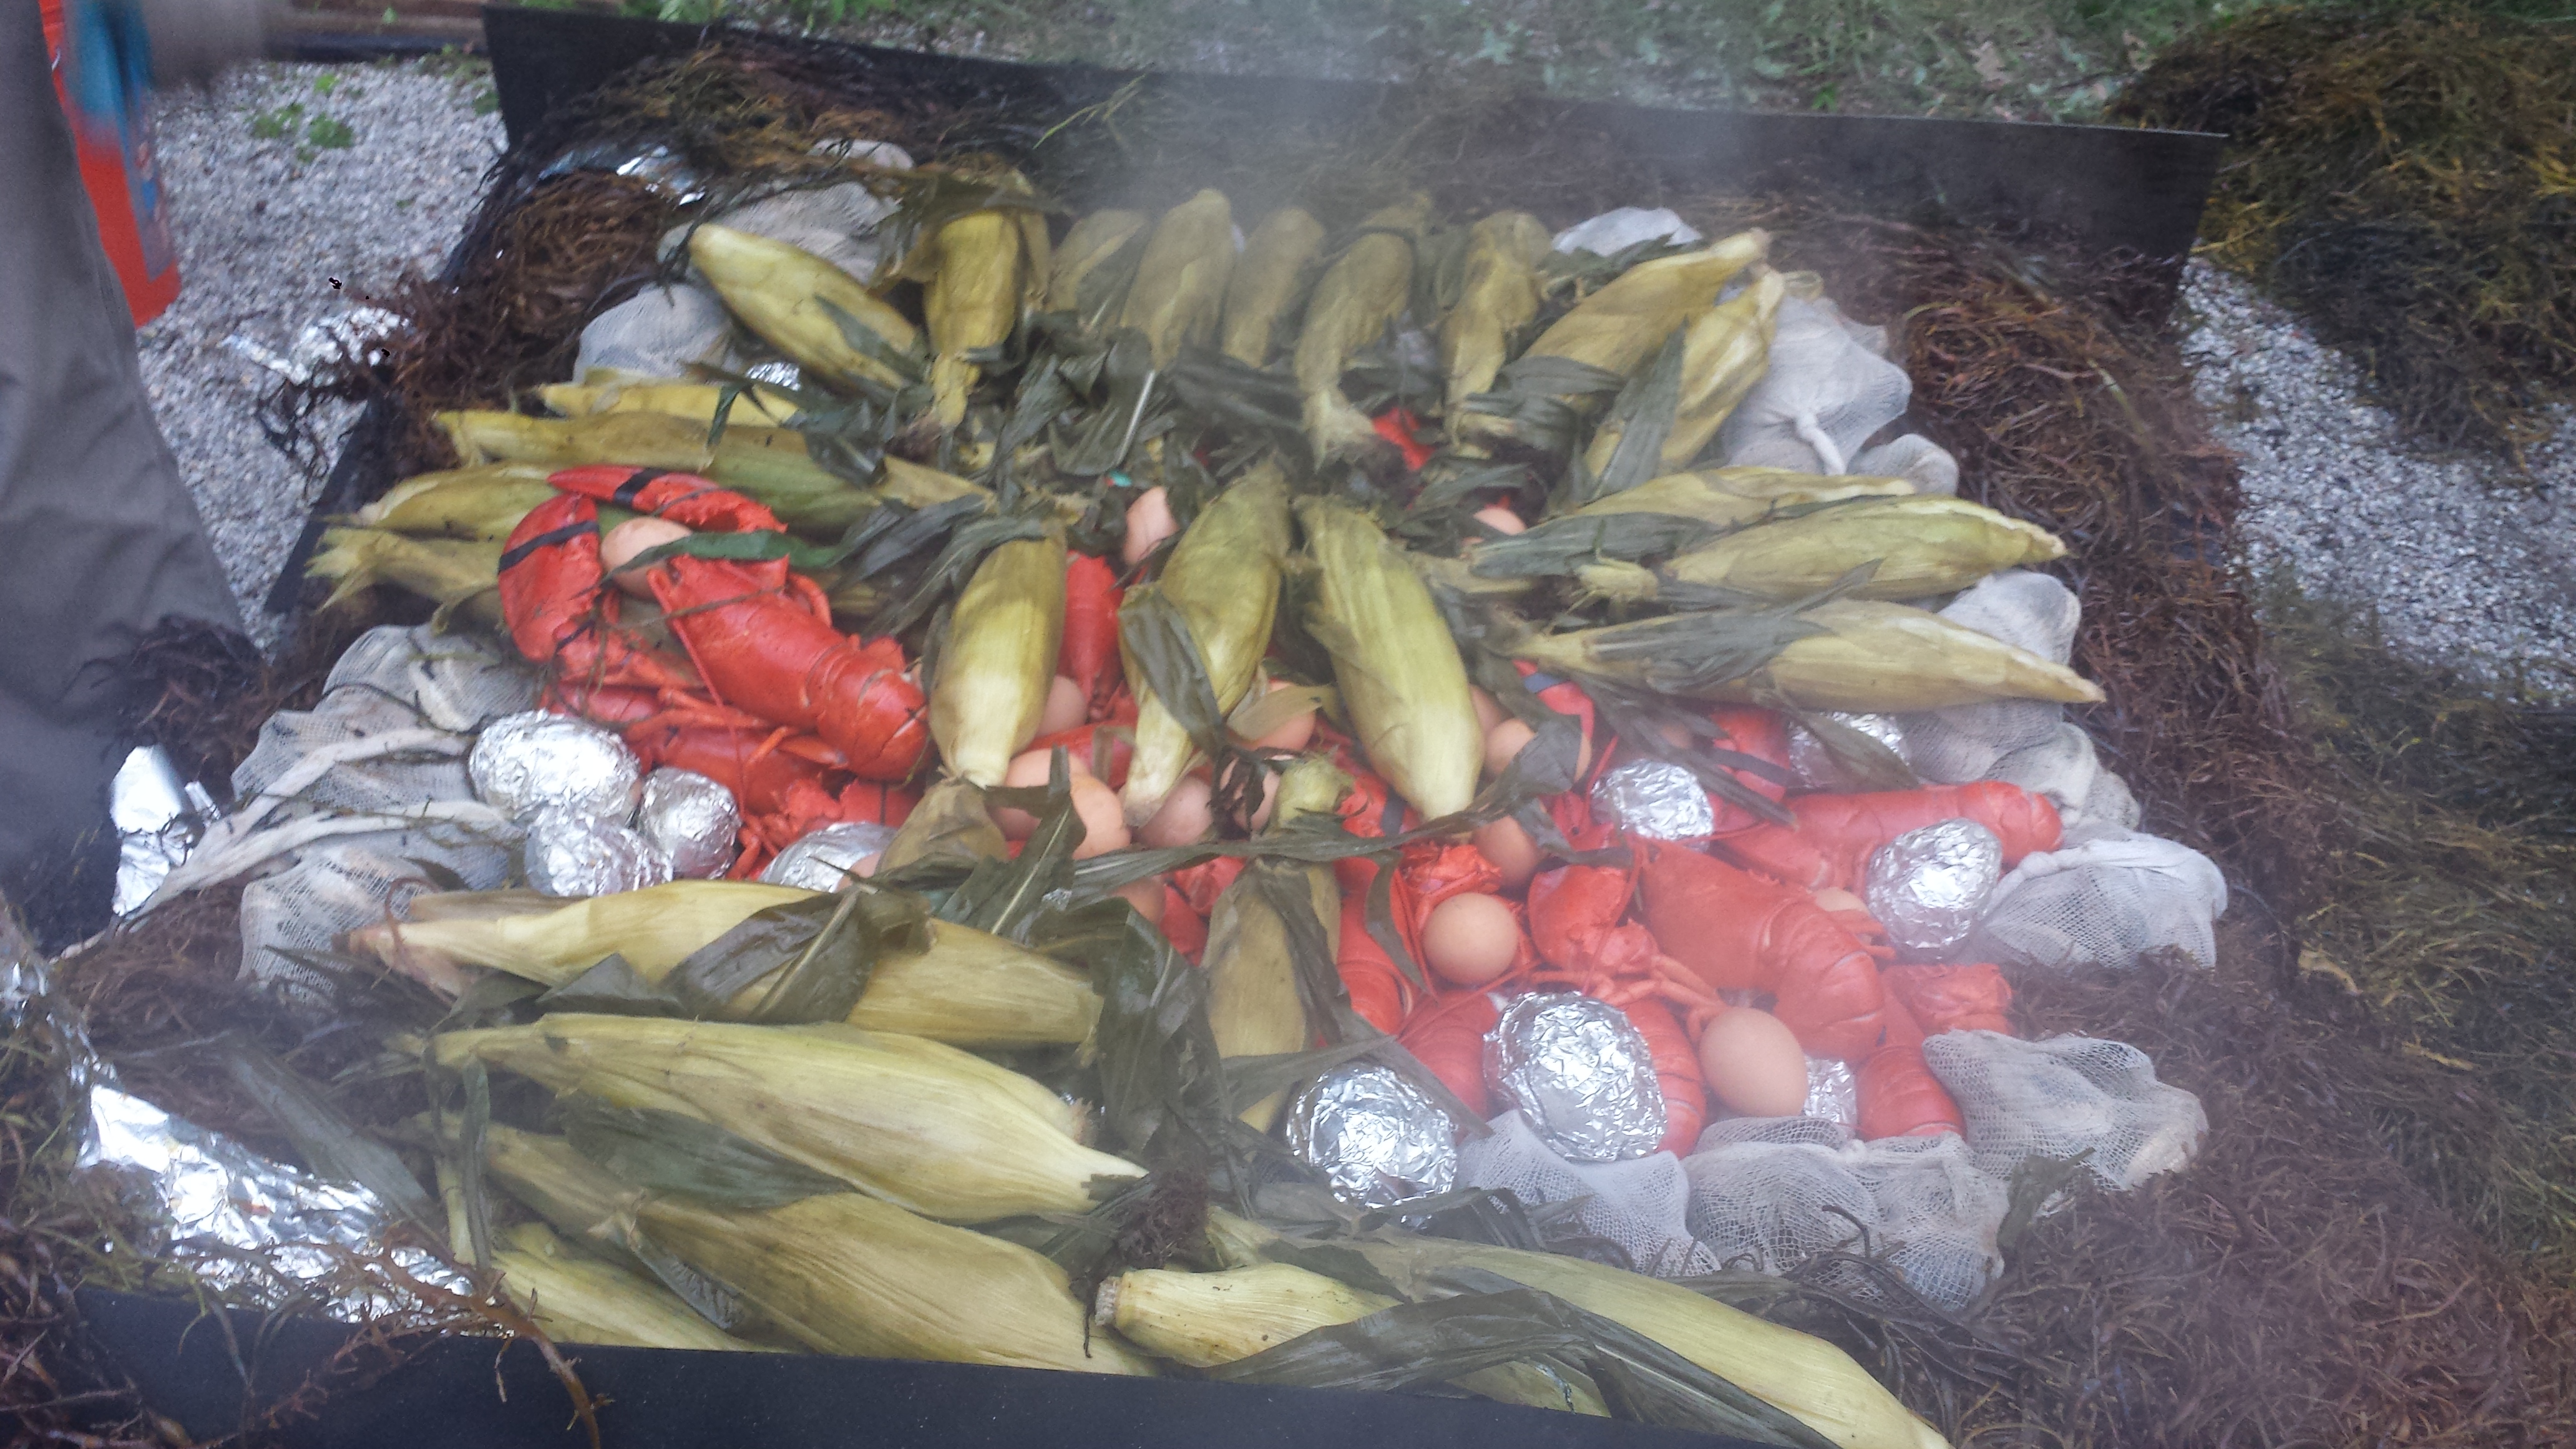
Next is bags of clams (steamers), lobsters and foil wrapped red skinned potatoes.

Lobster Bake7

Topped with raw eggs and corn on the cob.

Lobster Bake8

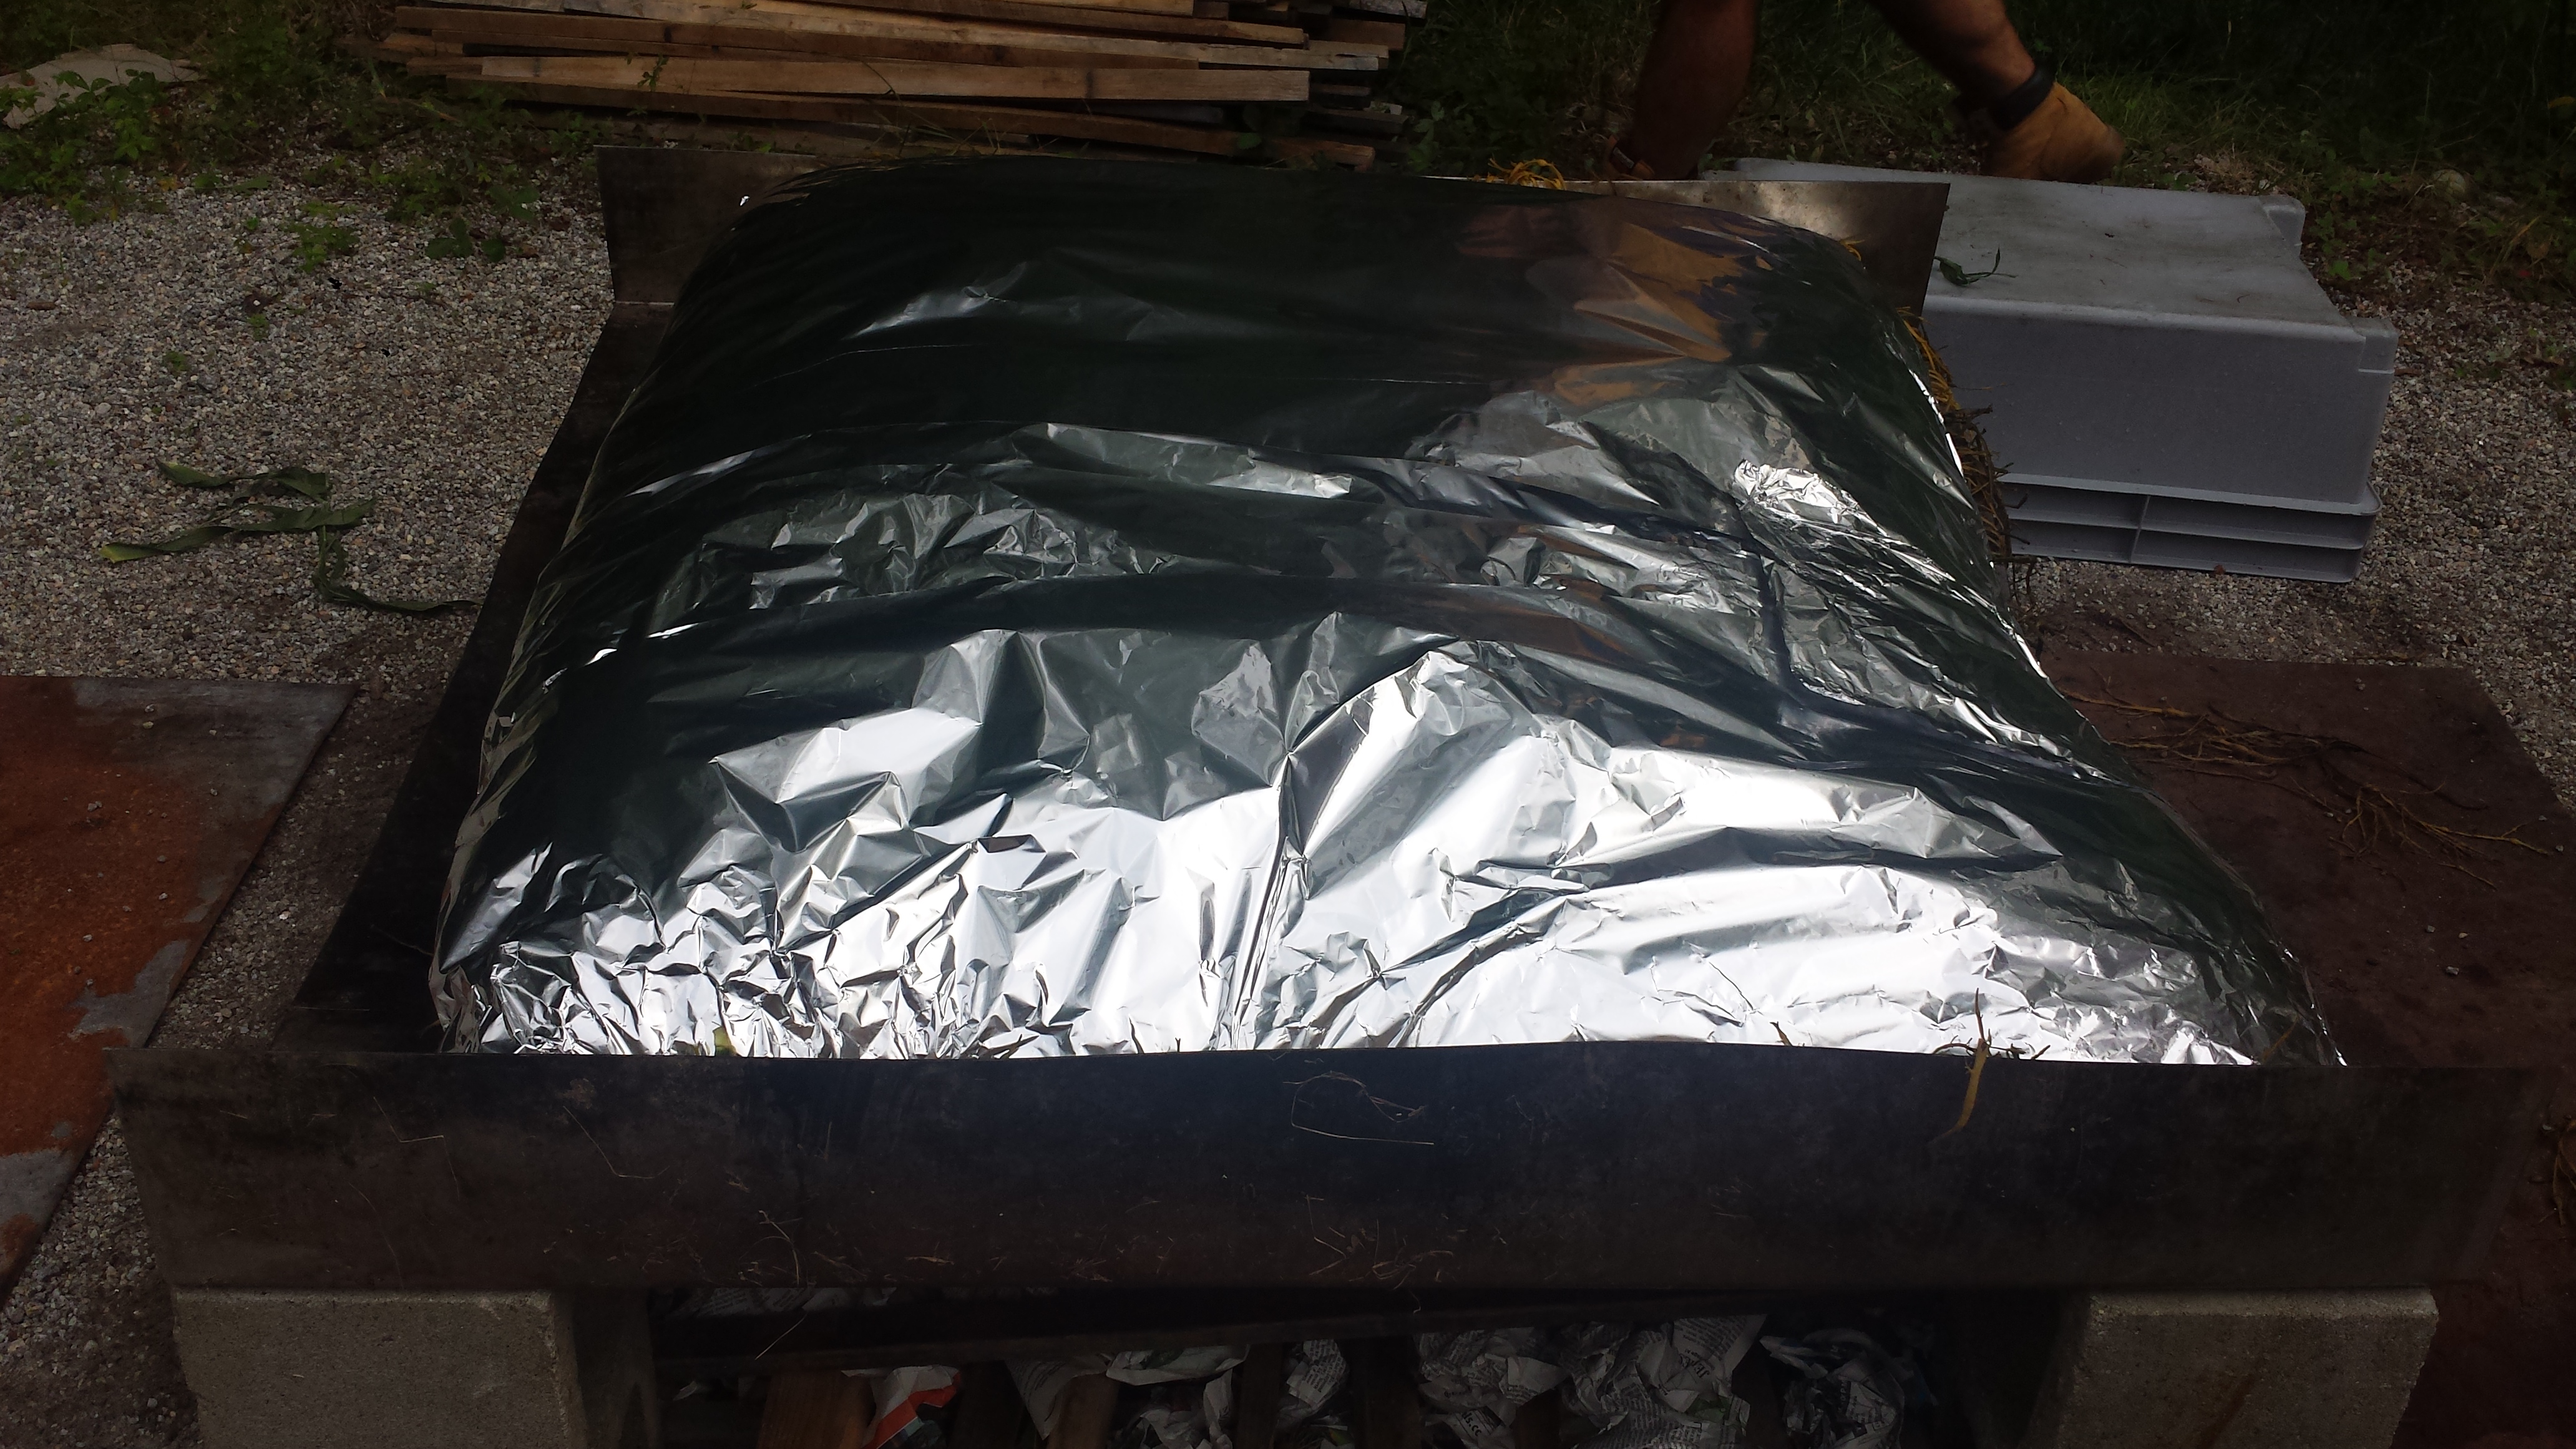
Wrap everything tightly with aluminum foil.

Lobster Bake9

Finish with another thick layer of wet seaweed.

Lobster Bake4

Light the fire and cook about 45 minutes.  TIP:  When the eggs are hard cooked, you know it’s done.

Lobster Bake10

The unveiling…

Lobster Bake18

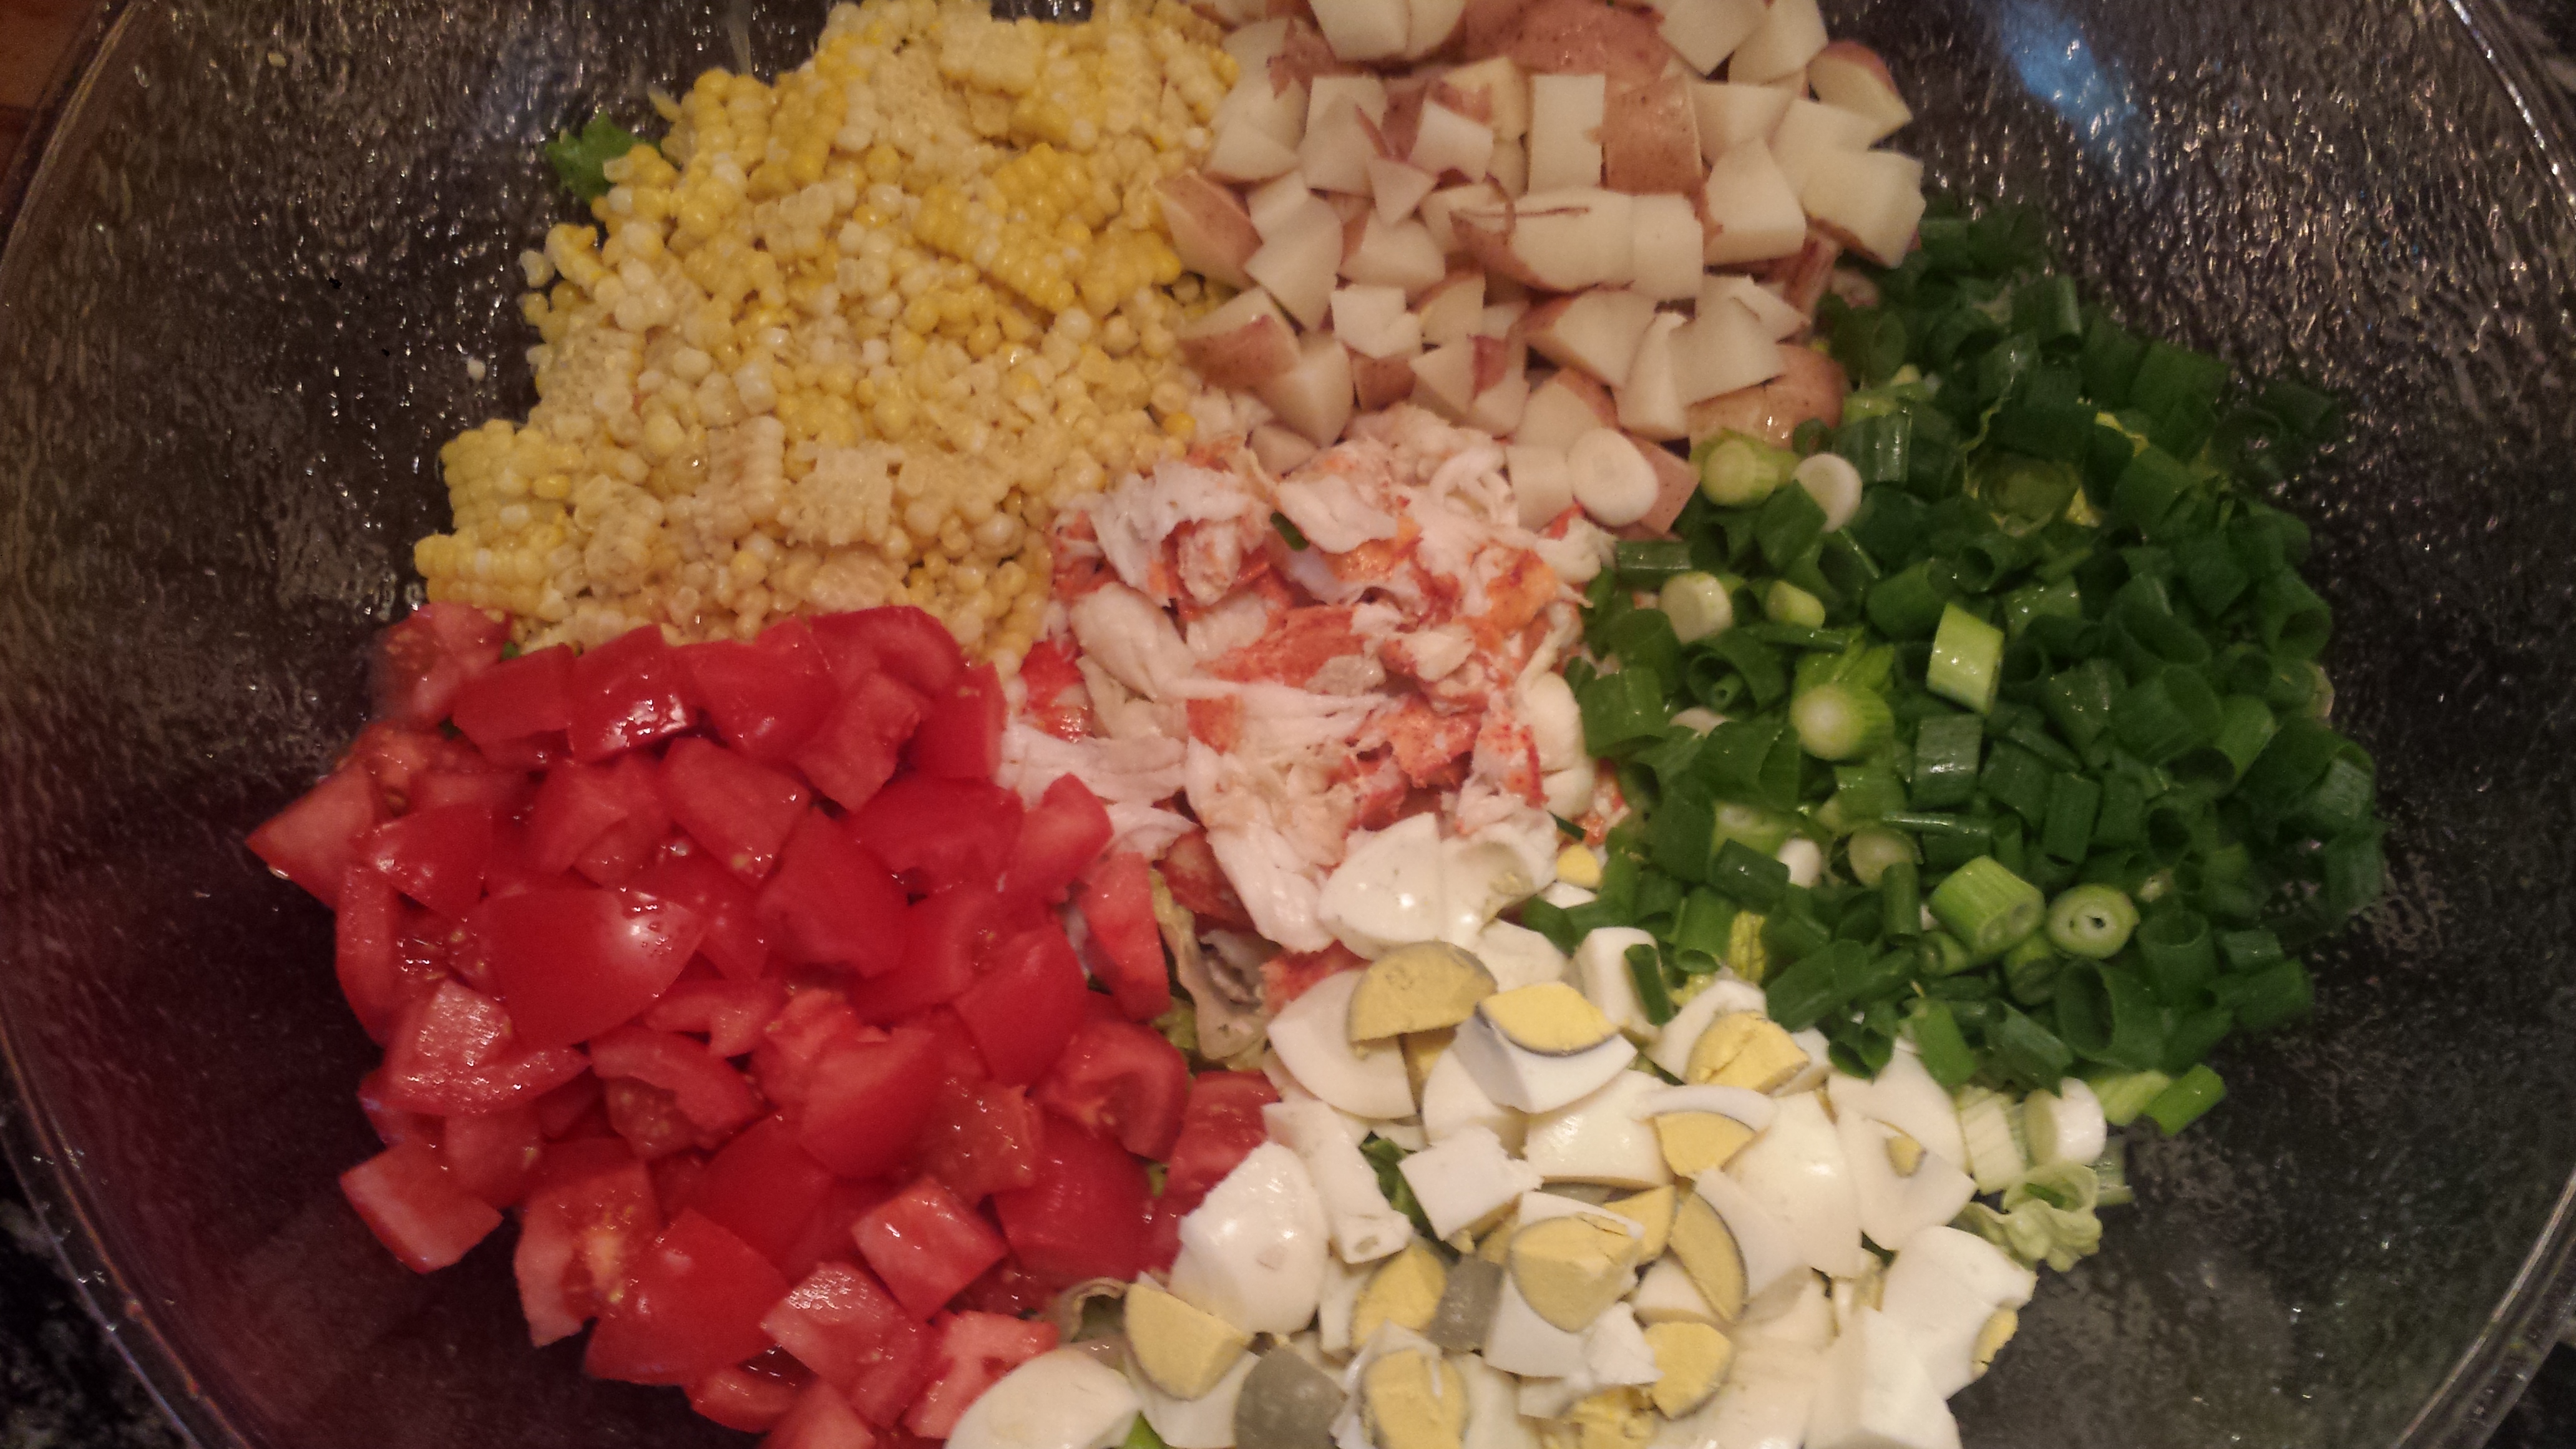
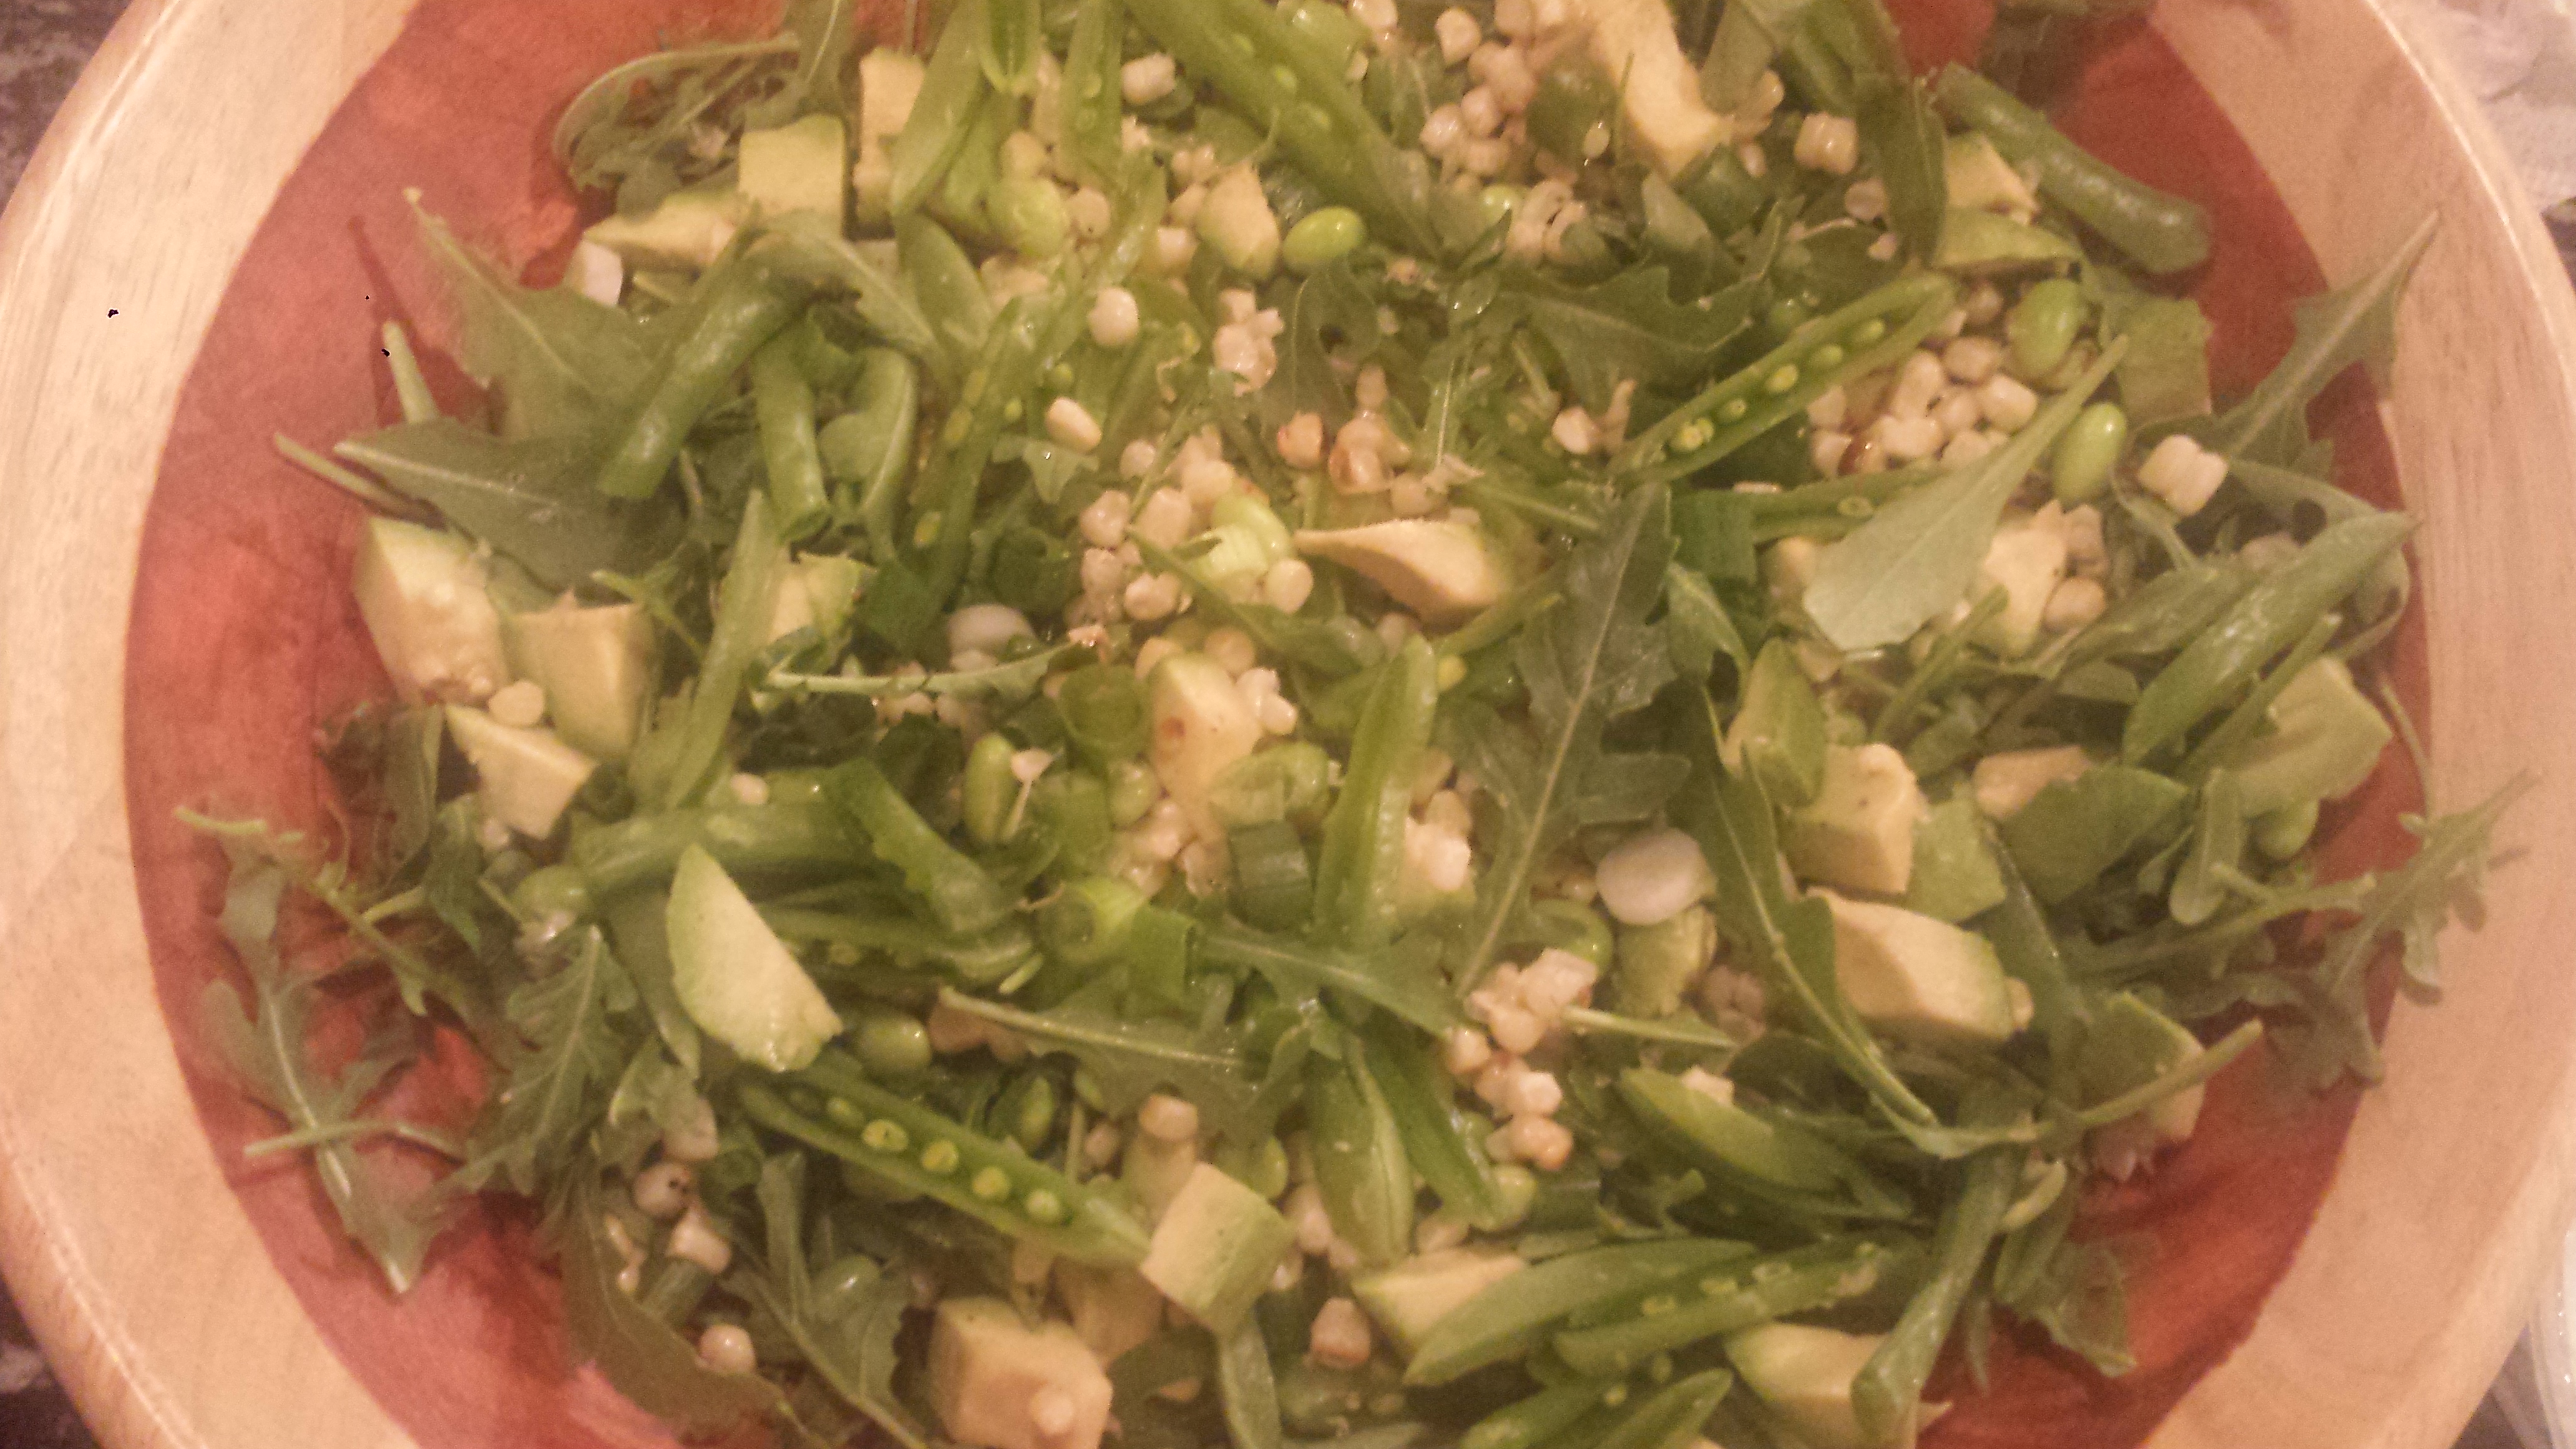
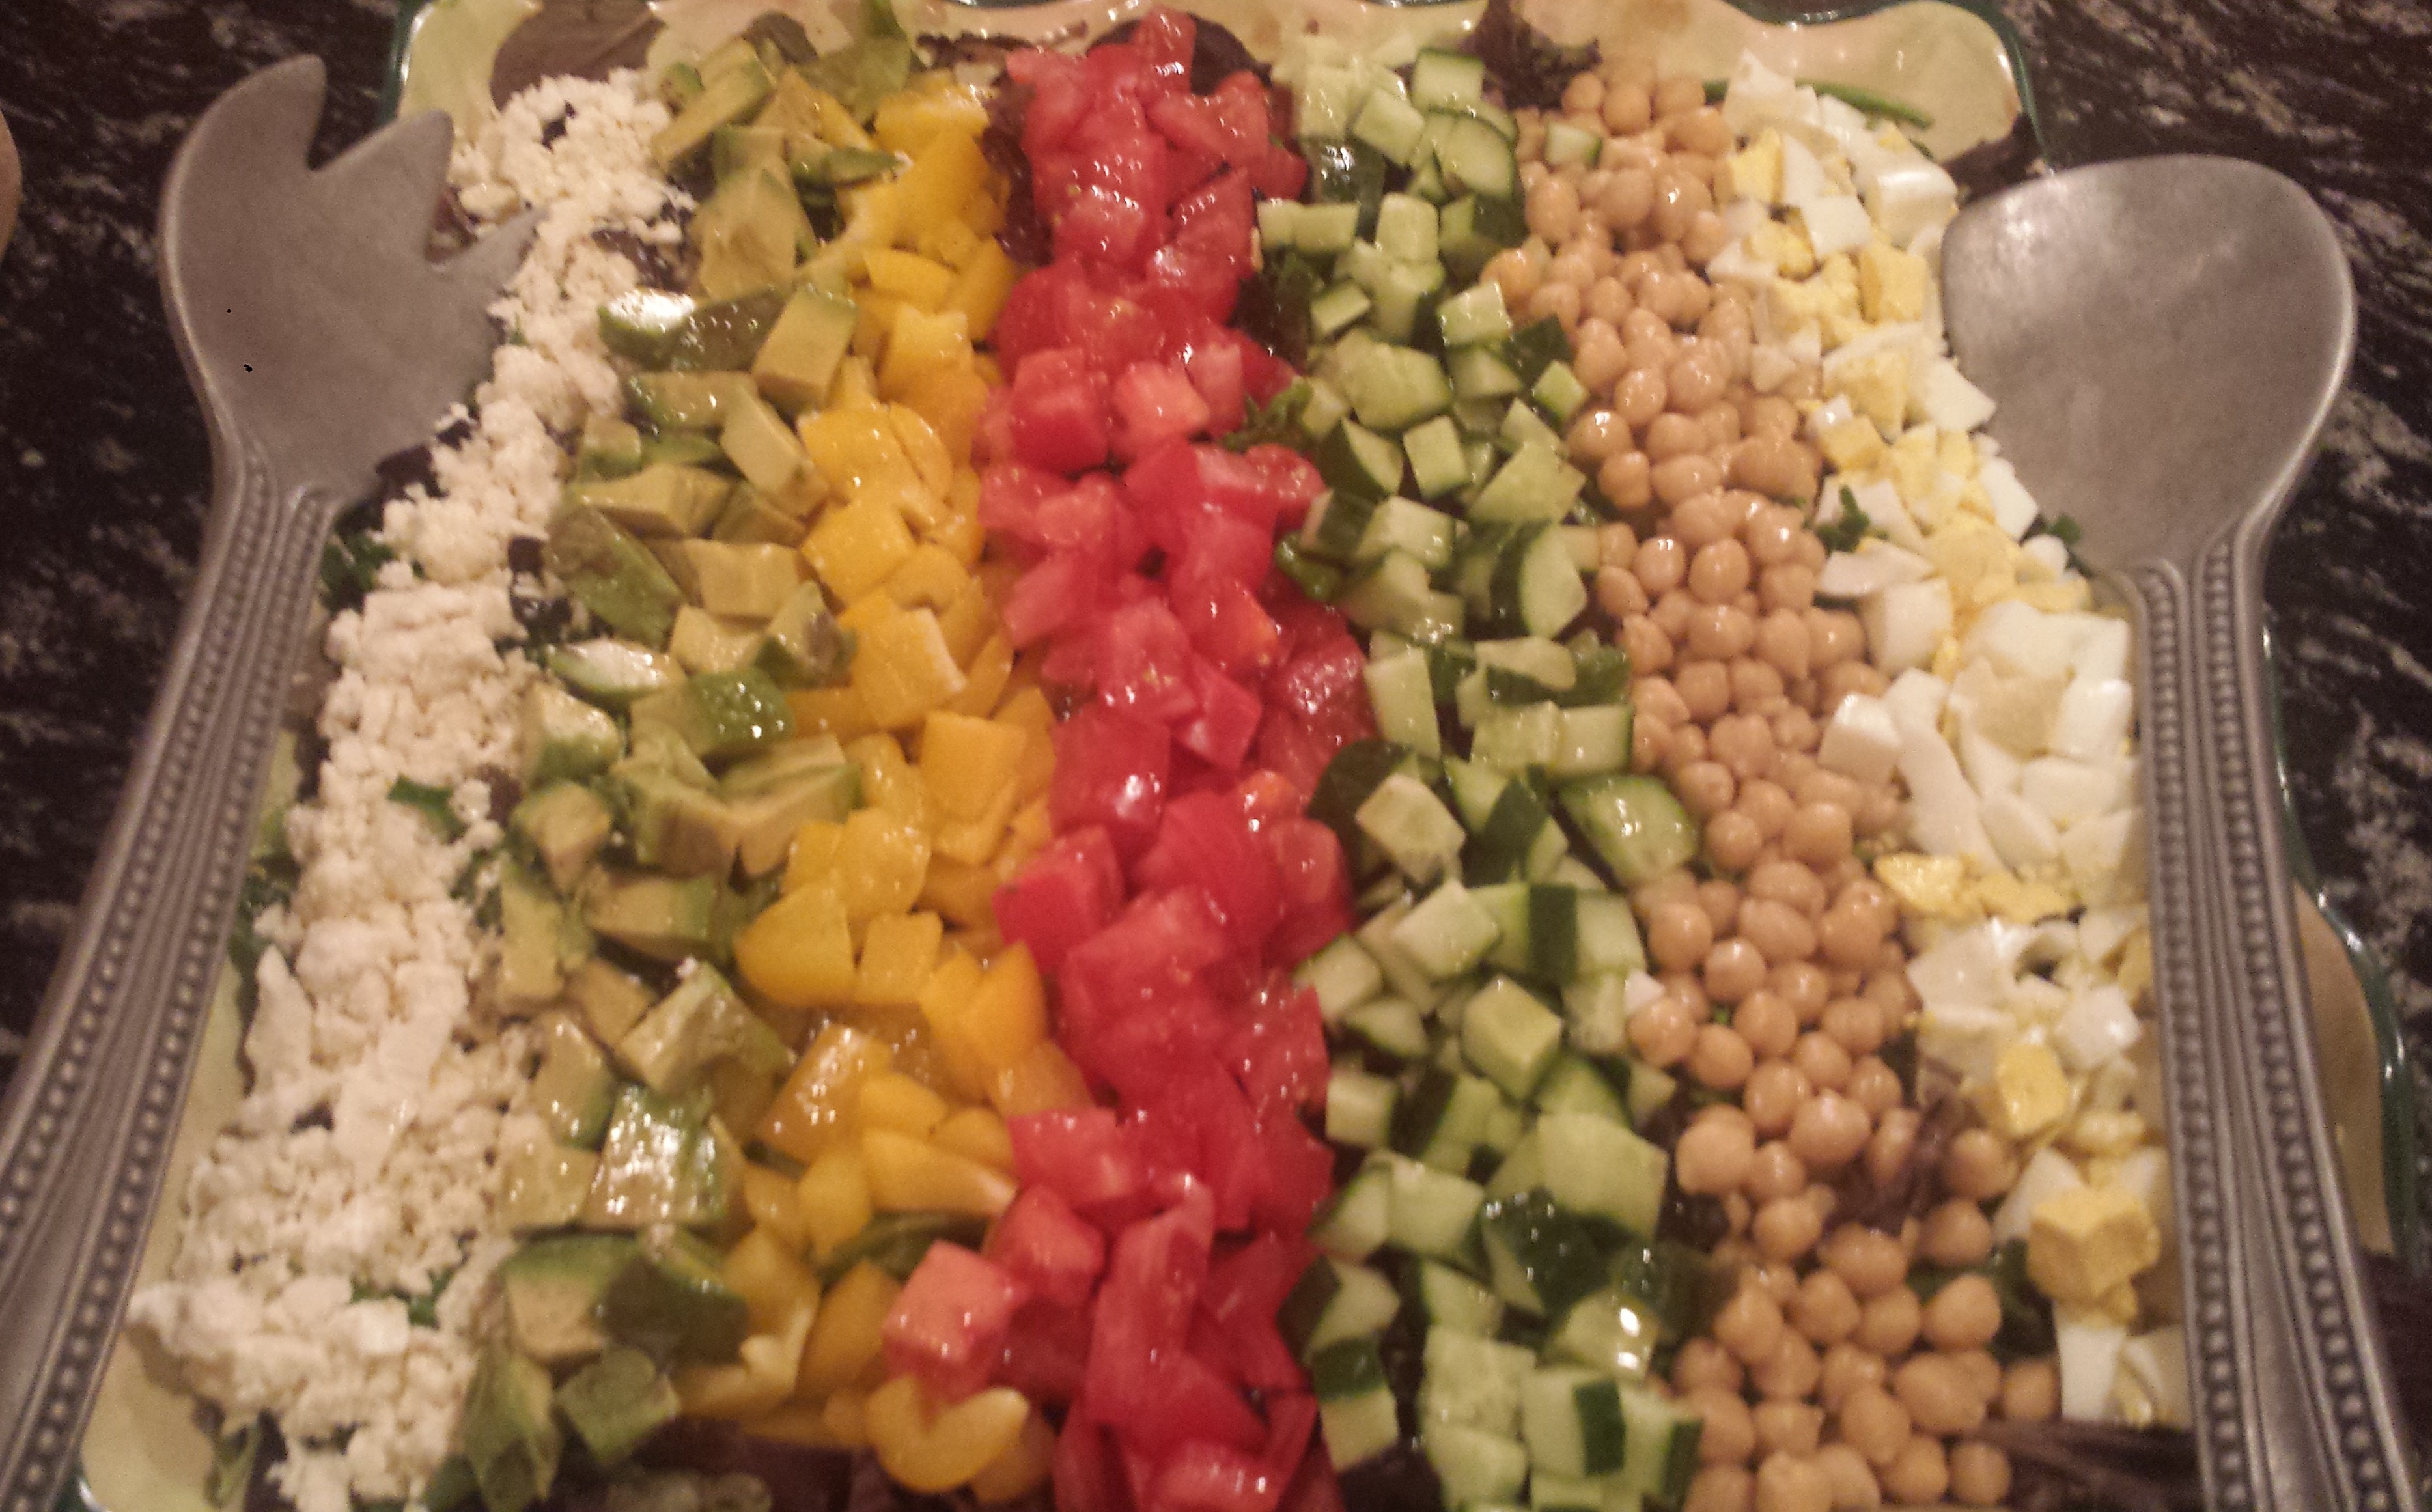
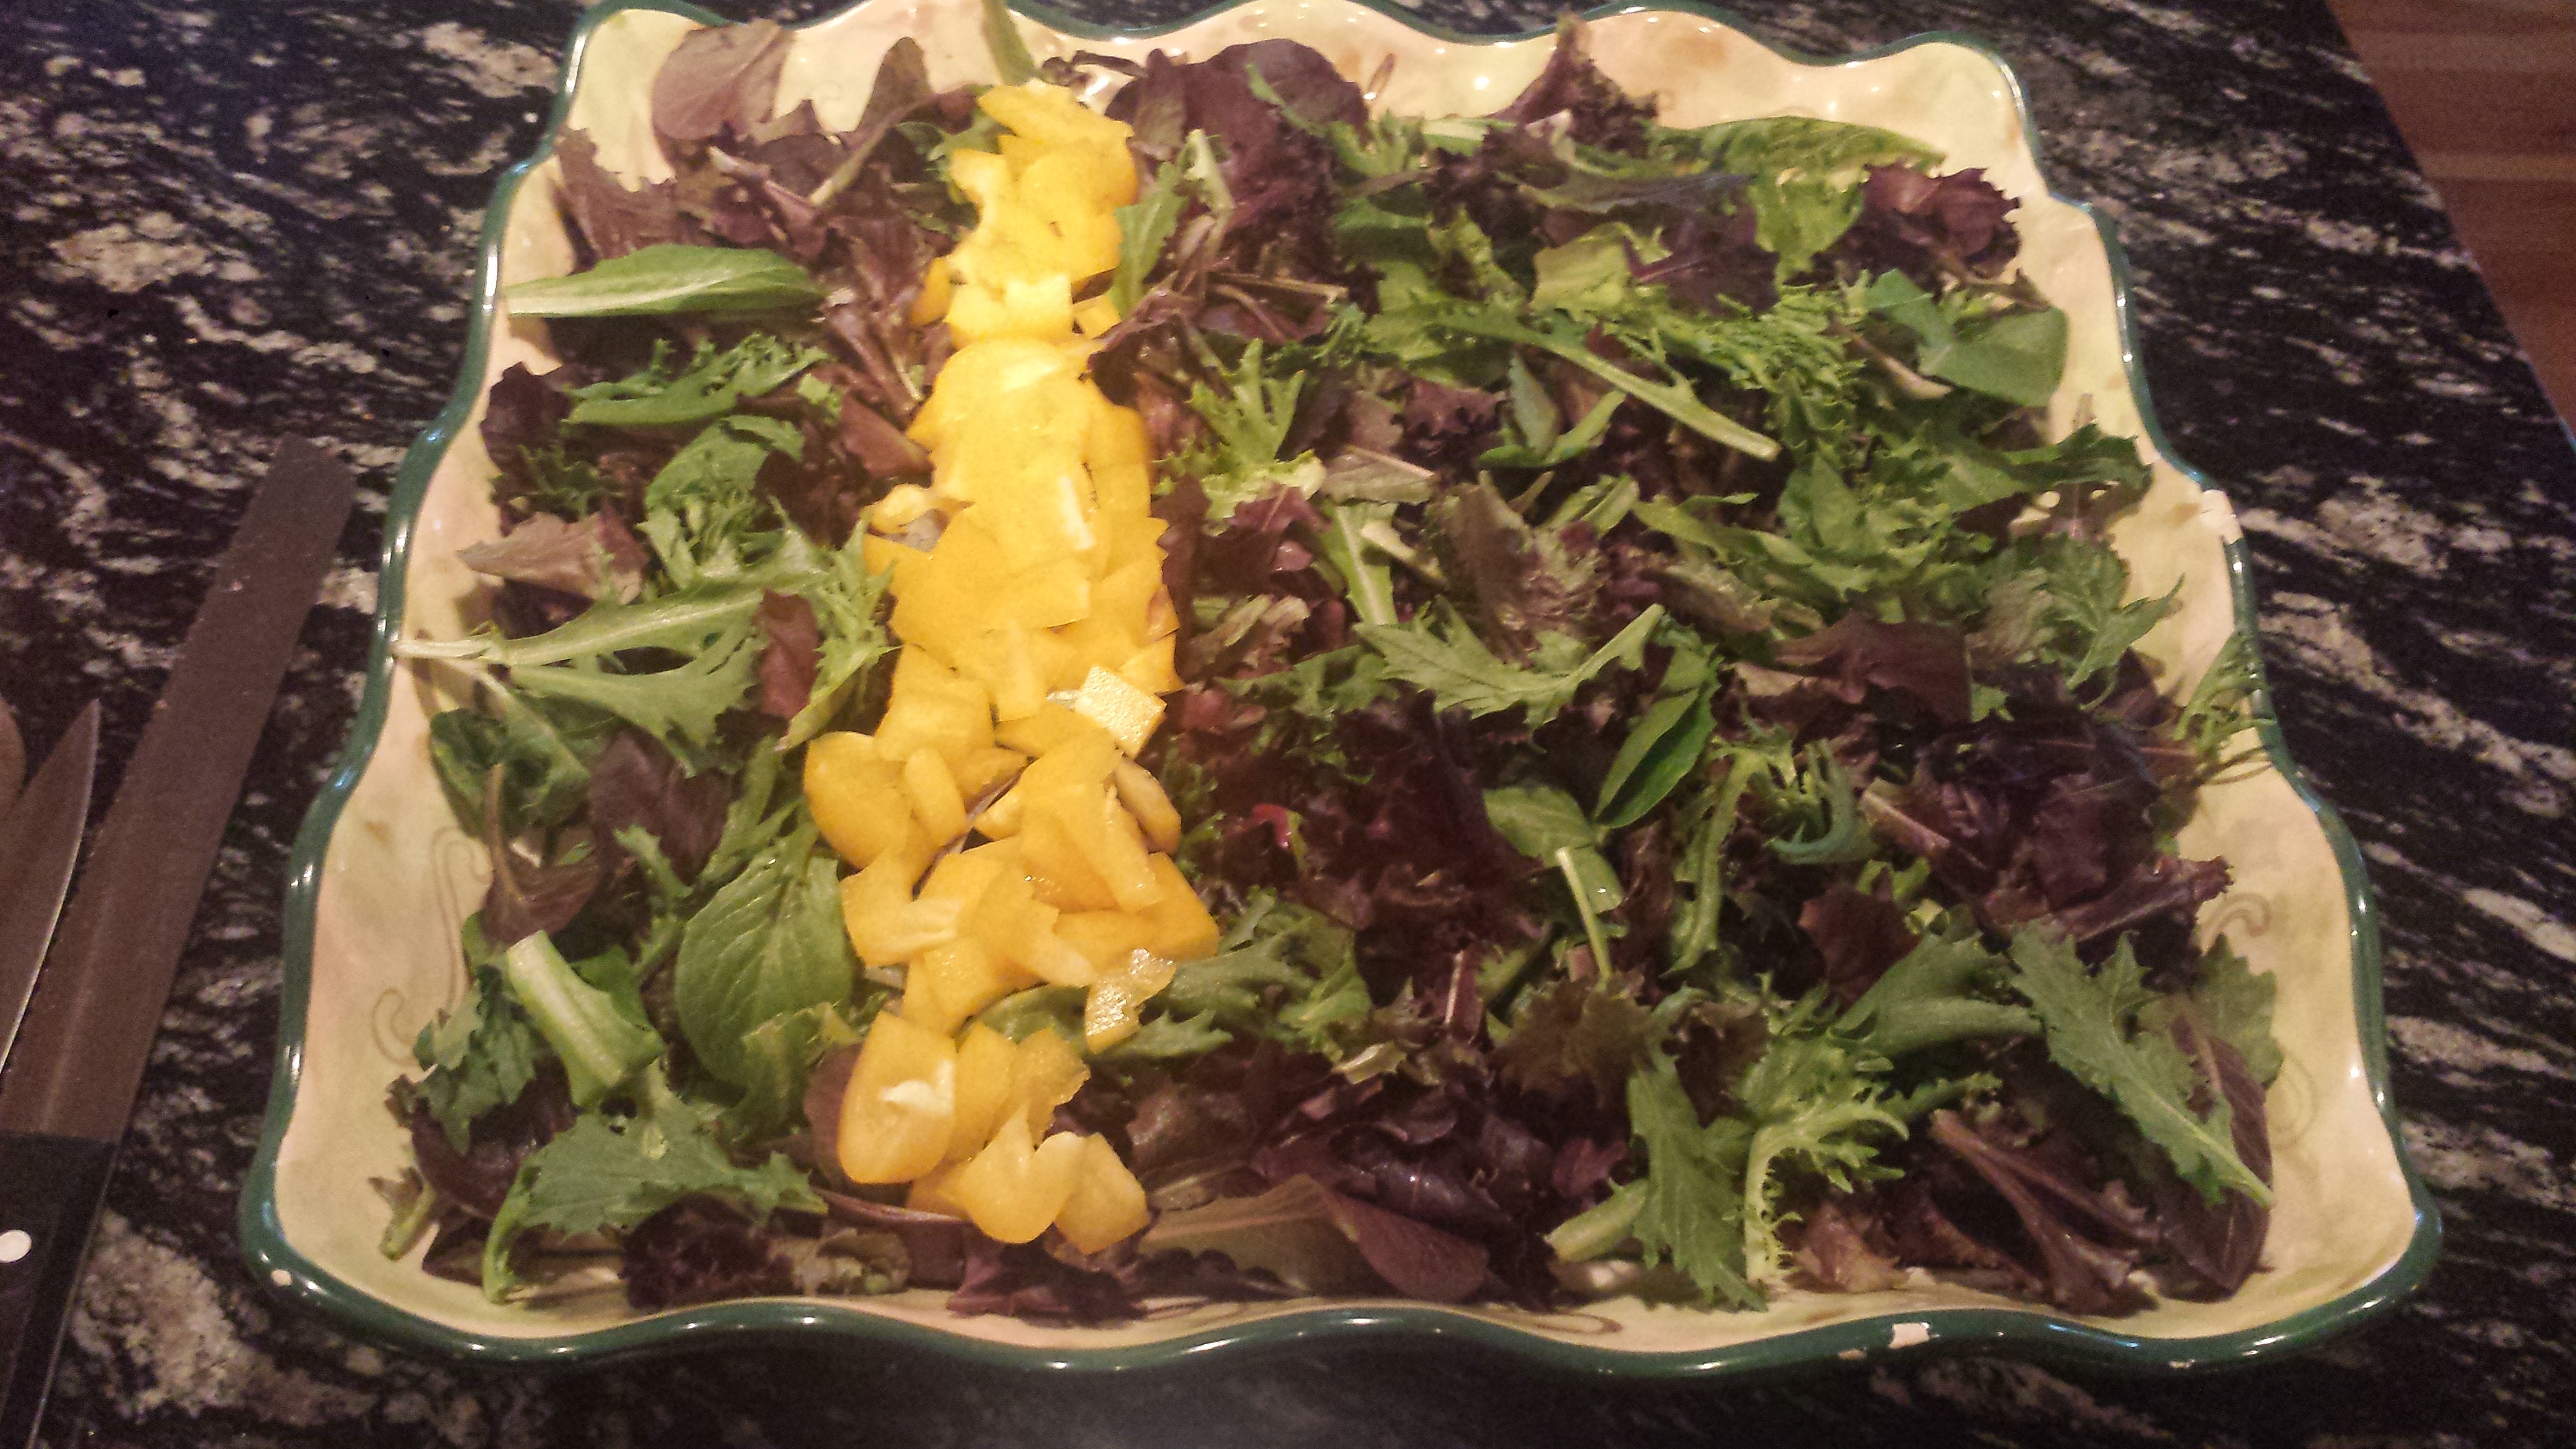
One of the nice things about a traditional lobster bake is the leftovers!  The next day I made a composed salad with the remaining lobster, eggs, potatoes and corn cut off the cob.  I added some chopped tomatoes and scallions and arranged it all on a bed of fresh romaine.

Lobster Bake12

I also made a big pot of clam chowder with the leftover clams and potatoes.  I sautéed a couple of chopped onions and garlic in butter, then added chopped potatoes, vegetable broth and milk and cooked it all for an hour or so until it’s slightly thickened.  Add the clams toward the end and cook another 20 minutes or so on low heat.  Don’t let it boil or the clams will get touch and chewy, like rubber bands.  Season with salt and pepper. Enjoy!

Lobster Bake13


Meatless Monday – Roasted Beet Salad with Ripe Peaches and Goat Cheese

1

Beet Peach Salad13

Is it a coincidence that fresh tomatoes ripe from the vine or juicy, just picked peaches taste especially good in summer or is it nature’s design to give us what we need?  I was thumbing through some cooking magazines admiring gorgeous photos of carmelized tomatoes and 10 ways to use fruit when I came across an article, “In Season For a Reason:”, by Ellie Krieger in CookFresh Magazine that claims our bodies are ‘calling for them’, meaning seasonal veggies.  “Not only do summer vegetables taste better and have a higher nutritional value, in season produce is in sync with our nutritional needs; it contains specific nutrients that replenish and protect us in the hot summer months”. Summer’s juicy fresh fruits and vegetables help keep us hydrated (20 percent of our water intake comes from the food we eat) and are rich in anti-oxidants, just when we need them most. Specifically, antioxidants like lycopene, vitamin C and beta-carotene help protect our skin from the sun by neutralizing damage to skin cells caused by the sun’s UV rays. Potassium, which we lose when we sweat, is also found in many summer vegetables. I wonder if winter vegetables give us what we need in winter too?

Beet Peach Salad8

I like combining seasonal fruits and vegetables, especially in salads.  I often toss orange or grapefruit sections into my salads to give them  a sweet and tangy boost. Today’s salad combines fresh, roasted beets, ripe peaches and arugula topped with goat cheese and pistachios. If I had them I would have added a few halved dark red Bing cherries or strawberries which are also in season. There is something about the combination of sweet and salty is really satisfying.  Right now with peaches in season, they are plentiful, delicious and less expensive at the height of the season! If you have the grill going, you can just halve and pit them and stick them on the grill for a few minutes to slightly caramelize them or just cut them up fresh and delicious.

Beet Peach Salad6

Like their intense color would suggest, beets are big on antioxidants, and have cancer and heart disease-fighting properties, as well as a host of vitamins and minerals. including iron.  Roasting them brings out a more intense flavor and gorgeous color since nothing is released into water, as happens with boiling.  If you slice them vertically, you  may get heart shapes, which if you’re my pinterest friend, you know I collect hearts found in nature so couldn’t resist this picture.  Too pretty!  Don’t throw away the beets tops.  They actually have more flavonoid antioxidants and vitamins than the beet roots themselves, including Vitamin A.  They can be chopped and sautéed with a bit of olive oil and garlic for a delicious side dish similar to chard or mustard greens.  The beets can be roasted a day or two beforehand and stored in the refrigerator until you need them.  Other than roasting the beets (which is easy but takes time), this is a very fast and easy meal to throw together, nice and colorful too!

Roasted Beet Salad with Ripe Peaches and Goat Cheese

  • Servings: 4
  • Difficulty: easy
  • Print

2-3 raw beets
1-2 peaches
1 bunch baby arugula
1/4 cup pistachios (or toasted pine nuts)
2 oz fresh goat cheese (optional)
1/4 cup fresh basil, chopped
2 Tbsn fresh mint, chopped
1/4 cup olive oil
2-3 Tbsn balsamic vinegar
salt and pepper to taste

Beet Peach Salad1

  • Preheat oven to 375 degrees. Lay beets on aluminum foil and drizzle with olive oil.  Don’t remove the stem or tail.  Wrap foil into a pouch and bake until the beets are fork tender, about 1 hour and 20 minutes.

Beet Peach Salad2Beet Peach Salad3

  • Let the beets cool, at least enough to handle, and remove the skins, stem and tail.  I like to use paper towels so my fingers don’t turn red.  Set aside and let them cool to room temperature, then slice.  I would recommend using a non-porous cutting board, since the juice from the beets stains everything it touches, including your hands.

Beet Peach Salad5

  • Wash, remove the pit and slice the peaches.  I like the skin but if you don’t, then remove the peel before slicing.
  • Coarsely chop the pistachios.

Beet Peach Salad10

  • Place the arugula in the bottom of  a large serving bowl or platter. Add the sliced beets and peaches.

Beet Peach Salad9

  • Top with pistachios and goat cheese.

Beet Peach Salad11

  • In a separate bowl, whisk together the olive oil, balsamic vinegar, salt, and pepper and pour over the salad before serving.

Beet Peach Salad13

Wheatless Wednesday – Grilled Artichoke & Mixed Veggie Platter

0

Grilled Veggies1

Summertime, and the livin’ is easy… (Sing along, I know you know the tune)  We are getting to the part of summer where fresh vegetables are plentiful and so good!  One of my favorite summer dishes is a grilled mixed vegetable platter using whatever is in season.   The double bonus is that fruits and veggies at the height of their season are at their best and their cheapest!   I just let everything sit in a basic marinade until I’m ready to grill, then toss them on a platter with fresh herbs (I love a combination of basil, mint and cilantro or thyme) and sprinkle with a bit of feta.  It is a very easy and colorful way to serve a lot of vegetables at once.  Today’s platter includes artichoke, asparagus, yellow squash, zucchini, Portobello mushroom, cherry tomatoes and lemon, all grilled to tender, sweet, slightly charred perfection. Somehow the grill brings out a lightly carmelized flavor that you can’t get with other types of cooking.  The artichoke needs to be boiled or steamed for about 15 minutes before grilling but the other vegetables can be cooked right away.  I grilled the tomatoes in a foil pouch so they didn’t get lost in the grates.  I just tossed them with some olive oil, garlic, oregano and a dash of salt and pepper, simple but delicious!  If you are lucky enough to have any leftovers, grilled vegetables are great in salads, sandwiches or on pizza (my fave)!  So head to the farmer’s market and fire up the grill!

Grilled Veggies12

Grilled Artichoke and Mixed Veggie Platter

  • Servings: 4-6
  • Difficulty: easy
  • Print

2 large artichokes
2 lemons
1-2 zucchini
1-2 yellow squash
1 bunch asparagus
1 pint cherry tomatoes
1/2 cup olive oil
4-5 cloves garlic, minced
1/4 cup feta, crumbled(optional)
1/2 cup or more mixed herbs, chopped(basil, mint, thyme or cilantro)

Grilled Veggies11

  •  Using a sharp knife, cut the top inch or two off the top of the artichoke and immediately rub the cut area with a cut lemon to prevent browning.  You can remove the sharp points from the leaves by cutting the tops of each leaf off with either a knife or kitchen scissors but this is optional.

Grilled Veggies10

  • Cut artichoke in half, rub with lemon and scoop out the choke with a small knife or spoon.  Squeeze the rest of the lemon into boiling water and boil or steam the artichokes for about 15 minutes, or until the stem is easily pierced with a knife.  Remove from the pan and let cool.

Grilled Veggies8

  • Toss the artichokes with a drizzle of olive oil, chopped garlic, thyme and a squeeze of lemon.  I like to use zip lock baggies for convenience but you can also use a bowl or platter.

Grilled Veggies9

  • Trim asparagus,  cut remaining lemon in half, slice Portobello mushrooms, squash and zucchini lengthwise and marinate with olive oil, garlic and oregano or thyme.  I like to add a dash of soy sauce to the mushrooms to bring out their meaty flavor(optional).

Grilled Veggies7

  • Lay the tomatoes in a double layer of foil and drizzle with olive oil, garlic and oregano.  Make the foil into a pouch.

Grilled Veggies4

  • Spray the grill with non-stick, high heat oil before lighting.  Grill the vegetables on a hot grill and turn when you get some good grill marks.  Season with salt and pepper.

Grilled Veggies6

  • You  may have to grill in batches but it’s best not to crowd.

Grilled Veggies5

  • Arrange grilled veggies on a large platter as they come off the grill.

Grilled Veggies3

  • Sprinkle with fresh herbs and feta, if using and give it a good squeeze from the grilled lemon.  Delish!

Grilled Veggies1

Wheatless Wednesday – Arugula Salad with Roasted Corn and Edamame

1

Arugula Salad8


What does it mean if you see a groundhog in the summer?  A couple of days ago, I spotted a fat, furry little creature stealing strawberries from my garden.  It scurried off into the woods as soon as it saw me but not before I got a good look.  It took me a couple of days to figure out what kind of animal it was since I have never seen one before and I have to admit that I became a bit obsessed.  It looked like a beaver but with a fluffy, bristle brush-like tail.  I finally spotted an internet picture of my new little friend, who turns out to be a groundhog, although here in Maine they are called woodchucks.  I know that Maine had a brutally long winter and Punxatawny Phil saw his shadow on Groundhog Day dooming the East to six more weeks of winter, so I hope that this means six extra weeks of summer.   Perhaps the fact that the little guy is a Mainer, and therefore, only a woodchuck, maybe it doesn’t mean anything and he is just a cute little neighbor who likes my strawberries…

groundhog

Photo Courtesy of http://www.teacheratlas.com

So what does my groundhog/woodchuck have to do with Wheatless Wednesday?  Nothing, except that I was carrying all the veggies I just bought into the house when I spotted him and almost dropped them in my excitement.  This week in Maine has been hot and humid so we are eating lots of salads.  You might say I overthink food, and perhaps I do, but here is my take on a Green Salad, which is green (arugula) on green (edamame) on green (snowpeas) on green (avocado) on green (scallions) with just an accent of color (corn and maybe a sprinkle of goat cheese).   The variety in this salad comes from the flavors and textures rather than most summer salads that are generally pretty colorful.

Arugula Salad3

Corn is just starting to come into season and I have had trouble finding organic, non-GMO corn here in Maine, perhaps its just too early or maybe it’s an indication of how much of our corn is now GMO. 😦 It’s hard to pass up the bins of 10 ears of corn for $4.00 but I just did that yesterday.  Instead I bought 3 hard to find ears of organic white corn for $3.00.  Call me crazy but I really go out of my way to avoid GMO’s!  Since corn was my accent in this salad, I decided to rub it with butter, salt and pepper(and maybe just a tad of Creole Seasoning.  I like Tony Cachere’s) and roast it until it turns golden brown.  I let it cool and then sliced the kernels off into the salad.  Delicious!

Arugula Salad2

Although this salad is light, it is also pretty hearty. Arugula is a great choice for a green salad. Arugula contains about eight times the calcium, fives times the vitamin A, vitamin C and vitamin K, and four times the iron as the same amount of iceberg lettuce.  The Edamame provides protein, fiber, vitamins and minerals (including calcium and iron). and the Avocado is nutrient dense and a source of good fat (which we need to absorb the nutrients so don’t hold back).  Sugar Snap Peas are also a good source of vitamins and minerals including calcium and Vitamin C.   Corn gets a bad rap but is actually pretty loaded in antioxidants and fiber.  The best thing about this salad though is that it’s simple but delicious-a perfect hot summer meal!

Arugula Salad9

Arugula Salad with Roasted Corn and Edamame

  • Servings: 4
  • Difficulty: easy
  • Print

3 cups baby arugula
1 cup edamame (fresh or frozen, thawed)
1 cup sugar snap peas, sliced lengthwise
1 avocado, peeled and diced
2 scallions, thinly sliced
2-3 ears of fresh corn, shucked
2 tsp butter (olive or coconut oil)
salt, pepper & creole seasoning (optional)
2 Tbsn goat cheese (optional)

Arugula Salad

  •  Wash corn and remove any remaining strings.  Rub 1/2 teaspoon butter onto each ear (I used my hands which was messy but effective) and sprinkle with salt and pepper.  I also like to add a bit of Creole Seasoning.  Put in a roasting pan and broil for 3-5 minutes per side, or until golden brown.  Let cool.

Arugula Salad6

  • Place arugula in the bottom of a large bowl.  Add snowpeas, avocado, edamame and green onions.  Slice the kernels off the cobs and add to the salad.

Arugula Salad7

  • Top with crumbled goat cheese or serve on the side, if desired.
  • To make a simple vinaigrette, whisk together 1/4 cup olive oil, 1/4 cup apple cider vinegar, 1 Tbsn lemon juice, 1/4 tsp salt and 1/8 tsp pepper
  • Drizzle with vinaigrette or serve on the side.


Meatless Monday – Composed Salad

0

Composed Salad2

What is a composed salad?  It is a salad that has been artfully arranged and drizzled with vinaigrette rather than tossed.  Why, you might ask, would you go to the trouble to arrange your veggies instead of just tossing everything together?  Well the obvious answer is aesthetics.  Composed salads elevate what would otherwise be a simple salad into  an artistic centerpiece.  The other benefit is that each ingredient maintains it’s integrity so you can taste each individual flavor.  Of course it all ends up mixed together eventually but each person gets to ‘create’ their own personal salad by hand picking from the tray of goodies.  Composed salads are usually hearty enough to be main courses, think Cobb Salad, but the possibilities are endless.  If you don’t have a rectangular tray, go circular like this Rainbow Chopped Salad by Fueled By Vegetables.

Chopped Salad13

You can even take the vertical or 3D approach like this layered Southwestern salad from Kitchen Excursions

Composed Salad10

I love composed or arranged salads, perhaps for the same reason I like to stack food and make edible ‘towers’ like my Crab Quinoa Tower or Polenta Towers. It must be the wanna be artist hidden deep inside me. Don’t worry I’m sticking to food. I recently went to my friend, Nicole’s birthday party where we  attempted learned to paint flowers and owls. Lets just say that my sad little flower went quite happily to it’s demise in the dumpster. I guess my artistry only goes so far…

Composed Salad12

My friends know that I rarely make the exact same salad twice, but I do use the same techniques over and over again, changing the ingredients to use what I have on hand or meet the situation. If I need a main course salad, I use heartier ingredients like chopped egg, beans and avocado to fill up hungry bellies. For a side salad I might do a combination of veggies and fruit with just a sprinkle of feta or goat cheese. The beauty of a composed salad is that it is visually striking and completely flexible.  Just layer the bottom of a wide container with greens and top with rows of any vegetables (or fruit), beans, cheese or nuts that you would normally put in a salad.  Voila, you have a visual feast!  It’s not more work, it just looks like it.

Composed Salad1

The amounts will vary depending on the size of your tray or bowl (A low platter works better than a deep bowl).  Amounts listed here are what I used for this particular salad in a 14×14 square tray.  Round works too, just put the ingredients you want the most of in the center rows, arrange them in triangles or concentric circles like a bullseye.  In arranging the rows, take advantage of the variations in color to provide a contrast.  I also put the cheese and egg on the sides so they are easier to avoid for those that are allergic or don’t eat them.  Be creative!  Use beets, artichoke, hearts of palm, strawberries, nuts or raisins.  Adding grains like quinoa or rice help make it a hearty main course.

Composed Salad5

Composed Salad

  • Servings: 6-8
  • Difficulty: easy
  • Print

 5-6 oz mixed lettuce
1 cup cooked, or 1 can garbanzo or black beans, drained and rinsed
2 large, ripe tomatoes, diced
1 large avocado, diced
1 cucumber, diced
1 yellow bell pepper, diced
3 hard boiled eggs, diced (optional)
3 oz feta, crumbled

Composed Salad7

  • Spread a layer of lettuce to cover the bottom of the container

Composed Salad9

  • Arrange each diced vegetable in rows, taking care to put allergens like cheeses and eggs on the outer rows.

Composed Salad8

  • Drizzle with your favorite vinaigrette or mix up a simple fresh one by whisking together 1/4 cup olive oil, 1/4 cup apple cider vinegar, 1 Tbsn balsamic vinegar, 1/2 tsp dry mustard, 1/2 tsp salt, 1/4 tsp pepper.  Serve with more dressing on the side.

Composed Salad1


Wheatless Wednesday – Santa Rosa Plum Crisp

5

Plum Crisp8

Looking for a simple 4th of July or summer dessert?  How about an easy Stone Fruit Crisp? Plums are in season right now as are other stone fruits like peaches, cherries and nectarines. Crisps are very forgiving to make as there is little that can go wrong, no crust to make or fruit to arrange. Just cut up your favorite fruit, sprinkle it with a yummy topping and bake. The beauty of this dessert is it’s simplicity.  This recipe is easily made vegan and gluten free and for a dessert, it’s pretty nutritious.  The oats and almond flour combined with the fruit and dates are loaded with vitamins and minerals ( and fiber, of course).   As an added bonus, your kitchen will smell divine!

I have a wonderfully prolific Santa Rosa plum tree in my garden in California.  Usually I make plum jam which I put on toast or in my yogurt for the rest of the year.  This spring in California has been so dry and warm that my plums were ripe and falling off my tree almost before I realized I was losing my crop.  So right before my summer move to Maine, I gathered everything I could reach and decided to take them with me since I didn’t have time to do anything with them in California.  I ‘smuggled’ the plums and some Meyer lemons, also from my garden, to Maine in my suitcase which I checked. I didn’t dare carry it on, since one of my friends once took home some of my lemons in her carry-on and security thought they were hand grenades. (Well they are rather large lemons!)   I decided it was not worth the risk of possibly having to dump them so packed them in with my shoes and extra clothes and hoped for the best.

Preserved Lemons2

The lemons made the trip very well but a few of the plums got a bit bruised on their journey and are no longer quite as perfect for eating, so I decided to make a plum crisp.  Since I have yet to do a complete restocking of my pantry, I had to make do with what I had on hand, even tearing open individual sugar packets to toss with the plums (after which, of course, I found the tin of sugar hiding up on the top shelf).  Like I said, this is a very forgiving dessert…

Plum Crisp1

TIPS:  Most fruit crisp recipes call for wheat flour but I opted to go grain free and use almond flour, although almost any flour would work as a thickening agent and in the topping as well.  I added pecans and almonds to the topping for added crunch as well as dates for extra chewy sweetness but both are optional.  If you don’t use nuts, just add a bit more flour and oats so there is enough topping to cover the fruit.   I usually prefer desserts that are one dedicated fruit but crisps are also good with a mixture of cut up fruits if that is what you have on hand.  This is  great way to make an amazing dessert out of leftover or less than perfect pieces of fruit.  Instead of throwing them out, just cut out the bad spots.  They will still taste delicious!

Santa Rosa Plum Crisp

  • Servings: 6
  • Difficulty: easy
  • Print

Plum Crisp2

4 cups plums, pits removed and chopped

1 Tbsn coconut, oat or almond flour (white or wheat work too)

3 Tbsn sugar (honey, agave necter, etc.)-more if your fruit is under ripe or sour

1 tsp vanilla or almond extract

1/2 tsp ground cinnamon

Topping:

1/2 cup flour (made from any grain or legume)

1/2 cup oats (not instant or fast cooking)

1/2 cup pecans or almonds, finely chopped(optional)

1/4 cup dates, pitted and finely chopped (optional)

1/2 cup brown sugar, packed

1/8 tsp salt

1/4 cup butter or coconut oil, melted

Plum Crisp3

  • Combine plums, flour, sugar, vanilla and cinnamon together in a medium bowl.  Pour into an ungreased baking dish or pie pan

Plum Crisp5

  • Mix together all topping ingredients with a fork until crumbly.

Plum Crisp6

  • Spread topping evenly over the plum mixture
  • Bake for 40 to 45 minutes in a 350 degree oven. Plums should be bubbling and the topping a golden brown.
  • Serve with vanilla ice cream (optional)

Plum Crisp7

Meatless Monday = Roasted Asparagus and Leeks

0

Asparagus and Leeks1


GoodMotherDiet has temporarily relocated to Maine for the summer. We have a house on Bear Pond nestled at the base of Bear Mountain.  Maine is a land of a thousand lakes and mountains where time goes more slowly. and we spend our days outside taking advantage of the abundance of nature.  Life is very casual and dinner is generally a last minute gathering of friends at our various homes or restaurants after a long day of playing on the lake or hiking in the mountains, sometimes squeezing in a sunset cocktail before heading home to make dinner.

Maine

I flew in yesterday on the red eye and I am still getting my bearings. As always happens when I switch homes, I have to remember the layout of the kitchen, relocate the silverware drawer and take a look at the contents of the pantry.  It usually takes me several trips to Hannaford before I have everything restocked. By evening we had our first dinner party, a typical potluck which travels from house to house along the lake.  My contribution to the meal was Asparagus and Leeks with shallots and garlic, drizzled with olive oil and roasted in a hot oven.  Although it is not the prettiest or most elegant of dishes, it is simple and delicious, a perfect addition to any meal.   For an added touch of flavor, you can drizzle with balsamic vinegar before serving.

Roasted Asparagus and Leeks

  • Servings: 4-6
  • Difficulty: easy
  • Print

1 bunch asparagus
2 large or 3 small leeks
2 shallots
2 cloves garlic
2 Tbsn olive oil
1/2 tsp salt
1/4 tsp black pepper
1 Tbsn balsamic vinegar (optional)


Asparagus and Leeks5

  • Trim rough end of asparagus and place in a baking dish
  • Trim  root end of leeks and cut off tops where the leaves start turning green.  Wash leeks under running water, fanning each layer like a deck of cards to remove any dirt left between the layers.  Pat dry and place in the baking dish.

Asparagus and Leeks6

  • Slice shallots lengthwise into large matchsticks

Asparagus and Leeks4

  • Slice garlic into thin strips
  • Sprinkle with salt and pepper

Asparagus and Leeks3

  • Drizzle with olive oil and gently toss to coat vegetables with oil

Asparagus and Leeks2

  • Roast in the oven at 400 degrees for about 25 minutes, stirring 3 or 4 times.  They should be tender and beginning to brown on the edges.

Asparagus and Leeks1

Wheatless Wednesday – Breakfast Polenta in a Mug!

4

Breakfast Polenta7

I love shortcuts and life hacks – but only if they work!  I will admit to sometimes using garlic paste from a tube, instead of chopping a pile of garlic cloves, or bags of pre-washed greens when I’m pressed for time and it can mean the difference between a home cooked meal and take out.  Sometimes you just have to go with whatever works and often the shortcuts are just short of brilliant.  For your reading pleasure I have provided a link to 40 Great Life Hacks which just may give you a good idea or two (or at least you will be impressed by the cleverness of some people).

life-hacks-22

Photo Credit: 40 Life Hacks

Knowing my interest in food (and avid GMD followers), my Mom and Dad sent me an early birthday present, “250 Best Meals in a Mug”,  a cookbook by Camilla V. Saulsbury with single serve recipes that can be made start to finish in a mug. I know this is a departure from most of my recipes, but my parents thought it was a fun concept and so different from the way I usually cook. So I decided to check it out.   Meals in a Mug has recipes for breakfast, lunch, dinner and dessert, all made and served in a mug for one. Brilliant! This not only solves the problem of making (and eating) too much food but also drastically reduces the prep and clean up time. No pots or pans to clean, just one mug and one spoon. How nice is that, especially at breakfast time when you’re trying to get out the door?

Breakfast Polenta3

I was immediately drawn to her recipe for Brown Sugar Vanilla Polenta. You might have had creamy polenta for dinner but have you tried it for breakfast?  Talk about comfort food, all warm and creamy, sprinkled with brown sugar and a swirl of butter. Yum! It tastes totally decadent and sinful yet, is surprisingly healthful. I used stone ground, non GMO, organic cornmeal which provides fiber, minerals (including magnesium and selenium) and vitamins (including B1 and B6), organic milk and dates, which are an underappreciated fruit.  They are also a good source of fiber and a great source of iron plus their natural sugar is an excellent substitute for ordinary sugar. I had good success in the past using dates for their sweetness in my Oat Nut Bars which are addicting pretty darn good.

Breakfast Polenta6

I rarely make polenta though because I am the only polenta eater in my house and I end up eating too much. However, the mug concept opens a whole new world of cooking for me, fast, easy and completely self-serving as I only have to cater to my own tastes.  If you are really in a hurry in the morning, you can prepare the mug before bed.  Measure the cornmeal, dried fruit and salt into the mug and let it sit on the counter overnight. You can also pre-measure the butter, vanilla, milk and water and refrigerate over night.

Breakfast Polenta1

TIPS:  I have never really used the microwave for anything other than reheating leftovers or making popcorn, so it took a couple of tries to get it right.  My microwave must be more powerful than the cookbook author’s, since my first attempt boiled over, so I have adjusted the times based on my personal experience.  I listed the cooking times as ranges because your microwave may take longer than mine, but I would start by using the shortest time at first.  I also reduced the amount of brown sugar from the original recipe by a third because the dates made it sweet enough (even without the pecans).  If you use cranberries or raisins you may need to add more sugar, depending on your tastes. The glazed pecans make a delicious topping for creamy polenta (or ice cream)  but they are also a great snack.  Just make them ahead and store them in a covered container or zip lock bag.


Breakfast Polenta in a Mug

  • Servings: 1
  • Difficulty: easy
  • Print

1/4 cup yellow cornmeal (preferably non GMO stone-ground)
3 chopped dried dates (or 1 1/2 Tbsn raisins, cranberries or other dried fruit)
1/8 tsp salt
2/3 cup water
3/4 cup milk, divided
2 tsp butter or coconut oil (optional)
1/4 tsp vanilla extract
1 tsp packed brown sugar ( sugar, maple syrup, honey or agave necter)
1 Tbsn glazed pecans, recipe below (optional)

Breakfast Polenta2

  • In a mug, combine cornmeal, dried fruit, salt, 1/2 cup milk and water.
  • Place in the microwave on top of a doubled paper towel and microwave on High for 2-3 Minutes.
  • Stir, making sure you get the cornmeal off the bottom.  Microwave on High for 1-2 minutes.
  • Stir.  Microwave on High for 1-2 minutes.  Check for thickness.  Microwave another minute if necessary.
  • Stir in butter and vanilla and sprinkle with brown sugar.  Drizzle with remaining milk, if desired and top with pecans or fresh fruit.  Yum!

Breakfast Polenta7


Glazed Pecans

  • Servings: 4
  • Difficulty: easy
  • Print

Beets8

1/4 white sugar)
1 Tbsn butter or coconut oil
1/8 teaspoon salt
2 Tbsn water
1 1/2 cup pecan halves (or walnut)
  • Combine sugar, butter, water and salt in a large skillet and stir over medium heat until butter is melted.
  • Add pecans and cook, stirring constantly, making sure pecans are evenly coated,  for 5-7 minutes.
  • Spread pecans in single layer on parchment paper and cool completely.

VARIATIONS:  To make pecans for snacking add 1/4 to 1/2 teaspoon of cayenne pepper for a spicy kick.  For a sweeter, dessert topping add 1/4 teaspoon vanilla or dash of cinnamon.  You can even substitute the white sugar for brown sugar for more of a carmely ‘turtle’ type result (great over ice cream!).


Meatless Monday – Zucchini & Apple Spirals with Basil & Mint Salad

1
Zucchini Spiral Salad1
 
I have always wondered how to make a ‘noodle’ several feet long, like the one in Lady and the Tramp.  Well now I know the secret.  My mother in law gifted us a vegetable spiraling machine for our anniversary (Well there is no special gift or gem for 28 years of marriage, go figure! So why not a vegetable spiraler…)   I couldn’t wait to try it out – and the result is awesome.  I experimented first with zucchini and got spirals over 6 feet long.  How cool is that?  Then I spiraled some apples and fell the rest of the way in love. It is easier than a mandolin, no peeling or coring and my fingertips and knuckles remained intact.  I decided to cut the zucchini spirals into shorter pieces to make it easier to serve, but it could be fun to make each 6-8 foot strand into it’s own serving.  Your surprised diners could have their own Lady and the Tramp moments…
lady-and-the-tramp-02
Photo Credit:  http://www.kitchenmemories.com
 
For this salad, I decided to add some spiraled apples to the zucchini to add a bit of sweetness and color.  I chose Fuji since they don’t turn brown as quickly as other varieties and I love their red skins.  I also really like the combination of fresh basil and mint in summer salads, especially with a honey, citrus vinaigrette.  To make this filling enough for a main course, I added avocado and pepitos which provide nutrients and good fats that help us feel satiated.  I also sliced up some sugar snap peas to add crunch.  This salad would be good topped with blue cheese, goat cheese or feta, if desired, for an additional protein boost.  
 
Zucchini Spiral Salad8
 

Zucchini & Apple Spiral Salad with Basil and Mint

  • Servings: 4
  • Difficulty: easy
  • Print

 3 medium zucchini
salt
1 Fuji apple (or other firm apple)
1/4 cup pepitas (shelled pumpkin seeds) or pine nuts, pistachios or hazelnuts
1/2 cup sugar snap peas
1 firm avocado
Salt
10 basil leaves
10 mint leaves
1/4 cup lemon juice
1/4 cup apple cider vinegar
1/4 cup avocado oil (or other light oil)
1 scant teaspoon honey (or more if you like it sweet)
Freshly ground black pepper
 
Zucchini Spiral Salad7
 
  •  Cut the ends off the  zucchini and spiral or shred into thin strips using a mandolin or grater.  The spiraler is definitely the easiest!   Cut spirals into desired lengths if needed (about the length of a strand of spaghetti).  Put the spirals in a bowl, sprinkle with salt and let sit for 10 or 20 minutes.  Taste.  If too salty, rinse, drain and pat dry.  No need to rinse if the taste is fine, just don’t add more salt later without tasting first.

Zucchini Spiral Salad6

  • Dry toast pepitas (hulled pumpkin seeds) on medium heat in a small skillet for a few minutes, until golden.  Add to zucchini when cool.

Zucchini Spiral Salad5

  • Cut basil and mint into ribbons.  An easy trick is to stack the leaves and slice thinly cross wise. Add to zucchini. (Leave a few for garnish)

Zucchini Spiral Salad4

  • Remove strings from sugar snap peas and cut lengthwise into julienne strips and add to the zucchini.

Zucchini Spiral Salad2

  • Whisk oil, lemon juice, honey and apple cider vinegar together and set aside.
  • Spiral apple (core first if using a mandolin) and add to the zucchini.  Gently toss with a bit of dressing to keep from turning brown.
  • Core and chop avocado and add to the zucchini mixture.  Add a bit more dressing and gently combine.
  • Taste for seasoning and add salt if desired.

Zucchini Spiral Salad3

Wheatless Wednesday – Shrimp Lettuce Wraps with Coconut Rice & Bok Choy

0


Shrimp Lettuce Wraps11

They’re Back! ( in sing song voice) With graduations and summer approaching, we have gone from being empty nesters to having a full house again. One of the biggest adjustments this time has been for the ‘kids’ because of my meatless diet.  They are more likely to cater to my diet now, which is a complete switch from when I used to plan meals around them. Back in the day I had to make many allowances for my picky eaters.    Even when my boys were young and ate only five or six things in the world, there was always the odd food, like flying fish roe sushi, that they would eat along with their plain pasta with butter and cucumber circles.  I lived in fear that they would figure out what flying fish roe was and then even that would be out.  Luckily for me, as they grew older their tastes expanded in the same proportion as their desire for ‘plain food with no sauce, nothing on the plate touching’ diminished.  Some of you still may be there but don’t worry, they do eventually grow up and eat real food.   I knew we were there when the last one crossed over into  the light ‘salads’.  My life was so much easier once I no longer had to hide veggies somewhere on their plates and could just serve them right out in the open, no secret dips or funny mashed potatoes.  Whew!

Shrimp Lettuce Wraps12

My boys (young men now) still have an affinity for Asian food, and although they still eat flying fish roe sushi, their tastes for the exotic have also expanded.  One of our favorite appetizers is Miang Kam (literally meaning Tasty Leaf Wrapped Tidbits) in which several ingredients, usually coconut, ginger, lemon, dried shrimp, peanuts and green onions, among many other interesting bits of food, are hand assembled in a leaf, topped with a yummy sauce, folded over and popped in the mouth where the ingredients combine for a burst of flavor.  These Shrimp Lettuce Wraps are loosely inspired by Miang Kam, although I took many liberties with the selection of ingredients.  The wraps themselves are reminiscent of the Thai dish with the garnishes of ginger, red chili pepper, toasted coconut, scallion and sliced lemon which provide an explosion of flavor.  I added Sriracha to mine since I love spicy but a plum or sweet ginger sauce would be tasty too.

Shrimp Lettuce Wraps13

No meal is complete in my book without some kind of veggies, so I sliced up fresh bok choy and sautéed it with a bit of garlic and ginger and added mung bean sprouts, which were in my refrigerator, for good measure.  I also made  Coconut Rice with brown Jasmine rice, ginger, turmeric and cumin which came out a deliciously lovely yellow (thanks to the Turmeric, which I’m sure you’ve heard is the new wonder spice that provides antioxidants and health benefits to your food along with it’s unique flavor).  Both side dishes are great as a base for the shrimp in the lettuce wraps or can be simply served on the side.

Shrimp Lettuce Wraps

  • Servings: 4
  • Difficulty: easy
  • Print
1 head Butter or Boston lettuce (whole leaves)
1 lb raw shrimp (shelled, tail removed)
4  Tbsn olive or avocado oil (divided)
4 cloves garlic, finely minced (divided)
1/4 tsp red pepper flakes
1/4 tsp chili powder
3-4 heads bok choy
1 cup bean sprouts(optional)
Shrimp Lettuce Wraps8

GARNISHES:

1/3 cup dried unsweetened coconut
1 fresh red chili pepper, minced
1 thumb-size piece of ginger, minced
3 green onions, minced
1 lime cut into small wedges
Sriracha Sauce, Plum Sauce or Sesame Chili Oil (Optional)


Shrimp Lettuce Wraps5

  • If you are using peeled and deveined shrimp, rinse them in cold water and pat them dry.  If your shrimp still have the shells, remove the legs, shell and tail or watch this video for instructions on peeling shrimp.
  • Dry toast coconut into a pan (preferably cast iron) on medium high heat until golden brown. (1-2 minutes). Remove from pan and let cool
  • Wash and dry lettuce leaves and arrange on a platter with toppings.

Shrimp Lettuce Wraps3

  • Reheat pan and saute bok choy on medium heat in half the oil and garlic for several minutes.  Add the bean sprouts, if using, and heat another minute or so.  Remove from heat and place in a serving bowl.

Shrimp Lettuce Wraps4

  • Reheat pan on medium high and add the remaining oil, garlic, chili powder and red pepper flakes.  Sautee the shrimp until it turns pink, 2-3 minutes. Remove from heat.  Serve in hot pan or place in a serving bowl.
  • Assemble lettuce wraps with coconut rice (see recipe below), bok choy and shrimp topped with your preferred condiments.  Or serve rice and bok choy on the side.


Coconut Jasmine Rice

  • Servings: 4
  • Difficulty: easy
  • Print


Shrimp Lettuce Wraps2
Coconut Jasmine Rice

1 cup brown or white jasmine rice
1 can coconut milk
1 cup vegetable stock
1 tsp turmeric
1 tsp cumin
pinch of saffron threads (optional)
1 clove garlic, minced
1/4 cup dry shredded or flaked coconut, unsweetened

  • Heat coconut milk and stock to boil.  Add rice and spices and simmer for about 15 minutes, or until the water has evaporated.  Remove from heat and let sit covered.
  • Dry toast the coconut in a pan on medium high heat for one or two minutes until golden brown.  Remove from heat and let cool.
  • Fluff the rice with a fork.  Serve topped with toasted coconut.

Wheatless Wednesday – Black Bean Quinoa Salad

6

Black Bean Mango Quinoa Salad4

Tired of green salad?  This flavor filled quinoa salad with mango and avocado topped with an orange cumin vinaigrette is my new favorite!  I promise you won’t be bored. It’s a little bit spicy from the jalapenos, a little bit sweet from the mango, the black beans add a rich salty flavor and fresh avocado, purple onion, bell pepper and cilantro make it salad worthy.  Yum!

Quinoa is the perfect backdrop for these beautiful flavors.  It also happens to be a nutritional powerhouse, high in protein, low in fat, gluten free and loaded with lovely vitamins and minerals (but you don’t have to tell your family that).  What I didn’t know is that Mango is also a superfood, providing over 20 vitamins and minerals in every delicious bite. ( This puts a whole new light on my recipe for Mango Margaritas!)  Black beans add another protein and nutrient boost and their high fiber content helps keep your tummy full. Then there is the Avocado, which we now know is a good fat that is highly nutritious.   The best part of this salad though, is how great it tastes!  I can’t wait to have it again for lunch…

This is the perfect dish to throw together for an easy dinner or bring to a potluck, especially if you have leftover quinoa on hand (or you make it ahead), then it’s only about ten minutes of chopping, mixing and you’re done!  This salad can be made a day ahead, without the avocado.  Bring to room temperature then gently toss in the avocado, if using, before serving.

TIP:  You can buy mango pre-cut but it’s very easy to do it yourself (and less expensive) if you know the right technique.  How to cut a Mango

VARIATIONS:  If you don’t have, or like, mango, you can substitute orange or nectarine segments (or even canned or frozen corn).  Use a combination of yellow, orange, red and green bell peppers for lots of color.  This recipe is only mildly spicy using one red jalapeno pepper so double the amount of jalapeno peppers and add a bit more cumin if you like it hot.

Black Bean Mango Quinoa Salad

Black Bean Quinoa with Cumin Orange Vinaigrette

  • Difficulty: easy
  • Print

 Black Bean Mango Quinoa Salad4

1 cup quinoa
1 cup mango, diced
1 red bell pepper, diced
1 red or green jalapeno, seeded and diced
1 cup canned black beans, drained and rinsed
1/2 red onion, diced
1/3 cup fresh cilantro or parsley leaves, chopped
1 avocado, peeled, seeded and diced
 
 vinaigrette
1/4 cup olive oil
1/4 cup apple cider vinegar
1/4 cup freshly squeezed orange juice
1 tsp cumin
1 tsp salt

Black Bean Mango Quinoa Salad3

  • Rinse quinoa to remove bitterness and cook according to package instructions; set aside and let cool.
  • To make the vinaigrette, whisk together olive oil, apple cider vinegar, orange juice, cumin and salt in a small bowl; set aside.
  • In a large bowl, combine quinoa, mango, bell pepper, jalapeno, black beans, avocado, onion and cilantro. Pour the vinaigrette on top of the salad and gently toss to combine.
  • If you aren’t serving immediately, place the avocado pit on top of the salad to keep the avocado from turning brown, or add the avocado right before serving .  Serve at room temperature.

Black Bean Mango Quinoa Salad8


Meatless Monday – Grilled Nectarines and Summer Squash with Balsamic Glaze

1

Grilled Vegetables10

I know I’m late to the grilled fruit game.  I never understood the fascination with throwing everything on the grill, but I am now a believer.  Grilling transforms something simple and delicious into a spectacular crowdpleaser.  Grilling enhances the natural flavors of fruits and vegetables and caramelizes the sugars in them, which is why grilled fruits are particularly delicious.   I came home to find a beautiful display of summer squash, nectarines and spring onions sitting on my counter, compliments of our local farmers market.  The squash had such interesting shapes that I immediately wanted to showcase.  I especially love the star shaped yellow squash!   I thought slicing them into rounds and grilling them would make a visually interesting dish.

Grilled Vegetables8

Then, once I added the nectarines and purple onion to the mix, I thought, “They look so beautiful all together, why not grill them all?  Sometimes dinner just  has to be dictated by what you have on hand.

Grilled Vegetables7


Vegetables can be grilled dry, but many of them taste better and are less prone to sticking if they are marinated first, or at least drizzled with oil.  Fruit, on the other hand, with its natural sugar content, is great when placed directly on the hot grill.  I marinated the squash in olive oil, garlic and herbs before grilling, then carmelized the onions on high heat in a cast iron pan and made the balsamic glaze (or rather, my sous chef, Veronica, made the glaze while I grilled the zucchini).  Lastly, I grilled the nectarines and piled everything together in a large tray and drizzled with the balsamic glaze.  I sprinkled with a bit of feta and a handful of blueberries, the first from my garden this year.  My final result was a pretty spectacular vegetable/fruit platter with gorgeous colors.  The balsamic glaze complimented the grilled fruit and combined nicely with the savory squash.  I will definitely be mixing more veggies and fruits this summer!

If you’re interested in more grilled fruit recipes, check out my recipe for Tortillas with Grilled Pineapple Salsa (with Mango Margaritas, of course)

Grilled Nectarines and Summer Squash with Balsamic Glaze

  • Servings: 4
  • Difficulty: easy
  • Print

4 -6 summer squash (any variety)

Marinade:  1/4 cup olive oil, 1 clove minced garlic, 1 Tbsn lemon juice, 1/4 tsp salt, 1 tsp fresh herbs(oregano, thyme, parsley or marjoram)

1 large spring onion (or Walla Walla or Maui sweet)

2 Tbsn avocado oil, or other high heat oil
6 nectarines
1/4 cup olive oil
2 oz feta (optional)
1/2 cup blueberries (optional)
Balsamic glaze:  1/4 cup basamic vinegar, 1 Tbsn honey, pinch of salt
salt and pepper to taste

Grilled Vegetables5

  • Place all marinade ingredients into a large ziploc baggie or container.  Slice squash into rounds and put into marinade until ready to grill.

Grilled Vegetables3

  • Heat balsamic vinegar in a small saucepan until reduced by about half.  Stir in honey and add a pinch of salt.  Remove from heat.
  • Slice onion into thick rounds.  If you don’t completely remove the stem, the top slice becomes a ‘rose’ which is a nice centerpiece.

Grilled Vegetables1

  • Saute the onion slices on high heat, keeping the sections together, turning with a spatula to brown both sides.  Then break apart and saute a few more minutes. Or you can marinate and grill the onions until they are softened and browned.  Remove to a platter.

Grilled Vegetables4

  • Grill the zucchini rounds until brown on both sides.  Remove to platter with onions.

Grilled Vegetables2

  • Half and pit the nectarines and place on a hot oiled grill, a few minutes per side until grill marks appear.  Remove to platter with veggies.
  • Sprinkle with feta and blueberries, if using.  Drizzle with balsamic glaze. Coarse salt and pepper to taste.
  • Serve warm or room temperature with reserved balsamic glaze on the side.

Grilled Vegetables9