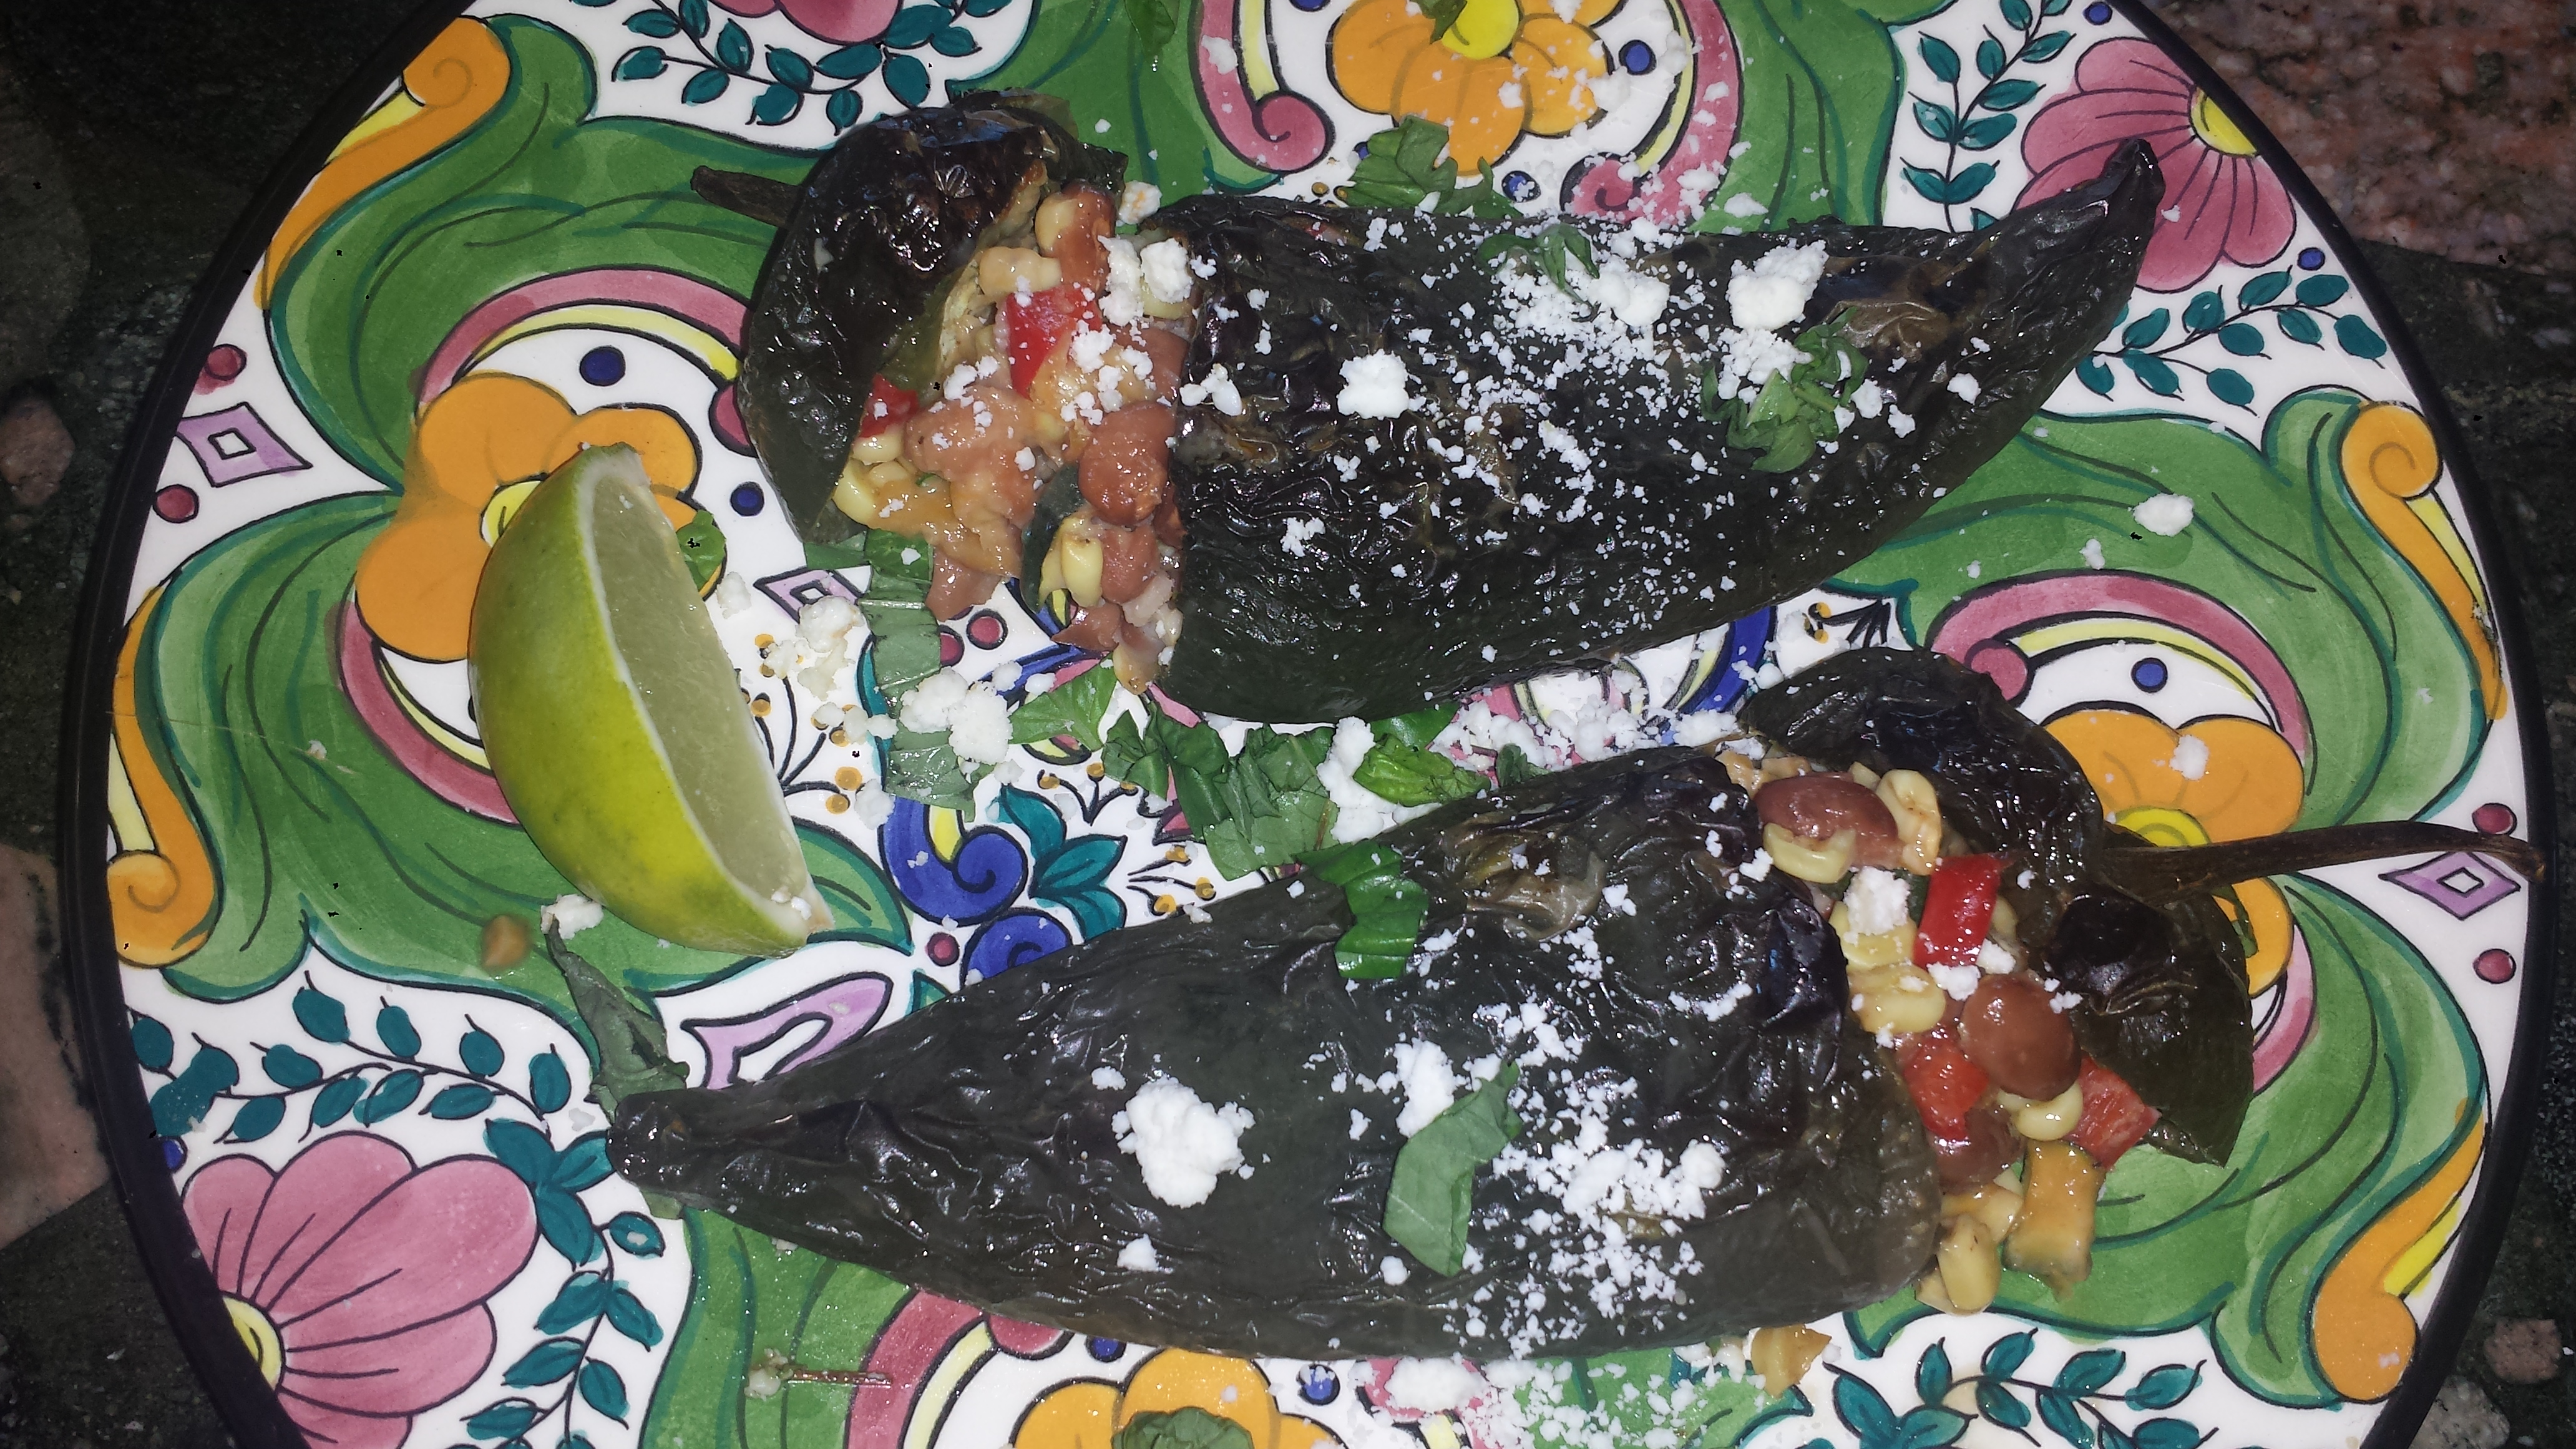
Sometimes you just want to go South of the Border… I’m talking about Mexican food – nachos, tacos and burritos – delicious but often calorie and carb laden. To satisfy my craving but keep it healthy, I made these yummy, spicy Poblano peppers stuffed with summer favorites, corn and zucchini, along with creamy pinto beans and shredded cheddar, all grilled or roasted to cheesy deliciousness. Yum! This is a great summertime Meatless Monday recipe. It takes advantage of seasonable vegetables that are plentiful and cheap, and only takes about a half hour to assemble and cook. On hot summer days you can grill them outside to avoid heating up your kitchen, or if you are not grill savvy, they can be roasted right in the oven. Best of all, the peppers can be assembled ahead of time and stored in the refrigerator for a day or so before cooking. Easy! Fast! Done!

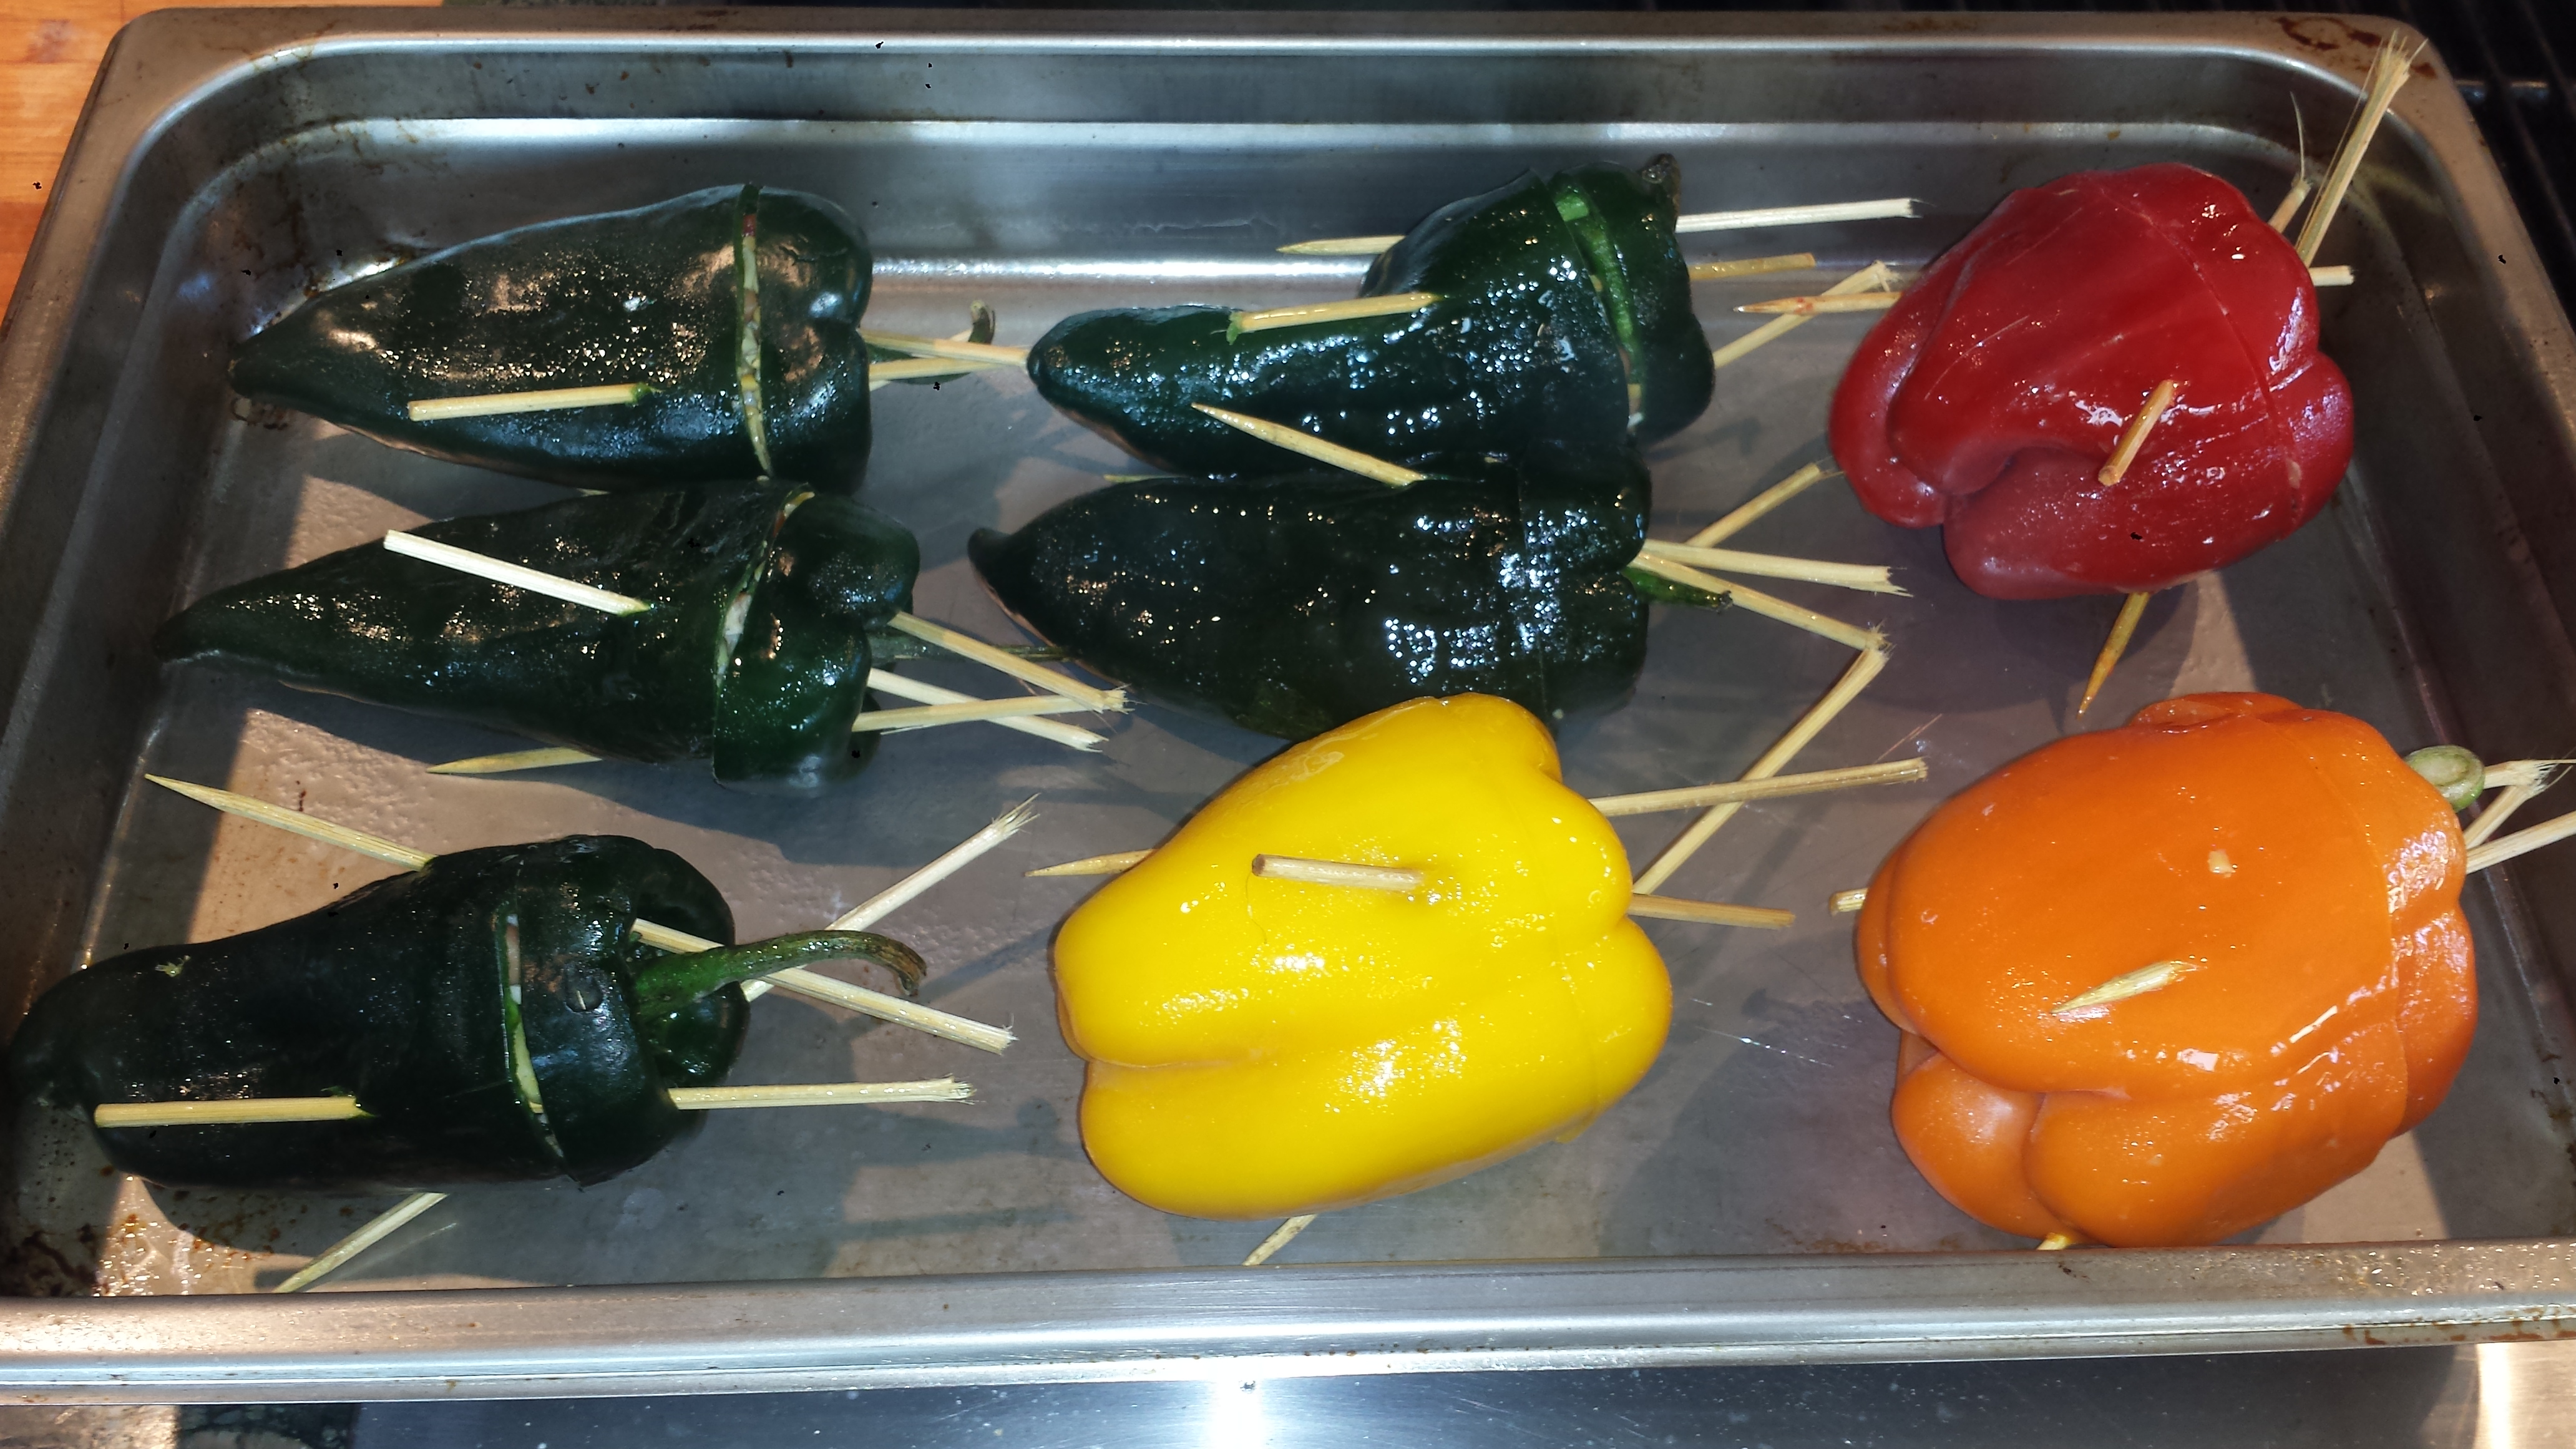
I love the moderate spiciness of Poblano peppers which have more oomph than a bell pepper but are not quite as hot as a jalapeno. They are also large enough, when stuffed, for one or two to serve as a main course. That said, not everyone in my family likes spicy food so I stuffed several sweet bell peppers to satisfy those less daring diners. Bell peppers are also larger so good for a heartier appetite – colorful too!

However, if you can tolerate spicy foods, the experts claim that spicy foods have many Health Benefits. Studies show that the main compound in chilies, called capsaicin, may cause the body to burn extra calories for 20 minutes after eating. Chili peppers can also reduce the damaging effects of LDL (bad cholesterol) and capsaicin may fight inflammation, which has been flagged as a risk factor for heart issues. Vitamins A and C strengthen the heart muscle walls, and the heat of the pepper increases blood flow throughout your body. All of this equals a stronger cardiovascular system. (SELF) So eat up and pour on the hot sauce. You’re doing your body good!

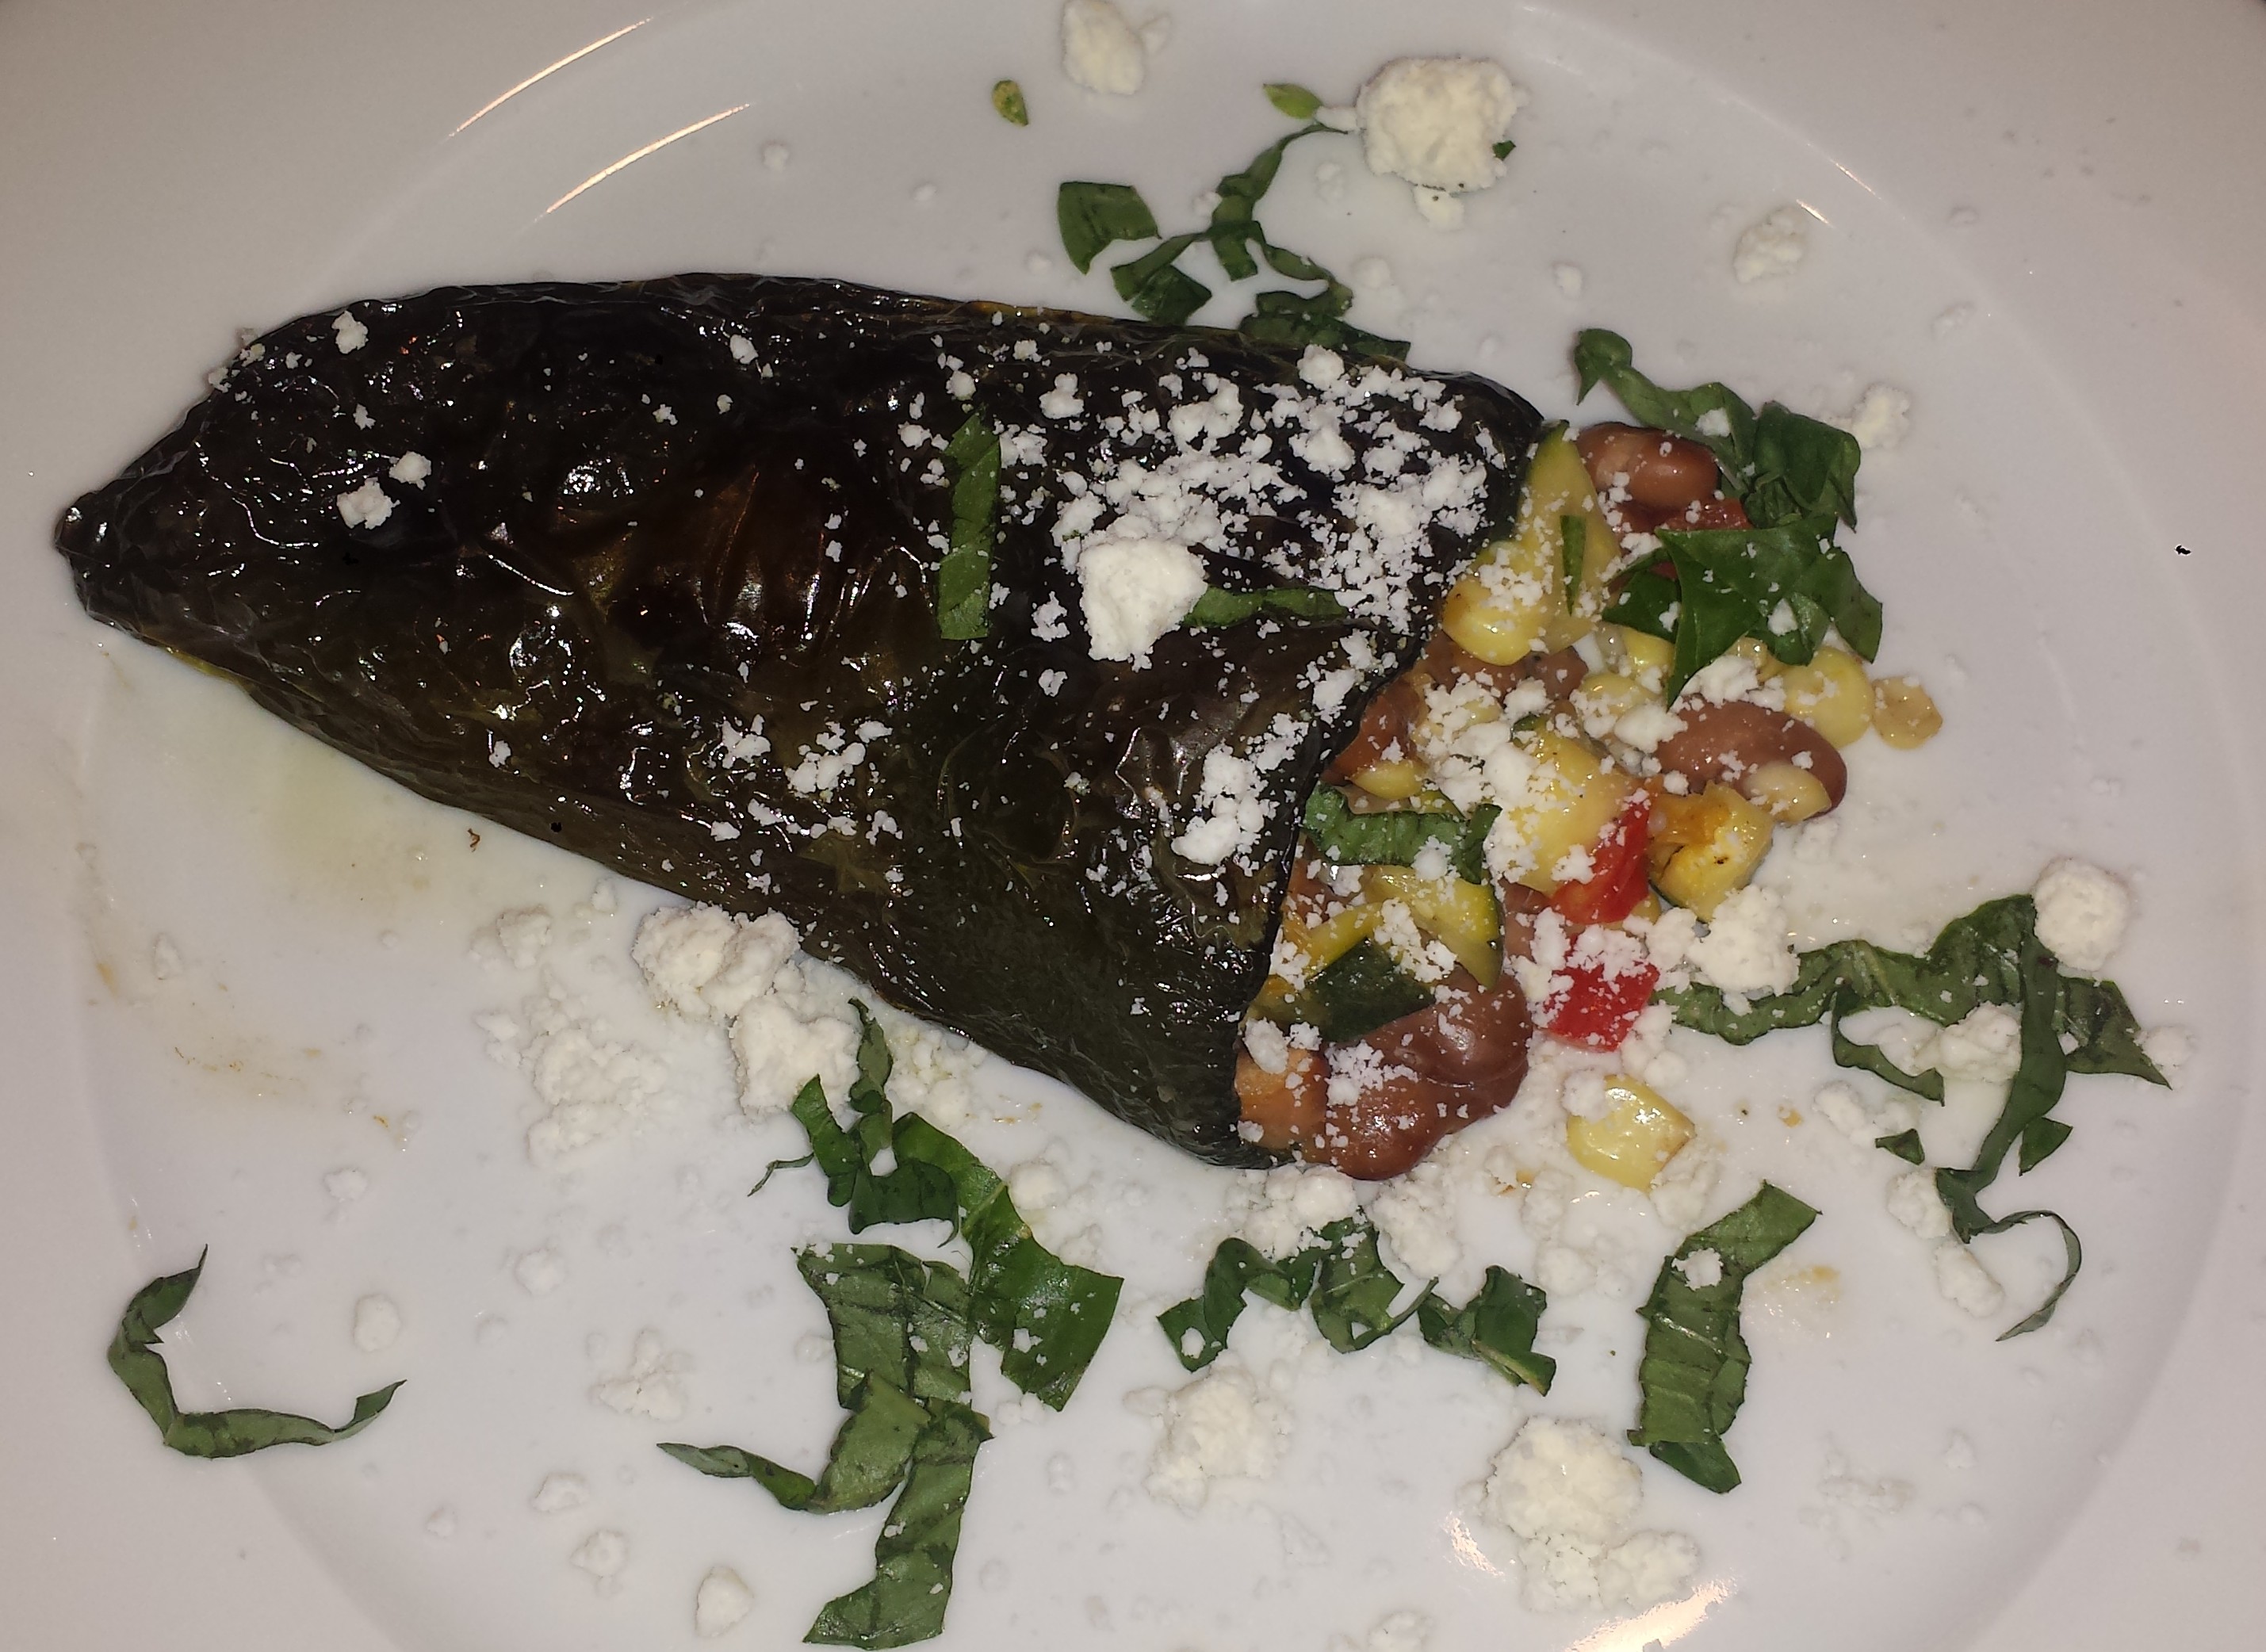
Enjoy them plain or fully dressed with a squeeze of lime.

TIPS: When removing the lid (stem end ), make sure you keep the lid with the matching pepper, otherwise it will be like solving a complicated puzzle to get them to fit later and you don’t want all the stuffing to fall out while they cook. I also recommend cutting veggies into a fine dice to ensure that they are properly cooked. Since these peppers don’t need to cook for very long, larger cut veggies may not have time to soften. The flavors will also blend better if everything is cut a similar size. Think chopped salad.

Recipe Adapted From: Cooking Light, August 2015
POBLANO PEPPERS STUFFED WITH PINTO BEANS, CORN AND ZUCCHINI
(15-ounce) can unsalted pinto beans, rinsed and drained
8-10 medium poblano peppers (or Anaheims) or 6 bell peppers
2 ears fresh corn on the cob or 1 cup frozen corn kernels
1/2 red bell pepper
1 small zucchini
1-2 cups shredded cheddar cheese
1 tablespoon olive oil
1/2 teaspoon salt
1/4 teaspoon black pepper
TOPPINGS (Optional)
lime wedges
chopped fresh herbs (cilantro, parsley or basil)
crumbled queso
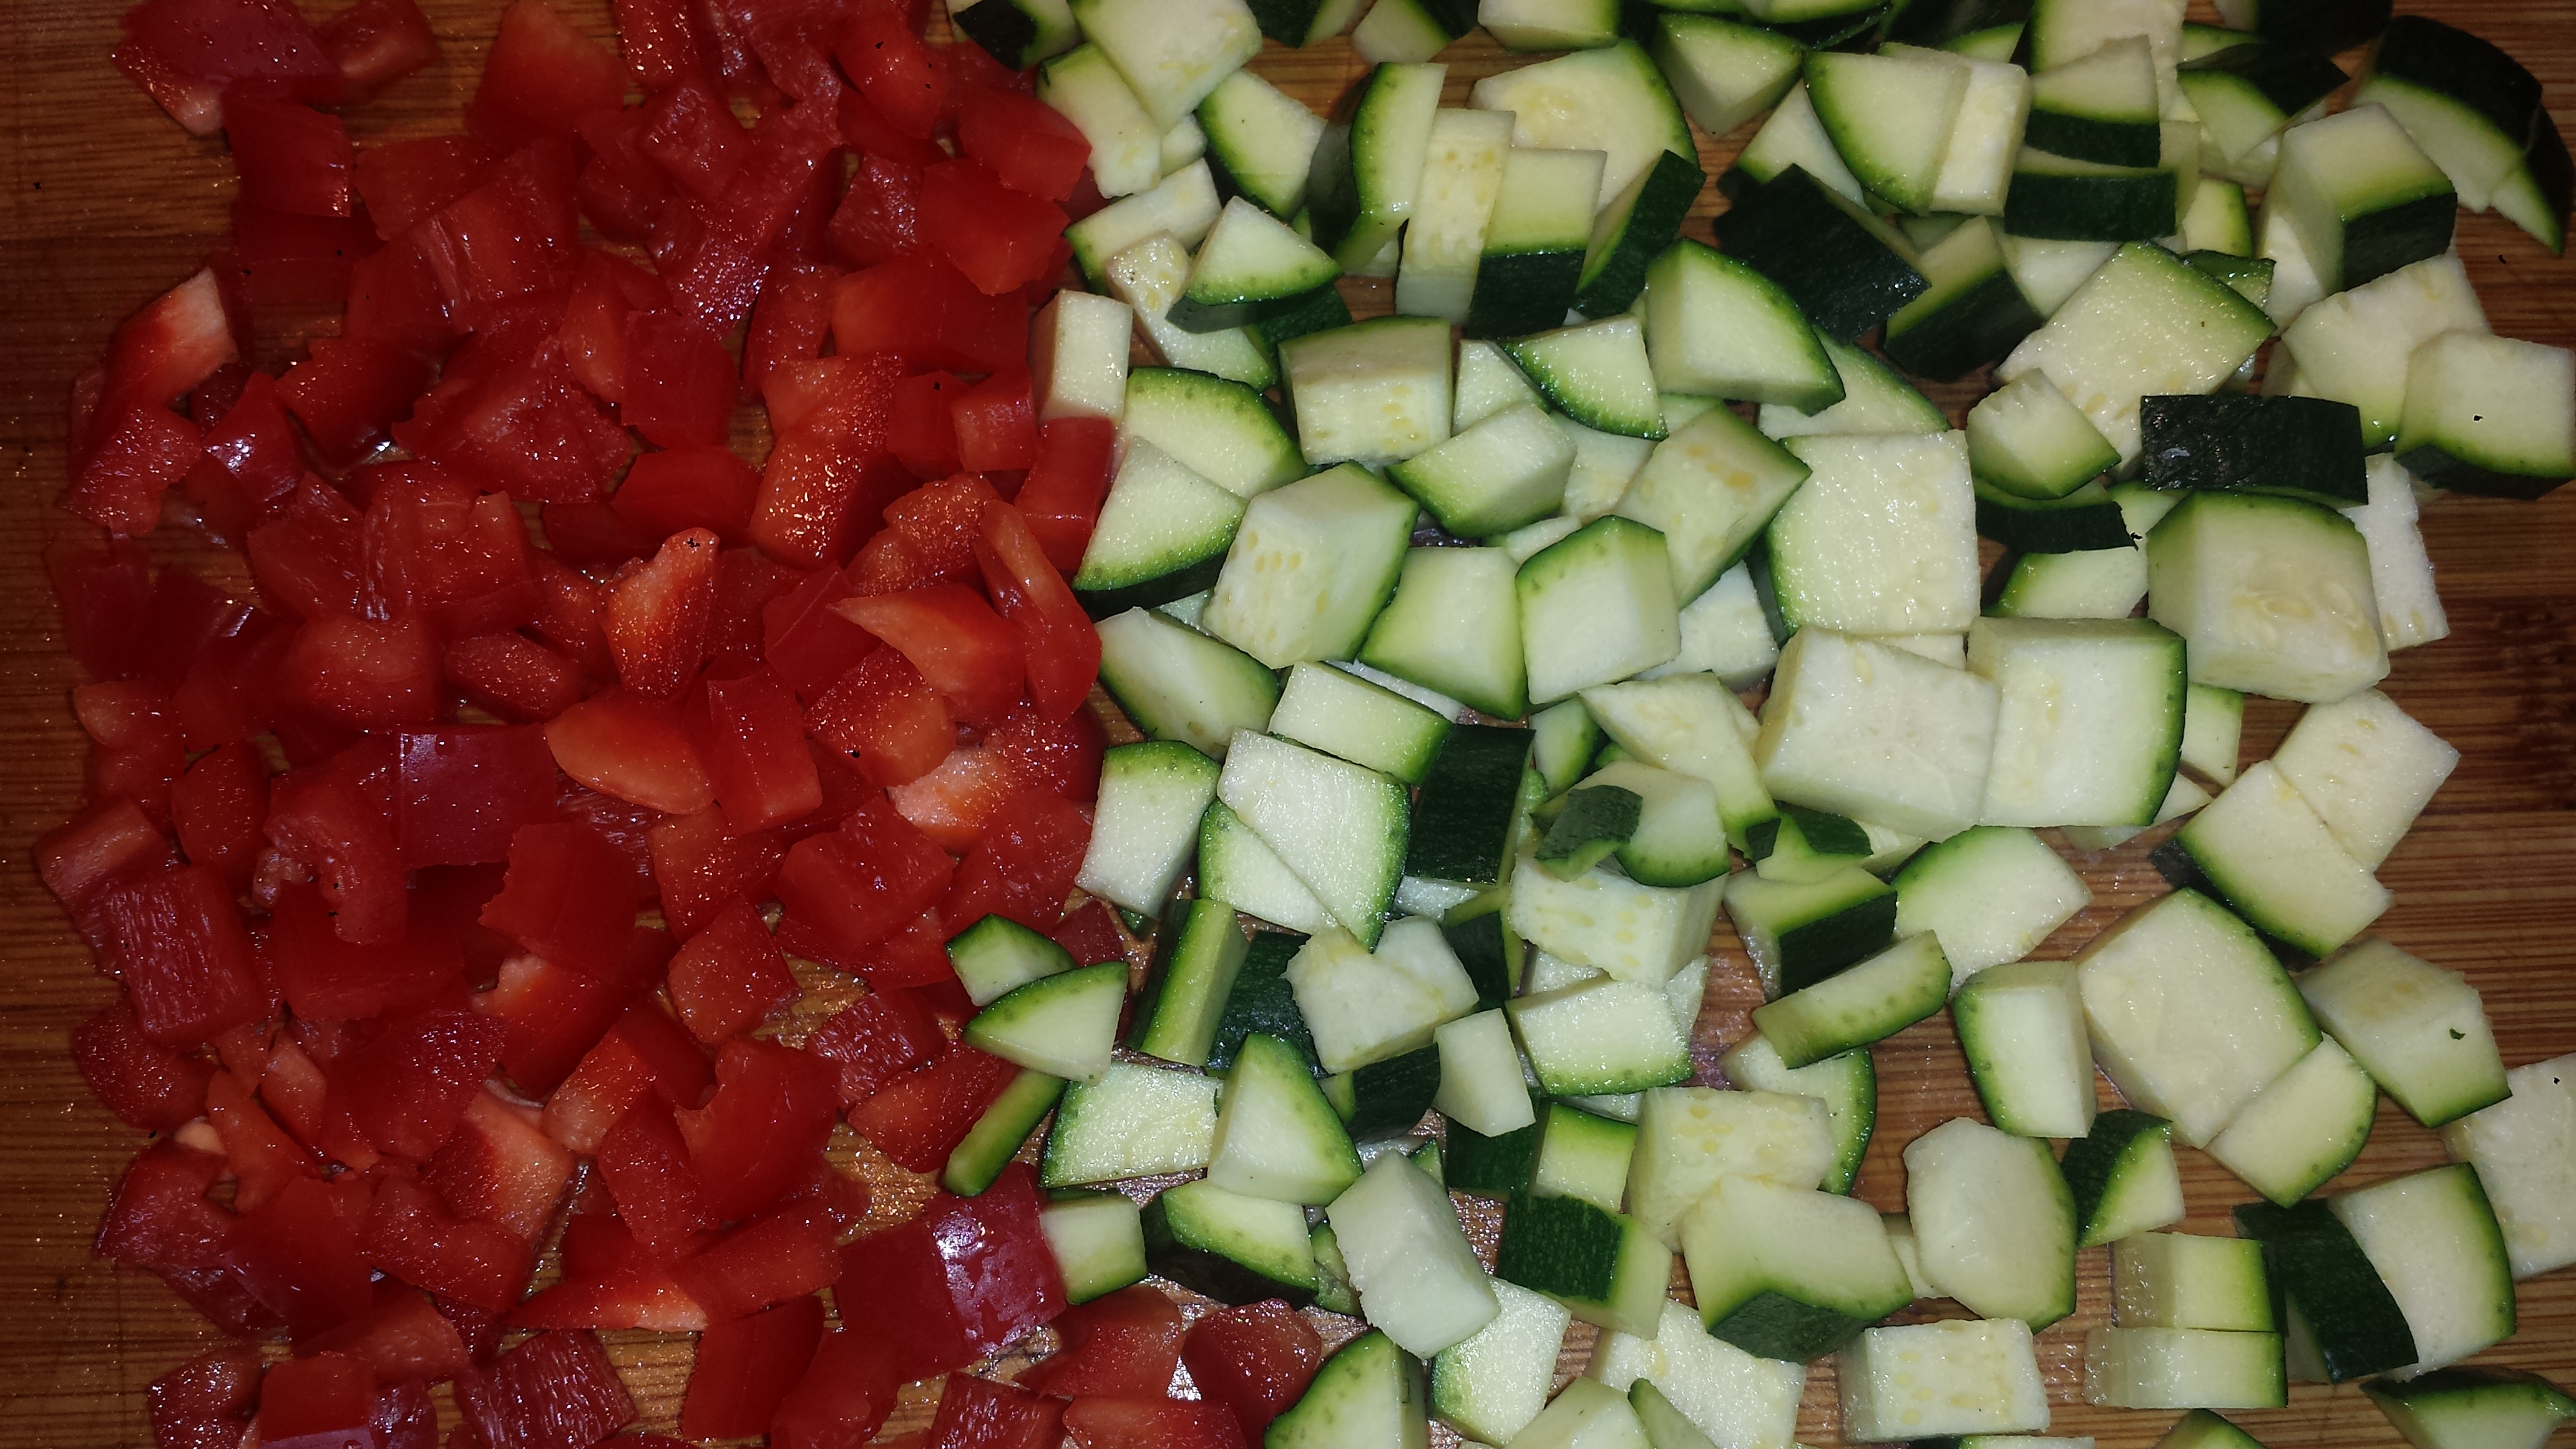
- Preheat oven to 450 degrees or grill to high heat. Cut bell pepper and zucchini into a small dice and place in a medium bowl.
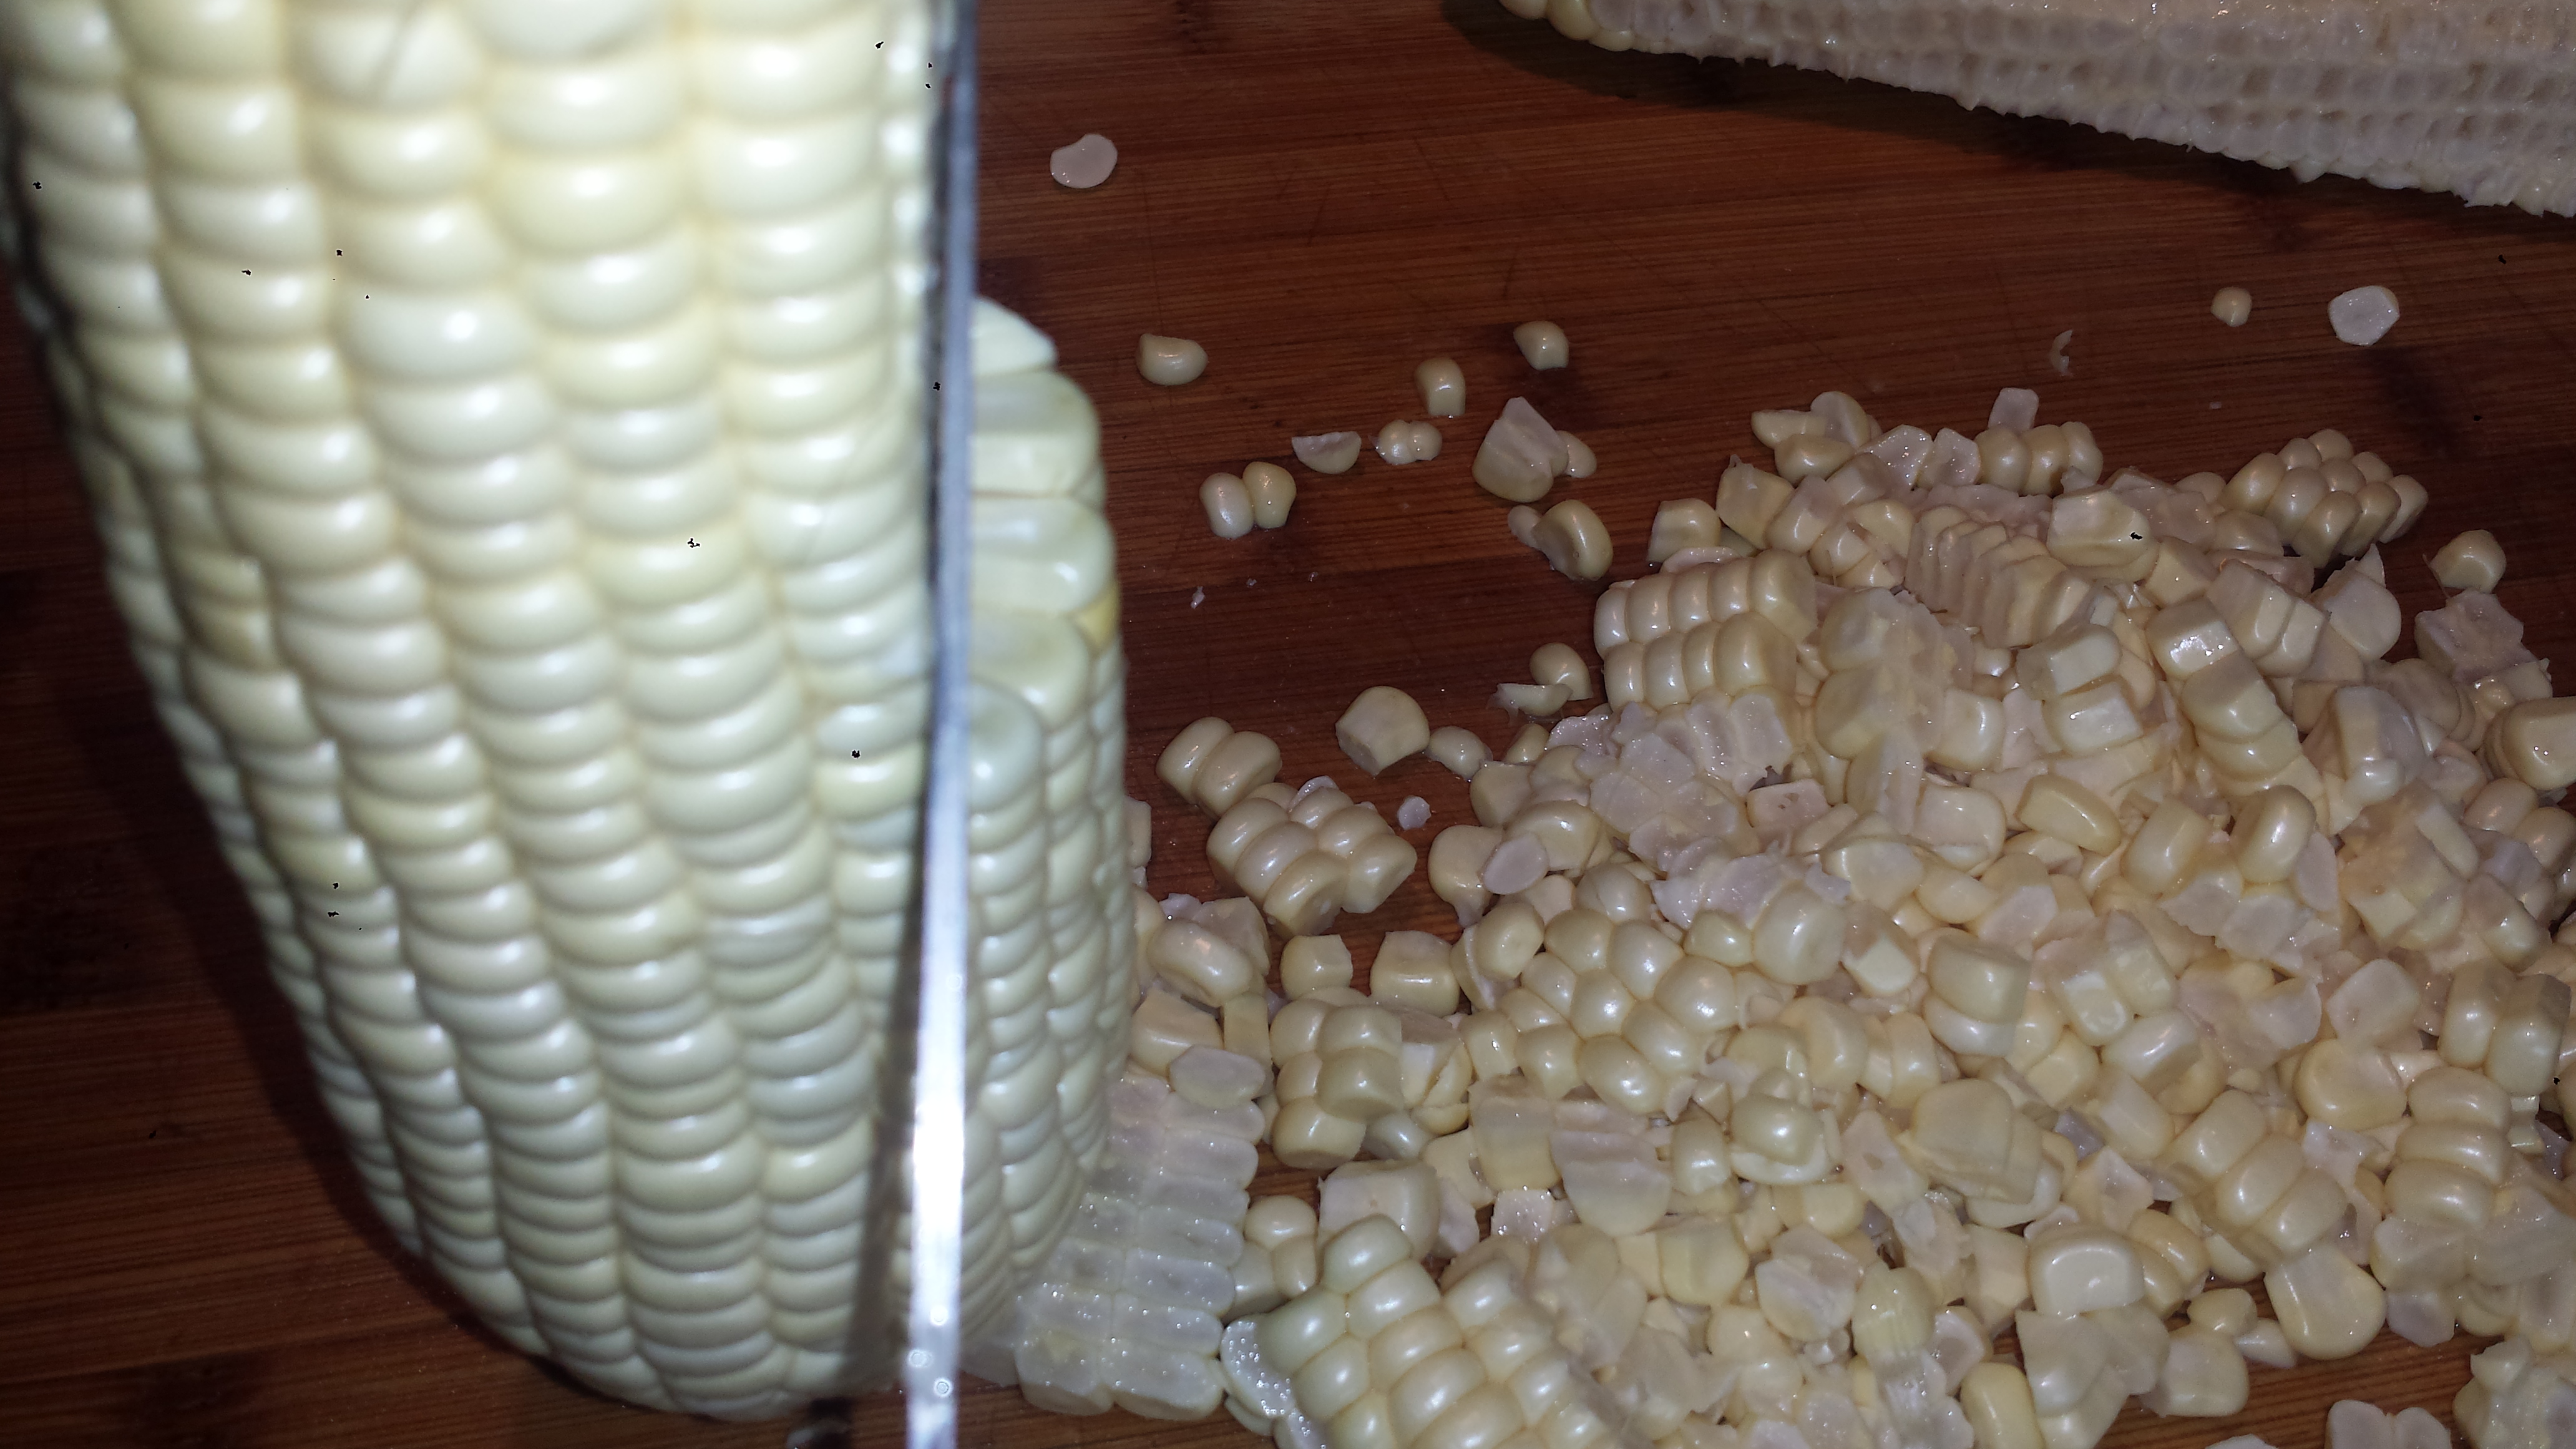
- With a sharp knife, cut kernels of corn from the cob and add to the other veggies.

- Add pinto beans, cheese, salt and pepper to the bowl and stir to combine. (for a less cheesy, lower calorie meal use 1 cup of cheese, or double the quantity for cheese lovers)

- Remove tops from poblanos and reserve tops. Scoop out seeds; discard.
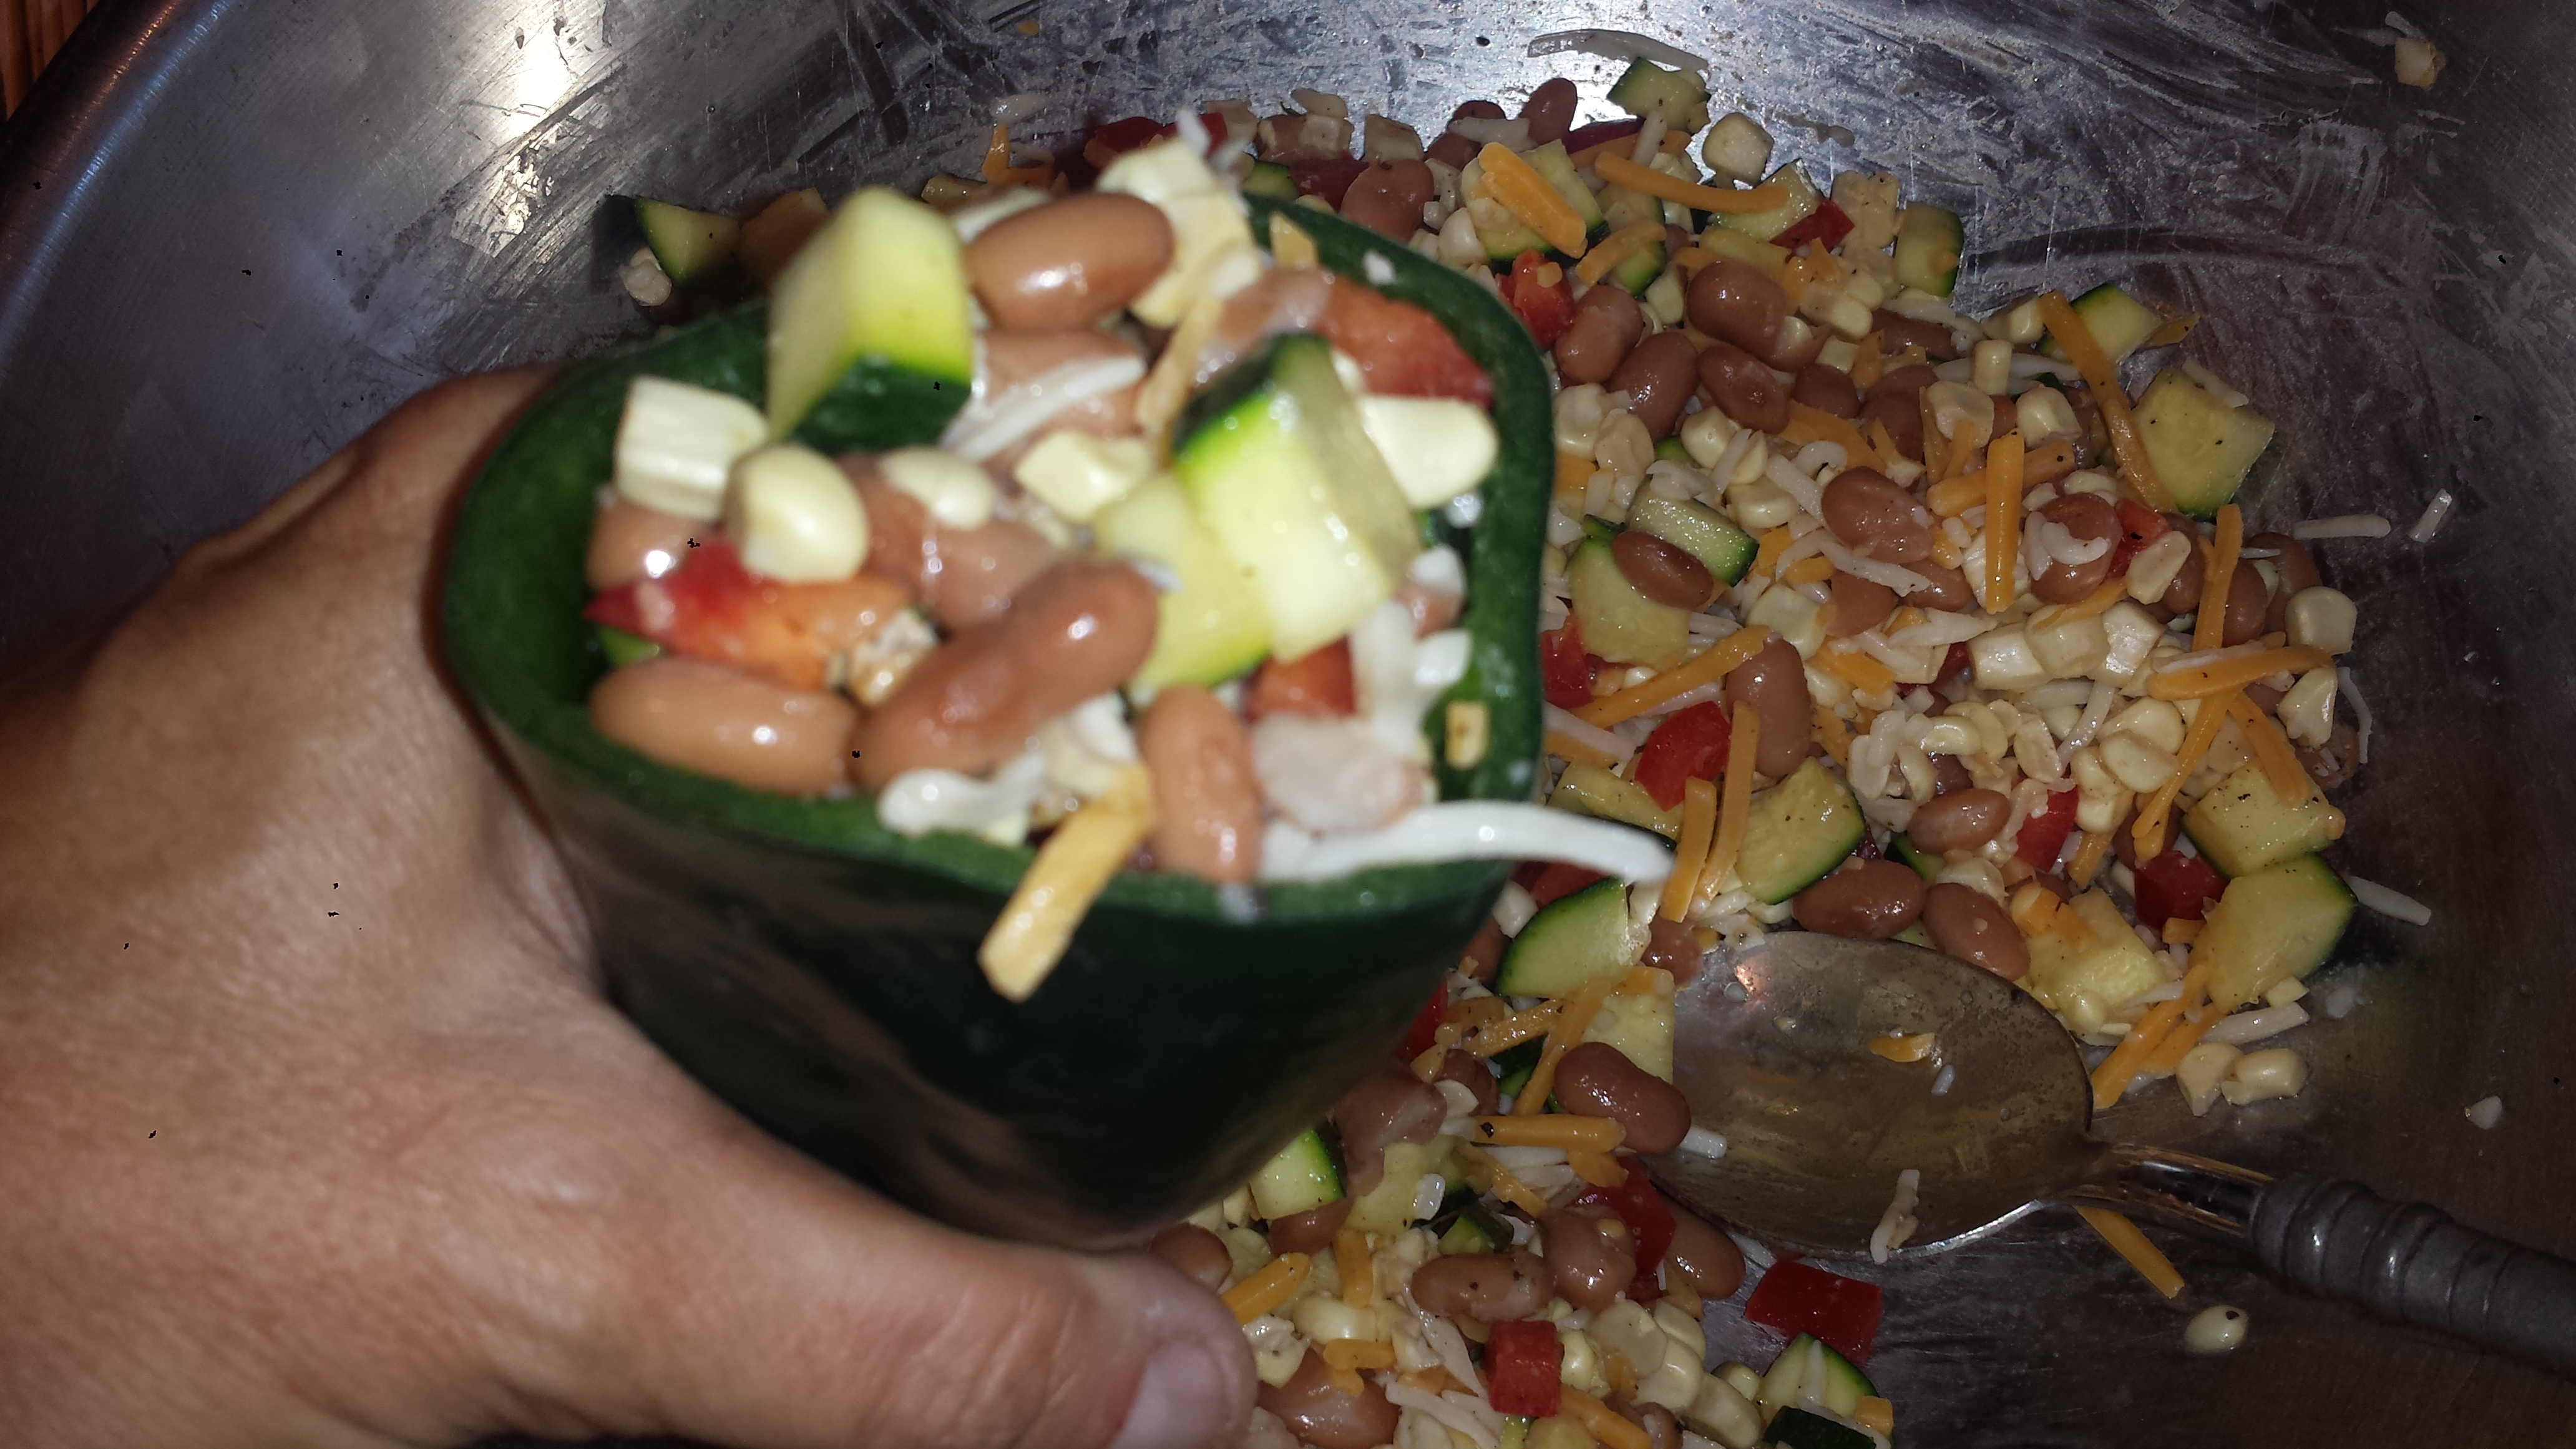
- Place about 1/2 cup bean mixture in each pepper.
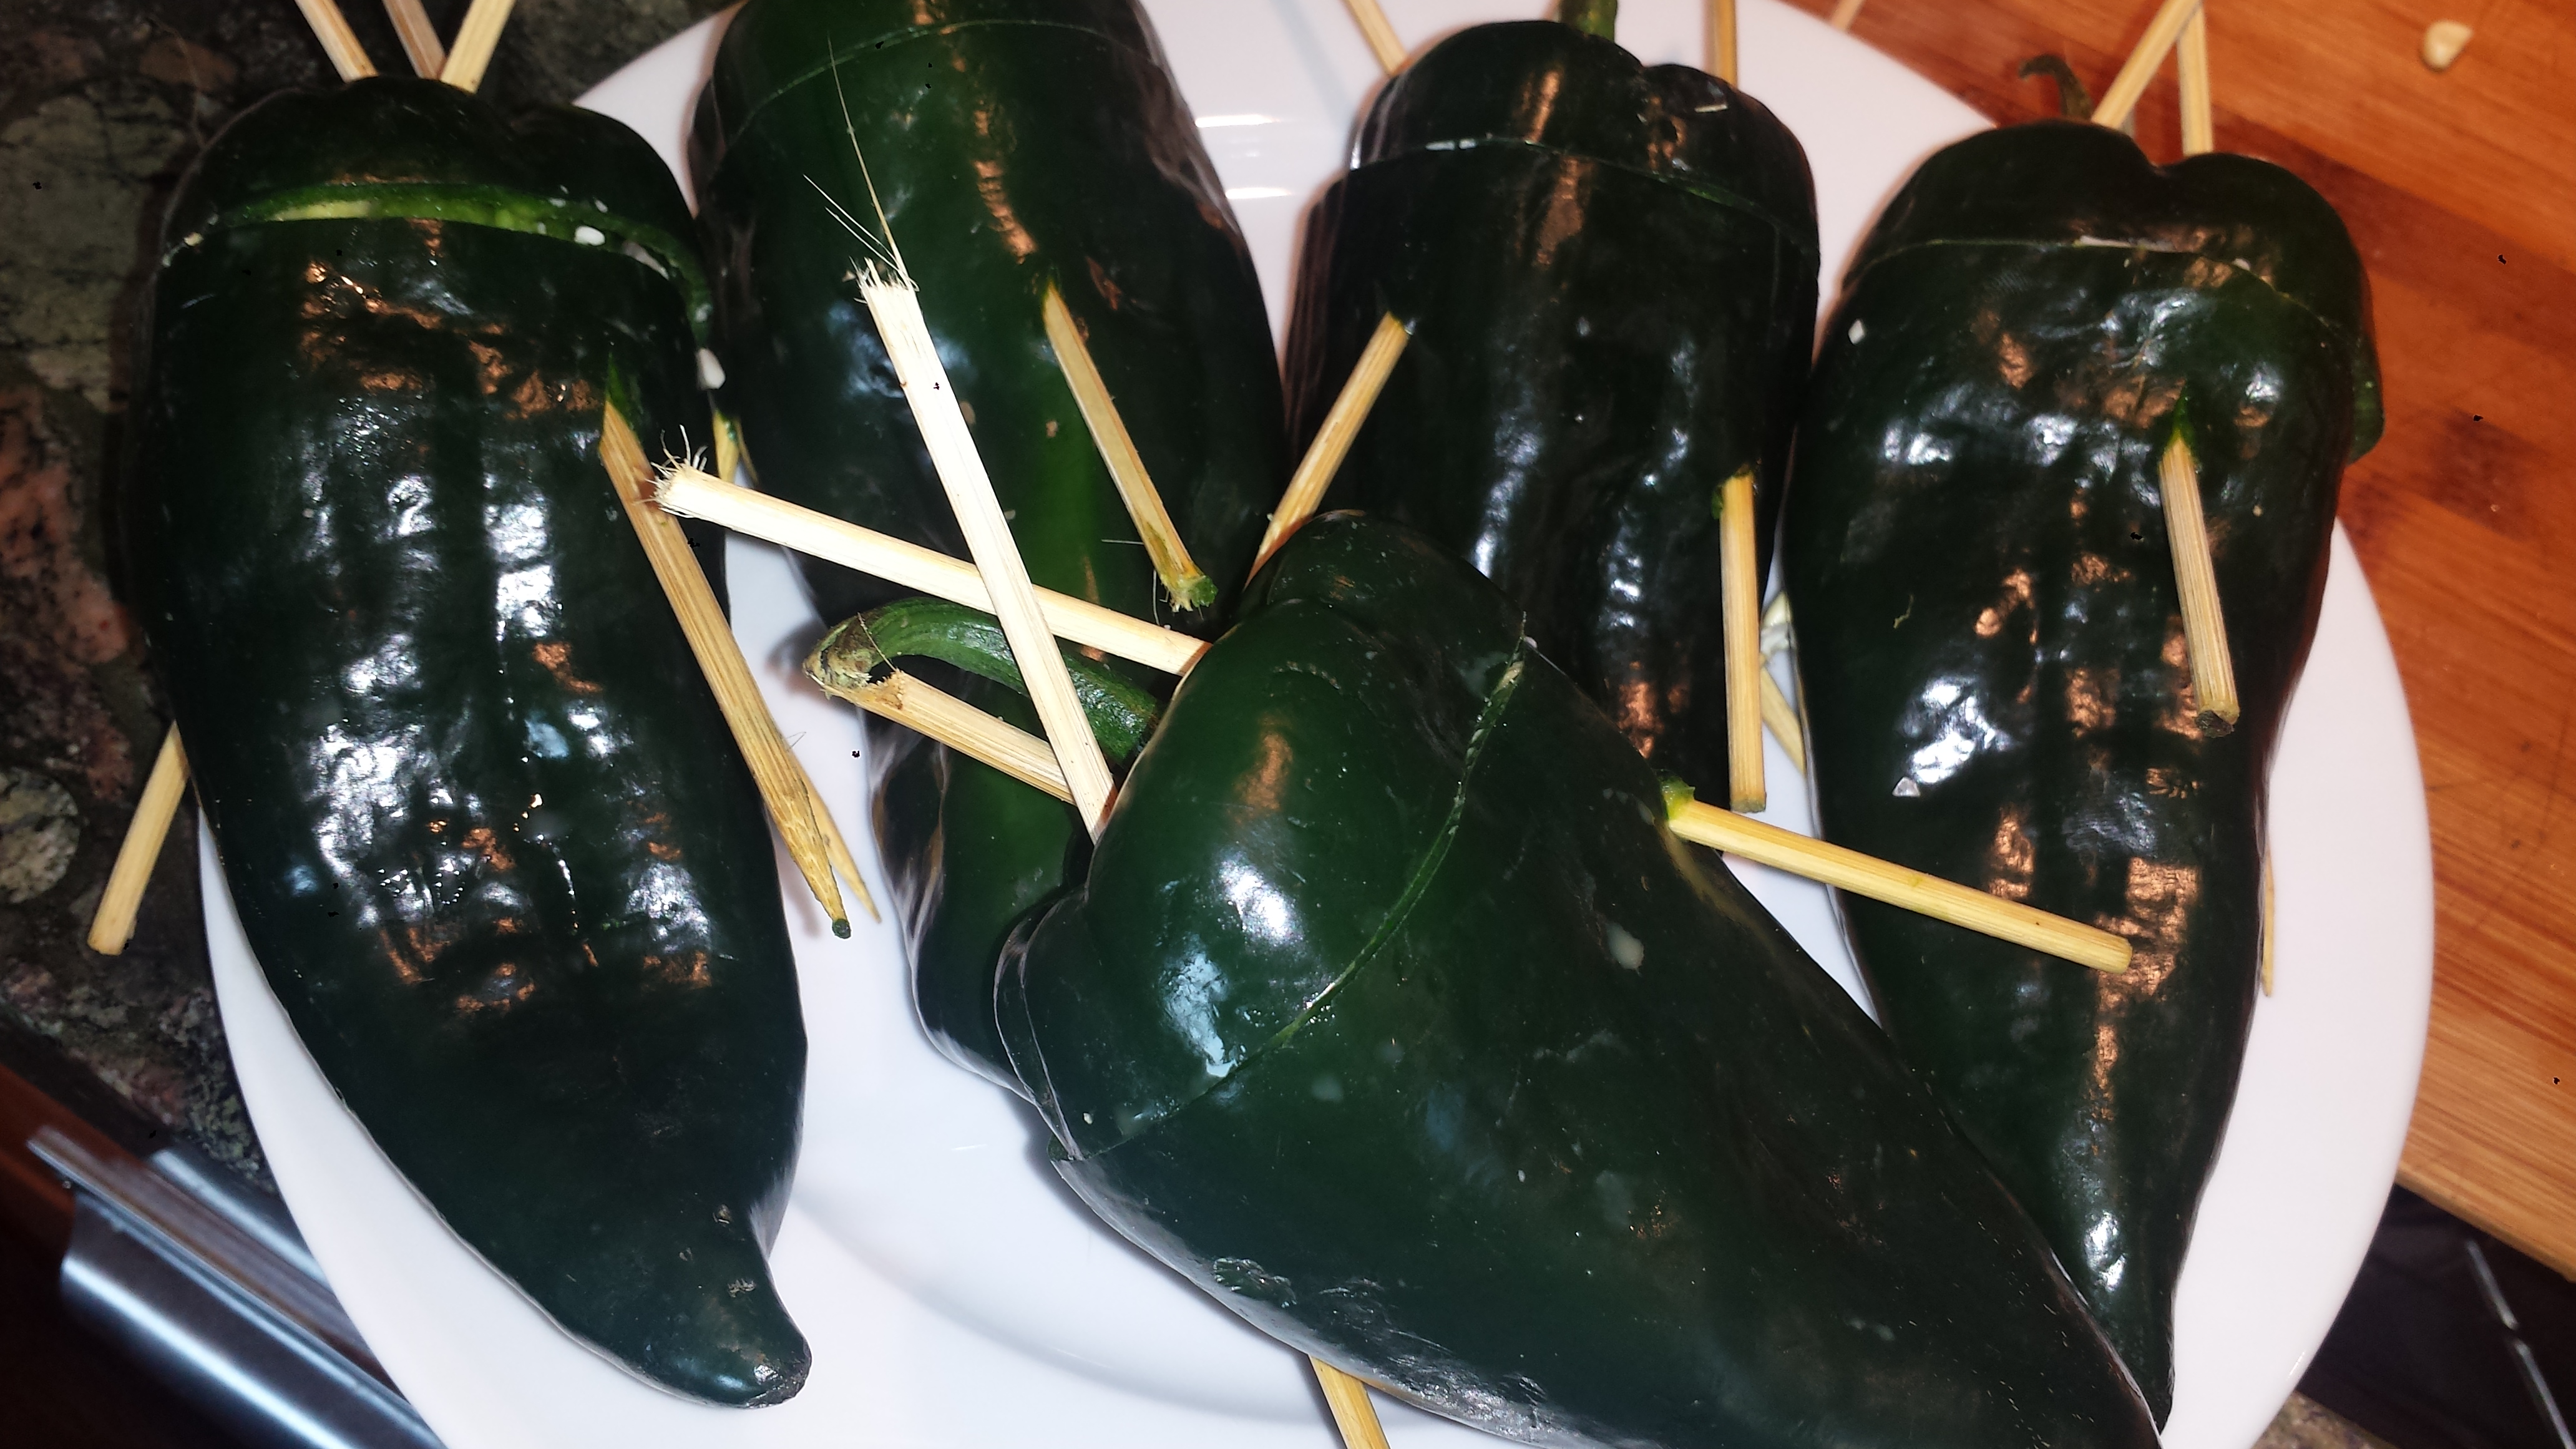
- Replace pepper tops and secure each with wooden skewers. I broke 10 inch skewers in half and used 3 per pepper.
- Brush peppers evenly with oil. Place peppers on grill or oven rack; grill or broil 12 – 15 minutes or until lightly charred, turning once after 6 minutes. (Larger peppers may need to be cooked longer to properly heat the insides.)
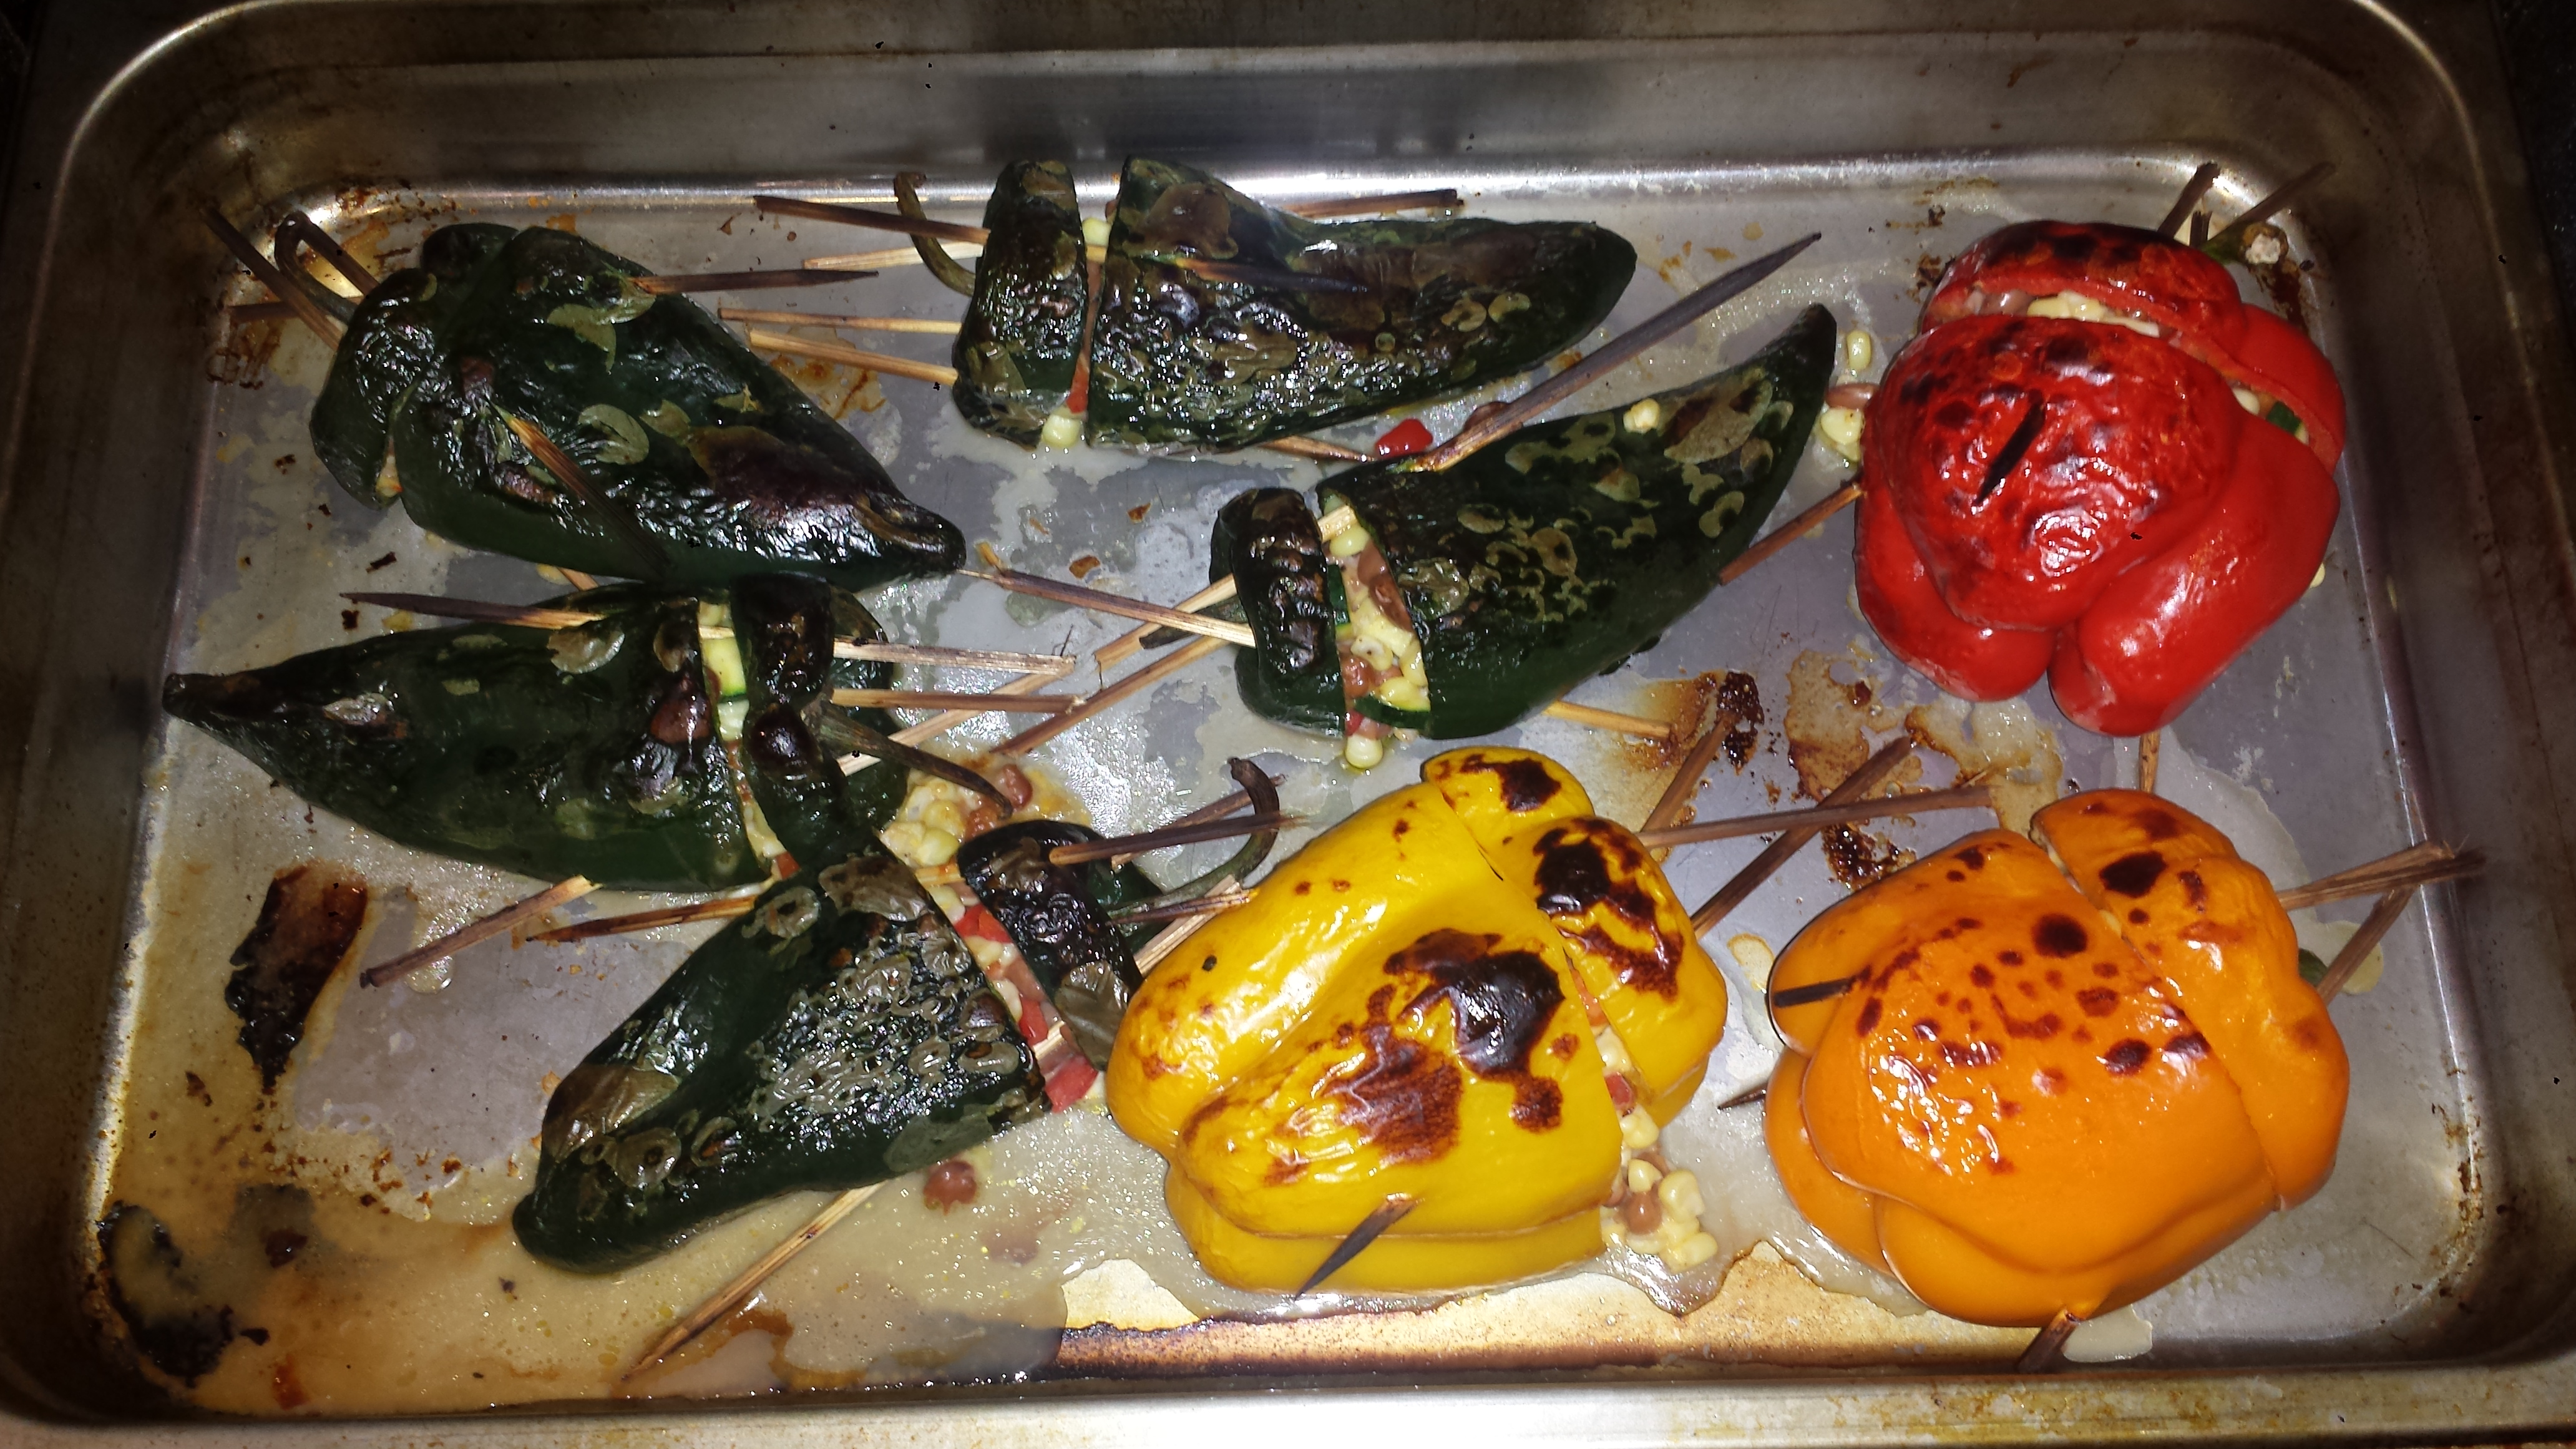
- Place stuffed peppers on a platter; remove skewers. Serve stuffed peppers with lime wedges, crumbled queso and fresh herbs.
(15-ounce) can unsalted pinto beans, rinsed and drained TOPPINGS (Optional)Poblano Peppers Stuffed with Pinto Beans, Corn and Zucchini
8-10 medium poblano peppers (or Anaheims) or 6 bell peppers
2 ears fresh corn on the cob or 1 cup frozen corn kernels
1/2 red bell pepper
1 small zucchini
1-2 cups shredded cheddar cheese
1 tablespoon olive oil
1/2 teaspoon salt
1/4 teaspoon black pepper
lime wedges
chopped fresh herbs (cilantro, parsley or basil)
crumbled queso