100th Post – Cauliflower “Mac” and Cheese

1

100

Wow, this is my 100th post! I’ve certainly learned a lot since publishing my first recipe, Green Curry Tofu, on November 25, 2013. I had never even been on a blog before starting Goodmotherdiet, so it has been quite a learning curve.  I got a domaine name on WordPress and suddenly, I was a blogger!  Every new techie thing I have learned, has been a major victory, like successfully uploading photos and then figuring out how to make them larger than a thumbnail; or adding links that work and making my recipes printable. I’m even writing code! What? Six months ago I didn’t even know what that was!  My thought processes and food choices have also evolved. It’s been over a year since I’ve eaten meat, other than the occasional free range chicken, and I feel good about the evolution, but I promised myself not to make any permanent changes, or edits to my About Page, until GMD turns one in November.  There will definitely be some edits since I now have a different and stronger perspective than when I started.  It’s interesting how just a simple change in diet can also change your way of thinking.  Anyway, thanks for joining me on this journey.  I hope you’re enjoying the ride…  You can follow me via email by clicking the Follow Me button or you can Like the Goodmotherdiet Facebook Page, both top left of the screen.

be-the-change
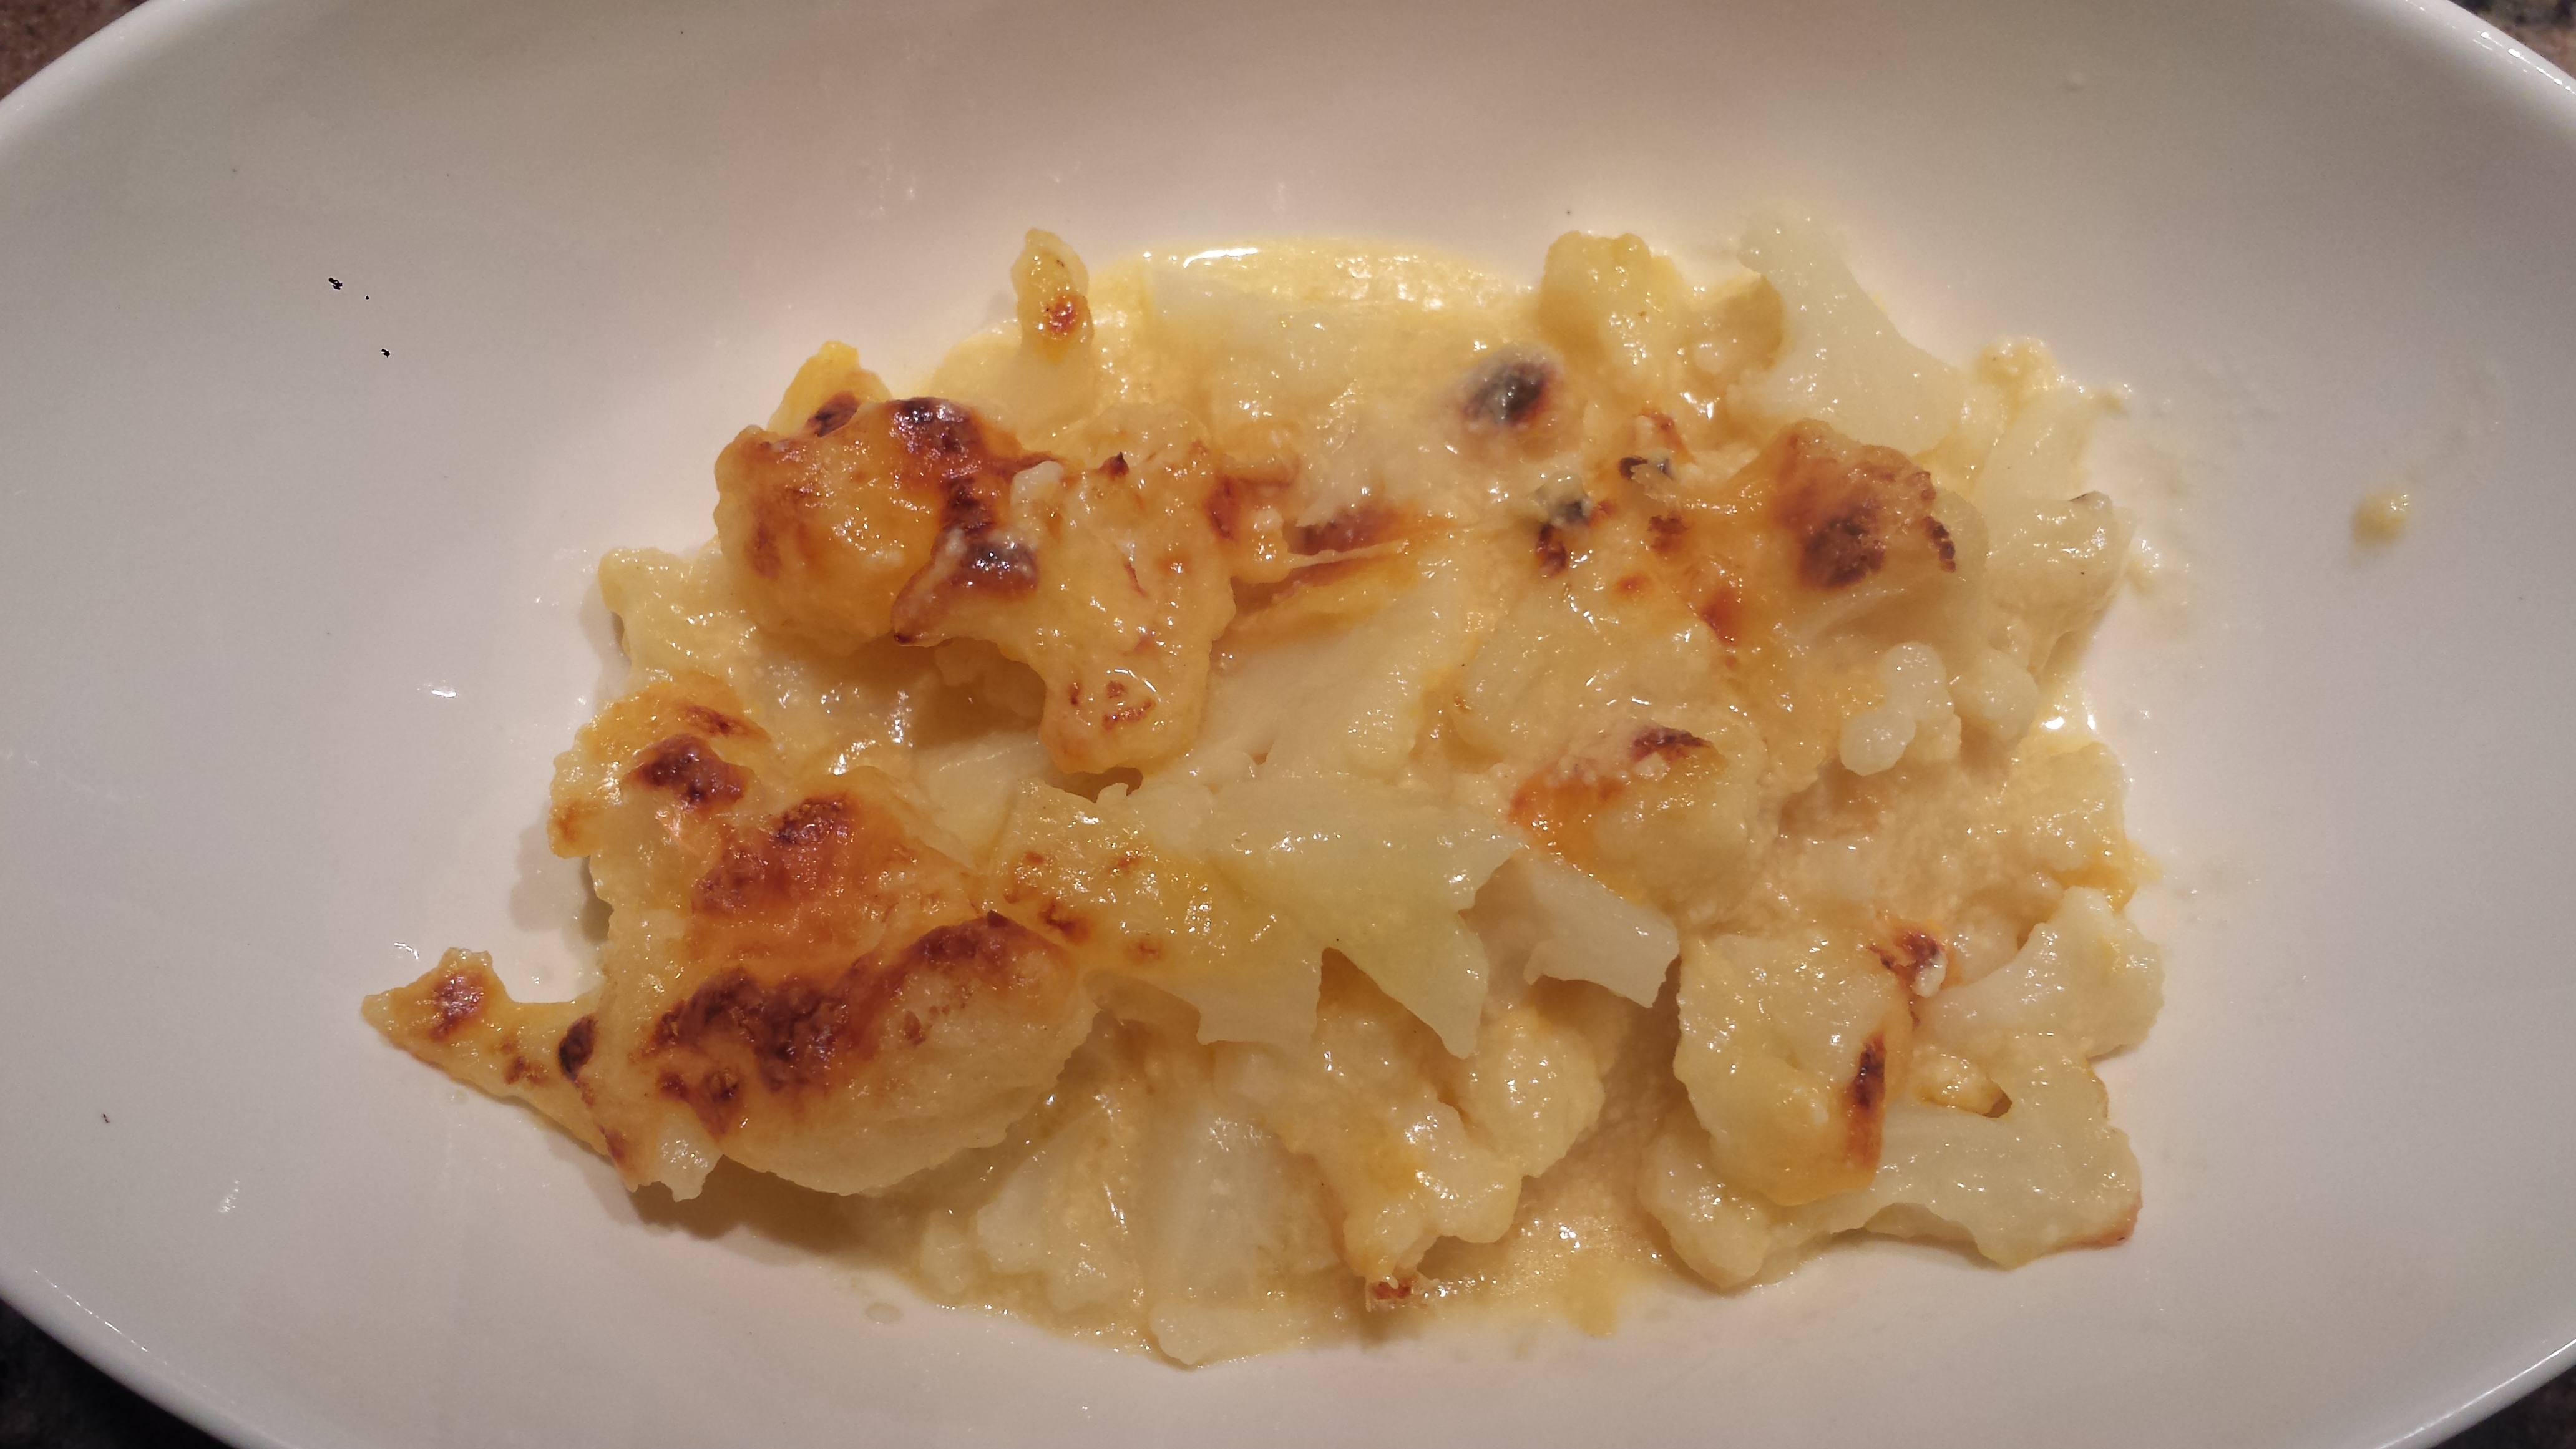
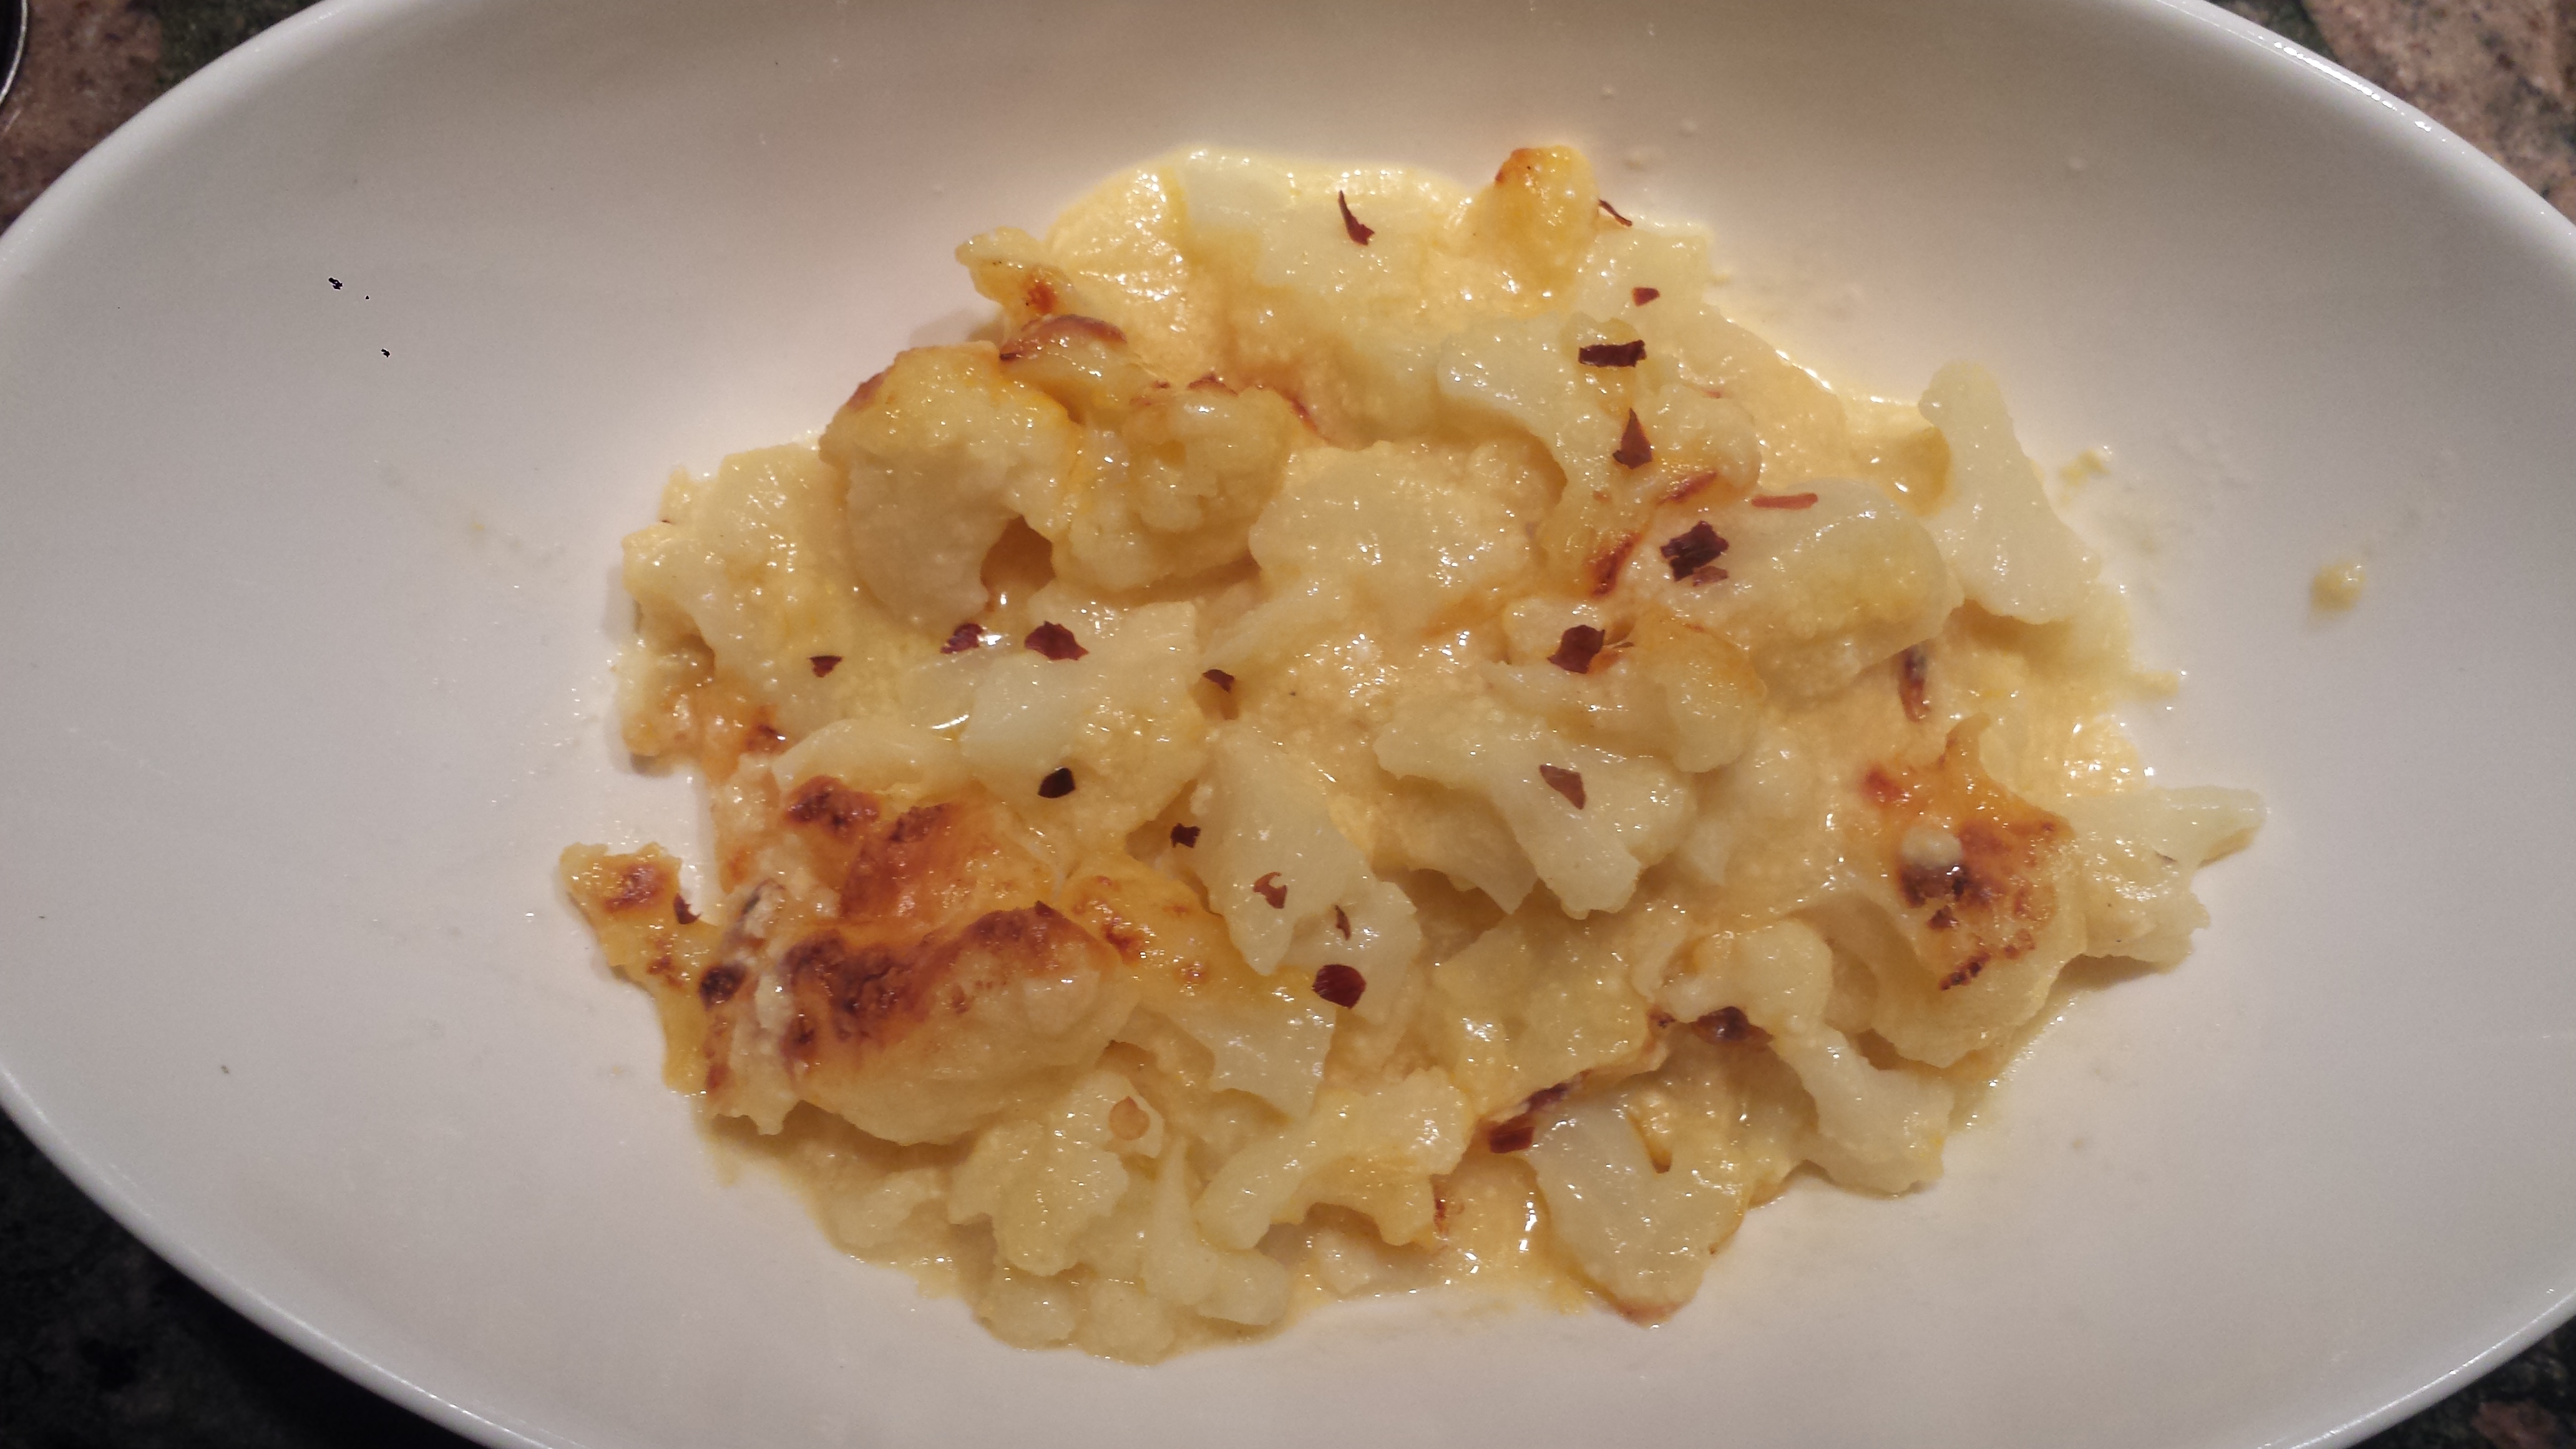
Deciding what to feature for my 100th post which happens to fall on a Wheatless Wednesday, was a challenge until I came across a recipe for Cauliflower ‘Mac’ and Cheese  on Tabitha’s Gluten Free Dishes, which is a great blog that I follow.  What is more iconic or American than Macaroni and Cheese? Nothing is quite so comforting as a big bowl of yummy, creamy cheesiness!   How about a Mac and Cheese that has no actual pasta but still satisfies that craving?  Many versions of Cauliflower Mac and Cheese are available including those by Dr Oz and Rachel Ray. Most recipes include heavy cream and cream cheese.  I have opted to make a ‘skinny’ version using non-fat milk and yogurt instead of heavy cream.  Cauliflower is a good stand in for pasta and many other things as it is extremely versatile and good at absorbing flavors while adding a variety of good nutrients and fiber but little fat and no cholesterol.  I have already posted recipes for Cauliflower Crust Pizza  and Cauliflower Buffalo ‘Wings’ and Cauliflower Puree instead of mashed potatoes, all with great success. So here goes…

Cauliflower Mac Cheese15

TIP:  You can use any kind of cheese that you like but a sharp cheddar gives you more bang for your buck than mild, in that it’s stronger flavor allows you to use less cheese (hense fewer calories and fat).  Another way to cut fat and calories is to use 2 cups non-fat milk and increase the butter and flour to 3 Tablespoons each,  or 1 1/2 cups low or non fat milk and 1/2 cup full fat milk or cream.  If you like extra creamy, you can use all heavy cream and even add 2 tablespoons of cream cheese.  To make this vegan, use coconut oil, almond milk and vegan cheese.  I used 1 1/2 cups non-fat milk and 1/2 cup non-fat yogurt with good results.  Several recipes I looked at called for adding cayenne pepper, onion powder, sautéed onions or fresh scallions before cooking, so think about those as options.
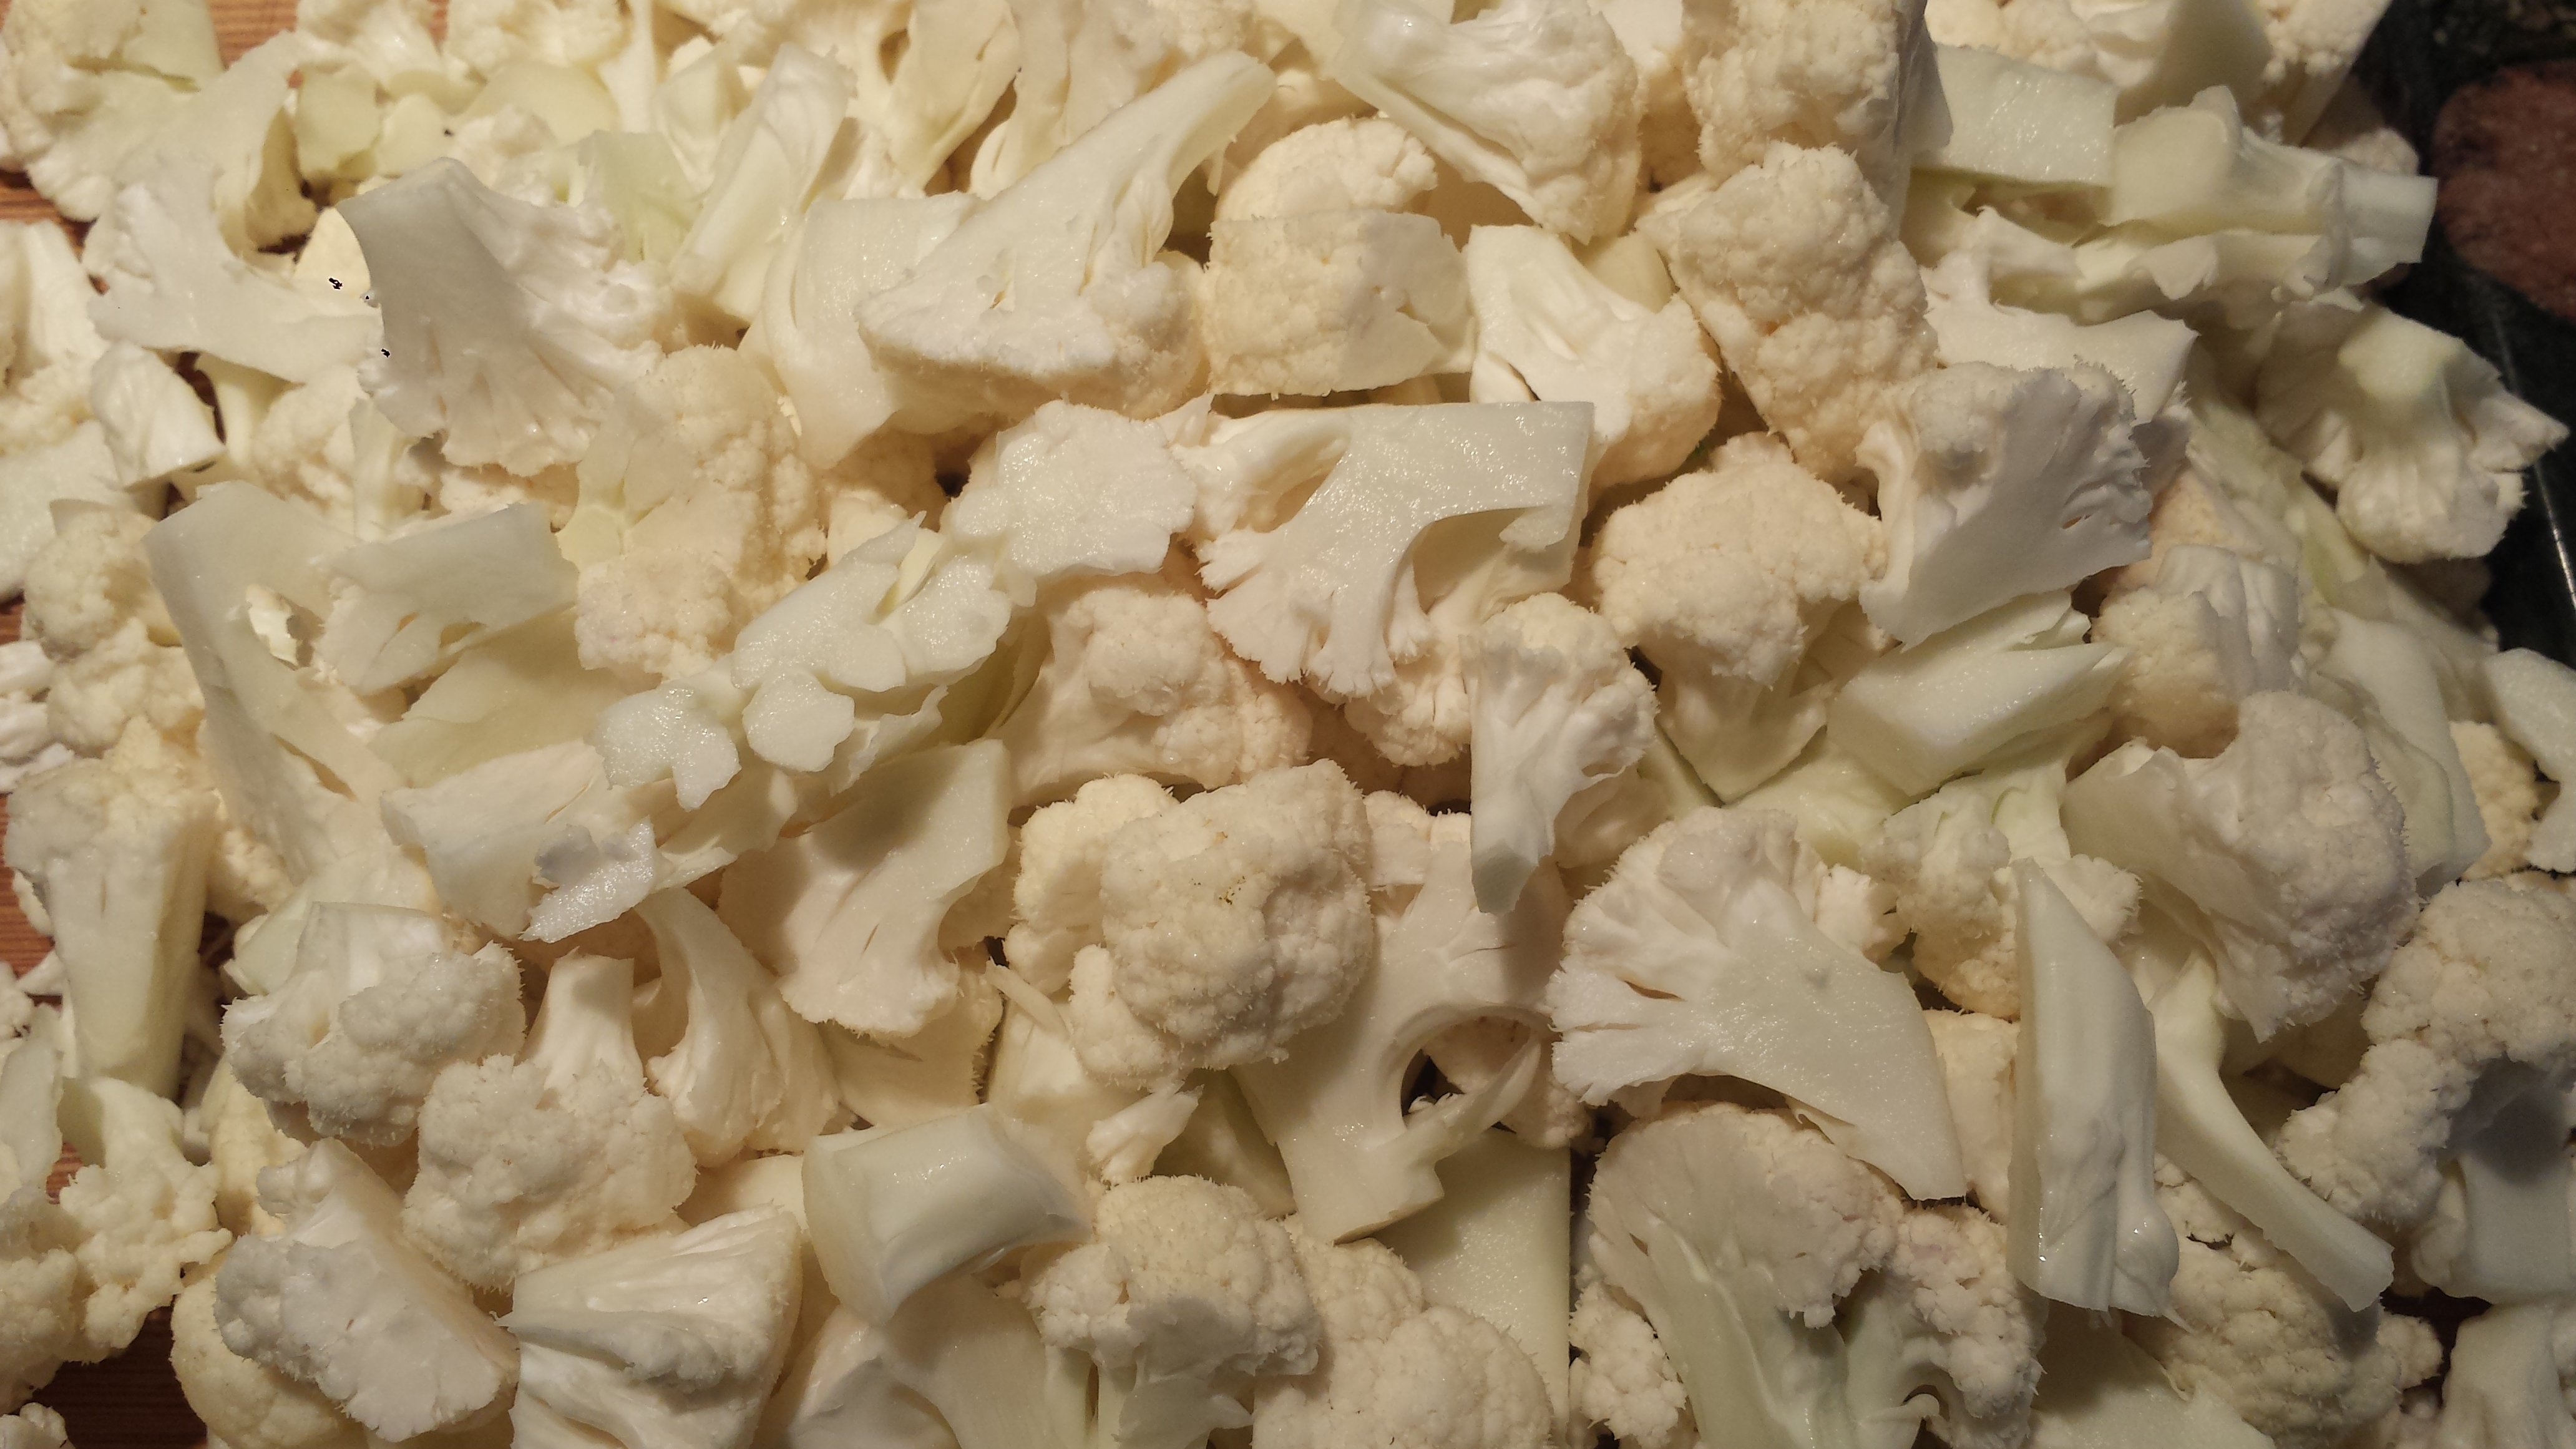
Cauliflower Mac and Cheese

  • Servings: 4
  • Difficulty: easy
  • Print

Cauliflower Mac Cheese13

1 head cauliflower
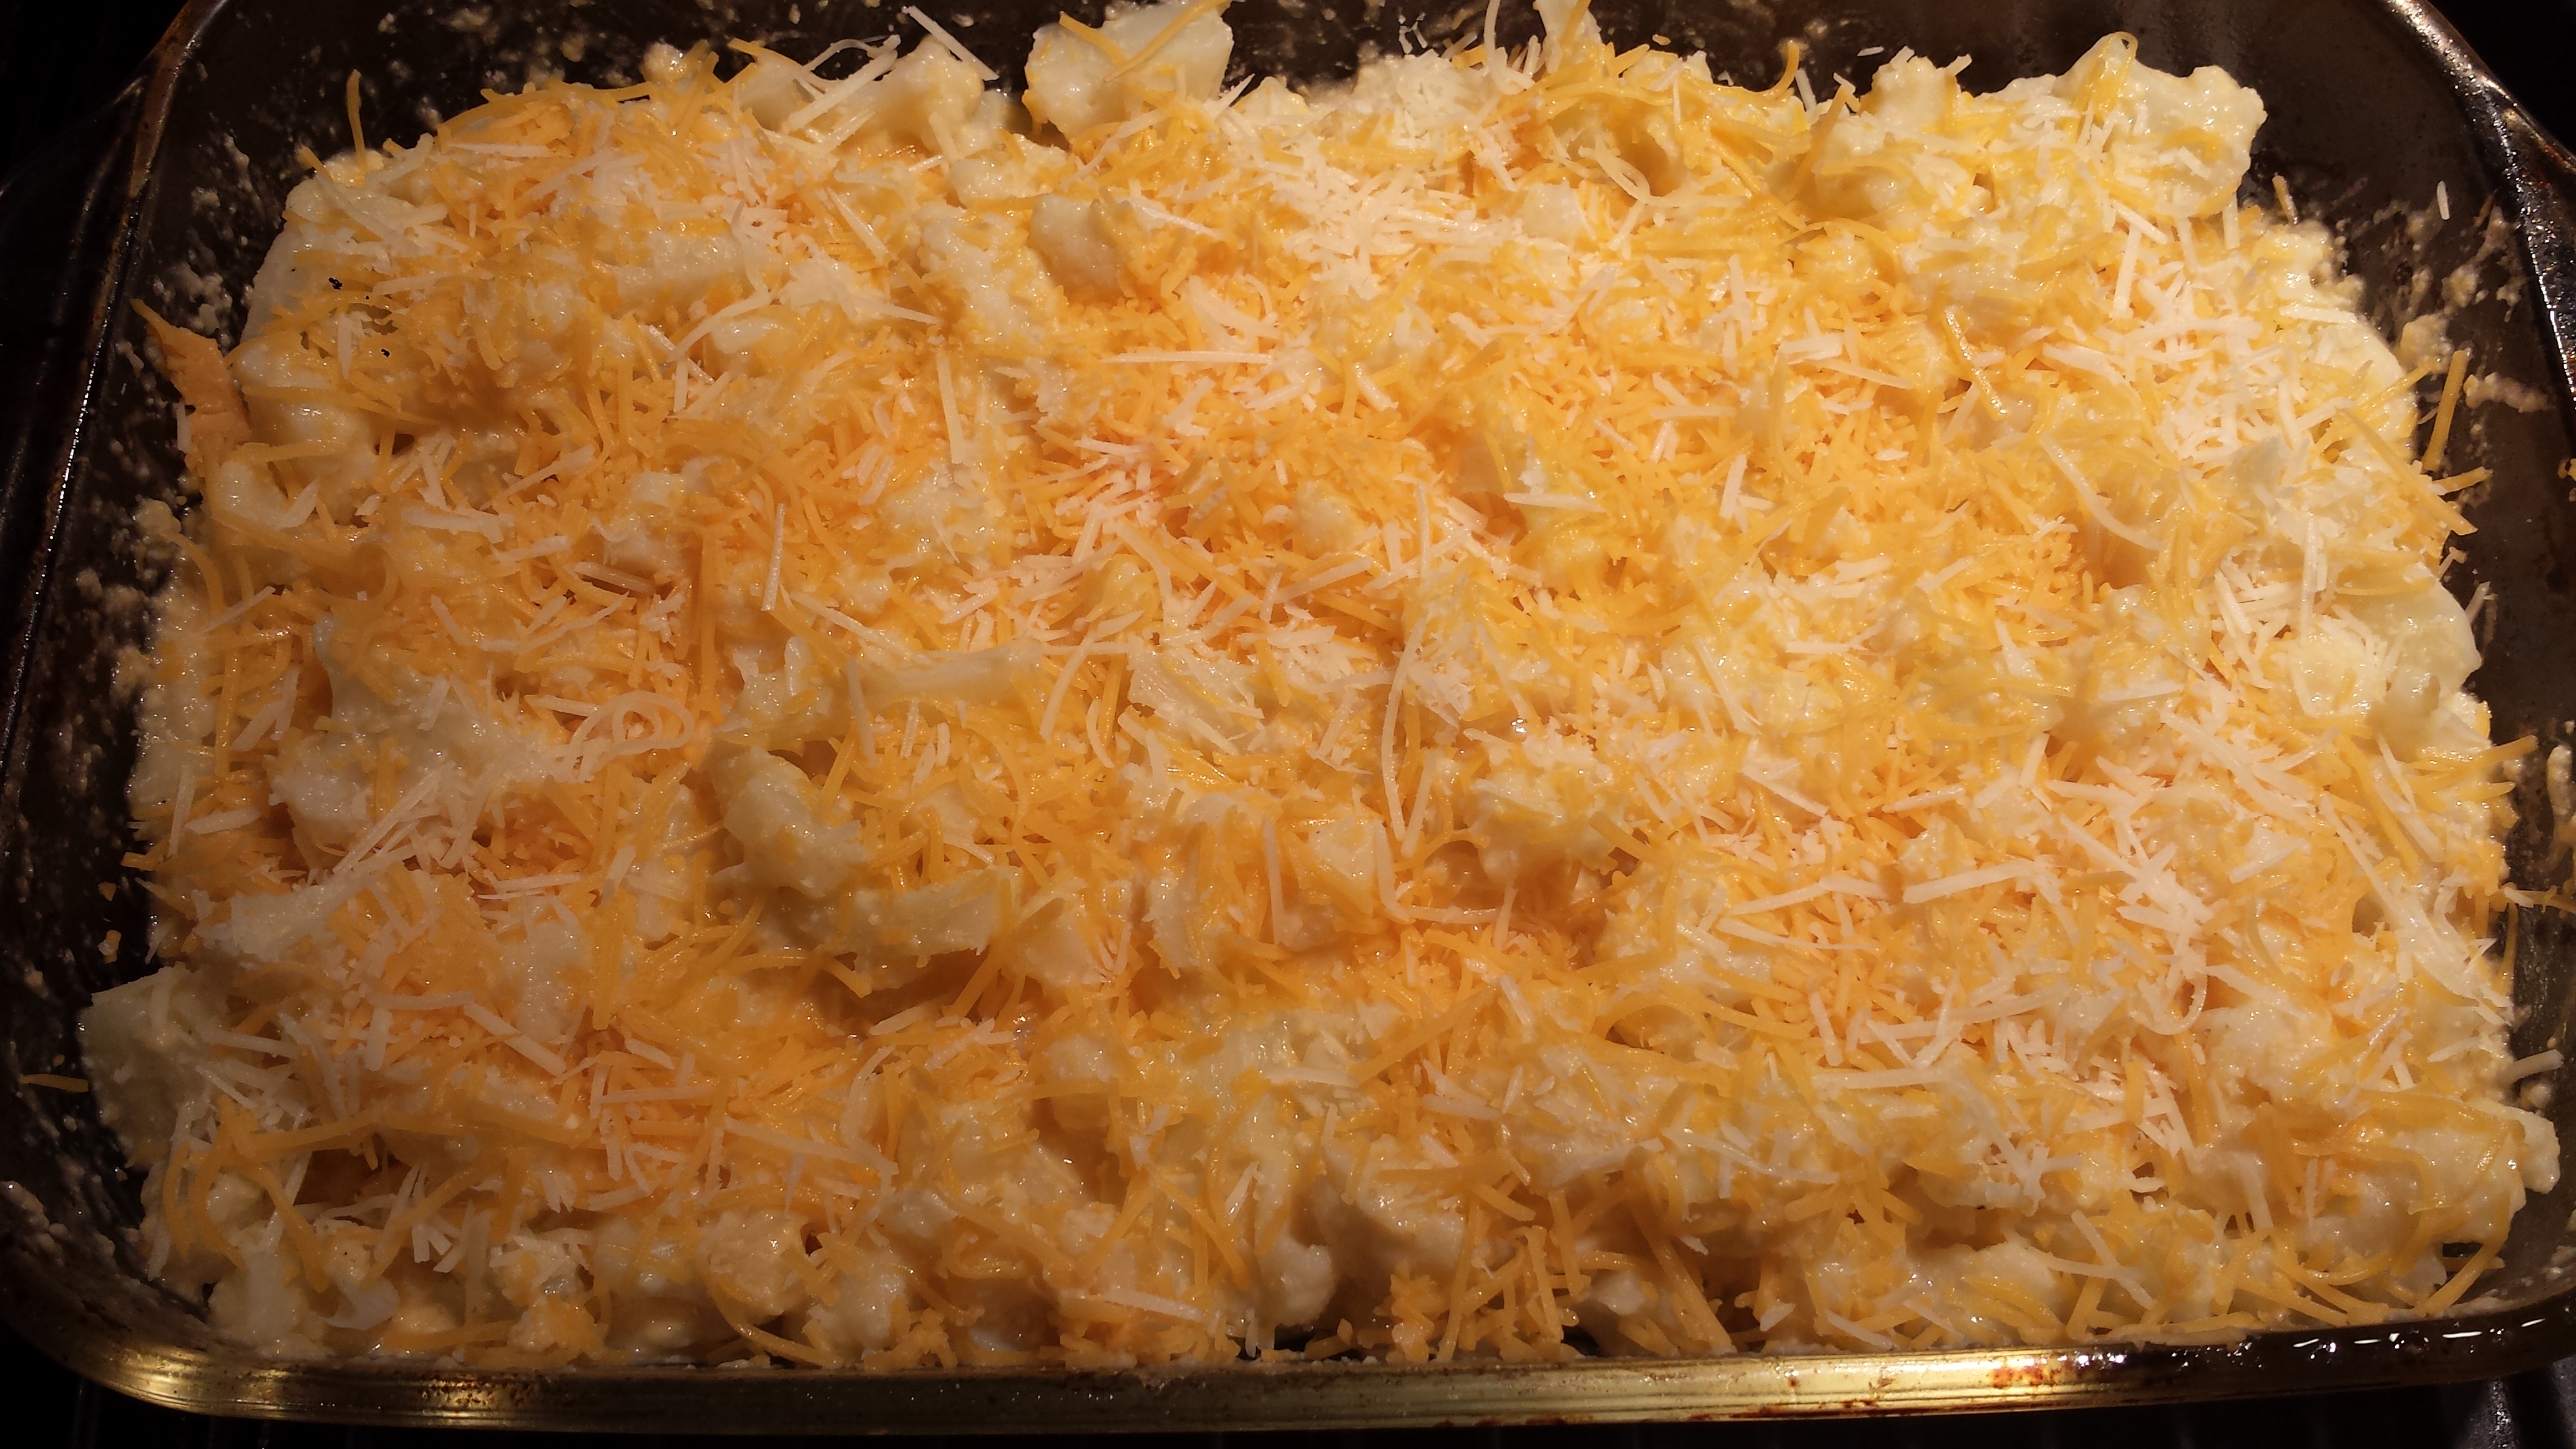
2  cups mild or sharp cheddar (gruyere, Swiss or your favorite melty cheese)
1/4 cup shredded parmesan (optional)
2 Tbsn butter
2 Tbsn flour (rice, oat or quinoa flour work well in lieu of wheat flour)
1 1/2 cups non or low fat milk  (see Tip above for other options)
1/2 cup yogurt
1 tsp Dijon mustard
1/4 tsp salt
1/4 tsp pepper


  • Pre-heat the oven to 375F
  • Spray a baking dish with cooking spray and set aside.

Cauliflower Mac Cheese2

  • Cut core out of cauliflower and break or cut into small florets.

Cauliflower Mac Cheese3

  • Bring a pot of water to a boil and par boil the cauliflower florets for 5 minutes. Rinse in cold water, drain well and pat between several layers of paper towels to dry. Transfer the cauliflower to the baking dish and set aside.

Cauliflower Mac Cheese4

  • Melt butter in a medium skillet over medium heat. Stir in flour and cook for 1 minute.


Cauliflower Mac Cheese6

  • Pour milk in slowly, whisking to combine.  Add yogurt one tablespoon at a time,  if using, and whisk into a creamy sauce.

Cauliflower Mac Cheese8

  • Stir in salt, pepper and 1 1/2 cups cheese. Stir over medium-low heat for 5 minutes.

Cauliflower Mac Cheese10

  • Pour the cheese sauce over the top and stir to combine.

Cauliflower Mac Cheese11

  • Top with remaining cheese, plus parmesan, if using.

Cauliflower Mac Cheese12

  • Cook for 15 minutes or so until the cheese turns golden and begins to bubble. Broil last few minutes to brown the top, if desired.

Cauliflower Mac Cheese16

  • Sprinkle with red pepper flakes for an added kick, if desired.


100 Photo Credit: Sonandoconparis.blogspot.com


Wheatless Wednesday – Egg in a Basket

2

Egg Basket13

Can you think of a happier breakfast than eggs Sunnyside Up? Think sunshine and smiley faces. How about stretching the cuteness factor by cooking them inside colorful bell pepper rings?

Egg Basket15

I found this new twist on the traditional Egg in a Hole (also called Egg in a Basket, Toad in a Hole, Turtle in a Shell, One Eyed Jack or Pirate’s Eye) on Natashas Kitchen.  In the traditional dish you cut out a circle from a slice of bread, fry it in some melted butter and cook the egg inside the hole.  In this new and improved version (which is originally a Martha Stewart brainchild), you use slices of bell pepper instead of bread to contain the egg while it cooks which adds a shock of color as well as flavor.  Its also a good way to get people to eat their veggies in the morning.  As an alternative, this can also be done with scrambled eggs.  Just whisk the eggs with salt and pepper, and divide the mixture between each pepper slice.  Eat plain if you’re a purist or top with cheese, avocado and fresh tomato for a more filling breakfast.  Serve with fruit and you’ve got a delicious and nutritious start to the day and it takes only about five minutes to prepare.

Egg Basket1

Eggs got a bad rap for a while and we were  advised for years to avoid eggs or limit our consumption of them due to their high cholesterol content.  It is now recognized that, for most people, cholesterol in food we eat doesn’t increase cholesterol in our bodies.  The real culprit is refined foods like white flour and sugar or polyunsaturated oils that cause inflammation in our bodies, resulting in heart disease and other health issues. In reality eggs are loaded with protein, vitamins and minerals, most of which are in the yolk.  For a good article on why the egg is considered the perfect food read The Truth About Food.  All eggs are not considered equal, however.  95 to 98% of eggs come from factory farms where conditions are inhumane and create food safety problems (for starters.)  The List of Reasons to Boycott Factory Farms is almost endless, the least of which is from a nutritional standpoint.  Factory Farmed eggs are less expensive but you get what you pay for.  Eggs from factory farms are nutritionally inferior to eggs from hens raised on pasture. According to Mother Earth News,  real free-range eggs contain:

• 1/3 less cholesterol
• 1/4 less saturated fat
• 2/3 more vitamin A
• 2 times more omega-3 fatty acids
• 3 times more vitamin E
• 7 times more beta carotene
• 50 percent more folic acid
• 70 percent more vitamin B12

OLYMPUS DIGITAL CAMERA

TIP:  I buy organic, free-range or pasture-raised, Certified Humanely Raised eggs (from an actual farm not a factory).  If I’m lucky, I get eggs raised in the backyard next door in exchange for the extra produce from my garden.   I also buy organic produce whenever possible.  I think it’s worth the added expense and I like to support the farmers that do it the ‘right’ way.  Sometimes its hard to know if your produce is organic or not, if it’s not labeled. I learned a handy tip from Dr. Oz (yes, on TV).  In supermarkets check the sticker with the barcode.  If the barcode starts with a 9 it’s organic.  For example, the green pepper I just bought has a barcode of #94065, which makes it organic.  A conventional green pepper would be labeled #4065.  Check it out next time you go shopping!

Egg Basket24

Egg in a Basket

  • Servings: 4
  • Difficulty: easy
  • Print

Egg Basket23

1 bell pepper (any color)
1/2 avocado
1 medium sized tomato
4 large eggs
Salt
Pepper
¼ cup grated cheese (any combination of parmesan, mozzarella, reggiano, fontina, etc.)
1 Tbsn any fresh herbs, minced (parsley, cilantro, basil, etc)
1 Tbsp olive, coconut oil or butter

Egg  Basket16

  • Cut pepper into 1/2″ rings and remove the seeds and centers.

Egg Basket16

  • For more color use a variety of bell peppers.

Egg Basket18

  • Cut avocado in half vertically, remove pit and slice into rings. Slice tomatoes horizontally into rings.

Egg Basket19

  • In a large, non-stick skillet, heat  oil over medium/high heat.   Place sliced peppers into the pan and let them saute for a minute.

Egg Basket20

  • Turn the peppers over and crack one egg into the center of each bell pepper slice. Pour the egg in slowly; it prevents the egg from leaking and forms a nice seal.  If some egg leaks out just use a spatula to push it back under. It might help to press firmly down on the pepper slices while you pour in the egg. Cook 2 to 3 minutes or until the whites are set and the yolk is runny.  Top with cheese, if desired, and serve.

Egg Basket21

  • For overeasy, turn over and top with cheese, if desired, salt and pepper.  Cook another minute, two for over hard.

Egg Basket22

  • Cover to melt cheese, if desired.

Egg Basket14

  • Top with avocado and tomato, if desired.  Sprinkle with salt and pepper and/or fresh herbs.

Egg Basket25


Meatless Monday – Chili Lime Grilled Tofu with Avocado &Mango Salsa

5

Chili Lime Tofu13

Chili Lime Grilled Tofu is my favorite tofu recipe so far.  It’s taken a few tries but I have finally nailed it. I made this last week and thought it needed something, so this time I topped it with an Avocado Mango salsa with red onions, lime and jalapenos which is a great combination of sweet, savory and spicy.   I also let the tofu marinate overnight which allows the flavors of the marinade to be fully absorbed before cooking.  I just served this dinner to my new future daughter in law (I love saying that) and one of my sons, who I thought wouldn’t even try tofu. Much to my surprise the tofu was a big hit.  I’m just happy there is a bit left for lunch tomorrow…

Chili Lime Tofu10

The Avocado Mango Salsa is a delight of flavors and would also be great on top of grilled or roasted fish or chicken. I know you’ve heard that Avocados are nutrient dense and a healthy fat but did you know that they also act as a ‘nutrient booster’ by helping the body absorb the nutrients from foods eaten along with it?  Furthermore, Mango is so nutritionally rich it is considered the “King of Fruit”.   Lastly,  Jalapeno Peppers add more than just spice. They are high in nutrients that may help you boost weight loss efforts, improve immunity, promote heart health and fight free radicals from environmental and dietary pollutants.  This recipe calls for one jalapeno pepper without the seeds.  If you like spicy, add another jalapeno or include the seeds, but beware, the seeds are really hot.  If you don’t like spicy, don’t use the jalapeno.  So feel free to load up on this salsa.  It might be the best thing you’ve done for your body today!

TIP:  I served this tofu with brown basmati rice which I cooked in vegetable broth.  A great way to add more flavor to rice is to add 1/2 to 1 teaspoon ginger paste or a one inch piece of peeled ginger root to the broth while cooking.  Just remove the root before serving.

For other tofu recipes, check out:

Crispy Glazed Tofu and Bok Choy

Tofu and Bok Choy1

Green Curry Tofu

Thai Green Curry Tofu


Chili Lime Grilled Tofu with Avocado Mango Salsa

  • Servings: 4
  • Difficulty: easy
  • Print

Chili Lime Tofu15
TOFU:
1 (14 ounce) package extra firm tofu
1/4 cup lime juice
1 tablespoon olive oil
5 tablespoons chopped fresh cilantro
2 cloves garlic, minced
2 teaspoons chili powder
1/4 teaspoon cayenne pepper
salt and black pepper to taste

SALSA:
1 avocado, diced
1/2 cup mango, diced
1/4 cup red onion, minced
1 jalapeno, seeded and minced (optional)
1 Tbsn lime juice (or more to taste)
1 Tbsn cilantro, chopped
1-2 Tbsn olive or avocado oil
1/2 tsp salt (optional)
Chili Lime Tofu17

  • Slice the tofu in 1/2 inch slices and place on double papertowels.  You can leave them rectangular or cut into triangle shapes.

Chili Lime Tofu16

  • Cover with papertowels and put a heavy pan on top to help press out excess water. Should take 20 to 30 minutes.  Don’t skip this step or the tofu won’t absorb the marinade.

Chili Lime Tofu12

  • Combine all other ingredients and marinate tofu in the refrigerator several hours or overnight.

Chili Lime Tofu3

  • To make the salsa, slice the mango about a third of the way (avoiding the rather large pit inside).

Chili Lime Tofu4

  • Using a sharp knife, cut rows horizontally through the flesh but not all the way through the skin.

Chili Lime Tofu5

  • Turn mango and cut crosswise

Chili Lime tofu6

  • Flip the mango slice inside out and slice off chunks.  Place in a bowl.

Chili Lime Tofu7

  • Cut avocado in half, pit and dice.  Place into bowl with mango.

Chili Lime Tofu8

  • Using gloves or a papertowel to protect your hands from the pepper oils, seed and mince the jalapeno.  Add to mango mixture.

Chili Lime Tofu2

  • Chop red onion and add to bowl.

Chili Lime Tofu9

  • Add chopped cilantro, lime juice and salt.  Gently combine and set aside.

Chili Lime Tofu10

  • Brush or spray oil on the grill and let it preheat.  Grill tofu several minutes until you see nice grill marks.  Turn and grill the other side.  Remove to a serving platter or individual plates.

Chili Lime Tofu14

  • Top with salsa mixture.

Chili Lime Tofu13

  • Serve with rice or some other grain for a well rounded meal.


  • Lobster Risotto

    1

    Lobster Risotto

    What happens when Maine meets Italiano meets Mexico?  Lobster Risotto, of course!  My new friend, Claudia, an Italian who lives in Mexico, was recently visiting my Maine neighbor, Lydia.  We were sitting at the lake one afternoon, enjoying the sunshine and the view, when the conversation turned to food, as it often does (occupational hazard).  Summers in Maine often involve Lobster Bakes and the inevitable leftover lobsters which the next day become lobster rolls, lobster salad or lobster fra diavlo.  Claudia makes a wonderful lobster risotto whenever she is in Maine visiting Lydia and graciously offered to share her recipe as a Guest Chef on Goodmotherdiet.
    Lobster Risotto8

    Lobster Risotto is a great way to use extra lobster but it is delicious enough on it’s own to buy lobster just to make this dish. It’s also a good way to get two lobsters to feed 4 or 5 people. Claudia likes to make a homemade lobster broth by simmering the lobster shells with fresh herbs for 20 minutes to an hour which infuses the broth with lobster flavor and gives it a richness that really makes the dish.  She also recommends using Albariño white wine but sauvignon blanc or pinot grigio are good substitutes.  Risotto is usually made with Arborio rice which is an Italian short-grain rice, named after the town of Arborio, in Italy, where it is grown. When cooked, the rounded grains are firm, creamy, and chewy, due to its higher starch content; but blends well with other flavors.  Carnaroli rice, grown in Northern Italy, is a medium grained high starch rice which is also great for risotto.  (Long grain rice doesn’t work quite as well.)  The resulting dish is very flavorful with a rich and creamy consistency.  For such a simple dish, Lobster Risotto is quite elegant. Thank you Claudia!

    Lobster Risotto2

    Lobster Risotto

    • Servings: 4
    • Difficulty: easy
    • Print

    1 cup Arborio rice
    1 glass Albariño white wine (or sauvignon blanc or pinot grigio)

    2  1 pound and half soft shell Maine lobsters, cooked
    8 cups home made lobster broth (directions below)
    pinch of Salt
    1/2 cup Butter
    1/4 cup Parsley, minced
    1/4 cup Basil, minced
    pinch of Saffron
    1 zucchini, diced
    3 tablespoons of extra virgin Olive oil
    1 medium red onion, diced
    Lobster Risotto16

    Lobster Risotto15

    • Place the shells, a few sprigs of parsley and basil in a stockpot, cover with water and simmer for at least an hour.  Remove shells, strain and keep broth hot.

    Lobster Risotto14

    • Saute the onion and zucchini in butter until soft.

    Lobster Risotto12

    • Add rice and sauté for several minutes.

    Lobster Risotto11

    • Add wine and saffron and let simmer for about five minutes.

    Lobster Risotto7

    • Add stock to the rice one cup at a time and reduce, stirring often until the liquid is absorbed.

    Lobster Risotto5

    •  Repeat until the stock is gone and the risotto is soft and creamy but slightly al dente. Salt to taste.

    Lobster Risotto6

    • Heat the lobster meat in a couple of tablespoons of butter in a small pan.

    Lobster Risotto

    • Arrange the lobster meat on the risotto, sprinkle with parsley and serve hot.

    Lobster Risotto3


    Wheatless Wednesday – Grilled Corn on the Cob with Herb Butter

    0

    Grilled Corn3

    Nothing says summer like fresh sweet corn.  Add herbs, spices and butter, then grill corn right in it’s own husk for a delicious treat!  Corn is an interesting crop in that it is considered both a vegetable (when you eat it as corn) or a grain (when it is popped as popcorn) so it deserves props for diversity as well as providing nutrition and lots of much needed fiber.  Corn is flavorful on its own, especially while it is in the peak of its season.  This is the time of year when it has the best flavor, is the least expensive and locally grown varieties are widely available. Since much of the corn produced today is genetically modified (GMO), purchase organically grown corn to avoid GMO corn. If you want to know what is wrong with GMO foods, click here.

    Grilled Corn7

    Grilling corn is easy and fun.  You can just throw them whole on the grill or you can season them first with a yummy herb butter.  Pull the husks down, without removing them from the cob, and remove the silky threads.  Then soak the cobs in cold water to keep the husks from completely burning and to provide enough moisture for the corn to steam.  Without the soaking, the corn will be chewier but still tasty.  Then liberally spread the corn kernels with butter, herbs and spices and close the husks back up.  Tying the husks closed is optional.  If you like charring, then leave the husks slightly open.  Grill for 15 minutes or so, turning every 5 minutes until all sides are charred.  Pull back the husks and enjoy!

    Grilled Corn on the Cob

    • Servings: 8
    • Difficulty: easy
    • Print

    8 ears fresh corn on the cob (unshucked)
    2 sticks butter, softened
    4 cloves garlic, minced
    1/2 cup fresh herbs (cilantro, basil, oregano or parsley), chopped
    1 tsp creole seasoning (or 1 tsp salt plus a dash of chili powder)
    1/4 tsp cayenne (optional)

    Grilled Corn10

    • Pull the outer husks down the ear to the base. Strip away the silk from each ear of corn by hand. Fold husks back into place, and place the ears of corn in a large container of cold water (or kitchen sink filled with cold water) for 20 minutes to an hour.  This step provides extra moisture to steam the corn and keep the husks from completely burning.
    • Combine butter, garlic, herbs and spices in a small bowl. Set Aside.

    grilled corn11

    •  Remove corn from water and shake off excess.  Pull husks back down and spread corn kernels liberally with herb butter.
    • Pull husks back into place and tie closed with a string (optional).

    Grilled Corn8

    • If you don’t have string you can tie with a long piece of husk or just grill without tying.

    Grilled Corn6

    • Place the corn on the grill, close the cover and grill for 15 to 20 minutes, turning every 5 minutes.

    Grilled Corn5

    • Remove the husks and eat on the cob or remove the kernels. Serve with any remaining herb butter.

    Grilled Corn6


    Feta, Chili & Lemon Dip

    0

    Feta Dip1

    How about an app to go with that TGIF cocktail?  (And, I’m not talking about an app for your iPhone).  If you’re inviting friends over this weekend, here is a very simple dip that takes less than 5 minutes and just involves throwing all the ingredients into a food processor.  Voila!  Add crackers or veggies and you’ve got a great appetizer.  I found this recipe on Simply Delicious.  It’s easy, quick and very tasty!  The combination of zesty feta cheese with garlic, hot red chili peppers, lemon and fresh mint leaves is surprisingly delicious.  I used one chili pepper with the seeds and it was pretty spicy, so you can lessen the heat by not including the seeds and increase the heat by adding a second chili pepper. You can also add more olive oil if you want a thinner dip for dipping rather than spreading. Happy Friday!

    Feta Dip10

    Feta, Chili and Lemon Dip

    • Servings: 6-8
    • Difficulty: easy
    • Print

     •6 oz feta cheese
    •1 garlic clove, peeled
    •zest and juice from 1 lemon
    •1-2 red chilies, roughly chopped
    •1/4 cup fresh mint leaves
    •pepper to taste
    •½ cup extra virgin olive oil

    Feta Dip9

    • Put garlic, lemon zest chilies and mint in a food processor and blend until finely minced.

    Feta Dip8

    •  Add the feta to the food processor and blend until everything is combined.

    Feta Dip7

    •  With the motor running, pour in the olive oil and blend until the dip is smooth and the desired consistency.

    Feta Dip6

    •  Transfer the dip to a serving bowl and serve.  Garnish with mint. Drizzle with more olive oil if desired.

    Feta Dip3


    Wheatless Wednesday – Grilled Avocado Caprese Salad

    2


    Grilled Avocado Caprese Salad10

    Insalata Caprese, the ubiquitous tomato, mozzarella, and basil salad, is one of the most popular dishes in summer when tomatoes are in season and so, so good.  It also happens to be one of my favorites and a great way to use up extra tomatoes.  I sometimes include avocado to increase the nutritional value and make it a bit more filling as a main dish.  I must admit that I am on quite a grilling kick this summer which has taken an interesting turn since I am no longer just throwing steaks and burgers on the grill.  I have had to get more creative with ingredients and have started grilling fruits and vegetables that I would not have considered in the past,  including recent dishes,  Grilled Nectarines and Summer Squash with Balsamic Glaze and Grilled Artichoke Mixed Veggie Platter.

    Grilled Vegetables1

    Grilled Nectarines and Summer Squash with Balsamic Glaze

    Grilled Veggies1

    Grilled Artichoke Mixed Veggie Platter.

    So when it came to making my first Caprese Salad of the summer, I decided to give it a twist by using the tiny sized mozzarella ‘Pearls’ and cherry tomatoes to top a grilled avocado.  Grilling the avocado gives it a wonderfully warm and creamy, slightly smoky flavor. In addition to being delicious, avocado is a great addition to any diet for health and weight loss.  “According to a study by the Haas Avocado Board, adding avocado to a lunch meal caused a 23-percent increase in satisfaction and a 28-percent decreased desire to eat over the next five hours after eating, compared with the avocado-free lunch. And, over a three-hour period, adding avocado to lunch meant a 26-percent increase in satisfaction and 40-percent decreased desire to eat later on.  Half an avocado has about 112 calories and 6 grams of fiber. Avocados are filled with heart-healthy fats, protein, potassium, and vitamins (such as B6, C, K, and B)” (Glamour.com)  So next time you have the grill going, throw on a couple of avocados.  You’ll like it!

    Grilled Avocado Caprese Salad5

    Grilled Avocado Caprese Salad

    • Servings: 2
    • Difficulty: easy
    • Print

    1 ripe but firm avocado
    2 Tbsn olive oil
    1 tsp lemon juice
    1/2 cup ciliglene, tiny fresh mozzarella balls (or larger mozzarella ball, diced)
    1/2 cup cherry tomatoes, sliced in half
    1/4 cup fresh basil, sliced crosswise into strips (chiffonade)
    1 Tbsn balsamic vinegar
    salt and pepper to taste

    Grilled Avocado Caprese Salad

    • Using a sharp knife, slice avocado in half lengthwise.  To remove the pit easily, strike the pit with the sharp blade and twist slightly.  The pit should pop right out.

    Grilled Avocado Caprese Salad3

    • Brush the cut sides of the avocado with olive oil, lemon juice and season with salt and pepper.  Place cut side down on a hot grill and grill for about 5 minutes, or until you see nice grill marks.  You can place the avocados on the grill perpendicular or horizontal, depending on how you want the grill marks to look.


    Grilled Avocado Caprese Salad12

    • Or you can get fancy and grill diagonally

    .Grilled Avocado Caprese Salad11

    • Get crisscross grill marks by turning the avocado 90 degrees half way through.

    Grilled Avocado Caprese Salad13

    • Remove avocados from heat and let cool slightly.

    Grilled Avocado Caprese Salad8

    • Place each avocado half on a plate and fill with tomatoes, mozzarella and basil, divided between the two.
    • Drizzle with olive oil and balsamic vinegar

    Grilled Avocado Caprese Salad7

    Grilled Avocado Photo Credits:

    1) Horizontal- http://www.foodandstyle.com

    2) Diagonal- http://www.glamour.com/health-fitness

    3) Criss-Cross- http://www.grillinfools.com

    Meatless Monday – Eggplant Parm Minis

    7

    Eggplant Parm5

    “I enjoy cooking with wine and sometimes I put it in the food.” – Julia Child.

    I’m not sure Julia Child would have appreciated Good Mother Diet as she was quite the meat lover and on her cooking show she was always throwing raw meat around or making raw chickens dance, but I can like her anyway as she was ground breaking in her approach to cooking.  She had a no nonsense approach in the kitchen and a great sense of humor.  In response to critics who thought she used too much butter,  she said “We should enjoy food and have fun. It is one of the simplest and nicest pleasures in life.”  I can certainly agree with her on that!

    Eggplant Parm1

    Eggplant is considered one of the worlds healthiest foods and it has a meaty texture that makes it a good substitute for meat.  Globe eggplants, in particular, are best if they are salted and drained (known as “degorging”) before cooking, to soften them and to reduce the amount of fat absorbed during cooking.  Raw eggplant can absorb an incredible amount of oil which adds unnecessary calories and fat.  Eggplant is naturally low fat and low carb.   Salting also removes any bitterness from the eggplant.

    Eggplant Parm16

    I spotted this eggplant recipe on Kalyns Kitchen and loved the simplicity.  It is inspired by Julia’s original recipe for what she calls Eggplant Pizza in her cookbook,  From Julia Child’s Kitchen.  Rather than making a traditional Eggplant Parmesan where the eggplant is breaded and fried before baking with layers of sauce and cheese, this version is grain free and brushed with olive oil and herbs before baking.  Slicing the eggplant into thick circles and making individual portions makes it very easy to serve.  I made this dish for a potluck where we needed to serve a lot of people, so I doubled the recipe. Needless to say, I came home with an empty platter!  I love a homemade sauce (and not just because it makes my kitchen smell divine) but you can skip that step and use any sauce you like from a jar as a shortcut.  I loved this recipe, which is not fussy but really delicious, and I will definitely make it again. Next time I’m hoping for leftovers!   Thanks Julia!

    Julia-Child-Quotes

    Photo Credit:  http://www.werecommend.com

    Eggplant Parm Minis

    • Servings: 4
    • Difficulty: easy
    • Print

    1 globe eggplant
    1 T salt
    2 T olive oil
    2 tsp. dried Italian seasoning
    10 large basil leaves, cut in chiffonade strips
    1/2 cup freshly Parmesan
    1/2 cup grated mozzarella
    red pepper flakes(optional)

    Sauce:
    1 Tbsn extra-virgin olive oil
    3-4 large garlic cloves, chopped
    1 can (14.5 oz.) diced tomatoes with liquid (or 2 cups peeled and diced fresh tomatoes)
    1/4 tsp. dried oregano (or1 Tbsn fresh oregano, minced)
    1 Tbsn fresh basil, minced
    salt and pepper to taste

    • Slice eggplant into 3/4 inch thick slices (trying to make them the same thickness to insure even cooking.) Put the eggplant pieces on a double layer of paper towels and sprinkle both sides generously with salt. Let the eggplant sit with the salt on it for 20- 30 minutes to draw out the liquid.

    Eggplant Parm2

    • While the eggplant sits, make the sauce. Saute the garlic in olive oil until it becomes fragrant.  Add the tomatoes with the juice, oregano and basil and let it cook at a low simmer until it’s thickened.  You can break up the tomatoes with a fork as it softens to make the mixture more sauce like.

    Eggplant Parm11

    • After 20- 30 minutes, the eggplant slices should be dotted with drops of water and the paper towels wet.  Wipe the slices  dry with paper towels, which also removes most of the salt.

    Eggplant Parm8

    •  Coat the bottom of a baking pan with olive oil and arrange the eggplant slices in a single layer. Brush the tops of the eggplant with olive oil, and sprinkle with oregano, salt and pepper.

    Eggplant Parm12

    • Roast the eggplant about 25 minutes in a 375 degree oven.

    Eggplant Parm6

    • Thinly slice the fresh basil into chiffonade strips.  This is easily done by stacking the leaves and slicing into thin strips.

    Eggplant Parm10

    •  Combine Parmesan and mozzarella. After 25 minutes remove eggplant from the oven. Spread a few tablespoons of sauce on the top of each eggplant slice.

    Eggplant Parm13

    • Place several slices of basil on each slice.

    Eggplant Parm14

    • Top with a generous amount of cheese and sprinkle with red pepper flakes, if using.

    Eggplant Parm15

    • Turn oven to broil and cook until cheese melts and is slightly browned.

    Eggplant Parm18

    • Remove from oven and sprinkle with more fresh basil, if desired

    Eggplant Parm5


    Wheatless Wednesday – Maine Lobster Bake

    0

    Lobster Bake14

    Maine is famous for it’s lobsters and summer is not considered complete here without at least one old fashioned lobster bake.  Traditional lobster dinners include lobster with drawn butter, corn on the cob and steamers (Ipswich clams) and sometimes potatoes or eggs, often served on these inexpensive, but iconic, blue platters that mimic retro diner tablecloths.   I tried lobster for the first time on my first trip to Maine, way back when my husband and I were just dating.  He went to summer camp in Maine as a kid and he has many fond memories (and good friends) and still loves to come here.   I’m pretty sure he brought me up here all those years ago as a relationship test, which luckily I passed with flying colors.  I learned how to eat lobster, waterskied in Bear Pond and slept on a cot in one of the old cabins, three actions which, I’m sure, made me marriage worthy.  My three sons followed in their father’s footsteps and consider themselves Wigwammers to the core, first as campers, then as counselors.    It’s no coincidence that we have a house across the lake from Camp Wigwam and come to Maine as often as possible.  It’s a little slice of heaven on earth.

    Lobster Bake16

    We were lucky enough to be invited to an authentic Maine Lobster Bake that was catered by our friend, Tom DeLois.  He provided and prepared everything, freshly procured that morning, including the seaweed which they gathered by boat from the ocean.  I was not involved in the preparations in any way, except for taking lots of pictures to document the process, which is simple but takes some effort.  It’s also a great way to feed a large group in a casual but festive manner.

    Lobster Bake2

    This technique can easily be done on the beach but we used a flat gravel driveway.  Just use something to elevate the cooking surface, a flat metal sheet or galvanized tub.  Layer your chosen ingredients with seaweed and  light the fire.  Tom and his crew were veterans and really knew what they were doing.  I have to admit it was nice to have someone else take care of dinner…

    Lobster Bake5

    In an effort to minimize damage to the area, they cleared the gravel down to the bare dirt, then set up the cooking area with four concrete blocks and a metal tray.  They stacked layers of wood and newspaper.  The four metal sides(on the ground in the photo) are to block the wind if necessary.

    Lobster Bake1

    The first layer is wet seaweed which they collected themselves from the ocean.

    Lobster Bake6

    Next is bags of clams (steamers), lobsters and foil wrapped red skinned potatoes.

    Lobster Bake7

    Topped with raw eggs and corn on the cob.

    Lobster Bake8

    Wrap everything tightly with aluminum foil.

    Lobster Bake9

    Finish with another thick layer of wet seaweed.

    Lobster Bake4

    Light the fire and cook about 45 minutes.  TIP:  When the eggs are hard cooked, you know it’s done.

    Lobster Bake10

    The unveiling…

    Lobster Bake18

    One of the nice things about a traditional lobster bake is the leftovers!  The next day I made a composed salad with the remaining lobster, eggs, potatoes and corn cut off the cob.  I added some chopped tomatoes and scallions and arranged it all on a bed of fresh romaine.

    Lobster Bake12

    I also made a big pot of clam chowder with the leftover clams and potatoes.  I sautéed a couple of chopped onions and garlic in butter, then added chopped potatoes, vegetable broth and milk and cooked it all for an hour or so until it’s slightly thickened.  Add the clams toward the end and cook another 20 minutes or so on low heat.  Don’t let it boil or the clams will get touch and chewy, like rubber bands.  Season with salt and pepper. Enjoy!

    Lobster Bake13


    Meatless Monday – Roasted Beet Salad with Ripe Peaches and Goat Cheese

    1

    Beet Peach Salad13

    Is it a coincidence that fresh tomatoes ripe from the vine or juicy, just picked peaches taste especially good in summer or is it nature’s design to give us what we need?  I was thumbing through some cooking magazines admiring gorgeous photos of carmelized tomatoes and 10 ways to use fruit when I came across an article, “In Season For a Reason:”, by Ellie Krieger in CookFresh Magazine that claims our bodies are ‘calling for them’, meaning seasonal veggies.  “Not only do summer vegetables taste better and have a higher nutritional value, in season produce is in sync with our nutritional needs; it contains specific nutrients that replenish and protect us in the hot summer months”. Summer’s juicy fresh fruits and vegetables help keep us hydrated (20 percent of our water intake comes from the food we eat) and are rich in anti-oxidants, just when we need them most. Specifically, antioxidants like lycopene, vitamin C and beta-carotene help protect our skin from the sun by neutralizing damage to skin cells caused by the sun’s UV rays. Potassium, which we lose when we sweat, is also found in many summer vegetables. I wonder if winter vegetables give us what we need in winter too?

    Beet Peach Salad8

    I like combining seasonal fruits and vegetables, especially in salads.  I often toss orange or grapefruit sections into my salads to give them  a sweet and tangy boost. Today’s salad combines fresh, roasted beets, ripe peaches and arugula topped with goat cheese and pistachios. If I had them I would have added a few halved dark red Bing cherries or strawberries which are also in season. There is something about the combination of sweet and salty is really satisfying.  Right now with peaches in season, they are plentiful, delicious and less expensive at the height of the season! If you have the grill going, you can just halve and pit them and stick them on the grill for a few minutes to slightly caramelize them or just cut them up fresh and delicious.

    Beet Peach Salad6

    Like their intense color would suggest, beets are big on antioxidants, and have cancer and heart disease-fighting properties, as well as a host of vitamins and minerals. including iron.  Roasting them brings out a more intense flavor and gorgeous color since nothing is released into water, as happens with boiling.  If you slice them vertically, you  may get heart shapes, which if you’re my pinterest friend, you know I collect hearts found in nature so couldn’t resist this picture.  Too pretty!  Don’t throw away the beets tops.  They actually have more flavonoid antioxidants and vitamins than the beet roots themselves, including Vitamin A.  They can be chopped and sautéed with a bit of olive oil and garlic for a delicious side dish similar to chard or mustard greens.  The beets can be roasted a day or two beforehand and stored in the refrigerator until you need them.  Other than roasting the beets (which is easy but takes time), this is a very fast and easy meal to throw together, nice and colorful too!

    Roasted Beet Salad with Ripe Peaches and Goat Cheese

    • Servings: 4
    • Difficulty: easy
    • Print

    2-3 raw beets
    1-2 peaches
    1 bunch baby arugula
    1/4 cup pistachios (or toasted pine nuts)
    2 oz fresh goat cheese (optional)
    1/4 cup fresh basil, chopped
    2 Tbsn fresh mint, chopped
    1/4 cup olive oil
    2-3 Tbsn balsamic vinegar
    salt and pepper to taste

    Beet Peach Salad1

    • Preheat oven to 375 degrees. Lay beets on aluminum foil and drizzle with olive oil.  Don’t remove the stem or tail.  Wrap foil into a pouch and bake until the beets are fork tender, about 1 hour and 20 minutes.

    Beet Peach Salad2Beet Peach Salad3

    • Let the beets cool, at least enough to handle, and remove the skins, stem and tail.  I like to use paper towels so my fingers don’t turn red.  Set aside and let them cool to room temperature, then slice.  I would recommend using a non-porous cutting board, since the juice from the beets stains everything it touches, including your hands.

    Beet Peach Salad5

    • Wash, remove the pit and slice the peaches.  I like the skin but if you don’t, then remove the peel before slicing.
    • Coarsely chop the pistachios.

    Beet Peach Salad10

    • Place the arugula in the bottom of  a large serving bowl or platter. Add the sliced beets and peaches.

    Beet Peach Salad9

    • Top with pistachios and goat cheese.

    Beet Peach Salad11

    • In a separate bowl, whisk together the olive oil, balsamic vinegar, salt, and pepper and pour over the salad before serving.

    Beet Peach Salad13

    Wheatless Wednesday – Grilled Artichoke & Mixed Veggie Platter

    0

    Grilled Veggies1

    Summertime, and the livin’ is easy… (Sing along, I know you know the tune)  We are getting to the part of summer where fresh vegetables are plentiful and so good!  One of my favorite summer dishes is a grilled mixed vegetable platter using whatever is in season.   The double bonus is that fruits and veggies at the height of their season are at their best and their cheapest!   I just let everything sit in a basic marinade until I’m ready to grill, then toss them on a platter with fresh herbs (I love a combination of basil, mint and cilantro or thyme) and sprinkle with a bit of feta.  It is a very easy and colorful way to serve a lot of vegetables at once.  Today’s platter includes artichoke, asparagus, yellow squash, zucchini, Portobello mushroom, cherry tomatoes and lemon, all grilled to tender, sweet, slightly charred perfection. Somehow the grill brings out a lightly carmelized flavor that you can’t get with other types of cooking.  The artichoke needs to be boiled or steamed for about 15 minutes before grilling but the other vegetables can be cooked right away.  I grilled the tomatoes in a foil pouch so they didn’t get lost in the grates.  I just tossed them with some olive oil, garlic, oregano and a dash of salt and pepper, simple but delicious!  If you are lucky enough to have any leftovers, grilled vegetables are great in salads, sandwiches or on pizza (my fave)!  So head to the farmer’s market and fire up the grill!

    Grilled Veggies12

    Grilled Artichoke and Mixed Veggie Platter

    • Servings: 4-6
    • Difficulty: easy
    • Print

    2 large artichokes
    2 lemons
    1-2 zucchini
    1-2 yellow squash
    1 bunch asparagus
    1 pint cherry tomatoes
    1/2 cup olive oil
    4-5 cloves garlic, minced
    1/4 cup feta, crumbled(optional)
    1/2 cup or more mixed herbs, chopped(basil, mint, thyme or cilantro)

    Grilled Veggies11

    •  Using a sharp knife, cut the top inch or two off the top of the artichoke and immediately rub the cut area with a cut lemon to prevent browning.  You can remove the sharp points from the leaves by cutting the tops of each leaf off with either a knife or kitchen scissors but this is optional.

    Grilled Veggies10

    • Cut artichoke in half, rub with lemon and scoop out the choke with a small knife or spoon.  Squeeze the rest of the lemon into boiling water and boil or steam the artichokes for about 15 minutes, or until the stem is easily pierced with a knife.  Remove from the pan and let cool.

    Grilled Veggies8

    • Toss the artichokes with a drizzle of olive oil, chopped garlic, thyme and a squeeze of lemon.  I like to use zip lock baggies for convenience but you can also use a bowl or platter.

    Grilled Veggies9

    • Trim asparagus,  cut remaining lemon in half, slice Portobello mushrooms, squash and zucchini lengthwise and marinate with olive oil, garlic and oregano or thyme.  I like to add a dash of soy sauce to the mushrooms to bring out their meaty flavor(optional).

    Grilled Veggies7

    • Lay the tomatoes in a double layer of foil and drizzle with olive oil, garlic and oregano.  Make the foil into a pouch.

    Grilled Veggies4

    • Spray the grill with non-stick, high heat oil before lighting.  Grill the vegetables on a hot grill and turn when you get some good grill marks.  Season with salt and pepper.

    Grilled Veggies6

    • You  may have to grill in batches but it’s best not to crowd.

    Grilled Veggies5

    • Arrange grilled veggies on a large platter as they come off the grill.

    Grilled Veggies3

    • Sprinkle with fresh herbs and feta, if using and give it a good squeeze from the grilled lemon.  Delish!

    Grilled Veggies1

    Wheatless Wednesday – Arugula Salad with Roasted Corn and Edamame

    1

    Arugula Salad8


    What does it mean if you see a groundhog in the summer?  A couple of days ago, I spotted a fat, furry little creature stealing strawberries from my garden.  It scurried off into the woods as soon as it saw me but not before I got a good look.  It took me a couple of days to figure out what kind of animal it was since I have never seen one before and I have to admit that I became a bit obsessed.  It looked like a beaver but with a fluffy, bristle brush-like tail.  I finally spotted an internet picture of my new little friend, who turns out to be a groundhog, although here in Maine they are called woodchucks.  I know that Maine had a brutally long winter and Punxatawny Phil saw his shadow on Groundhog Day dooming the East to six more weeks of winter, so I hope that this means six extra weeks of summer.   Perhaps the fact that the little guy is a Mainer, and therefore, only a woodchuck, maybe it doesn’t mean anything and he is just a cute little neighbor who likes my strawberries…

    groundhog

    Photo Courtesy of http://www.teacheratlas.com

    So what does my groundhog/woodchuck have to do with Wheatless Wednesday?  Nothing, except that I was carrying all the veggies I just bought into the house when I spotted him and almost dropped them in my excitement.  This week in Maine has been hot and humid so we are eating lots of salads.  You might say I overthink food, and perhaps I do, but here is my take on a Green Salad, which is green (arugula) on green (edamame) on green (snowpeas) on green (avocado) on green (scallions) with just an accent of color (corn and maybe a sprinkle of goat cheese).   The variety in this salad comes from the flavors and textures rather than most summer salads that are generally pretty colorful.

    Arugula Salad3

    Corn is just starting to come into season and I have had trouble finding organic, non-GMO corn here in Maine, perhaps its just too early or maybe it’s an indication of how much of our corn is now GMO. 😦 It’s hard to pass up the bins of 10 ears of corn for $4.00 but I just did that yesterday.  Instead I bought 3 hard to find ears of organic white corn for $3.00.  Call me crazy but I really go out of my way to avoid GMO’s!  Since corn was my accent in this salad, I decided to rub it with butter, salt and pepper(and maybe just a tad of Creole Seasoning.  I like Tony Cachere’s) and roast it until it turns golden brown.  I let it cool and then sliced the kernels off into the salad.  Delicious!

    Arugula Salad2

    Although this salad is light, it is also pretty hearty. Arugula is a great choice for a green salad. Arugula contains about eight times the calcium, fives times the vitamin A, vitamin C and vitamin K, and four times the iron as the same amount of iceberg lettuce.  The Edamame provides protein, fiber, vitamins and minerals (including calcium and iron). and the Avocado is nutrient dense and a source of good fat (which we need to absorb the nutrients so don’t hold back).  Sugar Snap Peas are also a good source of vitamins and minerals including calcium and Vitamin C.   Corn gets a bad rap but is actually pretty loaded in antioxidants and fiber.  The best thing about this salad though is that it’s simple but delicious-a perfect hot summer meal!

    Arugula Salad9

    Arugula Salad with Roasted Corn and Edamame

    • Servings: 4
    • Difficulty: easy
    • Print

    3 cups baby arugula
    1 cup edamame (fresh or frozen, thawed)
    1 cup sugar snap peas, sliced lengthwise
    1 avocado, peeled and diced
    2 scallions, thinly sliced
    2-3 ears of fresh corn, shucked
    2 tsp butter (olive or coconut oil)
    salt, pepper & creole seasoning (optional)
    2 Tbsn goat cheese (optional)

    Arugula Salad

    •  Wash corn and remove any remaining strings.  Rub 1/2 teaspoon butter onto each ear (I used my hands which was messy but effective) and sprinkle with salt and pepper.  I also like to add a bit of Creole Seasoning.  Put in a roasting pan and broil for 3-5 minutes per side, or until golden brown.  Let cool.

    Arugula Salad6

    • Place arugula in the bottom of a large bowl.  Add snowpeas, avocado, edamame and green onions.  Slice the kernels off the cobs and add to the salad.

    Arugula Salad7

    • Top with crumbled goat cheese or serve on the side, if desired.
    • To make a simple vinaigrette, whisk together 1/4 cup olive oil, 1/4 cup apple cider vinegar, 1 Tbsn lemon juice, 1/4 tsp salt and 1/8 tsp pepper
    • Drizzle with vinaigrette or serve on the side.


    Meatless Monday – Composed Salad

    0

    Composed Salad2

    What is a composed salad?  It is a salad that has been artfully arranged and drizzled with vinaigrette rather than tossed.  Why, you might ask, would you go to the trouble to arrange your veggies instead of just tossing everything together?  Well the obvious answer is aesthetics.  Composed salads elevate what would otherwise be a simple salad into  an artistic centerpiece.  The other benefit is that each ingredient maintains it’s integrity so you can taste each individual flavor.  Of course it all ends up mixed together eventually but each person gets to ‘create’ their own personal salad by hand picking from the tray of goodies.  Composed salads are usually hearty enough to be main courses, think Cobb Salad, but the possibilities are endless.  If you don’t have a rectangular tray, go circular like this Rainbow Chopped Salad by Fueled By Vegetables.

    Chopped Salad13

    You can even take the vertical or 3D approach like this layered Southwestern salad from Kitchen Excursions

    Composed Salad10

    I love composed or arranged salads, perhaps for the same reason I like to stack food and make edible ‘towers’ like my Crab Quinoa Tower or Polenta Towers. It must be the wanna be artist hidden deep inside me. Don’t worry I’m sticking to food. I recently went to my friend, Nicole’s birthday party where we  attempted learned to paint flowers and owls. Lets just say that my sad little flower went quite happily to it’s demise in the dumpster. I guess my artistry only goes so far…

    Composed Salad12

    My friends know that I rarely make the exact same salad twice, but I do use the same techniques over and over again, changing the ingredients to use what I have on hand or meet the situation. If I need a main course salad, I use heartier ingredients like chopped egg, beans and avocado to fill up hungry bellies. For a side salad I might do a combination of veggies and fruit with just a sprinkle of feta or goat cheese. The beauty of a composed salad is that it is visually striking and completely flexible.  Just layer the bottom of a wide container with greens and top with rows of any vegetables (or fruit), beans, cheese or nuts that you would normally put in a salad.  Voila, you have a visual feast!  It’s not more work, it just looks like it.

    Composed Salad1

    The amounts will vary depending on the size of your tray or bowl (A low platter works better than a deep bowl).  Amounts listed here are what I used for this particular salad in a 14×14 square tray.  Round works too, just put the ingredients you want the most of in the center rows, arrange them in triangles or concentric circles like a bullseye.  In arranging the rows, take advantage of the variations in color to provide a contrast.  I also put the cheese and egg on the sides so they are easier to avoid for those that are allergic or don’t eat them.  Be creative!  Use beets, artichoke, hearts of palm, strawberries, nuts or raisins.  Adding grains like quinoa or rice help make it a hearty main course.

    Composed Salad5

    Composed Salad

    • Servings: 6-8
    • Difficulty: easy
    • Print

     5-6 oz mixed lettuce
    1 cup cooked, or 1 can garbanzo or black beans, drained and rinsed
    2 large, ripe tomatoes, diced
    1 large avocado, diced
    1 cucumber, diced
    1 yellow bell pepper, diced
    3 hard boiled eggs, diced (optional)
    3 oz feta, crumbled

    Composed Salad7

    • Spread a layer of lettuce to cover the bottom of the container

    Composed Salad9

    • Arrange each diced vegetable in rows, taking care to put allergens like cheeses and eggs on the outer rows.

    Composed Salad8

    • Drizzle with your favorite vinaigrette or mix up a simple fresh one by whisking together 1/4 cup olive oil, 1/4 cup apple cider vinegar, 1 Tbsn balsamic vinegar, 1/2 tsp dry mustard, 1/2 tsp salt, 1/4 tsp pepper.  Serve with more dressing on the side.

    Composed Salad1


    Wheatless Wednesday – Santa Rosa Plum Crisp

    5

    Plum Crisp8

    Looking for a simple 4th of July or summer dessert?  How about an easy Stone Fruit Crisp? Plums are in season right now as are other stone fruits like peaches, cherries and nectarines. Crisps are very forgiving to make as there is little that can go wrong, no crust to make or fruit to arrange. Just cut up your favorite fruit, sprinkle it with a yummy topping and bake. The beauty of this dessert is it’s simplicity.  This recipe is easily made vegan and gluten free and for a dessert, it’s pretty nutritious.  The oats and almond flour combined with the fruit and dates are loaded with vitamins and minerals ( and fiber, of course).   As an added bonus, your kitchen will smell divine!

    I have a wonderfully prolific Santa Rosa plum tree in my garden in California.  Usually I make plum jam which I put on toast or in my yogurt for the rest of the year.  This spring in California has been so dry and warm that my plums were ripe and falling off my tree almost before I realized I was losing my crop.  So right before my summer move to Maine, I gathered everything I could reach and decided to take them with me since I didn’t have time to do anything with them in California.  I ‘smuggled’ the plums and some Meyer lemons, also from my garden, to Maine in my suitcase which I checked. I didn’t dare carry it on, since one of my friends once took home some of my lemons in her carry-on and security thought they were hand grenades. (Well they are rather large lemons!)   I decided it was not worth the risk of possibly having to dump them so packed them in with my shoes and extra clothes and hoped for the best.

    Preserved Lemons2

    The lemons made the trip very well but a few of the plums got a bit bruised on their journey and are no longer quite as perfect for eating, so I decided to make a plum crisp.  Since I have yet to do a complete restocking of my pantry, I had to make do with what I had on hand, even tearing open individual sugar packets to toss with the plums (after which, of course, I found the tin of sugar hiding up on the top shelf).  Like I said, this is a very forgiving dessert…

    Plum Crisp1

    TIPS:  Most fruit crisp recipes call for wheat flour but I opted to go grain free and use almond flour, although almost any flour would work as a thickening agent and in the topping as well.  I added pecans and almonds to the topping for added crunch as well as dates for extra chewy sweetness but both are optional.  If you don’t use nuts, just add a bit more flour and oats so there is enough topping to cover the fruit.   I usually prefer desserts that are one dedicated fruit but crisps are also good with a mixture of cut up fruits if that is what you have on hand.  This is  great way to make an amazing dessert out of leftover or less than perfect pieces of fruit.  Instead of throwing them out, just cut out the bad spots.  They will still taste delicious!

    Santa Rosa Plum Crisp

    • Servings: 6
    • Difficulty: easy
    • Print

    Plum Crisp2

    4 cups plums, pits removed and chopped

    1 Tbsn coconut, oat or almond flour (white or wheat work too)

    3 Tbsn sugar (honey, agave necter, etc.)-more if your fruit is under ripe or sour

    1 tsp vanilla or almond extract

    1/2 tsp ground cinnamon

    Topping:

    1/2 cup flour (made from any grain or legume)

    1/2 cup oats (not instant or fast cooking)

    1/2 cup pecans or almonds, finely chopped(optional)

    1/4 cup dates, pitted and finely chopped (optional)

    1/2 cup brown sugar, packed

    1/8 tsp salt

    1/4 cup butter or coconut oil, melted

    Plum Crisp3

    • Combine plums, flour, sugar, vanilla and cinnamon together in a medium bowl.  Pour into an ungreased baking dish or pie pan

    Plum Crisp5

    • Mix together all topping ingredients with a fork until crumbly.

    Plum Crisp6

    • Spread topping evenly over the plum mixture
    • Bake for 40 to 45 minutes in a 350 degree oven. Plums should be bubbling and the topping a golden brown.
    • Serve with vanilla ice cream (optional)

    Plum Crisp7

    Meatless Monday = Roasted Asparagus and Leeks

    0

    Asparagus and Leeks1


    GoodMotherDiet has temporarily relocated to Maine for the summer. We have a house on Bear Pond nestled at the base of Bear Mountain.  Maine is a land of a thousand lakes and mountains where time goes more slowly. and we spend our days outside taking advantage of the abundance of nature.  Life is very casual and dinner is generally a last minute gathering of friends at our various homes or restaurants after a long day of playing on the lake or hiking in the mountains, sometimes squeezing in a sunset cocktail before heading home to make dinner.

    Maine

    I flew in yesterday on the red eye and I am still getting my bearings. As always happens when I switch homes, I have to remember the layout of the kitchen, relocate the silverware drawer and take a look at the contents of the pantry.  It usually takes me several trips to Hannaford before I have everything restocked. By evening we had our first dinner party, a typical potluck which travels from house to house along the lake.  My contribution to the meal was Asparagus and Leeks with shallots and garlic, drizzled with olive oil and roasted in a hot oven.  Although it is not the prettiest or most elegant of dishes, it is simple and delicious, a perfect addition to any meal.   For an added touch of flavor, you can drizzle with balsamic vinegar before serving.

    Roasted Asparagus and Leeks

    • Servings: 4-6
    • Difficulty: easy
    • Print

    1 bunch asparagus
    2 large or 3 small leeks
    2 shallots
    2 cloves garlic
    2 Tbsn olive oil
    1/2 tsp salt
    1/4 tsp black pepper
    1 Tbsn balsamic vinegar (optional)


    Asparagus and Leeks5

    • Trim rough end of asparagus and place in a baking dish
    • Trim  root end of leeks and cut off tops where the leaves start turning green.  Wash leeks under running water, fanning each layer like a deck of cards to remove any dirt left between the layers.  Pat dry and place in the baking dish.

    Asparagus and Leeks6

    • Slice shallots lengthwise into large matchsticks

    Asparagus and Leeks4

    • Slice garlic into thin strips
    • Sprinkle with salt and pepper

    Asparagus and Leeks3

    • Drizzle with olive oil and gently toss to coat vegetables with oil

    Asparagus and Leeks2

    • Roast in the oven at 400 degrees for about 25 minutes, stirring 3 or 4 times.  They should be tender and beginning to brown on the edges.

    Asparagus and Leeks1