Meatless Monday – Char-Roasted Eggplant and Bell Peppers with Olives, Tomatoes and Goat Cheese

2

Eggplant Salad2

The end of summer means Back to School, Last Little Get Aways and Glorious Sunsets which herald more sunny days ahead. I have always loved this time of year, which has always seemed like the ‘real’ new year to me.   The beginning of each school year has always been filled with excitement and the anticipation of something new and better.  When I was young I was always sure that this was going to be the year I made the team and got straight A’s as well as the cute boy, ever the optimist. Fall also serves as a marker for where we are in our lives, sort of a  growth chart in time.  When my boys were young I  met each new school year with the disbelief that they were one grade older, each new grade a momentous step, coupled with an almost giddy joy that they were going back to school and I could finally get something done-call it a guilty pleasure.  Now that I am less married to the school calendar, since my kids are in college and beyond, I am still reminded of the season by my garden which is  abundantly rich with bounty but showing some signs that summer is ending.  It’s almost time to prepare for the cold of winter, but not quite yet…still many beautiful days ahead.

Garden June7
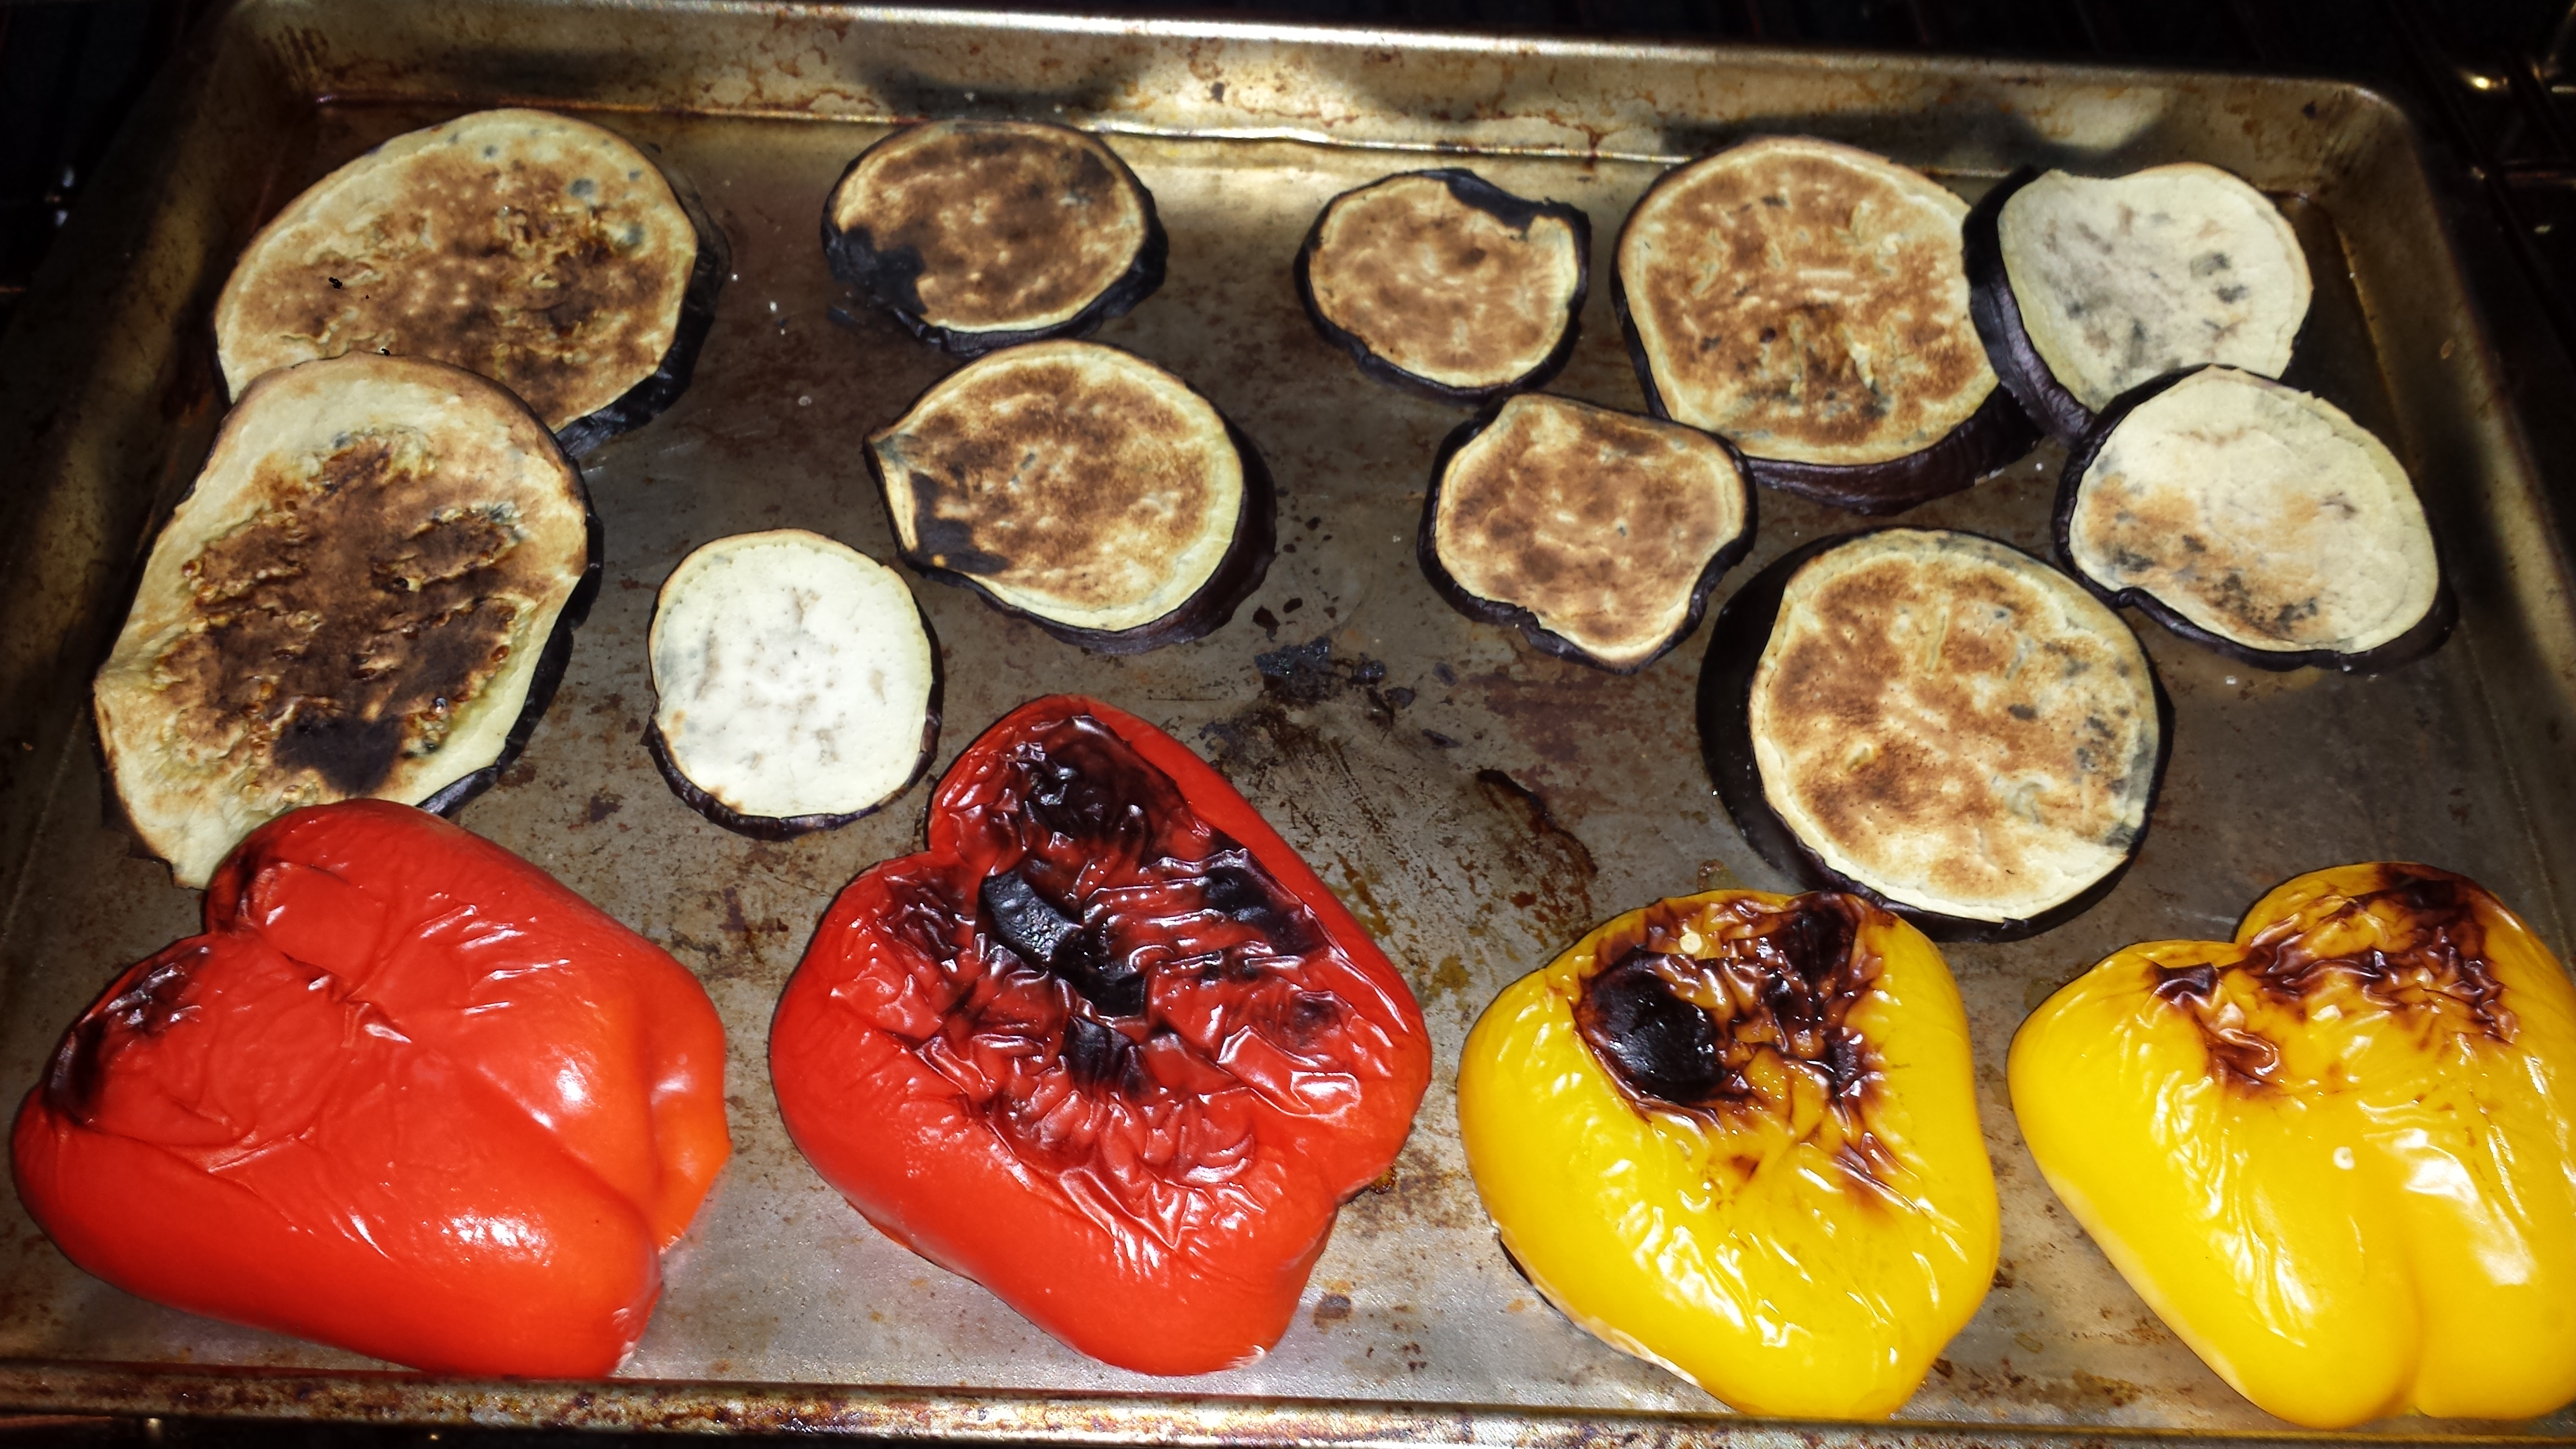
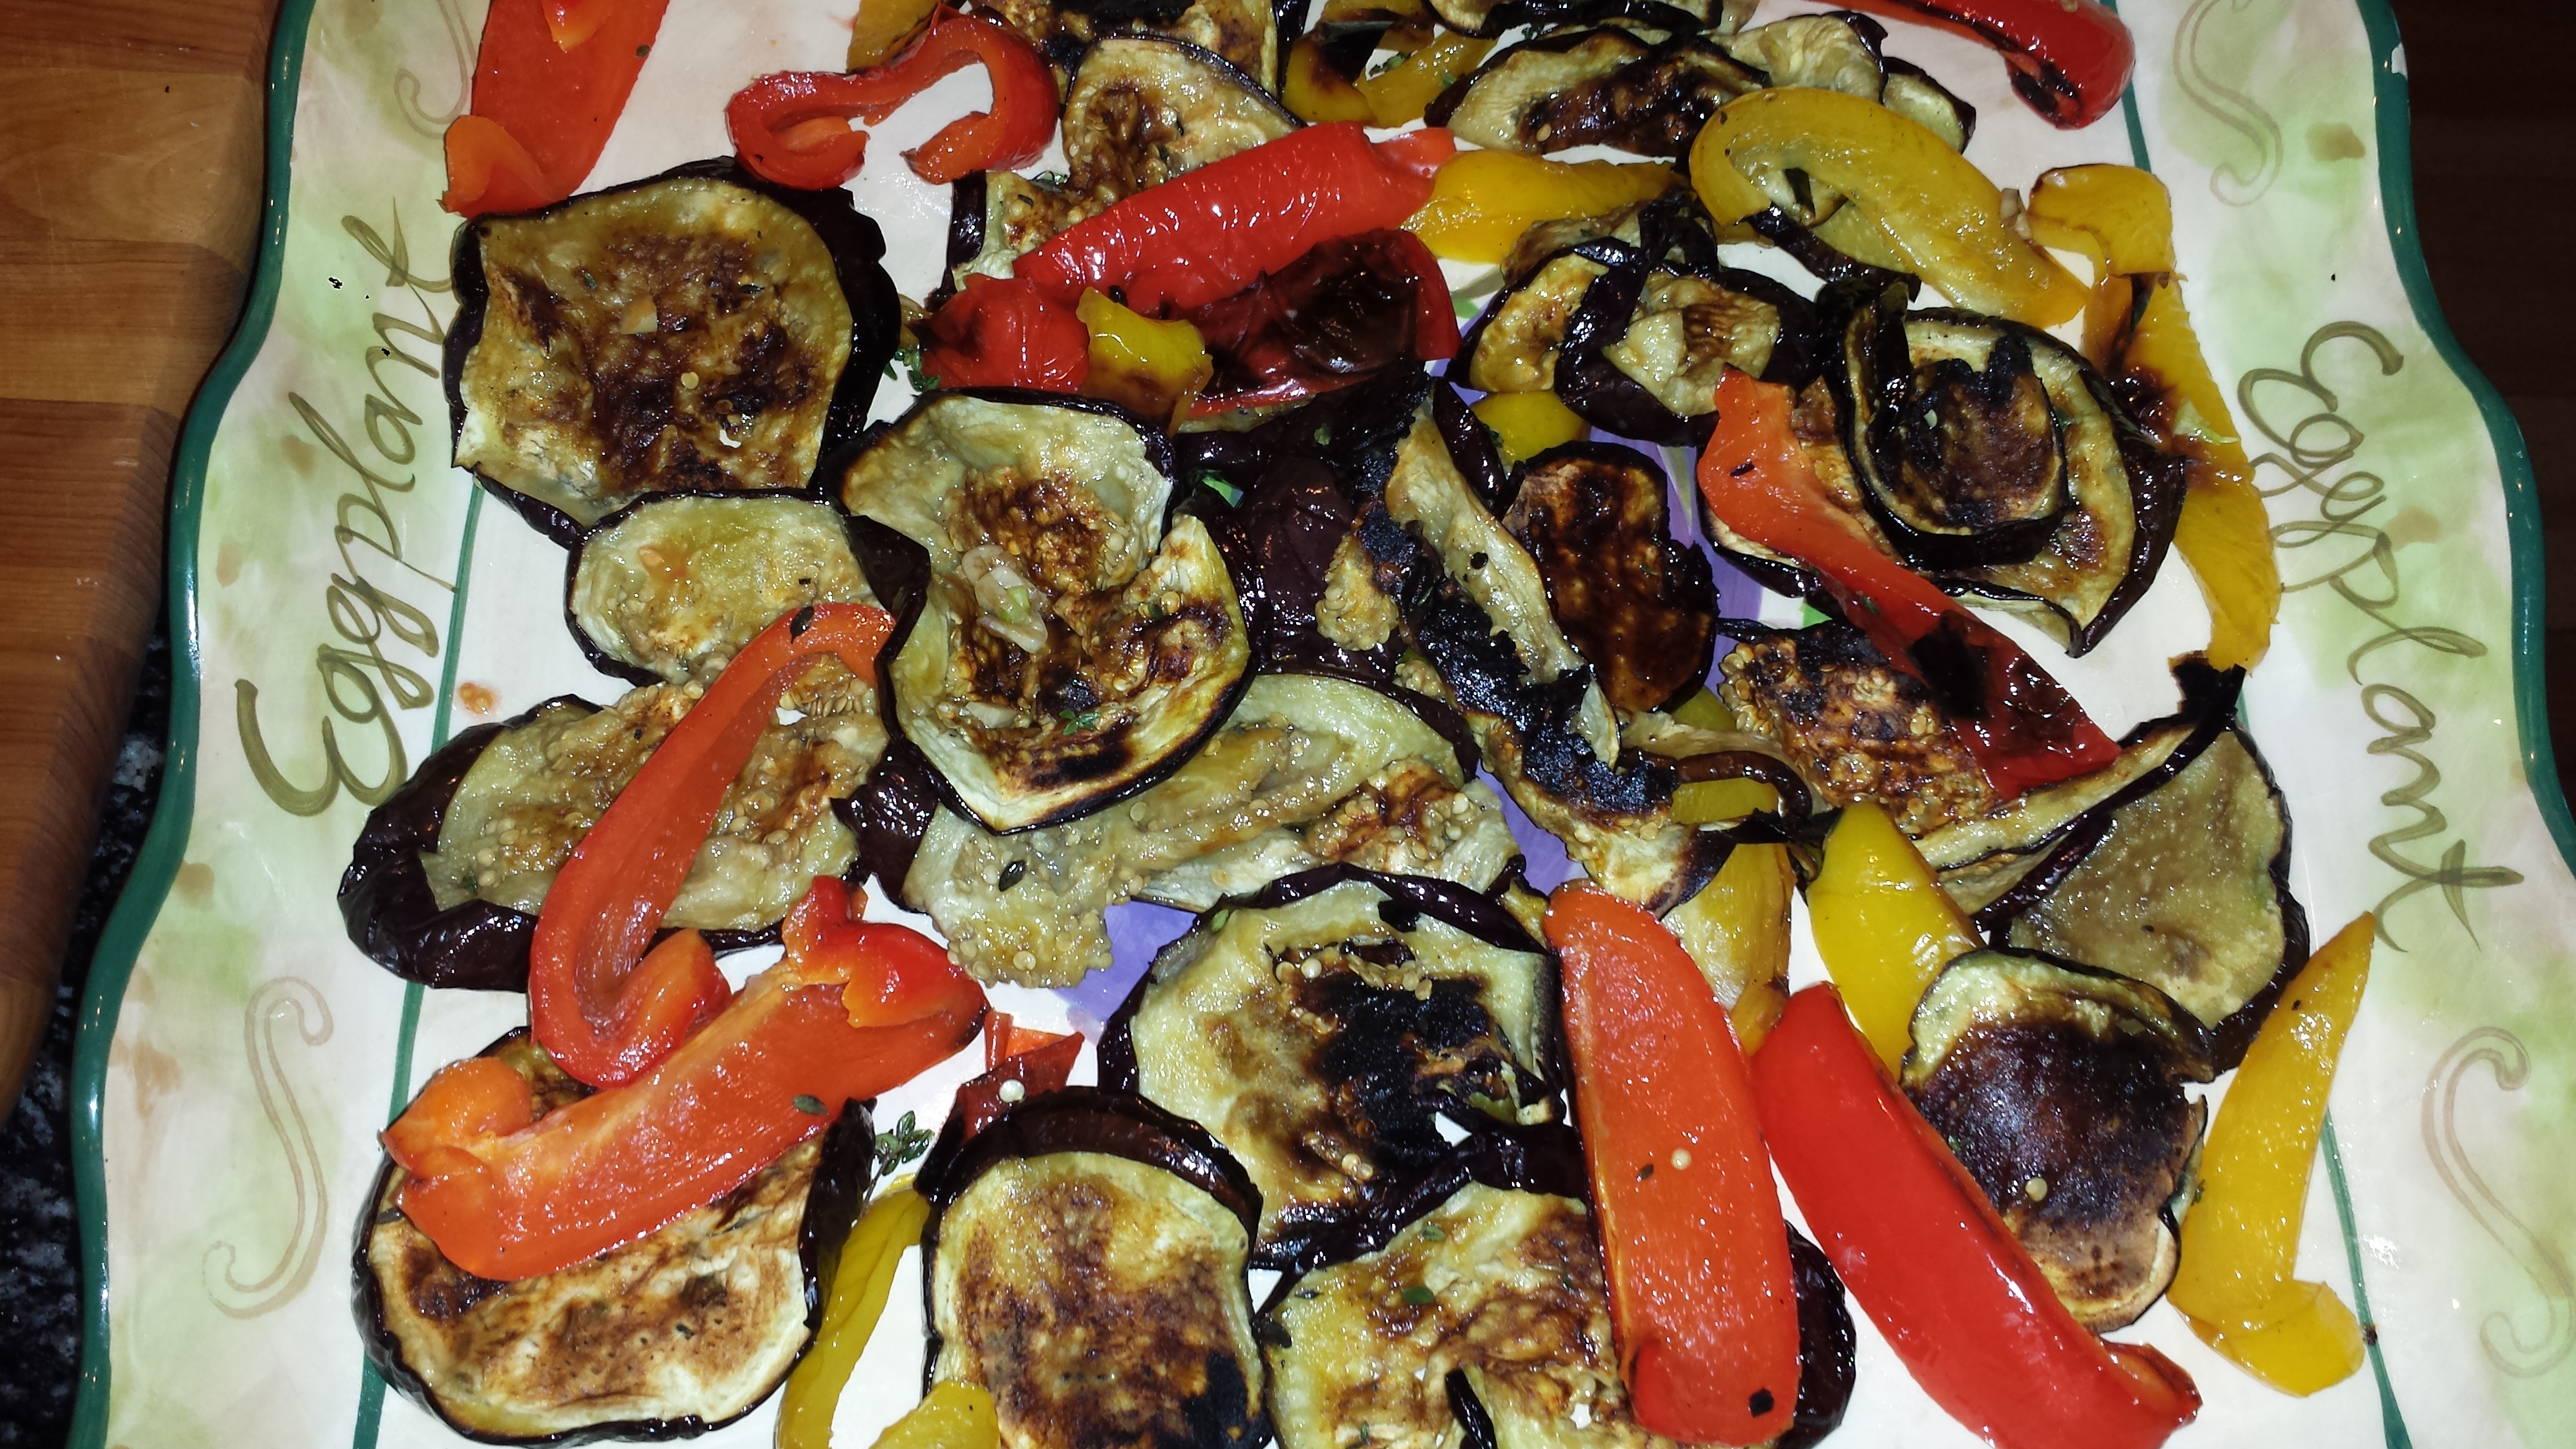
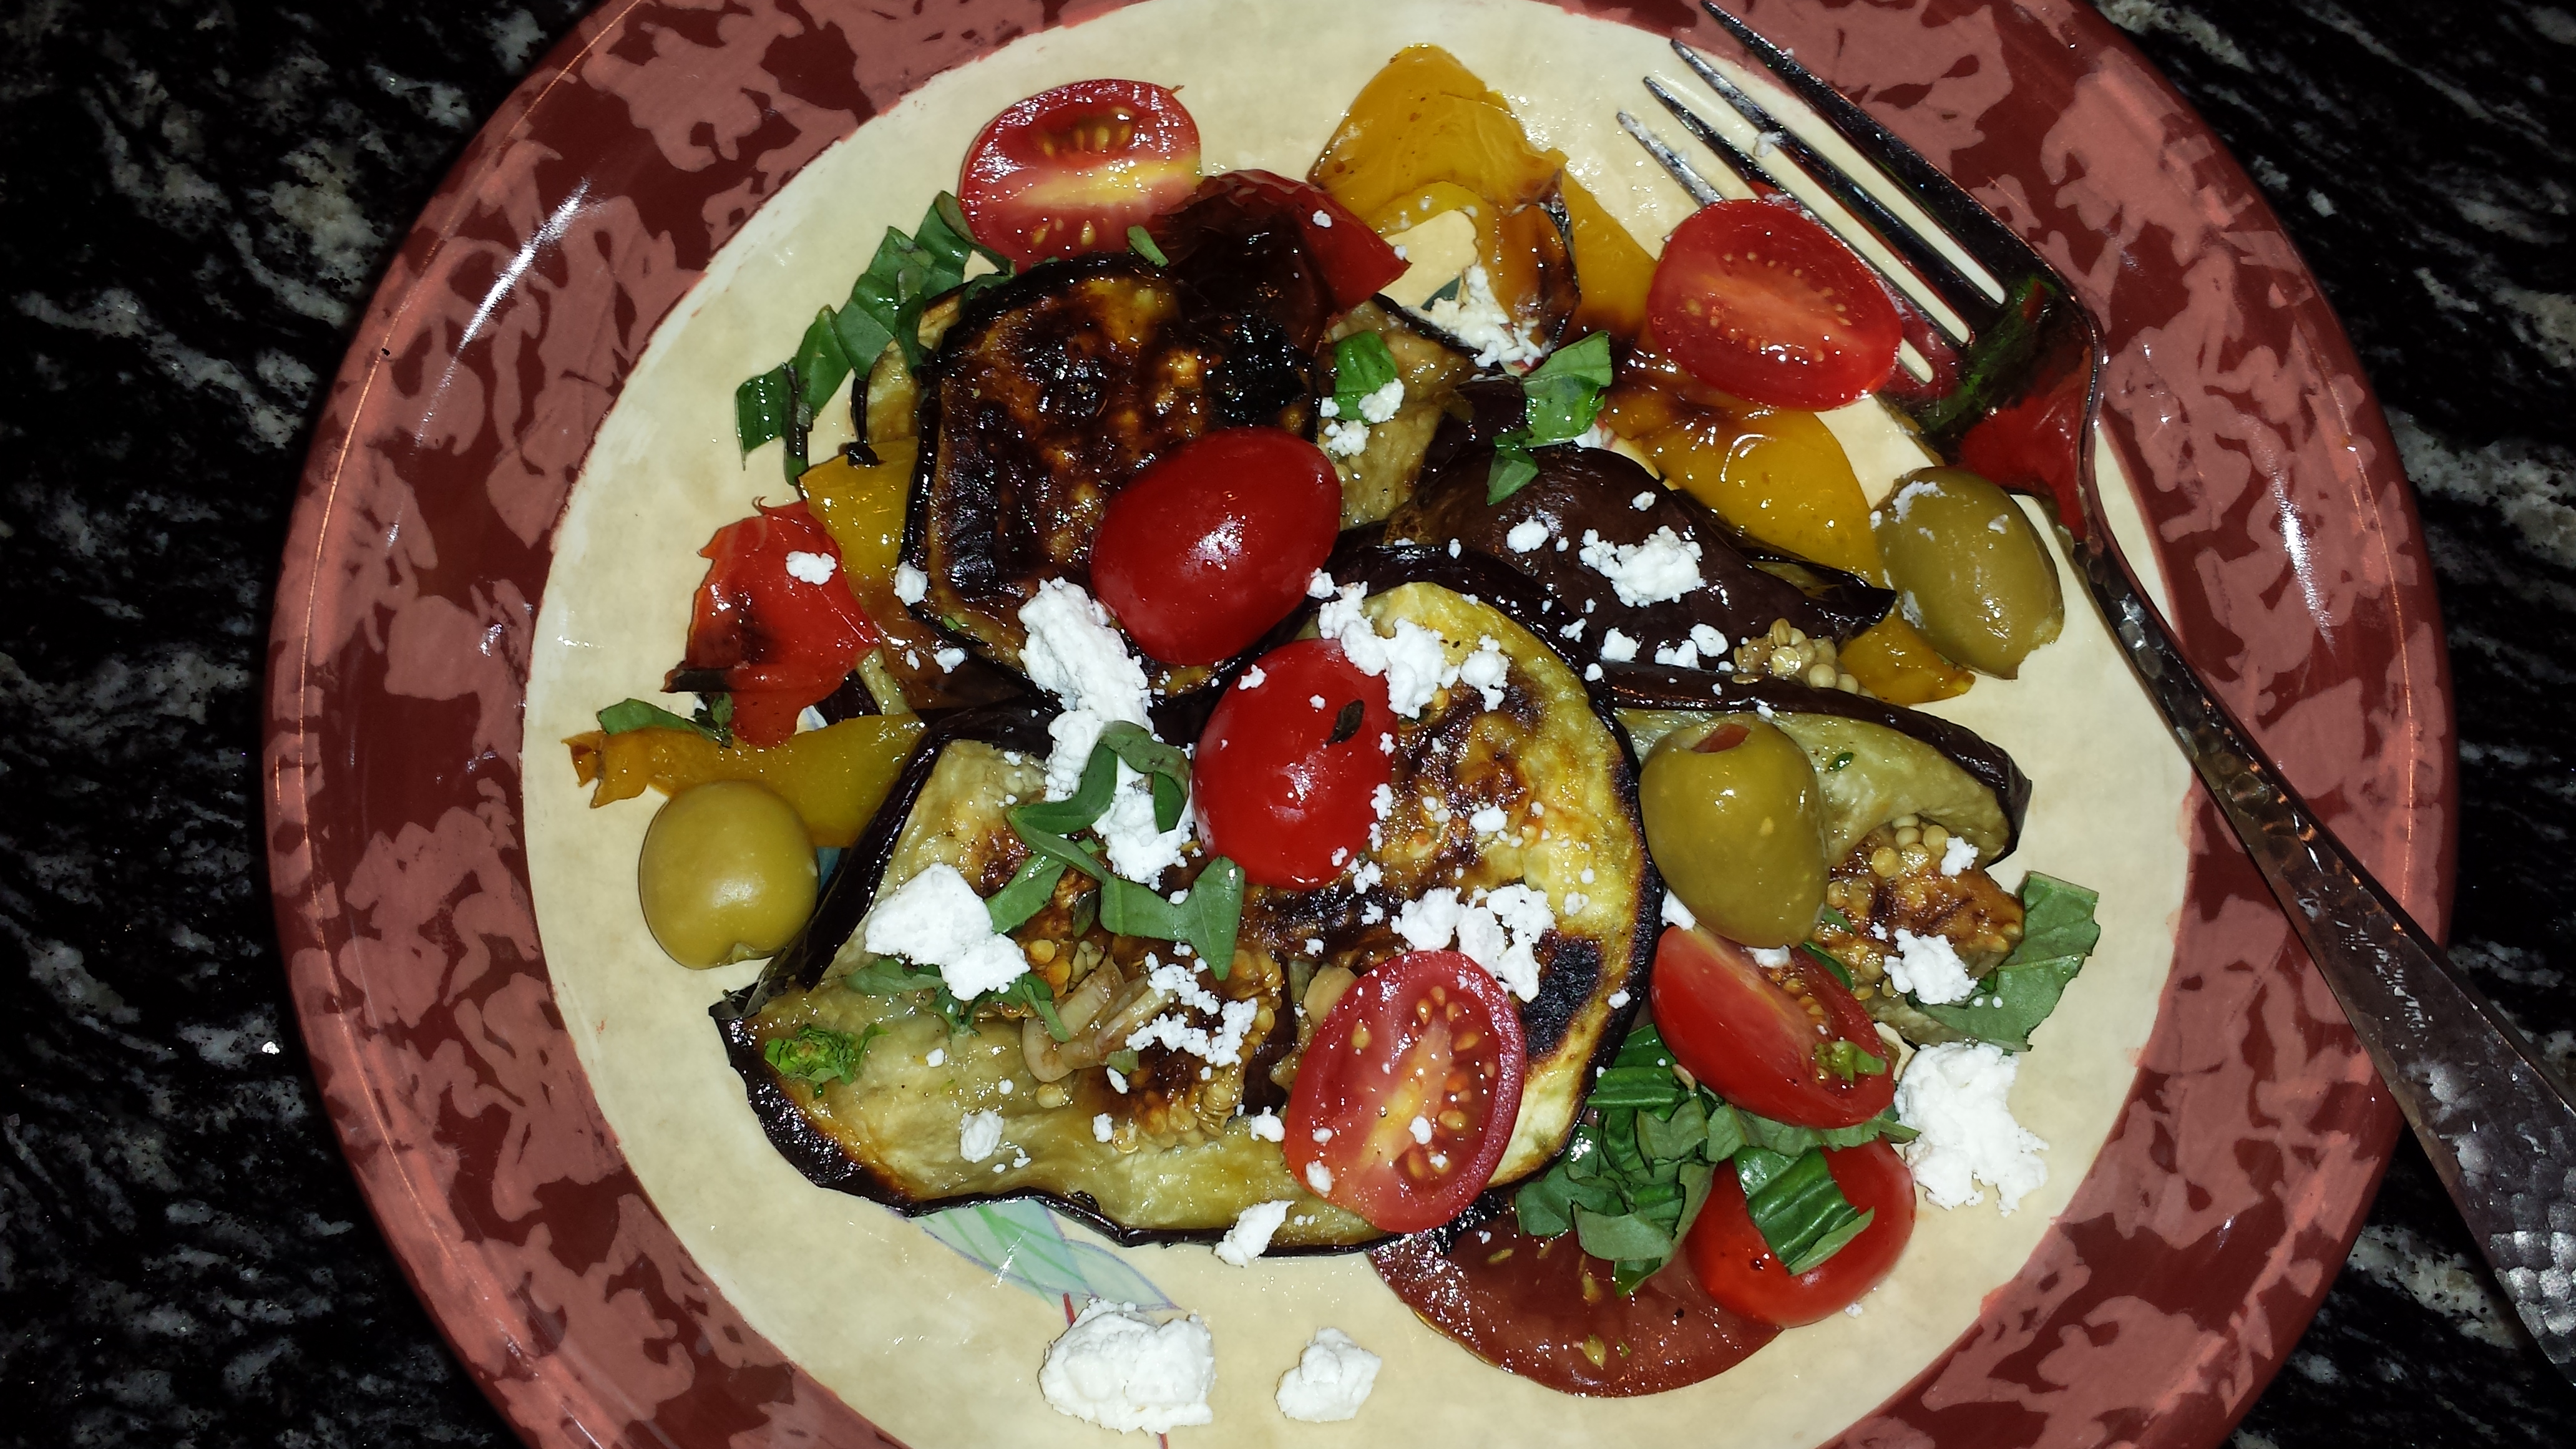
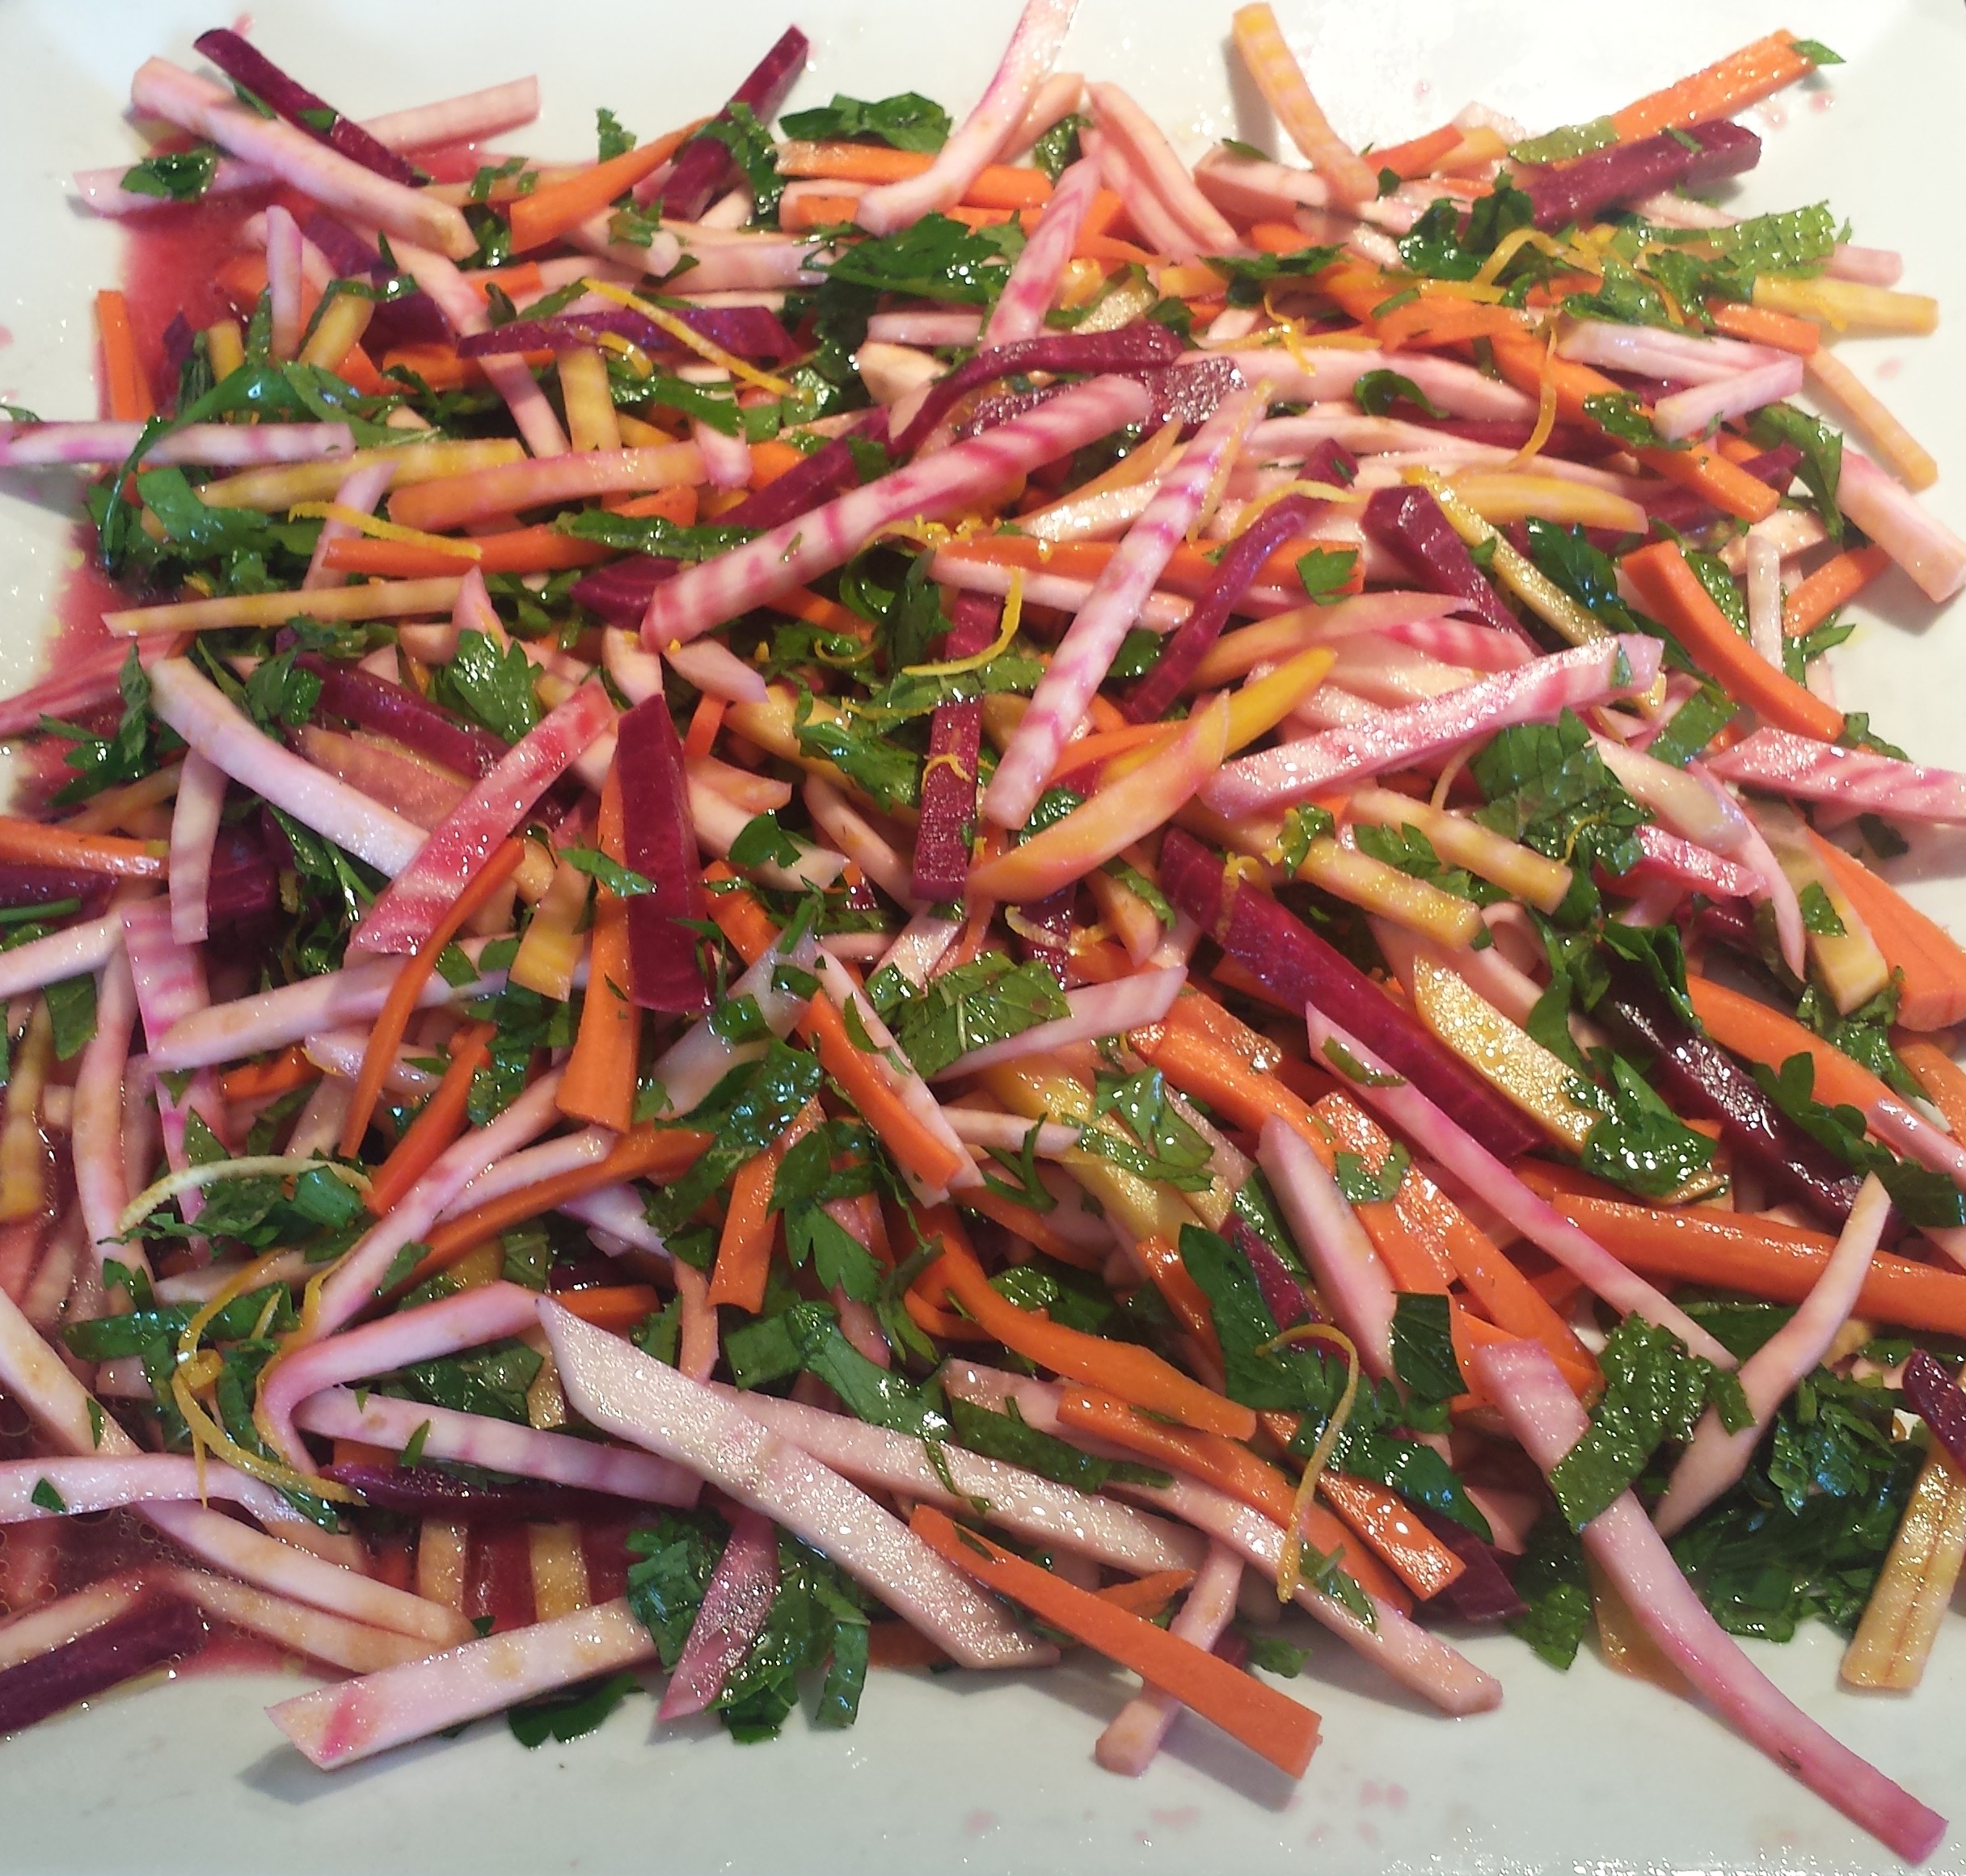
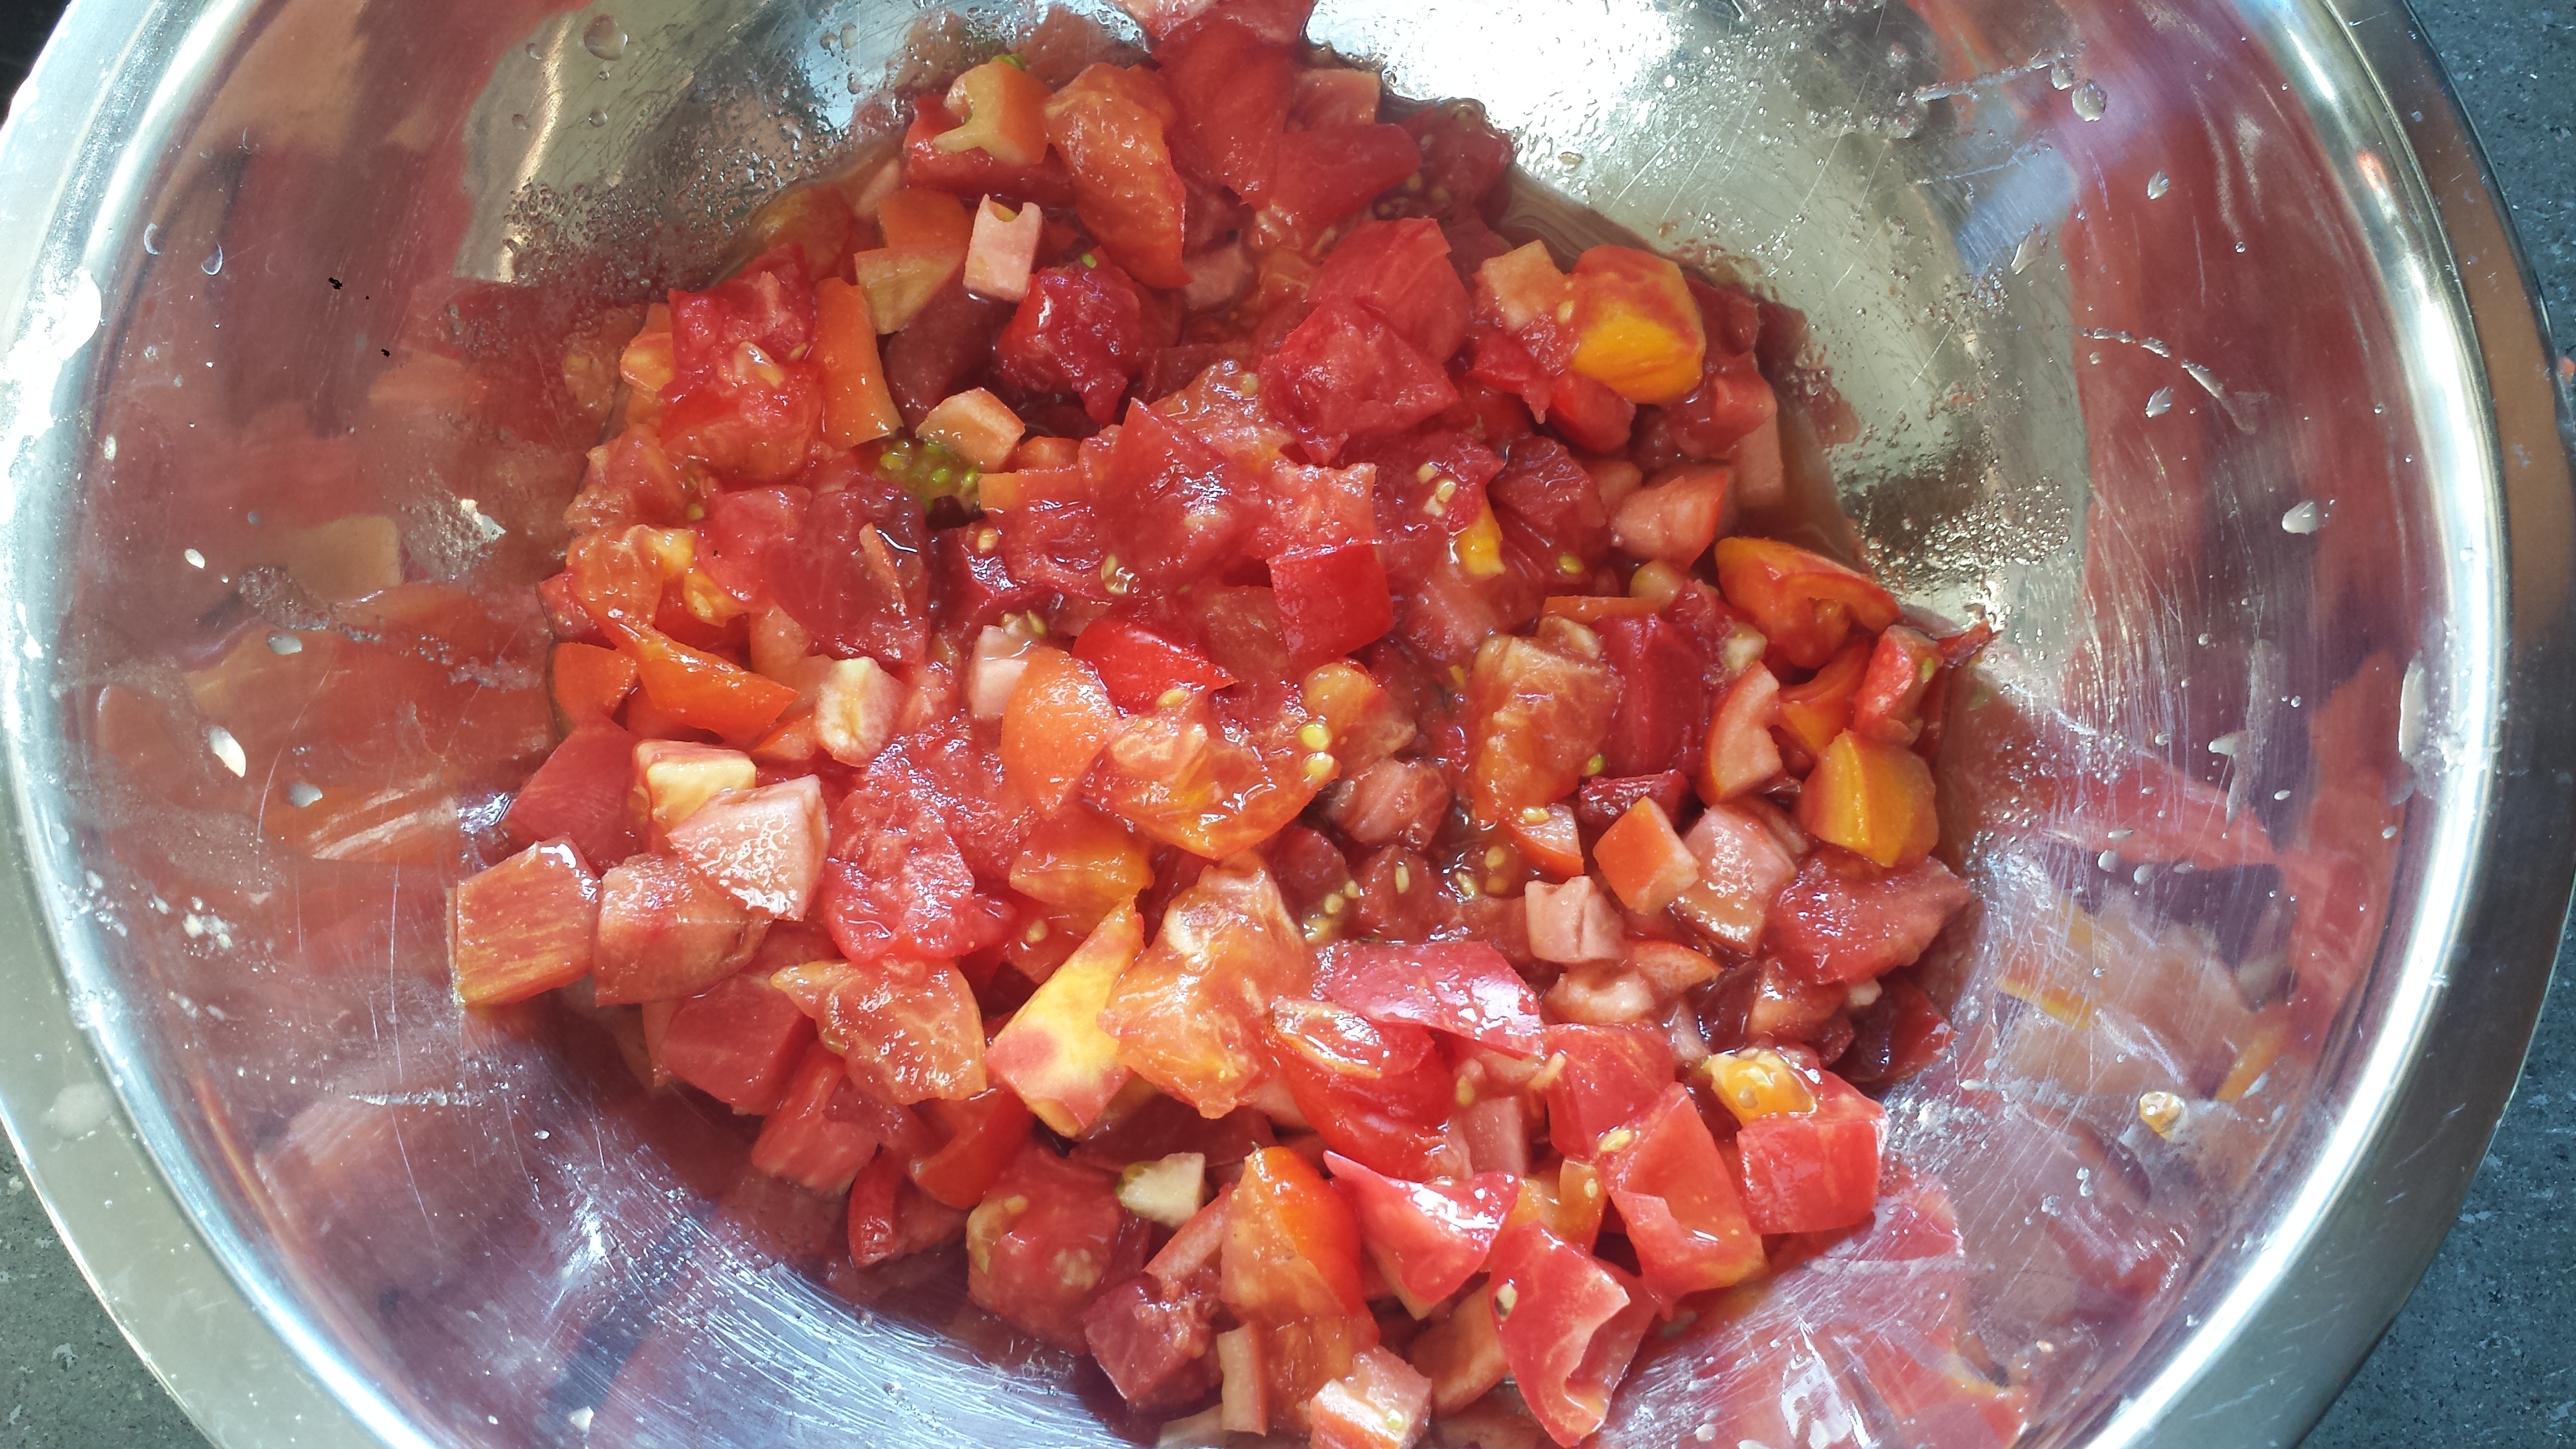
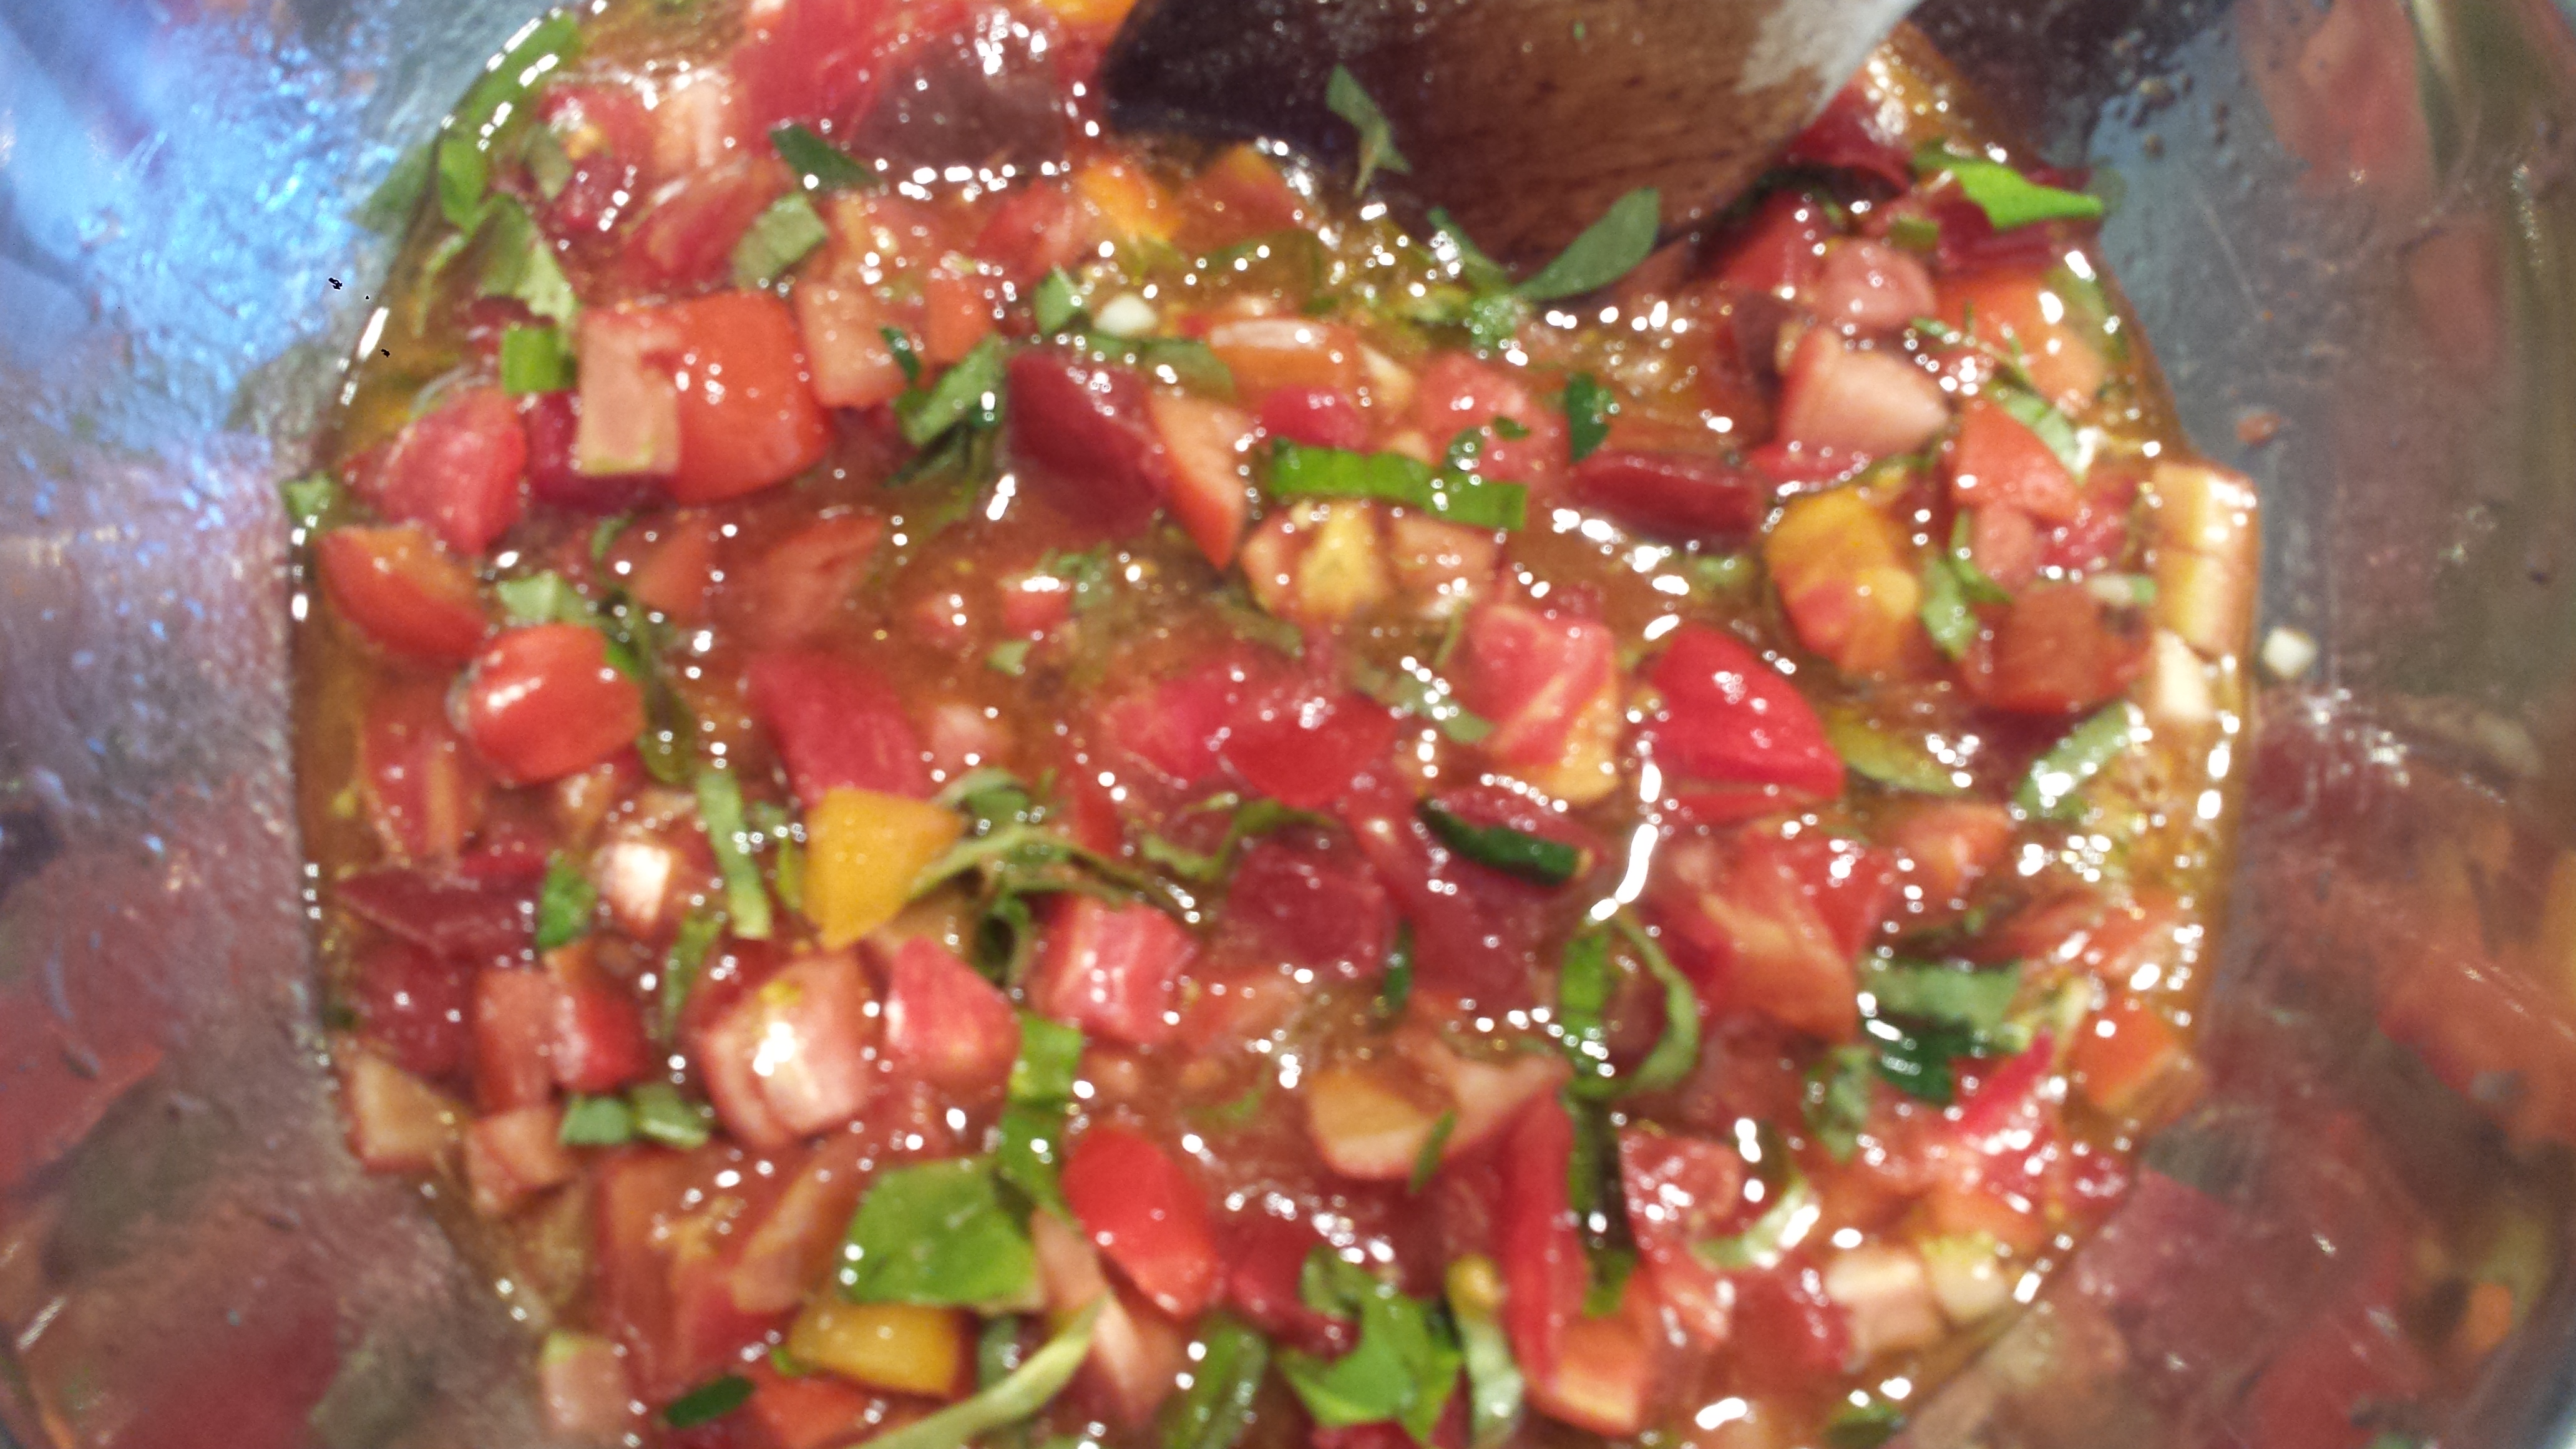
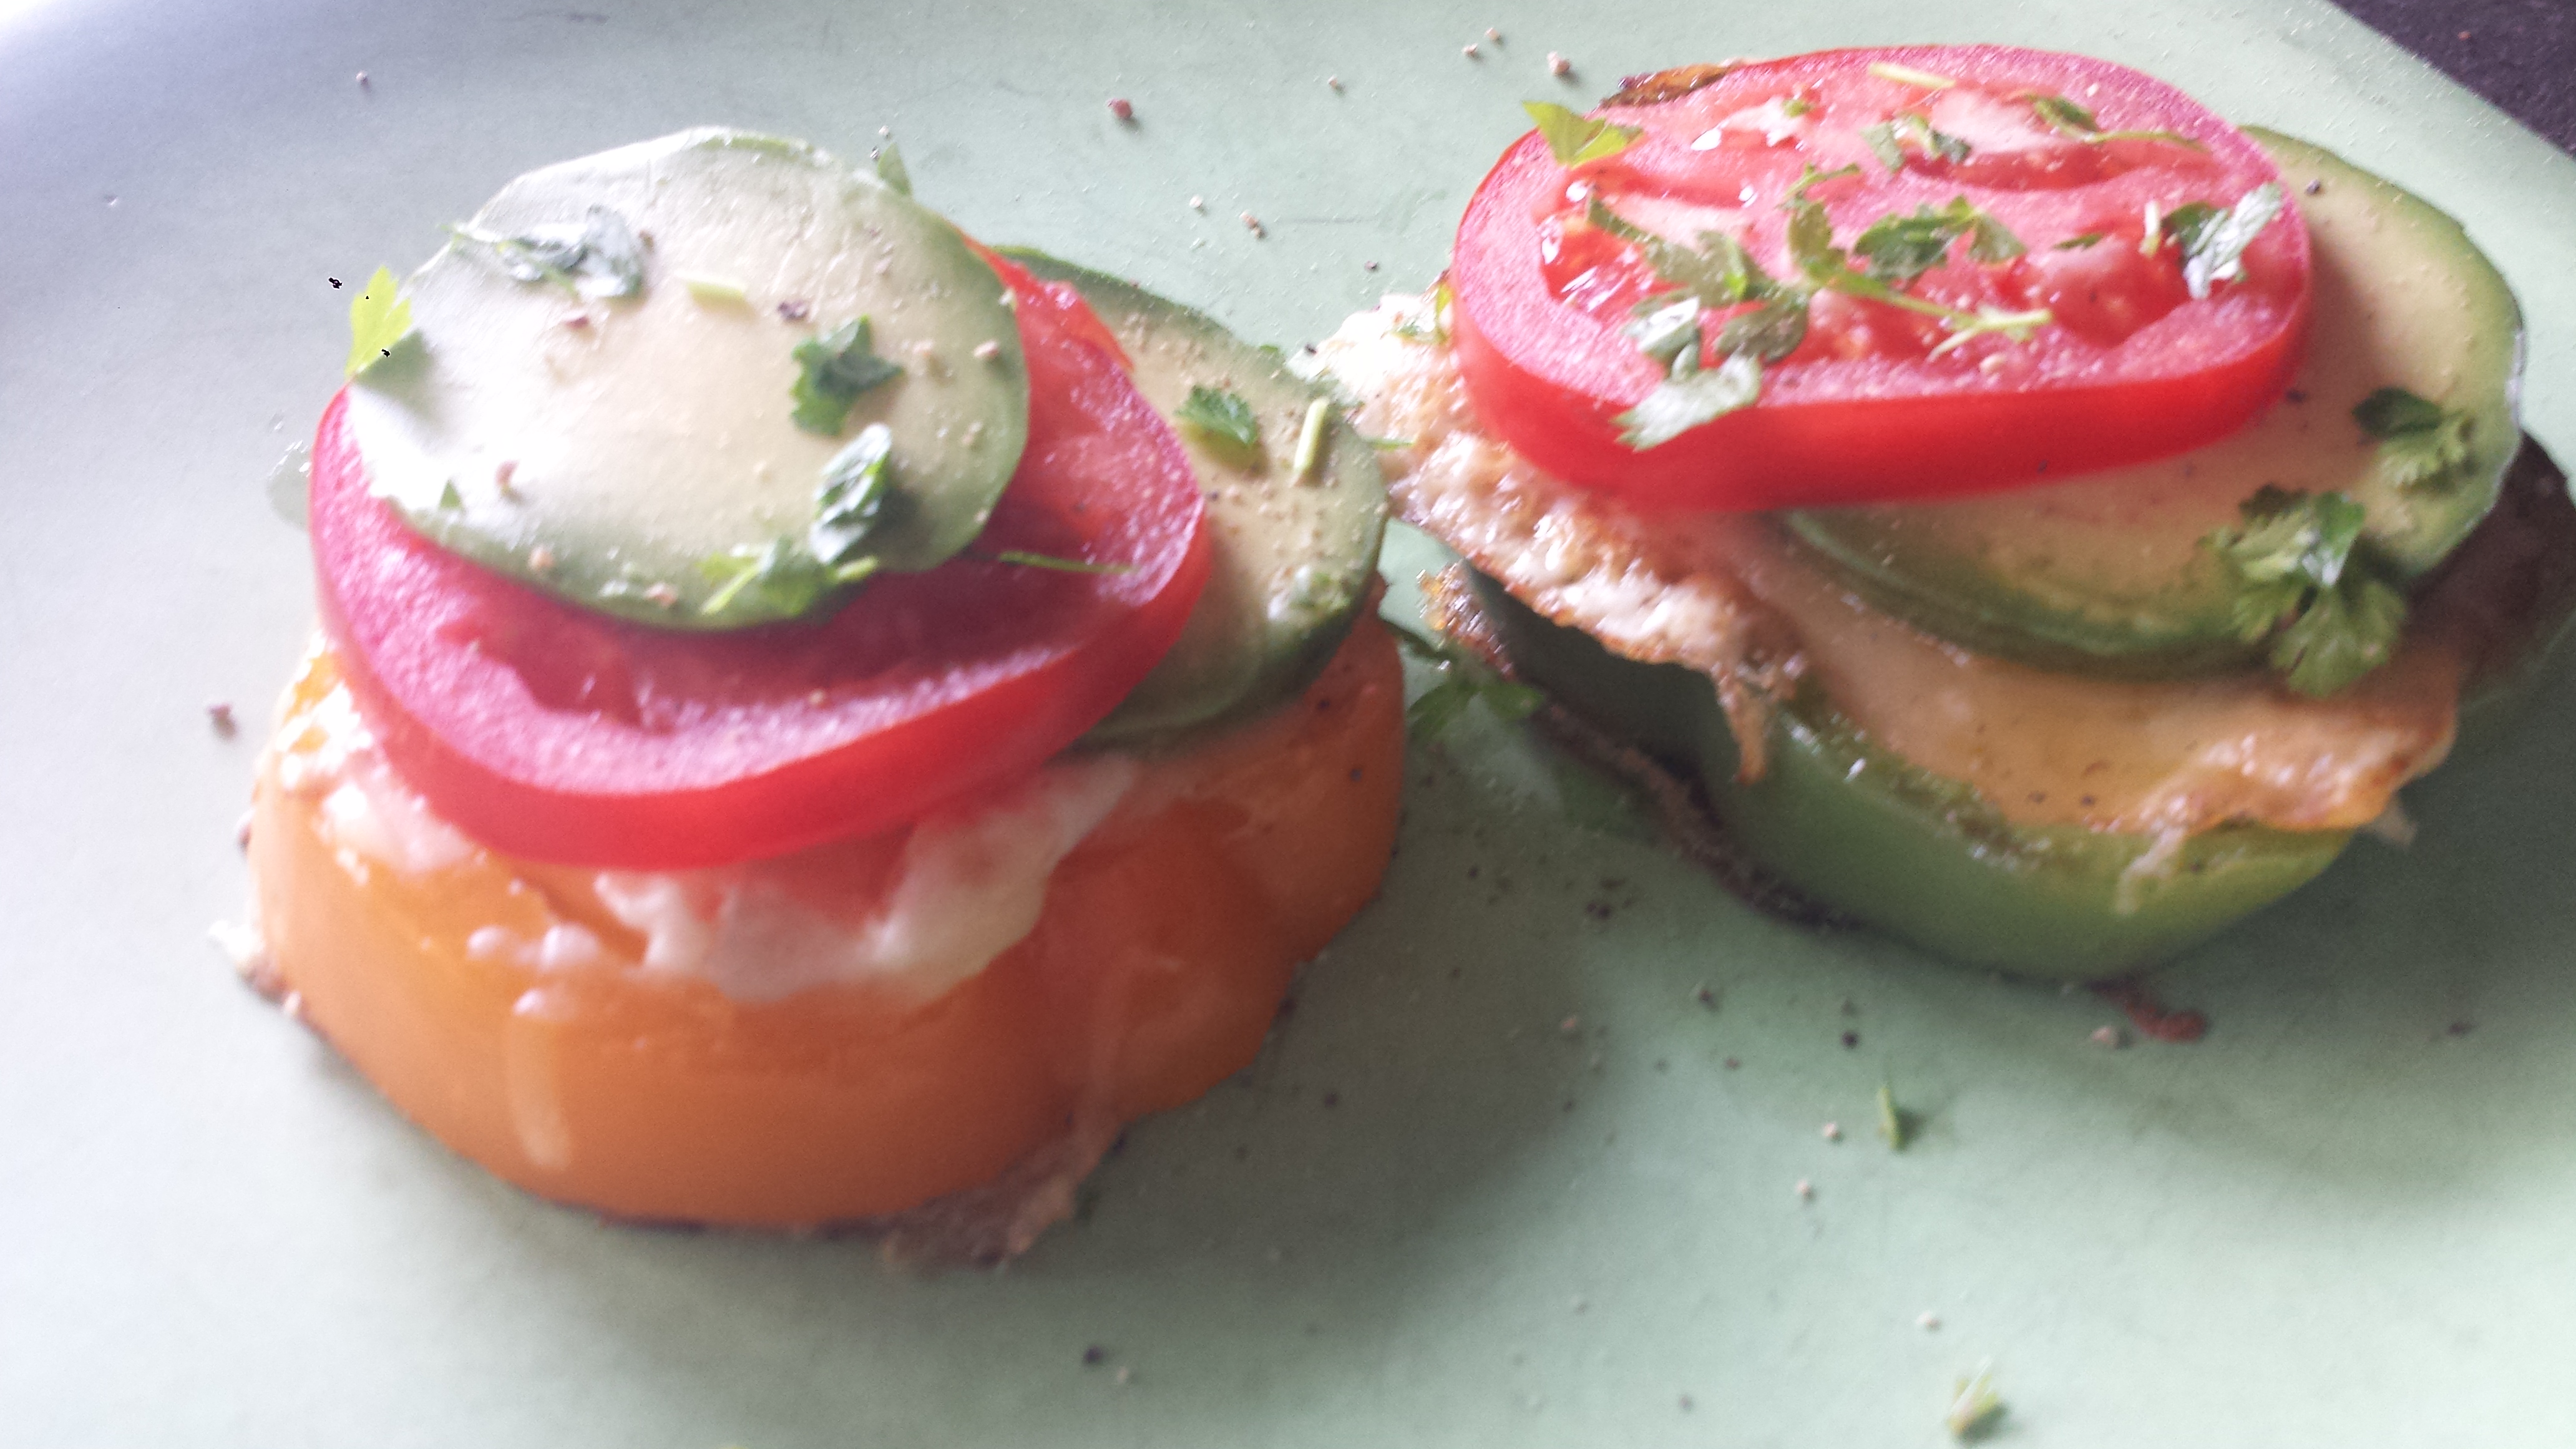
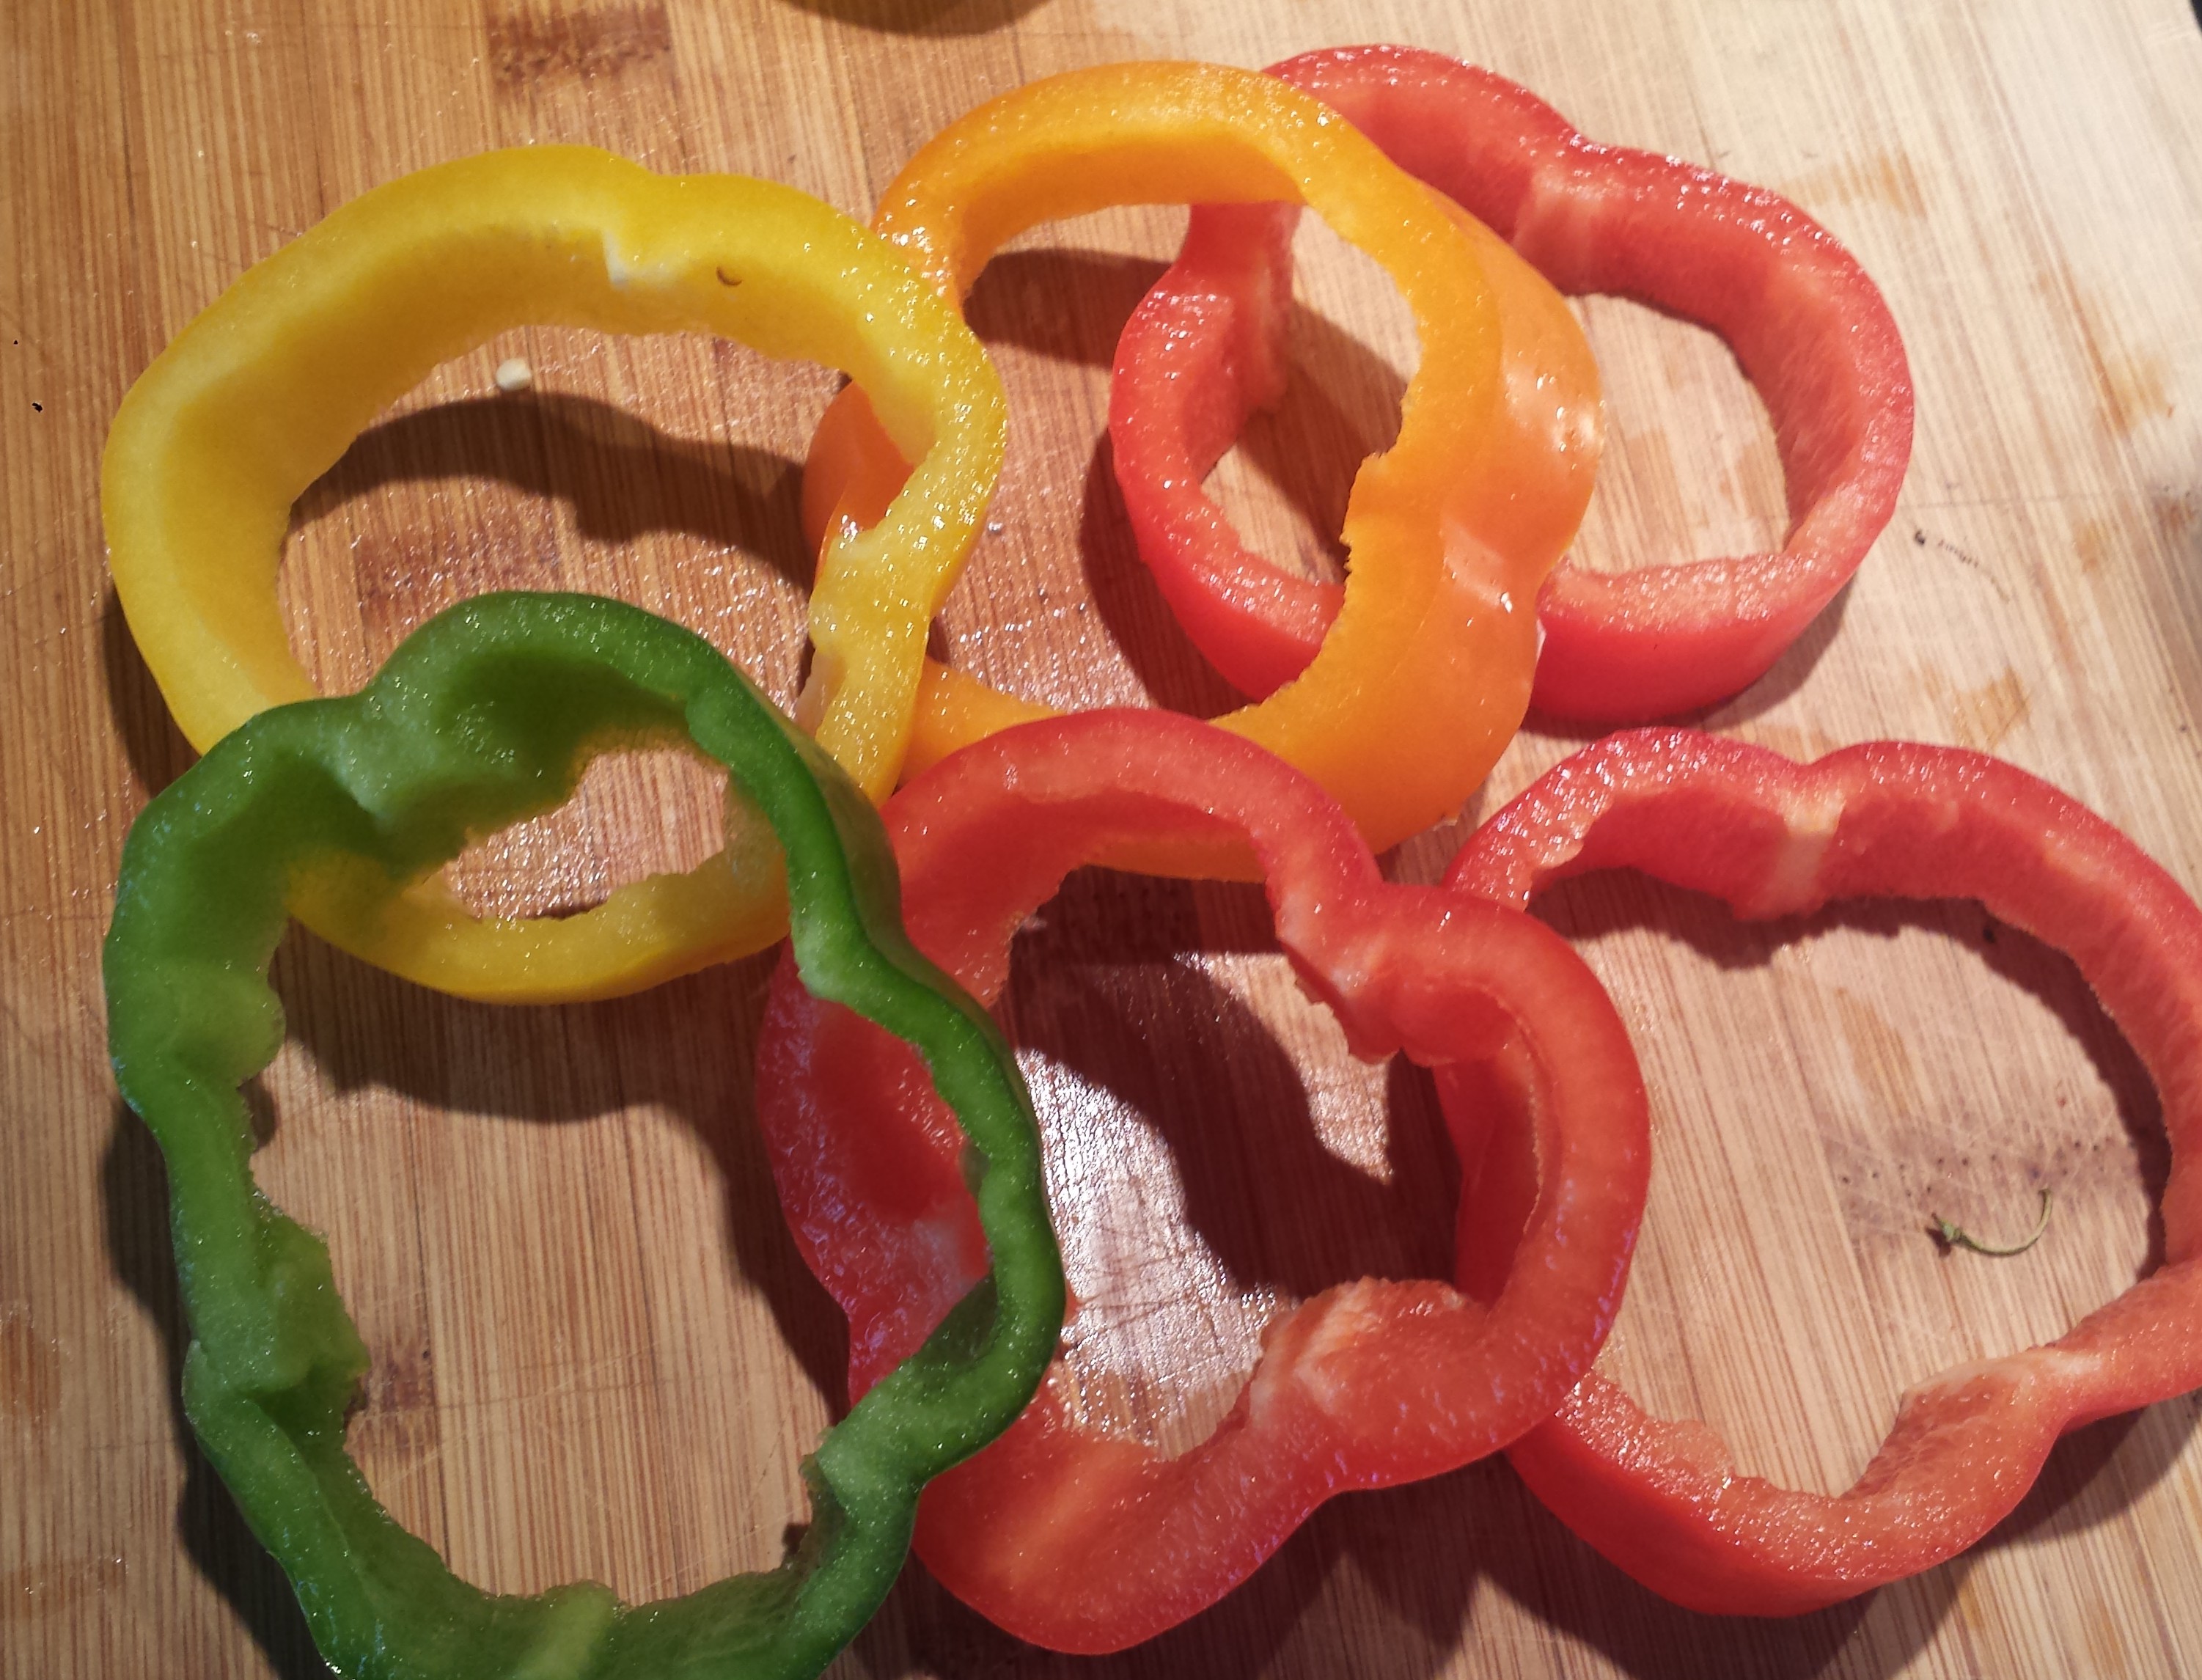
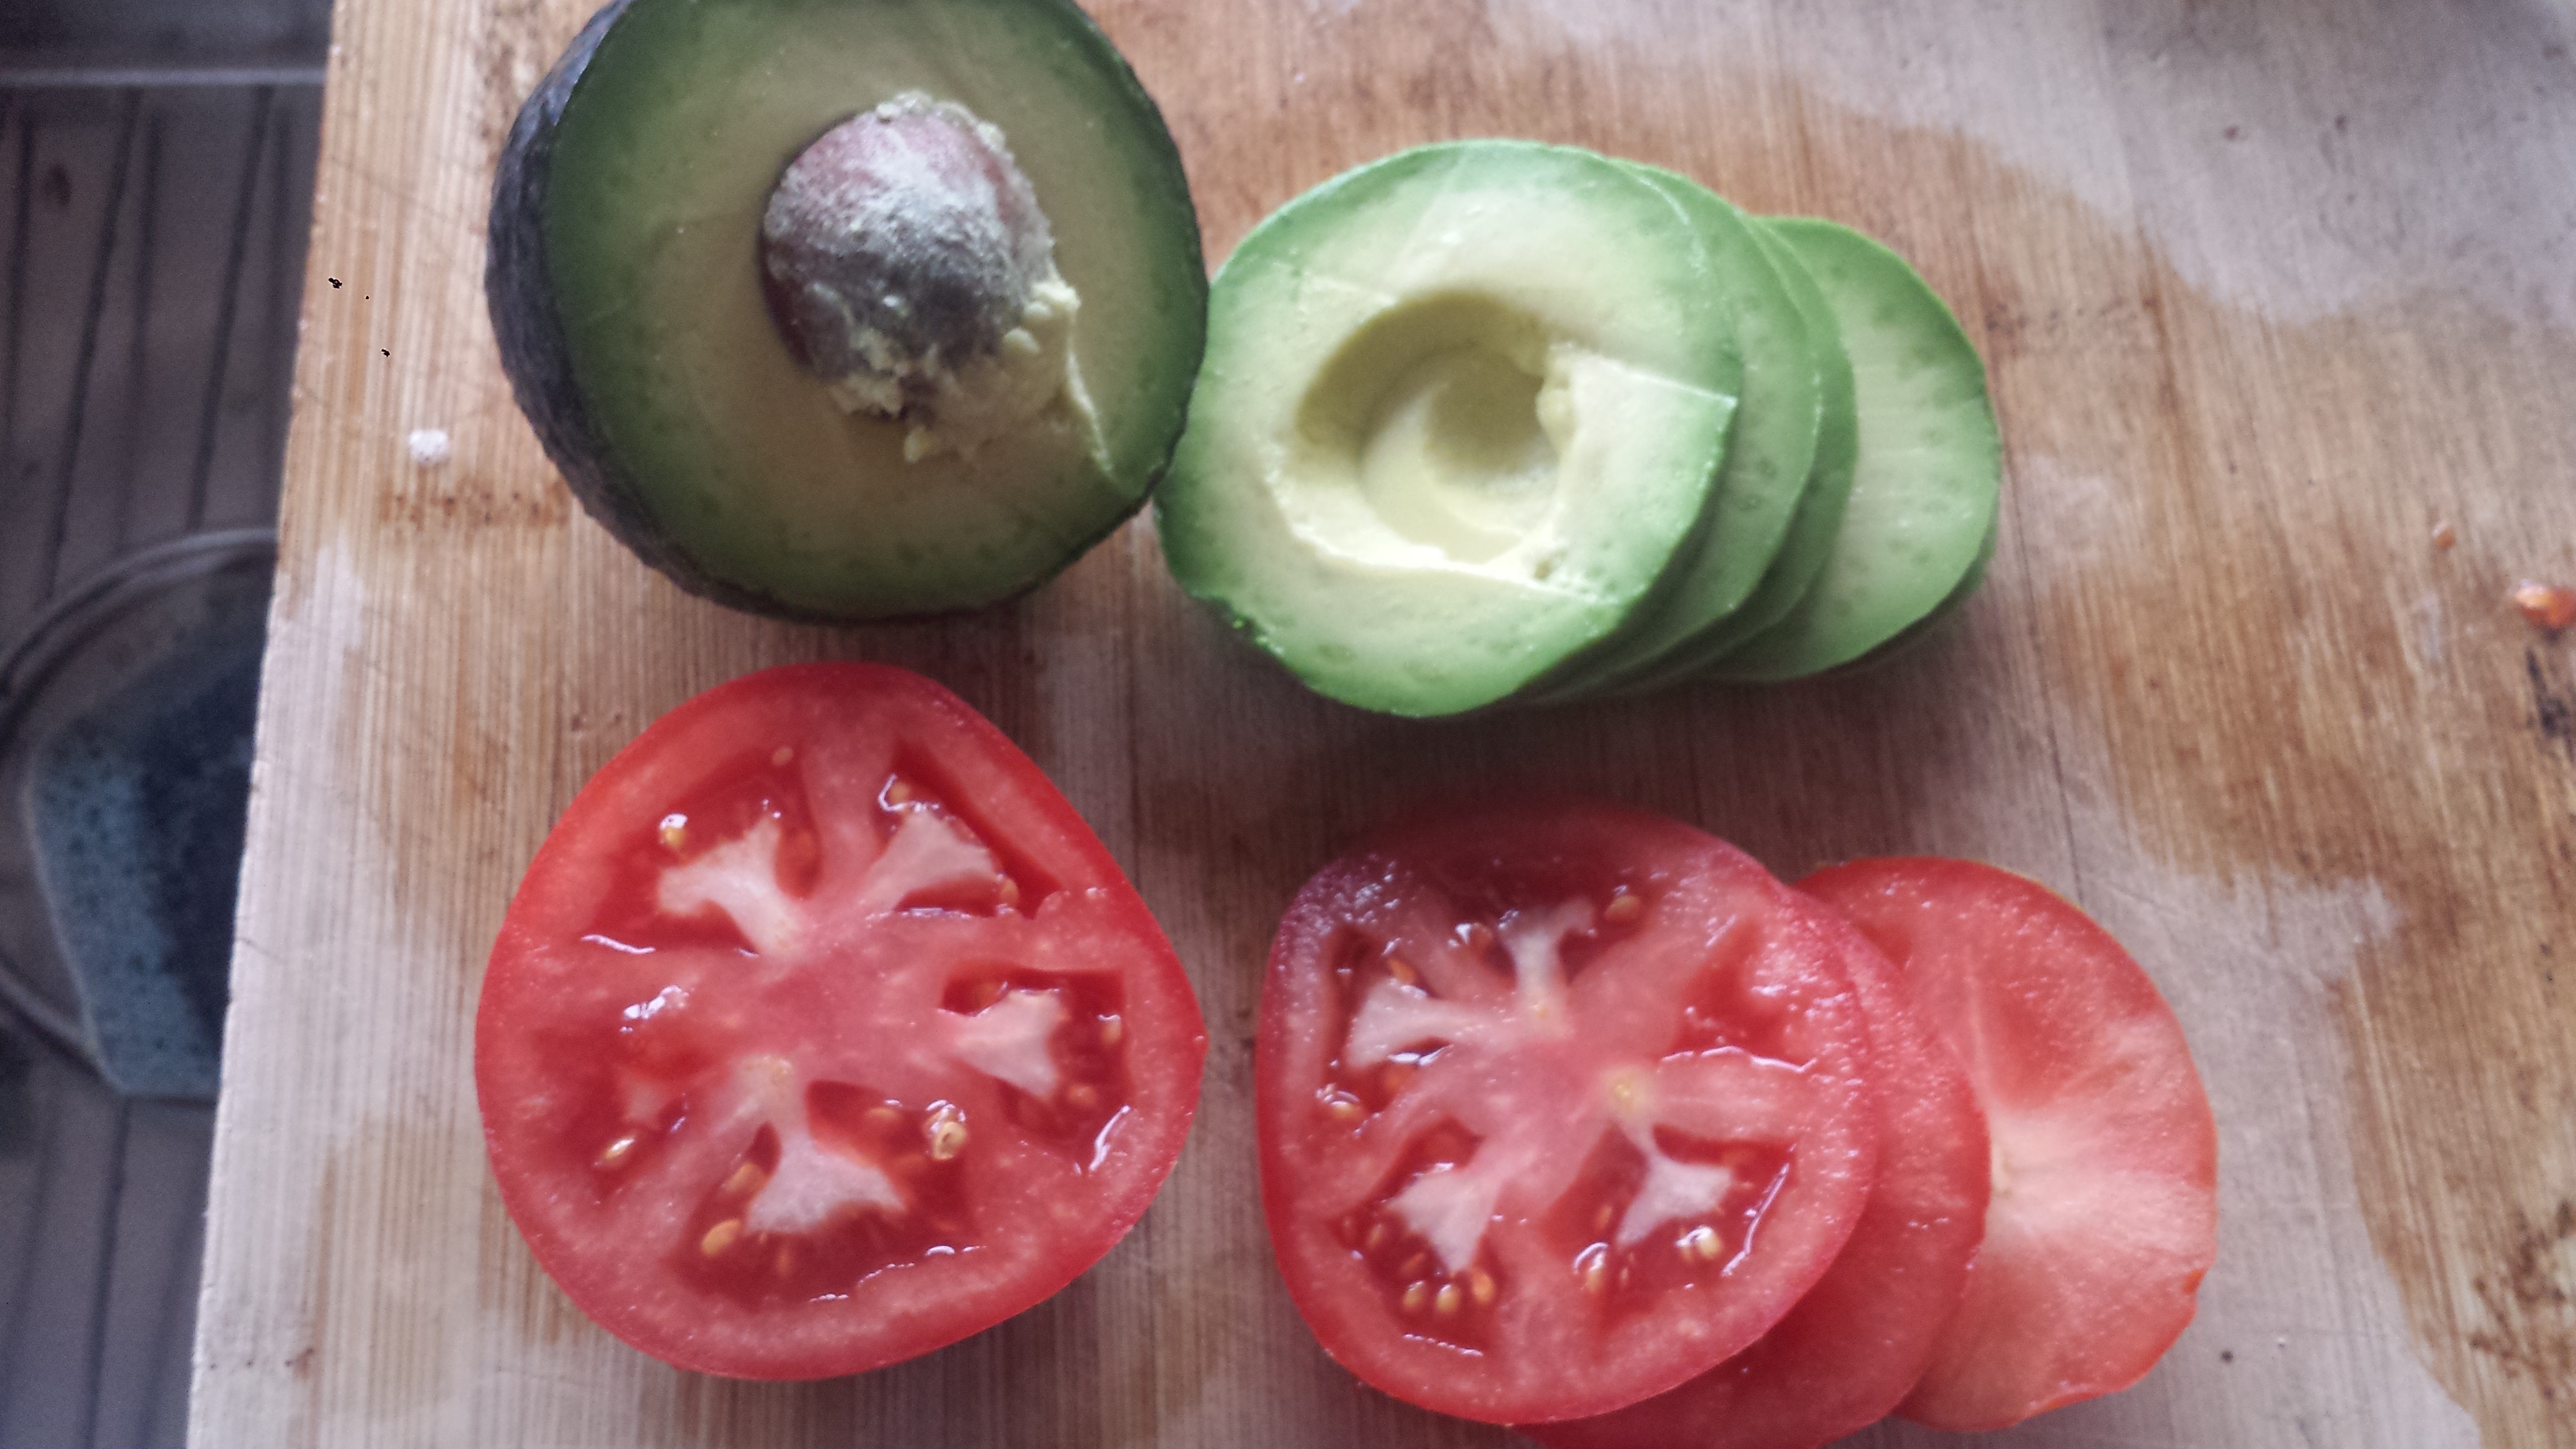
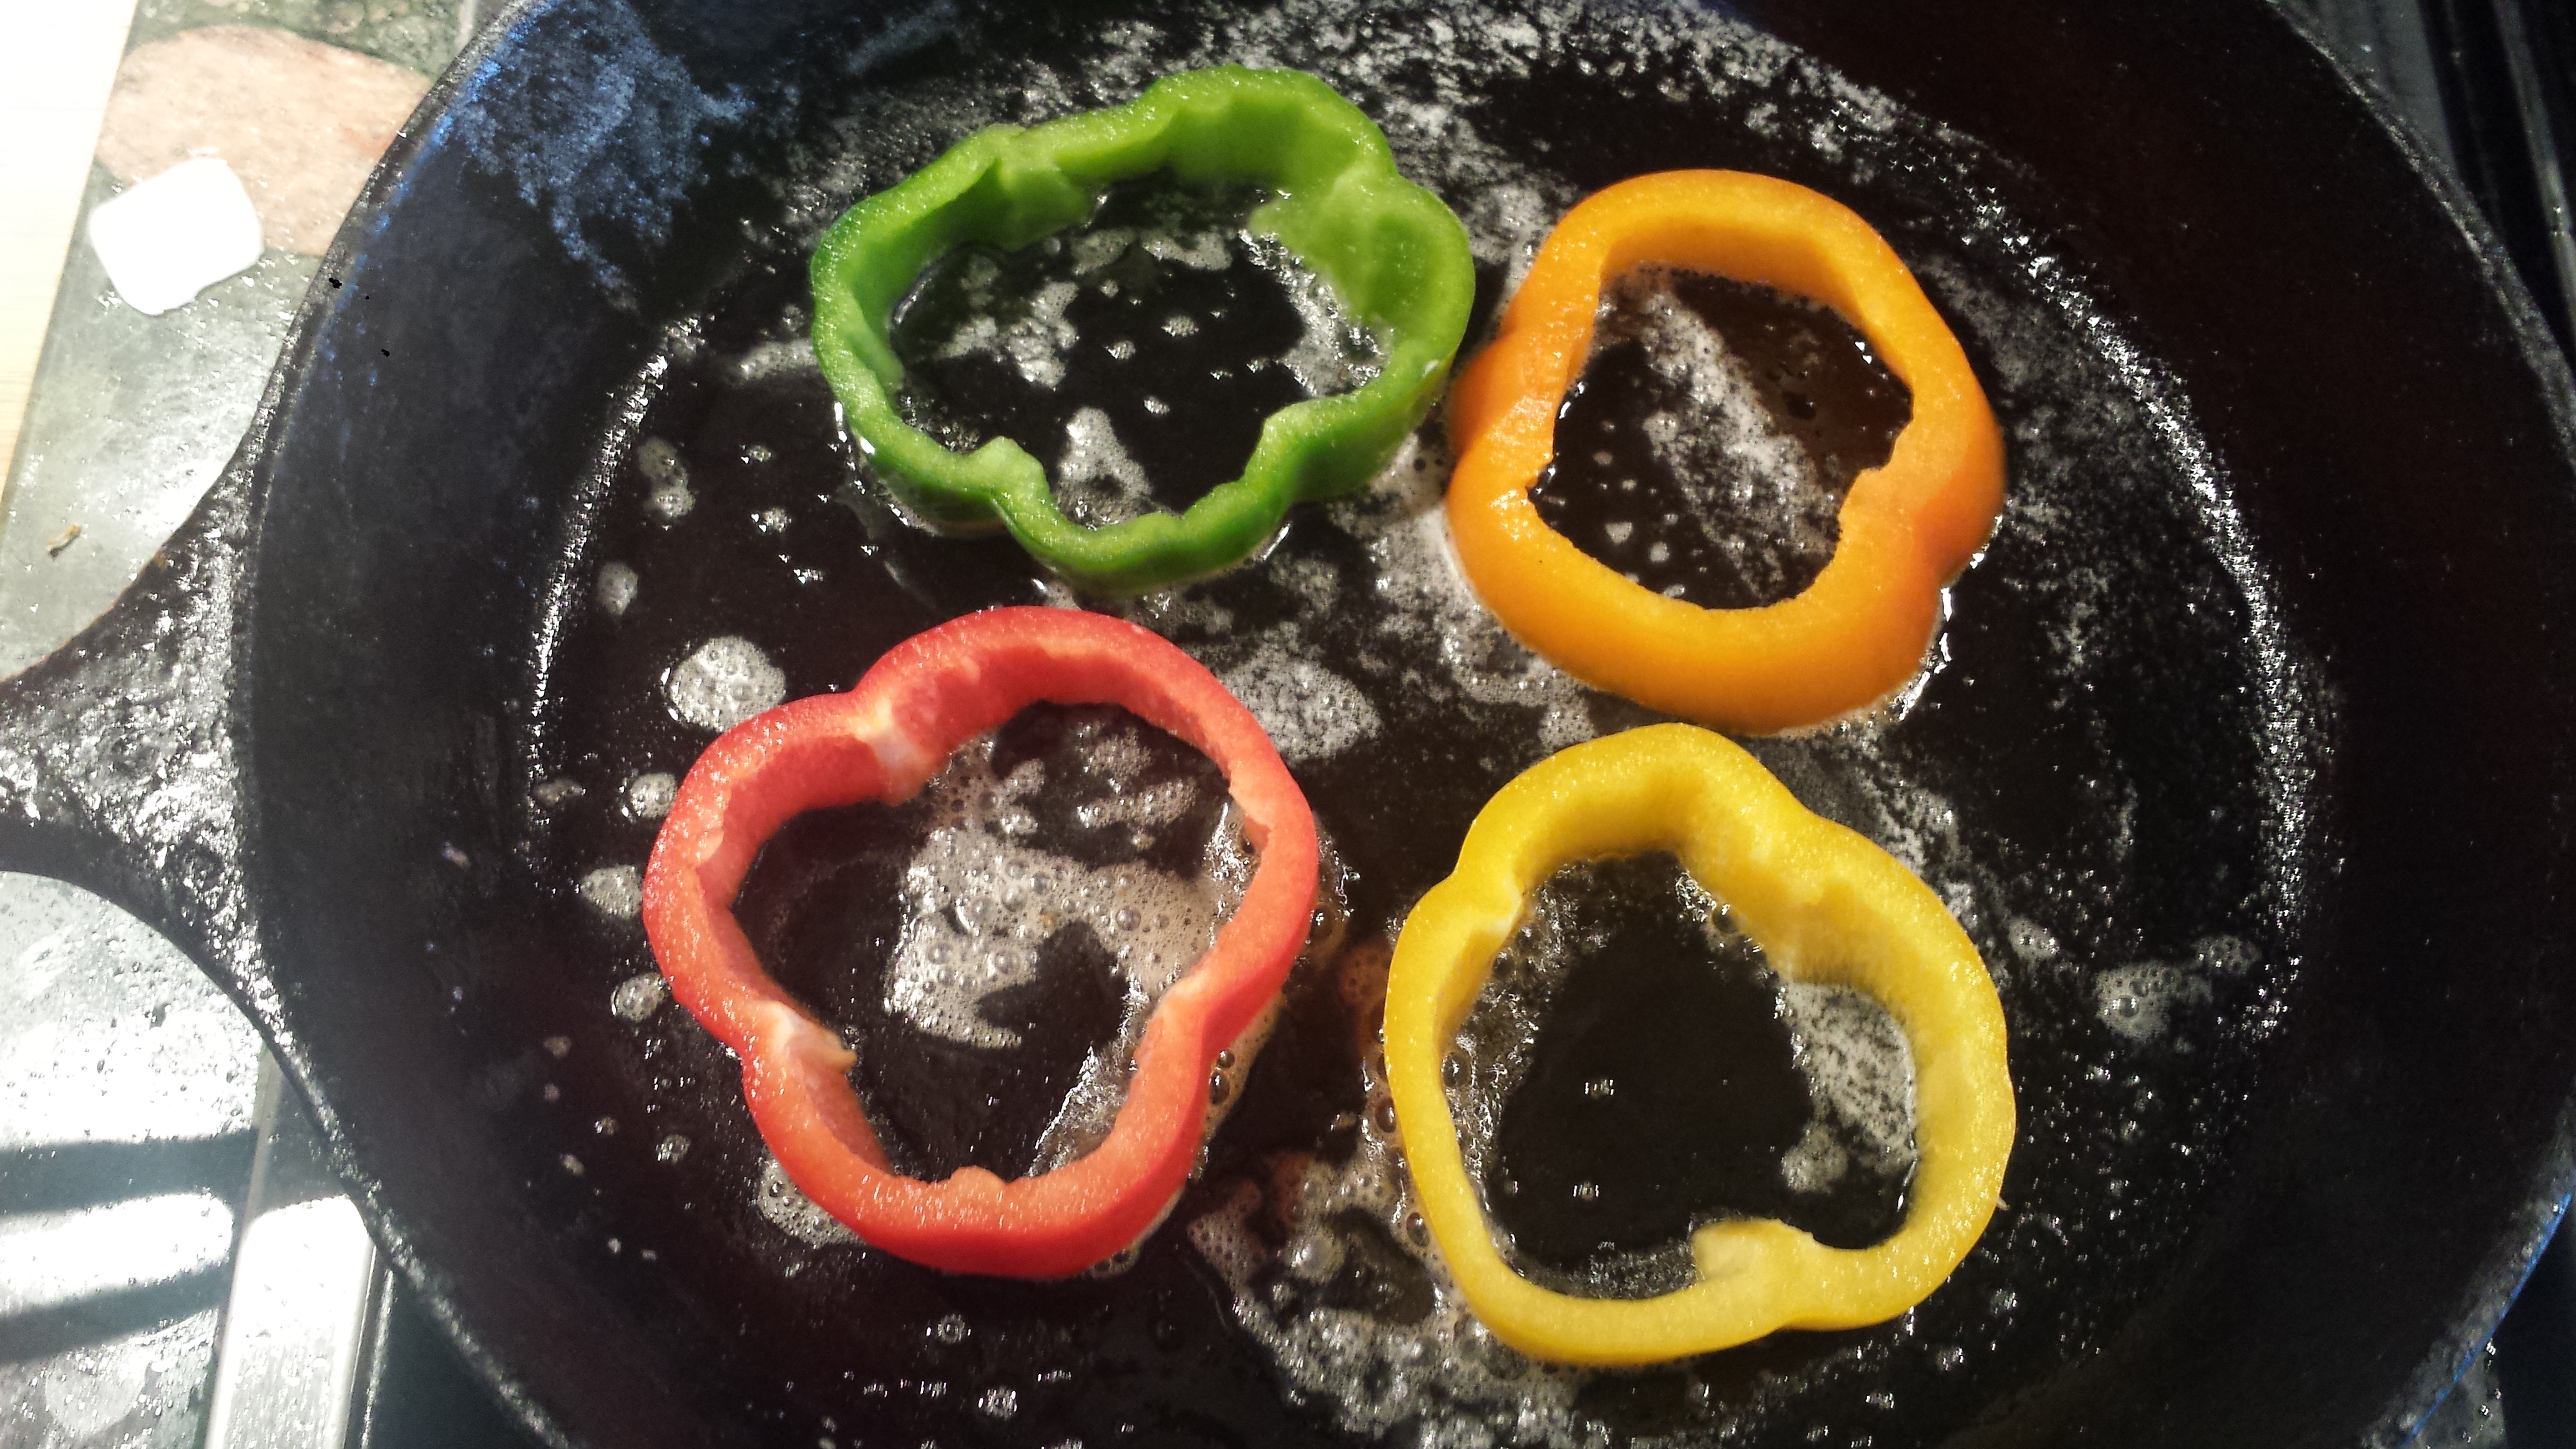
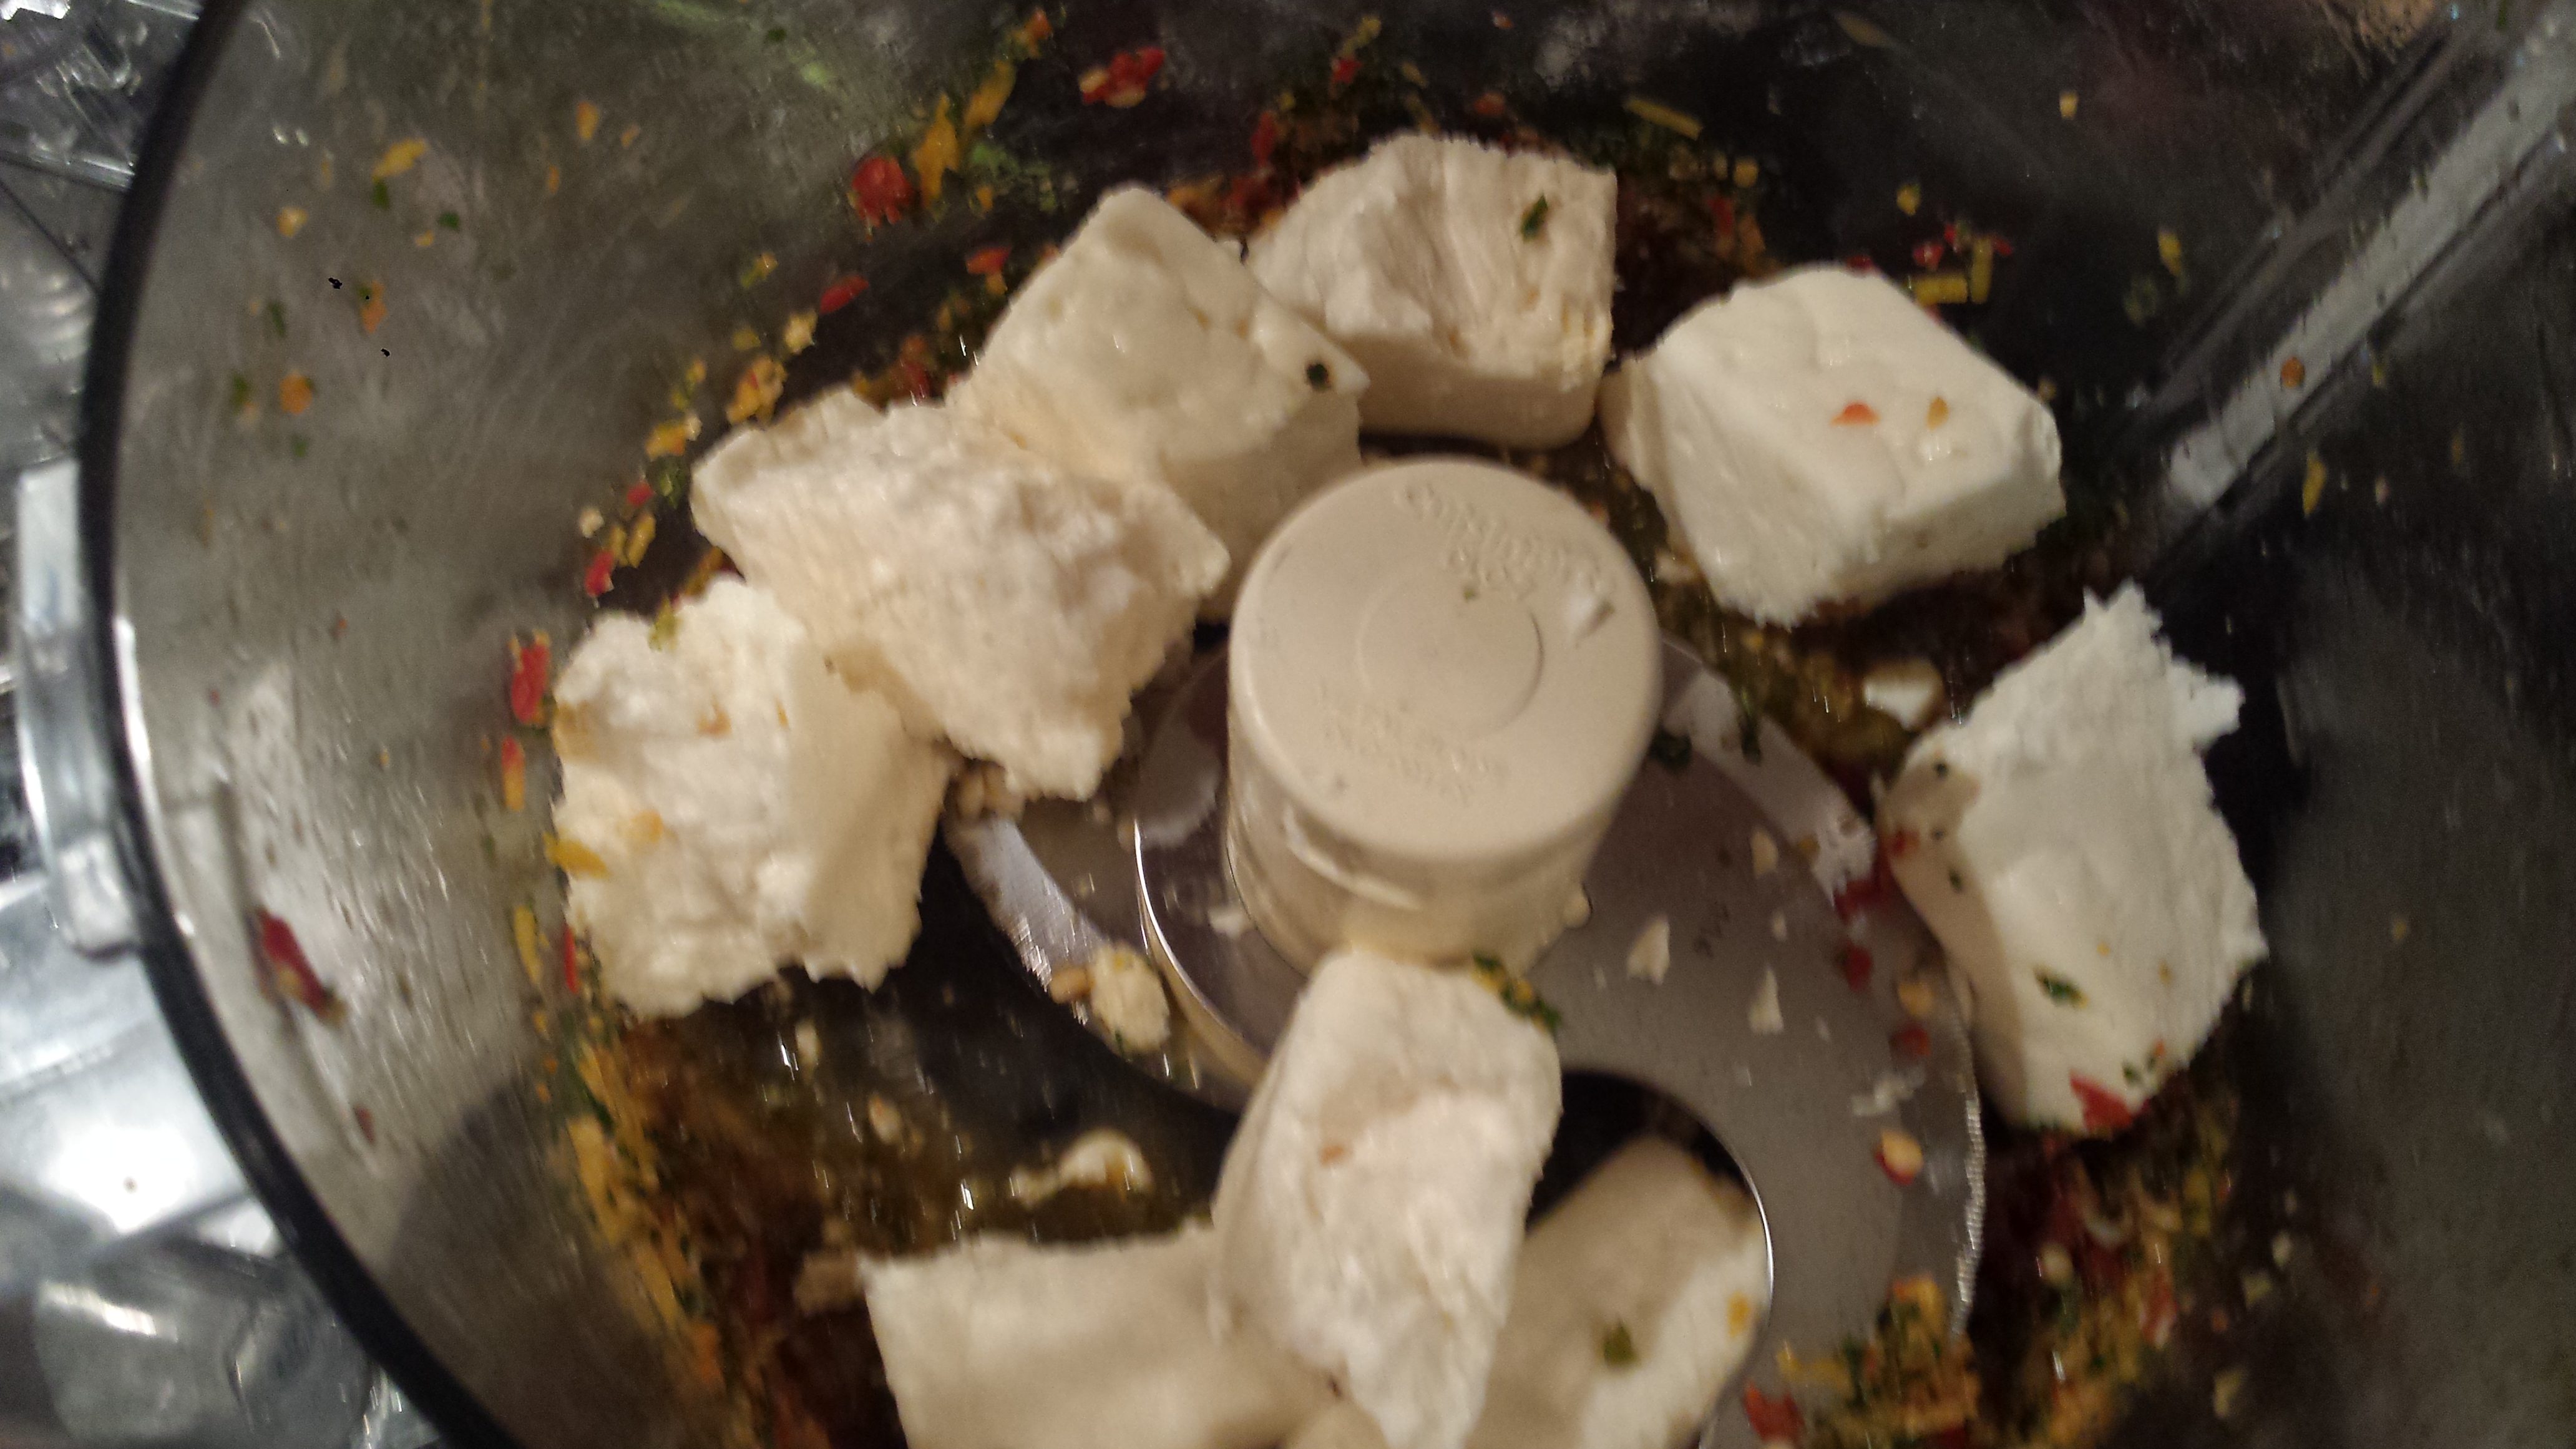
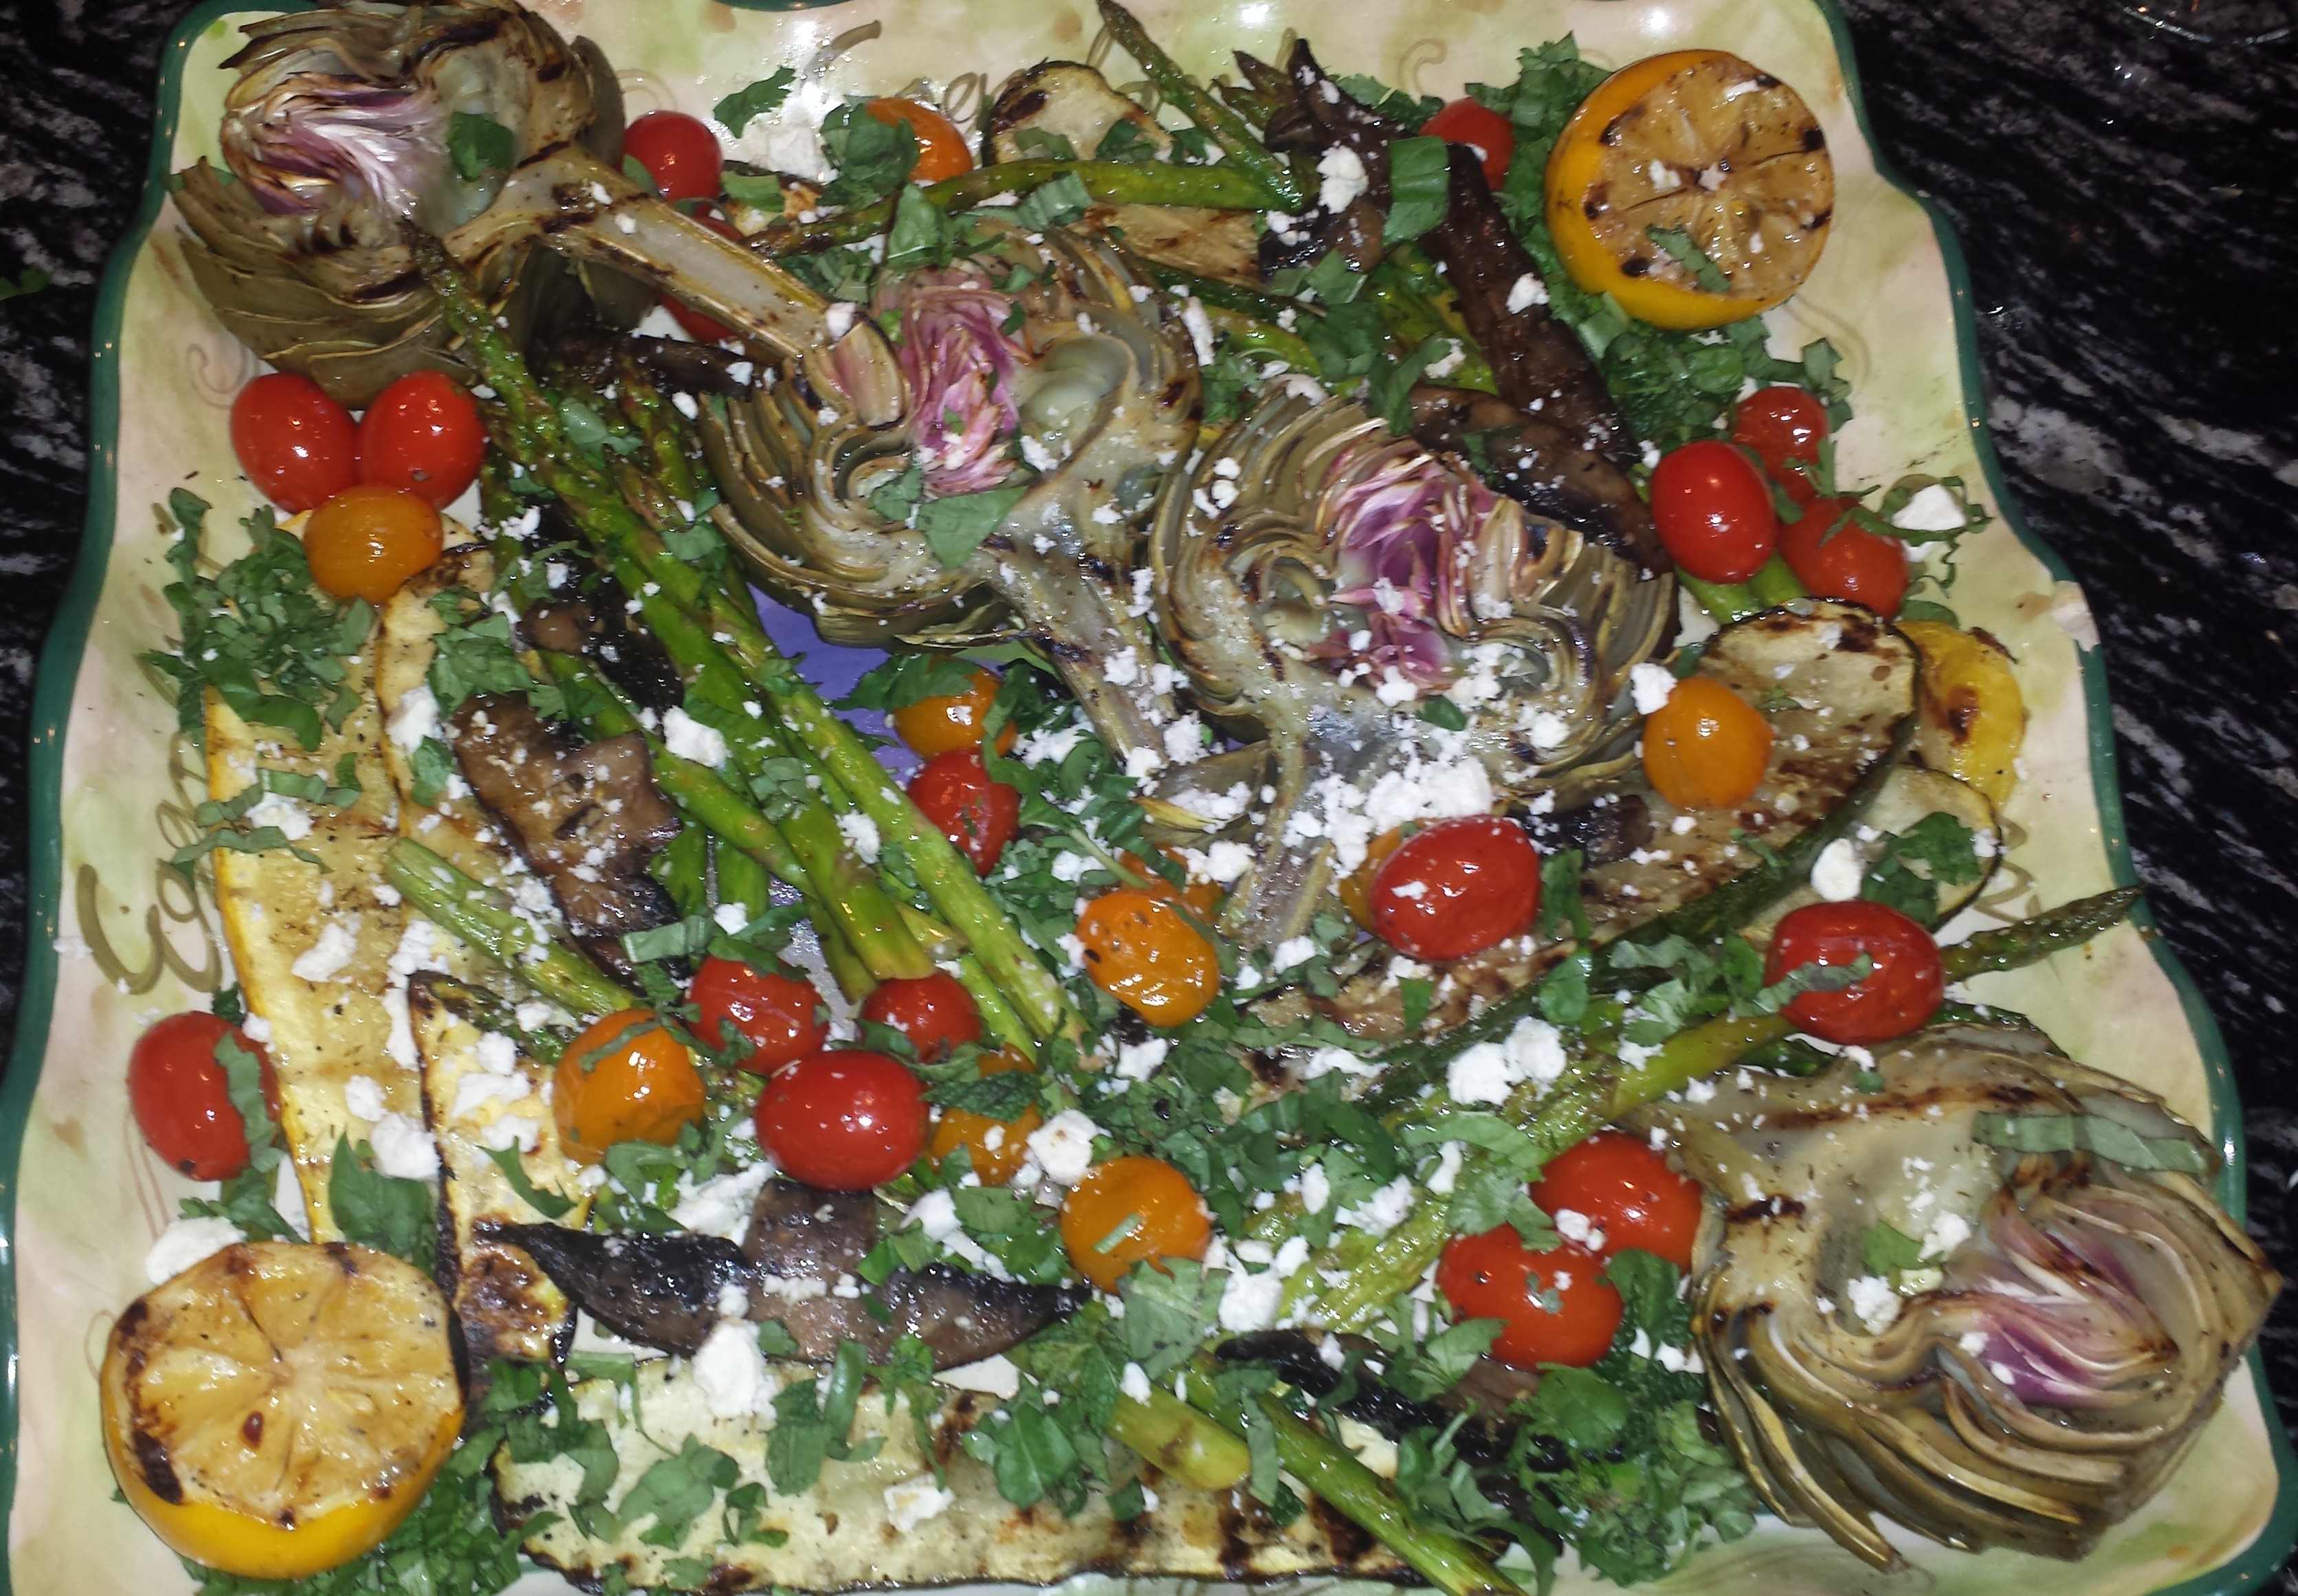
This lovely salad started with a Martha Stewart Living recipe for Blistered Eggplant with Tomatoes, Olives and Feta which I stumbled upon while thumbing through the September, 2014 issue.  I was immediately drawn to the colorful assortment of some of my favorite vegetables and decided to give it a try but, as they say on American Idol, ‘make it my own’. Those of you that know me well, understand that, unless I’m baking, I consider recipes to be merely suggestions and I tend to cook a bit on the fly with what I have on hand.  The original recipe calls for only a drizzle of olive oil with salt and pepper but I opted to let garlic and fresh herbs rest in the olive oil with a splash of balsamic vinegar while I prepared and roasted the vegetables.  I also roasted red and yellow bell peppers because I thought they would enhance the other flavors with their natural sweetness. The combination of charred eggplant and peppers with sweet, ripe tomatoes, tangy olives, fresh herbs and creamy goat cheese is a wonderful taste sensation. The goat cheese is optional, in fact my husband doesn’t care for it so I placed the goat cheese in a corner  of the tray so vegans or non-goat cheese lovers don’t have to pick through the salad for something ‘safe’.  Sprinkle some freshly chopped basil for a final fresh garnish.

Eggplant Salad3

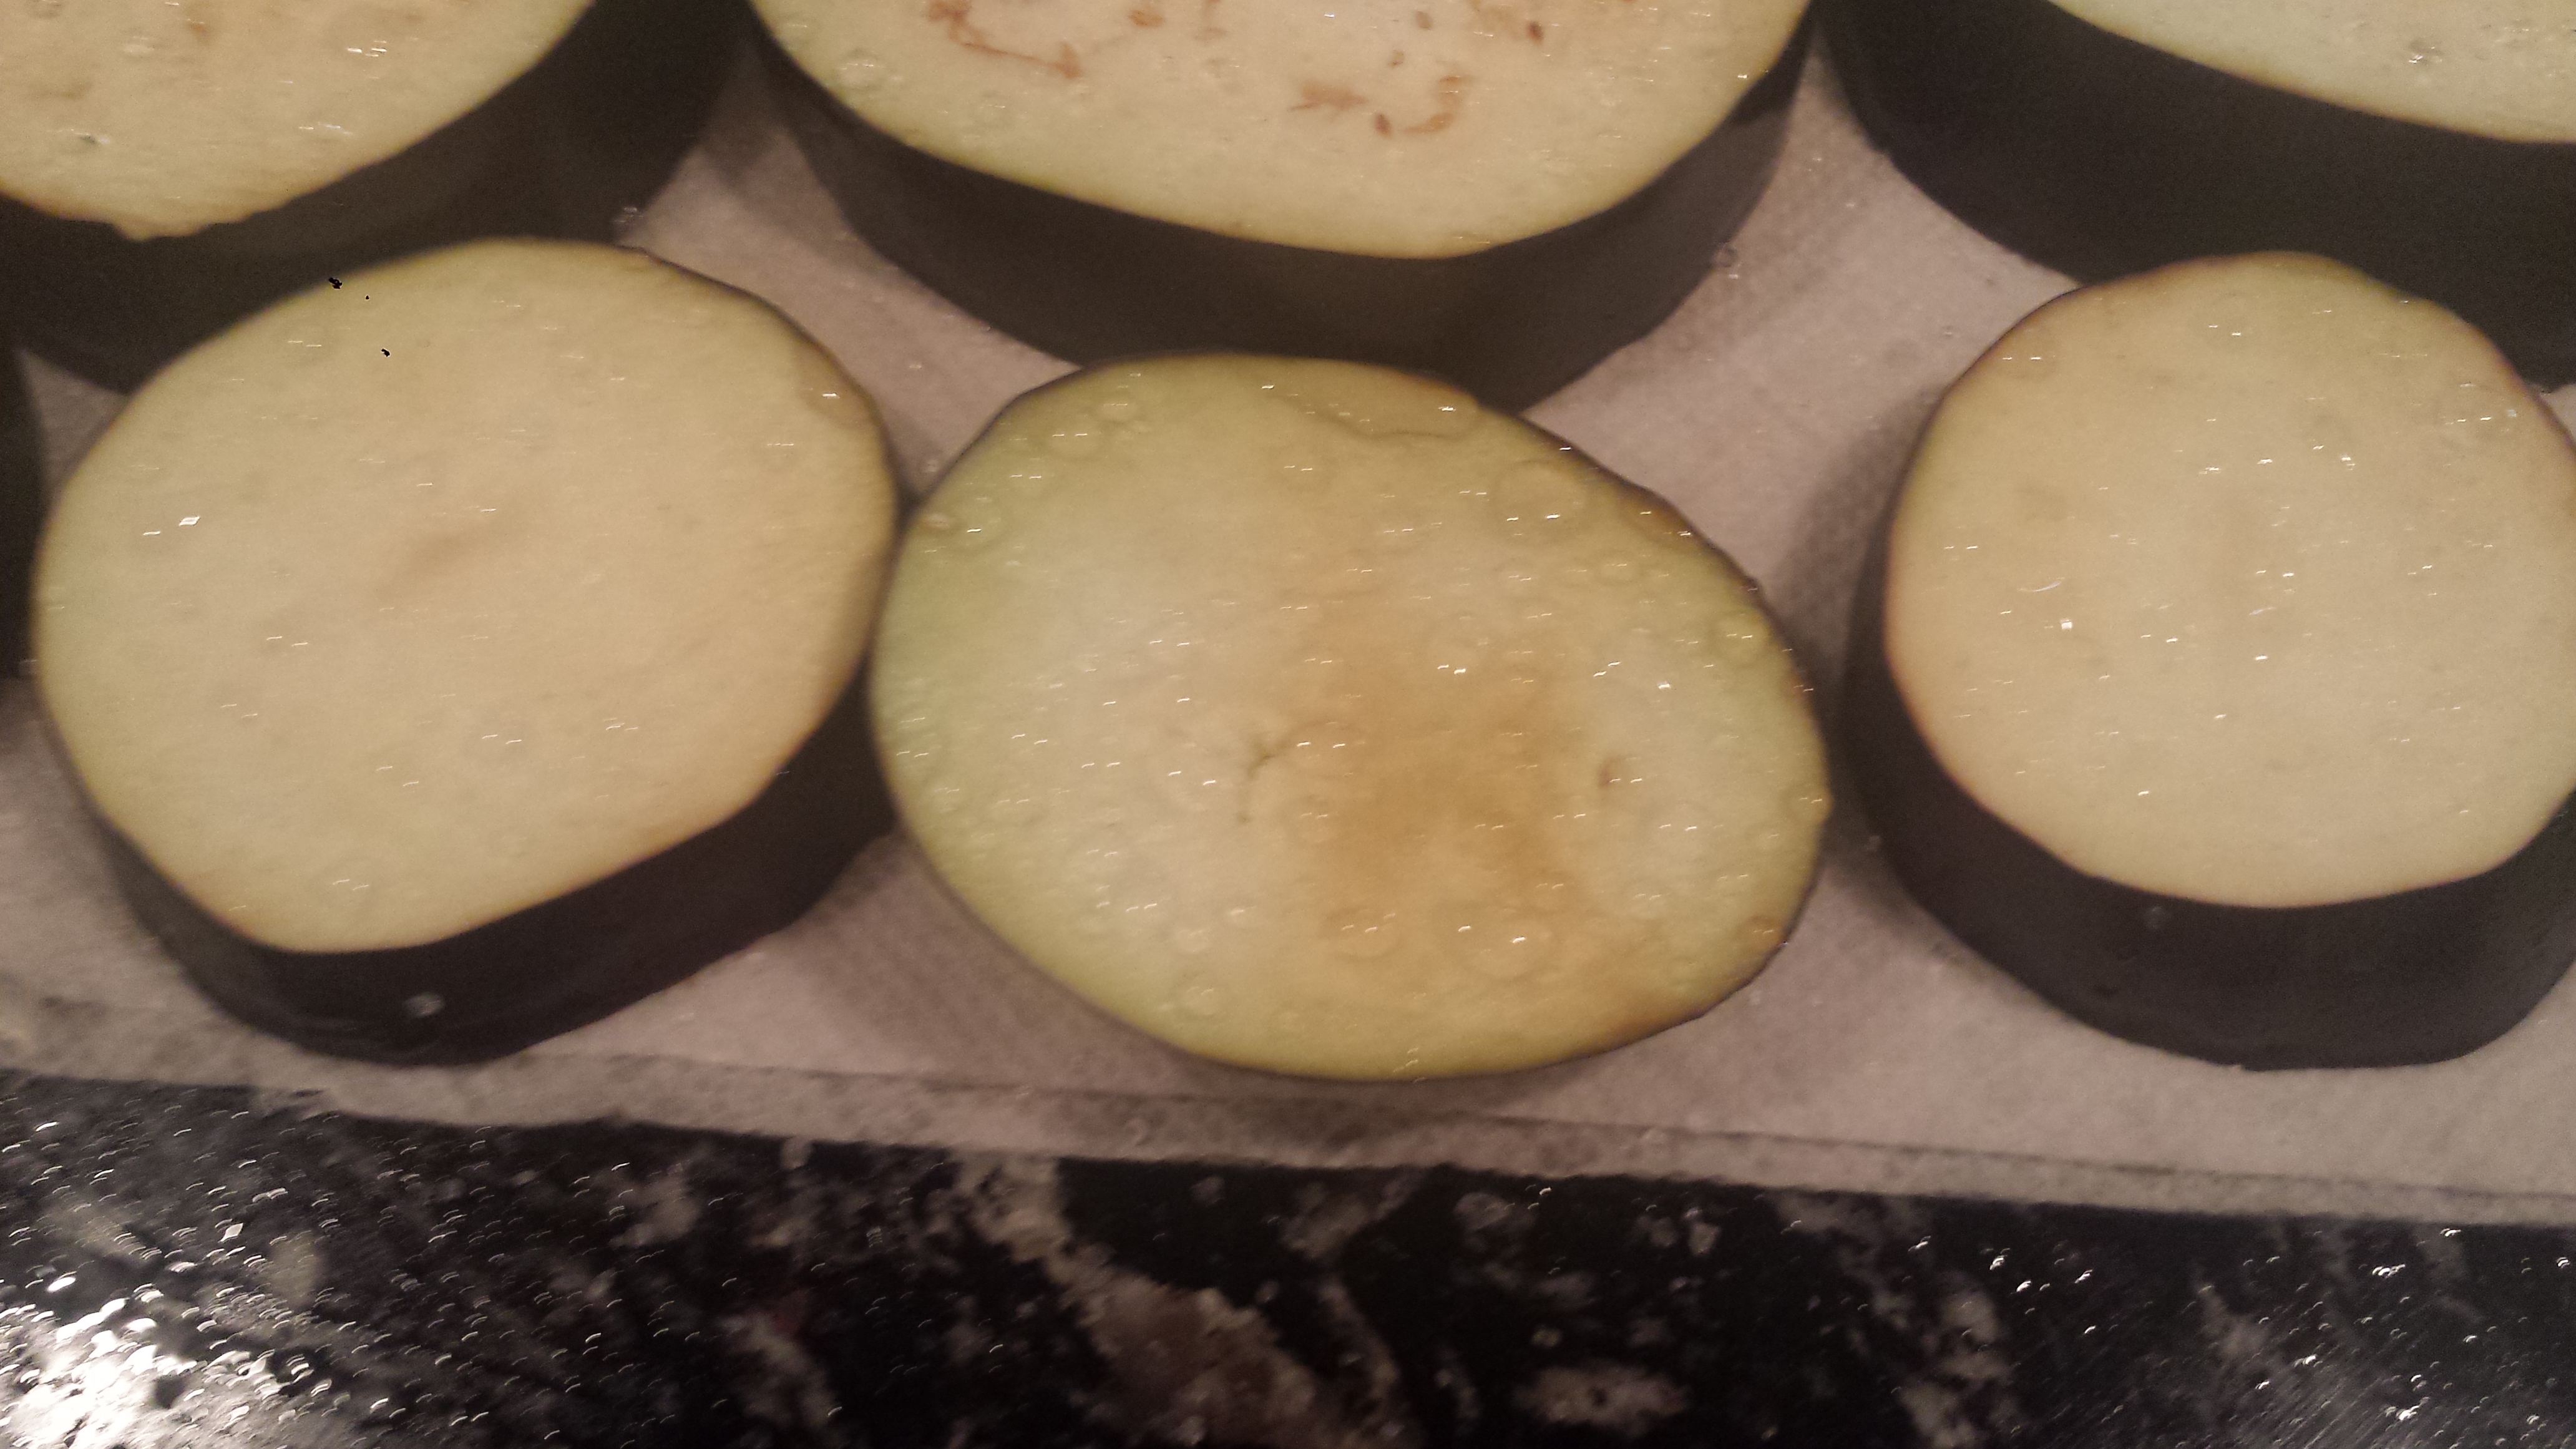
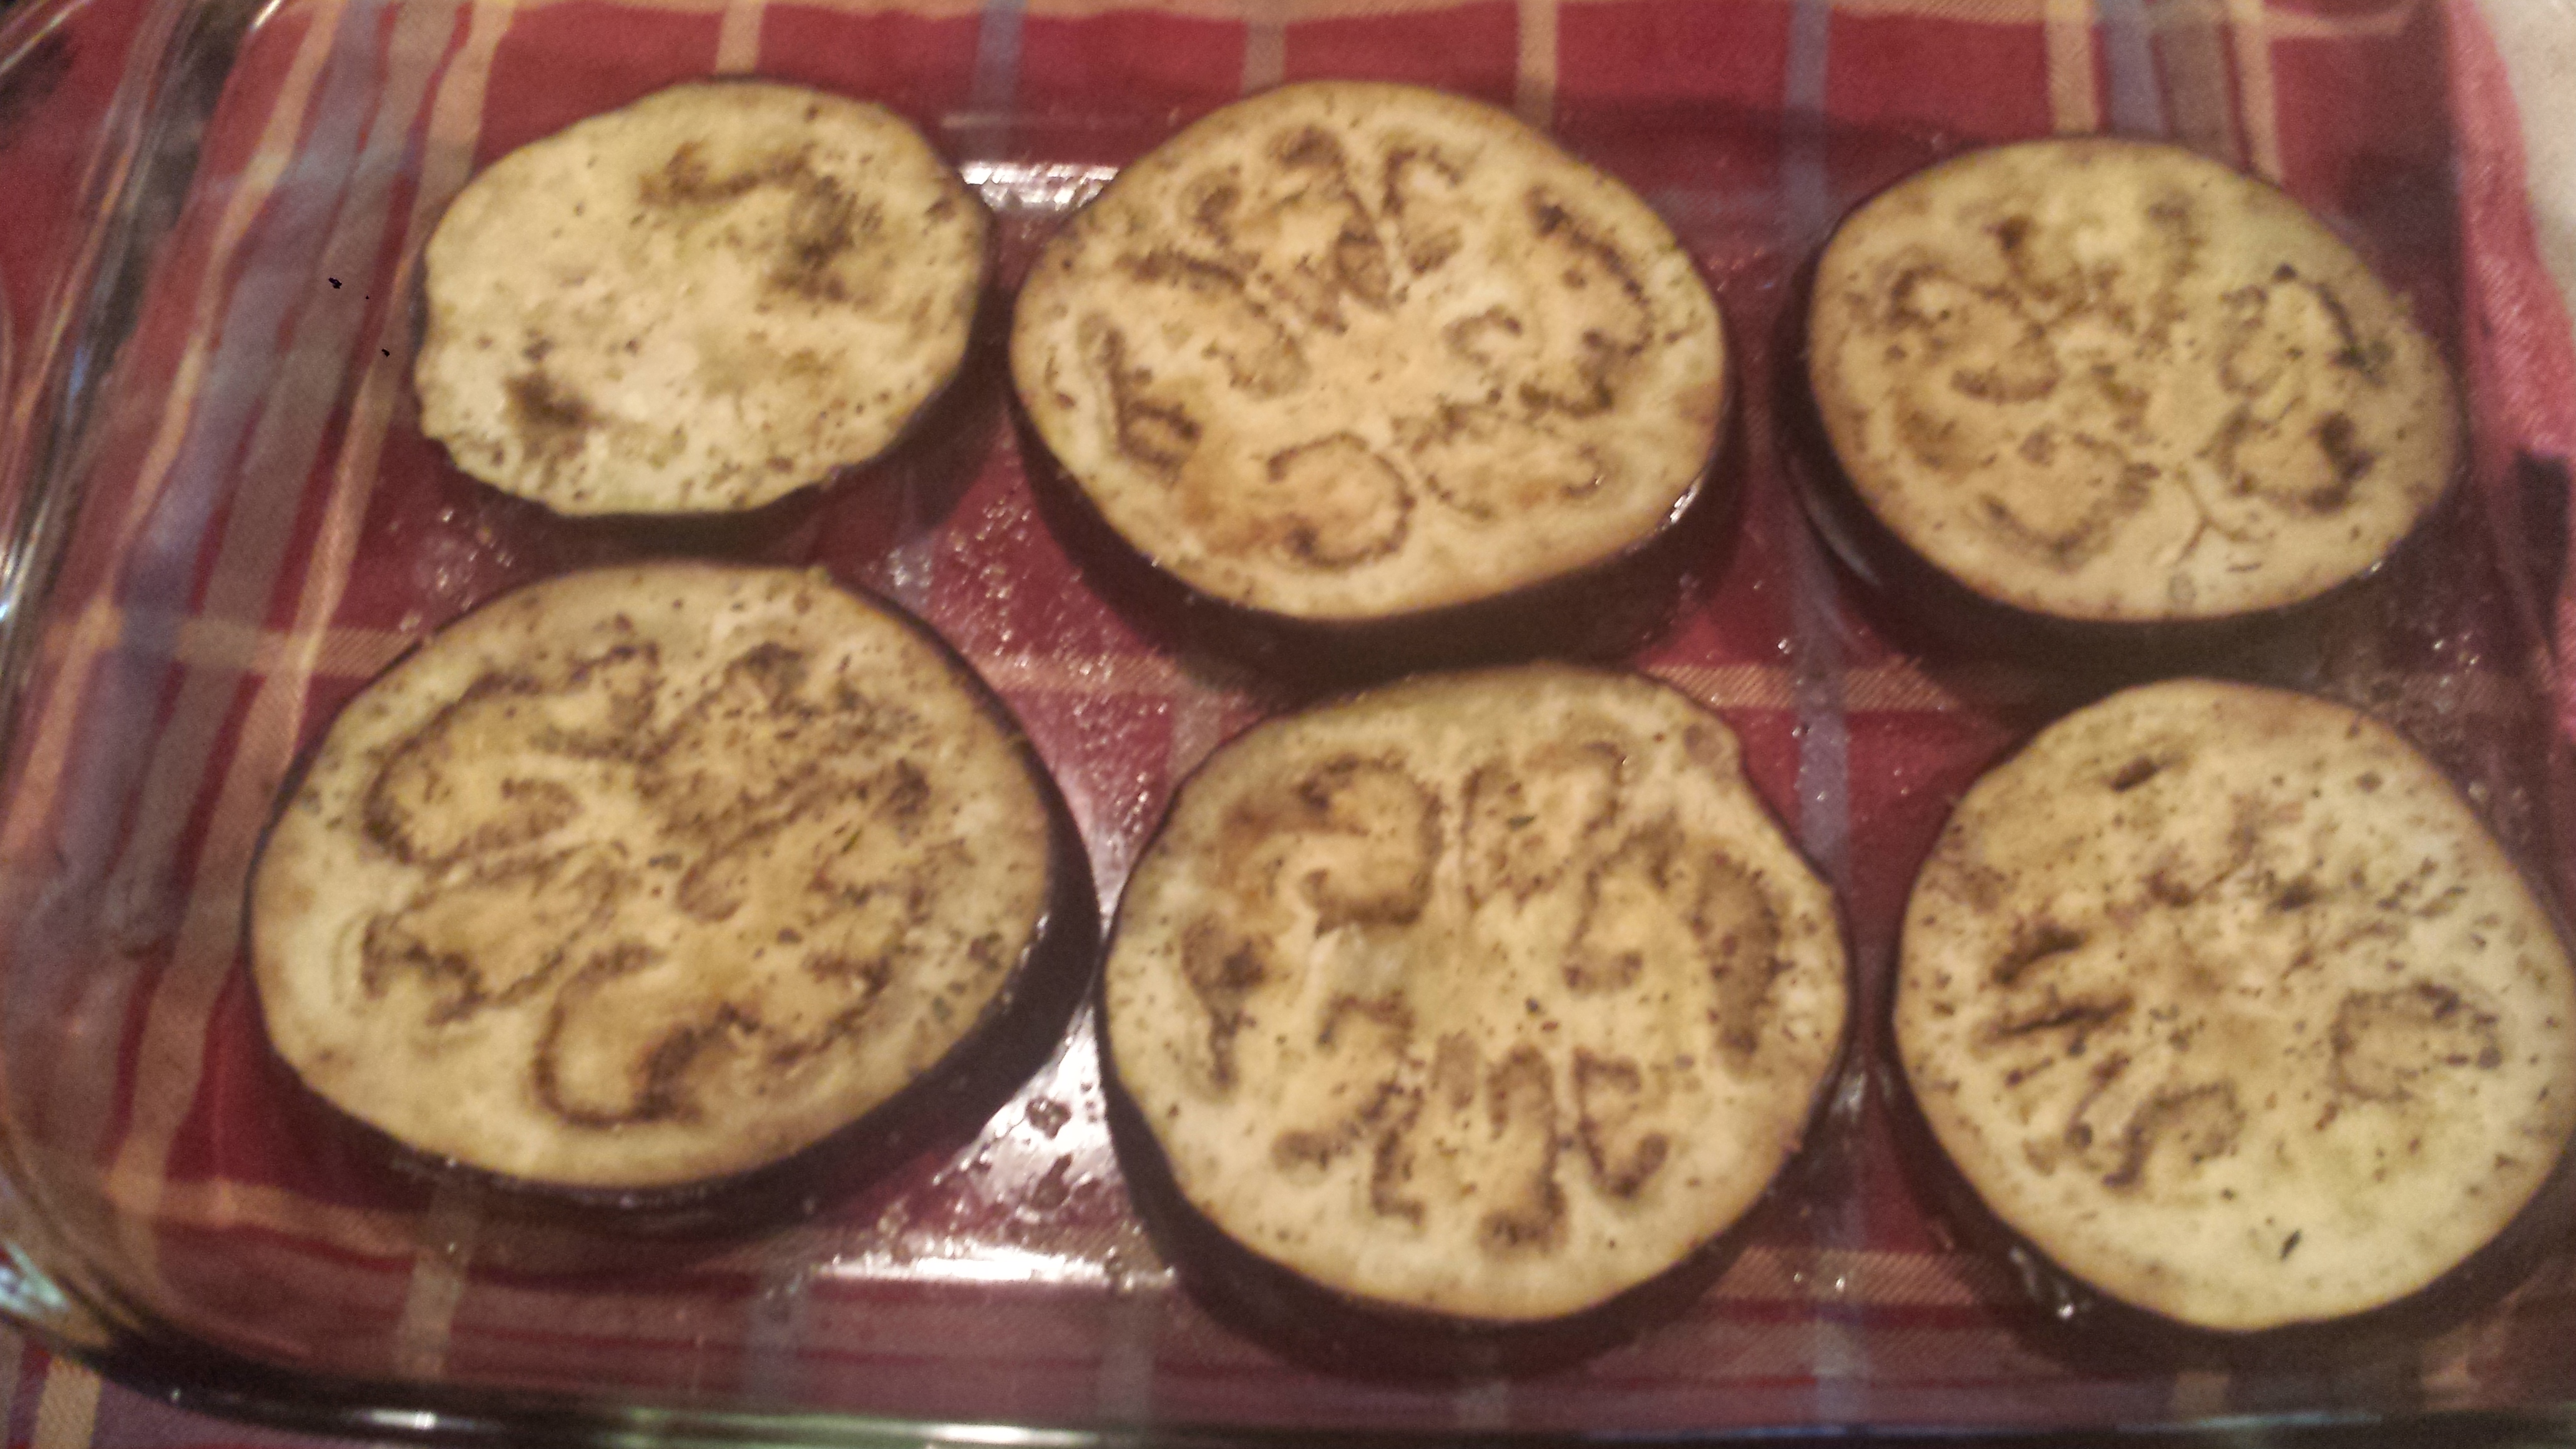
TIP:  Eggplant is usually sliced and then salted (a process called ‘degorging’) before cooking to remove any bitterness and to help draw out the extra water which prevents the eggplant from acting like a sponge and absorbing great quantities of oil or marinade or releasing unwanted water into the dish.  However, with this method of cooking, sometimes called blistering or charring (i.e. dry roasting), salting is not as necessary if the eggplant is fresh, as the high heat of the broiler dries the slices out enough.  Older, tougher eggplants will really benefit from salting though.  So if you have fresh eggplant and don’t have time, skip the salting process.  Adding the oil after roasting gives the eggplant a nice texture and enhances the slightly smoky, charred flavor.

eggplant salad20

For those eggplant lovers, you might want to try some of my other eggplant favorites.  Just click on the photo for the recipe.
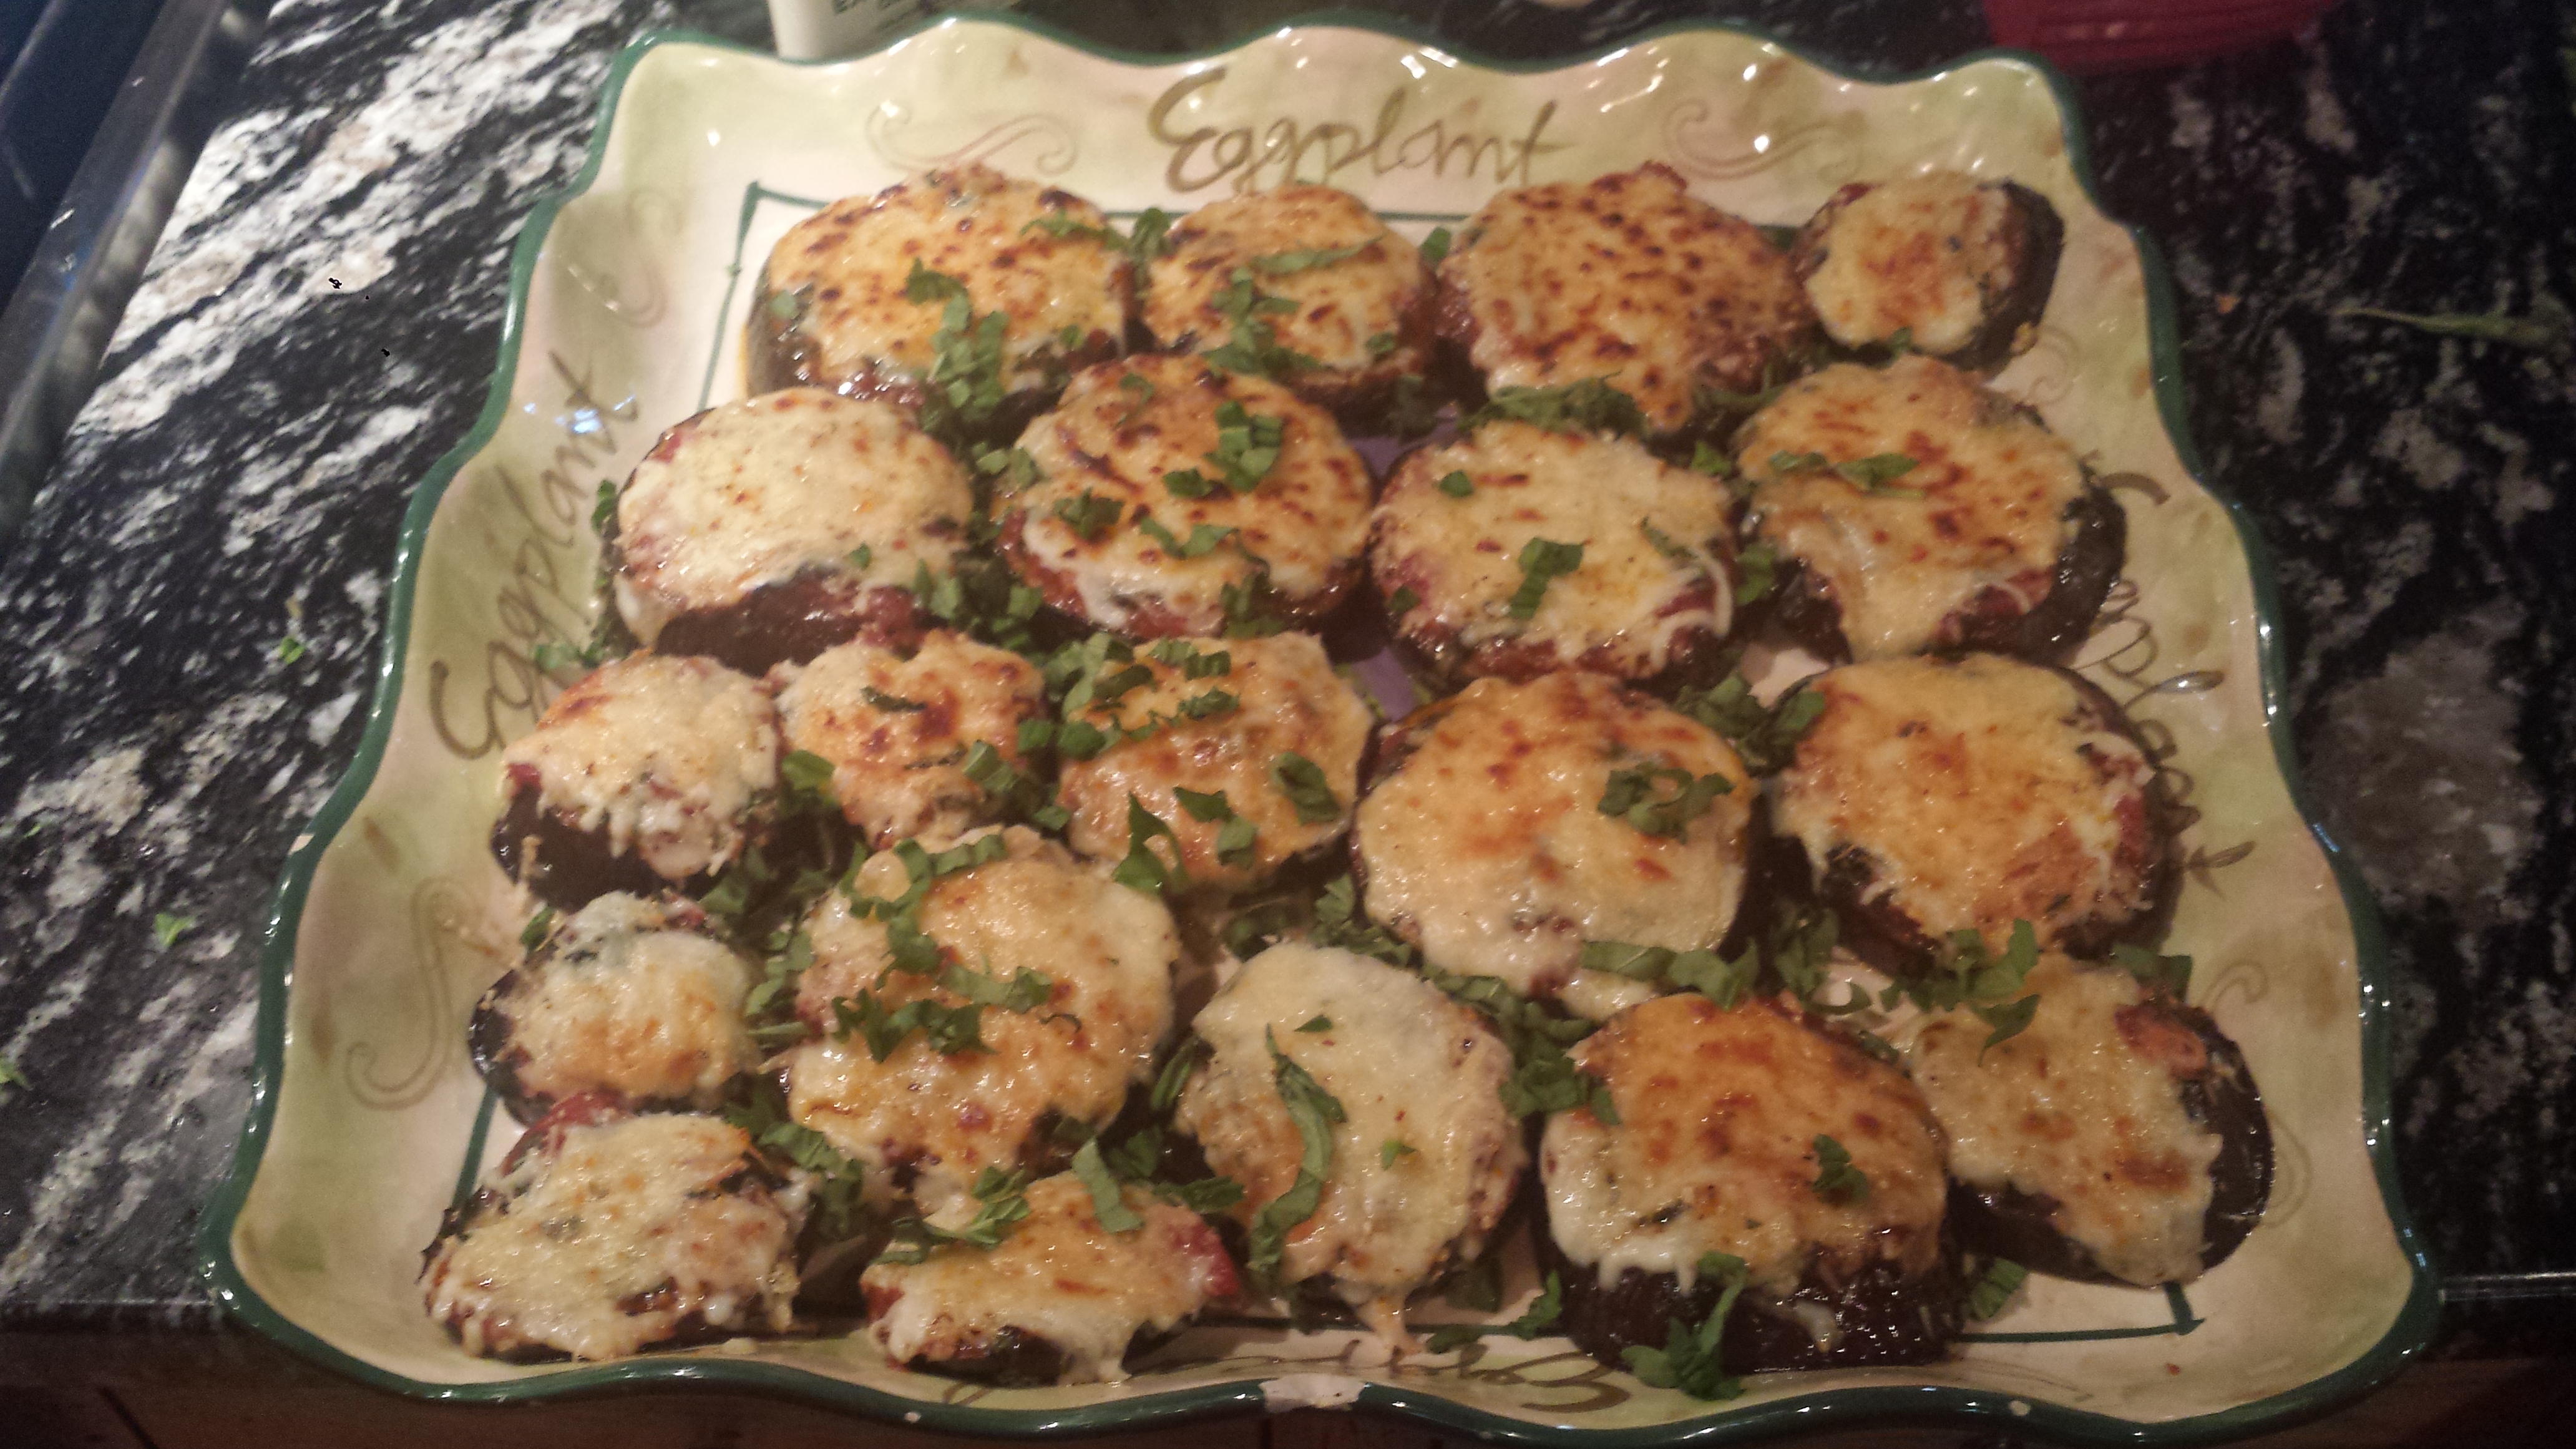
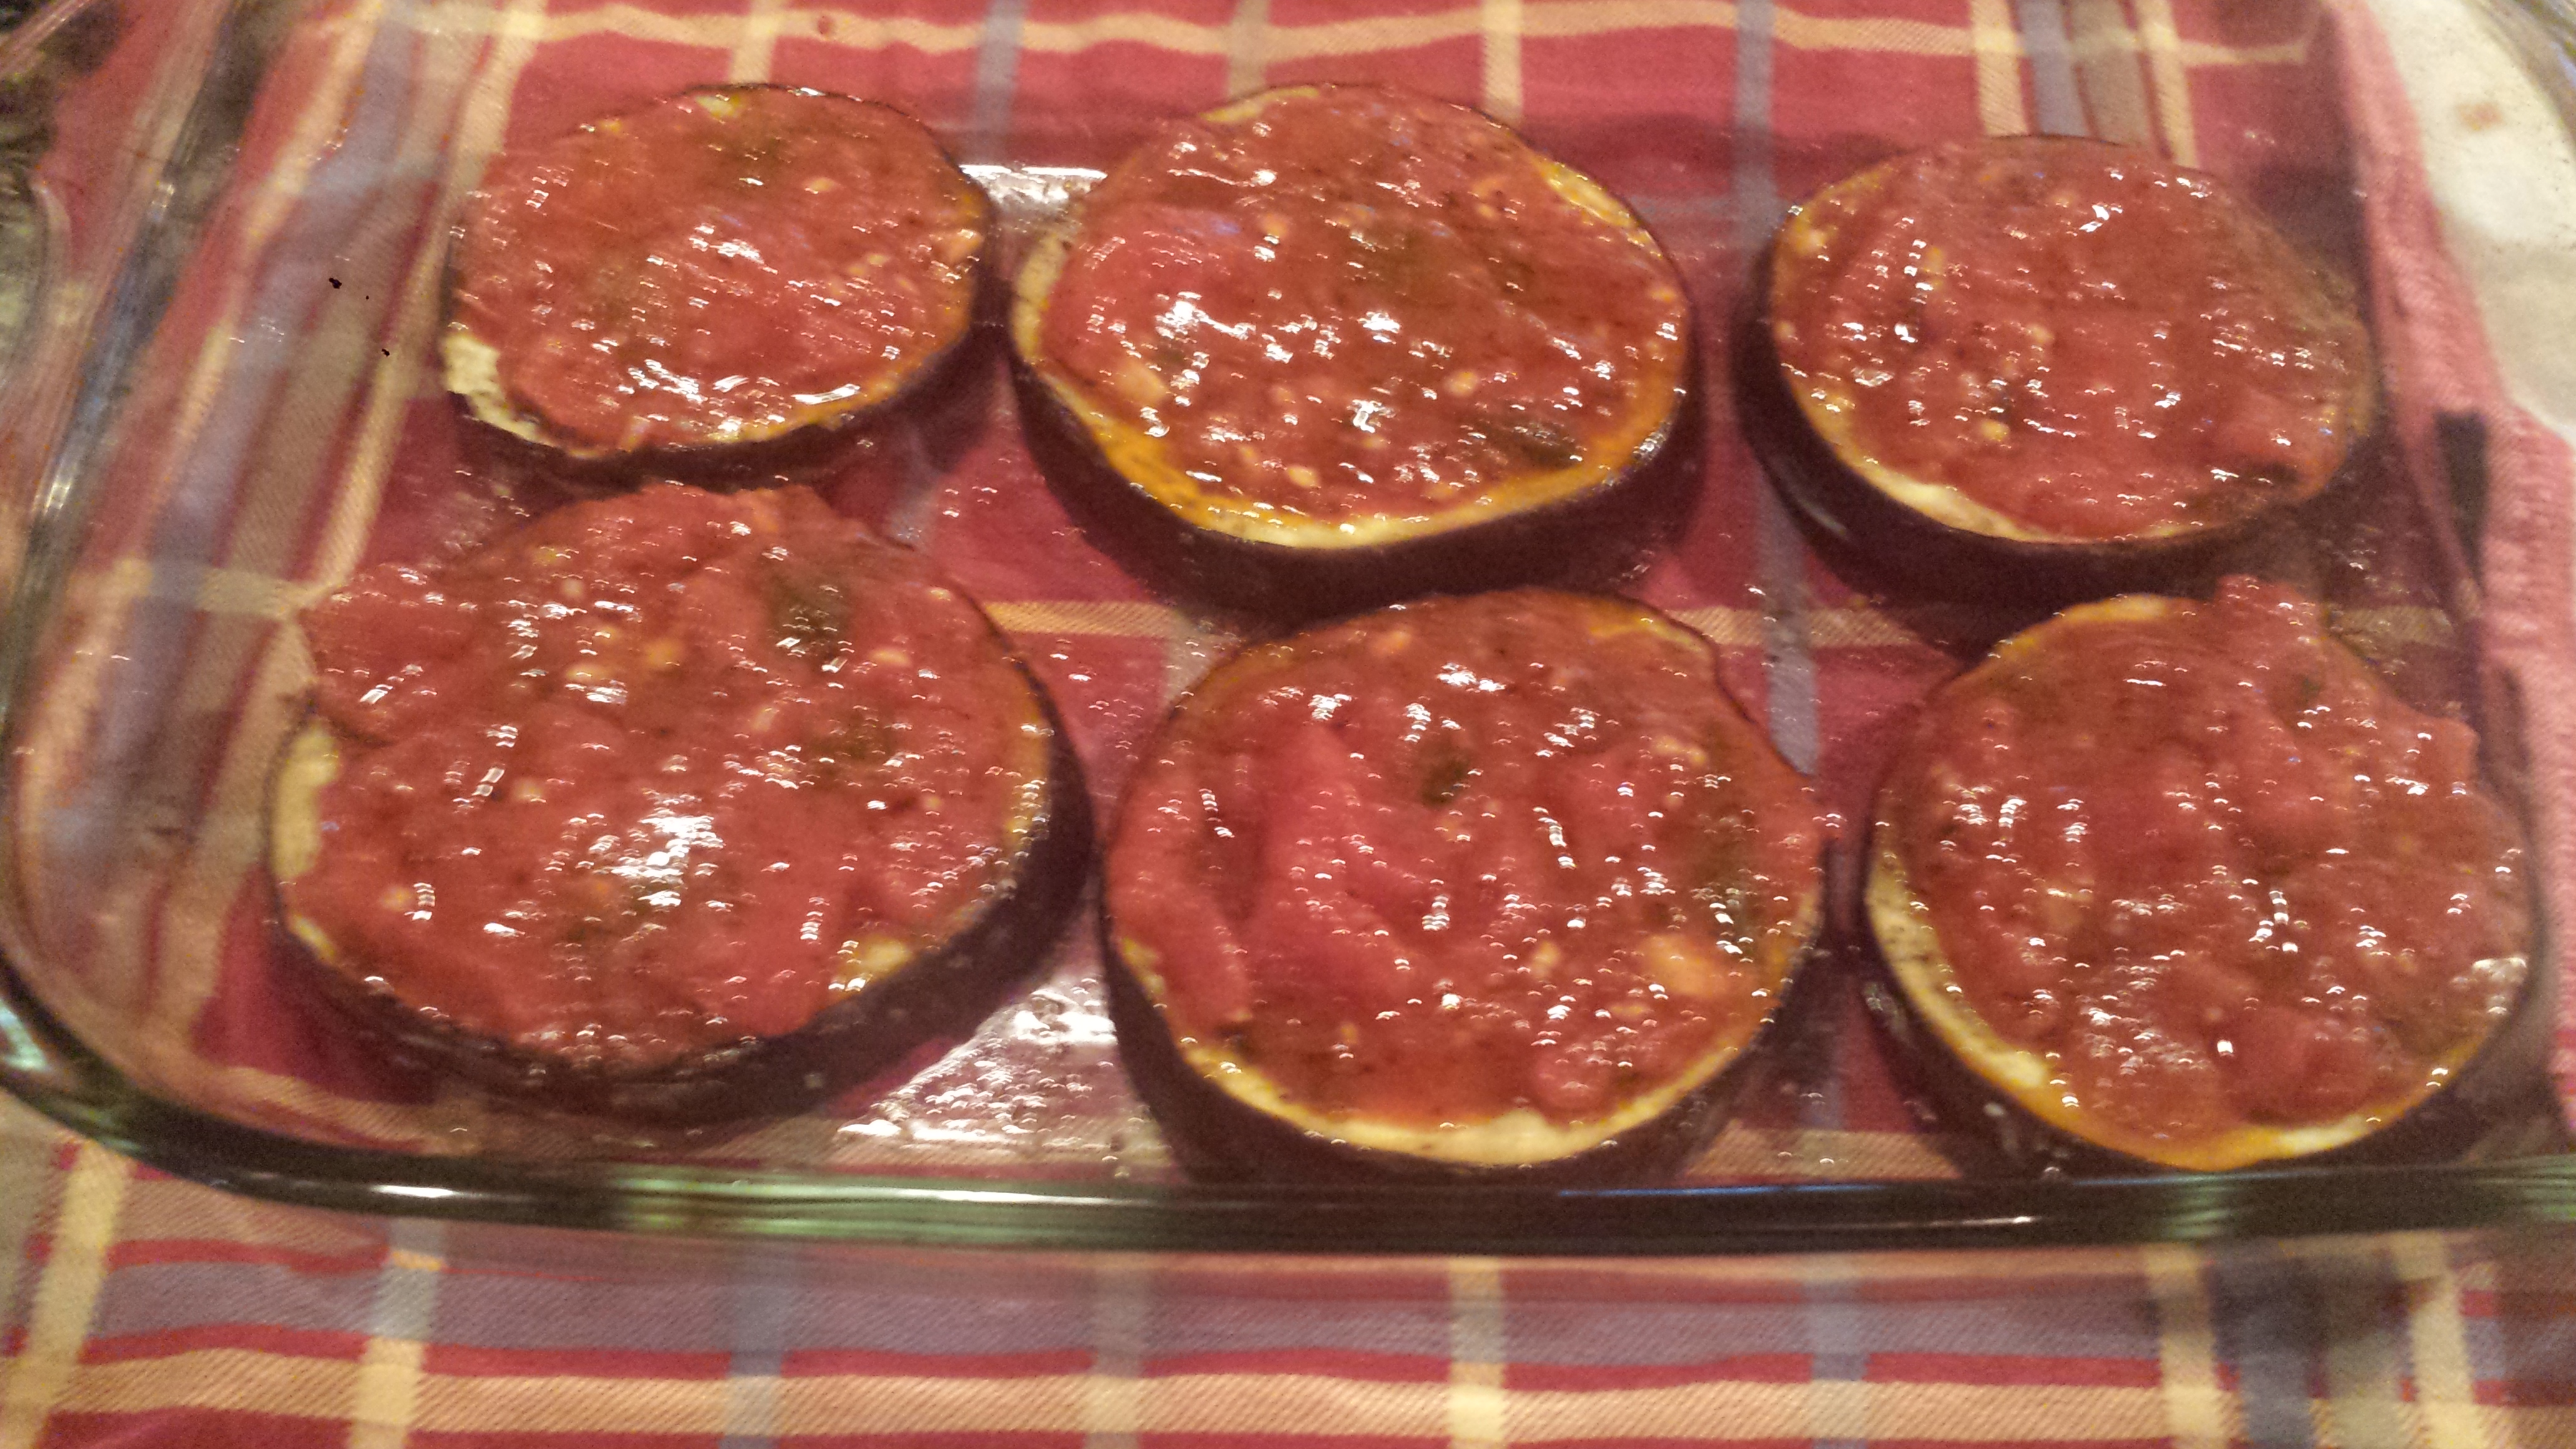
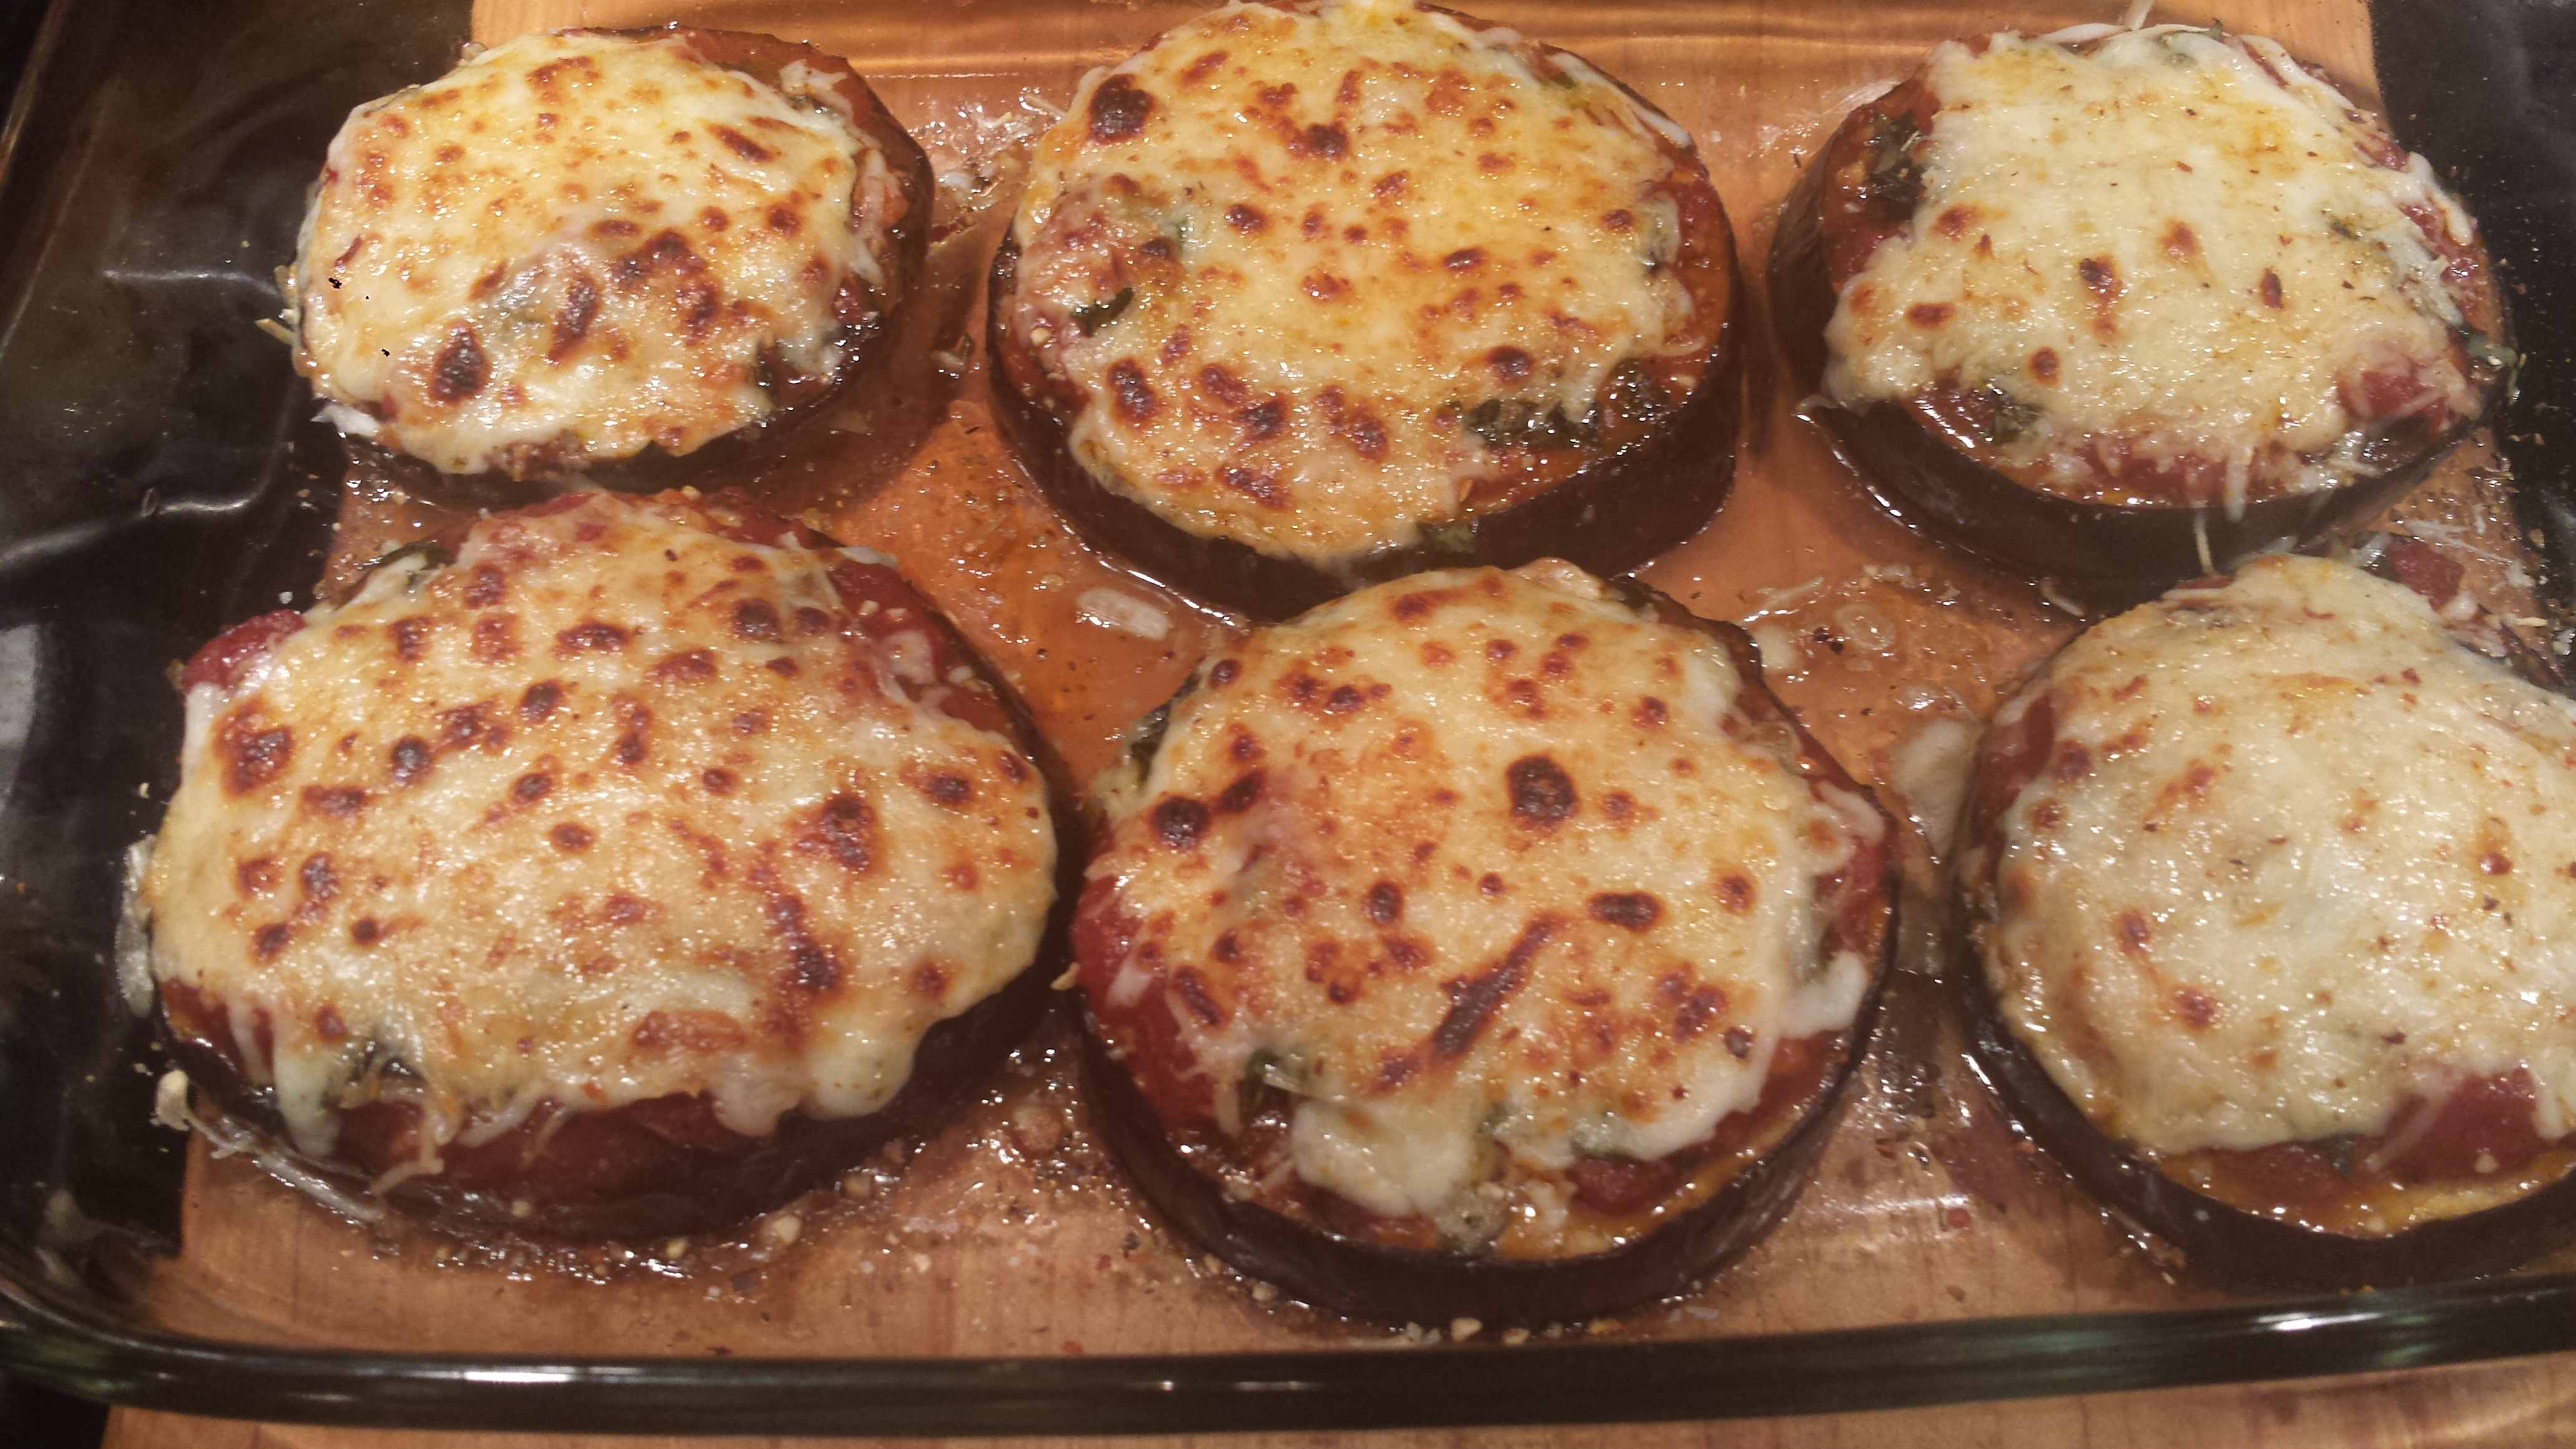
Eggplant Parm5

Eggplant Parm Minis

Eggplant Tart1

Summer Vegetable Tart

Eggplant1

Roasted Eggplant with Goat Cheese and Pine Nuts

Roasted Eggplant and Bell Pepper Salad with Tomatoes, Olives and Goat Cheese

  • Servings: 4
  • Difficulty: easy
  • Print

1 large globe eggplant
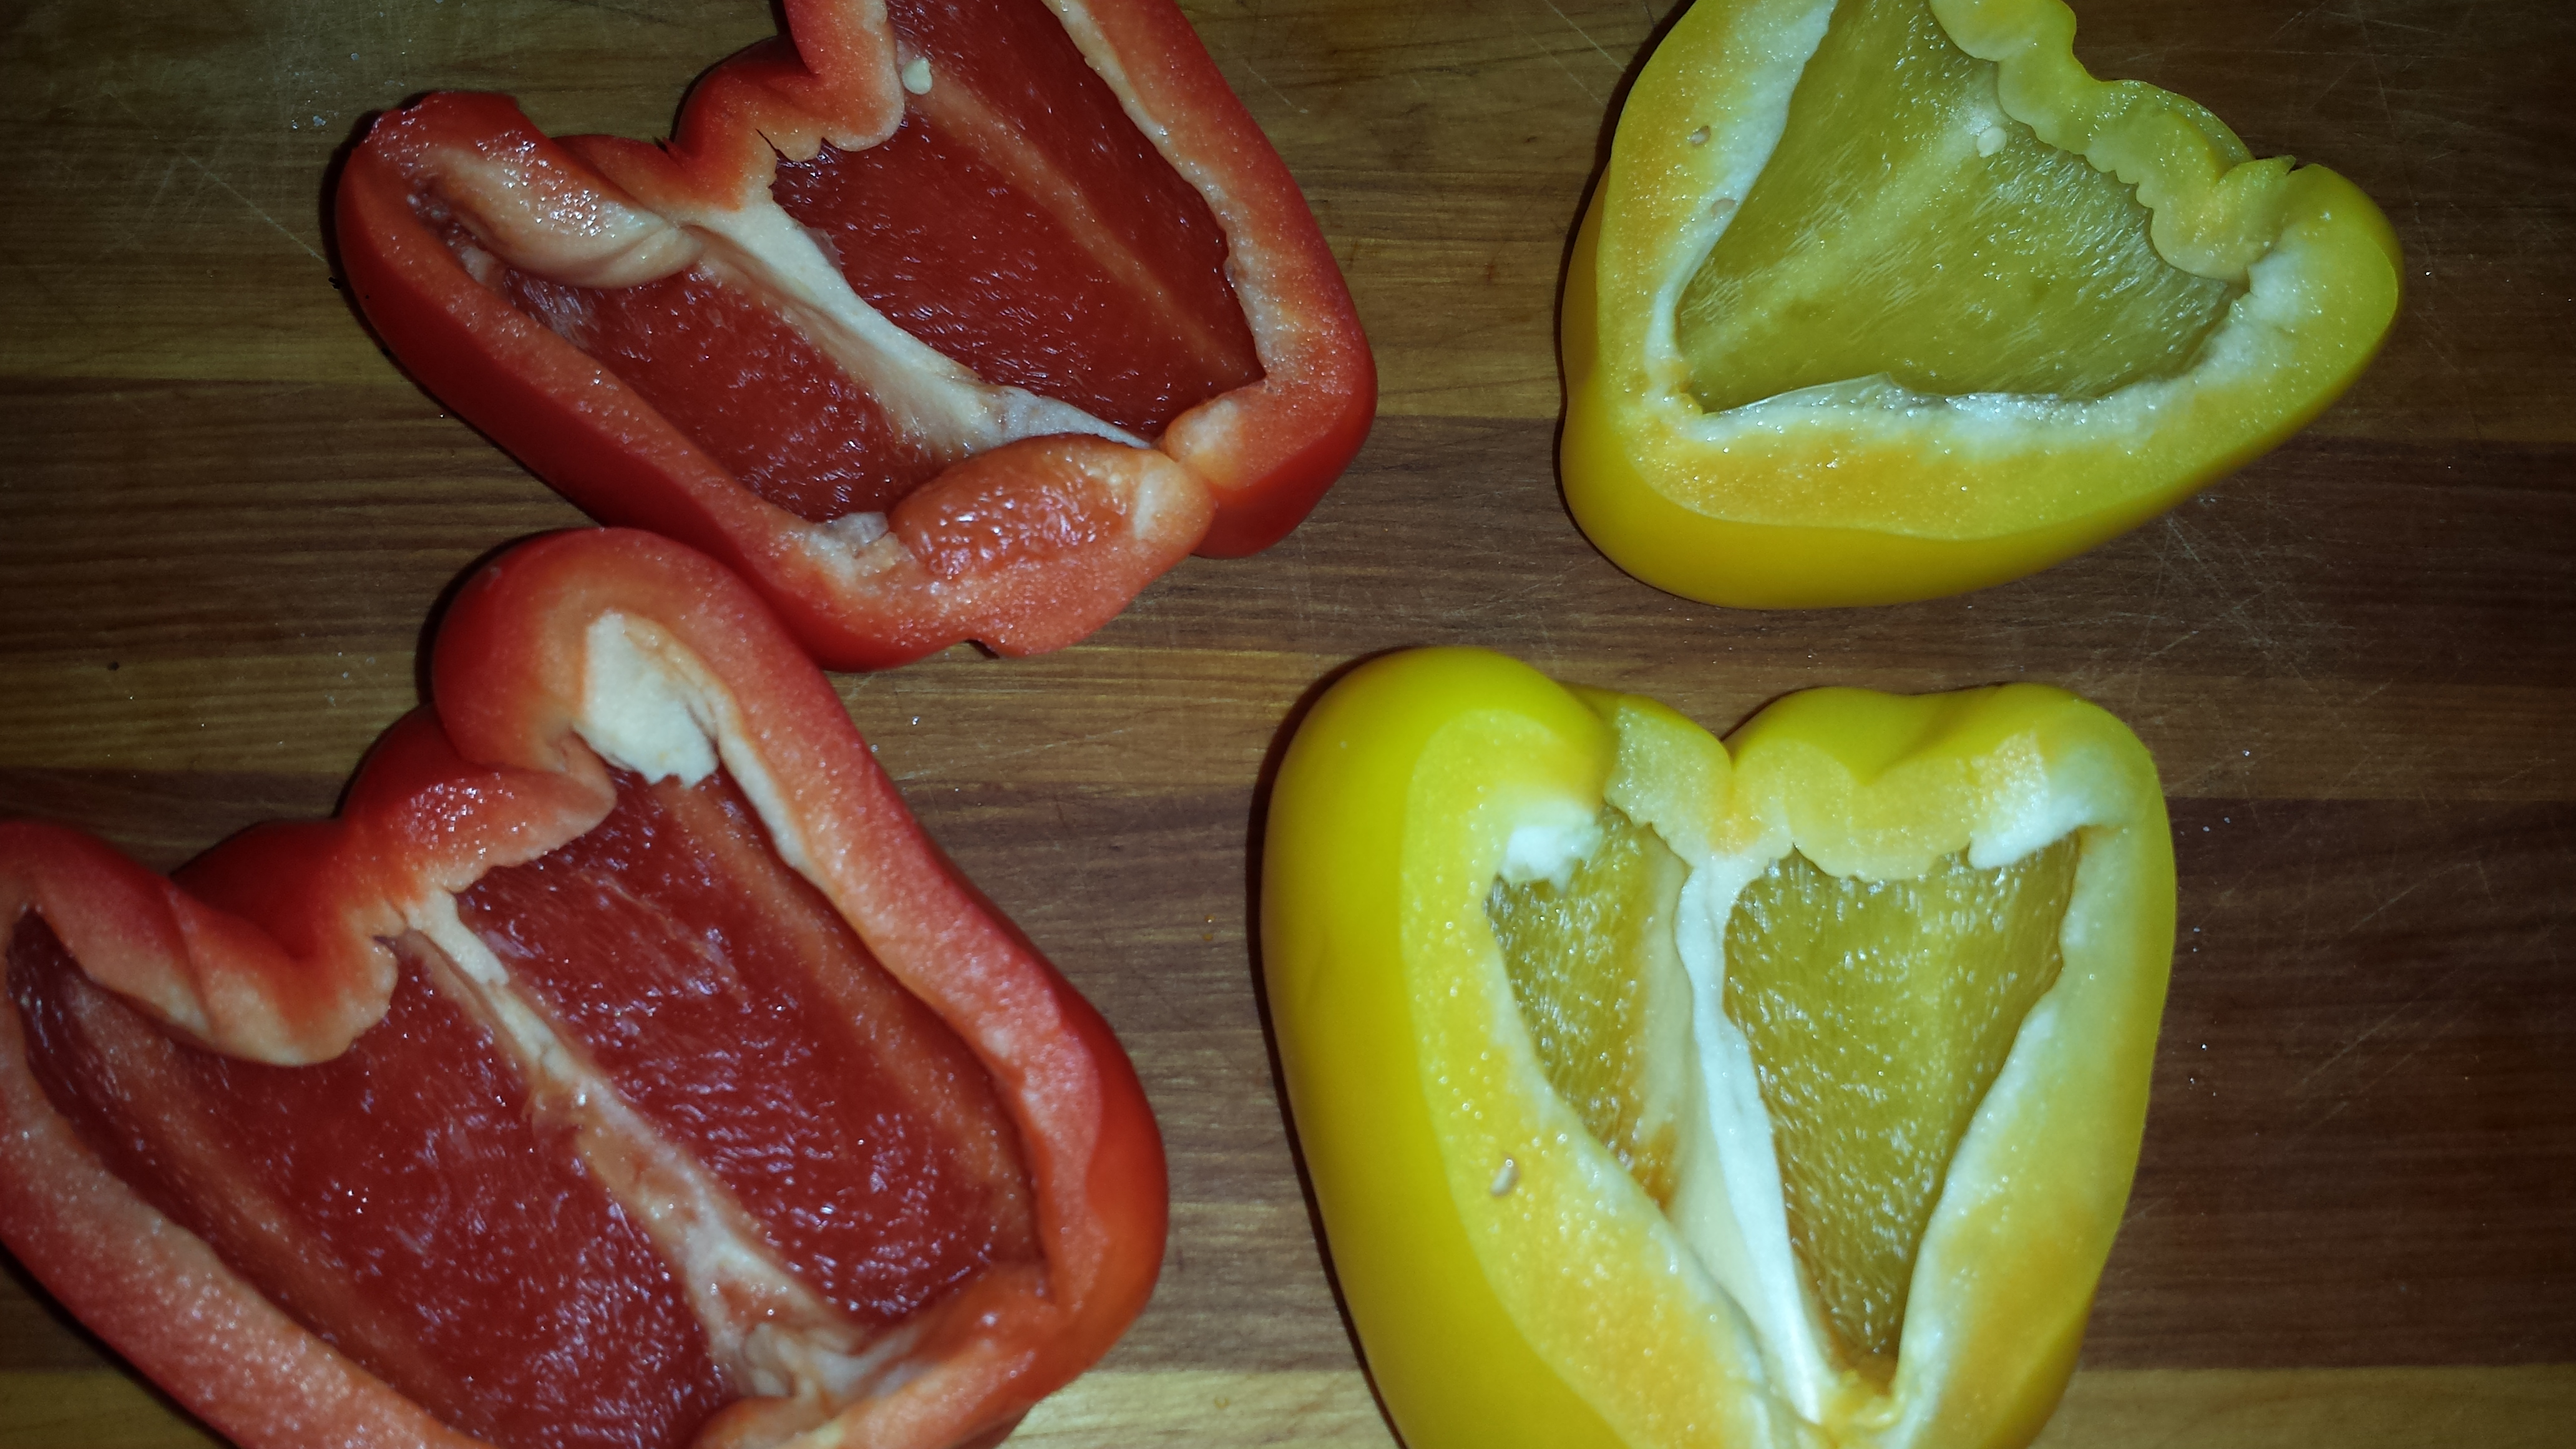
2 bell peppers, any color
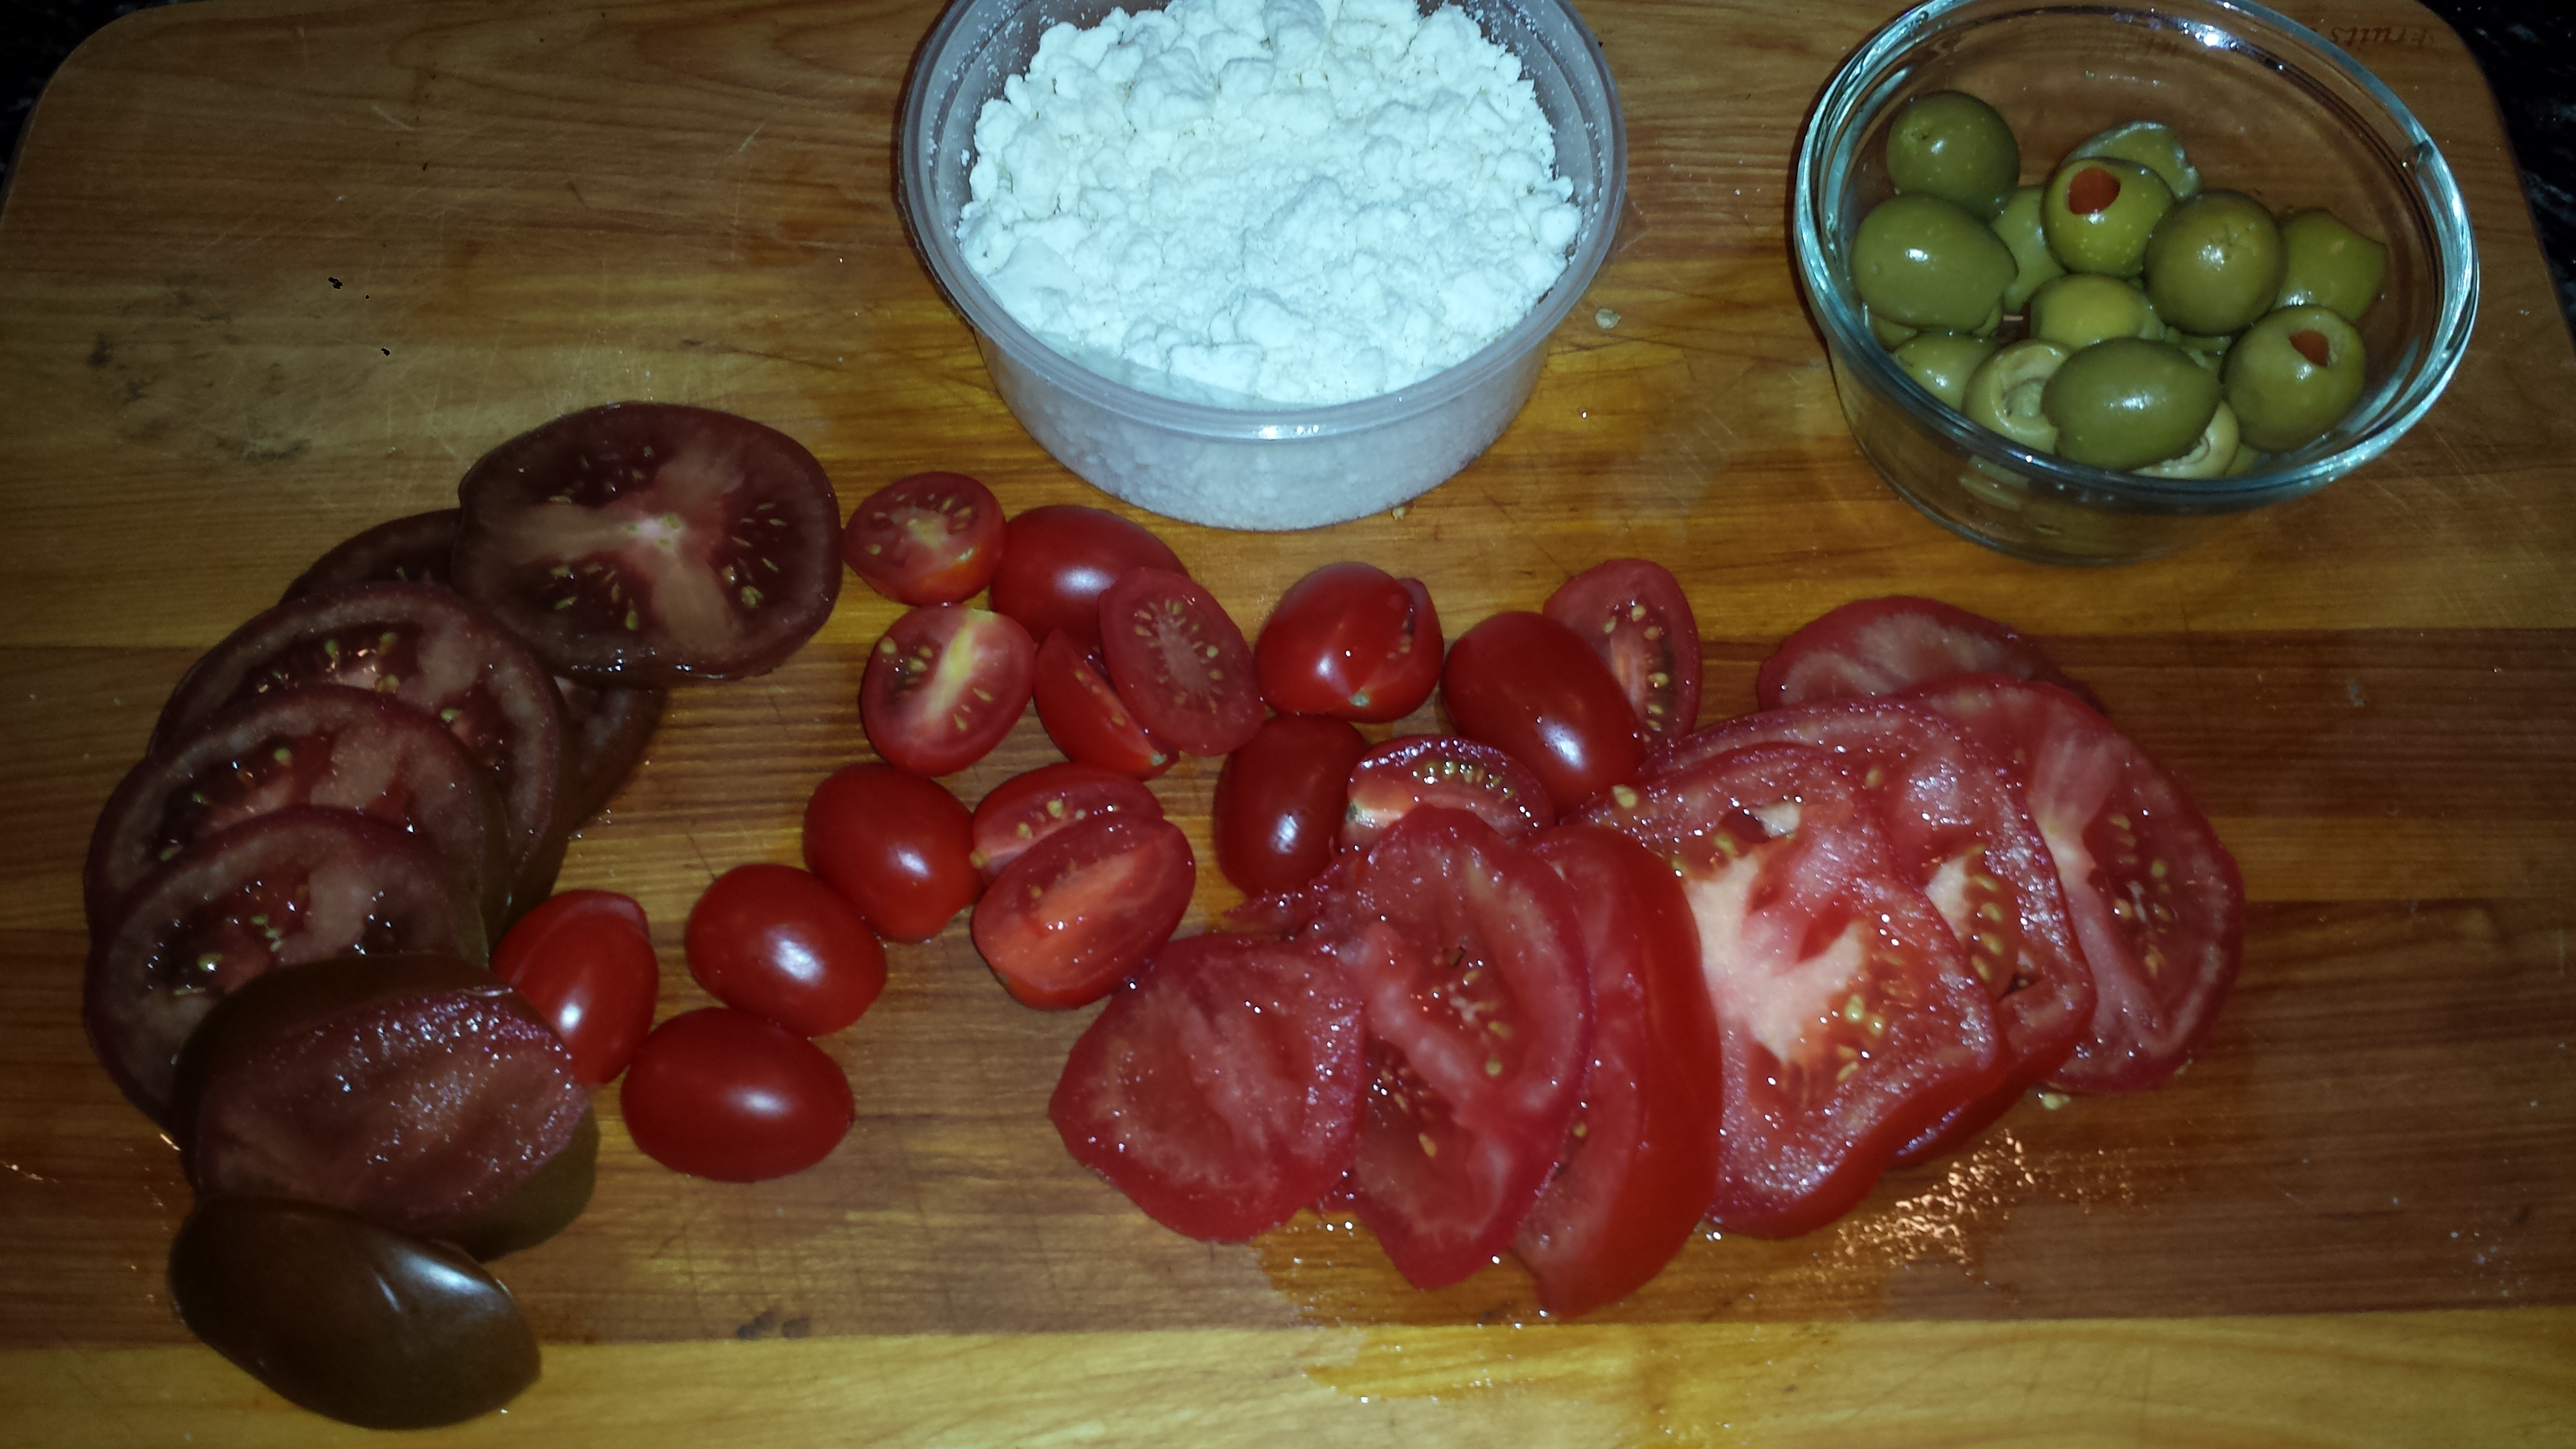
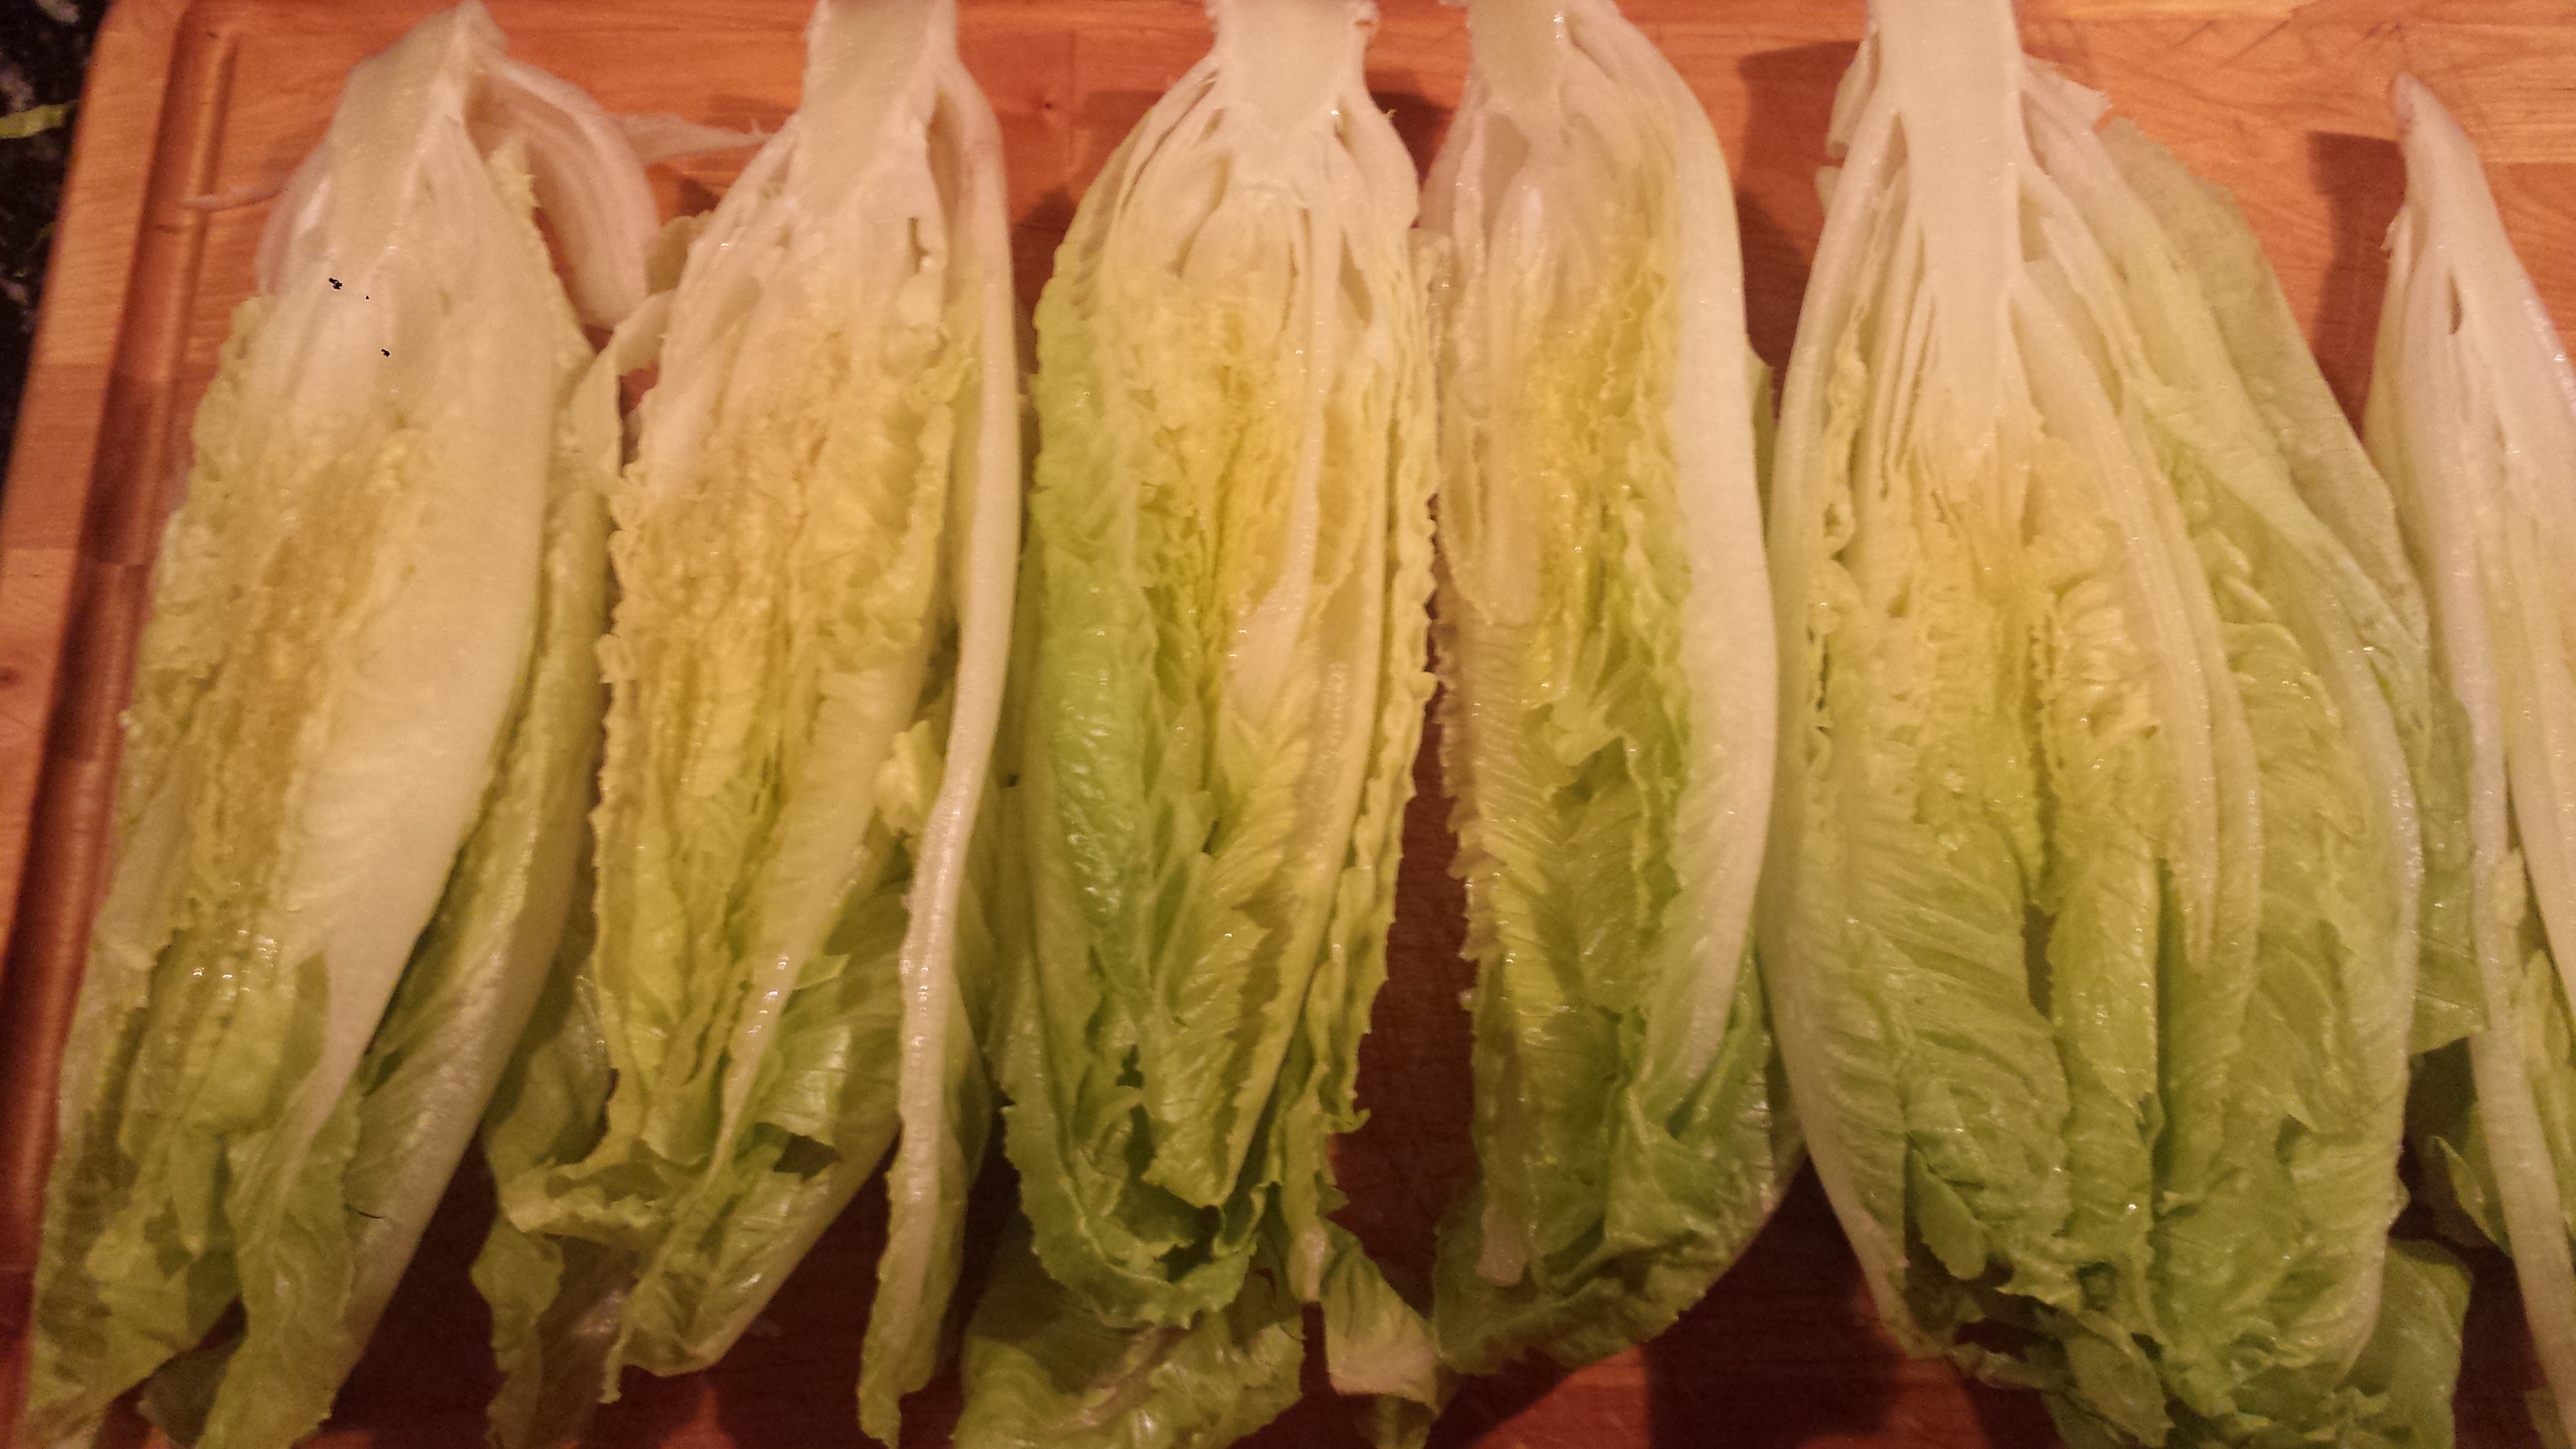
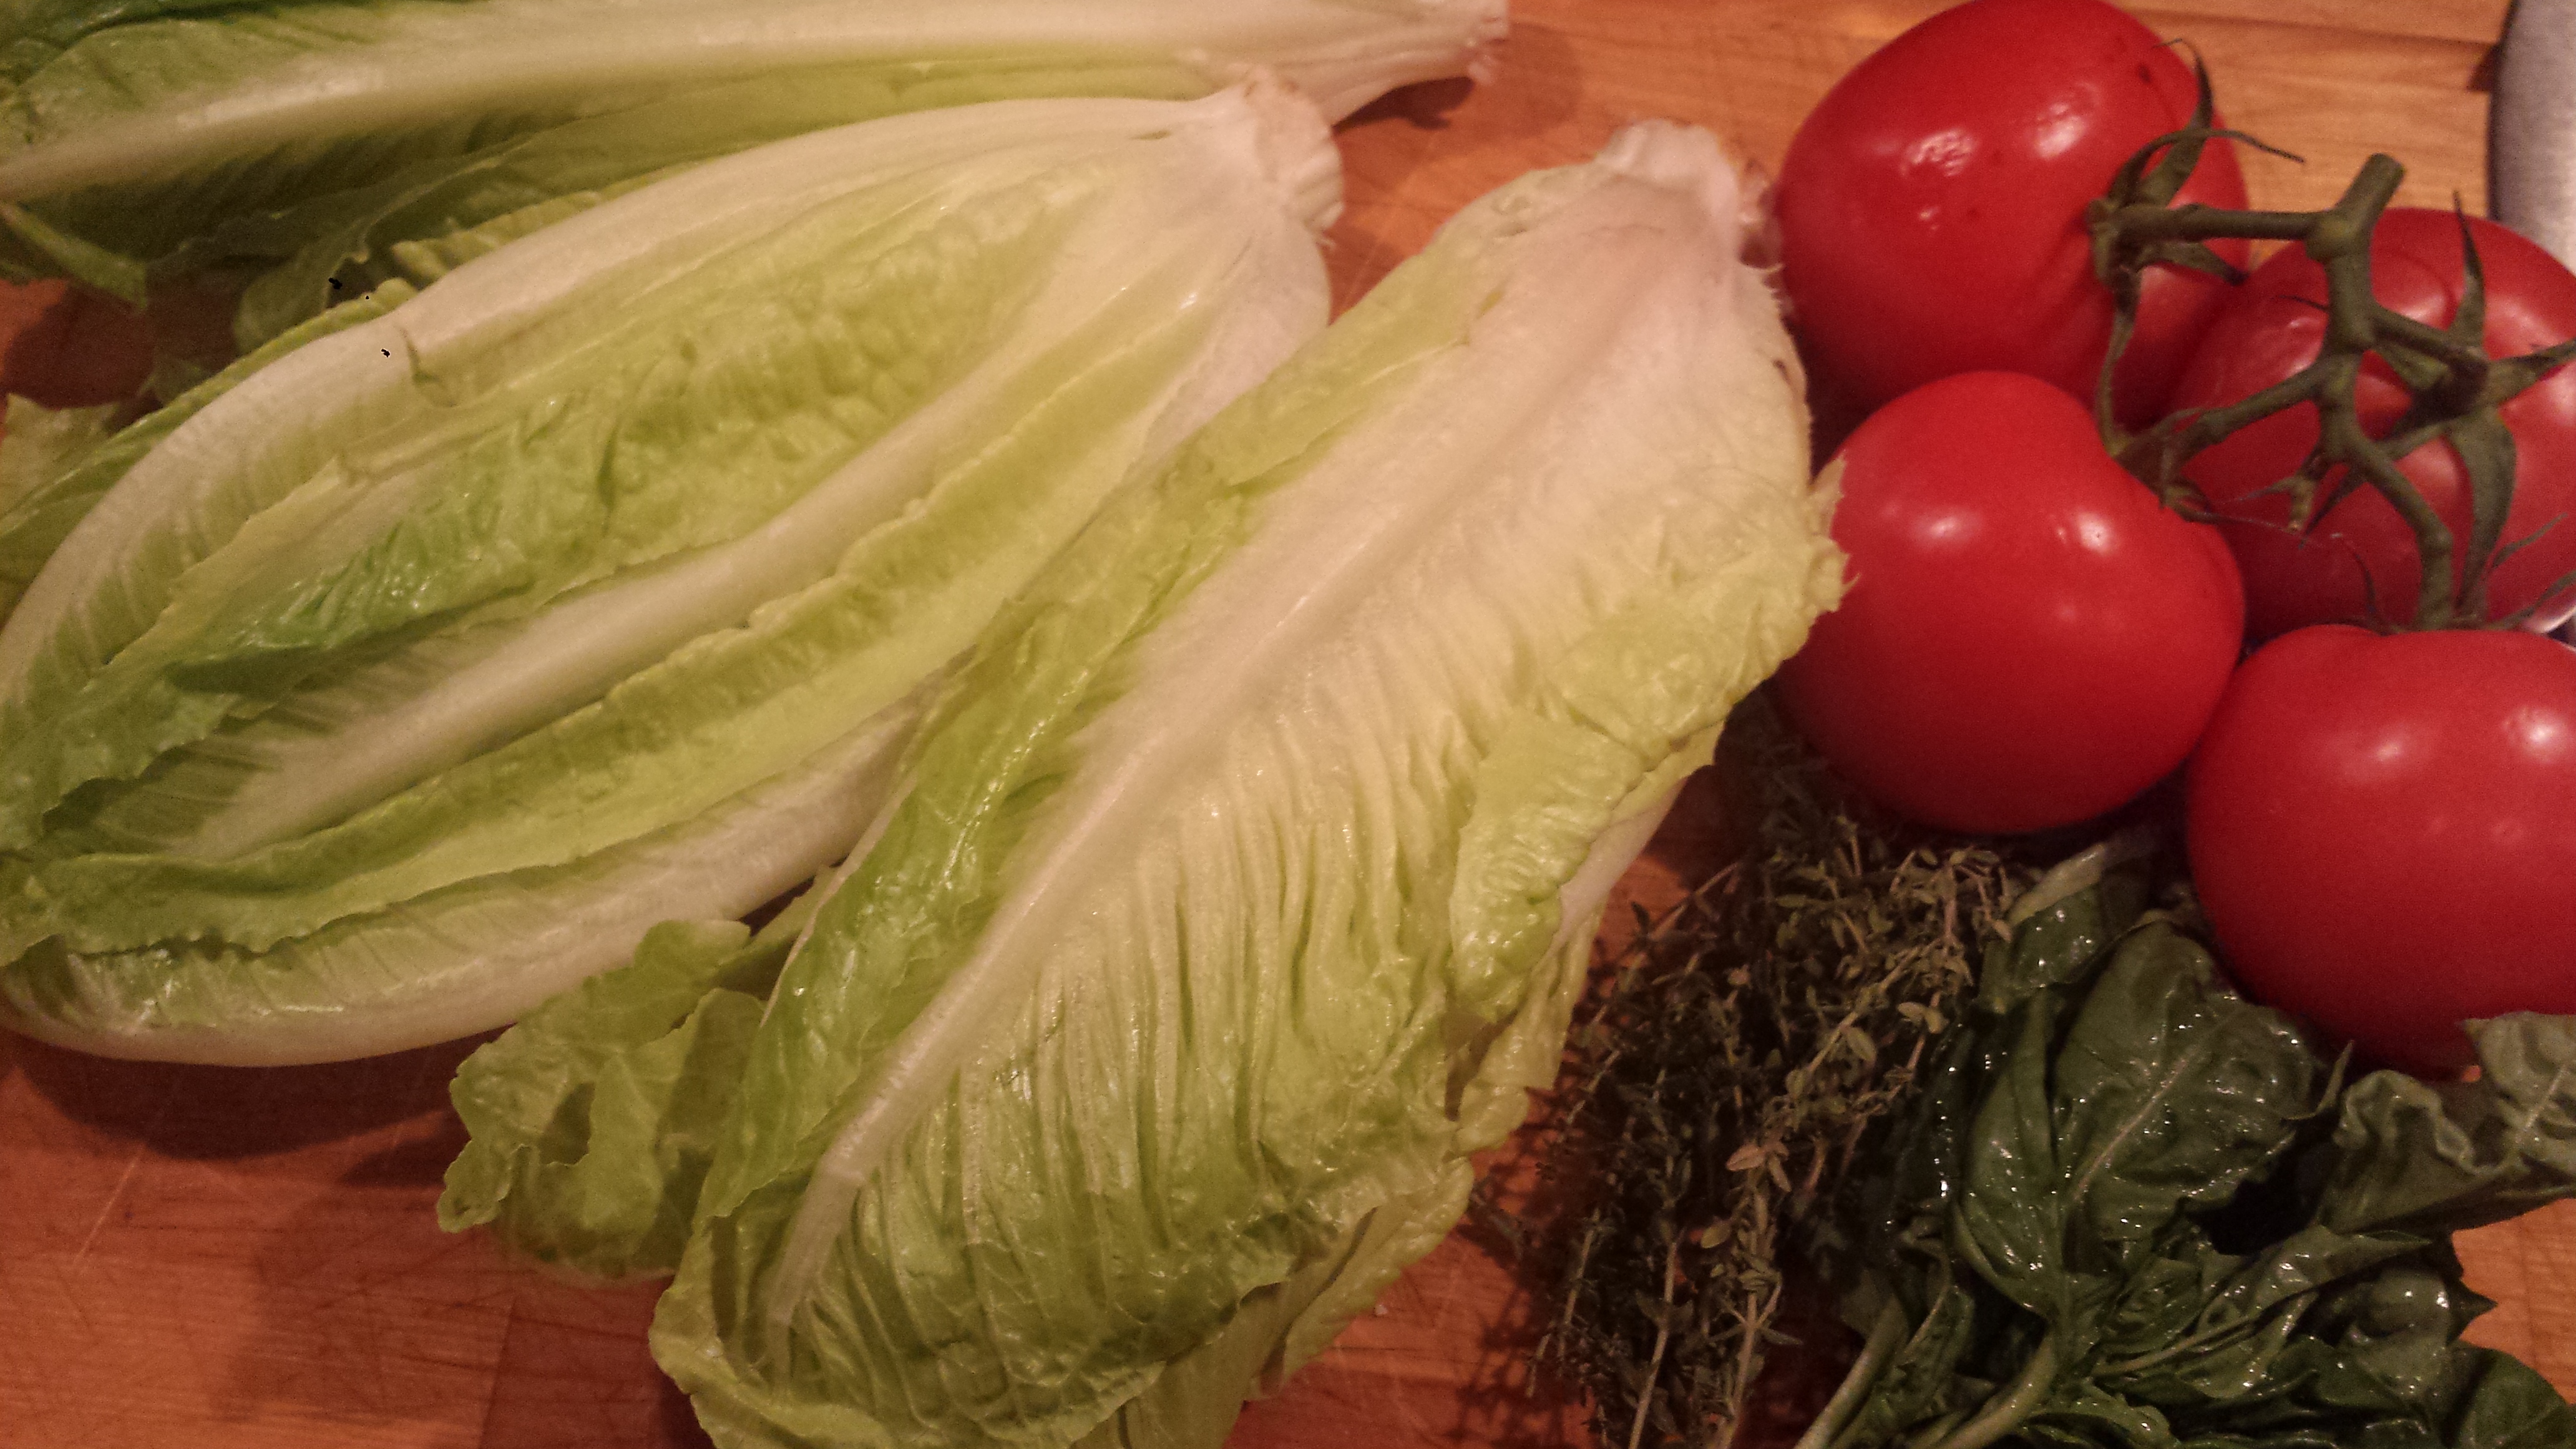
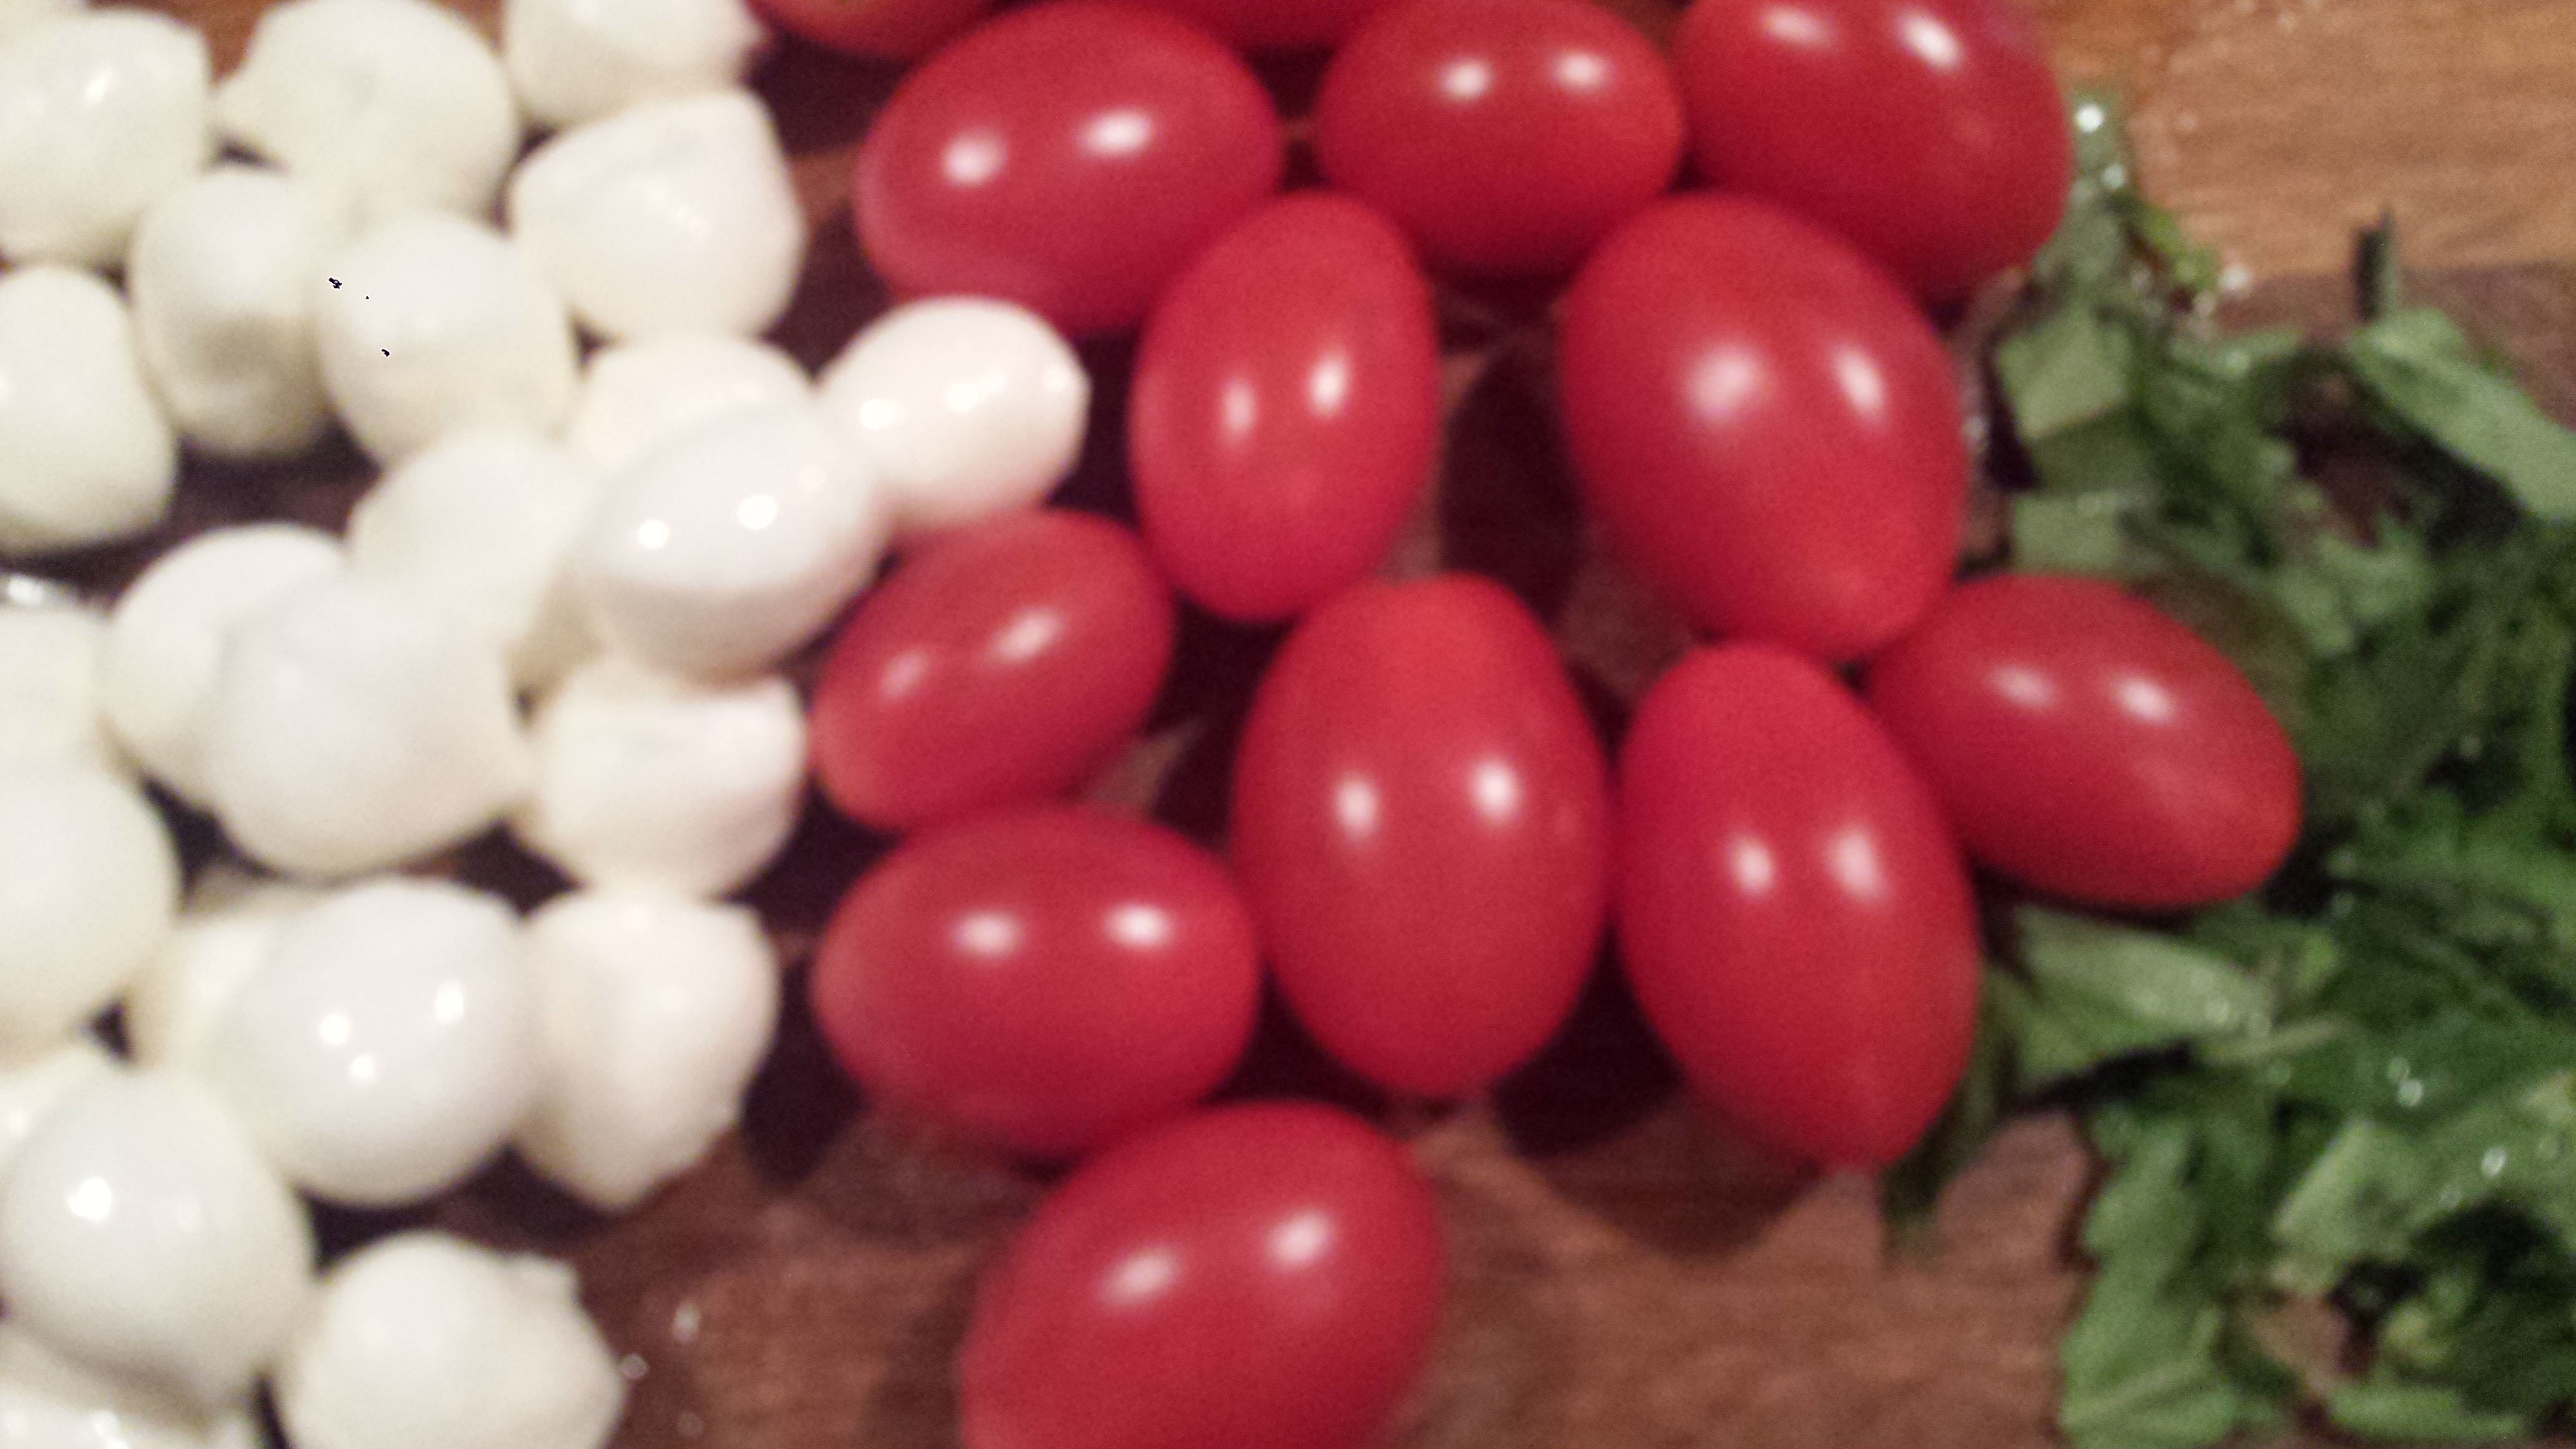
1-2 lbs mixed tomatoes
1/2 cup mixed olives
6 oz goat cheese (optional)
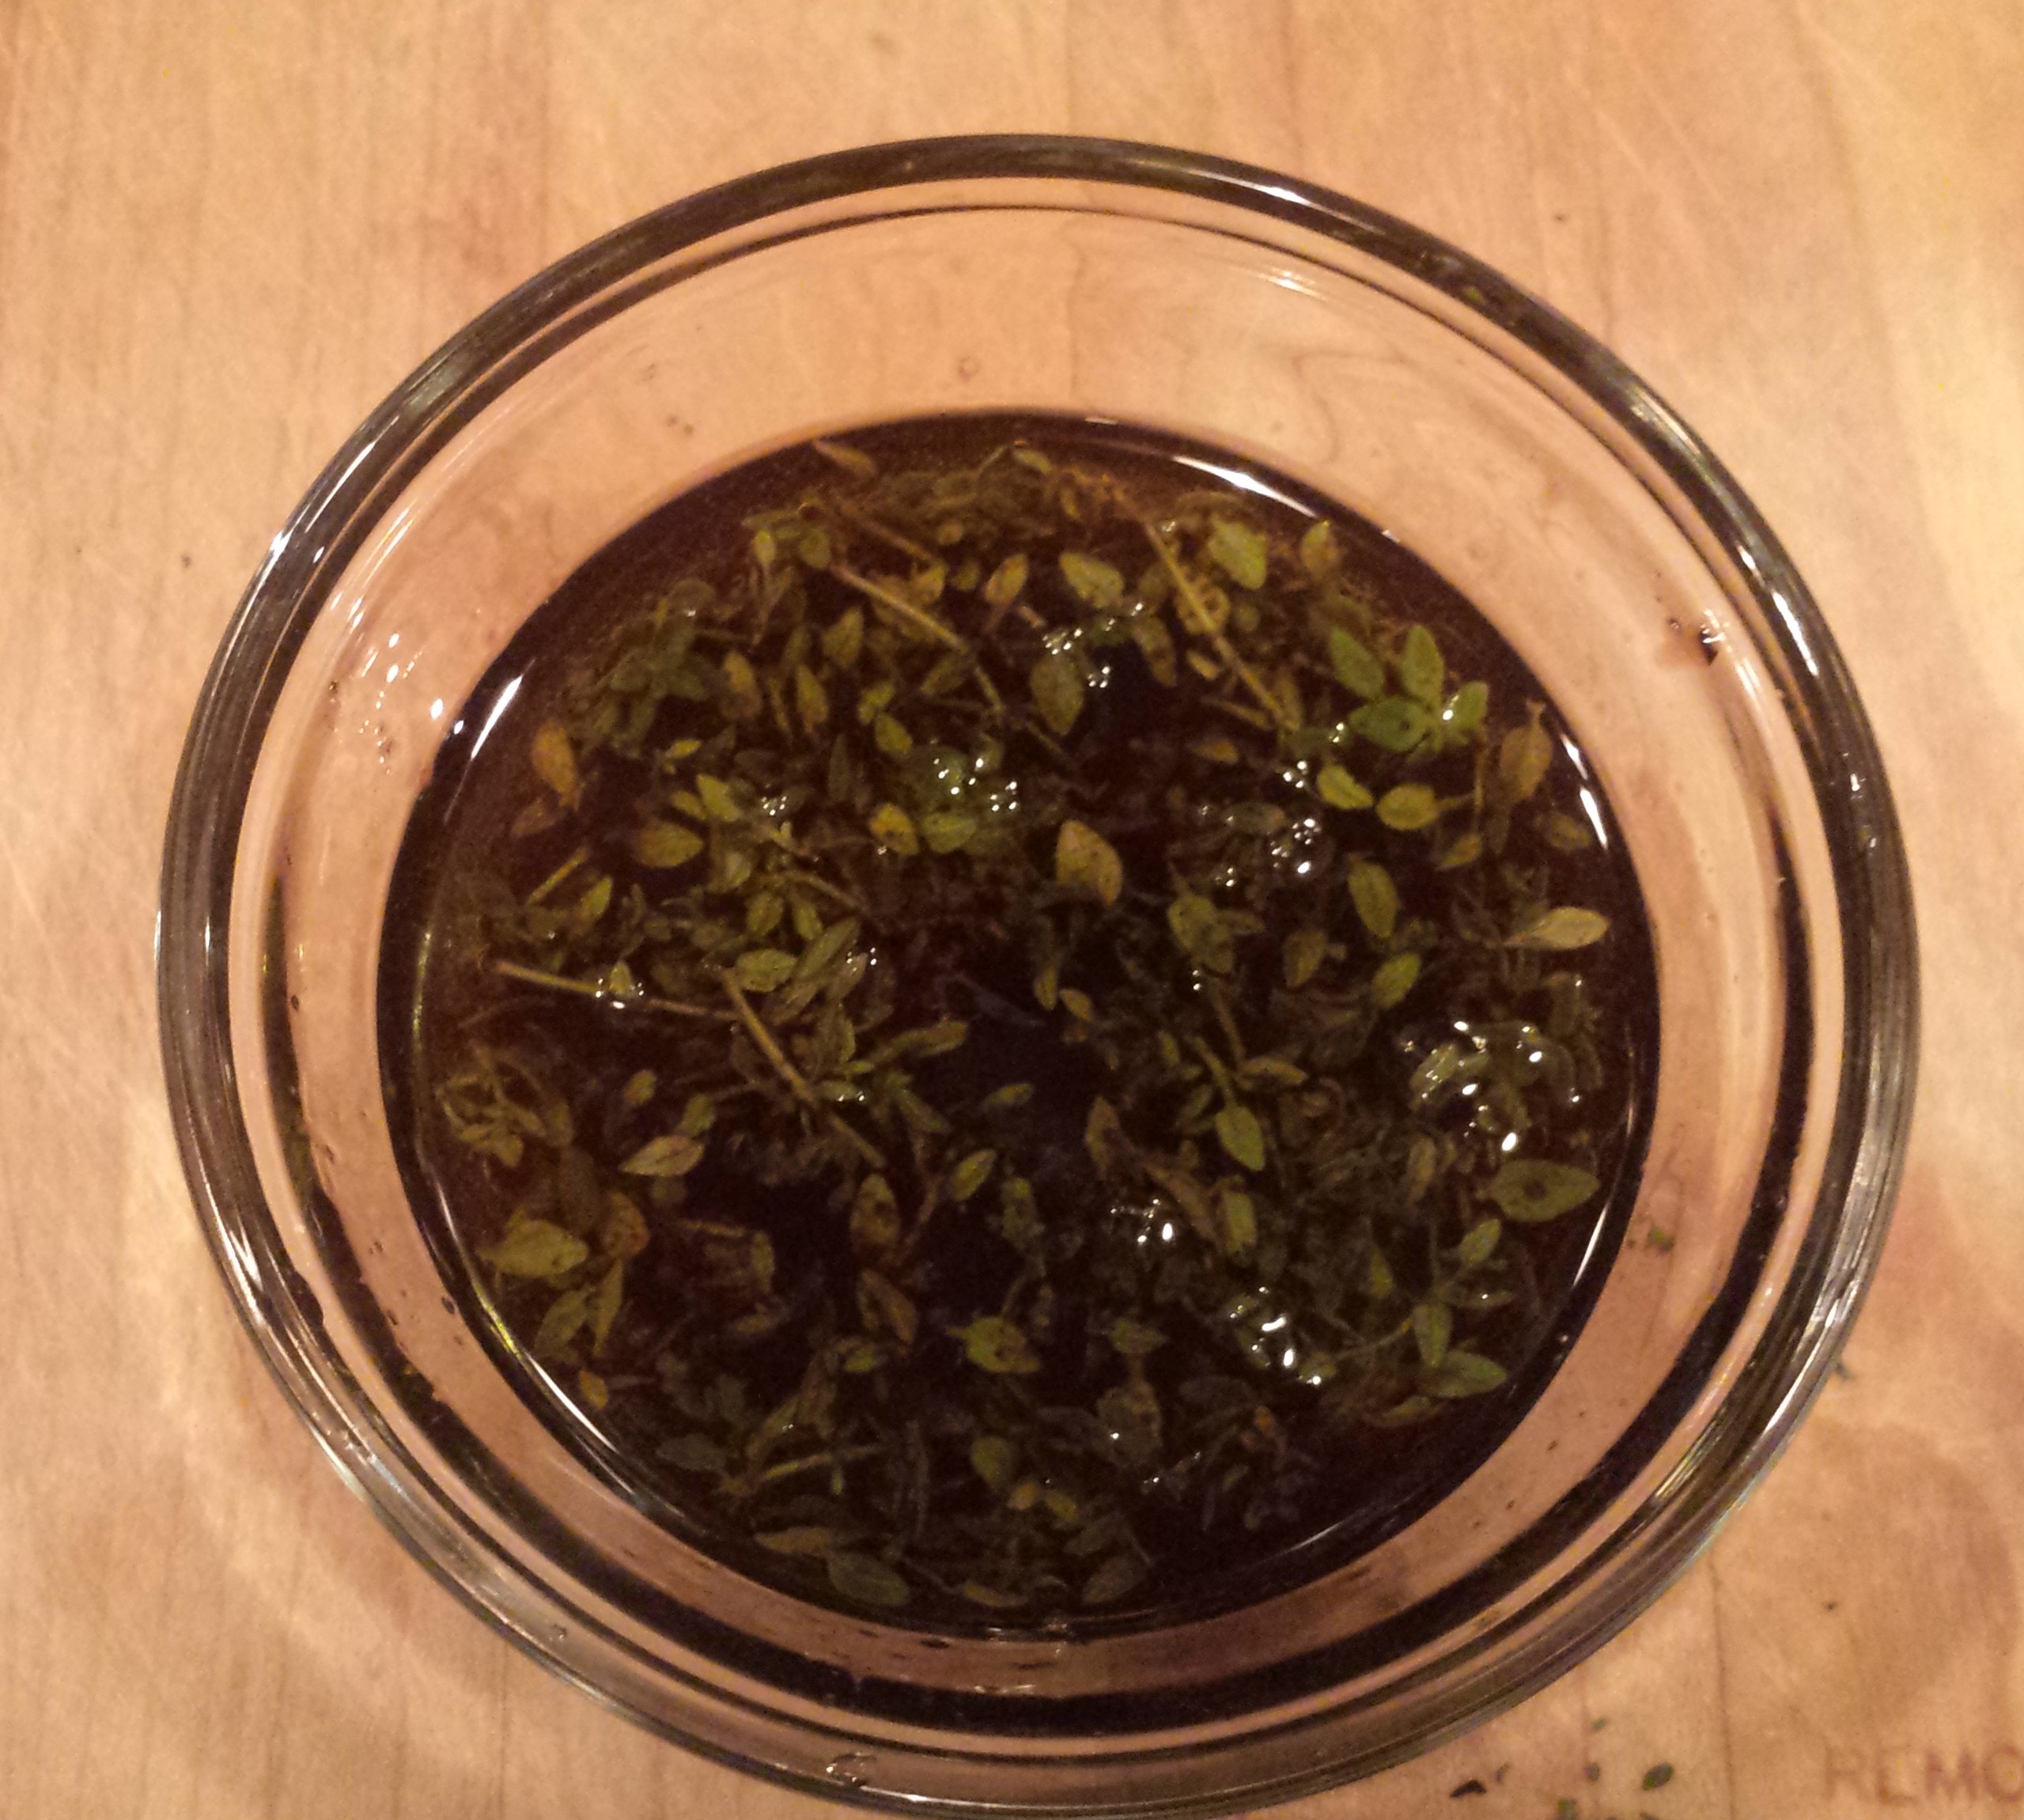
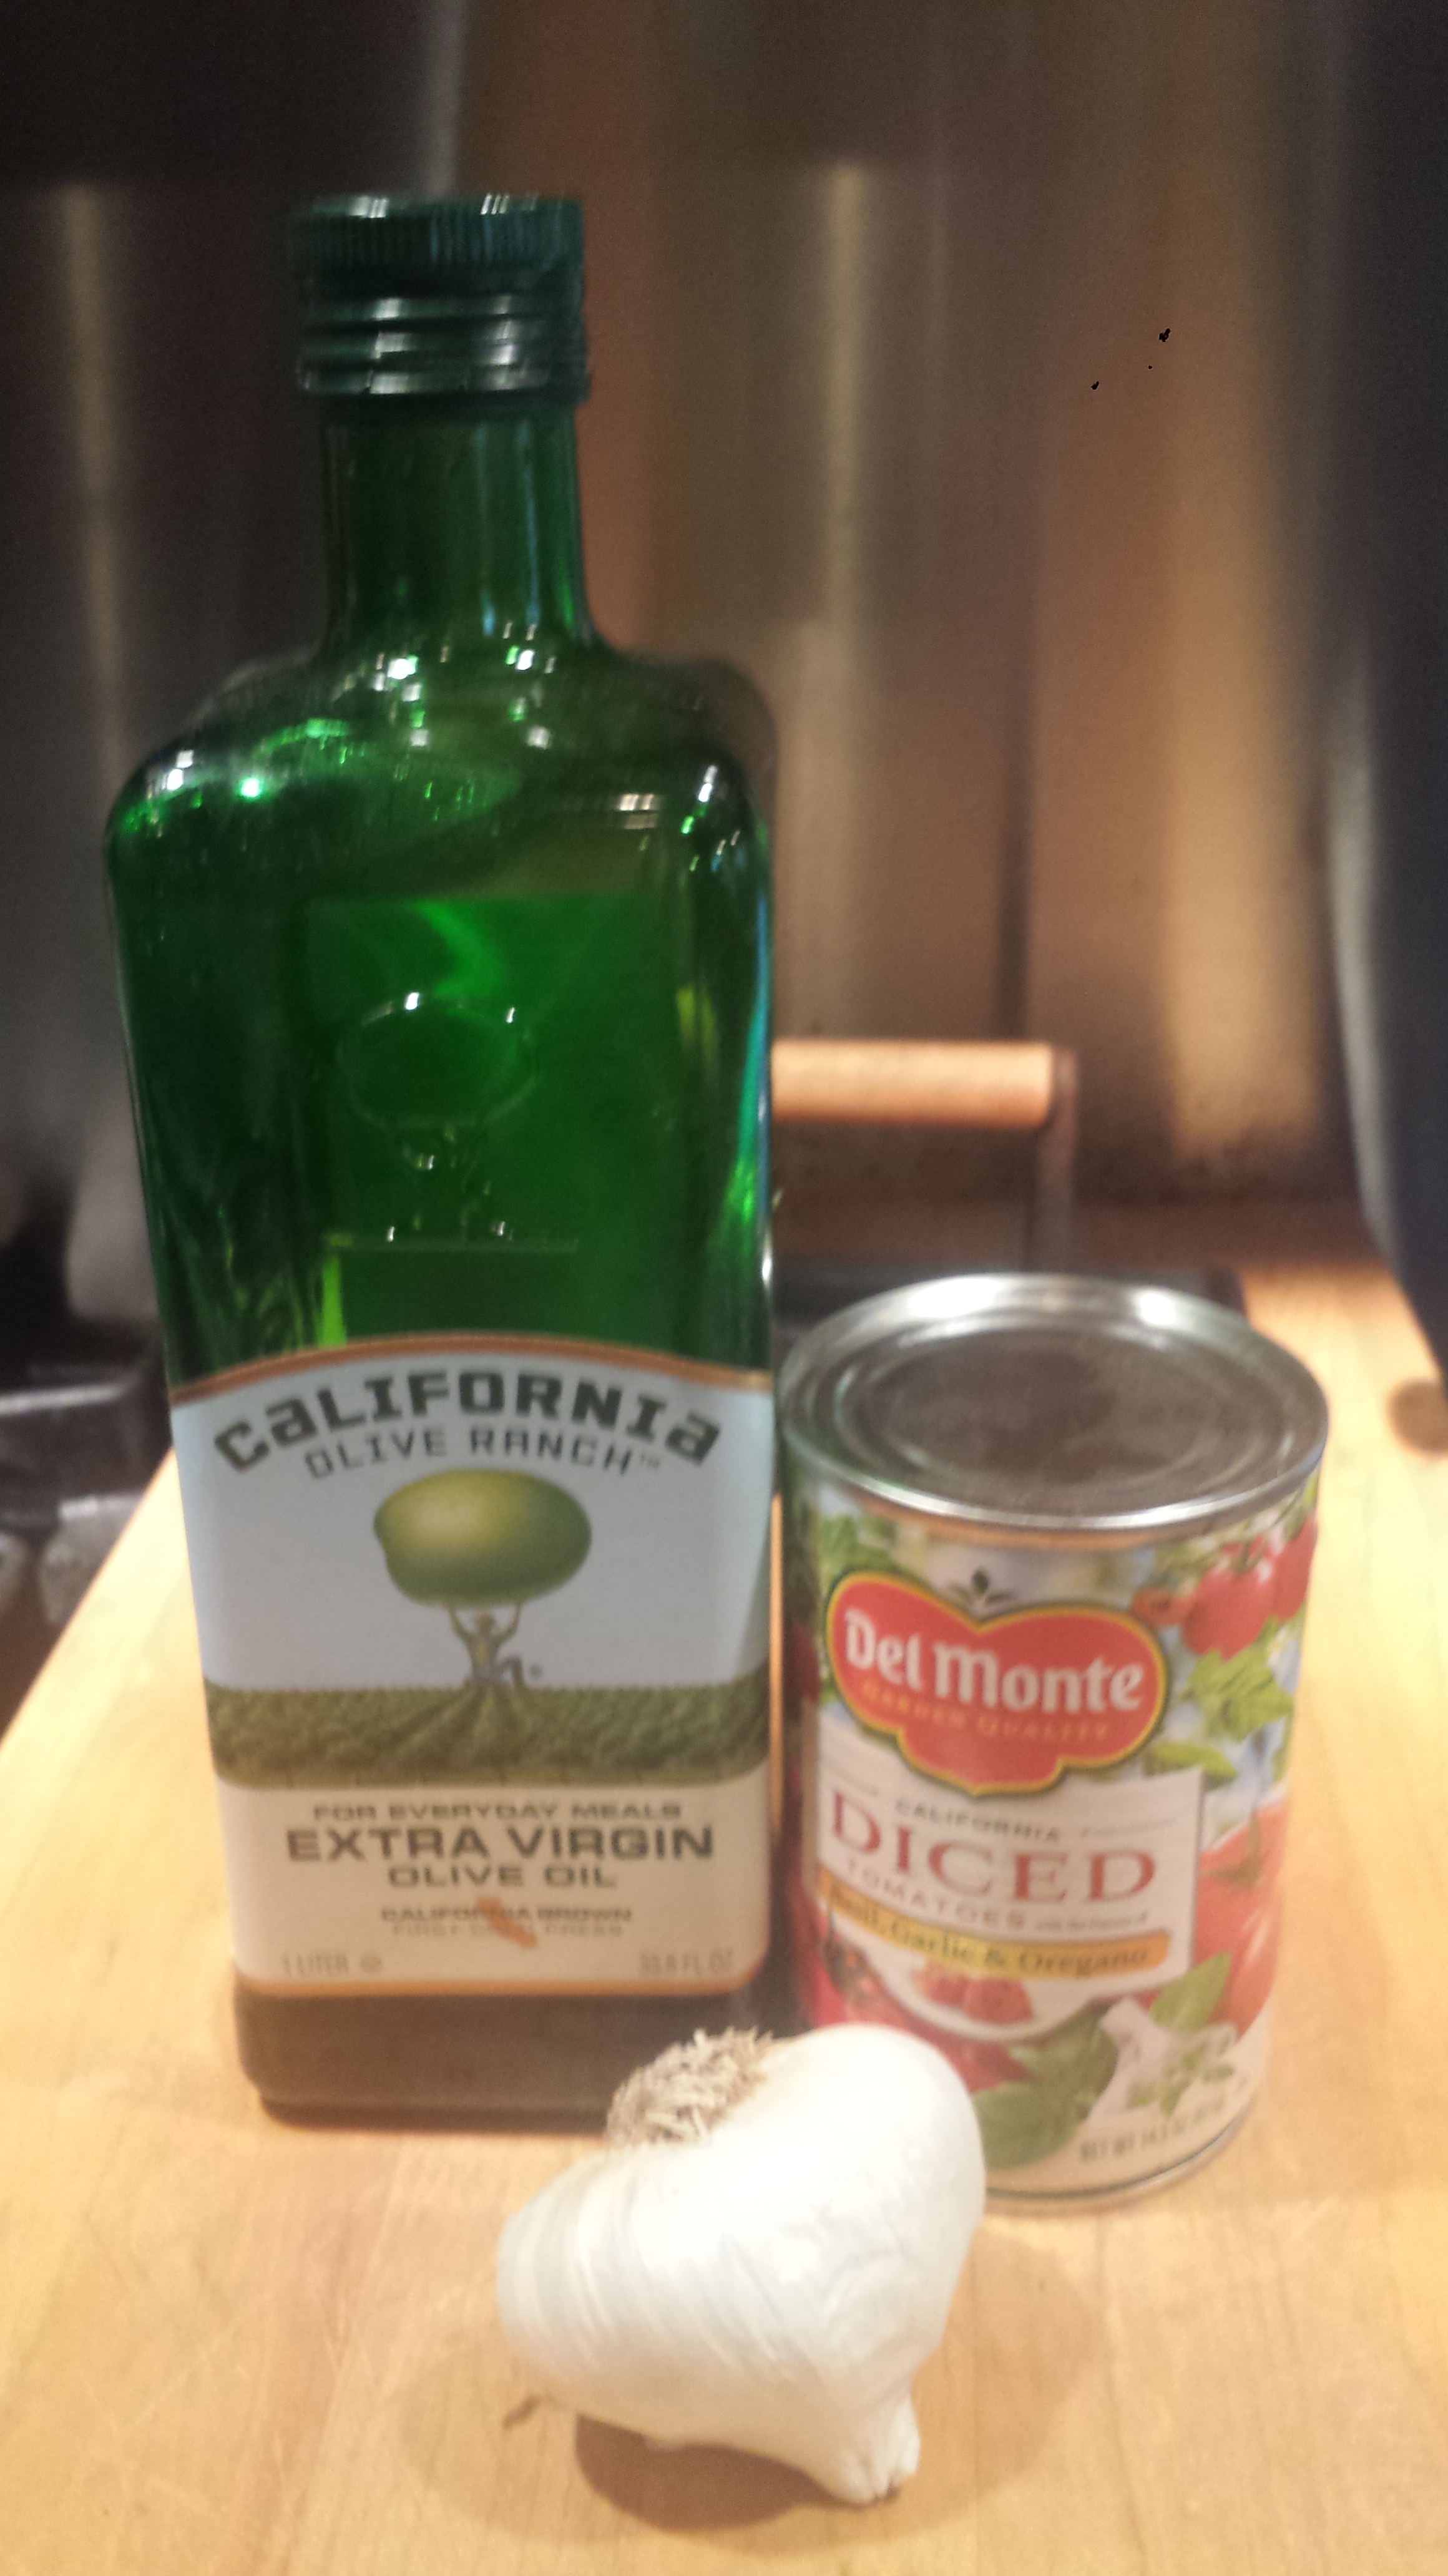
1/2 cup olive oil
1/4 cup balsamic vinegar
1 Tbsn fresh thyme leaves
1/4 cup fresh basil, chopped
salt and pepper to taste

Eggplant Salad17

  • Slice eggplant into thin rounds.  If you have time, spread the slices on paper towels and sprinkle with salt and let rest for 10 to 15 minutes.  Wipe moisture off the slices before roasting.

Eggplant Salad16

  • Combine olive oil, garlic and thyme in a small bowl. Set aside.

Eggplant Salad15

  • Halve bell peppers and remove core and seeds.

Eggplant Salad14

  • Preheat broiler and place rack 6 inches from the heat source.  Broil eggplant and peppers until they are blistered and deep brown on the top, about 10 minutes.

Eggplant Salad12


  •  Turn and repeat on the other side.

Eggplant Salad11

  • Immediately transfer eggplant to a large bowl, slice the peppers into wide strips and add to eggplant.  Toss with half the oil to coat all slices.

Eggplant Salad10

  • Cover with a plate and let stand until softened, about 10 minutes.

Eggplant Salad9

  • Slice larger tomatoes into thin rounds and cherry tomatoes in half.

Eggplant Salad8

  • Arrange eggplant and peppers on a platter.

Eggplant Salad7

  • Add tomatoes and olives and drizzle with remaining dressing.

Eggplant Salad3

  • If using, sprinkle with goat cheese or serve in the corner of the platter or on the side. Top with fresh basil and salt and pepper to taste.

Eggplant Salad1

  • Serve family style or prepare individual plates.


Wheatless Wednesday – Grilled Romaine & Tomato with Gorgonzola

0

Grilled Romaine3
I have never been a big fan of romaine lettuce, until now!  This time of year, pretty much everything ends up on the grill, perhaps in an effort to keep the kitchen cool.  It sounds odd to grill lettuce and I was skeptical the first time but this is now my favorite way to serve romaine.  Charring fruits and vegetables, even lettuce, enhances their natural flavors and transforms them into a delicacy.  Just split fresh romaine head down the middle, leaving the core intact, brush with olive oil and place face down on a hot grill.  Top grilled romaine with a balsamic vinaigrette and sprinkle with gorgonzola or parmesan, or just serve on its own.  This is not the prettiest of salads  but you won’t believe how delicious it is.  I also threw some tomatoes on the grill and topped them with gorgonzola and fresh basil.

Grilled Romaine6

Here are some surprising nutrition facts about Romaine lettuce that you may not know:

1 – Protein. Believe it or not, romaine lettuce is 17% protein with 7.7 grams per head. It is also contains all 9 essential amino acids, 9% RDA of some and up to 26% RDA of others.

2 – Calcium. One head of romaine has 206 milligrams (mg) of calcium (about 21% RDA). Blend it with calcium rich fruits like papaya and oranges and you’ll get more calcium than a glass of milk!

3 – Omega-3s. One head of romaine lettuce contains 44% RDA of Omega-3 essential fats. Forget the tainted fish oils, reach for some leafy greens instead!

4 – More Vitamin A Than An Carrot. One head of romaine contains 182% RDA of vitamin A (as beta-carotene) while a large carrot contains only 40%.

5 – Iron. One head of romaine contains 6mg of iron, which ads a significant source of iron to the diets of vegetarians and vegans.

6 – Romaine Lettuce is Rich in B-vitamins: Thiamine (B1) – 38% RDA, Riboflavin (B2) – 32% RDA, Niacin (B3) – 12% RDA, Pantothenic Acid (B5) – 18%, Pyridoxine (B6) – 36 %, Folate (B9) – 213%!

7 – Water. One head of romaine provides 16% of your daily water needs with about 20 ounces of water per head!

8 – Rich Source of vitamin K. As with most leafy greens, romaine is super rich vitamin K with 535% RDA in one head.

9 – Low Levels of Oxalic Acid. If you have problems with calcium oxalate kidney stones, romaine lettuce might be a good choice for leafy greens since it is very low in this anti-nutrient.

10 – Mineral-Rich. Don’t let the lighter color of romaine lettuce fool you. This not-so-dark leafy green is rich in minerals. One head contains copper (33% RDA), magnesium (22% RDA), manganese (42% RDA), phosphorus (27% RDA), potassium (33%), selenium (5% RDA) and zinc (13% RDA).

Makes me a believer!

Grilled Romaine5

Grilled Romaine and Tomato

  • Servings: 6
  • Difficulty: easy
  • Print

3 heads romaine lettuce (1 for every 2 people)
3 ripe but firm tomatoes (optional)
4 Tbsn olive oil, divided
2 Tbsn balsamic vinegar
1 Tbsn apple cider vinegar or red wine vinegar
1 tsp fresh thyme, minced
1/4-1/2 cup crumbled gorgonzola or grated parmesan
salt and pepper

  • Remove any old looking, leafy outer leaves of each head of romaine. Slice each head down the center lengthwise keeping the core intact. Rinse thoroughly with cold water and drain. Slice tomatoes in half, if using.

Grilled Romaine6

  • Brush both sides of romaine (and tomatoes) with 2 Tablespoons olive oil and sprinkle with salt and black pepper.

Grilled Romaine7

  • Preheat the grill and make the  dressing while waiting for the grill to get very hot. Combine remaining olive oil, vinegar and thyme in a small bowl and set aside.

Grilled Romaine8

  • Place the romaine and tomatoes flat side down on the hot grill

Grilled Romaine11

  • Grill 2 to 3 minutes or until charred.  Turn romaine a 1/3 turn and char one side of the curved side

Grilled Romaine10

  • Rotate to char the final side (tomatoes only need to be turned once and then removed to a serving platter) Remove romaine from heat and place on a serving platter.

Grilled Romaine13

  • Drizzle with dressing.

Grilled Romaine2

  •  Sprinkle with parmesan or gorgonzola, if desired.  Top tomato with fresh basil.

Grilled Romaine3


Meatless Monday – Quinoa Black Bean Sliders with Sriracha Aioli

2

Veggie Sliders1

SliderMania!  Sliders are all the rage, and rightly so!  What could be more delicious than a yummy, messy hand sized slider dripping with delicious sauce? Sliders are the perfect size, not a big commitment but more of an invitation to try something new. There are so many recipes for meatless burgers and I have been tempted to try several but didn’t really act on this impulse until I saw the Quinoa and Black Bean Burger with Sriracha Aioli from The Selfmade Man.  He had me at Sriracha!  The Selfmade Man made nice manly, big burgers but I love appetizers so opted for sliders.  The problem is, you really can’t eat just one!  They are that good.  Sriracha in the burger and a lovely creamy Sriracha sauce on top.  What could be bad?  I also added a layer of balsamic carmelized onions to add a bit of savory sweet and because I love them and thought they would pair nicely with the sriracha sauce. I served them on brioche slider buns. Yum!

Veggie Sliders2

So here is the kitchen confessional First, I am a home cook (not a professional chef), in a real home, feeding real people.  I take photos along the way and then we eat. Sometimes I forget to take the perfect photo and that just has to be okay.  I mean the photo with the bite already taken doesn’t usually work…  Second, you should follow recipes without letting the following get in the way:  1)The 10 people chatting away in your kitchen while you’re trying to cook  2)The 3 other dishes being made in your kitchen around you by other people using your stuff  3)The glass of wine in your hand…  This recipe is brilliant, however, my kitchen was in pandemonium with many cooks and dishes in various states of preparation, and I had a brain freeze added the oil that was meant for cooking to the batter.  I realized right away but couldn’t really take it back.  So I cooked the sliders in a dry cast iron pan and it worked out just fine. They were a bit softer and harder to form, but don’t you want your sliders to be a bit messy?   Next time (and there will be a next time because these are really good) I will cook the sliders with the oil on the outside. Duh!  Sorry Selfmade Man!
Veggie Sliders13

These burgers are delicious and hearty enough to satisfy your carnivore friends and family but they also pack a nutritional punch.   Black beans are loaded with protein and fiber along with several essential vitamins and minerals like B complex vitamins, potassium, magnesium and iron.  Quinoa also has a very high protein content and is a good source of fiber and several vitamins and minerals including B complex vitamins, vitamin E, calcium, iron, phosphorus, and magnesium.  Quinoa is also gluten-free which makes it a nice option for people who are gluten-intolerant.  Quinoa is a great choice for vegetarians, but also for anyone trying to cut down on refined, processed foods by increasing their consumption of whole grains. So feel free to have two or three!

Quinoa Black Bean Sliders with Carmelized Onions and Sriracha Aioli

  • Servings: 4-6
  • Difficulty: easy
  • Print

Veggie Sliders1
1 15 oz can black beans
1/4 cup quinoa
1/2 cup breadcrumbs or whole grain flour (I used quinoa flour)
1/4 green pepper, finely diced
1/4 onion, finely diced
1 clove garlic, minced
1 large egg
1 1/2 tsp cumin
salt and pepper to taste
3 Tbsn Sriracha Sauce
3 Tbsn olive, coconut or avocado oil
10-12 slider buns, or 4-5 regular (I used brioche slider sized buns)

Carmelized Onions
1 large onion
2 Tbsn olive, coconut or avocado oil
1 Tbsn balsamic vinegar

Sriracha Aioli
2/3 cup Mayonaise
3 Tbsn Sriracha
1 clove garlic, minced
1 1/2 tsp cumin
salt and pepper to taste

Veggie Sliders4


  • Bring the quinoa and a little more than a 1/2 cup of water to a boil in a small saucepan. Once water is boiling, reduce the heat to a medium-low and let it simmer for about15 minutes or until water has been absorbed.  While the quinoa is cooking, make the Sriracha Aioli.  Mix minced garlic, mayonnaise, and Sriracha sauce in a small bowl and set aside.

Veggie Sliders11

  • Rinse the black beans in a strainer and add them to a large mixing bowl. Add cooked quinoa to the bowl. Mash or blend the black bean-quinoa mixture into a paste.

Veggie Sliders9

  • Mix in bread crumbs, bell pepper, onion, garlic, egg, cumin, salt, pepper, and Sriracha sauce, and stir with wooden spoon until completely mixed.

Veggie Sliders8

Form the mixture into about 10 small or four to five large round patties.

Veggie Sliders7

  • If using carmelized onions, slice onion and cook on medium high heat with oil 4 or 5 minutes, until browned and softened.  Add a splash of balsamic vinegar and cook until liquid has absorbed.  Remove from heat.

Veggie Sliders5

  • Using a brush or spoon, spread olive oil onto the surfaces of the patties. Cook black bean patties on a grill set at medium heat or pan fry in a heavy pan.

Veggie Sliders6

  • Cook each side for about 3-5 minutes or until cooked through.

Veggie Sliders3

  • Slice open the bun and place a burger on the bottom and top it with a generous spoonful of onions.  Spread the top half with sriracha aioli.

Veggie Sliders2

Wheatless Wednesday – Root Vegetable Slaw with Burrata

0

Root Vegetable Slaw13

Roots don’t get the respect that they deserve.  Don’t be fooled by the outward appearance of  most root vegetables with their tough, hairy rough exteriors which only serve to protect the lovely jewels inside.  Their gorgeous interior colors indicate their rich nutrient value with each root containing it’s own set of health benefits. This raw root salad is the epitome of Eat the Rainbow with it’s vibrant red, pink, orange, yellow and green. Roots are packed with a high concentration of antioxidants, Vitamins C, B, A, and Iron. Roots, which grow under ground, absorb vitamins and minerals from the soil and are the energy store house for the plants. Their complex carbohydrates and fiber makes us feel full and satiated, hopefully satisfying our cravings for junk food. Summer is a great time to eat root vegetables fresh when you can eat them raw and get the most health benefits.
Jerusalem

This Root Vegetable Slaw is from the “Jerusalem” cookbook which I received as a very thoughtful birthday gift from a good friend.  “Jerusalem: A Cookbook” was written by Yotam Ottolenghi and Sami Tamimi, chefs who grew up on opposite sides of Jerusalem; Mr. Tamimi in the Arab East and Mr. Ottolenghi in the Jewish West, although they didn’t know each other. They left Israel more than 20 years ago and met in London where they became close friends and business partners.  This is more than just a cookbook.  It’s a gorgeous collection of photos, recipes, history and stories about Jerusalem.  The authors describe it as “a self-indulgent, nostalgic trip into our pasts.”

Root Vegetable Slaw8

I loved this salad!  At first I wasn’t sure about the combination of raw vegetables and soft cheese but the combination of crispy fresh with creamy soft is really nice.  The recipe calls for Labneh, which is really common in the Mediterranean.  It’s not as easy to find here so I substituted Burrata which is a fresh Italian cheese made from mozzarella and cream. It’s softer and creamier than fresh mozzarella.  Burrata means “buttered” in Italian which seems very appropriate.  “Jerusalem” includes a recipe to make your own Labneh if you are so inclined, or maybe you will find it in a market near you.

Root Vegetable Slaw with Burrata

  • Servings: 6
  • Difficulty: easy
  • Print

Root Vegetable Slaw1

3 medium beets
2 medium carrots
1/2 celery root
1 medium kohlrabi (optional)
4 Tbsn lemon juice
4 Tbsn olive oil
3 Tbsn sherry vinegar (or mirin)
2 tsp sugar
3/4 cup cilantro, coarsely chopped
2/3 cup flat leaf parsley, coarsely chopped
3/4 cup mint, ribboned or chopped
1/2 Tbsn lemon zest
salt and pepper
1 cup burrata or labneh (optional)

Root Vegetable Slaw5

  • Peel vegetables and slice then thinly into matchsticks (julienne).

Root Vegetable Slaw3

  • You can use a mandolin or food processor.  To do it by hand, stack a few slices at a time on top of one another and cut them into thin strips.

Root Vegetable Slaw4

  • For carrots, slice off ends and cut into halves or thirds, depending on the size of the carrots.  Mine were small so I used four.

Root Vegetable Slaw10


  • Try to cut all vegetables into the same sized matchsticks.

Root Vegetable Slaw17

  • Place all strips in a large bowl and cover with cold water.  Set aside while you make the dressing.

Root Vegetable Slaw14

  • Wash and dry a lemon.  Zest the lemon first, then halve and squeeze the juice.

Root Vegetable Slaw19

  • Place the lemon juice, olive oil, vinegar, sugar and 1 teaspoon salt in a small saucepan.  Bring to a gentle simmer and stir until the sugar and salt have dissolved.  Remove from heat.

Root Vegetable Slaw16

  • Drain the vegetable strips and transfer to a paper towel to dry well.  Dry the bowl and replace the vegetables.  Pour the hot dressing over the vegetables, mix well and let cool.  Place in the refrigerator for at least 45 minutes.

Root Vegetable Slaw9

  • Slice mint into ribbons and chop herbs, if you haven’t already done so.

Root Vegetable Slaw12

When ready to serve, add the herbs, lemon zest and 1 tsp black pepper to the salad.  Toss well, taste, and add more salt if needed.

Root Vegetable Slaw11

  • Serve with burrata or labneh on the side, if desired.


Meatless Monday – Spaghetti with Fresh Tomatoes and Basil

0

Tomato Pasta1

What could be easier than tossing warm pasta with fresh tomatoes, basil and olive oil?  This is a delicious NO COOK sauce that I have been making for ten years or so.  It is really delicious!   I no longer have the original recipe for this ‘sauce’ and usually only think about making it later in the summer when I have too many tomatoes on my windowsill on the verge of getting overripe. This recipe  is a great use for tomatoes that are a bit past their prime and starting to get a mealy texture. Of course, the better quality tomatoes, the more delicious the sauce but you can slip in an overripe tomato or two and it will work out just fine.  You can also add a few cherry tomatoes if you wish. I just use what I have on hand, but the more colorful the variety of tomatoes, the better.  Just dice the tomatoes, add a clove of minced garlic, sliced or chopped basil and oregano, drizzle with olive oil and let sit on the counter at room temperature for one to three hours.  All the flavors combine and transform raw tomatoes into a deliciously fresh sauce.  Sometimes I add fresh mozzarella for a Caprese type pasta or sprinkle with grated or shaved parmesan but it is just as good on its own.

Tomato Pasta12

There is some debate whether tomatoes are more nutritious raw or cooked.  Usually cooking vegetables reduces their nutritional value as vitamins are lost during the cooking process, however, it looks like tomatoes may be different.  Cooking tomatoes reduces the amount of vitamin C but may increase the amount of lycopene (a phytochemical with antioxidant properties) that can be absorbed by our bodies.  So I think its a toss up.  You can lightly sauté this sauce if you prefer but I love the simplicity of leaving it raw as nature intended.

TIP:  Garlic lovers beware!  For those of us who pile on the garlic, be forewarned.  Since this sauce is not cooked, the garlic does not mellow and sweeten the same way it does when cooked, so don’t use the same amount you would in a cooked sauce.

Spaghetti with Fresh Tomatoes and Basil

  • Servings: 6
  • Difficulty: easy
  • Print

Tomato Pasta1

4 – 6 ripe tomatoes of varying size and variety

1/2 cup olive oil

1/2 cup fresh basil, sliced or chopped

1 Tbsn fresh oregano, chopped (or thyme)

1-2 cloves garlic, minced

1/2 tsp salt (or to taste)

1/4 tsp pepper (or to taste)

1 cup fresh mozzarella (optional)

Tomato Pasta11

  •  Dice tomatoes and place in a medium sized bowl

Tomato Pasta9

  •  Add garlic, herbs, olive oil, salt and pepper to tomatoes.

Tomato Pasta8

  •  Stir gently to combine and let sit at room temperature for one to three hours (30 minutes if you can’t wait).

Tomato Pasta6

  •  Slice or dice fresh mozzarella, if using.

Tomato Pasta4

  •  Add mozzarella to the sauce about 15 minutes or so before serving. (You don’t want it sitting out too long). Adjust seasoning, if necessary.

Tomato Pasta3

  •  Cook spaghetti according to instructions, drain and place in a serving bowl.

Tomato Pasta2

  •  Pour tomato sauce over the top and gently combine.  Serve warm or at room temperature.


100th Post – Cauliflower “Mac” and Cheese

1

100

Wow, this is my 100th post! I’ve certainly learned a lot since publishing my first recipe, Green Curry Tofu, on November 25, 2013. I had never even been on a blog before starting Goodmotherdiet, so it has been quite a learning curve.  I got a domaine name on WordPress and suddenly, I was a blogger!  Every new techie thing I have learned, has been a major victory, like successfully uploading photos and then figuring out how to make them larger than a thumbnail; or adding links that work and making my recipes printable. I’m even writing code! What? Six months ago I didn’t even know what that was!  My thought processes and food choices have also evolved. It’s been over a year since I’ve eaten meat, other than the occasional free range chicken, and I feel good about the evolution, but I promised myself not to make any permanent changes, or edits to my About Page, until GMD turns one in November.  There will definitely be some edits since I now have a different and stronger perspective than when I started.  It’s interesting how just a simple change in diet can also change your way of thinking.  Anyway, thanks for joining me on this journey.  I hope you’re enjoying the ride…  You can follow me via email by clicking the Follow Me button or you can Like the Goodmotherdiet Facebook Page, both top left of the screen.

be-the-change
Deciding what to feature for my 100th post which happens to fall on a Wheatless Wednesday, was a challenge until I came across a recipe for Cauliflower ‘Mac’ and Cheese  on Tabitha’s Gluten Free Dishes, which is a great blog that I follow.  What is more iconic or American than Macaroni and Cheese? Nothing is quite so comforting as a big bowl of yummy, creamy cheesiness!   How about a Mac and Cheese that has no actual pasta but still satisfies that craving?  Many versions of Cauliflower Mac and Cheese are available including those by Dr Oz and Rachel Ray. Most recipes include heavy cream and cream cheese.  I have opted to make a ‘skinny’ version using non-fat milk and yogurt instead of heavy cream.  Cauliflower is a good stand in for pasta and many other things as it is extremely versatile and good at absorbing flavors while adding a variety of good nutrients and fiber but little fat and no cholesterol.  I have already posted recipes for Cauliflower Crust Pizza  and Cauliflower Buffalo ‘Wings’ and Cauliflower Puree instead of mashed potatoes, all with great success. So here goes…

Cauliflower Mac Cheese15

TIP:  You can use any kind of cheese that you like but a sharp cheddar gives you more bang for your buck than mild, in that it’s stronger flavor allows you to use less cheese (hense fewer calories and fat).  Another way to cut fat and calories is to use 2 cups non-fat milk and increase the butter and flour to 3 Tablespoons each,  or 1 1/2 cups low or non fat milk and 1/2 cup full fat milk or cream.  If you like extra creamy, you can use all heavy cream and even add 2 tablespoons of cream cheese.  To make this vegan, use coconut oil, almond milk and vegan cheese.  I used 1 1/2 cups non-fat milk and 1/2 cup non-fat yogurt with good results.  Several recipes I looked at called for adding cayenne pepper, onion powder, sautéed onions or fresh scallions before cooking, so think about those as options.

Cauliflower Mac and Cheese

  • Servings: 4
  • Difficulty: easy
  • Print

Cauliflower Mac Cheese13

1 head cauliflower
2  cups mild or sharp cheddar (gruyere, Swiss or your favorite melty cheese)
1/4 cup shredded parmesan (optional)
2 Tbsn butter
2 Tbsn flour (rice, oat or quinoa flour work well in lieu of wheat flour)
1 1/2 cups non or low fat milk  (see Tip above for other options)
1/2 cup yogurt
1 tsp Dijon mustard
1/4 tsp salt
1/4 tsp pepper


  • Pre-heat the oven to 375F
  • Spray a baking dish with cooking spray and set aside.

Cauliflower Mac Cheese2

  • Cut core out of cauliflower and break or cut into small florets.

Cauliflower Mac Cheese3

  • Bring a pot of water to a boil and par boil the cauliflower florets for 5 minutes. Rinse in cold water, drain well and pat between several layers of paper towels to dry. Transfer the cauliflower to the baking dish and set aside.

Cauliflower Mac Cheese4

  • Melt butter in a medium skillet over medium heat. Stir in flour and cook for 1 minute.


Cauliflower Mac Cheese6

  • Pour milk in slowly, whisking to combine.  Add yogurt one tablespoon at a time,  if using, and whisk into a creamy sauce.

Cauliflower Mac Cheese8

  • Stir in salt, pepper and 1 1/2 cups cheese. Stir over medium-low heat for 5 minutes.

Cauliflower Mac Cheese10

  • Pour the cheese sauce over the top and stir to combine.

Cauliflower Mac Cheese11

  • Top with remaining cheese, plus parmesan, if using.

Cauliflower Mac Cheese12

  • Cook for 15 minutes or so until the cheese turns golden and begins to bubble. Broil last few minutes to brown the top, if desired.

Cauliflower Mac Cheese16

  • Sprinkle with red pepper flakes for an added kick, if desired.


100 Photo Credit: Sonandoconparis.blogspot.com


Meatless Monday – Pasta Primavera with Summer Squash, Peas and Arugula

8

Pasta Primavera15
Primavera means Spring in Italian and the popular Pasta Primavera traditionally is pasta, usually spaghetti but other pasta shapes can be used, tossed with a variety of spring vegetables like asparagus, tomatoes and fresh herbs.  In spite of it’s name, it doesn’t mean you can only make this for dinner in the spring.  Pasta Primavera is a very versatile dish which allows for a wide range of vegetables to be used when they are at their best and their cheapest.  Throughout the year, the dish will change depending on whatever is in season.  I typically sauté whatever fresh vegetables looked the best at the market with garlic and olive oil, then braise in a bit of vegetable broth to make a nice sauce.  If my husband isn’t around, sometimes I will swirl in a spoonful of plain yogurt to add creaminess, then top with parmesan.  Yum!

Pasta Primavera1

Today’s pasta has the gorgeous baby squash and zucchini that I couldn’t resist at the market due to their pure cuteness, as well as peas.  I didn’t see any good fresh peas so I used frozen, which are a good option.  They are frozen right after picking so sometimes they are actually fresher than ‘fresh’ peas that have been sitting around for a while. If you are using fresh peas in a pod, choose pods that are smaller.  The large pods are often filled with over mature peas that are tough and woody and only good in soups and stews.   The smaller pods usually have younger, sweeter peas.   I also added fresh basil and mint plus cherry tomatoes and lemon zest from my garden.

Pasta Primavera5

To make this a healthier dish, use a whole grain pasta.  It’s easy to find good pasta made from whole grains like rice, quinoa or amaranth, all of which provide more protein, vitamins, minerals and fiber than pasta made from white flour. Don’t be fooled by packaging on regular pasta that says ‘fortified with iron or other nutrients’. That just means that nutrients like B vitamins  were removed during the refining process, and some of them are added back in.   Whole grain pasta has come a long way from when it used to be soft and gluey, so give it a try if you haven’t.  Livestrong suggests going half regular and half whole grain pasta if you’re having trouble making the switch to whole grain.

Pasta Primavera7

Pasta Primavera with Summer Squash, Peas and Arugula

  • Servings: 6
  • Difficulty: easy
  • Print

3/4 lb dried penne pasta
1 1/2 cup fresh or frozen peas, shelled
1 small zucchini, thinly sliced
1 small summer squash, thinly sliced
1 cup cherry tomatoes
1 red chili pepper(or dash of red pepper flakes – optional)
1/2 cup fresh basil, cut into ribbons
1/4 cup fresh mint, cut into ribbons
1-2 cups arugula or spinach
2 large shallots, minced
2 cloves garlic, minced
1 Tbsn lemon zest
3 Tbsn butter, olive or coconut oil
1 1/2 cups vegetable broth
Pasta Primavera6

  • Saute the shallots, chilis and garlic in butter or oil until soft, several minutes.  Add vegetable broth and let reduce.
  • Bring a pot of salted water to a boil and cook the pasta according to directions.  Drain and reserve 1 cup pasta water.

Pasta Primavera10

  • Add zucchini and summer squash to the shallot mixture and cook 2 to 3 minutes.  Then add peas.

Pasta Primavera11

  • Add cooked pasta to vegetable mixture and stir to reheat.  Add a bit of pasta water if needed.

Pasta Primavera12

  • Add cherry tomatoes, arugula, basil, mint and lemon zest and let wilt.  Add salt if necessary.  Depending on the saltiness of your vegetable broth, it may not be needed.

Pasta Primavera14

  • Top with fresh parmesan, if desired.

Pasta Primavera15


Vanilla – Brandy Pear Galette

0

Pear Galette14

After spending a month or so in Maine, I returned home to an overgrown vegetable garden, loads of tomatoes and a fruit tree heavily laden with Asian Pears. In fact, the branches were so heavy that some of them were almost on the ground. Someone I didn’t do a very good job thinning the baby fruit in the spring.  I know it’s better for the tree and the quality of the fruit but I have a hard time doing this task, deciding who stays and who goes.  I apologize to the few that I can stand to remove.  I know, silly me!  Quite a few ripe pears had fallen to the ground, so I gathered those first to see what was salvageable. Some of them had to be thrown out (or given to the chickens next door) but many of them were still good even though they had a few bad spots. Last year I made Asian Pear Butter with the less fortunate pears but I haven’t dragged my canning equipment out yet, so I decided to make a Pear Galette that I love. It’s based on a recipe for Canned Pears in Vanilla Syrup (Stay tuned – that recipe coming soon!) which is absolutely delicious and I created a pie last year using some of those flavors.  I used Asian pears but any kind of pear (or apple) will work.  Now the house smells lovely and we have a gorgeous dessert for later!
Pear Galette1

Vanilla Brandy Pear Galette

  • Servings: 6
  • Difficulty: easy
  • Print

1 (9 inch) unbaked pie crust (How to make a Homemade Pie Crust)
2-5 pears (any kind)
2/3 cup white sugar
1/4 cup butter, melted
1 Tbsn flour
1 Tbsn vanilla extract
2 Tbsn brandy
2 Tbsn slivered almonds (optional)

Pear Galette2

  • Preheat the oven to 350 degrees F (175 degrees C).

Pear Galette3

  • Press the pie pastry into the bottom and up the sides of a 9 inch pie plate. Let the edges fall over the side for now.

Pear Galette4

  • Half the pears and core them using a melon baller.  Peel and place the pear halves in a bowl of cold water with a lemon squeezed in to prevent browning.

Pear Galette7

  • Dry the pear halves and slice them into the pie crust.  You can arrange them in concentric circles starting at the outside and working your way into the center (with the small ends toward the center).  Or you can throw them in free form.  It will taste the same.

Pear Galette8

  • Start outside and make your way to the center, until the slices are all gone.  Slide any mis-shaped slices toward the outside where they will be covered by the crust.

Pear Galette6

  • In a medium bowl, mix the butter and sugar together until smooth.  Stir in flour, vanilla and brandy.  If you want a more custard-like dessert, double the flour and add two eggs that have been beaten until fluffy

Pear Galette9

  • Pour mixture over the top of the pears, coating them evenly.

Pear Galette10

  • Fold the extra pastry over the pears to form a crust.

Pear Galette11

  • Continue folding until the circle has been completed

Pear Galette12

  • Brush the pastry with beaten egg to prevent over browning

Pear Galette13

  • Bake for 1 hour in the preheated oven, until pears are soft and bubbling. Softer pears like Barlette should be done.  Firmer pears like Asian or D’Anjou may need another 10 minutes or so.

Pear Galette14

  • If you are topping your tart with almonds, toast them in a dry pan over medium high heat for a few minutes until golden brown.

Pear Galette16

  • Let cool slightly and sprinkle on top of the tart.

Pear Galette17


Wheatless Wednesday – Egg in a Basket

2

Egg Basket13

Can you think of a happier breakfast than eggs Sunnyside Up? Think sunshine and smiley faces. How about stretching the cuteness factor by cooking them inside colorful bell pepper rings?

Egg Basket15

I found this new twist on the traditional Egg in a Hole (also called Egg in a Basket, Toad in a Hole, Turtle in a Shell, One Eyed Jack or Pirate’s Eye) on Natashas Kitchen.  In the traditional dish you cut out a circle from a slice of bread, fry it in some melted butter and cook the egg inside the hole.  In this new and improved version (which is originally a Martha Stewart brainchild), you use slices of bell pepper instead of bread to contain the egg while it cooks which adds a shock of color as well as flavor.  Its also a good way to get people to eat their veggies in the morning.  As an alternative, this can also be done with scrambled eggs.  Just whisk the eggs with salt and pepper, and divide the mixture between each pepper slice.  Eat plain if you’re a purist or top with cheese, avocado and fresh tomato for a more filling breakfast.  Serve with fruit and you’ve got a delicious and nutritious start to the day and it takes only about five minutes to prepare.

Egg Basket1

Eggs got a bad rap for a while and we were  advised for years to avoid eggs or limit our consumption of them due to their high cholesterol content.  It is now recognized that, for most people, cholesterol in food we eat doesn’t increase cholesterol in our bodies.  The real culprit is refined foods like white flour and sugar or polyunsaturated oils that cause inflammation in our bodies, resulting in heart disease and other health issues. In reality eggs are loaded with protein, vitamins and minerals, most of which are in the yolk.  For a good article on why the egg is considered the perfect food read The Truth About Food.  All eggs are not considered equal, however.  95 to 98% of eggs come from factory farms where conditions are inhumane and create food safety problems (for starters.)  The List of Reasons to Boycott Factory Farms is almost endless, the least of which is from a nutritional standpoint.  Factory Farmed eggs are less expensive but you get what you pay for.  Eggs from factory farms are nutritionally inferior to eggs from hens raised on pasture. According to Mother Earth News,  real free-range eggs contain:

• 1/3 less cholesterol
• 1/4 less saturated fat
• 2/3 more vitamin A
• 2 times more omega-3 fatty acids
• 3 times more vitamin E
• 7 times more beta carotene
• 50 percent more folic acid
• 70 percent more vitamin B12

OLYMPUS DIGITAL CAMERA

TIP:  I buy organic, free-range or pasture-raised, Certified Humanely Raised eggs (from an actual farm not a factory).  If I’m lucky, I get eggs raised in the backyard next door in exchange for the extra produce from my garden.   I also buy organic produce whenever possible.  I think it’s worth the added expense and I like to support the farmers that do it the ‘right’ way.  Sometimes its hard to know if your produce is organic or not, if it’s not labeled. I learned a handy tip from Dr. Oz (yes, on TV).  In supermarkets check the sticker with the barcode.  If the barcode starts with a 9 it’s organic.  For example, the green pepper I just bought has a barcode of #94065, which makes it organic.  A conventional green pepper would be labeled #4065.  Check it out next time you go shopping!

Egg Basket24

Egg in a Basket

  • Servings: 4
  • Difficulty: easy
  • Print

Egg Basket23

1 bell pepper (any color)
1/2 avocado
1 medium sized tomato
4 large eggs
Salt
Pepper
¼ cup grated cheese (any combination of parmesan, mozzarella, reggiano, fontina, etc.)
1 Tbsn any fresh herbs, minced (parsley, cilantro, basil, etc)
1 Tbsp olive, coconut oil or butter

Egg  Basket16

  • Cut pepper into 1/2″ rings and remove the seeds and centers.

Egg Basket16

  • For more color use a variety of bell peppers.

Egg Basket18

  • Cut avocado in half vertically, remove pit and slice into rings. Slice tomatoes horizontally into rings.

Egg Basket19

  • In a large, non-stick skillet, heat  oil over medium/high heat.   Place sliced peppers into the pan and let them saute for a minute.

Egg Basket20

  • Turn the peppers over and crack one egg into the center of each bell pepper slice. Pour the egg in slowly; it prevents the egg from leaking and forms a nice seal.  If some egg leaks out just use a spatula to push it back under. It might help to press firmly down on the pepper slices while you pour in the egg. Cook 2 to 3 minutes or until the whites are set and the yolk is runny.  Top with cheese, if desired, and serve.

Egg Basket21

  • For overeasy, turn over and top with cheese, if desired, salt and pepper.  Cook another minute, two for over hard.

Egg Basket22

  • Cover to melt cheese, if desired.

Egg Basket14

  • Top with avocado and tomato, if desired.  Sprinkle with salt and pepper and/or fresh herbs.

Egg Basket25


Meatless Monday – Chili Lime Grilled Tofu with Avocado &Mango Salsa

5

Chili Lime Tofu13

Chili Lime Grilled Tofu is my favorite tofu recipe so far.  It’s taken a few tries but I have finally nailed it. I made this last week and thought it needed something, so this time I topped it with an Avocado Mango salsa with red onions, lime and jalapenos which is a great combination of sweet, savory and spicy.   I also let the tofu marinate overnight which allows the flavors of the marinade to be fully absorbed before cooking.  I just served this dinner to my new future daughter in law (I love saying that) and one of my sons, who I thought wouldn’t even try tofu. Much to my surprise the tofu was a big hit.  I’m just happy there is a bit left for lunch tomorrow…

Chili Lime Tofu10

The Avocado Mango Salsa is a delight of flavors and would also be great on top of grilled or roasted fish or chicken. I know you’ve heard that Avocados are nutrient dense and a healthy fat but did you know that they also act as a ‘nutrient booster’ by helping the body absorb the nutrients from foods eaten along with it?  Furthermore, Mango is so nutritionally rich it is considered the “King of Fruit”.   Lastly,  Jalapeno Peppers add more than just spice. They are high in nutrients that may help you boost weight loss efforts, improve immunity, promote heart health and fight free radicals from environmental and dietary pollutants.  This recipe calls for one jalapeno pepper without the seeds.  If you like spicy, add another jalapeno or include the seeds, but beware, the seeds are really hot.  If you don’t like spicy, don’t use the jalapeno.  So feel free to load up on this salsa.  It might be the best thing you’ve done for your body today!

TIP:  I served this tofu with brown basmati rice which I cooked in vegetable broth.  A great way to add more flavor to rice is to add 1/2 to 1 teaspoon ginger paste or a one inch piece of peeled ginger root to the broth while cooking.  Just remove the root before serving.

For other tofu recipes, check out:

Crispy Glazed Tofu and Bok Choy

Tofu and Bok Choy1

Green Curry Tofu

Thai Green Curry Tofu


Chili Lime Grilled Tofu with Avocado Mango Salsa

  • Servings: 4
  • Difficulty: easy
  • Print

Chili Lime Tofu15
TOFU:
1 (14 ounce) package extra firm tofu
1/4 cup lime juice
1 tablespoon olive oil
5 tablespoons chopped fresh cilantro
2 cloves garlic, minced
2 teaspoons chili powder
1/4 teaspoon cayenne pepper
salt and black pepper to taste

SALSA:
1 avocado, diced
1/2 cup mango, diced
1/4 cup red onion, minced
1 jalapeno, seeded and minced (optional)
1 Tbsn lime juice (or more to taste)
1 Tbsn cilantro, chopped
1-2 Tbsn olive or avocado oil
1/2 tsp salt (optional)
Chili Lime Tofu17

  • Slice the tofu in 1/2 inch slices and place on double papertowels.  You can leave them rectangular or cut into triangle shapes.

Chili Lime Tofu16

  • Cover with papertowels and put a heavy pan on top to help press out excess water. Should take 20 to 30 minutes.  Don’t skip this step or the tofu won’t absorb the marinade.

Chili Lime Tofu12

  • Combine all other ingredients and marinate tofu in the refrigerator several hours or overnight.

Chili Lime Tofu3

  • To make the salsa, slice the mango about a third of the way (avoiding the rather large pit inside).

Chili Lime Tofu4

  • Using a sharp knife, cut rows horizontally through the flesh but not all the way through the skin.

Chili Lime Tofu5

  • Turn mango and cut crosswise

Chili Lime tofu6

  • Flip the mango slice inside out and slice off chunks.  Place in a bowl.

Chili Lime Tofu7

  • Cut avocado in half, pit and dice.  Place into bowl with mango.

Chili Lime Tofu8

  • Using gloves or a papertowel to protect your hands from the pepper oils, seed and mince the jalapeno.  Add to mango mixture.

Chili Lime Tofu2

  • Chop red onion and add to bowl.

Chili Lime Tofu9

  • Add chopped cilantro, lime juice and salt.  Gently combine and set aside.

Chili Lime Tofu10

  • Brush or spray oil on the grill and let it preheat.  Grill tofu several minutes until you see nice grill marks.  Turn and grill the other side.  Remove to a serving platter or individual plates.

Chili Lime Tofu14

  • Top with salsa mixture.

Chili Lime Tofu13

  • Serve with rice or some other grain for a well rounded meal.


  • Wheatless Wednesday – Grilled Corn on the Cob with Herb Butter

    0

    Grilled Corn3

    Nothing says summer like fresh sweet corn.  Add herbs, spices and butter, then grill corn right in it’s own husk for a delicious treat!  Corn is an interesting crop in that it is considered both a vegetable (when you eat it as corn) or a grain (when it is popped as popcorn) so it deserves props for diversity as well as providing nutrition and lots of much needed fiber.  Corn is flavorful on its own, especially while it is in the peak of its season.  This is the time of year when it has the best flavor, is the least expensive and locally grown varieties are widely available. Since much of the corn produced today is genetically modified (GMO), purchase organically grown corn to avoid GMO corn. If you want to know what is wrong with GMO foods, click here.

    Grilled Corn7

    Grilling corn is easy and fun.  You can just throw them whole on the grill or you can season them first with a yummy herb butter.  Pull the husks down, without removing them from the cob, and remove the silky threads.  Then soak the cobs in cold water to keep the husks from completely burning and to provide enough moisture for the corn to steam.  Without the soaking, the corn will be chewier but still tasty.  Then liberally spread the corn kernels with butter, herbs and spices and close the husks back up.  Tying the husks closed is optional.  If you like charring, then leave the husks slightly open.  Grill for 15 minutes or so, turning every 5 minutes until all sides are charred.  Pull back the husks and enjoy!

    Grilled Corn on the Cob

    • Servings: 8
    • Difficulty: easy
    • Print

    8 ears fresh corn on the cob (unshucked)
    2 sticks butter, softened
    4 cloves garlic, minced
    1/2 cup fresh herbs (cilantro, basil, oregano or parsley), chopped
    1 tsp creole seasoning (or 1 tsp salt plus a dash of chili powder)
    1/4 tsp cayenne (optional)

    Grilled Corn10

    • Pull the outer husks down the ear to the base. Strip away the silk from each ear of corn by hand. Fold husks back into place, and place the ears of corn in a large container of cold water (or kitchen sink filled with cold water) for 20 minutes to an hour.  This step provides extra moisture to steam the corn and keep the husks from completely burning.
    • Combine butter, garlic, herbs and spices in a small bowl. Set Aside.

    grilled corn11

    •  Remove corn from water and shake off excess.  Pull husks back down and spread corn kernels liberally with herb butter.
    • Pull husks back into place and tie closed with a string (optional).

    Grilled Corn8

    • If you don’t have string you can tie with a long piece of husk or just grill without tying.

    Grilled Corn6

    • Place the corn on the grill, close the cover and grill for 15 to 20 minutes, turning every 5 minutes.

    Grilled Corn5

    • Remove the husks and eat on the cob or remove the kernels. Serve with any remaining herb butter.

    Grilled Corn6


    Feta, Chili & Lemon Dip

    0

    Feta Dip1

    How about an app to go with that TGIF cocktail?  (And, I’m not talking about an app for your iPhone).  If you’re inviting friends over this weekend, here is a very simple dip that takes less than 5 minutes and just involves throwing all the ingredients into a food processor.  Voila!  Add crackers or veggies and you’ve got a great appetizer.  I found this recipe on Simply Delicious.  It’s easy, quick and very tasty!  The combination of zesty feta cheese with garlic, hot red chili peppers, lemon and fresh mint leaves is surprisingly delicious.  I used one chili pepper with the seeds and it was pretty spicy, so you can lessen the heat by not including the seeds and increase the heat by adding a second chili pepper. You can also add more olive oil if you want a thinner dip for dipping rather than spreading. Happy Friday!

    Feta Dip10

    Feta, Chili and Lemon Dip

    • Servings: 6-8
    • Difficulty: easy
    • Print

     •6 oz feta cheese
    •1 garlic clove, peeled
    •zest and juice from 1 lemon
    •1-2 red chilies, roughly chopped
    •1/4 cup fresh mint leaves
    •pepper to taste
    •½ cup extra virgin olive oil

    Feta Dip9

    • Put garlic, lemon zest chilies and mint in a food processor and blend until finely minced.

    Feta Dip8

    •  Add the feta to the food processor and blend until everything is combined.

    Feta Dip7

    •  With the motor running, pour in the olive oil and blend until the dip is smooth and the desired consistency.

    Feta Dip6

    •  Transfer the dip to a serving bowl and serve.  Garnish with mint. Drizzle with more olive oil if desired.

    Feta Dip3


    Wheatless Wednesday – Grilled Avocado Caprese Salad

    2


    Grilled Avocado Caprese Salad10

    Insalata Caprese, the ubiquitous tomato, mozzarella, and basil salad, is one of the most popular dishes in summer when tomatoes are in season and so, so good.  It also happens to be one of my favorites and a great way to use up extra tomatoes.  I sometimes include avocado to increase the nutritional value and make it a bit more filling as a main dish.  I must admit that I am on quite a grilling kick this summer which has taken an interesting turn since I am no longer just throwing steaks and burgers on the grill.  I have had to get more creative with ingredients and have started grilling fruits and vegetables that I would not have considered in the past,  including recent dishes,  Grilled Nectarines and Summer Squash with Balsamic Glaze and Grilled Artichoke Mixed Veggie Platter.

    Grilled Vegetables1

    Grilled Nectarines and Summer Squash with Balsamic Glaze

    Grilled Veggies1

    Grilled Artichoke Mixed Veggie Platter.

    So when it came to making my first Caprese Salad of the summer, I decided to give it a twist by using the tiny sized mozzarella ‘Pearls’ and cherry tomatoes to top a grilled avocado.  Grilling the avocado gives it a wonderfully warm and creamy, slightly smoky flavor. In addition to being delicious, avocado is a great addition to any diet for health and weight loss.  “According to a study by the Haas Avocado Board, adding avocado to a lunch meal caused a 23-percent increase in satisfaction and a 28-percent decreased desire to eat over the next five hours after eating, compared with the avocado-free lunch. And, over a three-hour period, adding avocado to lunch meant a 26-percent increase in satisfaction and 40-percent decreased desire to eat later on.  Half an avocado has about 112 calories and 6 grams of fiber. Avocados are filled with heart-healthy fats, protein, potassium, and vitamins (such as B6, C, K, and B)” (Glamour.com)  So next time you have the grill going, throw on a couple of avocados.  You’ll like it!

    Grilled Avocado Caprese Salad5

    Grilled Avocado Caprese Salad

    • Servings: 2
    • Difficulty: easy
    • Print

    1 ripe but firm avocado
    2 Tbsn olive oil
    1 tsp lemon juice
    1/2 cup ciliglene, tiny fresh mozzarella balls (or larger mozzarella ball, diced)
    1/2 cup cherry tomatoes, sliced in half
    1/4 cup fresh basil, sliced crosswise into strips (chiffonade)
    1 Tbsn balsamic vinegar
    salt and pepper to taste

    Grilled Avocado Caprese Salad

    • Using a sharp knife, slice avocado in half lengthwise.  To remove the pit easily, strike the pit with the sharp blade and twist slightly.  The pit should pop right out.

    Grilled Avocado Caprese Salad3

    • Brush the cut sides of the avocado with olive oil, lemon juice and season with salt and pepper.  Place cut side down on a hot grill and grill for about 5 minutes, or until you see nice grill marks.  You can place the avocados on the grill perpendicular or horizontal, depending on how you want the grill marks to look.


    Grilled Avocado Caprese Salad12

    • Or you can get fancy and grill diagonally

    .Grilled Avocado Caprese Salad11

    • Get crisscross grill marks by turning the avocado 90 degrees half way through.

    Grilled Avocado Caprese Salad13

    • Remove avocados from heat and let cool slightly.

    Grilled Avocado Caprese Salad8

    • Place each avocado half on a plate and fill with tomatoes, mozzarella and basil, divided between the two.
    • Drizzle with olive oil and balsamic vinegar

    Grilled Avocado Caprese Salad7

    Grilled Avocado Photo Credits:

    1) Horizontal- http://www.foodandstyle.com

    2) Diagonal- http://www.glamour.com/health-fitness

    3) Criss-Cross- http://www.grillinfools.com

    Meatless Monday – Eggplant Parm Minis

    7

    Eggplant Parm5

    “I enjoy cooking with wine and sometimes I put it in the food.” – Julia Child.

    I’m not sure Julia Child would have appreciated Good Mother Diet as she was quite the meat lover and on her cooking show she was always throwing raw meat around or making raw chickens dance, but I can like her anyway as she was ground breaking in her approach to cooking.  She had a no nonsense approach in the kitchen and a great sense of humor.  In response to critics who thought she used too much butter,  she said “We should enjoy food and have fun. It is one of the simplest and nicest pleasures in life.”  I can certainly agree with her on that!

    Eggplant Parm1

    Eggplant is considered one of the worlds healthiest foods and it has a meaty texture that makes it a good substitute for meat.  Globe eggplants, in particular, are best if they are salted and drained (known as “degorging”) before cooking, to soften them and to reduce the amount of fat absorbed during cooking.  Raw eggplant can absorb an incredible amount of oil which adds unnecessary calories and fat.  Eggplant is naturally low fat and low carb.   Salting also removes any bitterness from the eggplant.

    Eggplant Parm16

    I spotted this eggplant recipe on Kalyns Kitchen and loved the simplicity.  It is inspired by Julia’s original recipe for what she calls Eggplant Pizza in her cookbook,  From Julia Child’s Kitchen.  Rather than making a traditional Eggplant Parmesan where the eggplant is breaded and fried before baking with layers of sauce and cheese, this version is grain free and brushed with olive oil and herbs before baking.  Slicing the eggplant into thick circles and making individual portions makes it very easy to serve.  I made this dish for a potluck where we needed to serve a lot of people, so I doubled the recipe. Needless to say, I came home with an empty platter!  I love a homemade sauce (and not just because it makes my kitchen smell divine) but you can skip that step and use any sauce you like from a jar as a shortcut.  I loved this recipe, which is not fussy but really delicious, and I will definitely make it again. Next time I’m hoping for leftovers!   Thanks Julia!

    Julia-Child-Quotes

    Photo Credit:  http://www.werecommend.com

    Eggplant Parm Minis

    • Servings: 4
    • Difficulty: easy
    • Print

    1 globe eggplant
    1 T salt
    2 T olive oil
    2 tsp. dried Italian seasoning
    10 large basil leaves, cut in chiffonade strips
    1/2 cup freshly Parmesan
    1/2 cup grated mozzarella
    red pepper flakes(optional)

    Sauce:
    1 Tbsn extra-virgin olive oil
    3-4 large garlic cloves, chopped
    1 can (14.5 oz.) diced tomatoes with liquid (or 2 cups peeled and diced fresh tomatoes)
    1/4 tsp. dried oregano (or1 Tbsn fresh oregano, minced)
    1 Tbsn fresh basil, minced
    salt and pepper to taste

    • Slice eggplant into 3/4 inch thick slices (trying to make them the same thickness to insure even cooking.) Put the eggplant pieces on a double layer of paper towels and sprinkle both sides generously with salt. Let the eggplant sit with the salt on it for 20- 30 minutes to draw out the liquid.

    Eggplant Parm2

    • While the eggplant sits, make the sauce. Saute the garlic in olive oil until it becomes fragrant.  Add the tomatoes with the juice, oregano and basil and let it cook at a low simmer until it’s thickened.  You can break up the tomatoes with a fork as it softens to make the mixture more sauce like.

    Eggplant Parm11

    • After 20- 30 minutes, the eggplant slices should be dotted with drops of water and the paper towels wet.  Wipe the slices  dry with paper towels, which also removes most of the salt.

    Eggplant Parm8

    •  Coat the bottom of a baking pan with olive oil and arrange the eggplant slices in a single layer. Brush the tops of the eggplant with olive oil, and sprinkle with oregano, salt and pepper.

    Eggplant Parm12

    • Roast the eggplant about 25 minutes in a 375 degree oven.

    Eggplant Parm6

    • Thinly slice the fresh basil into chiffonade strips.  This is easily done by stacking the leaves and slicing into thin strips.

    Eggplant Parm10

    •  Combine Parmesan and mozzarella. After 25 minutes remove eggplant from the oven. Spread a few tablespoons of sauce on the top of each eggplant slice.

    Eggplant Parm13

    • Place several slices of basil on each slice.

    Eggplant Parm14

    • Top with a generous amount of cheese and sprinkle with red pepper flakes, if using.

    Eggplant Parm15

    • Turn oven to broil and cook until cheese melts and is slightly browned.

    Eggplant Parm18

    • Remove from oven and sprinkle with more fresh basil, if desired

    Eggplant Parm5


    Tgif – Fun With Fruit!

    0

    grid-cell-8473-1372698485-33

    With fruit at it’s peak right now and plentiful, don’t be afraid to be creative.  Check out this collection of 16 Ideas For Amazing Fruit Salads from BuzzFeed which includes this charming fruit salad using a hollowed out citrus bowl and a wonderful watermelon grid salad.  Don’t miss the Pineapple Palm Tree Buffet.  It could be just what your next summer party needs…

    Happy Friday!


    Photo Credit:  charmingtrinity.com