Wheatless Wednesday – Santa Rosa Plum Crisp

5

Plum Crisp8

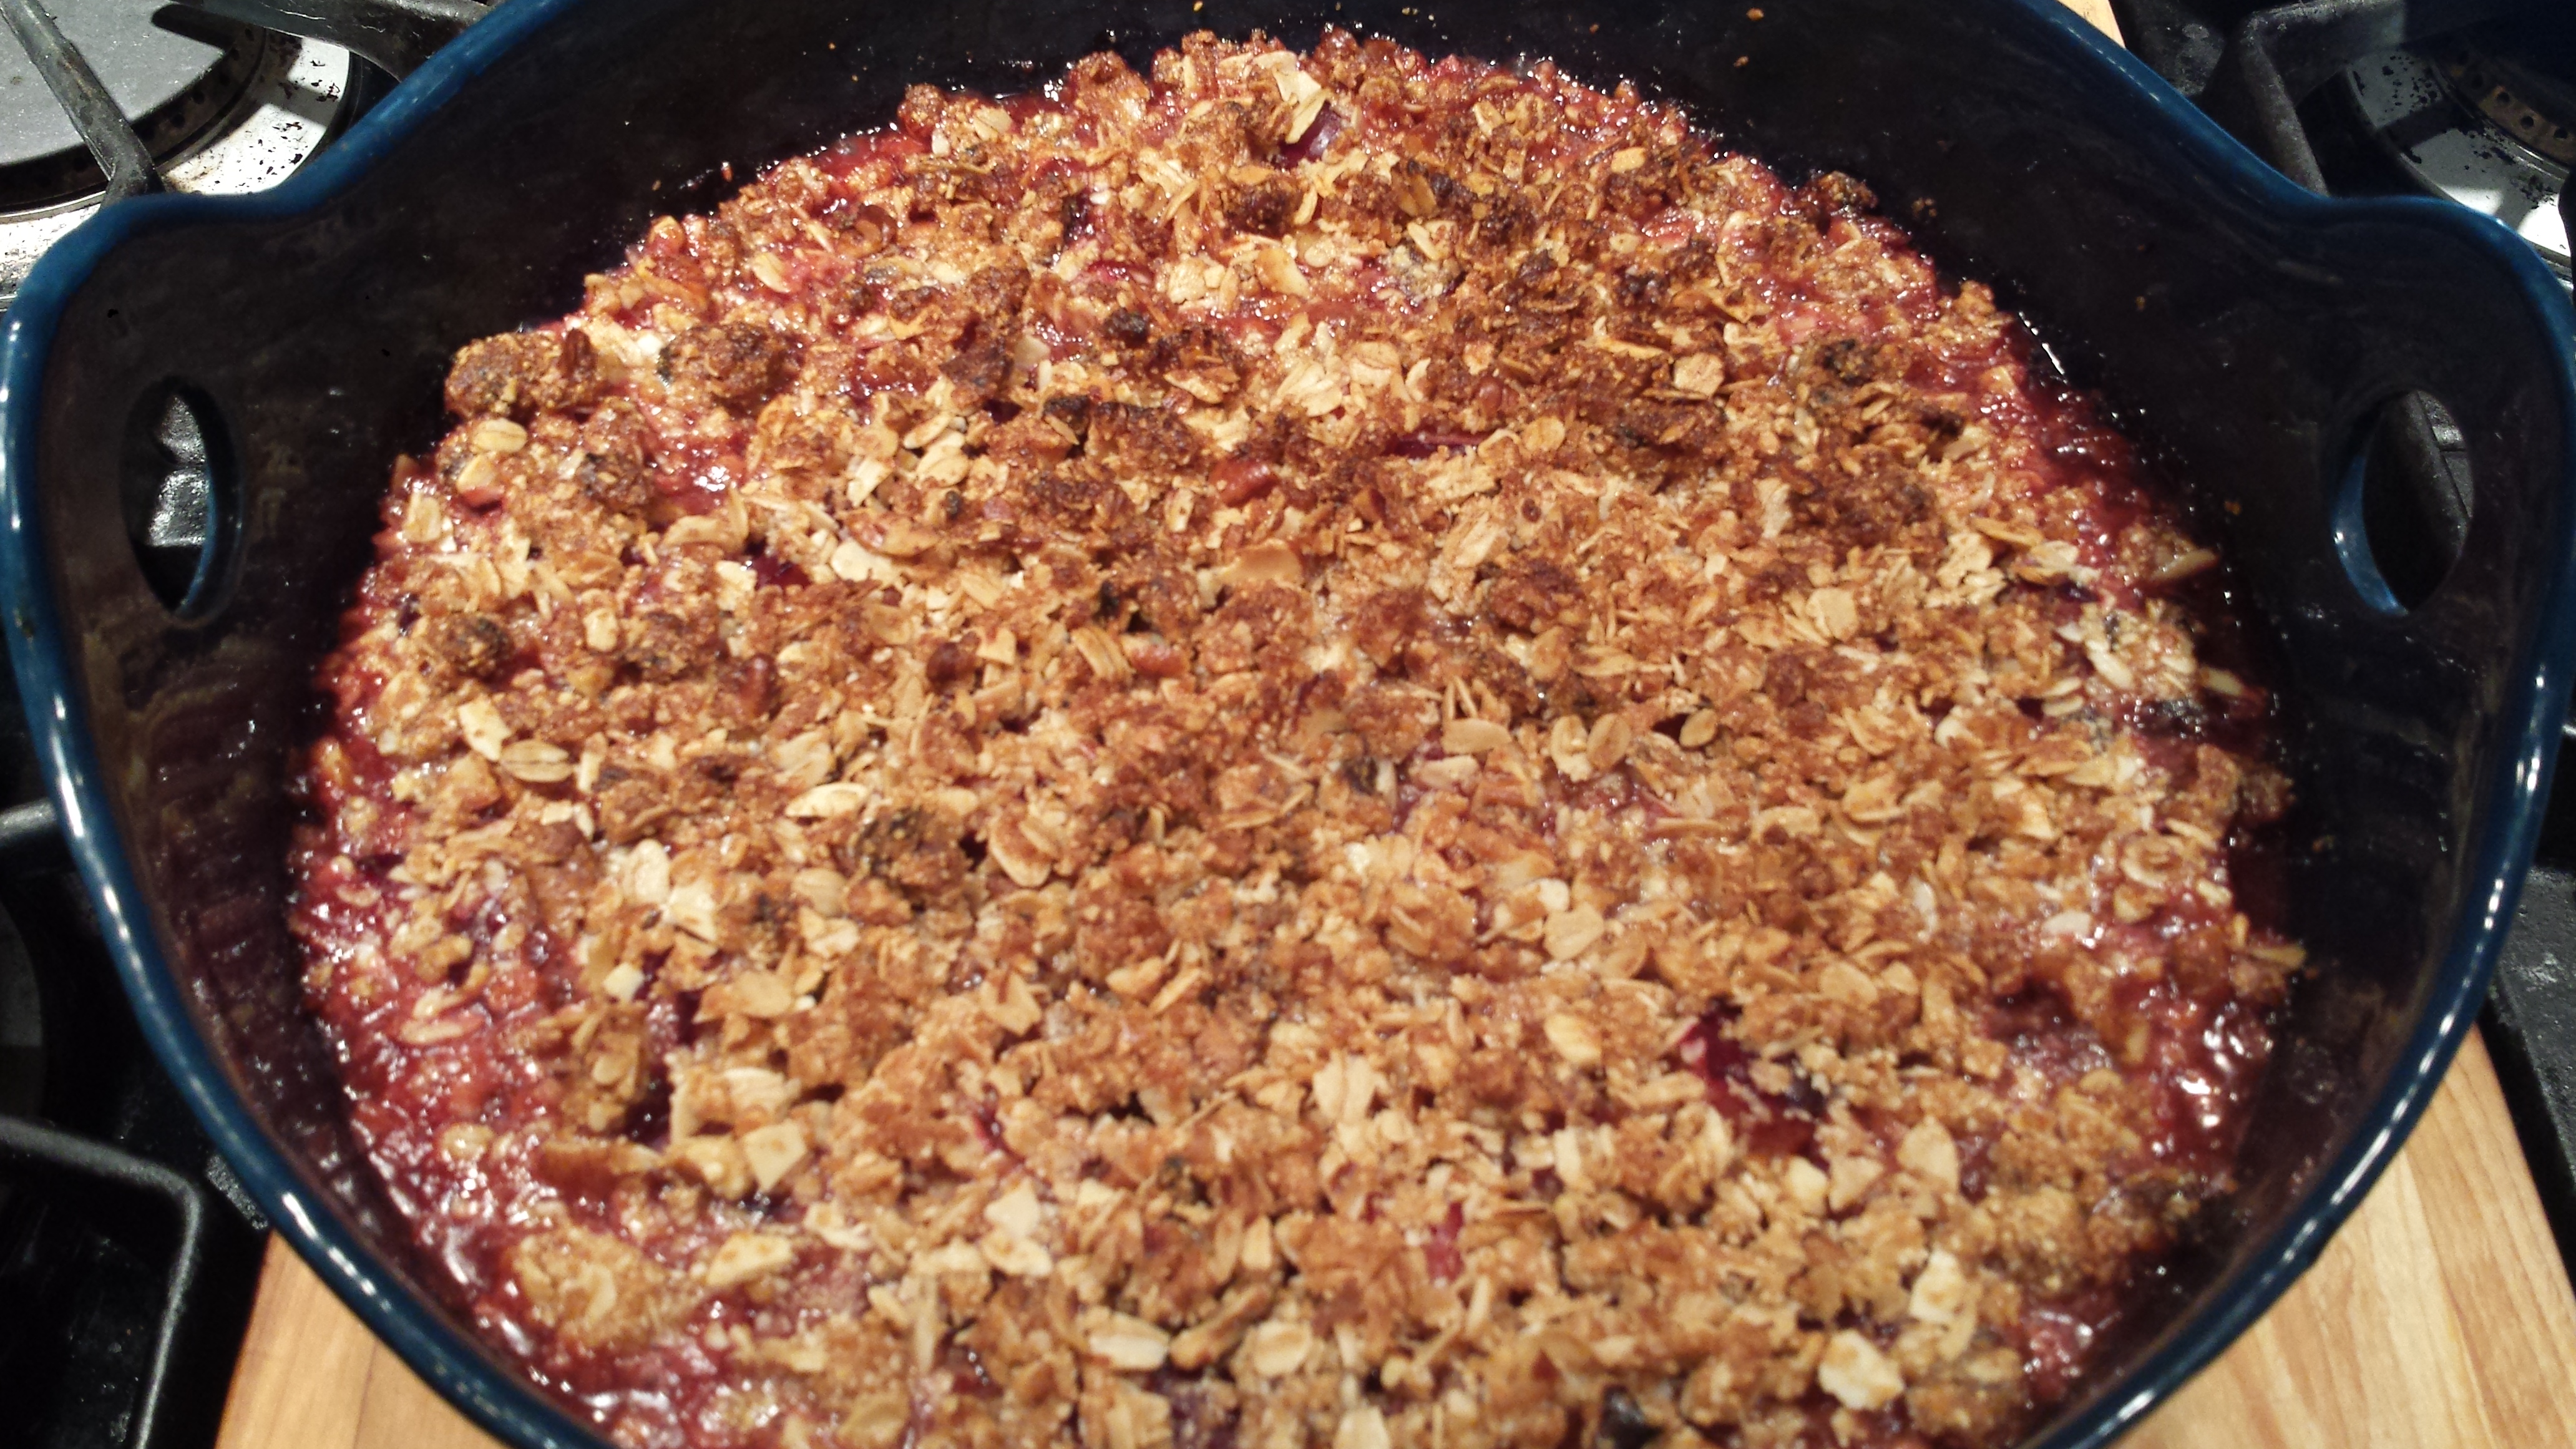
Looking for a simple 4th of July or summer dessert?  How about an easy Stone Fruit Crisp? Plums are in season right now as are other stone fruits like peaches, cherries and nectarines. Crisps are very forgiving to make as there is little that can go wrong, no crust to make or fruit to arrange. Just cut up your favorite fruit, sprinkle it with a yummy topping and bake. The beauty of this dessert is it’s simplicity.  This recipe is easily made vegan and gluten free and for a dessert, it’s pretty nutritious.  The oats and almond flour combined with the fruit and dates are loaded with vitamins and minerals ( and fiber, of course).   As an added bonus, your kitchen will smell divine!

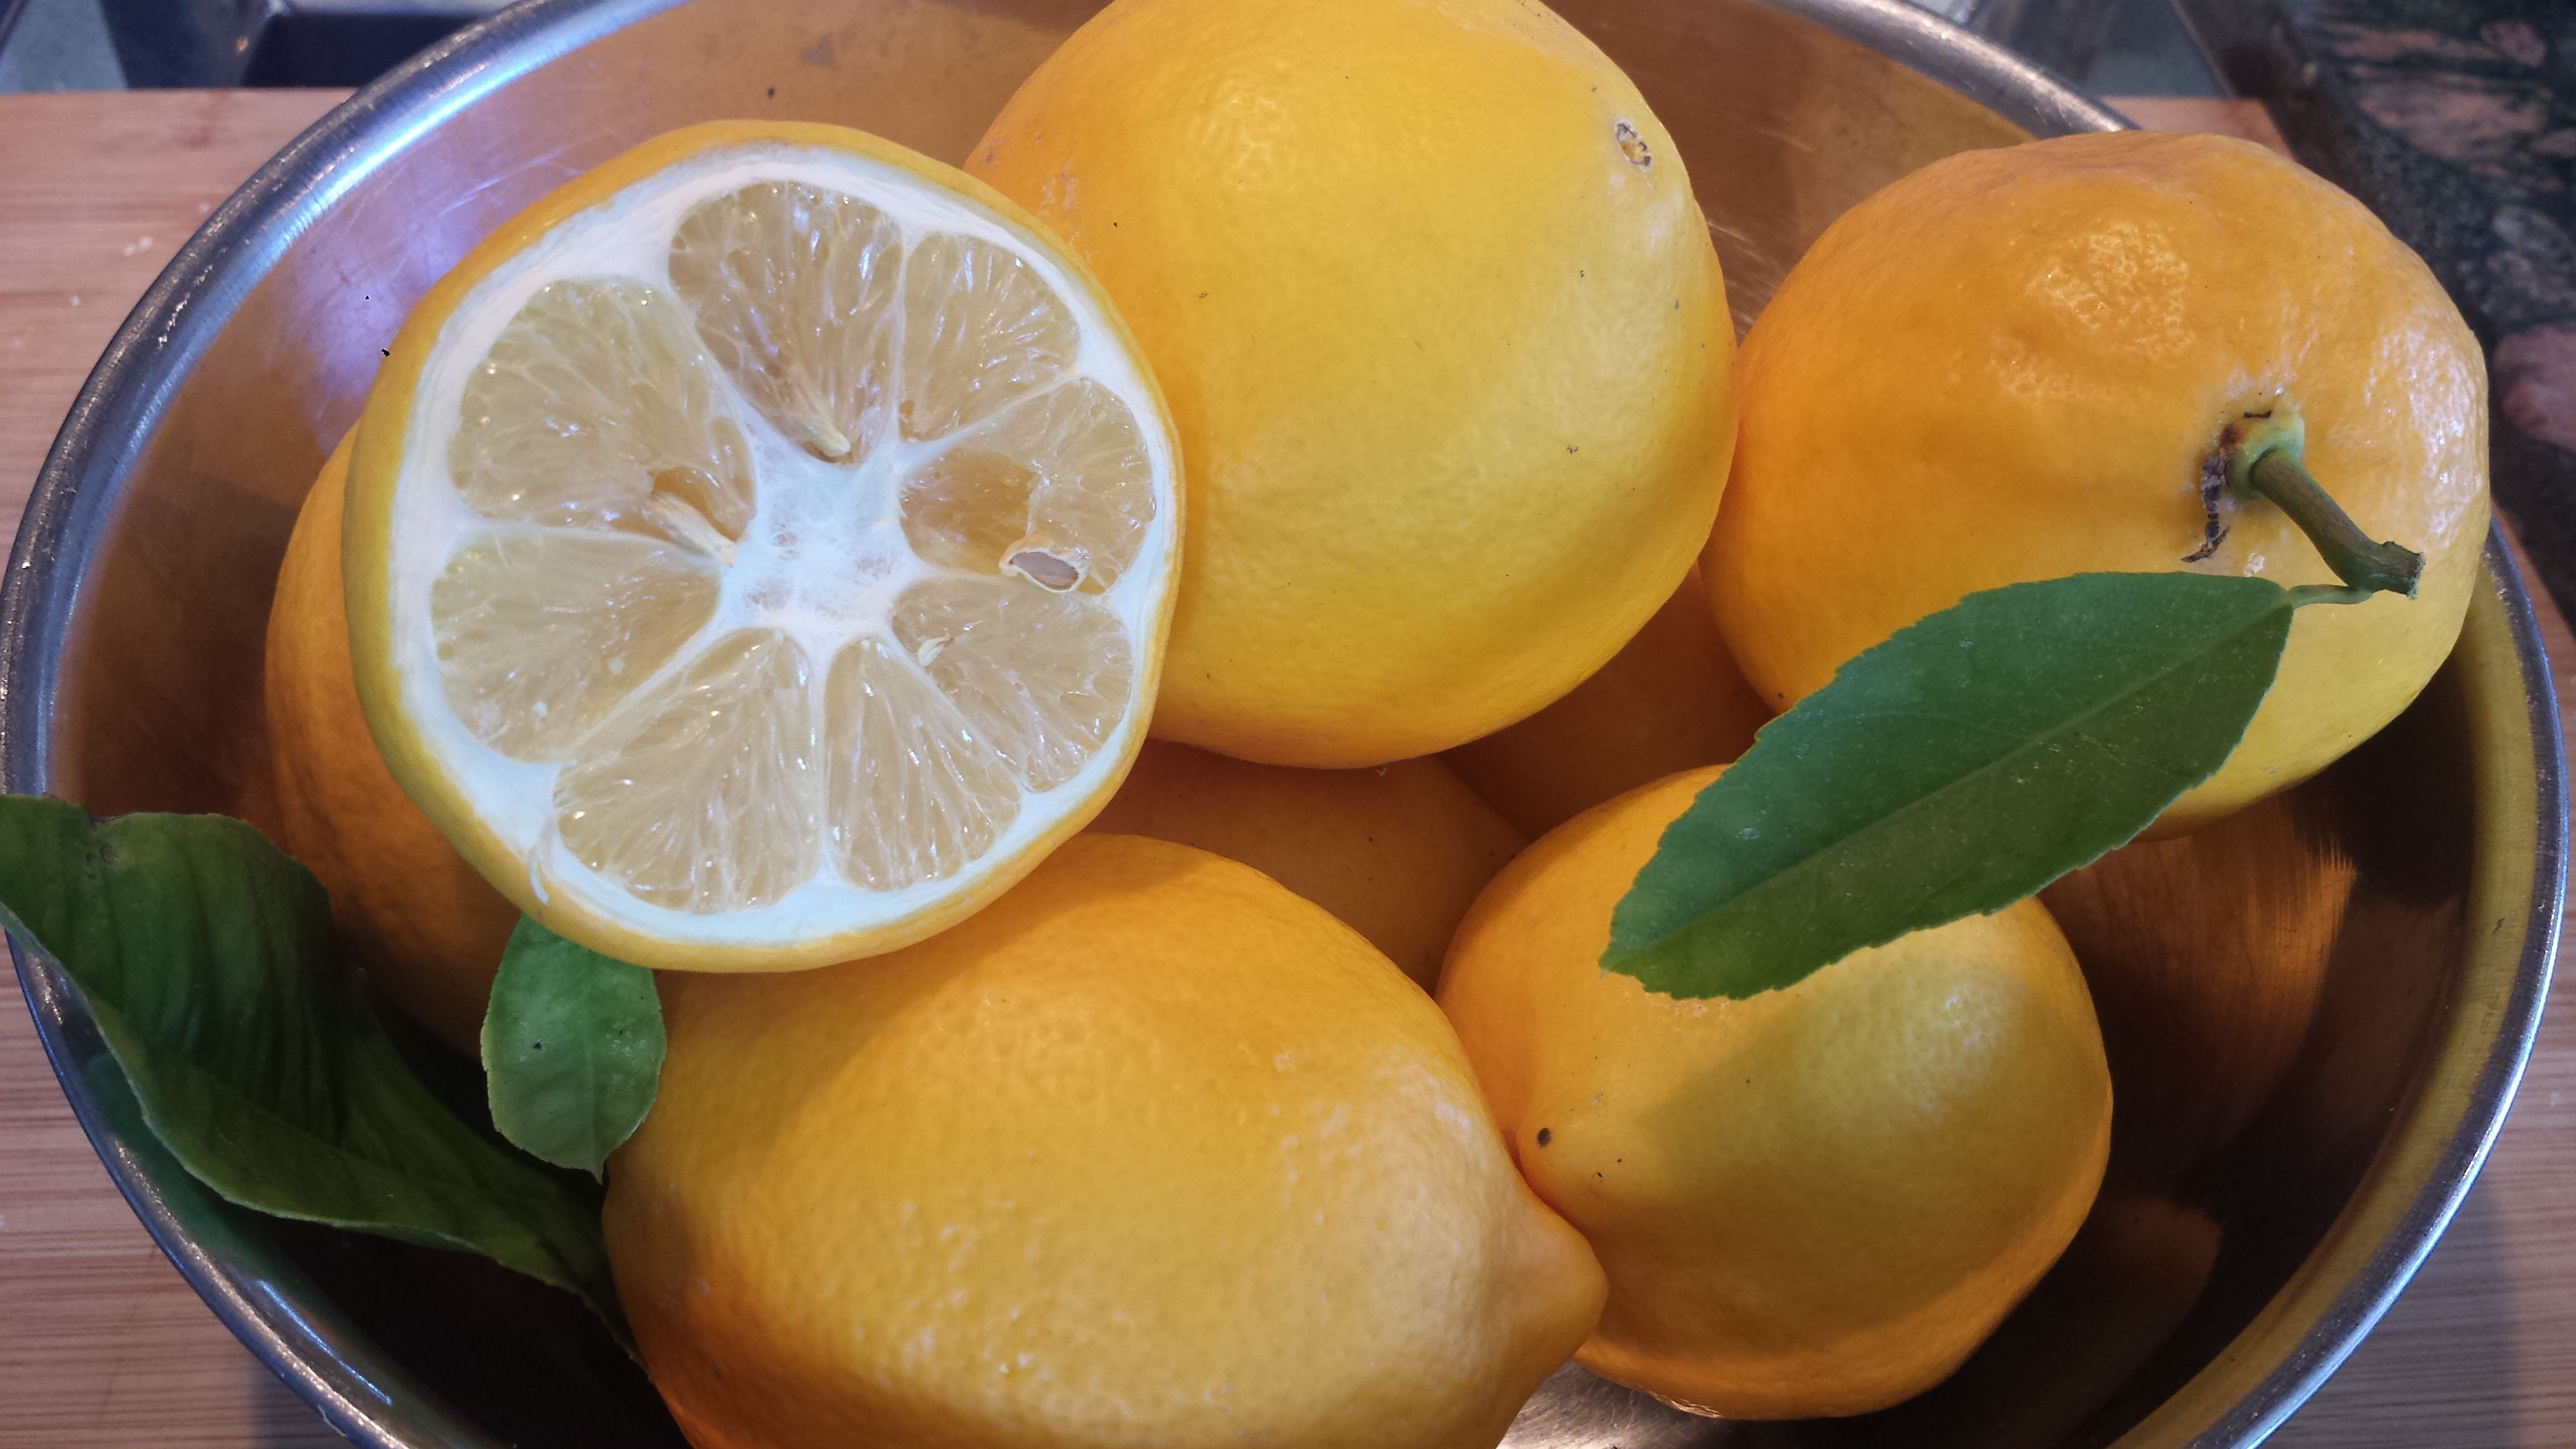
I have a wonderfully prolific Santa Rosa plum tree in my garden in California.  Usually I make plum jam which I put on toast or in my yogurt for the rest of the year.  This spring in California has been so dry and warm that my plums were ripe and falling off my tree almost before I realized I was losing my crop.  So right before my summer move to Maine, I gathered everything I could reach and decided to take them with me since I didn’t have time to do anything with them in California.  I ‘smuggled’ the plums and some Meyer lemons, also from my garden, to Maine in my suitcase which I checked. I didn’t dare carry it on, since one of my friends once took home some of my lemons in her carry-on and security thought they were hand grenades. (Well they are rather large lemons!)   I decided it was not worth the risk of possibly having to dump them so packed them in with my shoes and extra clothes and hoped for the best.

Preserved Lemons2

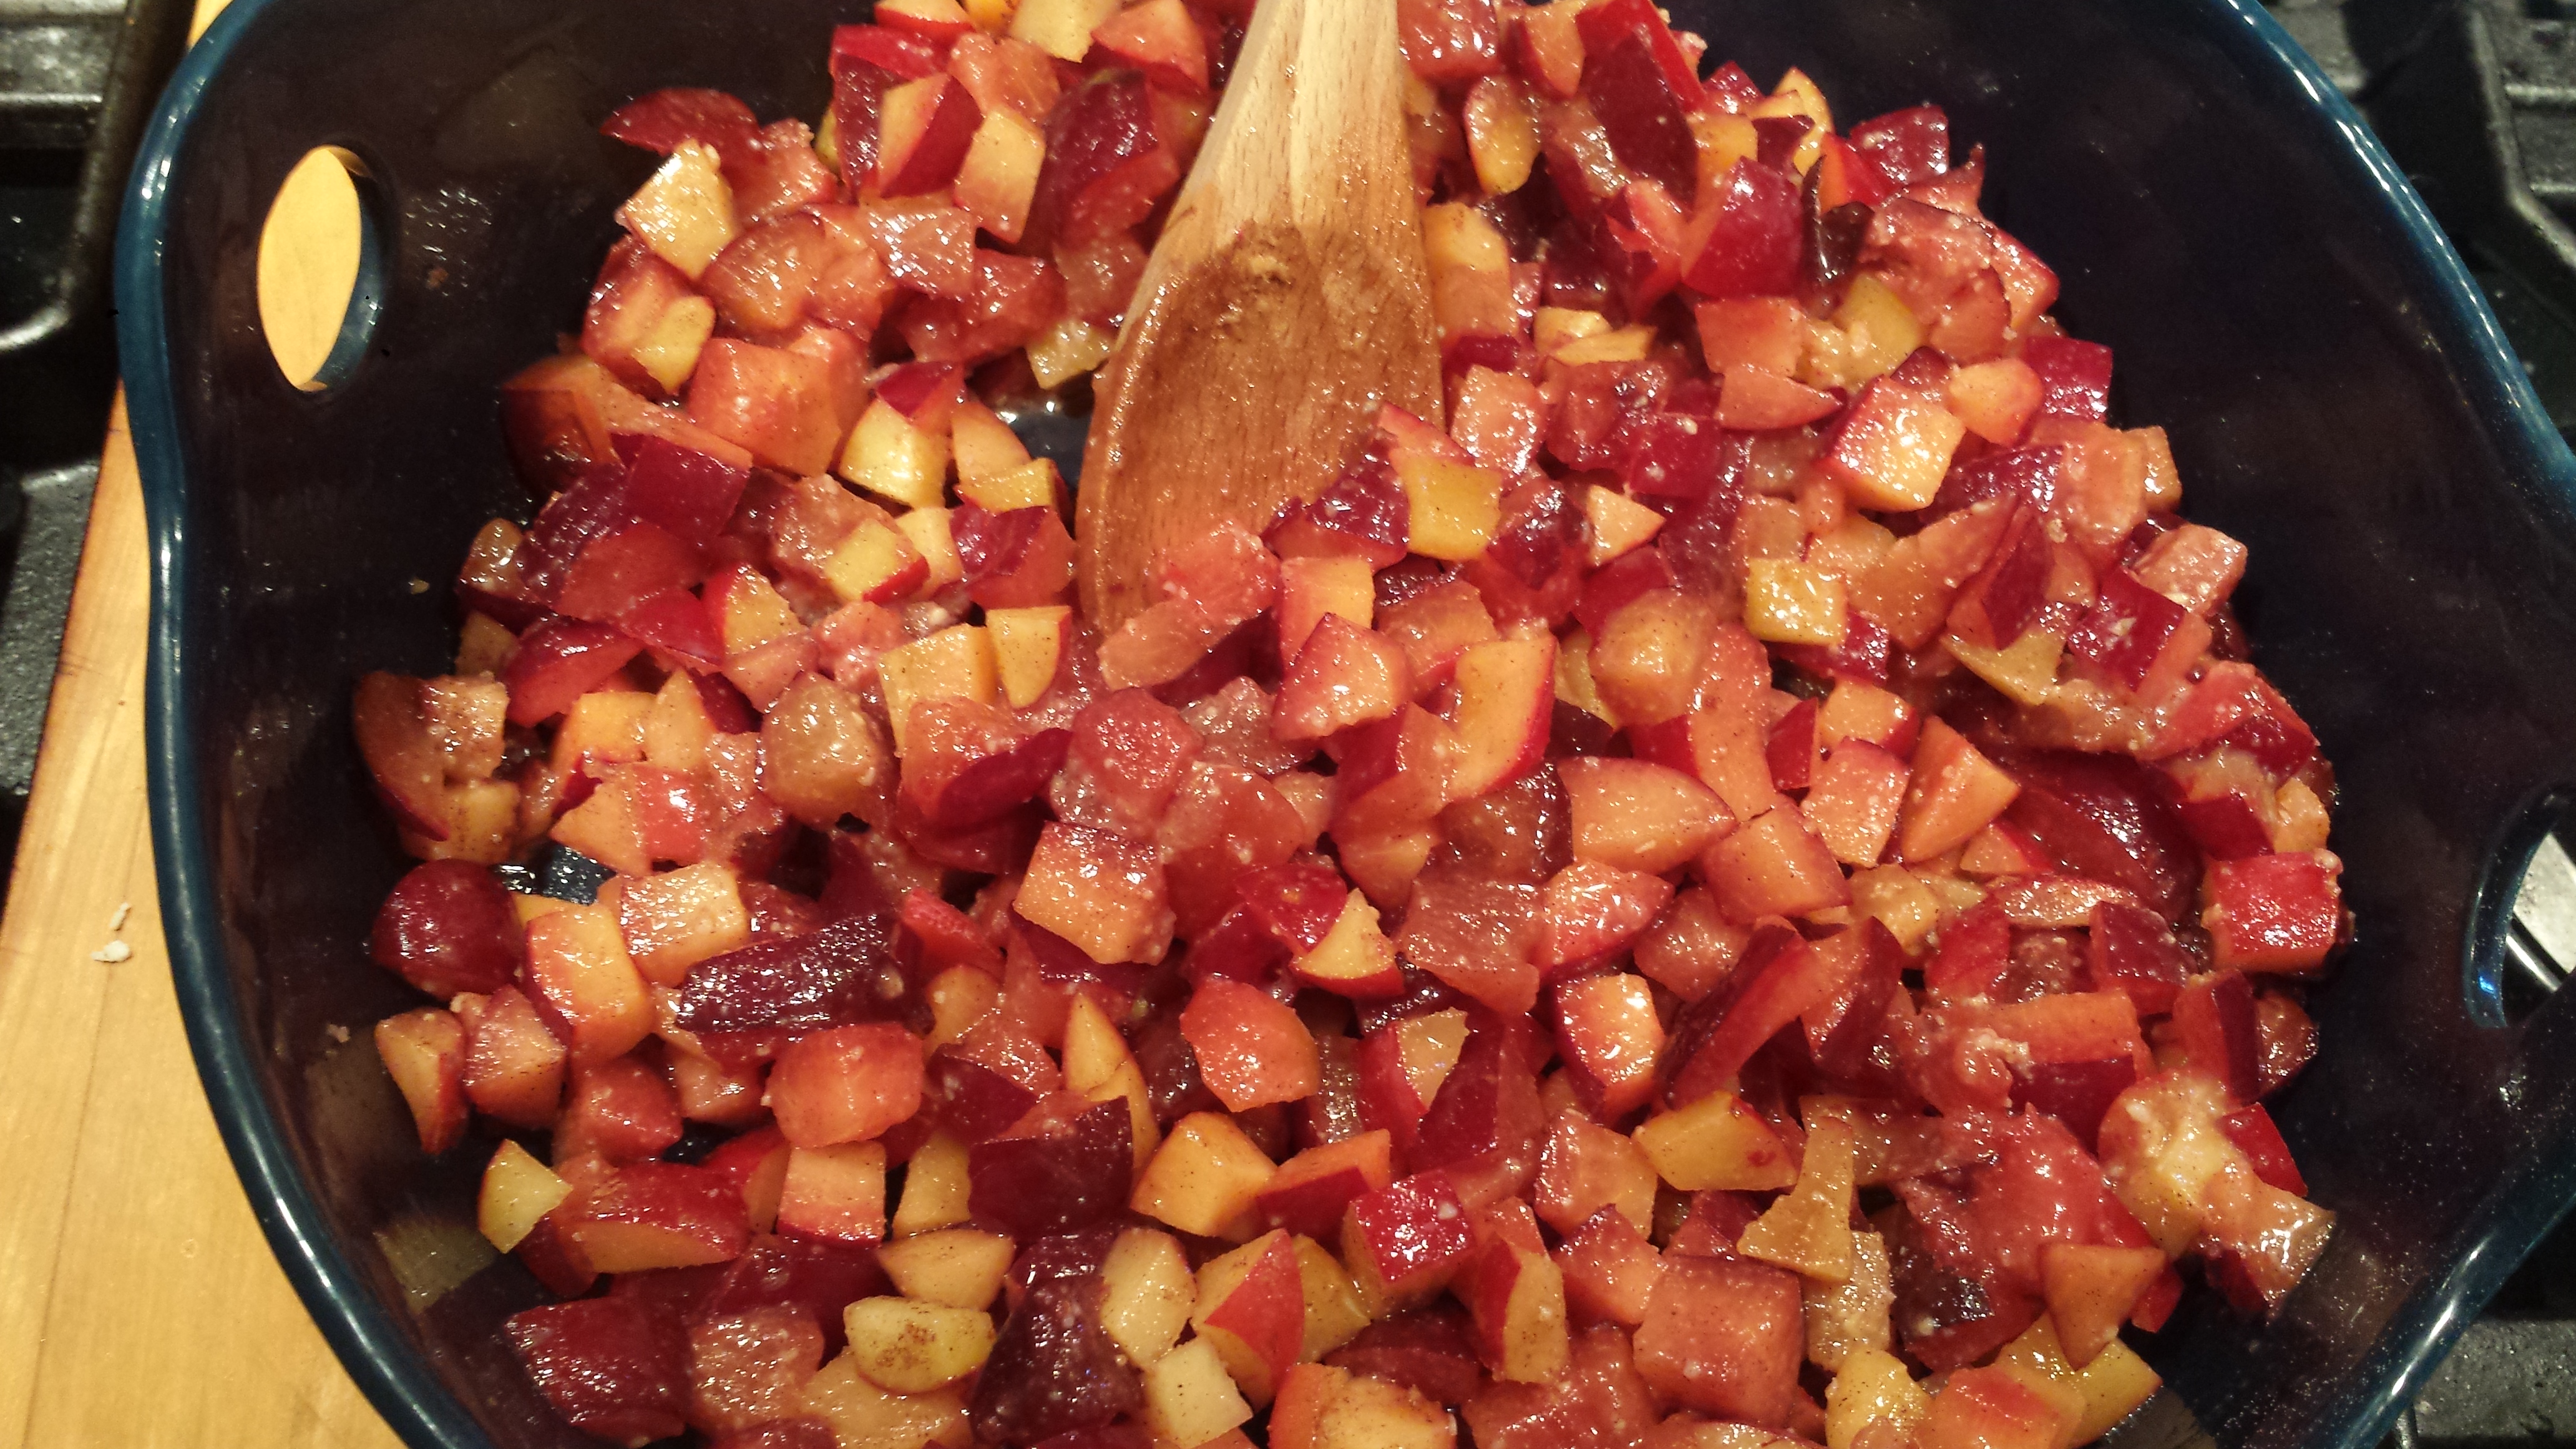
The lemons made the trip very well but a few of the plums got a bit bruised on their journey and are no longer quite as perfect for eating, so I decided to make a plum crisp.  Since I have yet to do a complete restocking of my pantry, I had to make do with what I had on hand, even tearing open individual sugar packets to toss with the plums (after which, of course, I found the tin of sugar hiding up on the top shelf).  Like I said, this is a very forgiving dessert…

Plum Crisp1

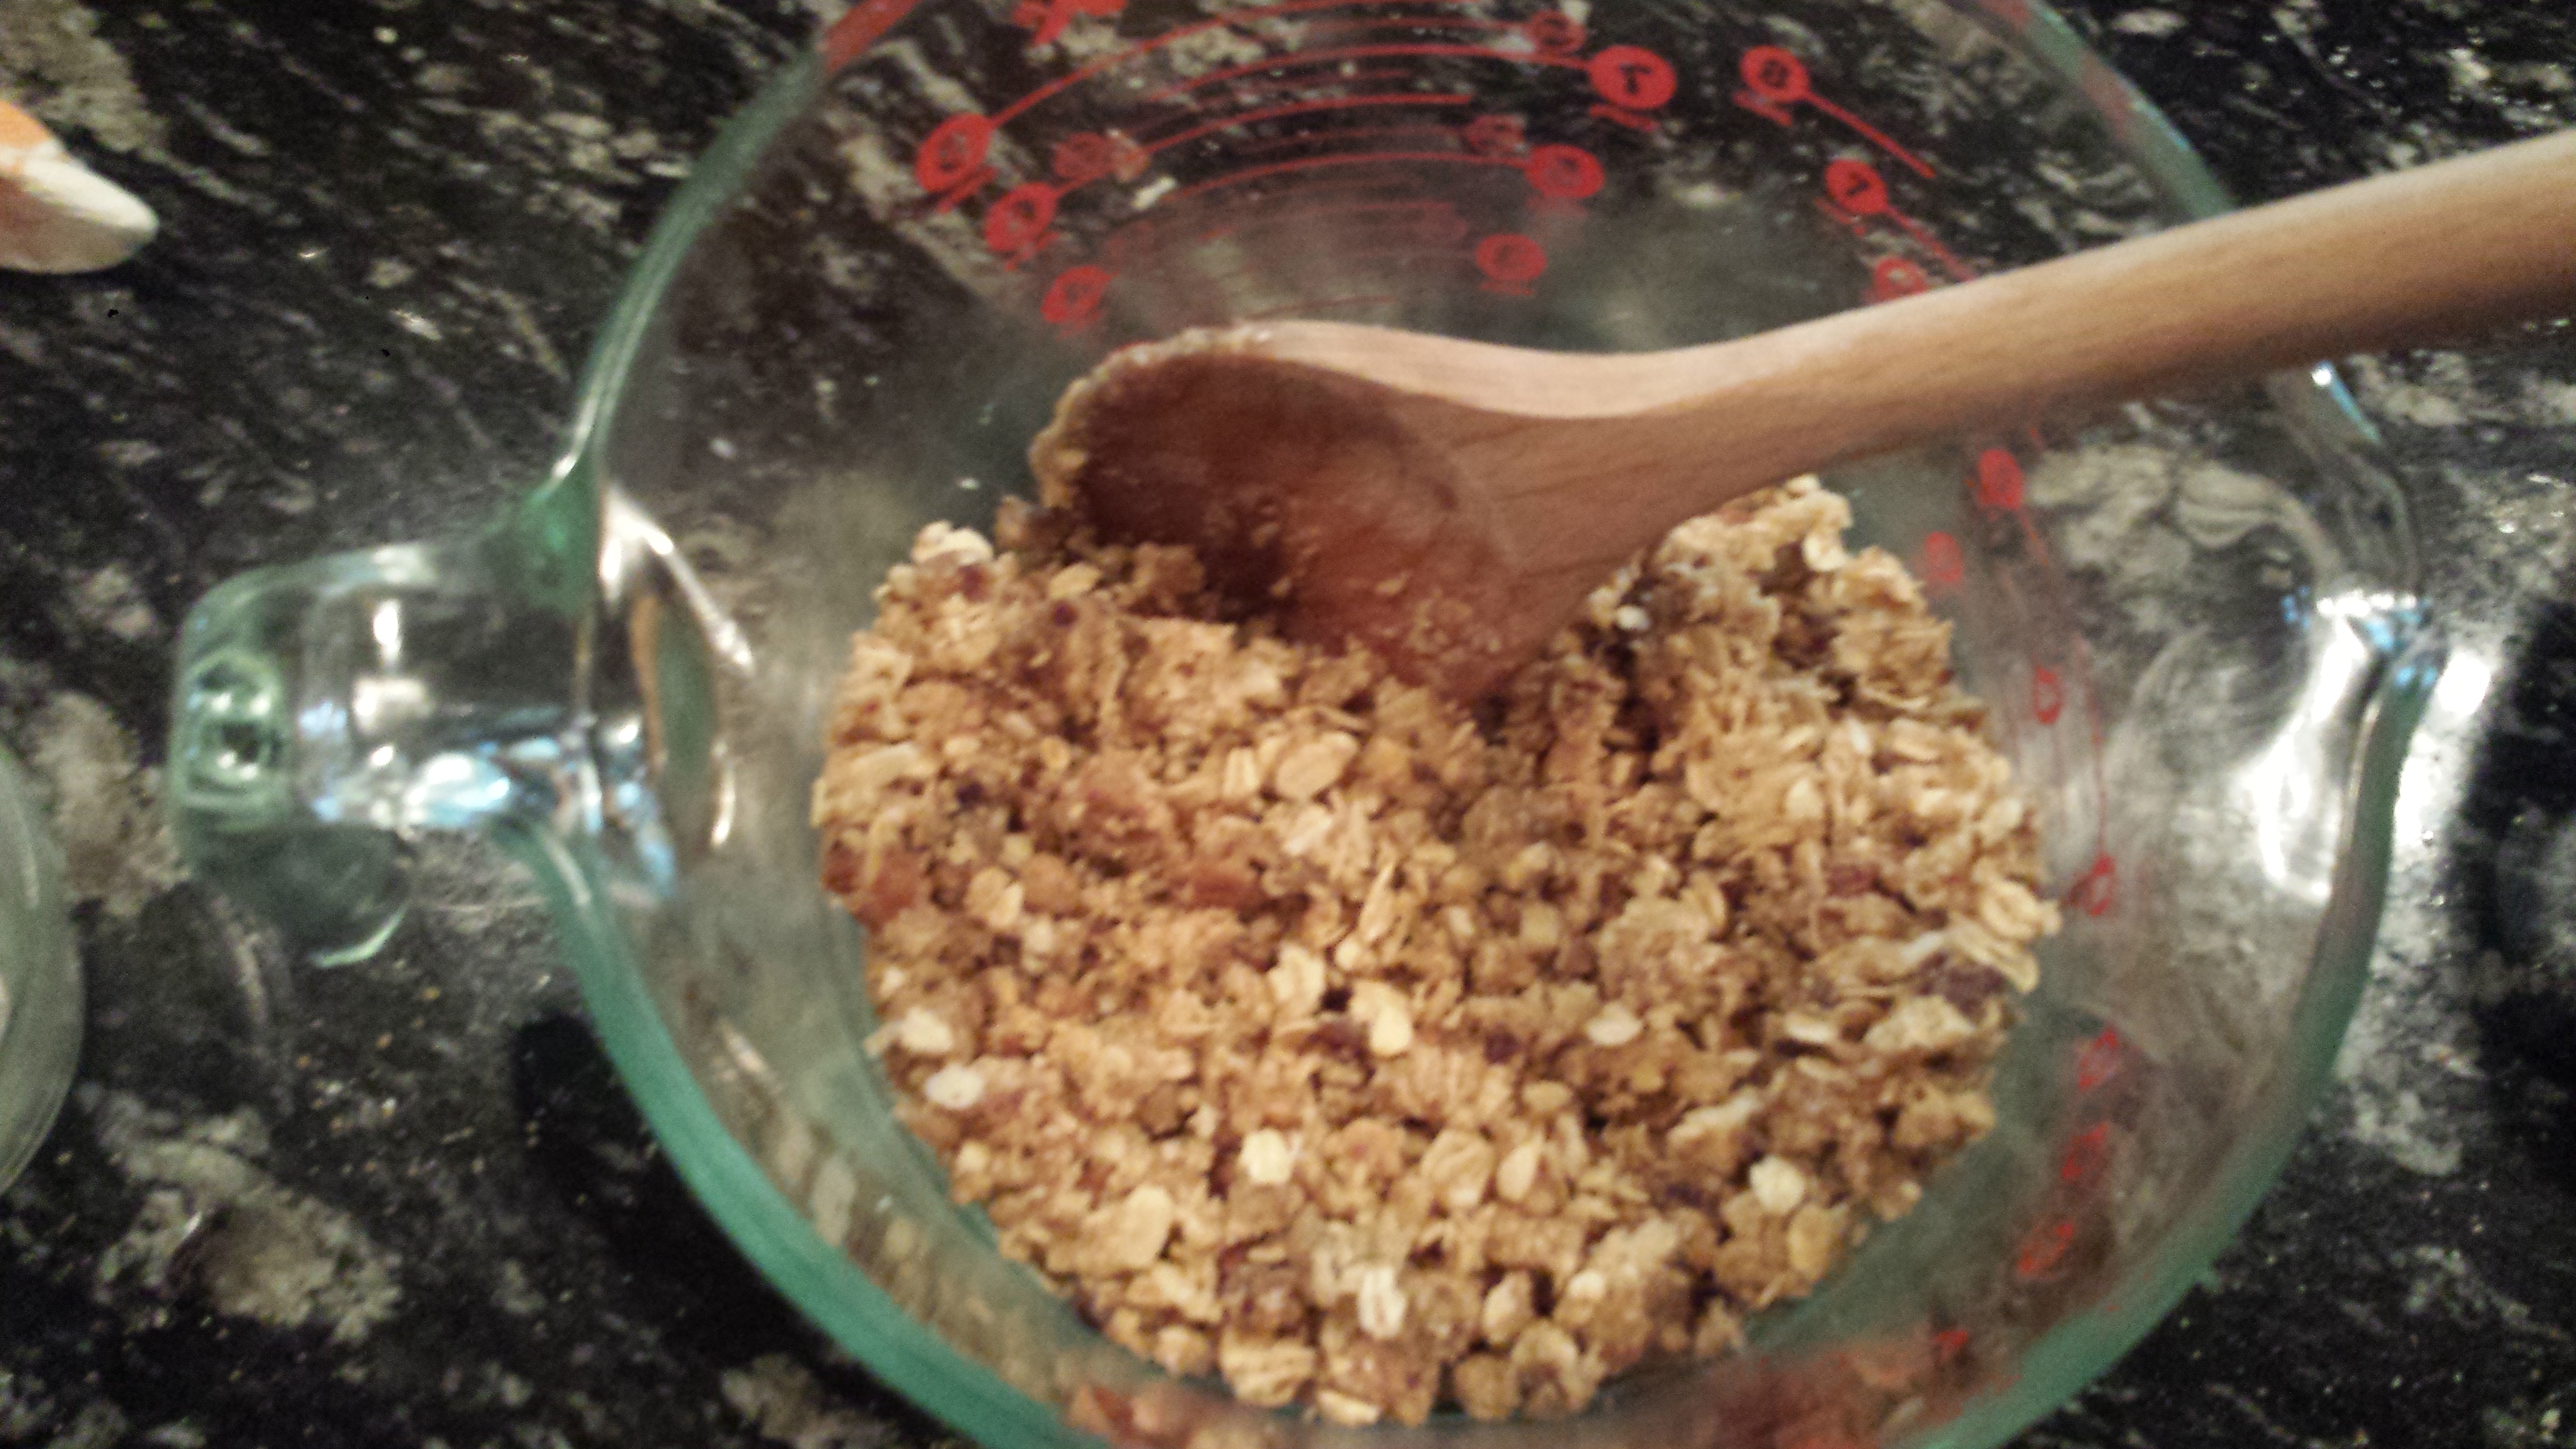
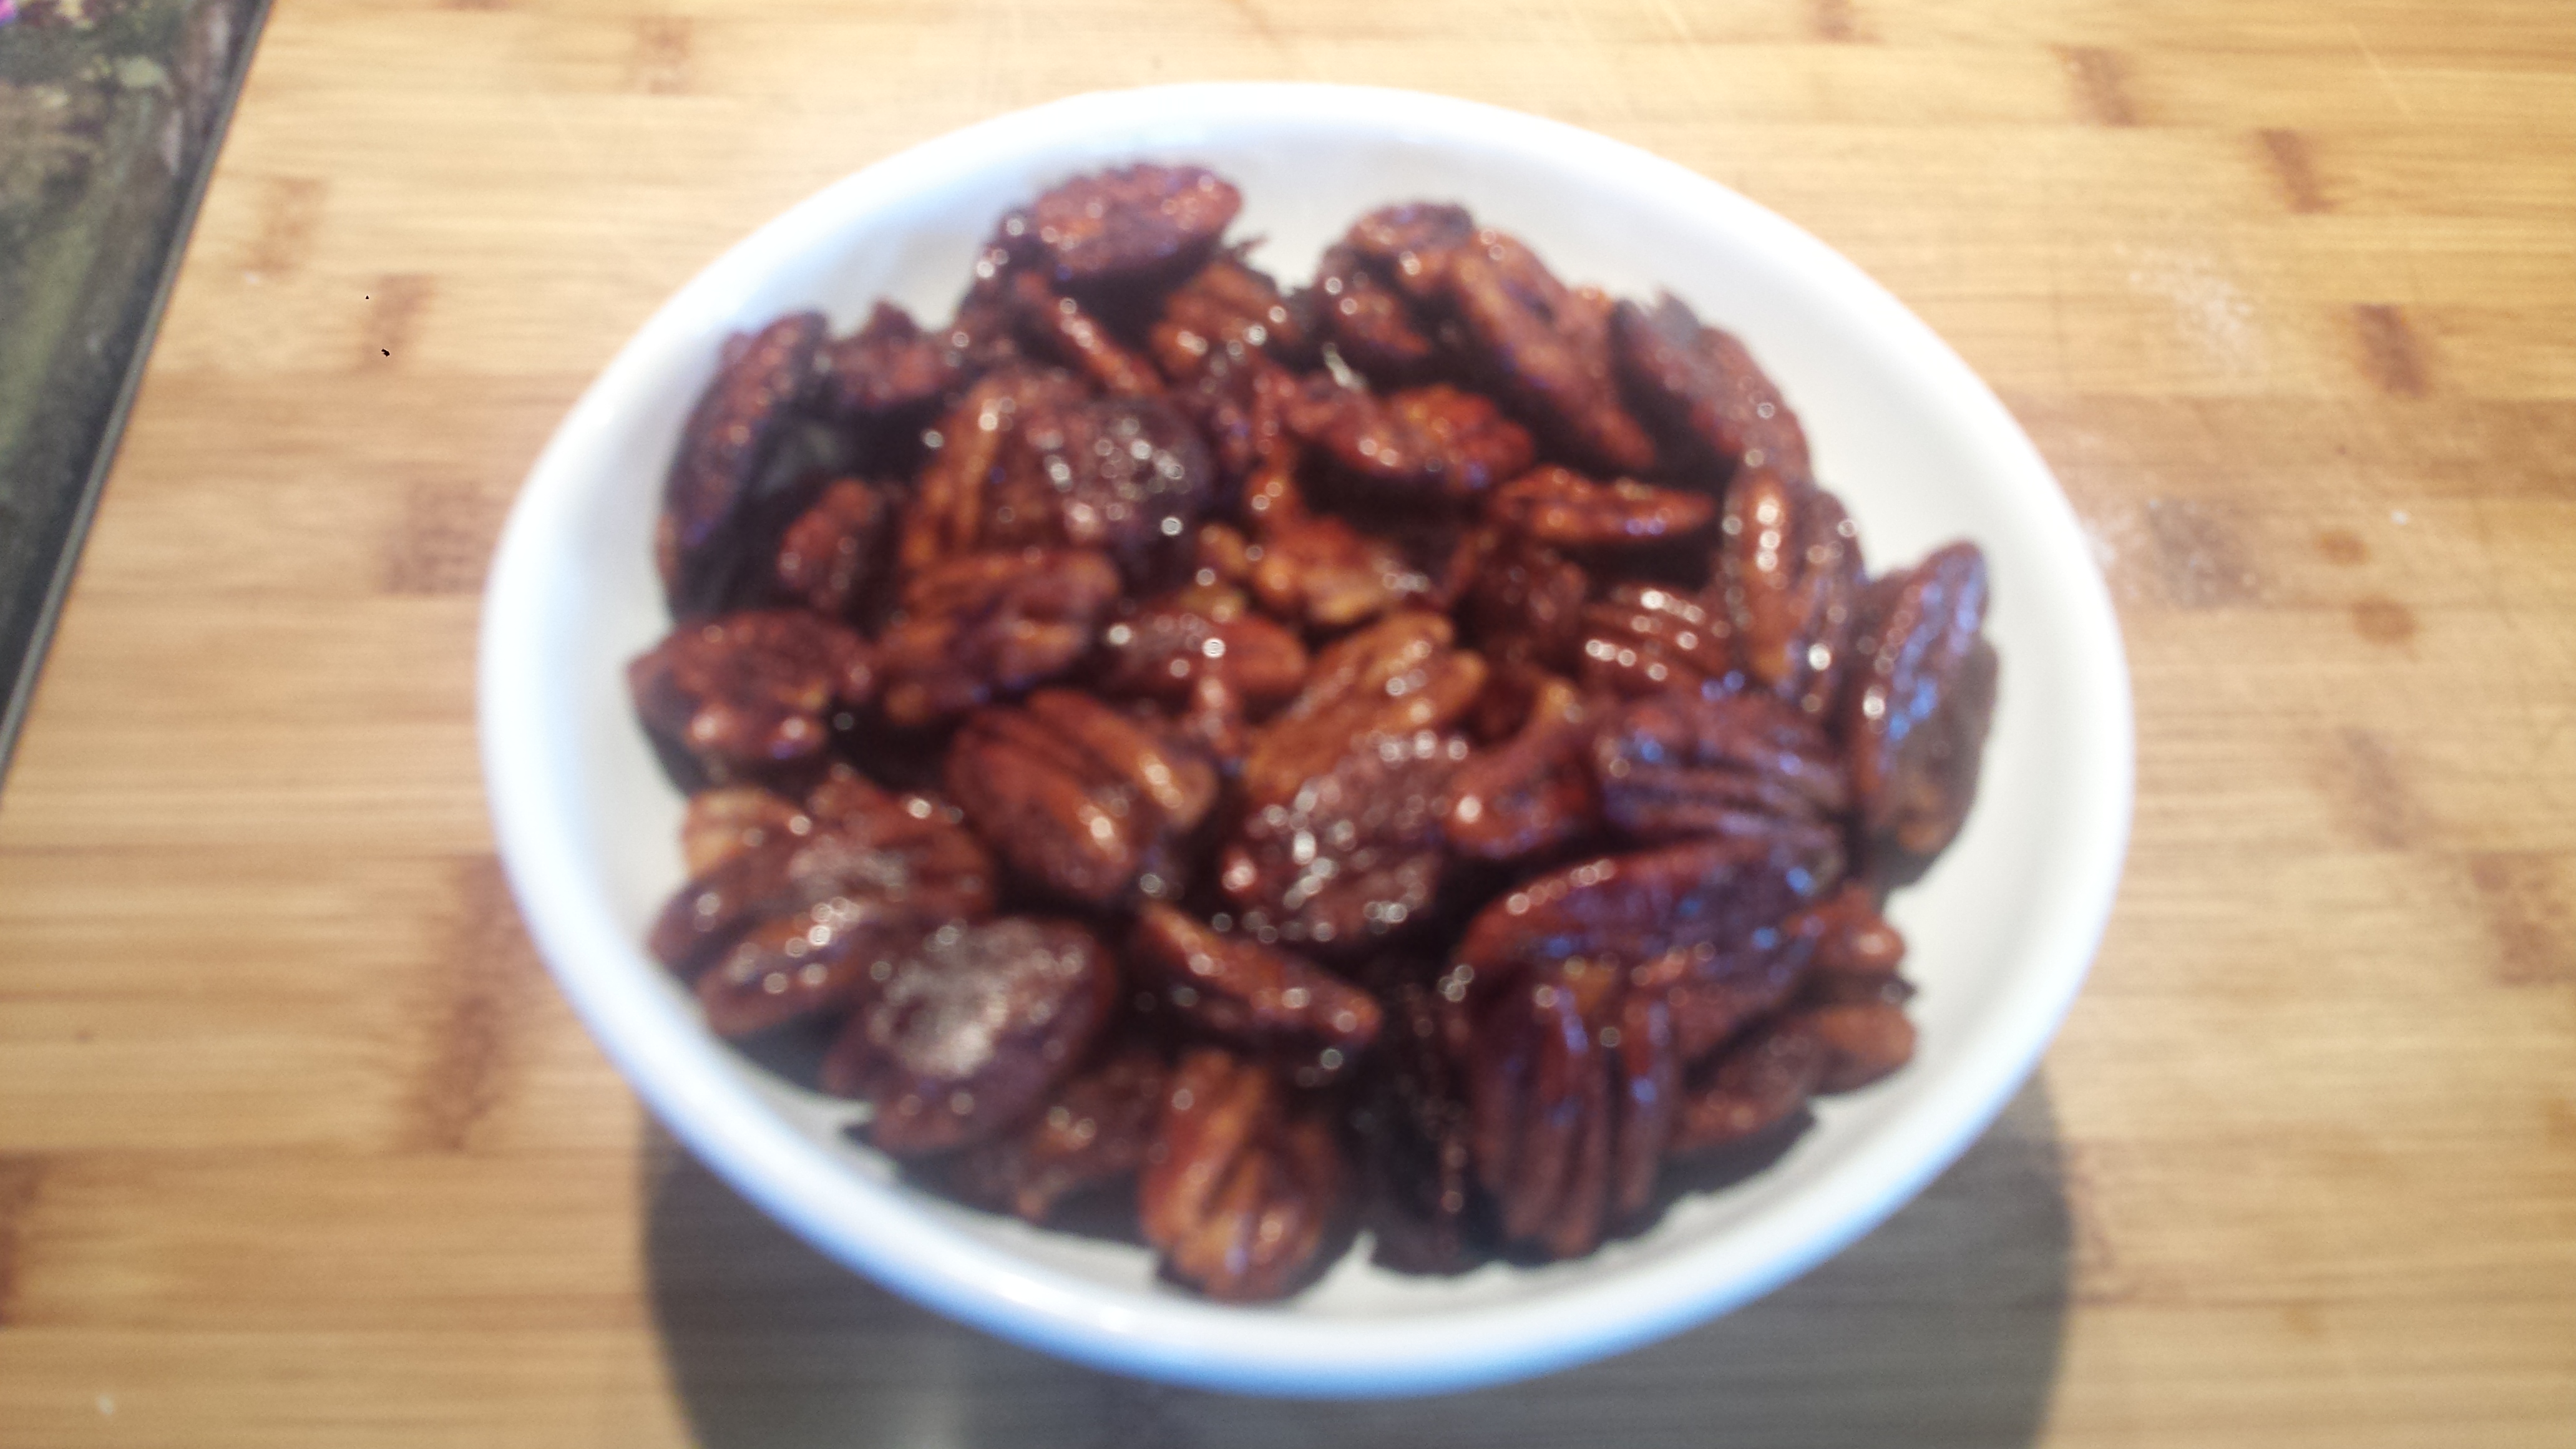
TIPS:  Most fruit crisp recipes call for wheat flour but I opted to go grain free and use almond flour, although almost any flour would work as a thickening agent and in the topping as well.  I added pecans and almonds to the topping for added crunch as well as dates for extra chewy sweetness but both are optional.  If you don’t use nuts, just add a bit more flour and oats so there is enough topping to cover the fruit.   I usually prefer desserts that are one dedicated fruit but crisps are also good with a mixture of cut up fruits if that is what you have on hand.  This is  great way to make an amazing dessert out of leftover or less than perfect pieces of fruit.  Instead of throwing them out, just cut out the bad spots.  They will still taste delicious!

Santa Rosa Plum Crisp

  • Servings: 6
  • Difficulty: easy
  • Print

Plum Crisp2

4 cups plums, pits removed and chopped

1 Tbsn coconut, oat or almond flour (white or wheat work too)

3 Tbsn sugar (honey, agave necter, etc.)-more if your fruit is under ripe or sour

1 tsp vanilla or almond extract

1/2 tsp ground cinnamon

Topping:

1/2 cup flour (made from any grain or legume)

1/2 cup oats (not instant or fast cooking)

1/2 cup pecans or almonds, finely chopped(optional)

1/4 cup dates, pitted and finely chopped (optional)

1/2 cup brown sugar, packed

1/8 tsp salt

1/4 cup butter or coconut oil, melted

Plum Crisp3

  • Combine plums, flour, sugar, vanilla and cinnamon together in a medium bowl.  Pour into an ungreased baking dish or pie pan

Plum Crisp5

  • Mix together all topping ingredients with a fork until crumbly.

Plum Crisp6

  • Spread topping evenly over the plum mixture
  • Bake for 40 to 45 minutes in a 350 degree oven. Plums should be bubbling and the topping a golden brown.
  • Serve with vanilla ice cream (optional)

Plum Crisp7

Meatless Monday = Roasted Asparagus and Leeks

0

Asparagus and Leeks1


GoodMotherDiet has temporarily relocated to Maine for the summer. We have a house on Bear Pond nestled at the base of Bear Mountain.  Maine is a land of a thousand lakes and mountains where time goes more slowly. and we spend our days outside taking advantage of the abundance of nature.  Life is very casual and dinner is generally a last minute gathering of friends at our various homes or restaurants after a long day of playing on the lake or hiking in the mountains, sometimes squeezing in a sunset cocktail before heading home to make dinner.

Maine

I flew in yesterday on the red eye and I am still getting my bearings. As always happens when I switch homes, I have to remember the layout of the kitchen, relocate the silverware drawer and take a look at the contents of the pantry.  It usually takes me several trips to Hannaford before I have everything restocked. By evening we had our first dinner party, a typical potluck which travels from house to house along the lake.  My contribution to the meal was Asparagus and Leeks with shallots and garlic, drizzled with olive oil and roasted in a hot oven.  Although it is not the prettiest or most elegant of dishes, it is simple and delicious, a perfect addition to any meal.   For an added touch of flavor, you can drizzle with balsamic vinegar before serving.

Roasted Asparagus and Leeks

  • Servings: 4-6
  • Difficulty: easy
  • Print

1 bunch asparagus
2 large or 3 small leeks
2 shallots
2 cloves garlic
2 Tbsn olive oil
1/2 tsp salt
1/4 tsp black pepper
1 Tbsn balsamic vinegar (optional)


Asparagus and Leeks5

  • Trim rough end of asparagus and place in a baking dish
  • Trim  root end of leeks and cut off tops where the leaves start turning green.  Wash leeks under running water, fanning each layer like a deck of cards to remove any dirt left between the layers.  Pat dry and place in the baking dish.

Asparagus and Leeks6

  • Slice shallots lengthwise into large matchsticks

Asparagus and Leeks4

  • Slice garlic into thin strips
  • Sprinkle with salt and pepper

Asparagus and Leeks3

  • Drizzle with olive oil and gently toss to coat vegetables with oil

Asparagus and Leeks2

  • Roast in the oven at 400 degrees for about 25 minutes, stirring 3 or 4 times.  They should be tender and beginning to brown on the edges.

Asparagus and Leeks1

Wheatless Wednesday – Breakfast Polenta in a Mug!

4

Breakfast Polenta7

I love shortcuts and life hacks – but only if they work!  I will admit to sometimes using garlic paste from a tube, instead of chopping a pile of garlic cloves, or bags of pre-washed greens when I’m pressed for time and it can mean the difference between a home cooked meal and take out.  Sometimes you just have to go with whatever works and often the shortcuts are just short of brilliant.  For your reading pleasure I have provided a link to 40 Great Life Hacks which just may give you a good idea or two (or at least you will be impressed by the cleverness of some people).

life-hacks-22

Photo Credit: 40 Life Hacks

Knowing my interest in food (and avid GMD followers), my Mom and Dad sent me an early birthday present, “250 Best Meals in a Mug”,  a cookbook by Camilla V. Saulsbury with single serve recipes that can be made start to finish in a mug. I know this is a departure from most of my recipes, but my parents thought it was a fun concept and so different from the way I usually cook. So I decided to check it out.   Meals in a Mug has recipes for breakfast, lunch, dinner and dessert, all made and served in a mug for one. Brilliant! This not only solves the problem of making (and eating) too much food but also drastically reduces the prep and clean up time. No pots or pans to clean, just one mug and one spoon. How nice is that, especially at breakfast time when you’re trying to get out the door?

Breakfast Polenta3

I was immediately drawn to her recipe for Brown Sugar Vanilla Polenta. You might have had creamy polenta for dinner but have you tried it for breakfast?  Talk about comfort food, all warm and creamy, sprinkled with brown sugar and a swirl of butter. Yum! It tastes totally decadent and sinful yet, is surprisingly healthful. I used stone ground, non GMO, organic cornmeal which provides fiber, minerals (including magnesium and selenium) and vitamins (including B1 and B6), organic milk and dates, which are an underappreciated fruit.  They are also a good source of fiber and a great source of iron plus their natural sugar is an excellent substitute for ordinary sugar. I had good success in the past using dates for their sweetness in my Oat Nut Bars which are addicting pretty darn good.

Breakfast Polenta6

I rarely make polenta though because I am the only polenta eater in my house and I end up eating too much. However, the mug concept opens a whole new world of cooking for me, fast, easy and completely self-serving as I only have to cater to my own tastes.  If you are really in a hurry in the morning, you can prepare the mug before bed.  Measure the cornmeal, dried fruit and salt into the mug and let it sit on the counter overnight. You can also pre-measure the butter, vanilla, milk and water and refrigerate over night.

Breakfast Polenta1

TIPS:  I have never really used the microwave for anything other than reheating leftovers or making popcorn, so it took a couple of tries to get it right.  My microwave must be more powerful than the cookbook author’s, since my first attempt boiled over, so I have adjusted the times based on my personal experience.  I listed the cooking times as ranges because your microwave may take longer than mine, but I would start by using the shortest time at first.  I also reduced the amount of brown sugar from the original recipe by a third because the dates made it sweet enough (even without the pecans).  If you use cranberries or raisins you may need to add more sugar, depending on your tastes. The glazed pecans make a delicious topping for creamy polenta (or ice cream)  but they are also a great snack.  Just make them ahead and store them in a covered container or zip lock bag.


Breakfast Polenta in a Mug

  • Servings: 1
  • Difficulty: easy
  • Print

1/4 cup yellow cornmeal (preferably non GMO stone-ground)
3 chopped dried dates (or 1 1/2 Tbsn raisins, cranberries or other dried fruit)
1/8 tsp salt
2/3 cup water
3/4 cup milk, divided
2 tsp butter or coconut oil (optional)
1/4 tsp vanilla extract
1 tsp packed brown sugar ( sugar, maple syrup, honey or agave necter)
1 Tbsn glazed pecans, recipe below (optional)

Breakfast Polenta2

  • In a mug, combine cornmeal, dried fruit, salt, 1/2 cup milk and water.
  • Place in the microwave on top of a doubled paper towel and microwave on High for 2-3 Minutes.
  • Stir, making sure you get the cornmeal off the bottom.  Microwave on High for 1-2 minutes.
  • Stir.  Microwave on High for 1-2 minutes.  Check for thickness.  Microwave another minute if necessary.
  • Stir in butter and vanilla and sprinkle with brown sugar.  Drizzle with remaining milk, if desired and top with pecans or fresh fruit.  Yum!

Breakfast Polenta7


Glazed Pecans

  • Servings: 4
  • Difficulty: easy
  • Print

Beets8

1/4 white sugar)
1 Tbsn butter or coconut oil
1/8 teaspoon salt
2 Tbsn water
1 1/2 cup pecan halves (or walnut)
  • Combine sugar, butter, water and salt in a large skillet and stir over medium heat until butter is melted.
  • Add pecans and cook, stirring constantly, making sure pecans are evenly coated,  for 5-7 minutes.
  • Spread pecans in single layer on parchment paper and cool completely.

VARIATIONS:  To make pecans for snacking add 1/4 to 1/2 teaspoon of cayenne pepper for a spicy kick.  For a sweeter, dessert topping add 1/4 teaspoon vanilla or dash of cinnamon.  You can even substitute the white sugar for brown sugar for more of a carmely ‘turtle’ type result (great over ice cream!).


Meatless Monday – Zucchini & Apple Spirals with Basil & Mint Salad

1
Zucchini Spiral Salad1
 
I have always wondered how to make a ‘noodle’ several feet long, like the one in Lady and the Tramp.  Well now I know the secret.  My mother in law gifted us a vegetable spiraling machine for our anniversary (Well there is no special gift or gem for 28 years of marriage, go figure! So why not a vegetable spiraler…)   I couldn’t wait to try it out – and the result is awesome.  I experimented first with zucchini and got spirals over 6 feet long.  How cool is that?  Then I spiraled some apples and fell the rest of the way in love. It is easier than a mandolin, no peeling or coring and my fingertips and knuckles remained intact.  I decided to cut the zucchini spirals into shorter pieces to make it easier to serve, but it could be fun to make each 6-8 foot strand into it’s own serving.  Your surprised diners could have their own Lady and the Tramp moments…
lady-and-the-tramp-02
Photo Credit:  http://www.kitchenmemories.com
 
For this salad, I decided to add some spiraled apples to the zucchini to add a bit of sweetness and color.  I chose Fuji since they don’t turn brown as quickly as other varieties and I love their red skins.  I also really like the combination of fresh basil and mint in summer salads, especially with a honey, citrus vinaigrette.  To make this filling enough for a main course, I added avocado and pepitos which provide nutrients and good fats that help us feel satiated.  I also sliced up some sugar snap peas to add crunch.  This salad would be good topped with blue cheese, goat cheese or feta, if desired, for an additional protein boost.  
 
Zucchini Spiral Salad8
 

Zucchini & Apple Spiral Salad with Basil and Mint

  • Servings: 4
  • Difficulty: easy
  • Print

 3 medium zucchini
salt
1 Fuji apple (or other firm apple)
1/4 cup pepitas (shelled pumpkin seeds) or pine nuts, pistachios or hazelnuts
1/2 cup sugar snap peas
1 firm avocado
Salt
10 basil leaves
10 mint leaves
1/4 cup lemon juice
1/4 cup apple cider vinegar
1/4 cup avocado oil (or other light oil)
1 scant teaspoon honey (or more if you like it sweet)
Freshly ground black pepper
 
Zucchini Spiral Salad7
 
  •  Cut the ends off the  zucchini and spiral or shred into thin strips using a mandolin or grater.  The spiraler is definitely the easiest!   Cut spirals into desired lengths if needed (about the length of a strand of spaghetti).  Put the spirals in a bowl, sprinkle with salt and let sit for 10 or 20 minutes.  Taste.  If too salty, rinse, drain and pat dry.  No need to rinse if the taste is fine, just don’t add more salt later without tasting first.

Zucchini Spiral Salad6

  • Dry toast pepitas (hulled pumpkin seeds) on medium heat in a small skillet for a few minutes, until golden.  Add to zucchini when cool.

Zucchini Spiral Salad5

  • Cut basil and mint into ribbons.  An easy trick is to stack the leaves and slice thinly cross wise. Add to zucchini. (Leave a few for garnish)

Zucchini Spiral Salad4

  • Remove strings from sugar snap peas and cut lengthwise into julienne strips and add to the zucchini.

Zucchini Spiral Salad2

  • Whisk oil, lemon juice, honey and apple cider vinegar together and set aside.
  • Spiral apple (core first if using a mandolin) and add to the zucchini.  Gently toss with a bit of dressing to keep from turning brown.
  • Core and chop avocado and add to the zucchini mixture.  Add a bit more dressing and gently combine.
  • Taste for seasoning and add salt if desired.

Zucchini Spiral Salad3

Citrus Strawberry Infused Water Plus 14 more Amazing Recipes

0


Citrus Strawberry Infused Water2

Several weeks ago, I whipped up a pitcher of LEMON CUCUMBER MINT WATER in an attempt to drink more water and fewer store-bought drinks.  It has been a very successful exercise and I love opening my refrigerator to see a colorful and delicious, cold beverage always on hand. I refill with plain water every time I pour a glass and dump it all out after most of the flavor is out of the fruit and start over, every 2 or 3 days.   Over the weeks, I have experimented with other fruits and vegetables, as well, based on what I have laying around.  I always seem to have an odd half lemon or lime, left over from a previous recipe which I will slice up and toss into my pitcher.  This time, I also had a ‘naked’ orange that I had zested the night before, so even though it was missing part of the peel the entire fruit still remained intact, so in it went.  I added several strawberries and a sprig each of basil and mint.  Delicious!

Lemon Water

I got such a great response on the Lemon Cucumber Mint Water and many people tried it right away, including my sister, Linda, who prepared a large batch for her granddaughter’s backyard wedding.  It was a warm day in Seattle and the LCM Water not only made a gorgeous centerpiece, it was the perfect beverage, refreshing, rehydrating and inexpensive (and easy to replenish).   For those that like infused water, I wanted to pass along an article by Eat Local Grown with a compilation of 14 recipes for fruit infused water or aqua fresca.   You can either follow the recipes or use them for inspiration.   Just click the link below.  Happy Friday!

14 AMAZING FRUIT INFUSED WATER RECIPES FROM EAT LOCAL GROWN

Citrus Strawberry Infused Water1

Wheatless Wednesday – Scallop Ceviche with Avocado and Tomatillo

2

Scallop Ceviche2

Summer officially begins on Saturday and you know what that means- long lazy days spent at the lake, cool, refreshing drinks by the pool and the return of brilliant pink and red sunsets!  It also means salads or cool foods that don’t heat up your body or your kitchen.  Ceviche is popular in South and Central America where temperatures are warm most of the year.  For the uninitiated, Ceviche is a delicious taste sensation.  Various fish or shellfish is marinated in a citrus-based mixture, usually lemons and limes. In addition to adding flavor, the citric acid causes the proteins in the seafood to become denatured, which is what makes it firm and gives it the taste and feel of being cooked.  Recipes for ceviche vary among countries but adding onions and chili peppers or other herbs and vegetables is fairly common.

My ceviche was inspired by the ingredients I had on hand (tomatillo, serrano peppers, red onion, cilantro and the first tomatoes from my garden), which give it a more Mexican flavor.  I had never used tomatillos before and bought them on a whim the other day. Tomatillo, (in Spanish “green or little tomato”) is not really a tomato but a part of the nightshade family.   If you don’t have access to tomatillos, then you can omit them from the recipe or put some of those ‘not quite ripe tomatoes’ to work for you for a similar flavor.

The ceviche needs at least 3 hours or over night to “cook” but can be assembled in less than 10 minutes.  The flavors combine for a tasty, slightly spicy and refreshing dish that is loaded with vitamins and minerals plus healthy fats.  This is perfect for when you don’t want to turn on your oven.  It makes a great appetizer served in small glasses with chips or crackers or as a main or side dish.


Scallop Ceviche4

Scallop Ceviche with Avocado and Tomatilla

  • Servings: 4
  • Difficulty: easy
  • Print

Scallop Ceviche1

2 lbs bay scallops
4-5 cloves garlic, minced
1 tsp salt
1/2 cup fresh cilantro, finely diced
2-3 Serrano peppers(or other hot pepper), seeded and diced
6 limes, 2 lemons freshly squeezed (should be enough to cover scallops)
1/2 red onion, finely diced
3-4 tomatillas
2-3 ripe tomatoes, diced
2 avocados, peeled, seeded and diced

Scallop Ceviche5

  • Rinse scallops and pat dry.  Place them in a ziplock bag or container with a lid.
  • Add garlic, lime and salt.
  • Dice peppers, onion and cilantro and add to scallops.
  • Remove papery skin from tomatillas and rinse to remove the sticky residue. Dice and add to the scallop mixture.
  • Gently comgine.  The scallops should be covered by lime juice.  Add a bit more if necessary.  Refrigerate at least 2 or 3 hours or overnight while the scallops “cook”.
  • Before serving pour off excess liquid, leaving a bit to keep it moist.  Add tomatoes and avocados and gently combine.

Scallop Ceviche6

  • Serve with crackers or tortilla chips (my fave)..

Scallop Ceviche3


Meatless Monday – Roasted Tofu with Miso Glaze and Black Barley, Fennel & Radish Salad

2

Tofu and Barley9

Game of Thrones Season Finale meets Father’s Day meets GoodMotherDiet!  So the long anticipated Game of Thrones Season Finale happened to fall on Father’s Day (No spoilers for those that haven’t seen it yet, except to say that the show did have an interesting Father’s Day theme). In order to honor both of these important events, we decided to create a feast that was Father’s Day worthy as well as authentic to GoT. We were even lucky enough to have “Daenerys, The Mother of Dragons” show up for dinner.

Tofu and Barley3

For inspiration I went, of course, to the Game of Thrones Food Blog (Yes, there really is such a thing!)  to find many dishes shown, discussed or inspired by the show or books.  As you might expect, much of the food is heavy with meat and not on the Goodmotherdiet,  so my son, Eric, is cooking a more authentic GoT menu including miniature pork pies and leg of lamb.  For the non meat eaters, I thought to attempt a Game of Thrones imagined meal, or rather what would they do with tofu if they had it.

Tofu and Barley1

I marinated extra firm  tofu in a thick and flavorful sauce overnight and then broiled it on high heat.  I paired it with black barley which was widely consumed in Medieval times, (more on that if you’re interested in the history of medieval barley in my Mushroom Barley Soup Blog Post). We know that GoT is not really set in Medieval times, nor is it even set on this planet or in any time but it seems most similar to Medieval times than any other. In preparing the barley, I tried a recipe for Black Barley, Fennel and Radish Salad from Bon Appetite.  This is a large and hearty salad. Next time I make it I will half the amount of barley (1 cup).  Black Barley is a substantial grain, chewy and flavorful but pearl barley, which is lighter and softer, can be substituted.

Tofu and Barley4

Roasted Tofu with Miso Glaze

  • Servings: 6
  • Difficulty: easy
  • Print

2 containers extra firm, organic tofu
1/4 cup Miso paste
1/4 cup Mirin (or Rice Wine Vinegar with a bit of sugar or honey added)
1/8 cup soy sauce (wheat free if necessary)
1/8 cup water (if needed to mix the paste in)
1/2 tsp salt
1/2 tsp sugar
1 Tbsn fresh ginger
1/8 tsp chili powder
1/8 tsp red pepper flakes (or more to taste)
Tofu and Barley8
  • Drain tofu and slice lengthwise into 1 inch rectangles.  Cover with papertowels and place a heavy object on top to help press out the liquid. Let drain 10 minutes or so.
  • Put tofu in a zip lock bag or container with a lid.

Tofu and Barley6

  • Combine all other ingredients and pour over tofu, making sure to coat all sides of every piece.  Refrigerate several hours or overnight.

Tofu and Barley2

  • Place marinated tofu  in a single layer on an oiled baking sheet and broil 5 – 10 minutes, or until browned.  Turn and broil the other side
  • Serve hot or room temperature


Black Barley, Fennel and Radish Salad

  • Servings: 8
  • Difficulty: easy
  • Print

Tofu and Barley4

2 cups black or pearl barley, rinsed
Kosher salt
1 large  or several small fennel bulbs (about 10 ounces), 2 tablespoons fronds set aside, bulb cut lengthwise into 1/4-inch slices
2 tablespoons plus 1/2 cup olive oil
Freshly ground black pepper
1/3 cup fresh orange juice
1/4 cup fresh lime juice
1 small shallot, minced
2 tablespoons chopped fresh dill plus 1/2 cup dills prigs, divided
1 teaspoon finely grated orange zes4 large radishes, thinly sliced, divided
1/4 cup oil-cured olives, pitted, halved lengthwise(optional)
  • Place barley in a medium pot and add water to cover by 1 1/2 inches. Season with salt. Bring to a boil; reduce heat and simmer uncovered until barley is tender and water is absorbed. Depending on the type of barley and your taste preferences, this can take anywhere from 45 minutes to a couple of hours.  Add water if necessary. Spread out barley on a large rimmed baking sheet; let cool.
  • While barley is cooking, toss fennel slices and 2 Tbsp. oil in a medium bowl to coat. Season with salt and pepper. Spread fennel slices out in a single layer on another rimmed baking sheet. Roast until fennel is crisp-tender and beginning to brown in spots, about 18 minutes. Let fennel cool on baking sheet.
  • Whisk orange juice, lime juice, shallot, 2 Tbsp. dill, and zest in a medium bowl. Gradually whisk in remaining 1/2 cup oil; season orange vinaigrette with salt and pepper.
  • Transfer barley to a large bowl; add roasted fennel, along with any accumulated juices on baking sheet. Add half of radishes, olives, and 1/4 cup dill sprigs. Drizzle 1/2 cup orange vinaigrette over and toss to coat; season with salt and pepper. Arrange salad on a large platter.
  • Scatter remaining radishes, reserved fennel fronds, and remaining 1/4 cup dill sprigs over salad. Pass remaining orange vinaigrette alongside for drizzling over.

TIPS:  You can halve the amount of barley for a lighter, smaller dish with more veggies and flavor.  You can also substitute pearl barley if you can’t find black barley or you prefer a softer dish.  If you don’t have dill, the fennel fronds make a good substitute.  Enjoy!


In My Garden – June

9

Garden June6


Somehow I missed May which went by in a blur, while I was attending weddings, graduations and bar mitzvahs.  Yet my garden survived.  I was too busy to notice my artichokes were ripe until it was too late, so I decided to let them flower.  Aren’t they glorious, and they’re not done yet!  The second one is about to bloom…

Garden June4

Since I planted back in April, I have been harvesting a steady crop of lettuces.  There are a few ways to harvest lettuce (and  kale and chards).  You can cut the entire plant off at the base, remove the roots and replant.  Sometimes, a plant will regrow if you leave a few inches but I’m often too impatient to wait.  You can also just pull up the whole plant by the roots.  Or you can remove just the outer leaves and allow the plant to keep growing, which it does from the center (so don’t remove those leaves).  Eventually though, it will bolt (flower or go to seed) and you then need to harvest or cut back the whole plant.  I started my lettuces out in nice rows but by now it’s quite the hodgepodge, since I replant as I go, but I think it looks pretty that way.  I always have seedlings and mature plants going along together so something is always ready for my salad bowl .

Garden June7

My tomato plants are mostly doing well and I have harvested a few tomatoes.  The Green Zebra and Black Krim were first.  This time of year, I remove all the yellowing leaves near the base of the plan!t and any others that look yellow, spotted or diseased. If you have any plants that really look sick, just pull them out and replace them with healthy seedlings.  It’s not too late . I just did that last week with one of my plants.   Tomatoes love to be buried deep and will put out more roots if you pile soil amendment around them.

Garden June8

My new experiment is with companion gardening.  I have had terrible luck growing basil.  They seem to be eaten to the ground by the next morning after planting.  So I planted them among my tomato plants and they have so far lasted almost a week. Apparently tomatoes repel the critters that like basil.  Keeping my fingers crossed.


Garden June1

I have been harvesting blueberries about a half cup at a time, just enough to eat for breakfast or add to a salad, but they are delicious!

Garden June11

My zucchini is just starting to grow up the trellis and I have a few harvestable fruits.  Hmmm, recipes starting to swirl through my head…Send me your best ideas!

Garden June2

Sugar snap peas are making their way up the teepee but not producing yet.

Garden June5

My non GMO corn is two or three feet tall.  I have never grown corn before, I’m excited about my tiny crop!

Garden June9

My main problem, though has been critters.  It’s wild animal kingdom here!  Most recently, it’s gophers. If you have ever found mounds like these that my dog, Lola, is checking out in my lawn, you know what I mean!  This time of year their babies are learning the new routes underground, so there is lots of activity and they leave giant earth mounds in their wake.  About 10 or 15 years ago I became obsessed with the gophers and went “Caddyshack”.  I have vivid memories of trying to smoke them out and running around blocking all the exits as smoke kept finding new areas to escape, as my small boys watched, noses pressed to the window.  “Mommy’s gone crazy!”  The gophers were too smart for that though and just went to lower ground to wait it out.  Over the years, however, I have just learned to co-exist with my subterranean ‘friends’.  I try to keep them off my lawn and out of my vegetable garden and pretty much let them roam to their hearts content around the rest of the property.  I have tried all kinds of home remedies, hot red pepper, hair clippings, windmills and several others to no avail.  The product that I am having the best luck on my lawn with is Repellex, which is a repellant not a poison, made with castor oil, cinnamon oil, garlic oil and white pepper. They don’t like the smell or taste and they stay away. It is non-toxic and biodegradable but wears off in about a month or so, so you have to reapply.

Garden June10

The main task though is WEEDING!  Do it now while the soil is still soft or it becomes back breaking work. The second task is to  mulch or amend the soil, especially in California with our drought conditions.  Mulching provides nutrients and helps retain moisture in the soil.

I am only a weekend warrior gardener, so check out the links below for some expert gardening tips.

What To Do In the Garden in June – About.com Regional guide for ornamentals, vegetables, fruit trees, trees and shrubs and pest control.

Calendar of Gardening Tasks for June – The Garden Helper  Tips on flowers, shrubs, vegetables and lawn care (even house plants).

How to Plant a Vegetable Garden in June – eHow  For those that haven’t planted yet.  It’s not too late if you do it right!


Wheatless Wednesday – Shrimp Lettuce Wraps with Coconut Rice & Bok Choy

0


Shrimp Lettuce Wraps11

They’re Back! ( in sing song voice) With graduations and summer approaching, we have gone from being empty nesters to having a full house again. One of the biggest adjustments this time has been for the ‘kids’ because of my meatless diet.  They are more likely to cater to my diet now, which is a complete switch from when I used to plan meals around them. Back in the day I had to make many allowances for my picky eaters.    Even when my boys were young and ate only five or six things in the world, there was always the odd food, like flying fish roe sushi, that they would eat along with their plain pasta with butter and cucumber circles.  I lived in fear that they would figure out what flying fish roe was and then even that would be out.  Luckily for me, as they grew older their tastes expanded in the same proportion as their desire for ‘plain food with no sauce, nothing on the plate touching’ diminished.  Some of you still may be there but don’t worry, they do eventually grow up and eat real food.   I knew we were there when the last one crossed over into  the light ‘salads’.  My life was so much easier once I no longer had to hide veggies somewhere on their plates and could just serve them right out in the open, no secret dips or funny mashed potatoes.  Whew!

Shrimp Lettuce Wraps12

My boys (young men now) still have an affinity for Asian food, and although they still eat flying fish roe sushi, their tastes for the exotic have also expanded.  One of our favorite appetizers is Miang Kam (literally meaning Tasty Leaf Wrapped Tidbits) in which several ingredients, usually coconut, ginger, lemon, dried shrimp, peanuts and green onions, among many other interesting bits of food, are hand assembled in a leaf, topped with a yummy sauce, folded over and popped in the mouth where the ingredients combine for a burst of flavor.  These Shrimp Lettuce Wraps are loosely inspired by Miang Kam, although I took many liberties with the selection of ingredients.  The wraps themselves are reminiscent of the Thai dish with the garnishes of ginger, red chili pepper, toasted coconut, scallion and sliced lemon which provide an explosion of flavor.  I added Sriracha to mine since I love spicy but a plum or sweet ginger sauce would be tasty too.

Shrimp Lettuce Wraps13

No meal is complete in my book without some kind of veggies, so I sliced up fresh bok choy and sautéed it with a bit of garlic and ginger and added mung bean sprouts, which were in my refrigerator, for good measure.  I also made  Coconut Rice with brown Jasmine rice, ginger, turmeric and cumin which came out a deliciously lovely yellow (thanks to the Turmeric, which I’m sure you’ve heard is the new wonder spice that provides antioxidants and health benefits to your food along with it’s unique flavor).  Both side dishes are great as a base for the shrimp in the lettuce wraps or can be simply served on the side.

Shrimp Lettuce Wraps

  • Servings: 4
  • Difficulty: easy
  • Print
1 head Butter or Boston lettuce (whole leaves)
1 lb raw shrimp (shelled, tail removed)
4  Tbsn olive or avocado oil (divided)
4 cloves garlic, finely minced (divided)
1/4 tsp red pepper flakes
1/4 tsp chili powder
3-4 heads bok choy
1 cup bean sprouts(optional)
Shrimp Lettuce Wraps8

GARNISHES:

1/3 cup dried unsweetened coconut
1 fresh red chili pepper, minced
1 thumb-size piece of ginger, minced
3 green onions, minced
1 lime cut into small wedges
Sriracha Sauce, Plum Sauce or Sesame Chili Oil (Optional)


Shrimp Lettuce Wraps5

  • If you are using peeled and deveined shrimp, rinse them in cold water and pat them dry.  If your shrimp still have the shells, remove the legs, shell and tail or watch this video for instructions on peeling shrimp.
  • Dry toast coconut into a pan (preferably cast iron) on medium high heat until golden brown. (1-2 minutes). Remove from pan and let cool
  • Wash and dry lettuce leaves and arrange on a platter with toppings.

Shrimp Lettuce Wraps3

  • Reheat pan and saute bok choy on medium heat in half the oil and garlic for several minutes.  Add the bean sprouts, if using, and heat another minute or so.  Remove from heat and place in a serving bowl.

Shrimp Lettuce Wraps4

  • Reheat pan on medium high and add the remaining oil, garlic, chili powder and red pepper flakes.  Sautee the shrimp until it turns pink, 2-3 minutes. Remove from heat.  Serve in hot pan or place in a serving bowl.
  • Assemble lettuce wraps with coconut rice (see recipe below), bok choy and shrimp topped with your preferred condiments.  Or serve rice and bok choy on the side.


Coconut Jasmine Rice

  • Servings: 4
  • Difficulty: easy
  • Print


Shrimp Lettuce Wraps2
Coconut Jasmine Rice

1 cup brown or white jasmine rice
1 can coconut milk
1 cup vegetable stock
1 tsp turmeric
1 tsp cumin
pinch of saffron threads (optional)
1 clove garlic, minced
1/4 cup dry shredded or flaked coconut, unsweetened

  • Heat coconut milk and stock to boil.  Add rice and spices and simmer for about 15 minutes, or until the water has evaporated.  Remove from heat and let sit covered.
  • Dry toast the coconut in a pan on medium high heat for one or two minutes until golden brown.  Remove from heat and let cool.
  • Fluff the rice with a fork.  Serve topped with toasted coconut.

Meatless Monday – Mushroom Pappardelle with Braised Greens

0

Mushroom Pappardelle8

Calling all Mushroom Lovers!  This one is for you (of course I had to choose between mushrooms and wild boar-more on that later).  I am an official blogger for the Meatless Monday website, as you can see by the cute logo on my sidebar.  The Meatless Monday campaign is working with the Mushroom Council and looking for recipes that substitute mushrooms in traditional meat dishes for their ‘Swap it Out’ contest.  I have already done a Portobello Mushroom Stuffed with Eggplant and Gorgonzola which was pretty tasty but I wanted to come up with something new.  Then I was perusing the pasta aisle and came across  a box of Pappardelle, a California product by Community Grains using 100% whole grain hard amber durum.  Perhaps I got sucked in by the packaging which states that it is “stone milled on a granite wheel”.  That sounds really labor intensive, and almost reminiscent of the Flintstones and their really cool stone age car and gadgets (Yabba Dabba Doo!) so it must be great, right?  I also loved the Tip on the package, “Pasta water should taste like the ocean.”  I had never heard that before, but now I know what I’m aiming for.  So I bought the pappardelle- and it was delicious!  The pasta had great texture and the sauce clung to the surface ensuring that every bite was flavorful.  It is also nice to know that they mill 100% of the grain, the germ, bran and endosperm all together instead of milling them separately and adding them back together (reconstituted), which is more common.  I’m kind of liking the re-emergence of the old tried and true, dare I say Stone Age, methods.

Mushroom Pappardelle6

Pappardelle are large, very broad, flat pasta noodles, similar to wide fettuccine (about the width of a finger). The name derives from the verb “pappare”, to gobble up (in Italian).  I would say this is an appropriate name, since I found myself doing just that with this yummy dish!  Pappardelle is usually topped with heavy sauces that include game like rabbit, duck and wild boar, however, for Meatless Monday, I chose to use the “meaty” mushroom, Portobello, as a stand in for wild boar.  I marinated them first, then seared them on high heat to intensify their flavor before adding them to the sauce.  I also included dried Porcini mushrooms along with garlic, herbs and shallots to give the sauce an earthy and rich flavor.  I threw in a few fresh Criminis for a wonderful mushroom trifecta!  I love braised greens and threw in a few handfuls of arugula and spinach, which really help lighten up a heavy sauce.   We tend to stay away from creamy sauces in our house, as my husband is not a fan, however, sour cream or plain yogurt can be added to this sauce if you crave rich and creamy.

Mushroom Pappardelle1

Of course you have to be a big fan of mushrooms to enjoy this dish, but if you are, lucky you!   ‘Mushrooms are a good source of Vitamin B, potassium and selenium and the only plant based source of Vitamin D.  Low calorie, fat free and gluten free, they have a great nutrient value at little cost.  In addition, mushrooms help satisfy our desire for Umami, which is the fifth basic taste after sweet, salty, bitter and sour. Derived from the Japanese word umai, meaning “delicious,” umami (pronounced oo-MAH-mee) is described as a savory, brothy, rich or meaty taste sensation. It’s a satisfying sense of deep, complete flavor, balancing savory flavors and full-bodied taste with distinctive qualities of aroma and mouthfeel.  The more umami present in food, the more flavorful it will be. All mushrooms are a rich source of umami and the darker the mushroom the more umami it contains.’ – See more at: http://mushroominfo.com/benefits/#sthash.NbUzgRtx.dpuf

So next time you plan to serve pasta with Wild Boar  meat, try a few mushrooms instead…

Mushroom Pappardelle with Braised Greens

  • Servings: 4
  • Difficulty: easy
  • Print

Mushroom Pappardelle8

3 large Portobello mushrooms, sliced
6-8 crimini mushrooms, sliced
2-3 cups vegetable broth
¼ cup dried porcini or mixed mushrooms(about 6 oz)
1/4  cup roughly chopped parsley
3 fresh sage leaves
3 cloves garlic, peeled
3 shallots or 1 small onion, roughly chopped
¼ cup olive oil
1/2 tsp salt(depending on the saltiness of the broth)
1/4 tsp black pepper (or more to taste)
½ cup dry white wine
2 cups fresh spinach, arugula or other dark leafy greens
8 oz. fresh or dried pappardelle (about 3/4 box)
½ cup grated parmesan(optional)
 
Mushroom Pappardelle2
  • Marinate the sliced, fresh mushrooms in 1-2 Tablespoons olive oil, 1 Tablespoons red wine vinegar, 1 teaspoon balsamic vinegar, pinch of Italian seasoning, salt and pepper (a zip lock baggie works great) and let rest.  The marinade should coat all pieces but they shouldn’t be swimming in liquid.
 Mushroom Pappardelle3
  • Pour 1 cup boiling water over dried mushrooms and let sit until soft, about 20 minutes.  Remove mushrooms with a slotted spoon and strain mushroom liquid to remove any sediment.  Reserve liquid.
  • In a food processor (or by hand) finely dice parsley, sage, garlic and shallots in a food processor until smooth; set aside.  Finely dice reconstituted mushrooms.

Mushroom Pappardelle4

  • Heat 1 Tbsp oil in a skillet(preferably cast iron) on medium high heat.  Sear/brown fresh mushrooms one layer at a time and turn to brown the other side.  Remove  and set aside.
  • Saute vegetable purée in about 2 Tablespoons oil, stirring occasionally, for 5 -6 minutes.  Stir in diced mushrooms.
  • Add wine, broth and mushroom liquid and cook, until almost completely reduced, about 10- 15 minutes.
  • Cook pasta in salted boiling water according to package instructions. Drain pasta; add to sauce
  • Stir in greens and let wilt.
  • Add seared mushrooms and half the parmesan ( if using) and toss to combine.
  • Transfer pasta to a serving dish; garnish with finely chopped parsley and remaining parmesan.
 VARIATIONS:  If you prefer a creamy sauce, stir in 1/2 cup sour cream or plain yogurt before adding pasta.  Fettuccine or other larger shaped pastas will work fine with this dish.
 Mushroom Pappardelle9


I’m a Farm Wife… and I hate GMOs.

0

What is so bad about GMO’s? I am a big believer in GMO labeling but not everyone agrees. This is a hot topic and it can be hard to cut to the truth. I ran across this honest and wonderfully written essay by a GMO Farmer’s Wife who explains the issue with clarity and heart. It’s nice to hear the story from an insider. The comments following the essay are pretty interesting too…

kiyaelizabeth's avatarmodern homesteading, one step at a time.

gmo corn

I’m a Farm Wife. And I Hate GMOs.

I’m a farm wife – of a grain farmer. A GMO grain farmer. There’s been a lot of heated debates about GMOs lately, as there should be, and it seems like I hear the same things repeated over and over in our agricultural community. If you’re against GMOs, you’re against farmers. If you’re against GMOs, you must be some yuppie woman from the city who drops her children off at their charter school, hits up her organic market, and goes back to her 7th floor flat to practice her internet activism against GMOs. If you are that mom, no offense, and the movement can certainly use you, provided that you really do your research and don’t quote things from NaturalNews without first making sure they are entirely unbiased and true. 🙂

You’d be hard pressed to find someone who loves agriculture…

View original post 2,202 more words

Wheatless Wednesday – Black Bean Quinoa Salad

6

Black Bean Mango Quinoa Salad4

Tired of green salad?  This flavor filled quinoa salad with mango and avocado topped with an orange cumin vinaigrette is my new favorite!  I promise you won’t be bored. It’s a little bit spicy from the jalapenos, a little bit sweet from the mango, the black beans add a rich salty flavor and fresh avocado, purple onion, bell pepper and cilantro make it salad worthy.  Yum!

Quinoa is the perfect backdrop for these beautiful flavors.  It also happens to be a nutritional powerhouse, high in protein, low in fat, gluten free and loaded with lovely vitamins and minerals (but you don’t have to tell your family that).  What I didn’t know is that Mango is also a superfood, providing over 20 vitamins and minerals in every delicious bite. ( This puts a whole new light on my recipe for Mango Margaritas!)  Black beans add another protein and nutrient boost and their high fiber content helps keep your tummy full. Then there is the Avocado, which we now know is a good fat that is highly nutritious.   The best part of this salad though, is how great it tastes!  I can’t wait to have it again for lunch…

This is the perfect dish to throw together for an easy dinner or bring to a potluck, especially if you have leftover quinoa on hand (or you make it ahead), then it’s only about ten minutes of chopping, mixing and you’re done!  This salad can be made a day ahead, without the avocado.  Bring to room temperature then gently toss in the avocado, if using, before serving.

TIP:  You can buy mango pre-cut but it’s very easy to do it yourself (and less expensive) if you know the right technique.  How to cut a Mango

VARIATIONS:  If you don’t have, or like, mango, you can substitute orange or nectarine segments (or even canned or frozen corn).  Use a combination of yellow, orange, red and green bell peppers for lots of color.  This recipe is only mildly spicy using one red jalapeno pepper so double the amount of jalapeno peppers and add a bit more cumin if you like it hot.

Black Bean Mango Quinoa Salad

Black Bean Quinoa with Cumin Orange Vinaigrette

  • Difficulty: easy
  • Print

 Black Bean Mango Quinoa Salad4

1 cup quinoa
1 cup mango, diced
1 red bell pepper, diced
1 red or green jalapeno, seeded and diced
1 cup canned black beans, drained and rinsed
1/2 red onion, diced
1/3 cup fresh cilantro or parsley leaves, chopped
1 avocado, peeled, seeded and diced
 
 vinaigrette
1/4 cup olive oil
1/4 cup apple cider vinegar
1/4 cup freshly squeezed orange juice
1 tsp cumin
1 tsp salt

Black Bean Mango Quinoa Salad3

  • Rinse quinoa to remove bitterness and cook according to package instructions; set aside and let cool.
  • To make the vinaigrette, whisk together olive oil, apple cider vinegar, orange juice, cumin and salt in a small bowl; set aside.
  • In a large bowl, combine quinoa, mango, bell pepper, jalapeno, black beans, avocado, onion and cilantro. Pour the vinaigrette on top of the salad and gently toss to combine.
  • If you aren’t serving immediately, place the avocado pit on top of the salad to keep the avocado from turning brown, or add the avocado right before serving .  Serve at room temperature.

Black Bean Mango Quinoa Salad8


Meatless Monday – Grilled Nectarines and Summer Squash with Balsamic Glaze

1

Grilled Vegetables10

I know I’m late to the grilled fruit game.  I never understood the fascination with throwing everything on the grill, but I am now a believer.  Grilling transforms something simple and delicious into a spectacular crowdpleaser.  Grilling enhances the natural flavors of fruits and vegetables and caramelizes the sugars in them, which is why grilled fruits are particularly delicious.   I came home to find a beautiful display of summer squash, nectarines and spring onions sitting on my counter, compliments of our local farmers market.  The squash had such interesting shapes that I immediately wanted to showcase.  I especially love the star shaped yellow squash!   I thought slicing them into rounds and grilling them would make a visually interesting dish.

Grilled Vegetables8

Then, once I added the nectarines and purple onion to the mix, I thought, “They look so beautiful all together, why not grill them all?  Sometimes dinner just  has to be dictated by what you have on hand.

Grilled Vegetables7


Vegetables can be grilled dry, but many of them taste better and are less prone to sticking if they are marinated first, or at least drizzled with oil.  Fruit, on the other hand, with its natural sugar content, is great when placed directly on the hot grill.  I marinated the squash in olive oil, garlic and herbs before grilling, then carmelized the onions on high heat in a cast iron pan and made the balsamic glaze (or rather, my sous chef, Veronica, made the glaze while I grilled the zucchini).  Lastly, I grilled the nectarines and piled everything together in a large tray and drizzled with the balsamic glaze.  I sprinkled with a bit of feta and a handful of blueberries, the first from my garden this year.  My final result was a pretty spectacular vegetable/fruit platter with gorgeous colors.  The balsamic glaze complimented the grilled fruit and combined nicely with the savory squash.  I will definitely be mixing more veggies and fruits this summer!

If you’re interested in more grilled fruit recipes, check out my recipe for Tortillas with Grilled Pineapple Salsa (with Mango Margaritas, of course)

Grilled Nectarines and Summer Squash with Balsamic Glaze

  • Servings: 4
  • Difficulty: easy
  • Print

4 -6 summer squash (any variety)

Marinade:  1/4 cup olive oil, 1 clove minced garlic, 1 Tbsn lemon juice, 1/4 tsp salt, 1 tsp fresh herbs(oregano, thyme, parsley or marjoram)

1 large spring onion (or Walla Walla or Maui sweet)

2 Tbsn avocado oil, or other high heat oil
6 nectarines
1/4 cup olive oil
2 oz feta (optional)
1/2 cup blueberries (optional)
Balsamic glaze:  1/4 cup basamic vinegar, 1 Tbsn honey, pinch of salt
salt and pepper to taste

Grilled Vegetables5

  • Place all marinade ingredients into a large ziploc baggie or container.  Slice squash into rounds and put into marinade until ready to grill.

Grilled Vegetables3

  • Heat balsamic vinegar in a small saucepan until reduced by about half.  Stir in honey and add a pinch of salt.  Remove from heat.
  • Slice onion into thick rounds.  If you don’t completely remove the stem, the top slice becomes a ‘rose’ which is a nice centerpiece.

Grilled Vegetables1

  • Saute the onion slices on high heat, keeping the sections together, turning with a spatula to brown both sides.  Then break apart and saute a few more minutes. Or you can marinate and grill the onions until they are softened and browned.  Remove to a platter.

Grilled Vegetables4

  • Grill the zucchini rounds until brown on both sides.  Remove to platter with onions.

Grilled Vegetables2

  • Half and pit the nectarines and place on a hot oiled grill, a few minutes per side until grill marks appear.  Remove to platter with veggies.
  • Sprinkle with feta and blueberries, if using.  Drizzle with balsamic glaze. Coarse salt and pepper to taste.
  • Serve warm or room temperature with reserved balsamic glaze on the side.

Grilled Vegetables9


Lemon Cucumber and Mint Water

2

Lemon Water

What’s new in my refrigerator?  In an attempt to drink more water and fewer store bought beverages, I have started making my own infused waters, similar to the ones in spa waiting rooms that are so refreshing.  A combination of lemon, cucumber and mint seems to be the most popular combination and for a great reason.  Besides being delicious it seems that lemon cleanses the body, mint aids in digestion and cucumber, not only rehydrates but helps you lose weight.   Read more from Healthy Holistic Living for the recipe as well as a great write up of these three lovely natural ingredients, especially the amazing cucumber.  I’m just going to sit here and wait for the pounds to melt away…(Smile)

Lemon Cucumber and Mint Water.

Wheatless Wednesday – Quinoa Crust Pizza with Goat Cheese, Meyer Lemon and Basil

4

Quinoa Pizza1

QUINOA CRUST PIZZA – YOU HAD ME AT PIZZA!  Those that have been following GMD, know that I am in constant search of great pizza recipes, especially those whose ingredients stretch conventional thinking (read not white flour). My Meyer Lemon tree outside is still loaded with lemons and I now have two pounds of freshly made goat cheese (click HERE to learn how to make goat cheese which is surprisingly easy), so when I saw this recipe from Cafe Johnsonia using quinoa instead of white flour for the crust, I knew we had a new Wheatless Wednesday contender.  The quinoa crust is fantastic!  I really like it and will make it again and again.  Its less heavy than a cornmeal crust and has a great consistency.  In fact, I experimented with thick vs thin crust and think this recipe would also make a great cracker, so you may be seeing Quinoa Crackers in a post coming soon.

Quinoa Pizza9

You could top this pizza crust with your favorite toppings if lemon and goat cheese are not your thing.   It will hold up well, even with wet toppings like tomato sauce or heavy cheeses.   The combination of tangy goat cheese and tart meyer lemon, topped with fresh basil and shallots is a wonderful explosion of flavors.  If you want the same flavor combination but a less intense version, substitute strips of lemon zest in place of the lemons.  My favorite variation includes thinly sliced zucchini circles, garlic and lemon zest cooked with the lemon goat cheese, then topped with fresh basil, shallots (or scallions) and a handful of arugula.  Delish!

Quinoa Pizza10

Quinoa is one of the reigning superfoods, but do you know why?  According to Forbes, quinoa is one of the most protein rich foods available and has twice as much fiber as other grains.  It is rich in vitamins and minerals, including iron and vitamin B2 and gluten free.  Making a crust out of quinoa is not only way more nutritious than one out of white flour, it is easier as it doesn’t have to rise or be handled in any way.  The quinoa does have to soak for 8 hours or overnight but other than that, it only takes about 45 minutes and the prep is easy. For those that also like alternative pizzas, check out some others I have done in the past with good results:

Cauliflower Crust Pizza
Margherita and Pesto Chicken Pizzas on White Whole Wheat Crust
Zucchini Crust Pizza with Grilled Eggplant and Roasted Red Pepper


Quinoa Crust Pizza with Goat Cheese, Meyer Lemon and Basil

  • Servings: 4
  • Difficulty: easy
  • Print

Quinoa Pizza2


1 cup quinoa
water, for soaking and blending
1 clove garlic
½ teaspoon salt
2 Tablespoons avocado oil (or another high-heat oil)
5-6 ounces fresh goat cheese (chèvre)
1 Meyer lemon, very thinly sliced (seeds removed)
2 teaspoons fresh lemon juice
1 shallot, thinly sliced
small handful fresh basil leaves, cut into ribbons
2 Tablespoons pine nuts ( toasted)
coarse ground black pepper
coarse sea salt
olive oil, for drizzling(optional)

  • Place quinoa in a medium bowl and cover with water by several inches. Let stand at room temperature for 8 hours or overnight.
  • Preheat oven to 450 degrees F. Drain the pre-soaked quinoa in a fine mesh sieve and rinse well to remove the bitter saponins (a naturally occurring residue). Place in a food processor or blender with a little water (about ¼ cup), garlic clove, and salt. Puree until smooth. Add more water if needed. The mixture should be the consistency of thick pancake batter but still pourable.
  • Place a 10-inch cast iron skillet into the hot oven. Allow to heat for 5-10 minutes. Carefully add the 2 Tablespoons of oil to the skillet and heat for another 3 minutes. Remove the pan from the oven carefully. Tilt the pan to evenly distribute the hot oil. Make sure pan and oil are hot or quinoa will stick.

Quinoa Pizza4o

  • Pour the batter into the center of the pan and tilt it to create an even layer on the bottom. Place back into the oven. Bake for 20 minutes, then remove pan from oven, turn crust over, and place back in oven for another 10. Remove from oven and transfer the crust to a pizza pan, if desired. (At this point you can also place it on a cooling rack and let it cool completely, then prepare the pizza at a later time.)
  •  Mix the goat cheese with the lemon juice. If the cheese is very crumbly, add a little milk or water to make it spreadable.

Quinoa Pizza6

  • Spread the cheese evenly over the crust. Layer the Meyer lemons evenly over the cheese.
  • Place in the 450 degree oven and let bake for 10-15 minutes, or until the cheese has melted and turned golden, and the lemons are tender. (For a crispy top, place under the broiler for a few minutes.)
  • Remove from oven and top with the remaining toppings. Cut into wedges and serve warm or at room temperature.

Quinoa Pizza11

  • MY FAVORITE VARIATION:  For a less lemon intense pizza, replace lemon slices with lemon zest,  thin zucchini circles, and add a clove or two of garlic, that has been thinly sliced.  After cooking add a handful of arugula on top of the other ingredients.  Yum!

Quinoa Pizza12