Meatless Monday – Roasted Beet Salad with Ripe Peaches and Goat Cheese

1

Beet Peach Salad13

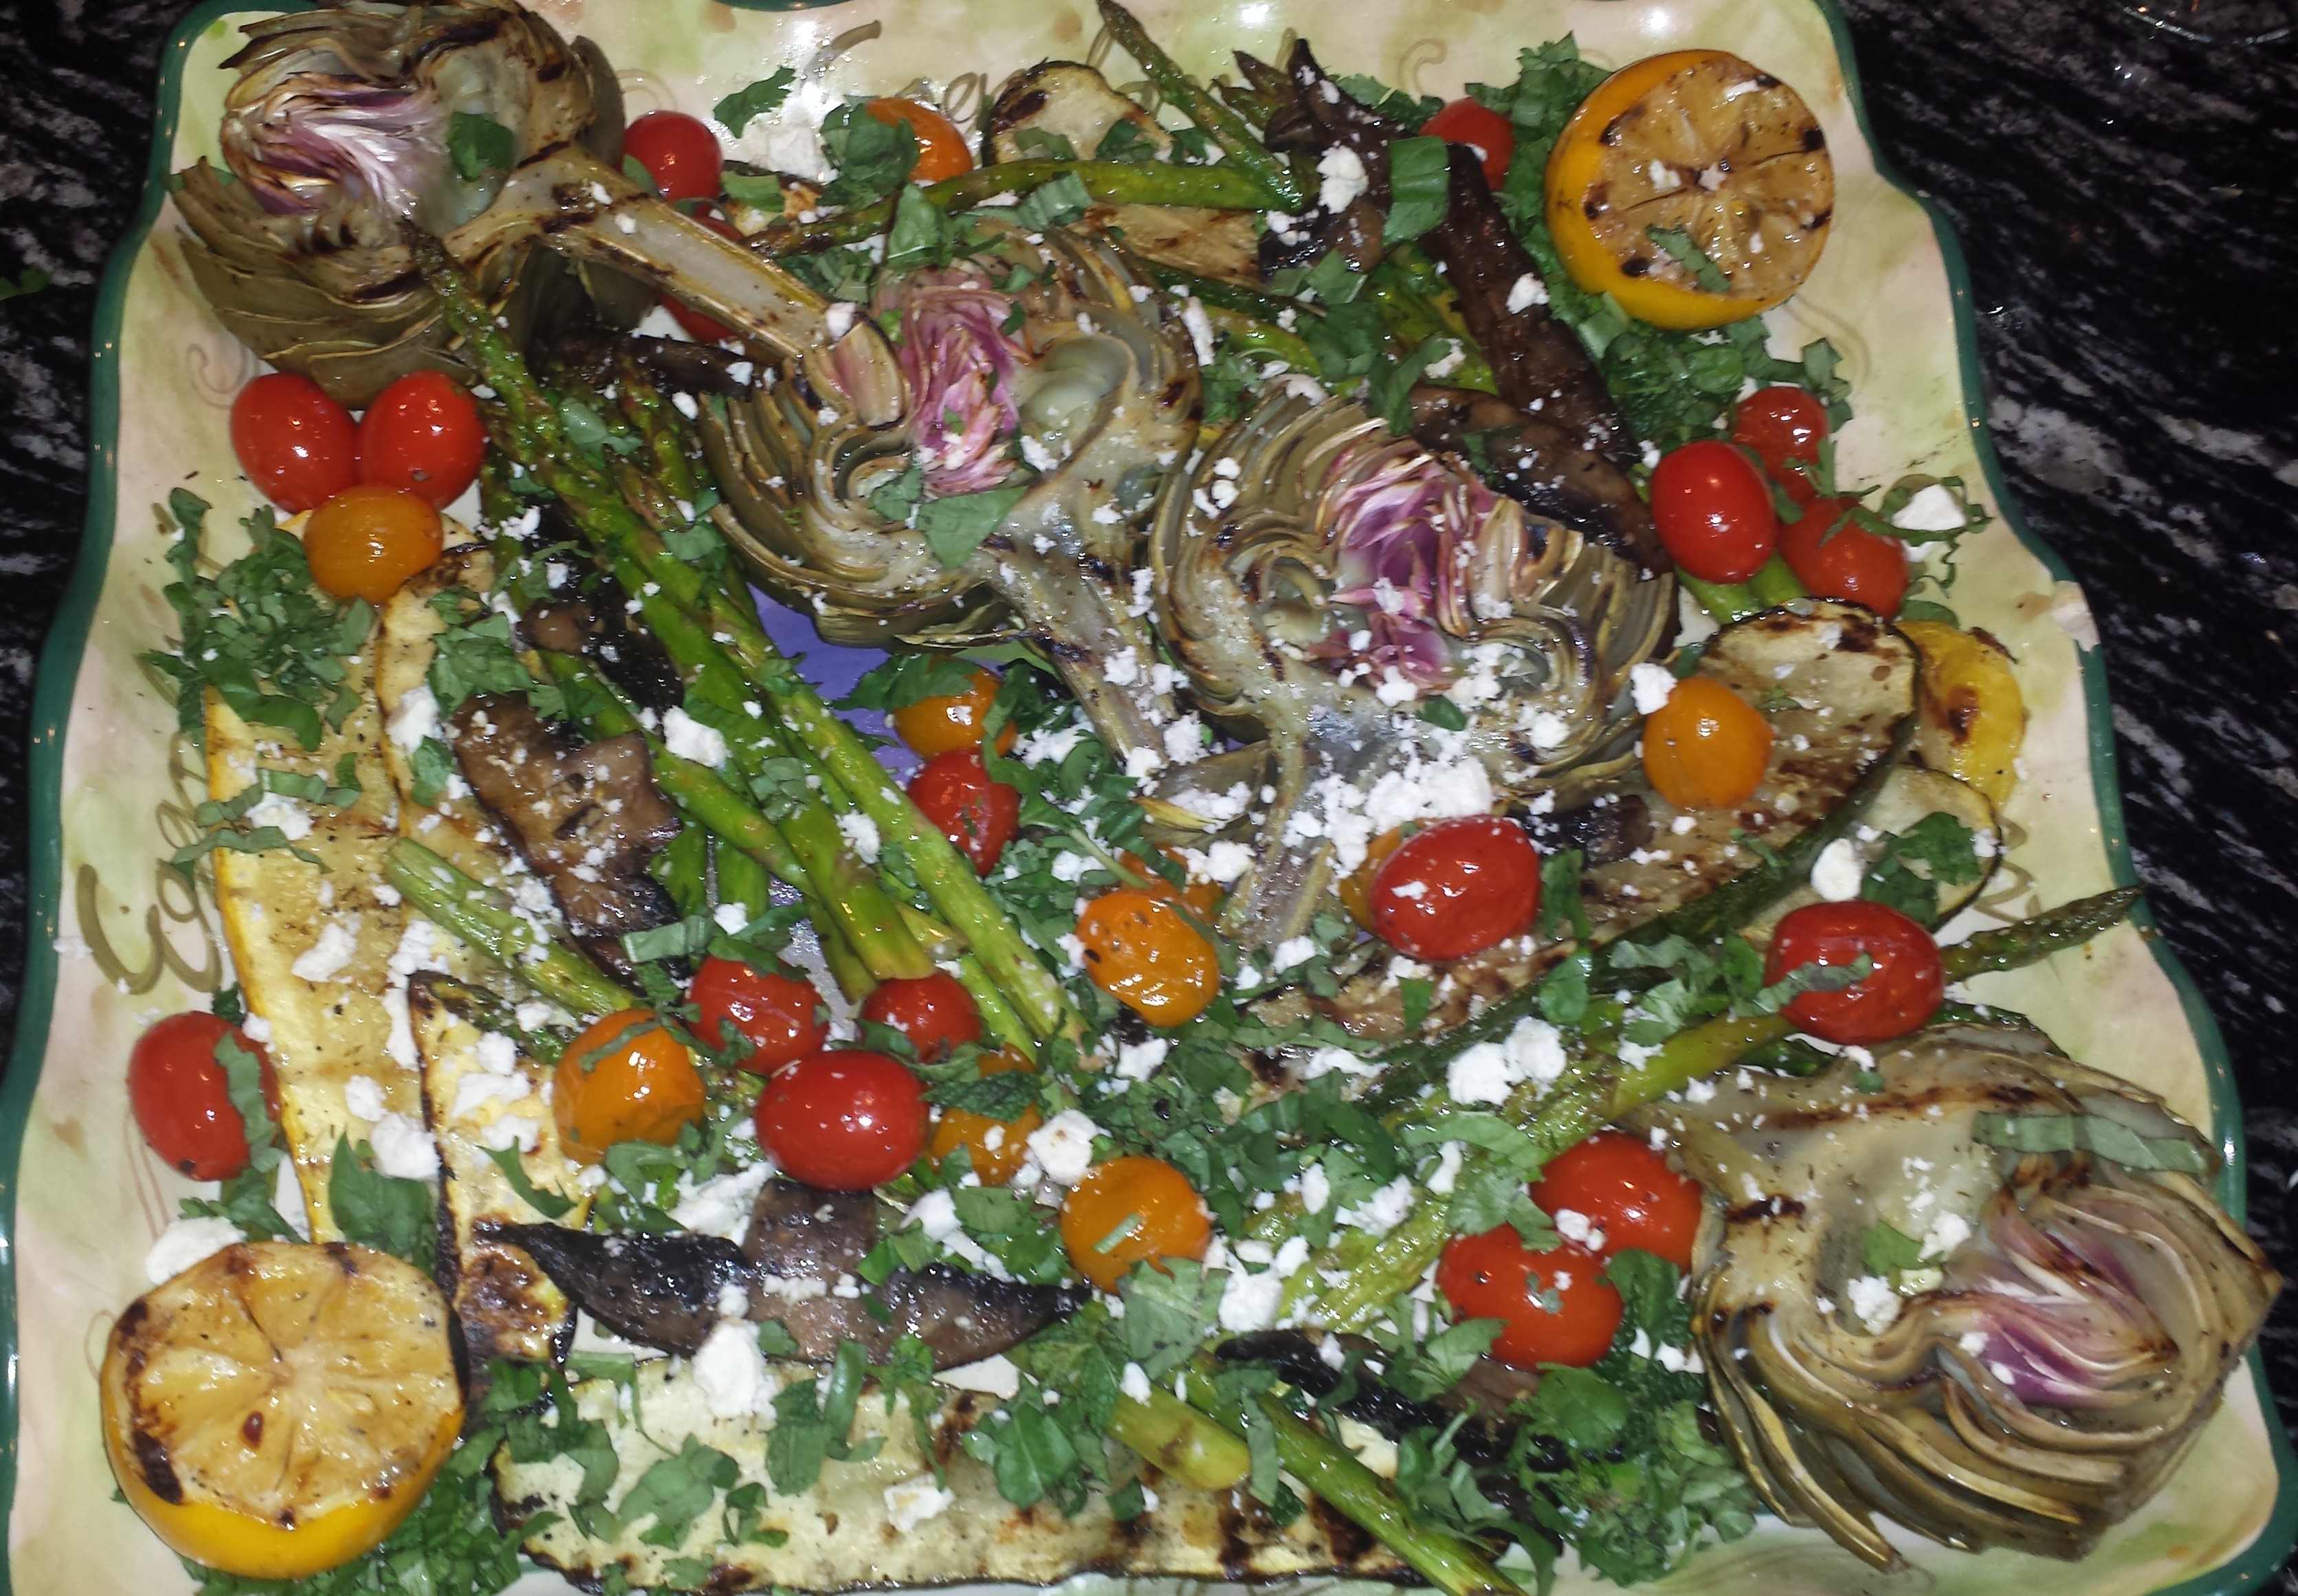
Is it a coincidence that fresh tomatoes ripe from the vine or juicy, just picked peaches taste especially good in summer or is it nature’s design to give us what we need?  I was thumbing through some cooking magazines admiring gorgeous photos of carmelized tomatoes and 10 ways to use fruit when I came across an article, “In Season For a Reason:”, by Ellie Krieger in CookFresh Magazine that claims our bodies are ‘calling for them’, meaning seasonal veggies.  “Not only do summer vegetables taste better and have a higher nutritional value, in season produce is in sync with our nutritional needs; it contains specific nutrients that replenish and protect us in the hot summer months”. Summer’s juicy fresh fruits and vegetables help keep us hydrated (20 percent of our water intake comes from the food we eat) and are rich in anti-oxidants, just when we need them most. Specifically, antioxidants like lycopene, vitamin C and beta-carotene help protect our skin from the sun by neutralizing damage to skin cells caused by the sun’s UV rays. Potassium, which we lose when we sweat, is also found in many summer vegetables. I wonder if winter vegetables give us what we need in winter too?

Beet Peach Salad8

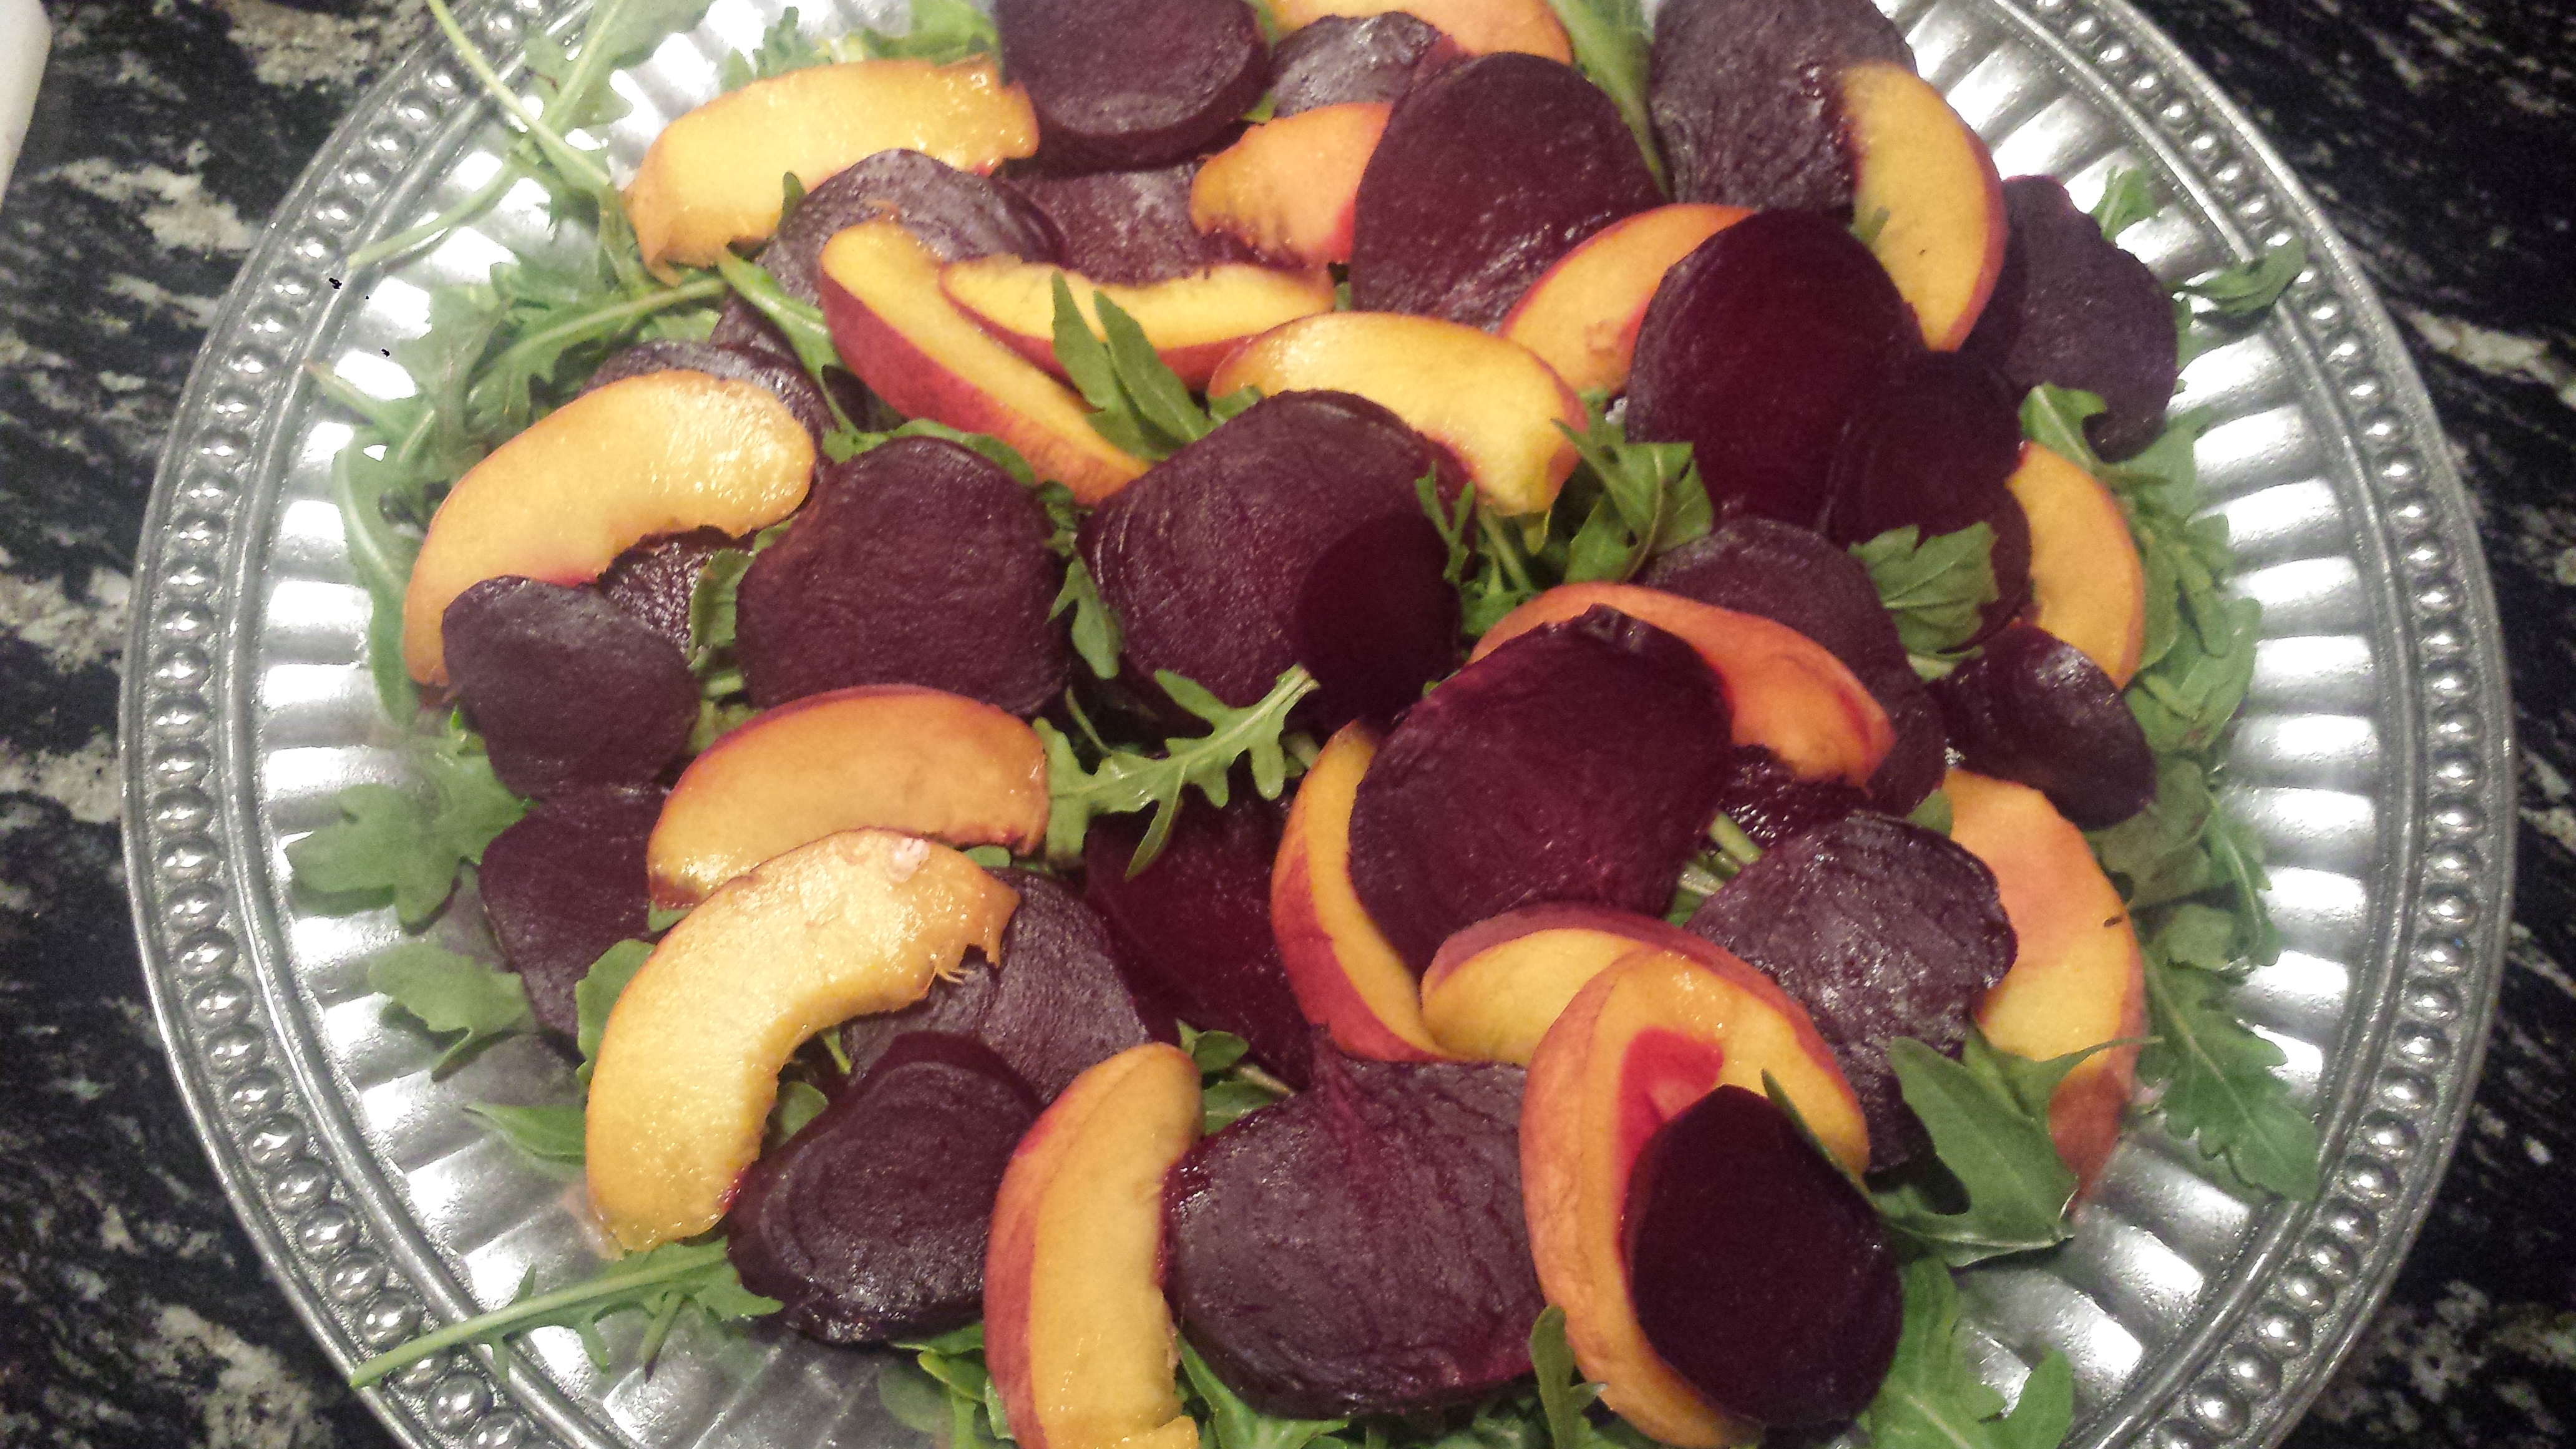
I like combining seasonal fruits and vegetables, especially in salads.  I often toss orange or grapefruit sections into my salads to give them  a sweet and tangy boost. Today’s salad combines fresh, roasted beets, ripe peaches and arugula topped with goat cheese and pistachios. If I had them I would have added a few halved dark red Bing cherries or strawberries which are also in season. There is something about the combination of sweet and salty is really satisfying.  Right now with peaches in season, they are plentiful, delicious and less expensive at the height of the season! If you have the grill going, you can just halve and pit them and stick them on the grill for a few minutes to slightly caramelize them or just cut them up fresh and delicious.

Beet Peach Salad6

Like their intense color would suggest, beets are big on antioxidants, and have cancer and heart disease-fighting properties, as well as a host of vitamins and minerals. including iron.  Roasting them brings out a more intense flavor and gorgeous color since nothing is released into water, as happens with boiling.  If you slice them vertically, you  may get heart shapes, which if you’re my pinterest friend, you know I collect hearts found in nature so couldn’t resist this picture.  Too pretty!  Don’t throw away the beets tops.  They actually have more flavonoid antioxidants and vitamins than the beet roots themselves, including Vitamin A.  They can be chopped and sautéed with a bit of olive oil and garlic for a delicious side dish similar to chard or mustard greens.  The beets can be roasted a day or two beforehand and stored in the refrigerator until you need them.  Other than roasting the beets (which is easy but takes time), this is a very fast and easy meal to throw together, nice and colorful too!

Roasted Beet Salad with Ripe Peaches and Goat Cheese

  • Servings: 4
  • Difficulty: easy
  • Print

2-3 raw beets
1-2 peaches
1 bunch baby arugula
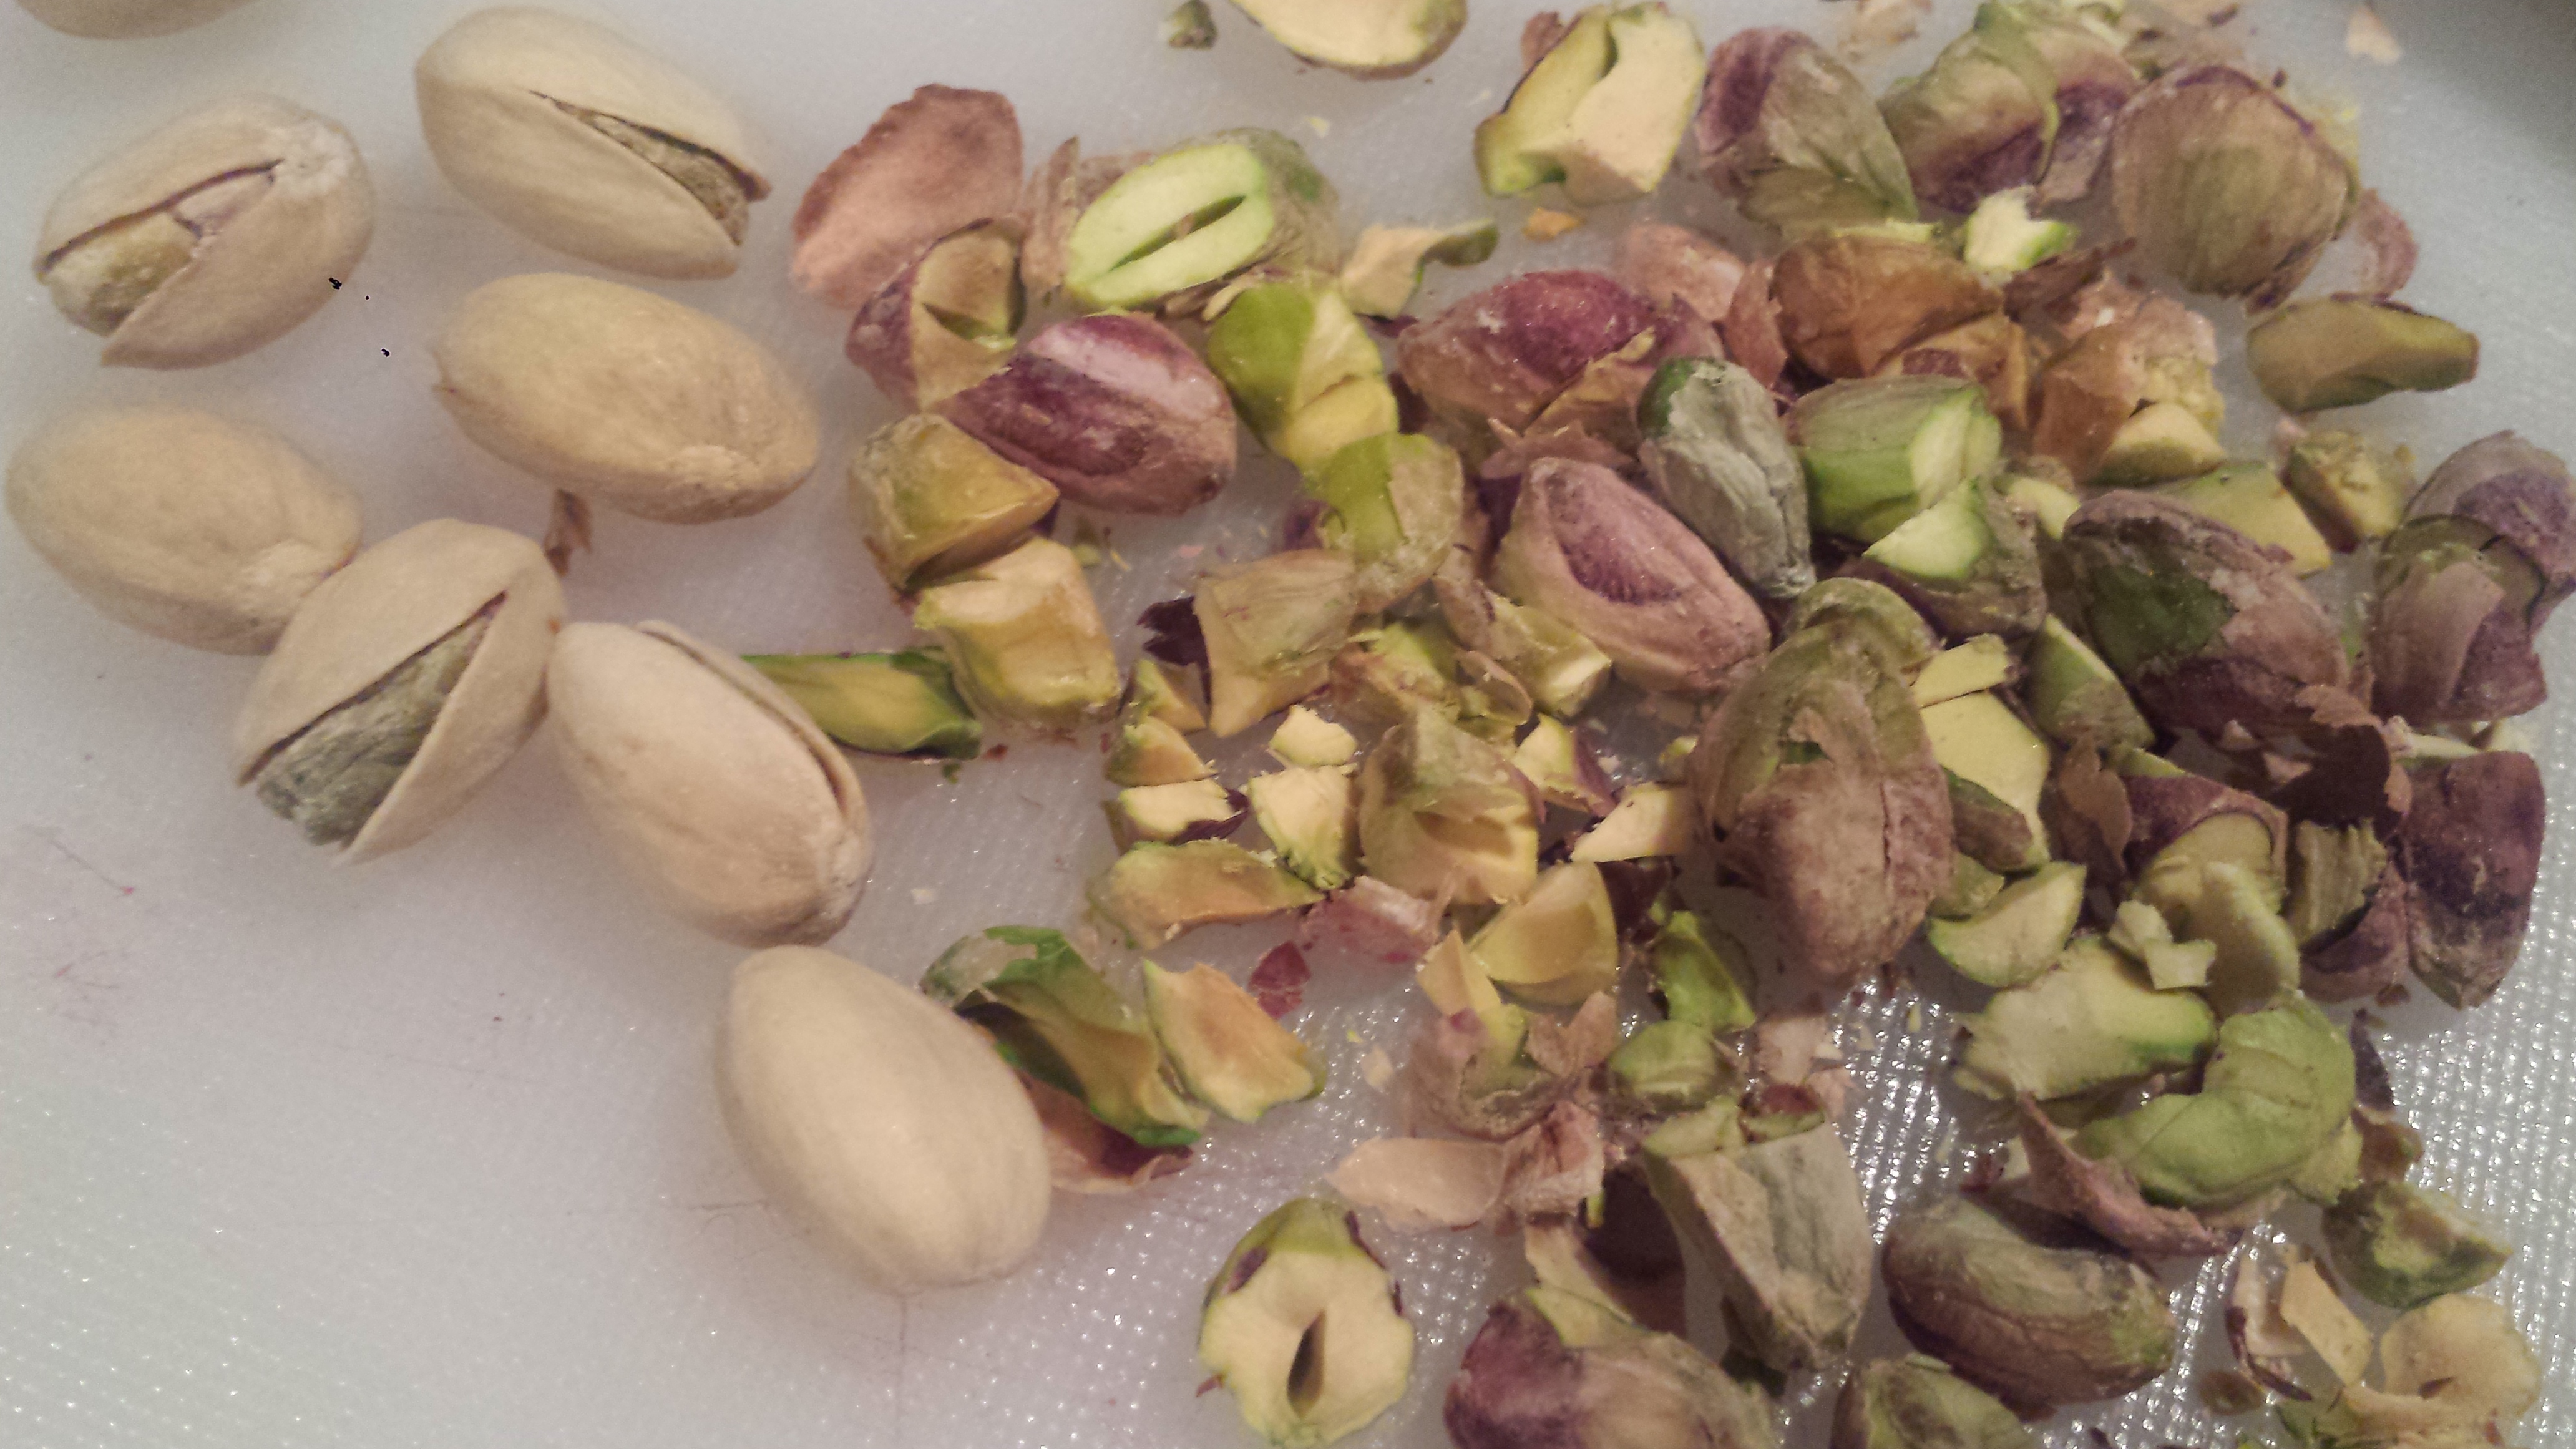
1/4 cup pistachios (or toasted pine nuts)
2 oz fresh goat cheese (optional)
1/4 cup fresh basil, chopped
2 Tbsn fresh mint, chopped
1/4 cup olive oil
2-3 Tbsn balsamic vinegar
salt and pepper to taste

Beet Peach Salad1

  • Preheat oven to 375 degrees. Lay beets on aluminum foil and drizzle with olive oil.  Don’t remove the stem or tail.  Wrap foil into a pouch and bake until the beets are fork tender, about 1 hour and 20 minutes.

Beet Peach Salad2Beet Peach Salad3

  • Let the beets cool, at least enough to handle, and remove the skins, stem and tail.  I like to use paper towels so my fingers don’t turn red.  Set aside and let them cool to room temperature, then slice.  I would recommend using a non-porous cutting board, since the juice from the beets stains everything it touches, including your hands.

Beet Peach Salad5

  • Wash, remove the pit and slice the peaches.  I like the skin but if you don’t, then remove the peel before slicing.
  • Coarsely chop the pistachios.

Beet Peach Salad10

  • Place the arugula in the bottom of  a large serving bowl or platter. Add the sliced beets and peaches.

Beet Peach Salad9

  • Top with pistachios and goat cheese.

Beet Peach Salad11

  • In a separate bowl, whisk together the olive oil, balsamic vinegar, salt, and pepper and pour over the salad before serving.

Beet Peach Salad13

Wheatless Wednesday – Grilled Artichoke & Mixed Veggie Platter

0

Grilled Veggies1

Summertime, and the livin’ is easy… (Sing along, I know you know the tune)  We are getting to the part of summer where fresh vegetables are plentiful and so good!  One of my favorite summer dishes is a grilled mixed vegetable platter using whatever is in season.   The double bonus is that fruits and veggies at the height of their season are at their best and their cheapest!   I just let everything sit in a basic marinade until I’m ready to grill, then toss them on a platter with fresh herbs (I love a combination of basil, mint and cilantro or thyme) and sprinkle with a bit of feta.  It is a very easy and colorful way to serve a lot of vegetables at once.  Today’s platter includes artichoke, asparagus, yellow squash, zucchini, Portobello mushroom, cherry tomatoes and lemon, all grilled to tender, sweet, slightly charred perfection. Somehow the grill brings out a lightly carmelized flavor that you can’t get with other types of cooking.  The artichoke needs to be boiled or steamed for about 15 minutes before grilling but the other vegetables can be cooked right away.  I grilled the tomatoes in a foil pouch so they didn’t get lost in the grates.  I just tossed them with some olive oil, garlic, oregano and a dash of salt and pepper, simple but delicious!  If you are lucky enough to have any leftovers, grilled vegetables are great in salads, sandwiches or on pizza (my fave)!  So head to the farmer’s market and fire up the grill!

Grilled Veggies12

Grilled Artichoke and Mixed Veggie Platter

  • Servings: 4-6
  • Difficulty: easy
  • Print

2 large artichokes
2 lemons
1-2 zucchini
1-2 yellow squash
1 bunch asparagus
1 pint cherry tomatoes
1/2 cup olive oil
4-5 cloves garlic, minced
1/4 cup feta, crumbled(optional)
1/2 cup or more mixed herbs, chopped(basil, mint, thyme or cilantro)

Grilled Veggies11

  •  Using a sharp knife, cut the top inch or two off the top of the artichoke and immediately rub the cut area with a cut lemon to prevent browning.  You can remove the sharp points from the leaves by cutting the tops of each leaf off with either a knife or kitchen scissors but this is optional.

Grilled Veggies10

  • Cut artichoke in half, rub with lemon and scoop out the choke with a small knife or spoon.  Squeeze the rest of the lemon into boiling water and boil or steam the artichokes for about 15 minutes, or until the stem is easily pierced with a knife.  Remove from the pan and let cool.

Grilled Veggies8

  • Toss the artichokes with a drizzle of olive oil, chopped garlic, thyme and a squeeze of lemon.  I like to use zip lock baggies for convenience but you can also use a bowl or platter.

Grilled Veggies9

  • Trim asparagus,  cut remaining lemon in half, slice Portobello mushrooms, squash and zucchini lengthwise and marinate with olive oil, garlic and oregano or thyme.  I like to add a dash of soy sauce to the mushrooms to bring out their meaty flavor(optional).

Grilled Veggies7

  • Lay the tomatoes in a double layer of foil and drizzle with olive oil, garlic and oregano.  Make the foil into a pouch.

Grilled Veggies4

  • Spray the grill with non-stick, high heat oil before lighting.  Grill the vegetables on a hot grill and turn when you get some good grill marks.  Season with salt and pepper.

Grilled Veggies6

  • You  may have to grill in batches but it’s best not to crowd.

Grilled Veggies5

  • Arrange grilled veggies on a large platter as they come off the grill.

Grilled Veggies3

  • Sprinkle with fresh herbs and feta, if using and give it a good squeeze from the grilled lemon.  Delish!

Grilled Veggies1

Meatless Monday – Summer VegetableTart

7

Eggplant Tart2

Are you a flexitarian?  I have heard the terms omnivore, herbivore, vegetarian, vegan and pescetarian.  What on earth is a flexitarian?  Well apparently it wasn’t even a word until 2012, when it was added to the Merriam-Webster Dictionary. Flexitarian = flexible + vegetarian:  a person whose diet is mostly vegetarian but sometimes includes meat, fish, or poultry.  My mom recently sent me an article from Mother Earth News,  Becoming a Flexitarian. which outlines the basic flexitarian approach – eat less meat and eating grass-fed when you do.  There are a lot of great reasons to eliminate or reduce meat in our diets, including health, the environment and humankindness.  Perhaps a Flexitarian approach is more doable for people than going vegetarian or vegan and can actually help promote local farming as a profitable business by only buying grass fed, humanely raised meat from responsible growers and not from the big factory farms.  I personally apply the same principles to purchasing eggs, milk and other animal products.

Eggplant Tart12

The good news is that people who don’t eat meat, i.e. vegetarians and vegans, are becoming more main stream and there has been a shift in the public perception to consider where your meat has come from for  health, safety and animal rights reasons. Vegetarianism has come a long way from the hippie culture of the 70’s as evidenced by widespread programs like the Meatless Monday Campaign which has gone global.   It’s been over a year since I’ve eaten meat (although I do eat fish and the occasional chicken that has been locally farm raised) and I don’t miss it.  It was an easy adjustment for me since I never ate huge quantities of meat anyway, except maybe for bacon.  Anyway, I feel good about my choices and now I have another moniker, Flexitarian.  Thanks Mom!

Eggplant Tart13

So how do you eat less meat and still have delicious, satisfying meals?  It’s pretty easy but takes a bit more thought than just throwing something on the grill, although you can do that too.  How about my Meatless Monday selection of the week, a Summer Vegetable Tart? I was inspired by an exquisite Zucchini and Aubergine Tart by Mimi Thorisson which is a complete work of art (photo above). You can click on her name to get the recipe if you are so inclined.  It’s almost too pretty to eat!  Not being a recipe follower, I didn’t actually make her recipe but just used the overall concept of making a tart in flower form. My tart is a bit more casual than Mimi’s and next time I will pack in even more veggies to make it more vertical (which my followers know I love vertical food).  My tart can be made with or without a crust and is easy to make vegan by leaving out the fresh mozzarella.  I absolutely loved this dish.  My guests loved it too, although I was surprised to see three 22 year olds going back for seconds on the vegetables rather than the meat.   I consider that quite an accomplishment.  The only problem is that there were no leftovers…

Summer Vegetable Tart

  • Servings: 4
  • Difficulty: moderate
  • Print

1 small eggplant
1-2 zucchini
1-2 yellow squash
3 tomatoes
3-4 Boccocinni fresh Mozzarella balls (optional)
3-4 cloves garlic, chopped
3 Tbsn fresh basil, chopped
2 Tbsn olive oil
Salt and pepper

Crust (Optional):  There are some pretty decent store bought crusts or click Here for a very simple Whole Wheat Crust recipe from Whole Foods

Eggplant Tart11

  • Thinly slice eggplant using a sharp knife or mandolin.  Spread the slices on a flat surface and sprinkle them with salt and let sweat for at least 10 minutes.

Eggplant Tart15

  • Thinly slice zucchini, squash, tomato and mozzarella.
  • Pat eggplant dry and place in a large bowl.  Add zucchini and squash, garlic and oil.  Gently mix to evenly coat all veggies.

Eggplant Tart8

  • If you are using a crust, spread it evenly in the bottom and up the sides of an ungreased pie or quiche pan.  If you’re not using a crust, spread a little oil in the bottom of the pan to prevent sticking.

Eggplant Tart6

  • Arrange the veggie slices in a circular pattern starting at the outside making sure the veggies go up the sides of the crust.  I did a couple of rows of eggplant and squash before adding tomatoes and mozzarella since they are so soft.  For an even less fussy dish, just layer the vegetables and don’t worry about the pattern.  It will still be delicious.

Eggplant Tart5

  • Keep arranging  toward the center, pushing the slices towards the outside and into a more vertical position as you go.  The more vertical you go, the more veggies you can use.
  • Save a few of your best thin slices of eggplant or zucchini and roll or fold this into flower like shapes to decorate the center.

Eggplant Tart4

  • If you have any leftover slices, just slip them in anywhere.  Slide any remaining garlic and basil between the slices.
  • Bake in a preheated 400 degree oven for about 45 minutes or until the vegetables are done and the rust is golden brown.
  • Remove from heat and let cool a bit before serving. Also good at room temperature.

Eggplant Tart1


Cupcake Love

4

Cupcake Love6

I don’t do a lot of baking and (spoiler alert!) I did not bake these cupcakes.  It was just my birthday, which, of course means I got to indulge myself.  Sometimes you need to go with delicious over nutritious and I thought cupcakes would be the perfect dessert to serve at the lake.  It’s easy to mix and match several flavors so you can please everyone. Plus, people will often say no to a slice of cake but not hesitate to eat a cupcake. People love cupcakes, which are quite the food craze of the moment.  There is even a reality show, ‘Cupcake Wars’ on Food Network which pits bakers against each other for prize winnings, so I guess we’re on trend.

Cupcake Love9

These yummy treats are from Cupcake Love, a cute little cupcake shop on Maine Street in Bridgton, Maine. The owner and baker extraordinaire, Shannon Lyon, puts her creative spin on traditional cupcakes taking them, literally, to new heights.  For someone like me who enjoys making my food into fun edible towers, her cupcakes are simply irresistible, like this Brownie Sundae.

Cupcake Love2

Or this Vanilla Chocolate Chip which is almost too cute for words.

Cupcake Love4

I love coconut cake so ordered a dozen Coconut Cupcakes and was not disappointed with the yummy coconut buttercream topped with toasted coconut.  Hard to resist?  Why even try?

Cupcake Love8

Cupcake Love10

So you might think it is cruel and unusual to post this when you might be too far away to just pop in and pick up some of her cupcake creations.  On the other hand, those of you that are bakers can consider this inspiration.  Go tall!  Check out Cupcake Love on Facebook for hours or more yummy flavors.  Stop in if you’re anywhere near Bridgton but go early since she usually sells out.

Cupcake Love5


Wheatless Wednesday – Arugula Salad with Roasted Corn and Edamame

1

Arugula Salad8


What does it mean if you see a groundhog in the summer?  A couple of days ago, I spotted a fat, furry little creature stealing strawberries from my garden.  It scurried off into the woods as soon as it saw me but not before I got a good look.  It took me a couple of days to figure out what kind of animal it was since I have never seen one before and I have to admit that I became a bit obsessed.  It looked like a beaver but with a fluffy, bristle brush-like tail.  I finally spotted an internet picture of my new little friend, who turns out to be a groundhog, although here in Maine they are called woodchucks.  I know that Maine had a brutally long winter and Punxatawny Phil saw his shadow on Groundhog Day dooming the East to six more weeks of winter, so I hope that this means six extra weeks of summer.   Perhaps the fact that the little guy is a Mainer, and therefore, only a woodchuck, maybe it doesn’t mean anything and he is just a cute little neighbor who likes my strawberries…

groundhog

Photo Courtesy of http://www.teacheratlas.com

So what does my groundhog/woodchuck have to do with Wheatless Wednesday?  Nothing, except that I was carrying all the veggies I just bought into the house when I spotted him and almost dropped them in my excitement.  This week in Maine has been hot and humid so we are eating lots of salads.  You might say I overthink food, and perhaps I do, but here is my take on a Green Salad, which is green (arugula) on green (edamame) on green (snowpeas) on green (avocado) on green (scallions) with just an accent of color (corn and maybe a sprinkle of goat cheese).   The variety in this salad comes from the flavors and textures rather than most summer salads that are generally pretty colorful.

Arugula Salad3

Corn is just starting to come into season and I have had trouble finding organic, non-GMO corn here in Maine, perhaps its just too early or maybe it’s an indication of how much of our corn is now GMO. 😦 It’s hard to pass up the bins of 10 ears of corn for $4.00 but I just did that yesterday.  Instead I bought 3 hard to find ears of organic white corn for $3.00.  Call me crazy but I really go out of my way to avoid GMO’s!  Since corn was my accent in this salad, I decided to rub it with butter, salt and pepper(and maybe just a tad of Creole Seasoning.  I like Tony Cachere’s) and roast it until it turns golden brown.  I let it cool and then sliced the kernels off into the salad.  Delicious!

Arugula Salad2

Although this salad is light, it is also pretty hearty. Arugula is a great choice for a green salad. Arugula contains about eight times the calcium, fives times the vitamin A, vitamin C and vitamin K, and four times the iron as the same amount of iceberg lettuce.  The Edamame provides protein, fiber, vitamins and minerals (including calcium and iron). and the Avocado is nutrient dense and a source of good fat (which we need to absorb the nutrients so don’t hold back).  Sugar Snap Peas are also a good source of vitamins and minerals including calcium and Vitamin C.   Corn gets a bad rap but is actually pretty loaded in antioxidants and fiber.  The best thing about this salad though is that it’s simple but delicious-a perfect hot summer meal!

Arugula Salad9

Arugula Salad with Roasted Corn and Edamame

  • Servings: 4
  • Difficulty: easy
  • Print

3 cups baby arugula
1 cup edamame (fresh or frozen, thawed)
1 cup sugar snap peas, sliced lengthwise
1 avocado, peeled and diced
2 scallions, thinly sliced
2-3 ears of fresh corn, shucked
2 tsp butter (olive or coconut oil)
salt, pepper & creole seasoning (optional)
2 Tbsn goat cheese (optional)

Arugula Salad

  •  Wash corn and remove any remaining strings.  Rub 1/2 teaspoon butter onto each ear (I used my hands which was messy but effective) and sprinkle with salt and pepper.  I also like to add a bit of Creole Seasoning.  Put in a roasting pan and broil for 3-5 minutes per side, or until golden brown.  Let cool.

Arugula Salad6

  • Place arugula in the bottom of a large bowl.  Add snowpeas, avocado, edamame and green onions.  Slice the kernels off the cobs and add to the salad.

Arugula Salad7

  • Top with crumbled goat cheese or serve on the side, if desired.
  • To make a simple vinaigrette, whisk together 1/4 cup olive oil, 1/4 cup apple cider vinegar, 1 Tbsn lemon juice, 1/4 tsp salt and 1/8 tsp pepper
  • Drizzle with vinaigrette or serve on the side.


Meatless Monday – Composed Salad

0

Composed Salad2

What is a composed salad?  It is a salad that has been artfully arranged and drizzled with vinaigrette rather than tossed.  Why, you might ask, would you go to the trouble to arrange your veggies instead of just tossing everything together?  Well the obvious answer is aesthetics.  Composed salads elevate what would otherwise be a simple salad into  an artistic centerpiece.  The other benefit is that each ingredient maintains it’s integrity so you can taste each individual flavor.  Of course it all ends up mixed together eventually but each person gets to ‘create’ their own personal salad by hand picking from the tray of goodies.  Composed salads are usually hearty enough to be main courses, think Cobb Salad, but the possibilities are endless.  If you don’t have a rectangular tray, go circular like this Rainbow Chopped Salad by Fueled By Vegetables.

Chopped Salad13

You can even take the vertical or 3D approach like this layered Southwestern salad from Kitchen Excursions

Composed Salad10

I love composed or arranged salads, perhaps for the same reason I like to stack food and make edible ‘towers’ like my Crab Quinoa Tower or Polenta Towers. It must be the wanna be artist hidden deep inside me. Don’t worry I’m sticking to food. I recently went to my friend, Nicole’s birthday party where we  attempted learned to paint flowers and owls. Lets just say that my sad little flower went quite happily to it’s demise in the dumpster. I guess my artistry only goes so far…

Composed Salad12

My friends know that I rarely make the exact same salad twice, but I do use the same techniques over and over again, changing the ingredients to use what I have on hand or meet the situation. If I need a main course salad, I use heartier ingredients like chopped egg, beans and avocado to fill up hungry bellies. For a side salad I might do a combination of veggies and fruit with just a sprinkle of feta or goat cheese. The beauty of a composed salad is that it is visually striking and completely flexible.  Just layer the bottom of a wide container with greens and top with rows of any vegetables (or fruit), beans, cheese or nuts that you would normally put in a salad.  Voila, you have a visual feast!  It’s not more work, it just looks like it.

Composed Salad1

The amounts will vary depending on the size of your tray or bowl (A low platter works better than a deep bowl).  Amounts listed here are what I used for this particular salad in a 14×14 square tray.  Round works too, just put the ingredients you want the most of in the center rows, arrange them in triangles or concentric circles like a bullseye.  In arranging the rows, take advantage of the variations in color to provide a contrast.  I also put the cheese and egg on the sides so they are easier to avoid for those that are allergic or don’t eat them.  Be creative!  Use beets, artichoke, hearts of palm, strawberries, nuts or raisins.  Adding grains like quinoa or rice help make it a hearty main course.

Composed Salad5

Composed Salad

  • Servings: 6-8
  • Difficulty: easy
  • Print

 5-6 oz mixed lettuce
1 cup cooked, or 1 can garbanzo or black beans, drained and rinsed
2 large, ripe tomatoes, diced
1 large avocado, diced
1 cucumber, diced
1 yellow bell pepper, diced
3 hard boiled eggs, diced (optional)
3 oz feta, crumbled

Composed Salad7

  • Spread a layer of lettuce to cover the bottom of the container

Composed Salad9

  • Arrange each diced vegetable in rows, taking care to put allergens like cheeses and eggs on the outer rows.

Composed Salad8

  • Drizzle with your favorite vinaigrette or mix up a simple fresh one by whisking together 1/4 cup olive oil, 1/4 cup apple cider vinegar, 1 Tbsn balsamic vinegar, 1/2 tsp dry mustard, 1/2 tsp salt, 1/4 tsp pepper.  Serve with more dressing on the side.

Composed Salad1


Wheatless Wednesday – Santa Rosa Plum Crisp

5

Plum Crisp8

Looking for a simple 4th of July or summer dessert?  How about an easy Stone Fruit Crisp? Plums are in season right now as are other stone fruits like peaches, cherries and nectarines. Crisps are very forgiving to make as there is little that can go wrong, no crust to make or fruit to arrange. Just cut up your favorite fruit, sprinkle it with a yummy topping and bake. The beauty of this dessert is it’s simplicity.  This recipe is easily made vegan and gluten free and for a dessert, it’s pretty nutritious.  The oats and almond flour combined with the fruit and dates are loaded with vitamins and minerals ( and fiber, of course).   As an added bonus, your kitchen will smell divine!

I have a wonderfully prolific Santa Rosa plum tree in my garden in California.  Usually I make plum jam which I put on toast or in my yogurt for the rest of the year.  This spring in California has been so dry and warm that my plums were ripe and falling off my tree almost before I realized I was losing my crop.  So right before my summer move to Maine, I gathered everything I could reach and decided to take them with me since I didn’t have time to do anything with them in California.  I ‘smuggled’ the plums and some Meyer lemons, also from my garden, to Maine in my suitcase which I checked. I didn’t dare carry it on, since one of my friends once took home some of my lemons in her carry-on and security thought they were hand grenades. (Well they are rather large lemons!)   I decided it was not worth the risk of possibly having to dump them so packed them in with my shoes and extra clothes and hoped for the best.

Preserved Lemons2

The lemons made the trip very well but a few of the plums got a bit bruised on their journey and are no longer quite as perfect for eating, so I decided to make a plum crisp.  Since I have yet to do a complete restocking of my pantry, I had to make do with what I had on hand, even tearing open individual sugar packets to toss with the plums (after which, of course, I found the tin of sugar hiding up on the top shelf).  Like I said, this is a very forgiving dessert…

Plum Crisp1

TIPS:  Most fruit crisp recipes call for wheat flour but I opted to go grain free and use almond flour, although almost any flour would work as a thickening agent and in the topping as well.  I added pecans and almonds to the topping for added crunch as well as dates for extra chewy sweetness but both are optional.  If you don’t use nuts, just add a bit more flour and oats so there is enough topping to cover the fruit.   I usually prefer desserts that are one dedicated fruit but crisps are also good with a mixture of cut up fruits if that is what you have on hand.  This is  great way to make an amazing dessert out of leftover or less than perfect pieces of fruit.  Instead of throwing them out, just cut out the bad spots.  They will still taste delicious!

Santa Rosa Plum Crisp

  • Servings: 6
  • Difficulty: easy
  • Print

Plum Crisp2

4 cups plums, pits removed and chopped

1 Tbsn coconut, oat or almond flour (white or wheat work too)

3 Tbsn sugar (honey, agave necter, etc.)-more if your fruit is under ripe or sour

1 tsp vanilla or almond extract

1/2 tsp ground cinnamon

Topping:

1/2 cup flour (made from any grain or legume)

1/2 cup oats (not instant or fast cooking)

1/2 cup pecans or almonds, finely chopped(optional)

1/4 cup dates, pitted and finely chopped (optional)

1/2 cup brown sugar, packed

1/8 tsp salt

1/4 cup butter or coconut oil, melted

Plum Crisp3

  • Combine plums, flour, sugar, vanilla and cinnamon together in a medium bowl.  Pour into an ungreased baking dish or pie pan

Plum Crisp5

  • Mix together all topping ingredients with a fork until crumbly.

Plum Crisp6

  • Spread topping evenly over the plum mixture
  • Bake for 40 to 45 minutes in a 350 degree oven. Plums should be bubbling and the topping a golden brown.
  • Serve with vanilla ice cream (optional)

Plum Crisp7

Meatless Monday = Roasted Asparagus and Leeks

0

Asparagus and Leeks1


GoodMotherDiet has temporarily relocated to Maine for the summer. We have a house on Bear Pond nestled at the base of Bear Mountain.  Maine is a land of a thousand lakes and mountains where time goes more slowly. and we spend our days outside taking advantage of the abundance of nature.  Life is very casual and dinner is generally a last minute gathering of friends at our various homes or restaurants after a long day of playing on the lake or hiking in the mountains, sometimes squeezing in a sunset cocktail before heading home to make dinner.

Maine

I flew in yesterday on the red eye and I am still getting my bearings. As always happens when I switch homes, I have to remember the layout of the kitchen, relocate the silverware drawer and take a look at the contents of the pantry.  It usually takes me several trips to Hannaford before I have everything restocked. By evening we had our first dinner party, a typical potluck which travels from house to house along the lake.  My contribution to the meal was Asparagus and Leeks with shallots and garlic, drizzled with olive oil and roasted in a hot oven.  Although it is not the prettiest or most elegant of dishes, it is simple and delicious, a perfect addition to any meal.   For an added touch of flavor, you can drizzle with balsamic vinegar before serving.

Roasted Asparagus and Leeks

  • Servings: 4-6
  • Difficulty: easy
  • Print

1 bunch asparagus
2 large or 3 small leeks
2 shallots
2 cloves garlic
2 Tbsn olive oil
1/2 tsp salt
1/4 tsp black pepper
1 Tbsn balsamic vinegar (optional)


Asparagus and Leeks5

  • Trim rough end of asparagus and place in a baking dish
  • Trim  root end of leeks and cut off tops where the leaves start turning green.  Wash leeks under running water, fanning each layer like a deck of cards to remove any dirt left between the layers.  Pat dry and place in the baking dish.

Asparagus and Leeks6

  • Slice shallots lengthwise into large matchsticks

Asparagus and Leeks4

  • Slice garlic into thin strips
  • Sprinkle with salt and pepper

Asparagus and Leeks3

  • Drizzle with olive oil and gently toss to coat vegetables with oil

Asparagus and Leeks2

  • Roast in the oven at 400 degrees for about 25 minutes, stirring 3 or 4 times.  They should be tender and beginning to brown on the edges.

Asparagus and Leeks1

Wheatless Wednesday – Breakfast Polenta in a Mug!

4

Breakfast Polenta7

I love shortcuts and life hacks – but only if they work!  I will admit to sometimes using garlic paste from a tube, instead of chopping a pile of garlic cloves, or bags of pre-washed greens when I’m pressed for time and it can mean the difference between a home cooked meal and take out.  Sometimes you just have to go with whatever works and often the shortcuts are just short of brilliant.  For your reading pleasure I have provided a link to 40 Great Life Hacks which just may give you a good idea or two (or at least you will be impressed by the cleverness of some people).

life-hacks-22

Photo Credit: 40 Life Hacks

Knowing my interest in food (and avid GMD followers), my Mom and Dad sent me an early birthday present, “250 Best Meals in a Mug”,  a cookbook by Camilla V. Saulsbury with single serve recipes that can be made start to finish in a mug. I know this is a departure from most of my recipes, but my parents thought it was a fun concept and so different from the way I usually cook. So I decided to check it out.   Meals in a Mug has recipes for breakfast, lunch, dinner and dessert, all made and served in a mug for one. Brilliant! This not only solves the problem of making (and eating) too much food but also drastically reduces the prep and clean up time. No pots or pans to clean, just one mug and one spoon. How nice is that, especially at breakfast time when you’re trying to get out the door?

Breakfast Polenta3

I was immediately drawn to her recipe for Brown Sugar Vanilla Polenta. You might have had creamy polenta for dinner but have you tried it for breakfast?  Talk about comfort food, all warm and creamy, sprinkled with brown sugar and a swirl of butter. Yum! It tastes totally decadent and sinful yet, is surprisingly healthful. I used stone ground, non GMO, organic cornmeal which provides fiber, minerals (including magnesium and selenium) and vitamins (including B1 and B6), organic milk and dates, which are an underappreciated fruit.  They are also a good source of fiber and a great source of iron plus their natural sugar is an excellent substitute for ordinary sugar. I had good success in the past using dates for their sweetness in my Oat Nut Bars which are addicting pretty darn good.

Breakfast Polenta6

I rarely make polenta though because I am the only polenta eater in my house and I end up eating too much. However, the mug concept opens a whole new world of cooking for me, fast, easy and completely self-serving as I only have to cater to my own tastes.  If you are really in a hurry in the morning, you can prepare the mug before bed.  Measure the cornmeal, dried fruit and salt into the mug and let it sit on the counter overnight. You can also pre-measure the butter, vanilla, milk and water and refrigerate over night.

Breakfast Polenta1

TIPS:  I have never really used the microwave for anything other than reheating leftovers or making popcorn, so it took a couple of tries to get it right.  My microwave must be more powerful than the cookbook author’s, since my first attempt boiled over, so I have adjusted the times based on my personal experience.  I listed the cooking times as ranges because your microwave may take longer than mine, but I would start by using the shortest time at first.  I also reduced the amount of brown sugar from the original recipe by a third because the dates made it sweet enough (even without the pecans).  If you use cranberries or raisins you may need to add more sugar, depending on your tastes. The glazed pecans make a delicious topping for creamy polenta (or ice cream)  but they are also a great snack.  Just make them ahead and store them in a covered container or zip lock bag.


Breakfast Polenta in a Mug

  • Servings: 1
  • Difficulty: easy
  • Print

1/4 cup yellow cornmeal (preferably non GMO stone-ground)
3 chopped dried dates (or 1 1/2 Tbsn raisins, cranberries or other dried fruit)
1/8 tsp salt
2/3 cup water
3/4 cup milk, divided
2 tsp butter or coconut oil (optional)
1/4 tsp vanilla extract
1 tsp packed brown sugar ( sugar, maple syrup, honey or agave necter)
1 Tbsn glazed pecans, recipe below (optional)

Breakfast Polenta2

  • In a mug, combine cornmeal, dried fruit, salt, 1/2 cup milk and water.
  • Place in the microwave on top of a doubled paper towel and microwave on High for 2-3 Minutes.
  • Stir, making sure you get the cornmeal off the bottom.  Microwave on High for 1-2 minutes.
  • Stir.  Microwave on High for 1-2 minutes.  Check for thickness.  Microwave another minute if necessary.
  • Stir in butter and vanilla and sprinkle with brown sugar.  Drizzle with remaining milk, if desired and top with pecans or fresh fruit.  Yum!

Breakfast Polenta7


Glazed Pecans

  • Servings: 4
  • Difficulty: easy
  • Print

Beets8

1/4 white sugar)
1 Tbsn butter or coconut oil
1/8 teaspoon salt
2 Tbsn water
1 1/2 cup pecan halves (or walnut)
  • Combine sugar, butter, water and salt in a large skillet and stir over medium heat until butter is melted.
  • Add pecans and cook, stirring constantly, making sure pecans are evenly coated,  for 5-7 minutes.
  • Spread pecans in single layer on parchment paper and cool completely.

VARIATIONS:  To make pecans for snacking add 1/4 to 1/2 teaspoon of cayenne pepper for a spicy kick.  For a sweeter, dessert topping add 1/4 teaspoon vanilla or dash of cinnamon.  You can even substitute the white sugar for brown sugar for more of a carmely ‘turtle’ type result (great over ice cream!).


Meatless Monday – Zucchini & Apple Spirals with Basil & Mint Salad

1
Zucchini Spiral Salad1
 
I have always wondered how to make a ‘noodle’ several feet long, like the one in Lady and the Tramp.  Well now I know the secret.  My mother in law gifted us a vegetable spiraling machine for our anniversary (Well there is no special gift or gem for 28 years of marriage, go figure! So why not a vegetable spiraler…)   I couldn’t wait to try it out – and the result is awesome.  I experimented first with zucchini and got spirals over 6 feet long.  How cool is that?  Then I spiraled some apples and fell the rest of the way in love. It is easier than a mandolin, no peeling or coring and my fingertips and knuckles remained intact.  I decided to cut the zucchini spirals into shorter pieces to make it easier to serve, but it could be fun to make each 6-8 foot strand into it’s own serving.  Your surprised diners could have their own Lady and the Tramp moments…
lady-and-the-tramp-02
Photo Credit:  http://www.kitchenmemories.com
 
For this salad, I decided to add some spiraled apples to the zucchini to add a bit of sweetness and color.  I chose Fuji since they don’t turn brown as quickly as other varieties and I love their red skins.  I also really like the combination of fresh basil and mint in summer salads, especially with a honey, citrus vinaigrette.  To make this filling enough for a main course, I added avocado and pepitos which provide nutrients and good fats that help us feel satiated.  I also sliced up some sugar snap peas to add crunch.  This salad would be good topped with blue cheese, goat cheese or feta, if desired, for an additional protein boost.  
 
Zucchini Spiral Salad8
 

Zucchini & Apple Spiral Salad with Basil and Mint

  • Servings: 4
  • Difficulty: easy
  • Print

 3 medium zucchini
salt
1 Fuji apple (or other firm apple)
1/4 cup pepitas (shelled pumpkin seeds) or pine nuts, pistachios or hazelnuts
1/2 cup sugar snap peas
1 firm avocado
Salt
10 basil leaves
10 mint leaves
1/4 cup lemon juice
1/4 cup apple cider vinegar
1/4 cup avocado oil (or other light oil)
1 scant teaspoon honey (or more if you like it sweet)
Freshly ground black pepper
 
Zucchini Spiral Salad7
 
  •  Cut the ends off the  zucchini and spiral or shred into thin strips using a mandolin or grater.  The spiraler is definitely the easiest!   Cut spirals into desired lengths if needed (about the length of a strand of spaghetti).  Put the spirals in a bowl, sprinkle with salt and let sit for 10 or 20 minutes.  Taste.  If too salty, rinse, drain and pat dry.  No need to rinse if the taste is fine, just don’t add more salt later without tasting first.

Zucchini Spiral Salad6

  • Dry toast pepitas (hulled pumpkin seeds) on medium heat in a small skillet for a few minutes, until golden.  Add to zucchini when cool.

Zucchini Spiral Salad5

  • Cut basil and mint into ribbons.  An easy trick is to stack the leaves and slice thinly cross wise. Add to zucchini. (Leave a few for garnish)

Zucchini Spiral Salad4

  • Remove strings from sugar snap peas and cut lengthwise into julienne strips and add to the zucchini.

Zucchini Spiral Salad2

  • Whisk oil, lemon juice, honey and apple cider vinegar together and set aside.
  • Spiral apple (core first if using a mandolin) and add to the zucchini.  Gently toss with a bit of dressing to keep from turning brown.
  • Core and chop avocado and add to the zucchini mixture.  Add a bit more dressing and gently combine.
  • Taste for seasoning and add salt if desired.

Zucchini Spiral Salad3

Citrus Strawberry Infused Water Plus 14 more Amazing Recipes

0


Citrus Strawberry Infused Water2

Several weeks ago, I whipped up a pitcher of LEMON CUCUMBER MINT WATER in an attempt to drink more water and fewer store-bought drinks.  It has been a very successful exercise and I love opening my refrigerator to see a colorful and delicious, cold beverage always on hand. I refill with plain water every time I pour a glass and dump it all out after most of the flavor is out of the fruit and start over, every 2 or 3 days.   Over the weeks, I have experimented with other fruits and vegetables, as well, based on what I have laying around.  I always seem to have an odd half lemon or lime, left over from a previous recipe which I will slice up and toss into my pitcher.  This time, I also had a ‘naked’ orange that I had zested the night before, so even though it was missing part of the peel the entire fruit still remained intact, so in it went.  I added several strawberries and a sprig each of basil and mint.  Delicious!

Lemon Water

I got such a great response on the Lemon Cucumber Mint Water and many people tried it right away, including my sister, Linda, who prepared a large batch for her granddaughter’s backyard wedding.  It was a warm day in Seattle and the LCM Water not only made a gorgeous centerpiece, it was the perfect beverage, refreshing, rehydrating and inexpensive (and easy to replenish).   For those that like infused water, I wanted to pass along an article by Eat Local Grown with a compilation of 14 recipes for fruit infused water or aqua fresca.   You can either follow the recipes or use them for inspiration.   Just click the link below.  Happy Friday!

14 AMAZING FRUIT INFUSED WATER RECIPES FROM EAT LOCAL GROWN

Citrus Strawberry Infused Water1

Meatless Monday – Roasted Tofu with Miso Glaze and Black Barley, Fennel & Radish Salad

2

Tofu and Barley9

Game of Thrones Season Finale meets Father’s Day meets GoodMotherDiet!  So the long anticipated Game of Thrones Season Finale happened to fall on Father’s Day (No spoilers for those that haven’t seen it yet, except to say that the show did have an interesting Father’s Day theme). In order to honor both of these important events, we decided to create a feast that was Father’s Day worthy as well as authentic to GoT. We were even lucky enough to have “Daenerys, The Mother of Dragons” show up for dinner.

Tofu and Barley3

For inspiration I went, of course, to the Game of Thrones Food Blog (Yes, there really is such a thing!)  to find many dishes shown, discussed or inspired by the show or books.  As you might expect, much of the food is heavy with meat and not on the Goodmotherdiet,  so my son, Eric, is cooking a more authentic GoT menu including miniature pork pies and leg of lamb.  For the non meat eaters, I thought to attempt a Game of Thrones imagined meal, or rather what would they do with tofu if they had it.

Tofu and Barley1

I marinated extra firm  tofu in a thick and flavorful sauce overnight and then broiled it on high heat.  I paired it with black barley which was widely consumed in Medieval times, (more on that if you’re interested in the history of medieval barley in my Mushroom Barley Soup Blog Post). We know that GoT is not really set in Medieval times, nor is it even set on this planet or in any time but it seems most similar to Medieval times than any other. In preparing the barley, I tried a recipe for Black Barley, Fennel and Radish Salad from Bon Appetite.  This is a large and hearty salad. Next time I make it I will half the amount of barley (1 cup).  Black Barley is a substantial grain, chewy and flavorful but pearl barley, which is lighter and softer, can be substituted.

Tofu and Barley4

Roasted Tofu with Miso Glaze

  • Servings: 6
  • Difficulty: easy
  • Print

2 containers extra firm, organic tofu
1/4 cup Miso paste
1/4 cup Mirin (or Rice Wine Vinegar with a bit of sugar or honey added)
1/8 cup soy sauce (wheat free if necessary)
1/8 cup water (if needed to mix the paste in)
1/2 tsp salt
1/2 tsp sugar
1 Tbsn fresh ginger
1/8 tsp chili powder
1/8 tsp red pepper flakes (or more to taste)
Tofu and Barley8
  • Drain tofu and slice lengthwise into 1 inch rectangles.  Cover with papertowels and place a heavy object on top to help press out the liquid. Let drain 10 minutes or so.
  • Put tofu in a zip lock bag or container with a lid.

Tofu and Barley6

  • Combine all other ingredients and pour over tofu, making sure to coat all sides of every piece.  Refrigerate several hours or overnight.

Tofu and Barley2

  • Place marinated tofu  in a single layer on an oiled baking sheet and broil 5 – 10 minutes, or until browned.  Turn and broil the other side
  • Serve hot or room temperature


Black Barley, Fennel and Radish Salad

  • Servings: 8
  • Difficulty: easy
  • Print

Tofu and Barley4

2 cups black or pearl barley, rinsed
Kosher salt
1 large  or several small fennel bulbs (about 10 ounces), 2 tablespoons fronds set aside, bulb cut lengthwise into 1/4-inch slices
2 tablespoons plus 1/2 cup olive oil
Freshly ground black pepper
1/3 cup fresh orange juice
1/4 cup fresh lime juice
1 small shallot, minced
2 tablespoons chopped fresh dill plus 1/2 cup dills prigs, divided
1 teaspoon finely grated orange zes4 large radishes, thinly sliced, divided
1/4 cup oil-cured olives, pitted, halved lengthwise(optional)
  • Place barley in a medium pot and add water to cover by 1 1/2 inches. Season with salt. Bring to a boil; reduce heat and simmer uncovered until barley is tender and water is absorbed. Depending on the type of barley and your taste preferences, this can take anywhere from 45 minutes to a couple of hours.  Add water if necessary. Spread out barley on a large rimmed baking sheet; let cool.
  • While barley is cooking, toss fennel slices and 2 Tbsp. oil in a medium bowl to coat. Season with salt and pepper. Spread fennel slices out in a single layer on another rimmed baking sheet. Roast until fennel is crisp-tender and beginning to brown in spots, about 18 minutes. Let fennel cool on baking sheet.
  • Whisk orange juice, lime juice, shallot, 2 Tbsp. dill, and zest in a medium bowl. Gradually whisk in remaining 1/2 cup oil; season orange vinaigrette with salt and pepper.
  • Transfer barley to a large bowl; add roasted fennel, along with any accumulated juices on baking sheet. Add half of radishes, olives, and 1/4 cup dill sprigs. Drizzle 1/2 cup orange vinaigrette over and toss to coat; season with salt and pepper. Arrange salad on a large platter.
  • Scatter remaining radishes, reserved fennel fronds, and remaining 1/4 cup dill sprigs over salad. Pass remaining orange vinaigrette alongside for drizzling over.

TIPS:  You can halve the amount of barley for a lighter, smaller dish with more veggies and flavor.  You can also substitute pearl barley if you can’t find black barley or you prefer a softer dish.  If you don’t have dill, the fennel fronds make a good substitute.  Enjoy!


Wheatless Wednesday – Black Bean Quinoa Salad

6

Black Bean Mango Quinoa Salad4

Tired of green salad?  This flavor filled quinoa salad with mango and avocado topped with an orange cumin vinaigrette is my new favorite!  I promise you won’t be bored. It’s a little bit spicy from the jalapenos, a little bit sweet from the mango, the black beans add a rich salty flavor and fresh avocado, purple onion, bell pepper and cilantro make it salad worthy.  Yum!

Quinoa is the perfect backdrop for these beautiful flavors.  It also happens to be a nutritional powerhouse, high in protein, low in fat, gluten free and loaded with lovely vitamins and minerals (but you don’t have to tell your family that).  What I didn’t know is that Mango is also a superfood, providing over 20 vitamins and minerals in every delicious bite. ( This puts a whole new light on my recipe for Mango Margaritas!)  Black beans add another protein and nutrient boost and their high fiber content helps keep your tummy full. Then there is the Avocado, which we now know is a good fat that is highly nutritious.   The best part of this salad though, is how great it tastes!  I can’t wait to have it again for lunch…

This is the perfect dish to throw together for an easy dinner or bring to a potluck, especially if you have leftover quinoa on hand (or you make it ahead), then it’s only about ten minutes of chopping, mixing and you’re done!  This salad can be made a day ahead, without the avocado.  Bring to room temperature then gently toss in the avocado, if using, before serving.

TIP:  You can buy mango pre-cut but it’s very easy to do it yourself (and less expensive) if you know the right technique.  How to cut a Mango

VARIATIONS:  If you don’t have, or like, mango, you can substitute orange or nectarine segments (or even canned or frozen corn).  Use a combination of yellow, orange, red and green bell peppers for lots of color.  This recipe is only mildly spicy using one red jalapeno pepper so double the amount of jalapeno peppers and add a bit more cumin if you like it hot.

Black Bean Mango Quinoa Salad

Black Bean Quinoa with Cumin Orange Vinaigrette

  • Difficulty: easy
  • Print

 Black Bean Mango Quinoa Salad4

1 cup quinoa
1 cup mango, diced
1 red bell pepper, diced
1 red or green jalapeno, seeded and diced
1 cup canned black beans, drained and rinsed
1/2 red onion, diced
1/3 cup fresh cilantro or parsley leaves, chopped
1 avocado, peeled, seeded and diced
 
 vinaigrette
1/4 cup olive oil
1/4 cup apple cider vinegar
1/4 cup freshly squeezed orange juice
1 tsp cumin
1 tsp salt

Black Bean Mango Quinoa Salad3

  • Rinse quinoa to remove bitterness and cook according to package instructions; set aside and let cool.
  • To make the vinaigrette, whisk together olive oil, apple cider vinegar, orange juice, cumin and salt in a small bowl; set aside.
  • In a large bowl, combine quinoa, mango, bell pepper, jalapeno, black beans, avocado, onion and cilantro. Pour the vinaigrette on top of the salad and gently toss to combine.
  • If you aren’t serving immediately, place the avocado pit on top of the salad to keep the avocado from turning brown, or add the avocado right before serving .  Serve at room temperature.

Black Bean Mango Quinoa Salad8


Meatless Monday – Grilled Nectarines and Summer Squash with Balsamic Glaze

1

Grilled Vegetables10

I know I’m late to the grilled fruit game.  I never understood the fascination with throwing everything on the grill, but I am now a believer.  Grilling transforms something simple and delicious into a spectacular crowdpleaser.  Grilling enhances the natural flavors of fruits and vegetables and caramelizes the sugars in them, which is why grilled fruits are particularly delicious.   I came home to find a beautiful display of summer squash, nectarines and spring onions sitting on my counter, compliments of our local farmers market.  The squash had such interesting shapes that I immediately wanted to showcase.  I especially love the star shaped yellow squash!   I thought slicing them into rounds and grilling them would make a visually interesting dish.

Grilled Vegetables8

Then, once I added the nectarines and purple onion to the mix, I thought, “They look so beautiful all together, why not grill them all?  Sometimes dinner just  has to be dictated by what you have on hand.

Grilled Vegetables7


Vegetables can be grilled dry, but many of them taste better and are less prone to sticking if they are marinated first, or at least drizzled with oil.  Fruit, on the other hand, with its natural sugar content, is great when placed directly on the hot grill.  I marinated the squash in olive oil, garlic and herbs before grilling, then carmelized the onions on high heat in a cast iron pan and made the balsamic glaze (or rather, my sous chef, Veronica, made the glaze while I grilled the zucchini).  Lastly, I grilled the nectarines and piled everything together in a large tray and drizzled with the balsamic glaze.  I sprinkled with a bit of feta and a handful of blueberries, the first from my garden this year.  My final result was a pretty spectacular vegetable/fruit platter with gorgeous colors.  The balsamic glaze complimented the grilled fruit and combined nicely with the savory squash.  I will definitely be mixing more veggies and fruits this summer!

If you’re interested in more grilled fruit recipes, check out my recipe for Tortillas with Grilled Pineapple Salsa (with Mango Margaritas, of course)

Grilled Nectarines and Summer Squash with Balsamic Glaze

  • Servings: 4
  • Difficulty: easy
  • Print

4 -6 summer squash (any variety)

Marinade:  1/4 cup olive oil, 1 clove minced garlic, 1 Tbsn lemon juice, 1/4 tsp salt, 1 tsp fresh herbs(oregano, thyme, parsley or marjoram)

1 large spring onion (or Walla Walla or Maui sweet)

2 Tbsn avocado oil, or other high heat oil
6 nectarines
1/4 cup olive oil
2 oz feta (optional)
1/2 cup blueberries (optional)
Balsamic glaze:  1/4 cup basamic vinegar, 1 Tbsn honey, pinch of salt
salt and pepper to taste

Grilled Vegetables5

  • Place all marinade ingredients into a large ziploc baggie or container.  Slice squash into rounds and put into marinade until ready to grill.

Grilled Vegetables3

  • Heat balsamic vinegar in a small saucepan until reduced by about half.  Stir in honey and add a pinch of salt.  Remove from heat.
  • Slice onion into thick rounds.  If you don’t completely remove the stem, the top slice becomes a ‘rose’ which is a nice centerpiece.

Grilled Vegetables1

  • Saute the onion slices on high heat, keeping the sections together, turning with a spatula to brown both sides.  Then break apart and saute a few more minutes. Or you can marinate and grill the onions until they are softened and browned.  Remove to a platter.

Grilled Vegetables4

  • Grill the zucchini rounds until brown on both sides.  Remove to platter with onions.

Grilled Vegetables2

  • Half and pit the nectarines and place on a hot oiled grill, a few minutes per side until grill marks appear.  Remove to platter with veggies.
  • Sprinkle with feta and blueberries, if using.  Drizzle with balsamic glaze. Coarse salt and pepper to taste.
  • Serve warm or room temperature with reserved balsamic glaze on the side.

Grilled Vegetables9


Lemon Cucumber and Mint Water

2

Lemon Water

What’s new in my refrigerator?  In an attempt to drink more water and fewer store bought beverages, I have started making my own infused waters, similar to the ones in spa waiting rooms that are so refreshing.  A combination of lemon, cucumber and mint seems to be the most popular combination and for a great reason.  Besides being delicious it seems that lemon cleanses the body, mint aids in digestion and cucumber, not only rehydrates but helps you lose weight.   Read more from Healthy Holistic Living for the recipe as well as a great write up of these three lovely natural ingredients, especially the amazing cucumber.  I’m just going to sit here and wait for the pounds to melt away…(Smile)

Lemon Cucumber and Mint Water.